
Leather E-Brake install w/pics


Leather E-Brake install w/pics
E-Brake installation
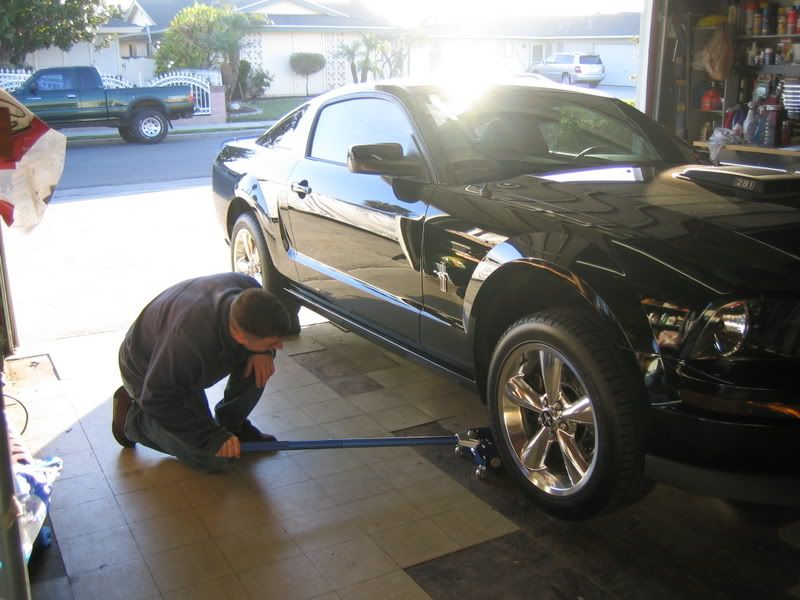
This install was preformed on my friend, Leo's GT (LEO_06GT). He upgraded to the leather wrapped e-brake handle used on the GT500. Part number M-2302-C.
Estimated time for this install will be between 1 to 2 hours. As far as difficulty, I would rate this as 'Easy to Moderate'; about the same as changing the rear springs.
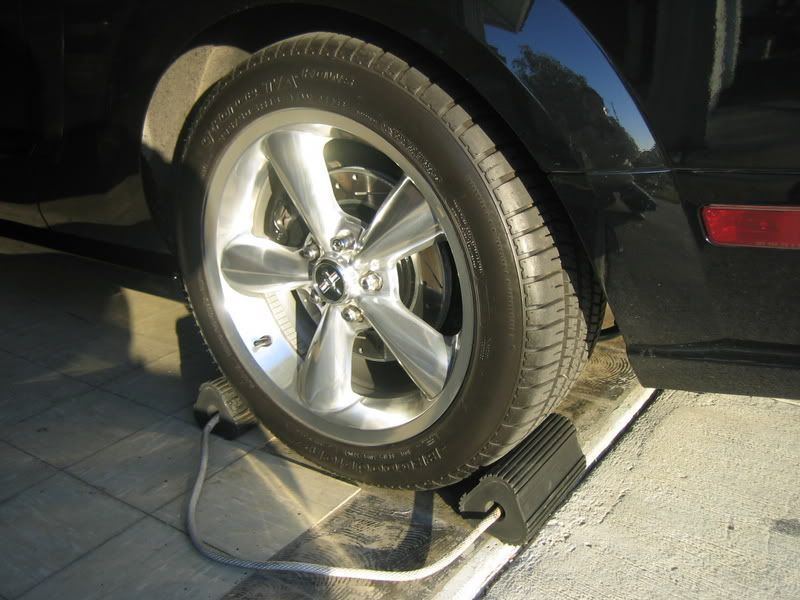
It will involve jacking the car up (front or rear) as well as interior console and center dash removal.
Install
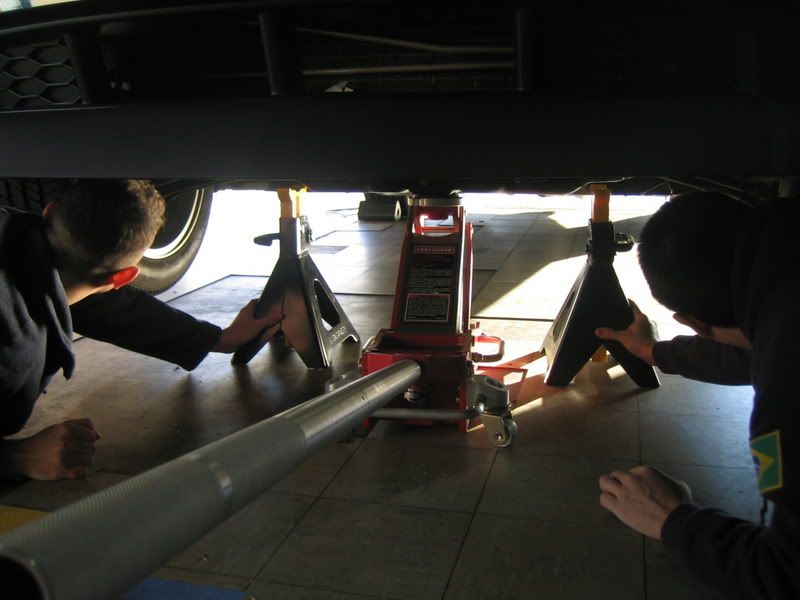
Because Leo's car is lowered with a set of Steeda Ultralite springs and has a CDC Classic chin spoiler installed, we used 2 floor jacks to lift the front end. First jack was used on the side so the second jack was able to reach the center cross-member frame. Jack stands were placed accordingly. Note: Always use jack stands and wheel chocks for safety when working underneath the car.
Another option would have been to jack the car up from the rear and use the jack stands. We raised the front because we had just completed the installation of the front lowering springs.
Jacking
Follow the steps in the following link to gain access to the lower center console (all the way to the A-Pillar trim removal).
Top console and center dash removal
EDIT: 03-14-08
SEE POST 61 ON THE MGW SHIFTER INSTALL FOR SPECIAL INSTRUCTIONS FOR THOSE WITH THE AMBIENT LIGHTING OPTION.
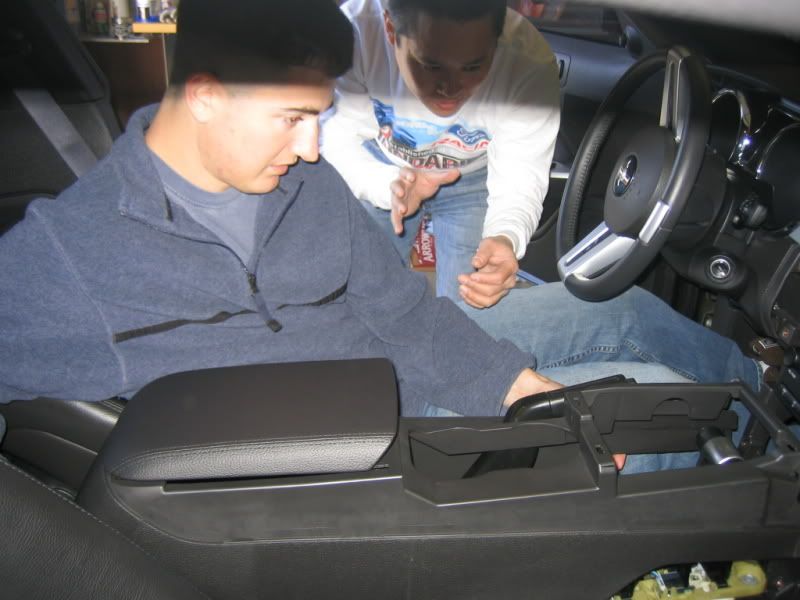
Remove the 2 forward screws (1 each side) that attaches the lower console to the center dash.
Remove the 2 nuts inside the center armrest.
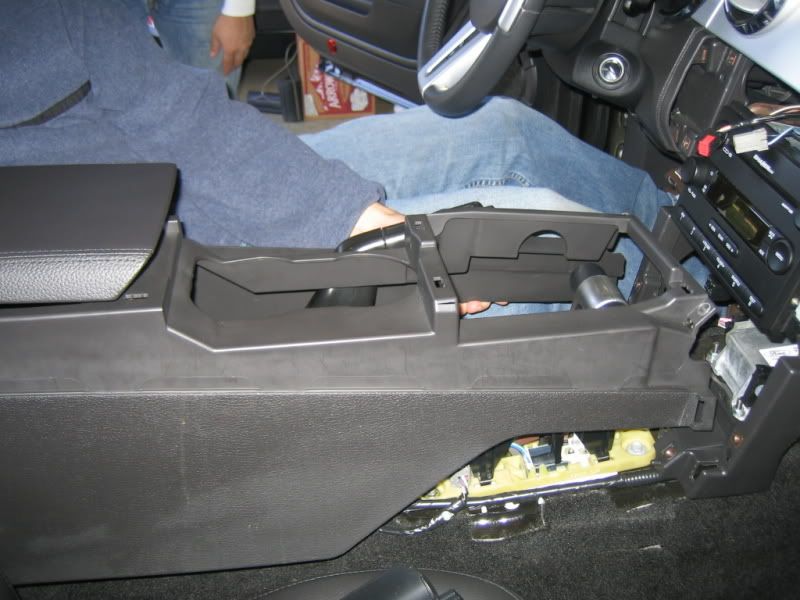
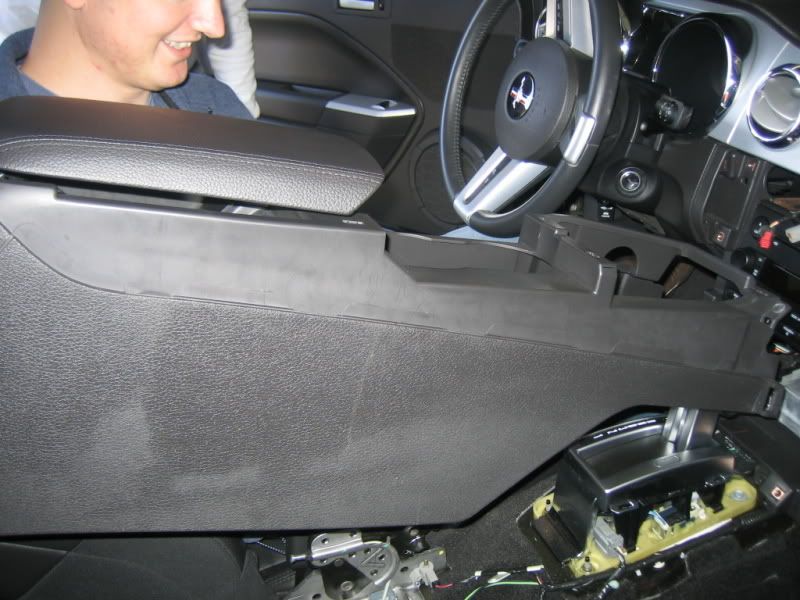
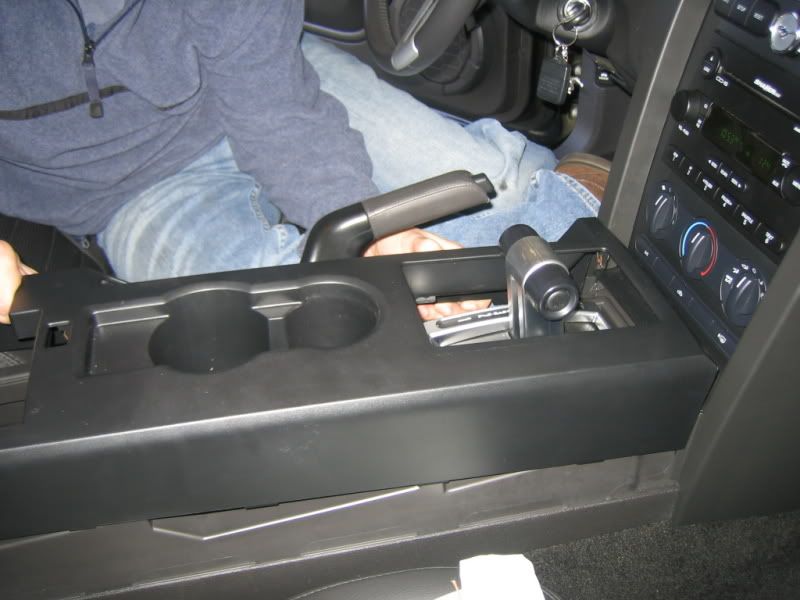
Carefully lift the lower console up high enough to disconnect the 12V connector plug.
Remove the lower console.
Tip: Raising the e-brake handle may help the console slip through the opening a little easier.
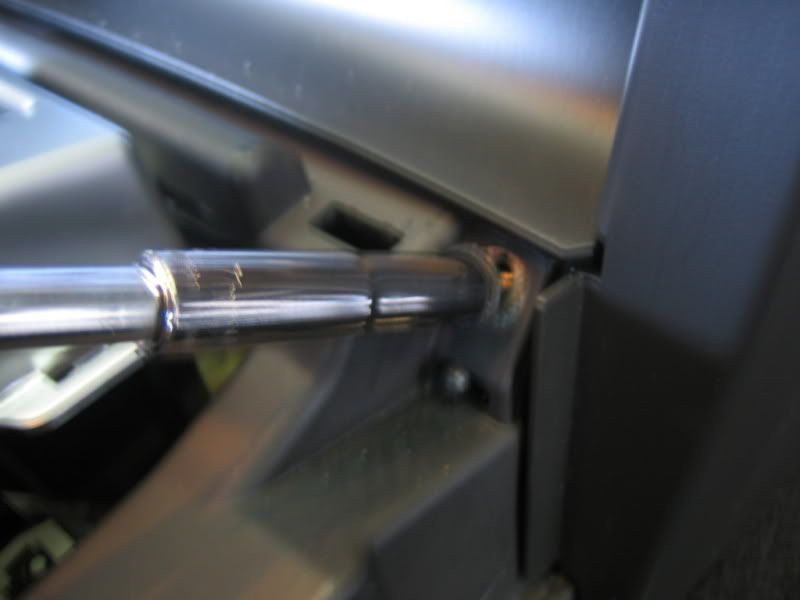
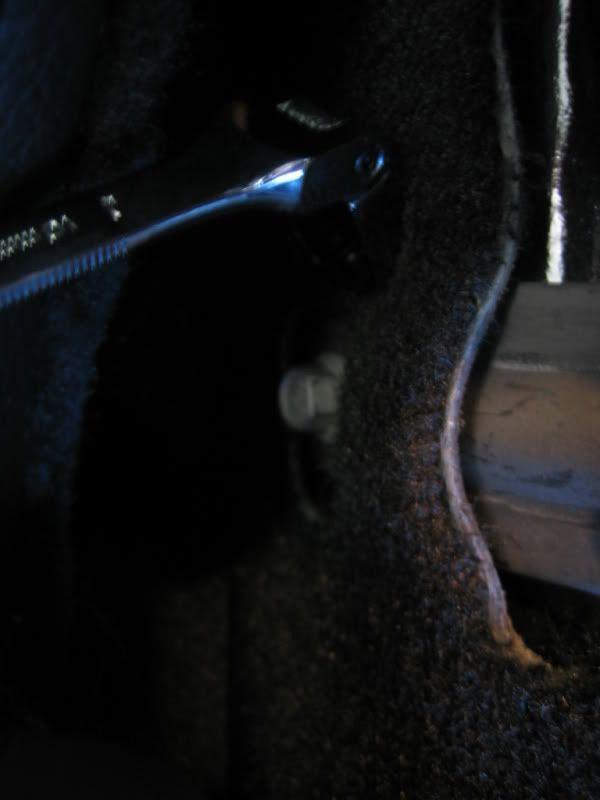
Loosen the cable adjustment nut all the way back to give as much cable slack as possible. A deep socket or ratcheting wrench can be used.
Tip: To make re-adjusting the new e-brake quicker, measure the length how many threads on the adjuster is showing prior to backing off the nut.
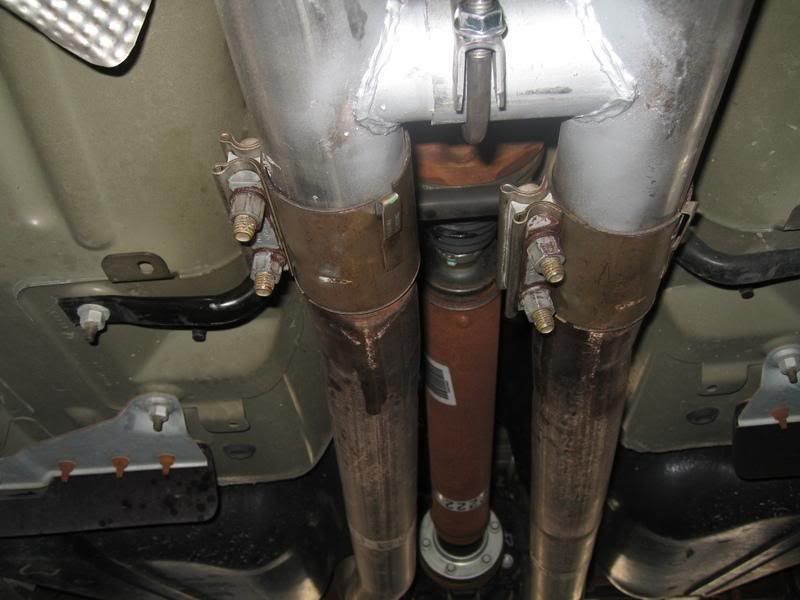
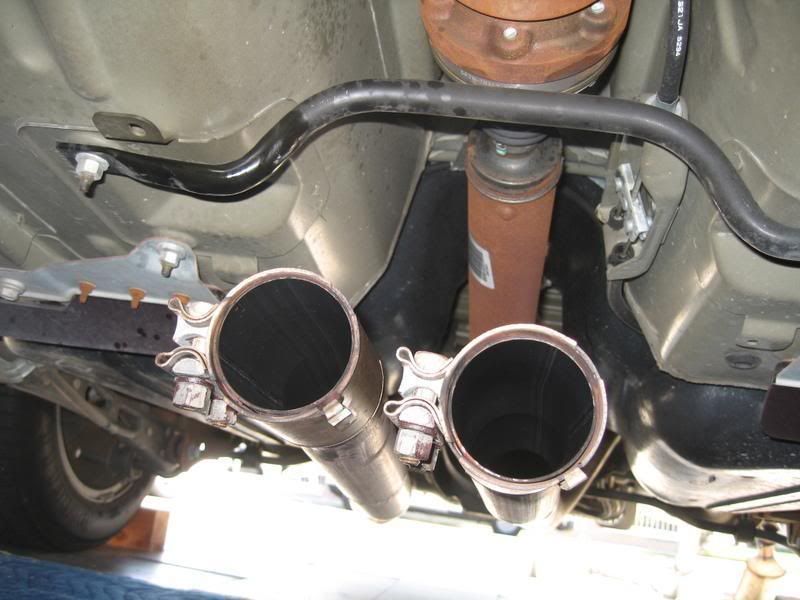
Here is the location of the e-brake cable connections and bracket that must be accessed to complete the installation; Drivers side, just back of the mid-pipe clamp.
Note: Removal of the mid-pipe clamp is not necessary. The pic below is just for reference.
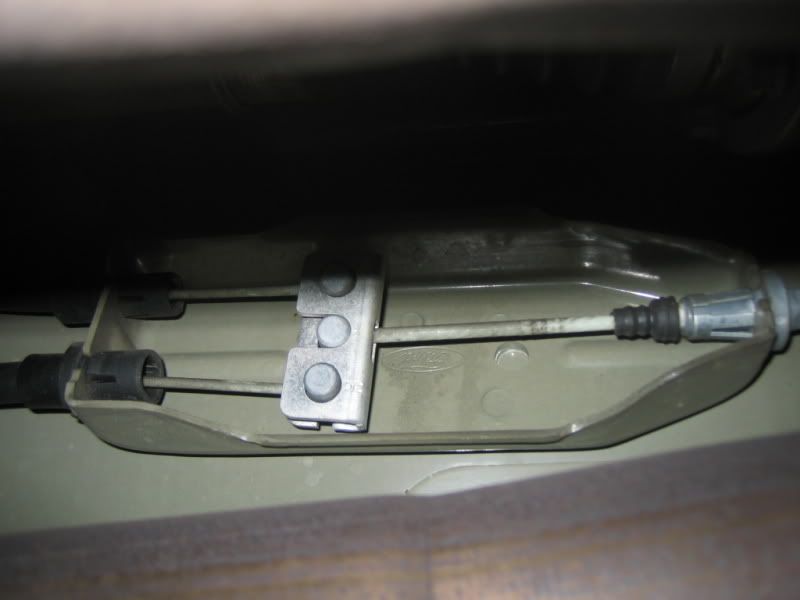
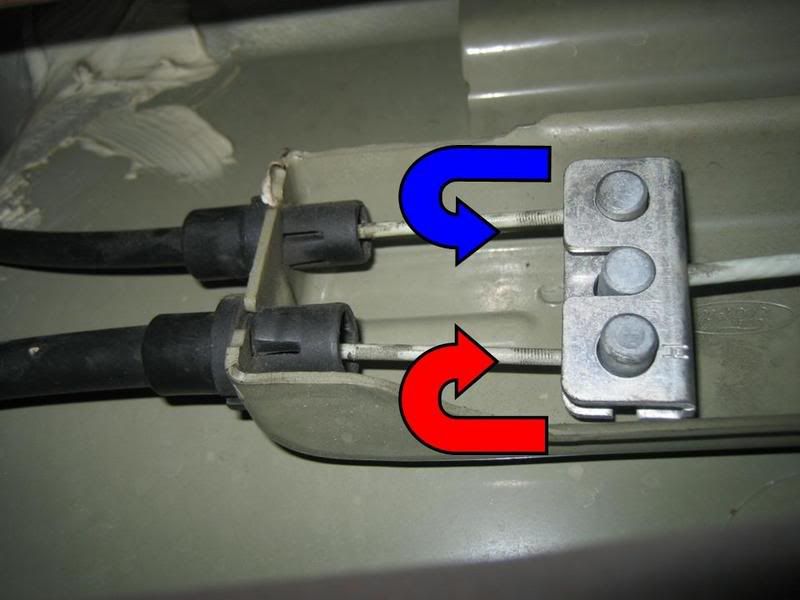
With the brake handle in the down position and cable slacked, one at a time, rotate the cable end bracket 90 degrees to disconnect the cable barrel end. The cable will slide out from the slit in the bracket.
Once the 2 cables have been disconnected, pry open the retainer clip and remove. I used 2 flat blade screwdrivers to accomplish this.
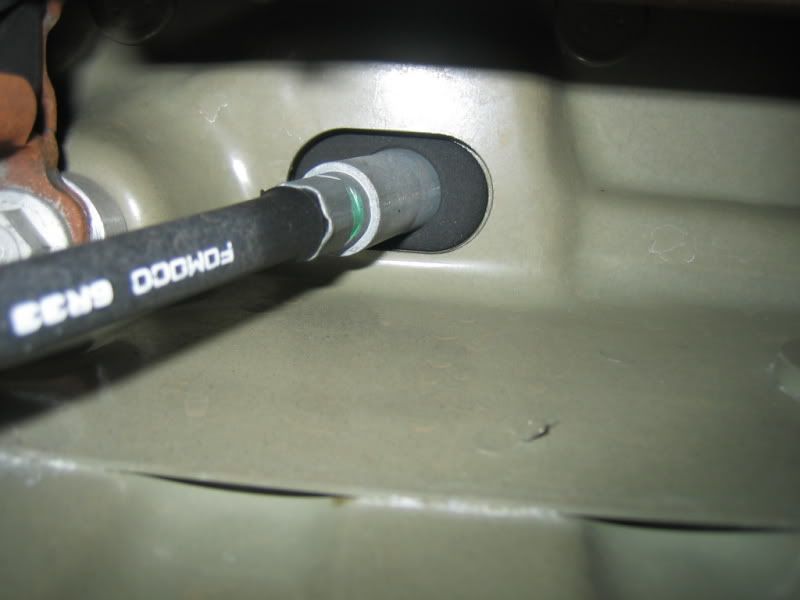
Pull back the small black rubber and move it back, can do this by slightly twisting it.
Once this is done, the brake cable can slide forward and be slid out through the slot in the bracket.

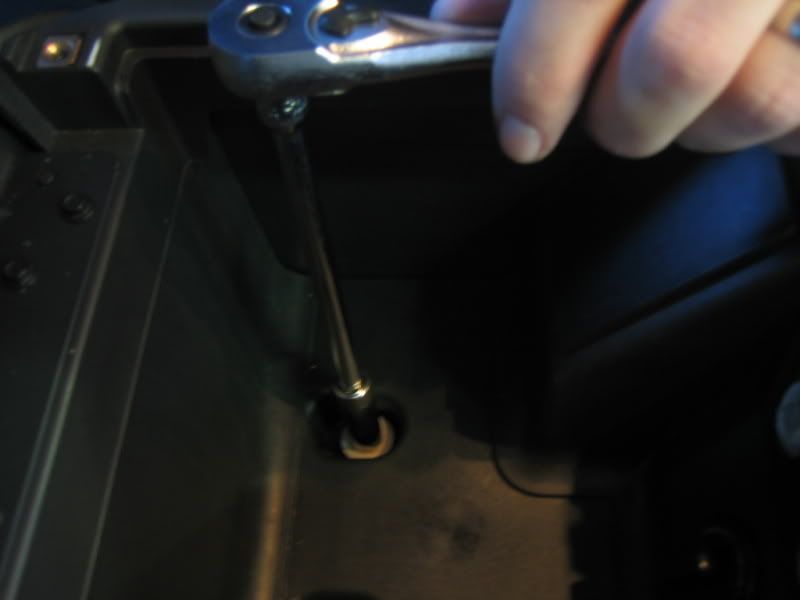
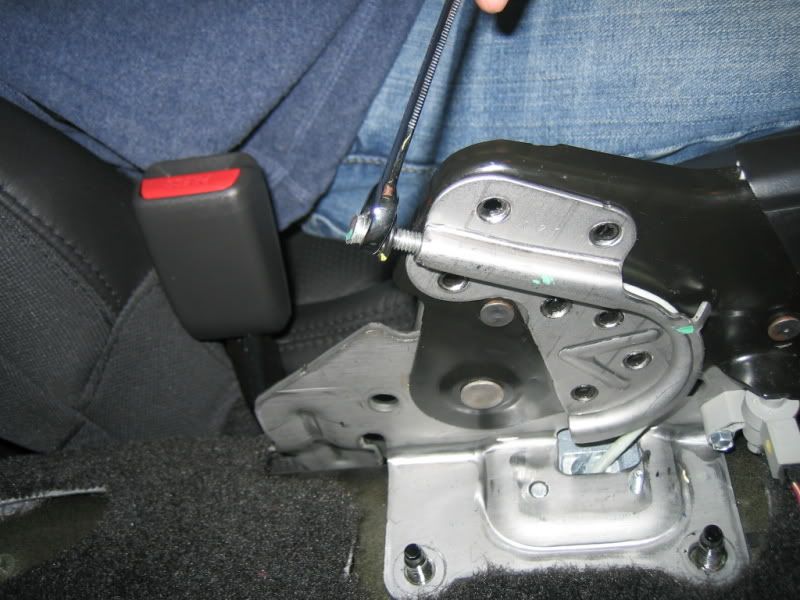
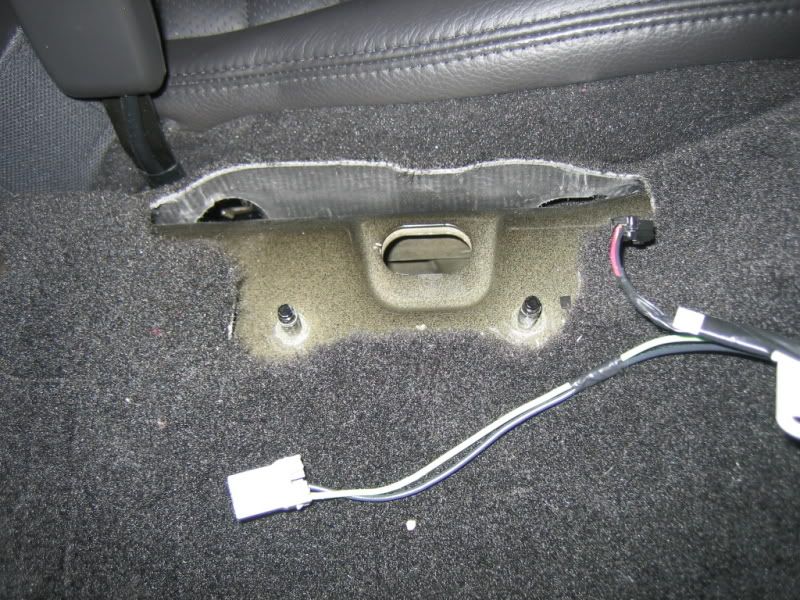
Back inside the car, remove the 2 nuts and 2 bolts that hold the parking brake control assembly.
Tip: For the 2 side bolts, using a ratcheting box end wrench will make life easier. Also, moving the seat will help gain access to them.
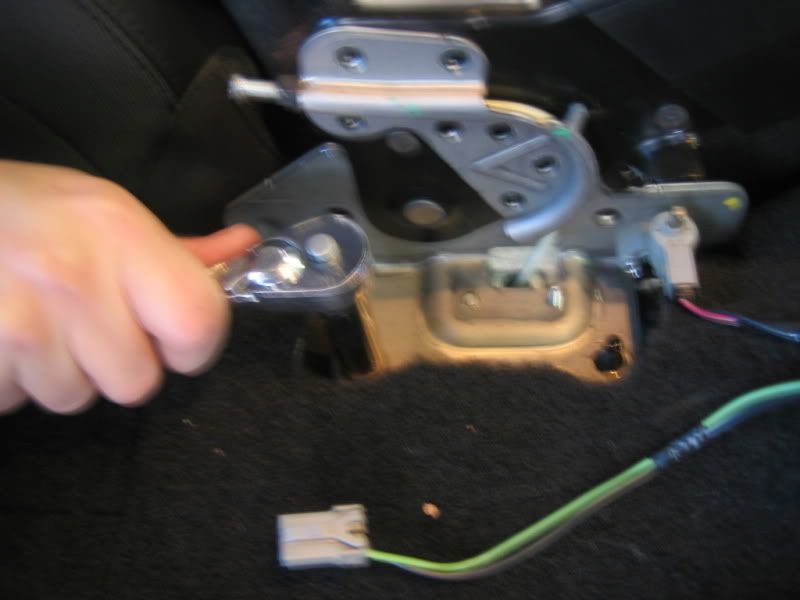
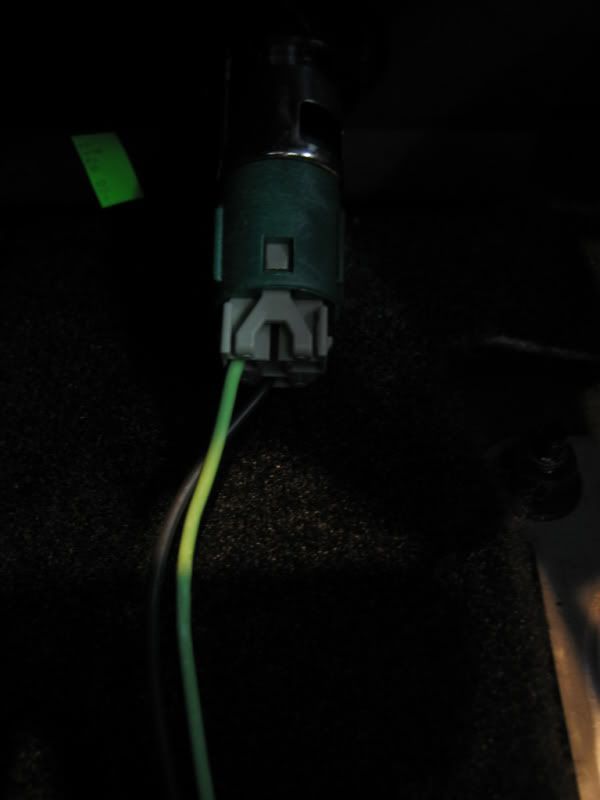
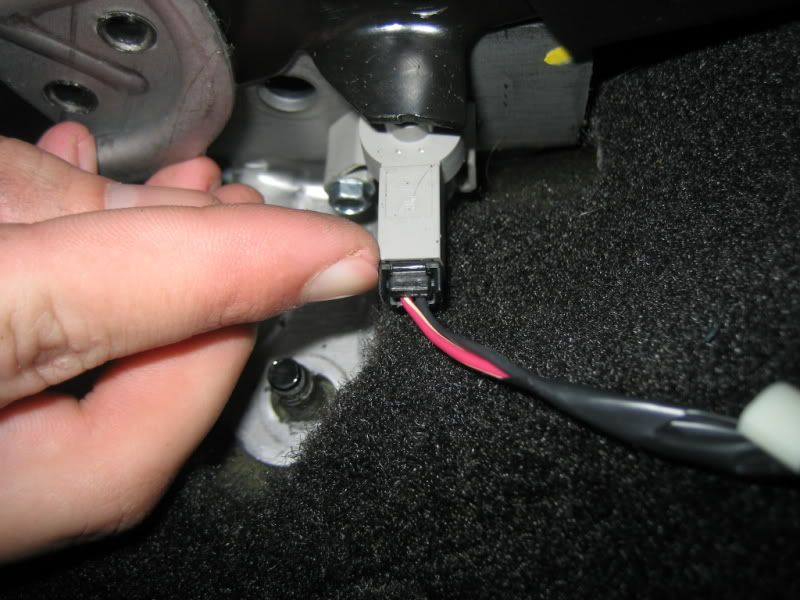
Disconnect the parking brake switch. This one is on pretty good, be careful not to break it.
Top release tab flips up, release push-in located at bottom.
The brake assembly is now ready to be removed from the car.
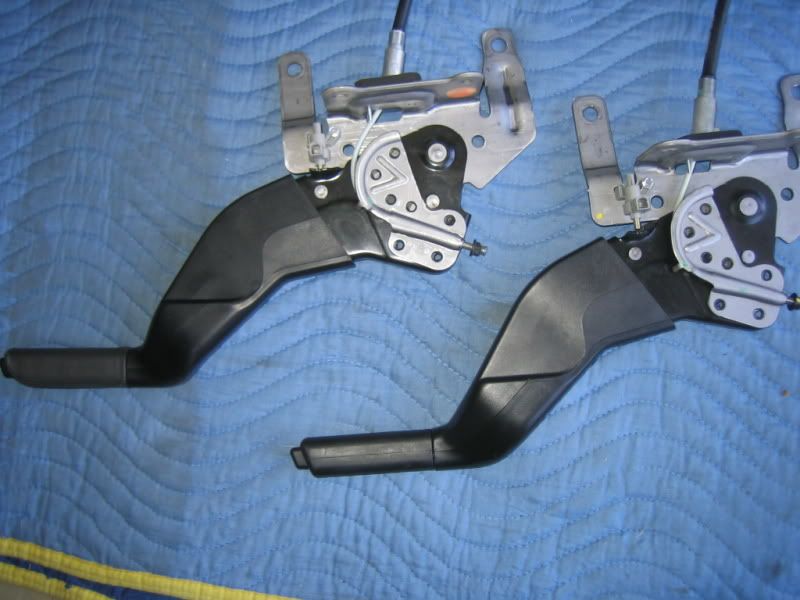
Side by side comparison.
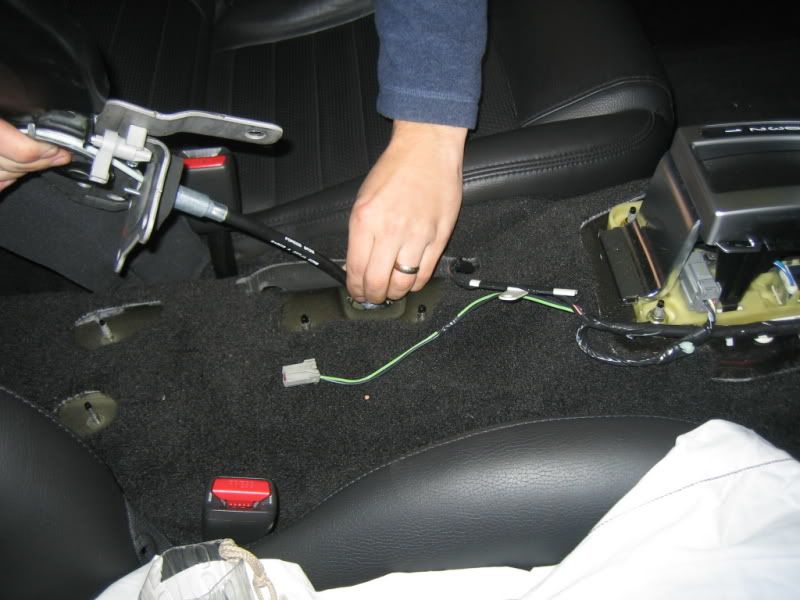
Feed the new cable through the opening and re-install that attaching hardware. Keep everything loose until you get both bolts in. You may have to press down on the handle (or certain places on the brake assembly) to get the holes to line up.
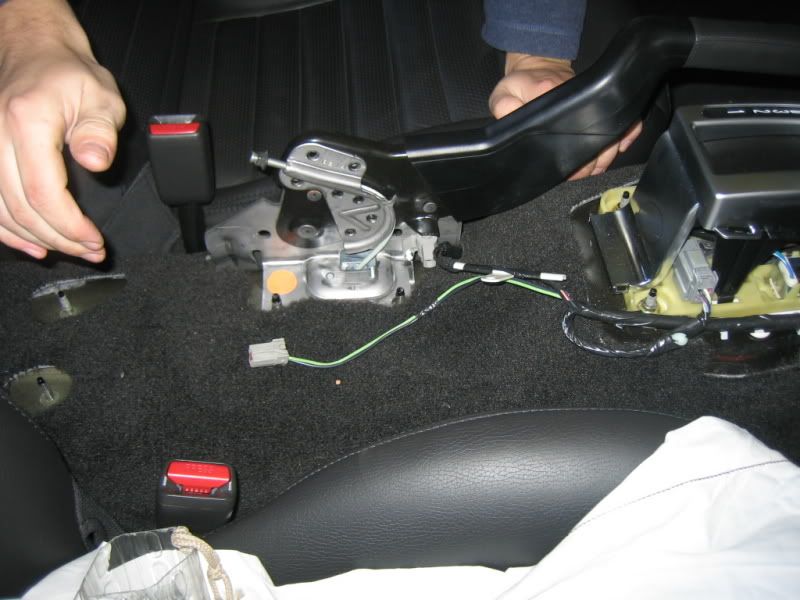
Re-connect the parking brake switch.
(Under the car) Pull back the black rubber seal on the new cable and feed it through the same slot it was removed from (in the welded bracket). Now push the cable retaining clip through the hole (in bracket) until it springs open. Push back the rubber seal back in place.
Rotate the cable end bracket to re-attach the 2 cable ends.
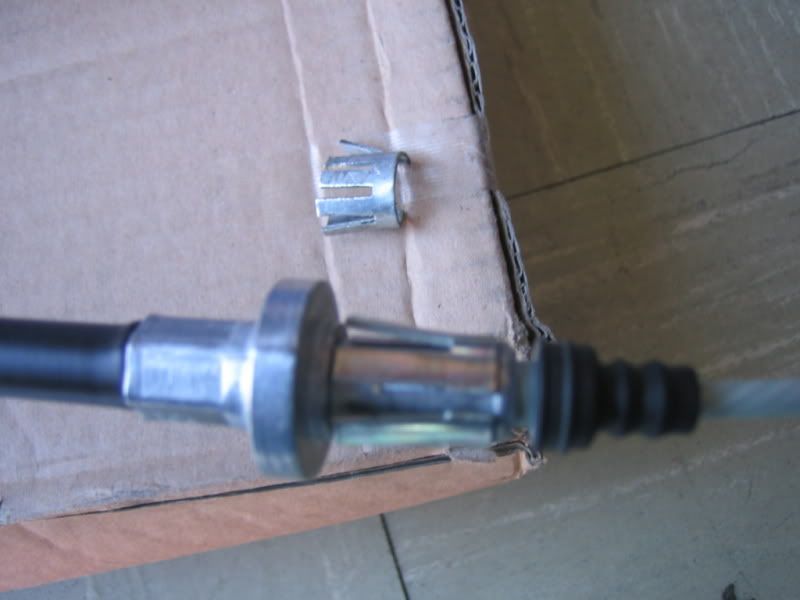
Here's a close-up pic of the retaining clip.
Re-adjust the cable adjustment nut to the same distance it was before and test it. Adjust as necessary.
Re-install the lower center console (don't forget to plug back the 12V connector), center dash, and upper center console.
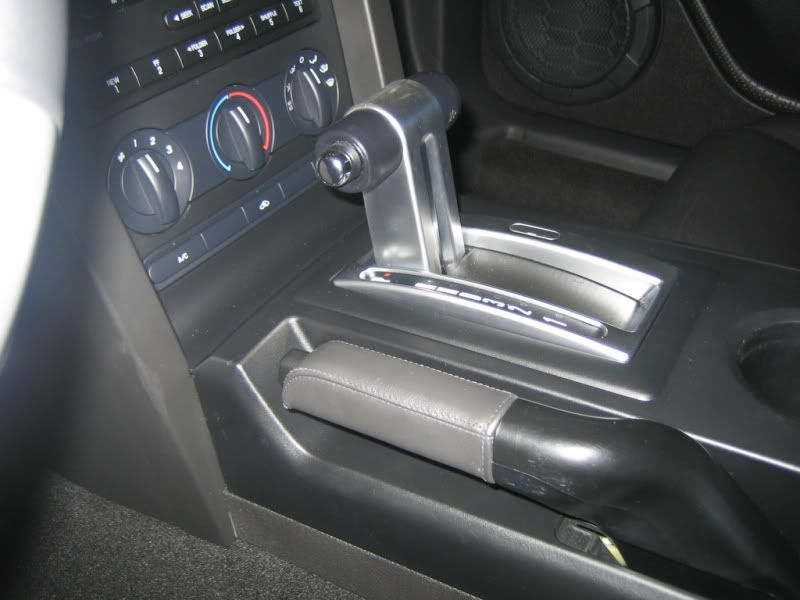
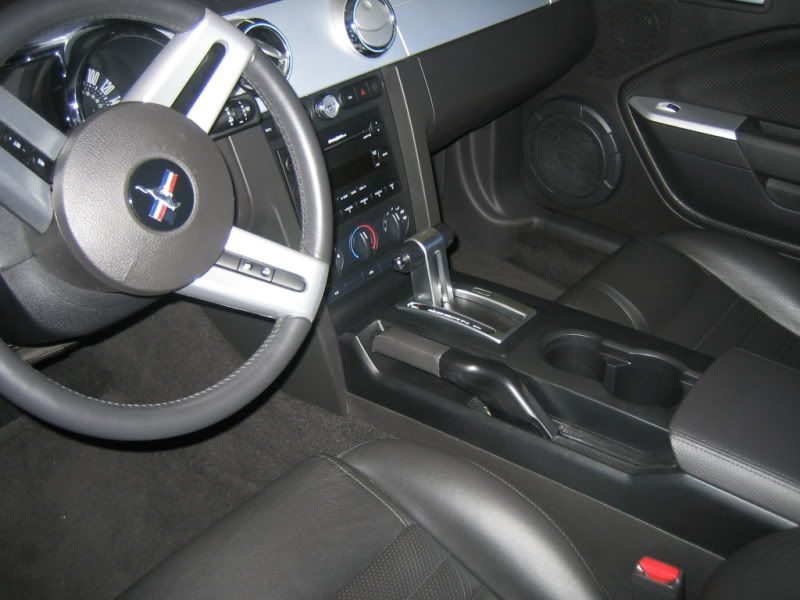
Installation complete.
This install was preformed on my friend, Leo's GT (LEO_06GT). He upgraded to the leather wrapped e-brake handle used on the GT500. Part number M-2302-C.
Estimated time for this install will be between 1 to 2 hours. As far as difficulty, I would rate this as 'Easy to Moderate'; about the same as changing the rear springs.
It will involve jacking the car up (front or rear) as well as interior console and center dash removal.
Install
Because Leo's car is lowered with a set of Steeda Ultralite springs and has a CDC Classic chin spoiler installed, we used 2 floor jacks to lift the front end. First jack was used on the side so the second jack was able to reach the center cross-member frame. Jack stands were placed accordingly. Note: Always use jack stands and wheel chocks for safety when working underneath the car.
Another option would have been to jack the car up from the rear and use the jack stands. We raised the front because we had just completed the installation of the front lowering springs.
Jacking
Follow the steps in the following link to gain access to the lower center console (all the way to the A-Pillar trim removal).
Top console and center dash removal
EDIT: 03-14-08
SEE POST 61 ON THE MGW SHIFTER INSTALL FOR SPECIAL INSTRUCTIONS FOR THOSE WITH THE AMBIENT LIGHTING OPTION.
Remove the 2 forward screws (1 each side) that attaches the lower console to the center dash.
Remove the 2 nuts inside the center armrest.
Carefully lift the lower console up high enough to disconnect the 12V connector plug.
Remove the lower console.
Tip: Raising the e-brake handle may help the console slip through the opening a little easier.
Loosen the cable adjustment nut all the way back to give as much cable slack as possible. A deep socket or ratcheting wrench can be used.
Tip: To make re-adjusting the new e-brake quicker, measure the length how many threads on the adjuster is showing prior to backing off the nut.
Here is the location of the e-brake cable connections and bracket that must be accessed to complete the installation; Drivers side, just back of the mid-pipe clamp.
Note: Removal of the mid-pipe clamp is not necessary. The pic below is just for reference.
With the brake handle in the down position and cable slacked, one at a time, rotate the cable end bracket 90 degrees to disconnect the cable barrel end. The cable will slide out from the slit in the bracket.
Once the 2 cables have been disconnected, pry open the retainer clip and remove. I used 2 flat blade screwdrivers to accomplish this.
Pull back the small black rubber and move it back, can do this by slightly twisting it.
Once this is done, the brake cable can slide forward and be slid out through the slot in the bracket.
Back inside the car, remove the 2 nuts and 2 bolts that hold the parking brake control assembly.
Tip: For the 2 side bolts, using a ratcheting box end wrench will make life easier. Also, moving the seat will help gain access to them.
Disconnect the parking brake switch. This one is on pretty good, be careful not to break it.
Top release tab flips up, release push-in located at bottom.
The brake assembly is now ready to be removed from the car.
Side by side comparison.
Feed the new cable through the opening and re-install that attaching hardware. Keep everything loose until you get both bolts in. You may have to press down on the handle (or certain places on the brake assembly) to get the holes to line up.
Re-connect the parking brake switch.
(Under the car) Pull back the black rubber seal on the new cable and feed it through the same slot it was removed from (in the welded bracket). Now push the cable retaining clip through the hole (in bracket) until it springs open. Push back the rubber seal back in place.
Rotate the cable end bracket to re-attach the 2 cable ends.
Here's a close-up pic of the retaining clip.
Re-adjust the cable adjustment nut to the same distance it was before and test it. Adjust as necessary.
Re-install the lower center console (don't forget to plug back the 12V connector), center dash, and upper center console.
Installation complete.
Last edited by TacoBill; Mar 14, 2008 at 01:57 PM. Reason: note added for console removal for those with Ambient Lighting option.

 . I'd go with Redline's slip on.Oh well kudos for being brave enough to tackle this

Shelby GT500 Member
Joined: July 1, 2006
Posts: 2,911
Likes: 1
Where's your sense of adventure? Hahaha! 
Really, it wasn't too labor intensive... especially knowing each and every step. For Leo and myself, we were going at it blind!
Really, it wasn't too labor intensive... especially knowing each and every step. For Leo and myself, we were going at it blind!

GT Member
Joined: February 14, 2004
Posts: 186
Likes: 0
Mach 1 Member
Joined: November 29, 2004
Posts: 634
Likes: 2
Here are some additional pictures of the parking brake switch connector. What a PITA. It is easier to unbolt the switch (only 1 screw) from the original parking brake assembly and transfer it to the new parking brake assembly rather than mess with this connector.
Also the ratcheting wrench needed for the 2 bolts on the side of the parking brake assembly is 10mm.
Also the ratcheting wrench needed for the 2 bolts on the side of the parking brake assembly is 10mm.
Last edited by tmcolegr; Mar 24, 2008 at 05:58 PM.


Thread
Thread Starter
Forum
Replies
Last Post
iliveonnitro
2015 - 2023 MUSTANG
25
Oct 7, 2021 06:31 PM