
First diff fluid change pics

Thread Starter
Mach 1 Member
Joined: April 8, 2011
Posts: 621
Likes: 0
From: An hour from Laguna Seca
4th of July Boss Quality Time - Rear Diff Fluid Edition
I got a chance to change out the rear diff fluid. It wasn't bad at all, about two hours without a lift or air tools. Just kinda messy and a pain to slide in and out a million times but not unlike any other diff fluid change.
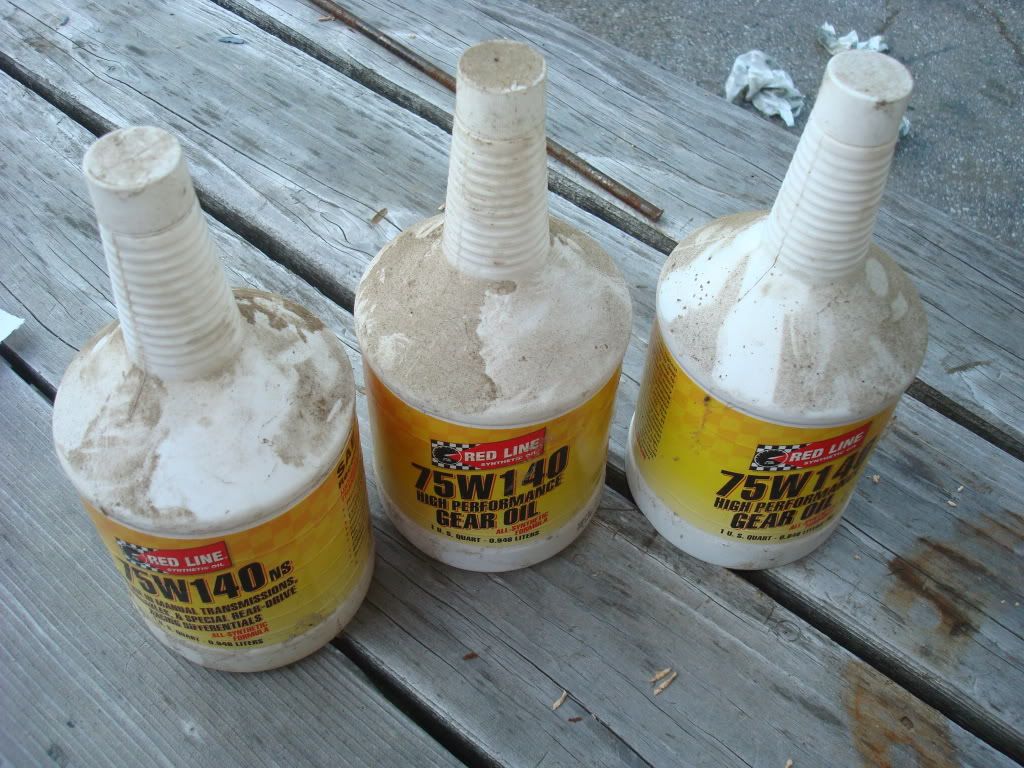
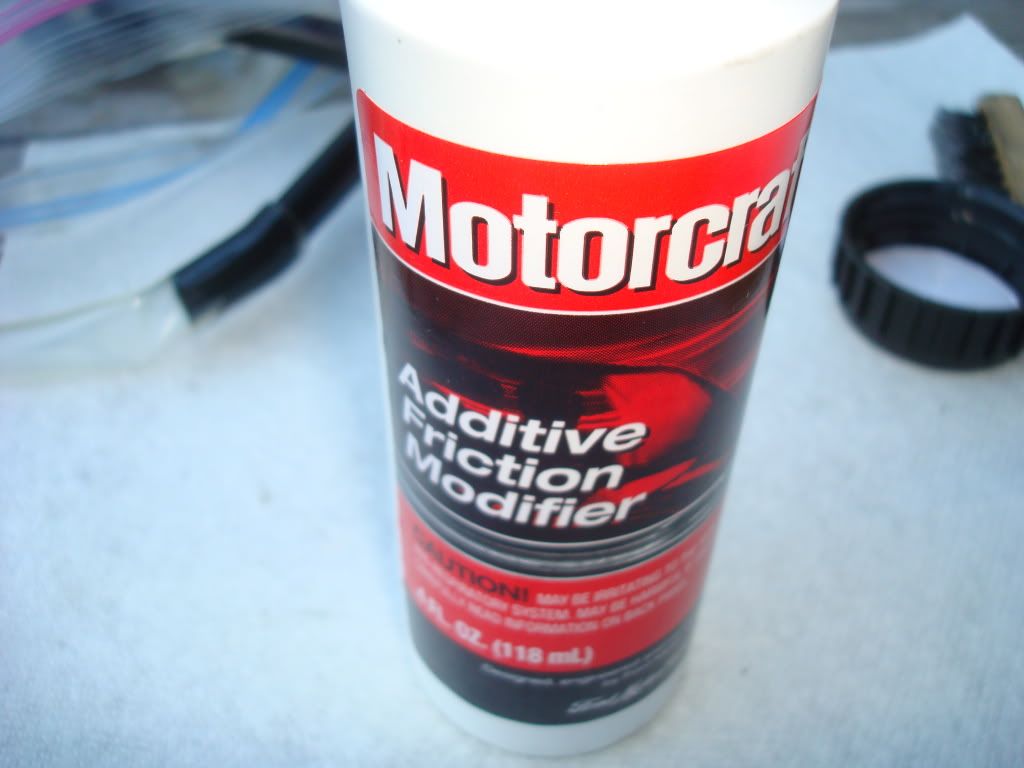
I had some Red Line fluid and a bottle of the friction modifier. I also had a pump and an empty bottle that would fit the pump since Red Line caps are smaller.
I decided against drilling the cover. I think the better place would be the bottom of the housing where you'd get it all to drain out. That lower "boss" on the cover would work well for a temp sending unit.
First I needed to get it in the air so I could work. I think Scott made some like this? Anyway they were the perfect height for this job. They won't be high enough for the trans fluid job though. Thirty bucks from Home Depot with a box of screws. I had them do the cuts and I pre drilled the screw holes with the help of some clamps.

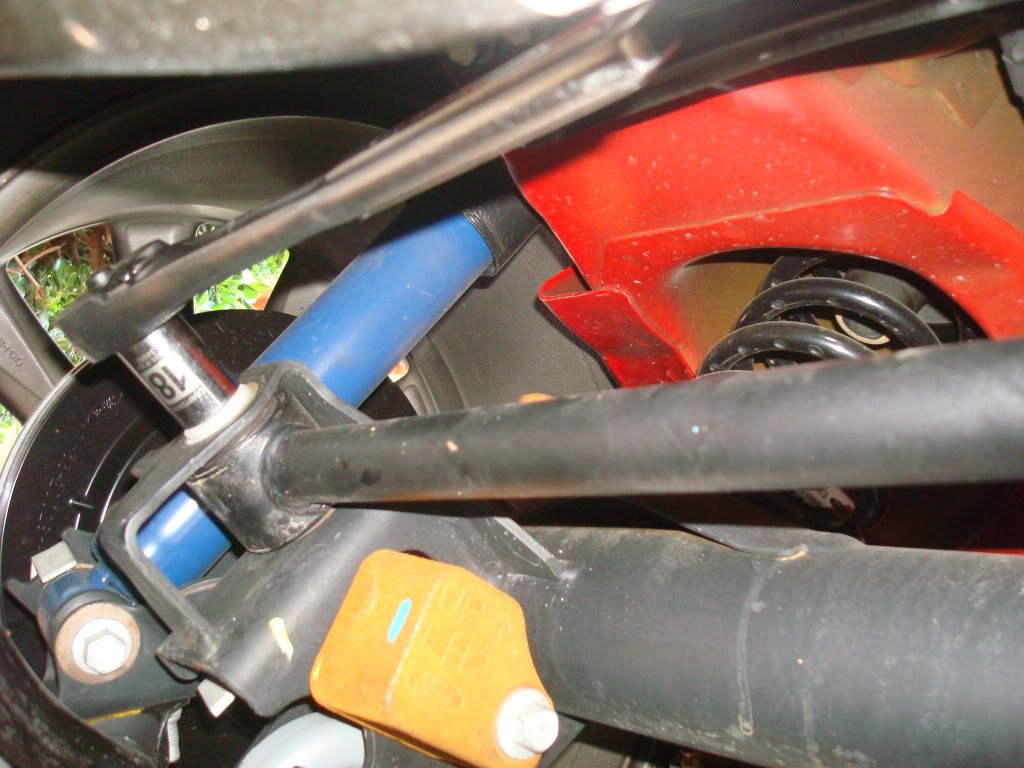
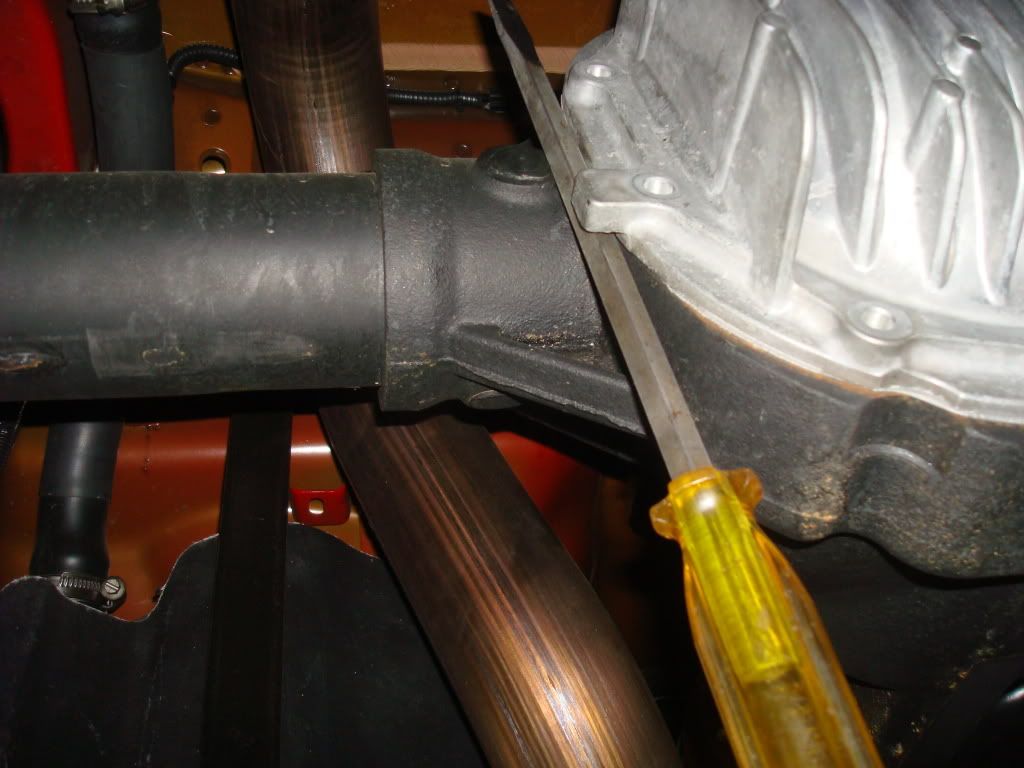
Turns out the panhard bar was easy to remove and likely necessary. Take the bolt out of each end and also loosen the other large bolt in the sheetmetal bracket to allow the bar to come out.
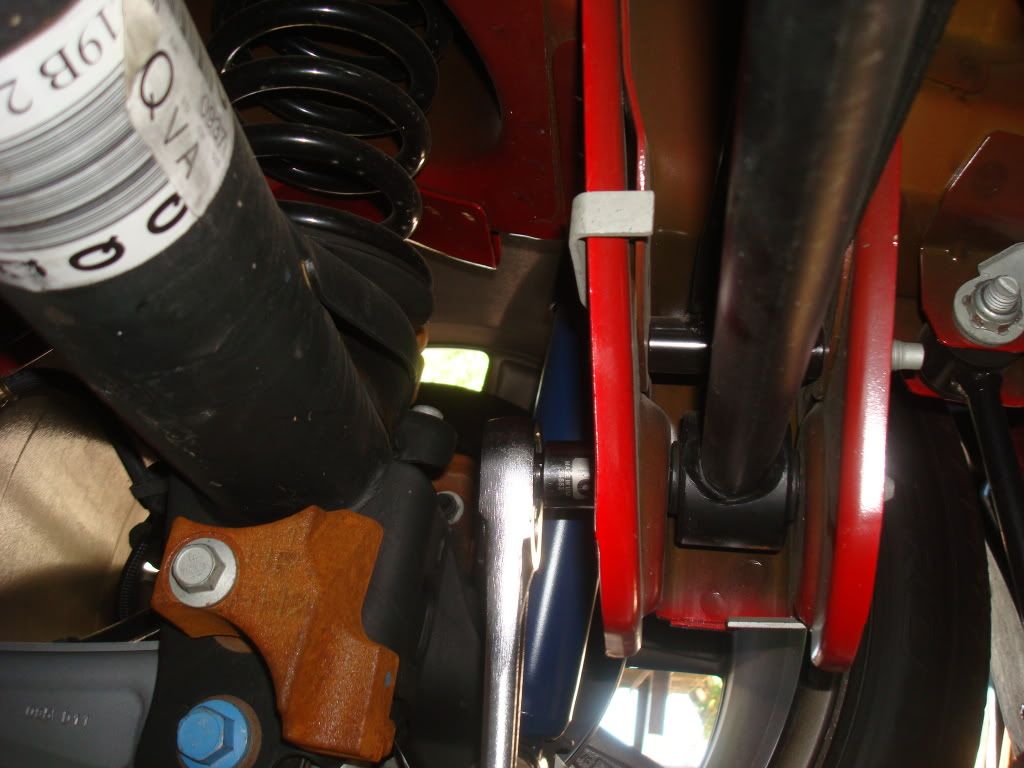

The first clue the bolt holes are blind was when I took the lower bolt out and no fluid followed. All the holes appear to be blind and not through to the inside. Sorry if this is common knowledge. My last diff was a 10.5" Sterling.
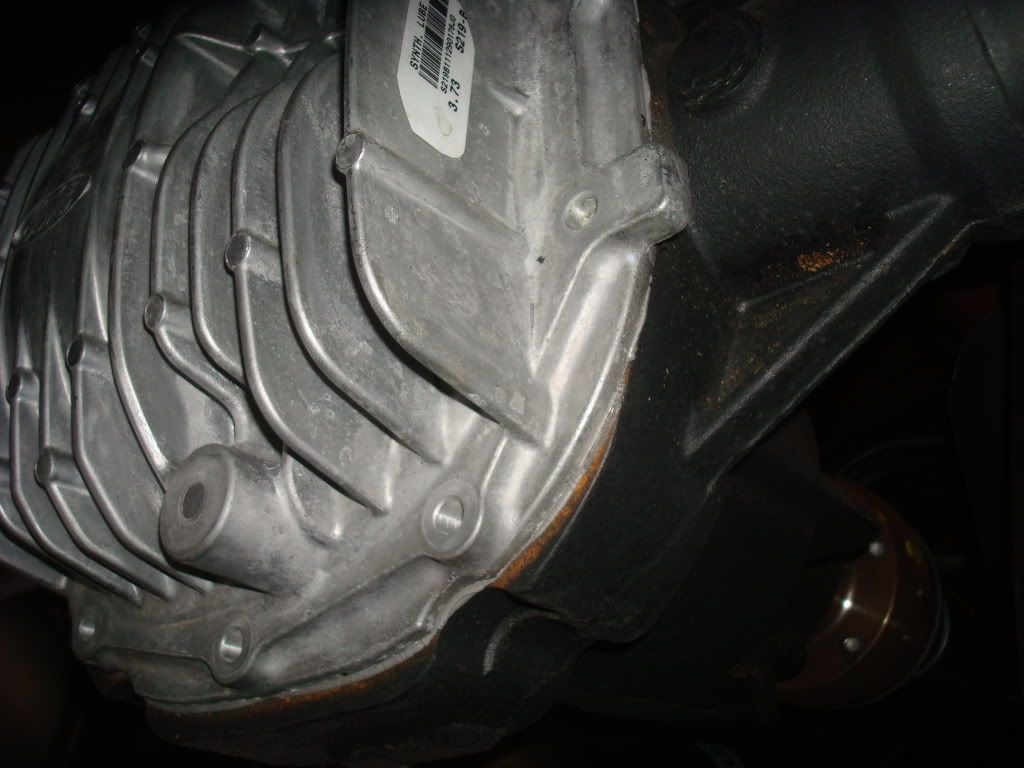
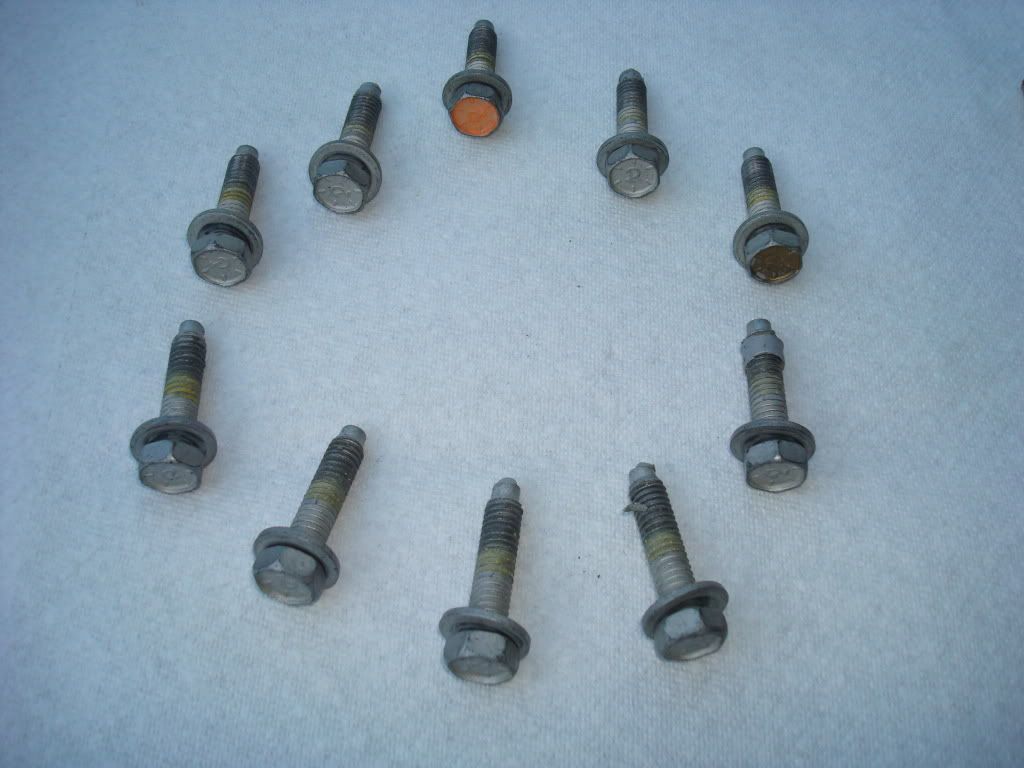
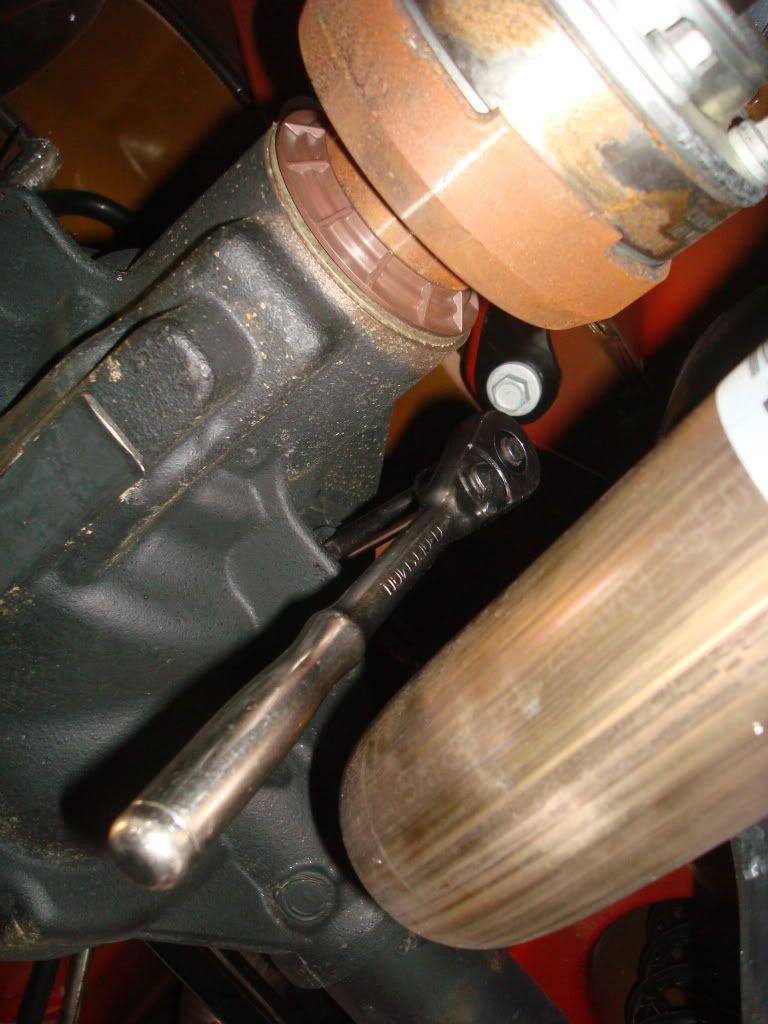
The top bolt was painted. A 12mm socket with short extension on a 3/8" ratchet is what I used for the cover bolts.
Remove the socket for the fill plug in the front of the pinion support housing.
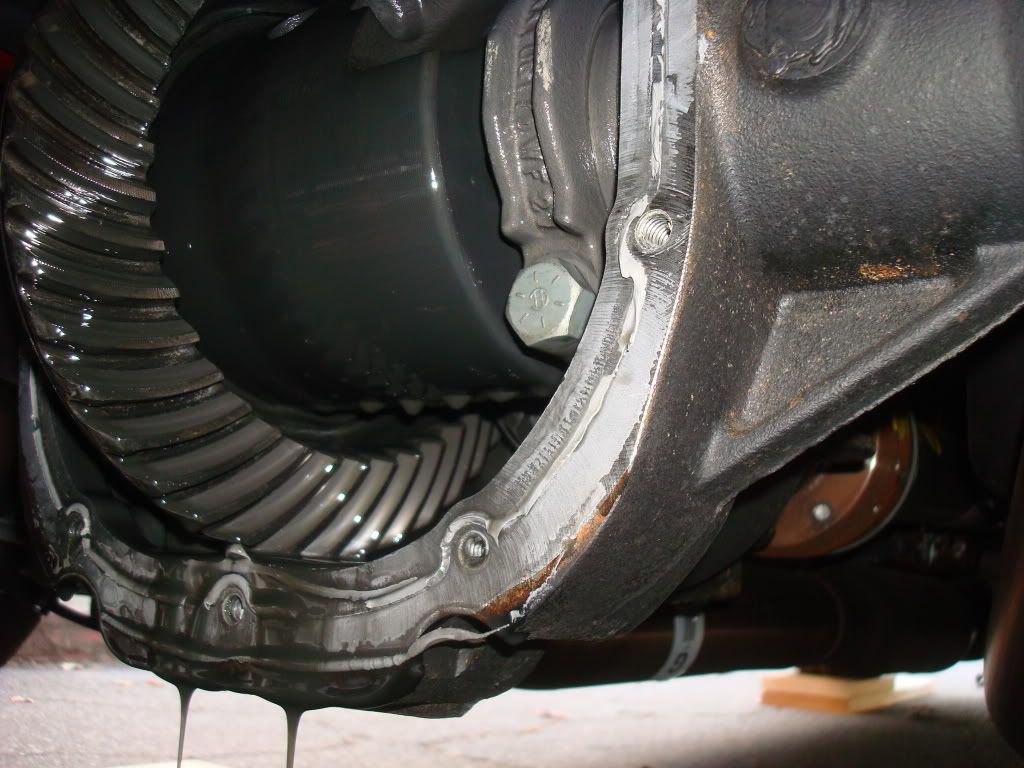
Once all the bolts were out it was a matter of prying the cover off. This was very easy. It was not brutally stuck and there's a nice feature in the casting that allows for an easy pry. Make sure your catch pan is right there ready to go.
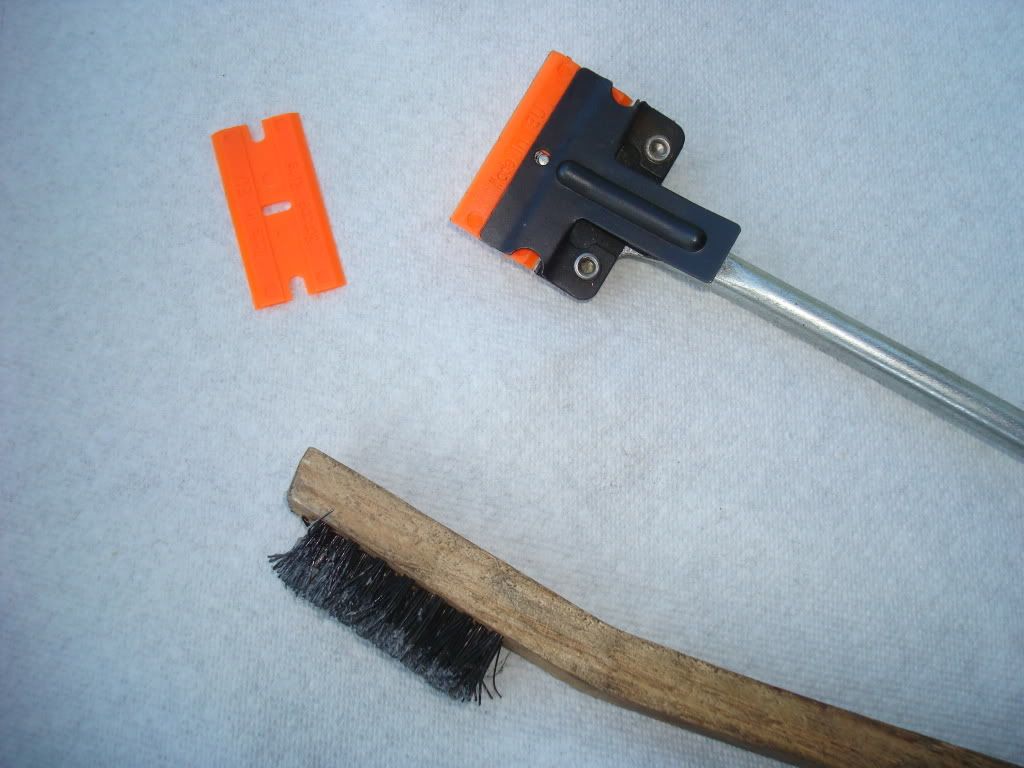
Once off I spent considerable time getting the surfaces clean. The OEM sealant was not cured all the way through. Maybe this is by design. It made it more difficult to remove is all. I used quite a bit of blue shop towels and brake cleaner after using the plastic razor blades.
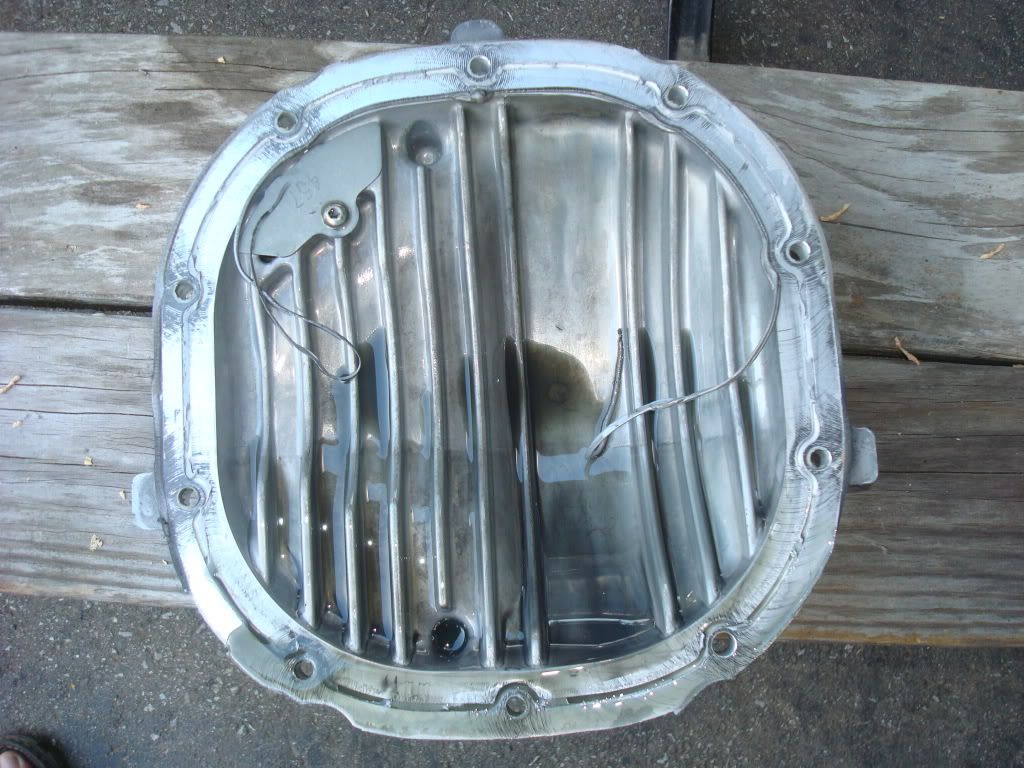
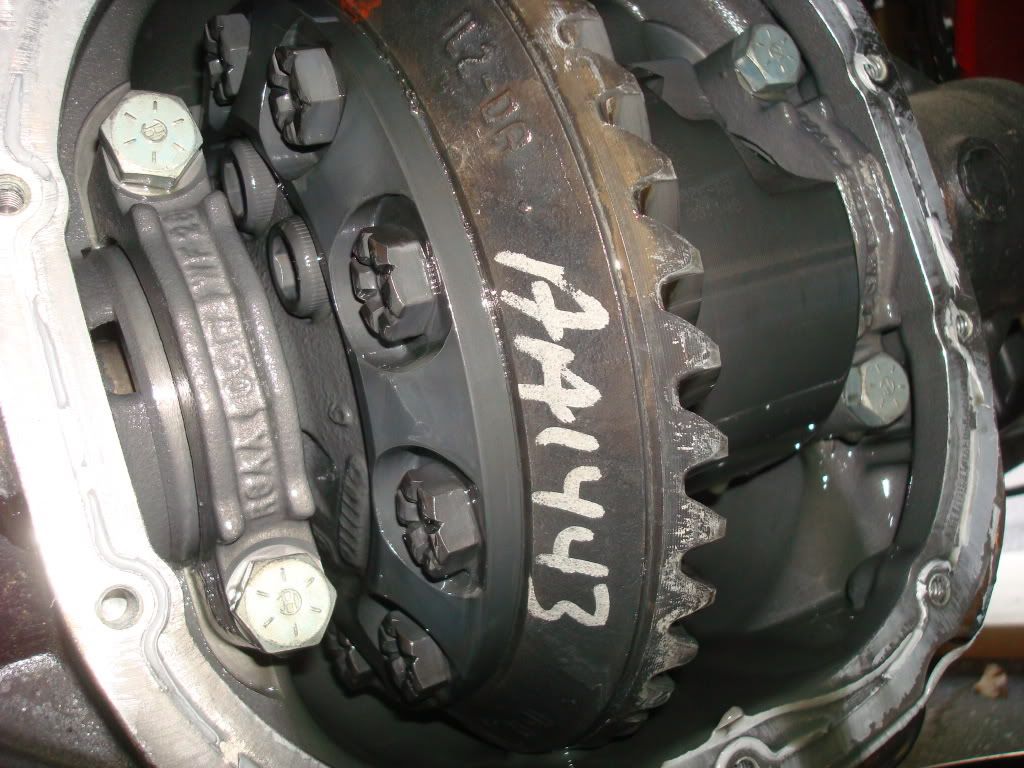
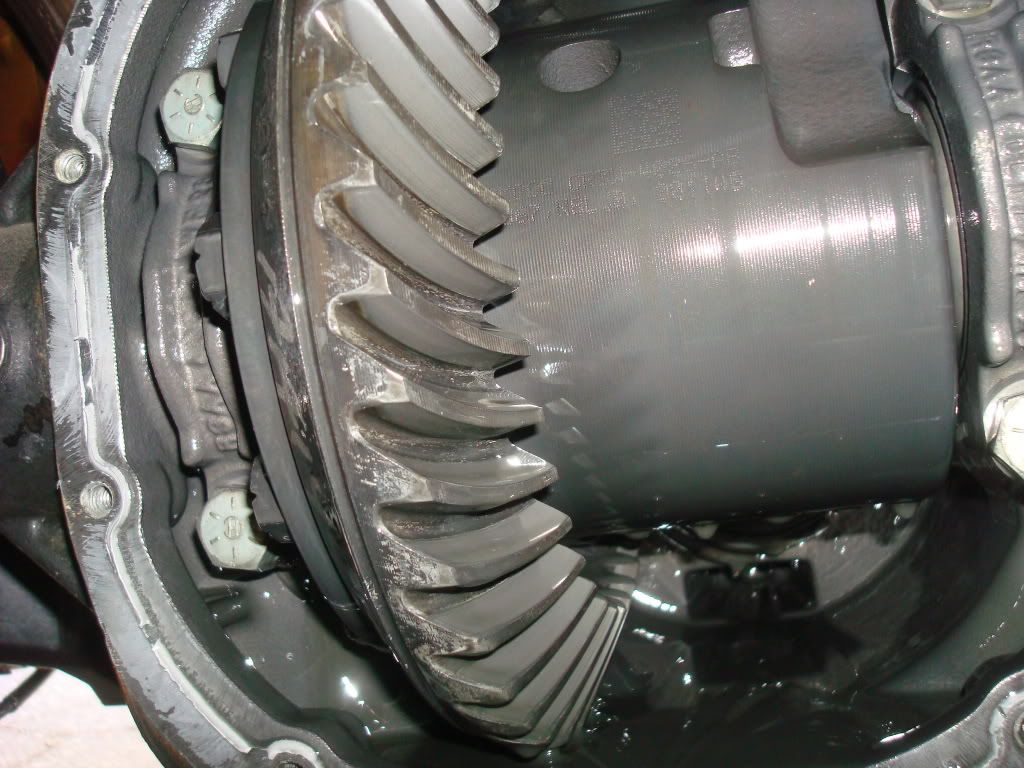
Good pics of the innards.
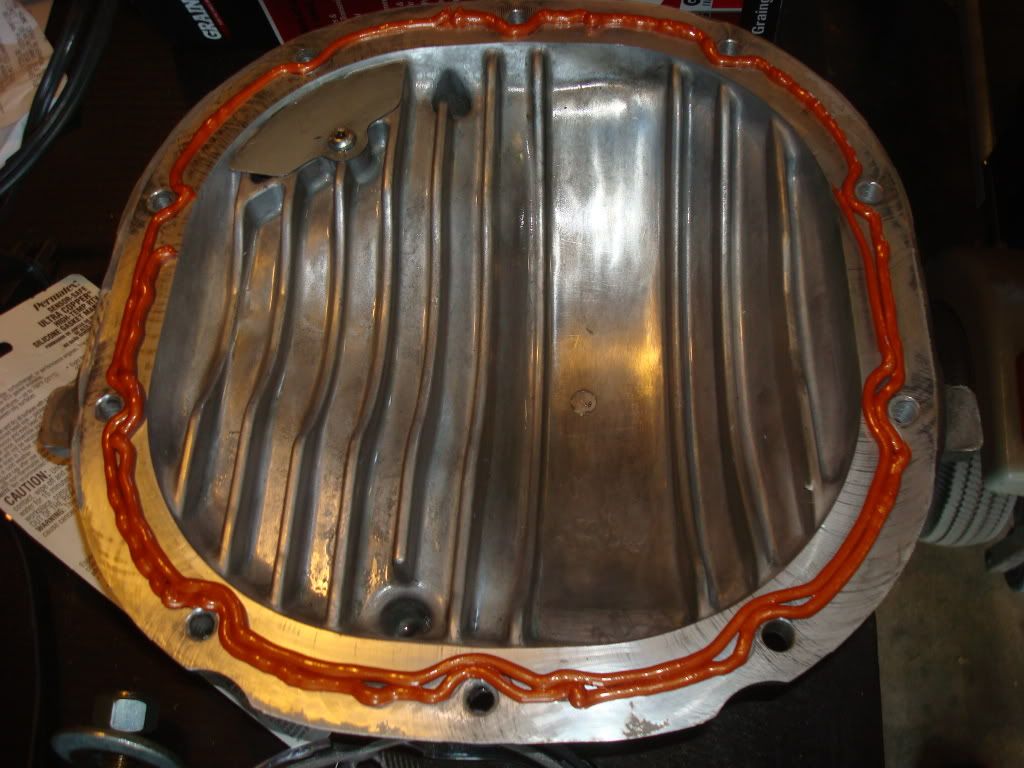
Bead it up! Lower half got another bead even though I think I was good with the first bead which I managed to get a complete circle in one squeeze.
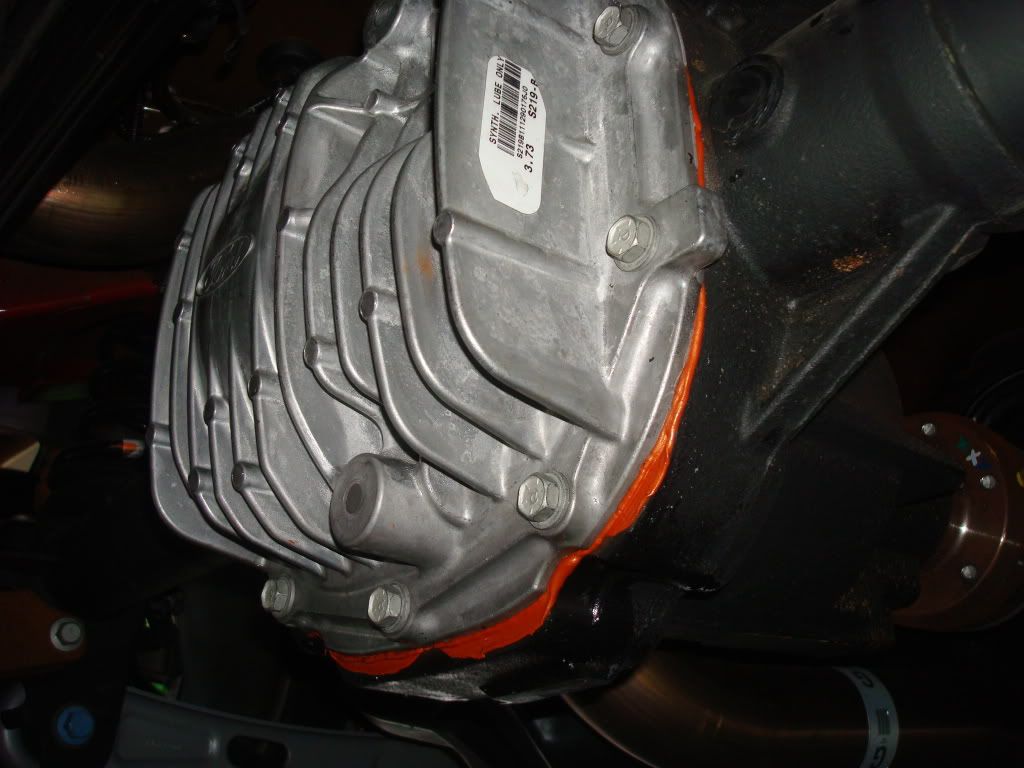
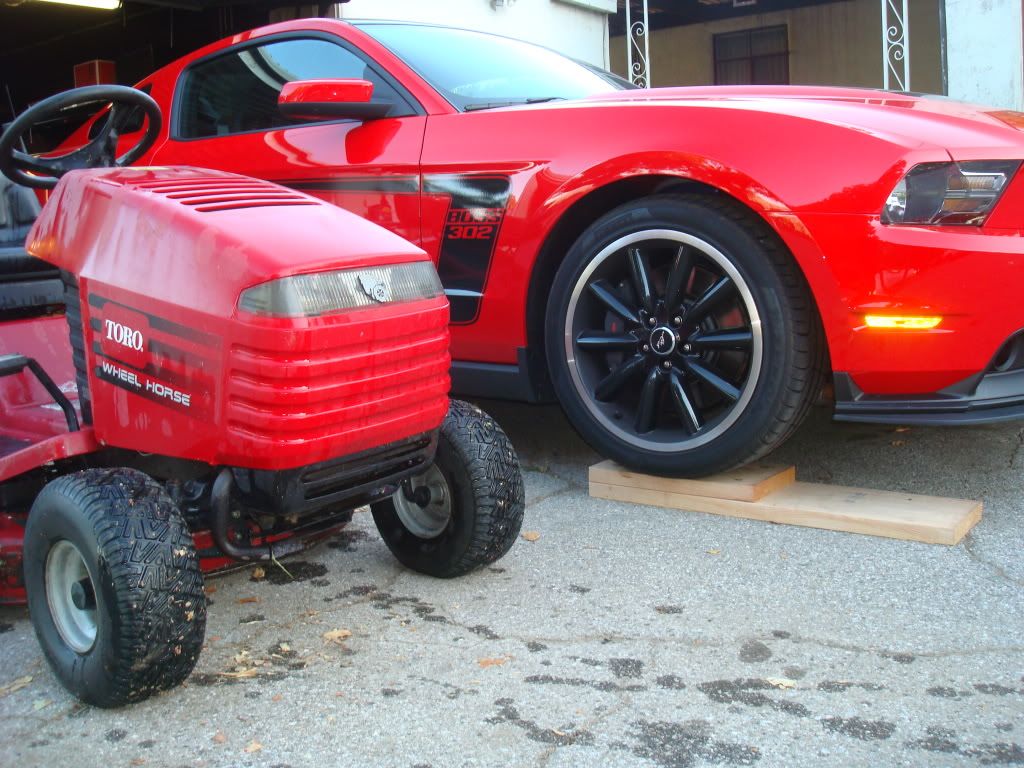
Tightened them until they started to squeeze out. Then gave them a break and washed the Race Red lawnmower! Came back and tightened them some more. Not super tight. Probably should have used a torque wrench but I had such good momentum at this point and the cover is very rigid. The cover rocks! Nice internal and external fins.
Panhard bar was an easy install. 18 mm socket on a 1/2" ratchet is what I used. Don't forget to tighten up the "3rd bolt" that you might have loosened in order to remove the panhard bar.
Removed the fill plug with the 3/8" extension on the ratchet. Easy.
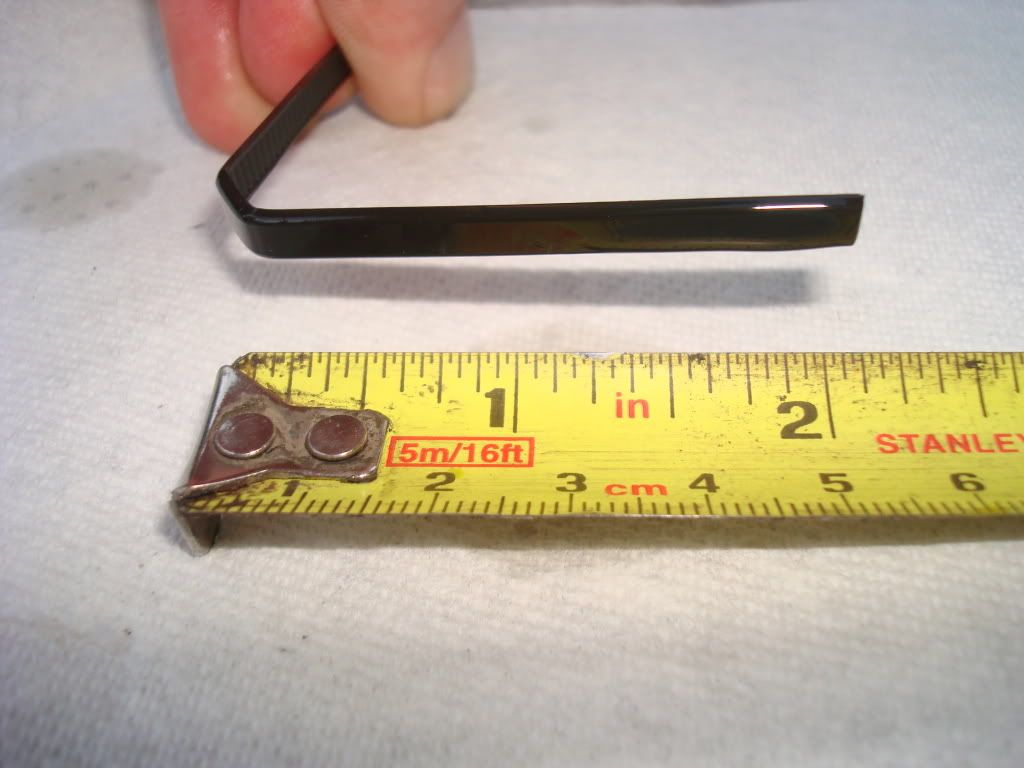
Filled it up using the pump. Always put the additive in the diff first since you don't want to try and float some on at the end. For me that meant pouring it in the transfer bottle that fit the pump early on in the cycle. It took multiple times under the car since the bottle I was using was too tall for the pump and I didn't feel like monkeying with it. Used a bent piece of zip tie to measure depth. More knowledge gained from this site! I filled it again and measured again after this pic to get just under an inch below the fill plug.
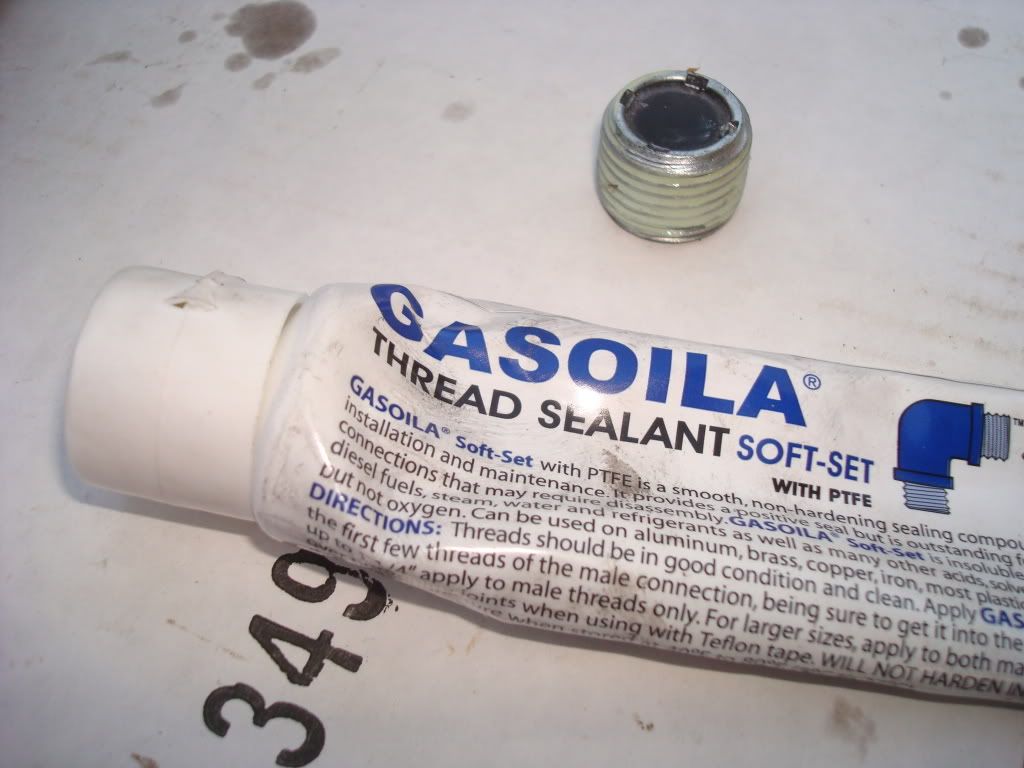
I used some "Gasolia" to seal the fill plug. The plug is magnetic. Good stuff available from http://www.dieselorings.com/index.ph...at=15&group=12
The proof will be whether I have leaks but I feel good getting this out of the way. There was a fair amount of very, very fine silver colored material in the fluid so it was ready for some new blood. I highly recommend this to anyone capable of getting their car up in the air safely. I need to incorporate some chocks to augment the parking brake I had set.
I got a chance to change out the rear diff fluid. It wasn't bad at all, about two hours without a lift or air tools. Just kinda messy and a pain to slide in and out a million times but not unlike any other diff fluid change.
I had some Red Line fluid and a bottle of the friction modifier. I also had a pump and an empty bottle that would fit the pump since Red Line caps are smaller.
I decided against drilling the cover. I think the better place would be the bottom of the housing where you'd get it all to drain out. That lower "boss" on the cover would work well for a temp sending unit.
First I needed to get it in the air so I could work. I think Scott made some like this? Anyway they were the perfect height for this job. They won't be high enough for the trans fluid job though. Thirty bucks from Home Depot with a box of screws. I had them do the cuts and I pre drilled the screw holes with the help of some clamps.
Turns out the panhard bar was easy to remove and likely necessary. Take the bolt out of each end and also loosen the other large bolt in the sheetmetal bracket to allow the bar to come out.
The first clue the bolt holes are blind was when I took the lower bolt out and no fluid followed. All the holes appear to be blind and not through to the inside. Sorry if this is common knowledge. My last diff was a 10.5" Sterling.
The top bolt was painted. A 12mm socket with short extension on a 3/8" ratchet is what I used for the cover bolts.
Remove the socket for the fill plug in the front of the pinion support housing.
Once all the bolts were out it was a matter of prying the cover off. This was very easy. It was not brutally stuck and there's a nice feature in the casting that allows for an easy pry. Make sure your catch pan is right there ready to go.
Once off I spent considerable time getting the surfaces clean. The OEM sealant was not cured all the way through. Maybe this is by design. It made it more difficult to remove is all. I used quite a bit of blue shop towels and brake cleaner after using the plastic razor blades.
Good pics of the innards.
Bead it up! Lower half got another bead even though I think I was good with the first bead which I managed to get a complete circle in one squeeze.
Tightened them until they started to squeeze out. Then gave them a break and washed the Race Red lawnmower! Came back and tightened them some more. Not super tight. Probably should have used a torque wrench but I had such good momentum at this point and the cover is very rigid. The cover rocks! Nice internal and external fins.
Panhard bar was an easy install. 18 mm socket on a 1/2" ratchet is what I used. Don't forget to tighten up the "3rd bolt" that you might have loosened in order to remove the panhard bar.
Removed the fill plug with the 3/8" extension on the ratchet. Easy.
Filled it up using the pump. Always put the additive in the diff first since you don't want to try and float some on at the end. For me that meant pouring it in the transfer bottle that fit the pump early on in the cycle. It took multiple times under the car since the bottle I was using was too tall for the pump and I didn't feel like monkeying with it. Used a bent piece of zip tie to measure depth. More knowledge gained from this site! I filled it again and measured again after this pic to get just under an inch below the fill plug.
I used some "Gasolia" to seal the fill plug. The plug is magnetic. Good stuff available from http://www.dieselorings.com/index.ph...at=15&group=12
The proof will be whether I have leaks but I feel good getting this out of the way. There was a fair amount of very, very fine silver colored material in the fluid so it was ready for some new blood. I highly recommend this to anyone capable of getting their car up in the air safely. I need to incorporate some chocks to augment the parking brake I had set.
Bullitt Member
Joined: April 21, 2011
Posts: 482
Likes: 0
From: Santa Clarita, CA
Great write up and super pictures, Fat Boss. I hope everyone realizes and appreciates the extra time it takes to grab these pics at each step and then to take the time to organize, upload, and document! Well done and thanks very much!!
Bullitt Member
Joined: April 10, 2011
Posts: 240
Likes: 0
From: So. NH
Thanks for the write-up!
I'm somewhat surprised that they didn't incorporate a drain plug (& fill for that matter) into the diff cover. It appears that the bosses there on the cover are designed for that purpose.
I'm somewhat surprised that they didn't incorporate a drain plug (& fill for that matter) into the diff cover. It appears that the bosses there on the cover are designed for that purpose.
Thread Starter
Mach 1 Member
Joined: April 8, 2011
Posts: 621
Likes: 0
From: An hour from Laguna Seca
http://www.grand-am.com/assets/2011L...icialsched.pdf
Thread Starter
Mach 1 Member
Joined: April 8, 2011
Posts: 621
Likes: 0
From: An hour from Laguna Seca
As for the fill, it's not too bad at all to use the existing fill on the front of the pinion housing. It'd be nice to have a sight glass or a fill hole that you fill until it pours out though.
Bullitt Member
Joined: February 23, 2011
Posts: 204
Likes: 1
Very nice write-up!
As an aside, and to save you some potential money - Redline already adds a friction modifier additive to the gear oil you used there, so no real need for you to do anything additional on future changes
As an aside, and to save you some potential money - Redline already adds a friction modifier additive to the gear oil you used there, so no real need for you to do anything additional on future changes
Thread Starter
Mach 1 Member
Joined: April 8, 2011
Posts: 621
Likes: 0
From: An hour from Laguna Seca

Bullitt Member
Joined: February 23, 2011
Posts: 204
Likes: 1
Interesting - I had planned on pure Redline myself without an additive, but I'll have to pay attantion to it. Good info! Did you use the full 4oz of the Motorcraft additive?

Thread Starter
Mach 1 Member
Joined: April 8, 2011
Posts: 621
Likes: 0
From: An hour from Laguna Seca
Yes. The spec calls for 5oz, but since I am not convinced the Torsen needs any I just put in 4oz. If I get any sort of chatter I'll add another oz and re-evaluate.
Tasca Super Boss 429 Member
Joined: December 18, 2010
Posts: 3,708
Likes: 0
From: NorCal
You know it Rick! Looks like my dad might roll down with me since all my friends have to work. I'm hoping if we get down there early we'll be ahead of the motorhomes and gremlins during the parade laps!
http://www.grand-am.com/assets/2011L...icialsched.pdf
http://www.grand-am.com/assets/2011L...icialsched.pdf
Bullitt Member
Joined: February 23, 2011
Posts: 204
Likes: 1
Thread Starter
Mach 1 Member
Joined: April 8, 2011
Posts: 621
Likes: 0
From: An hour from Laguna Seca
Based on some threads I have read I decided on about 13/16" from the bottom of the hole. I have a little room to put more friction modifier in as well. I may just put some more 75W-140 in if the F/M % is ok.
Mach 1 Member
Joined: January 6, 2011
Posts: 872
Likes: 3
From: Phoenix, Az
Thanks. I have to document builds at work so this was actually minimal in comparison to the multi hundred page docs I'm used to!
You know it Rick! Looks like my dad might roll down with me since all my friends have to work. I'm hoping if we get down there early we'll be ahead of the motorhomes and gremlins during the parade laps!
http://www.grand-am.com/assets/2011L...icialsched.pdf
You know it Rick! Looks like my dad might roll down with me since all my friends have to work. I'm hoping if we get down there early we'll be ahead of the motorhomes and gremlins during the parade laps!
http://www.grand-am.com/assets/2011L...icialsched.pdf
Tasca Super Boss 429 Member
Joined: December 18, 2010
Posts: 3,708
Likes: 0
From: NorCal
 See you Friday afternoon.
Thread Starter
Mach 1 Member
Joined: April 8, 2011
Posts: 621
Likes: 0
From: An hour from Laguna Seca