
My custom (somewhat) dash kit project.

Thread Starter
Mach 1 Member
Joined: January 25, 2011
Posts: 1,075
Likes: 1
From: Ville Platte, Louisiana
My custom (somewhat) dash kit project.
Well guys I started a project with some extra parts I had laying around. Through several deals that I was able to come across I had a couple Scosche dash kits laying around as well as a Nav dash kit I bought here on the forums. Well my chief complaint with the scosche kit has always been the radio placement. At first I thought I would get used to the low placement of the radio and it really isn't that bad but the low placement just looks out of place to me. So I did something about it. I cut up the scosche kit, and the NAV faceplate the formed them together to make my own dash kit.
Now before you even think about trying this please understand a few things. 1. You have to be willing to lose the information screen. I don't even use the Sync system anymore so I have no use for the screen.
2. You will have to bend or cut some brackets that hold the Climate Control Module (Little black box behind the info screen).
This mod is not for the faint of heart and I do not recommend it for someone that isn't willing to work with these parts and willing to cut things up with a dremel. But my feeling is that the payoff is fantastic and I hope you think so to!
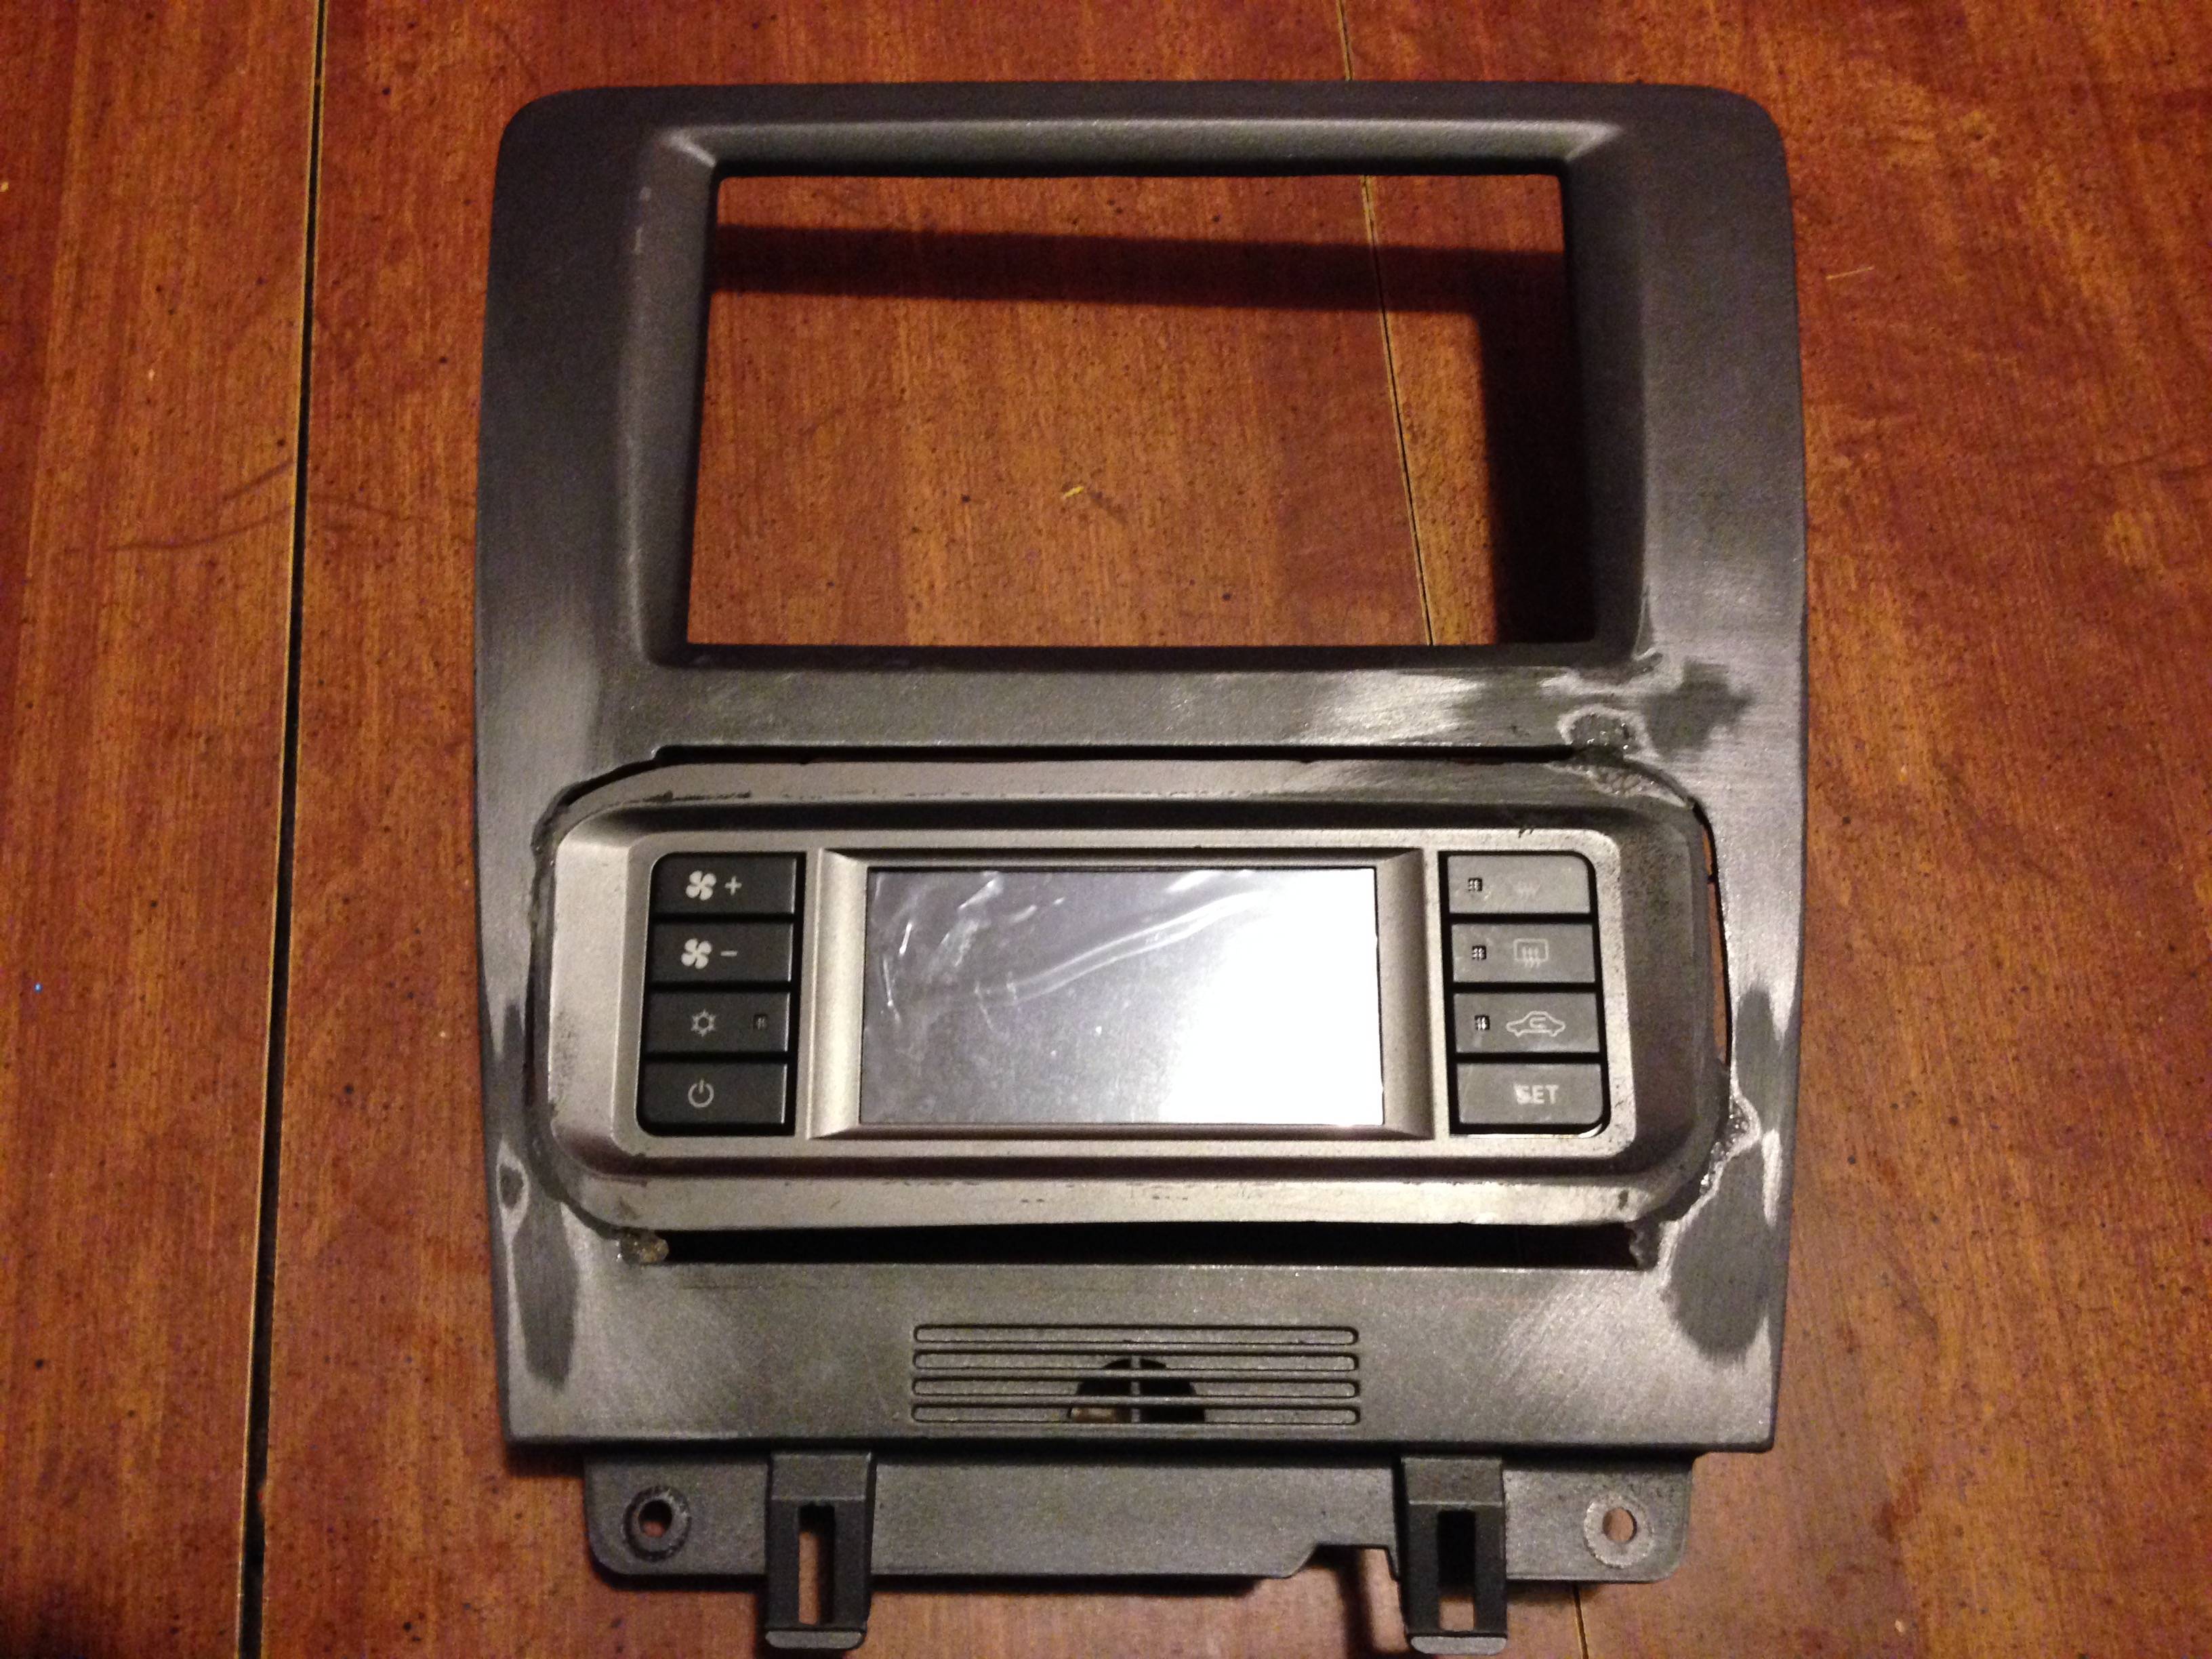
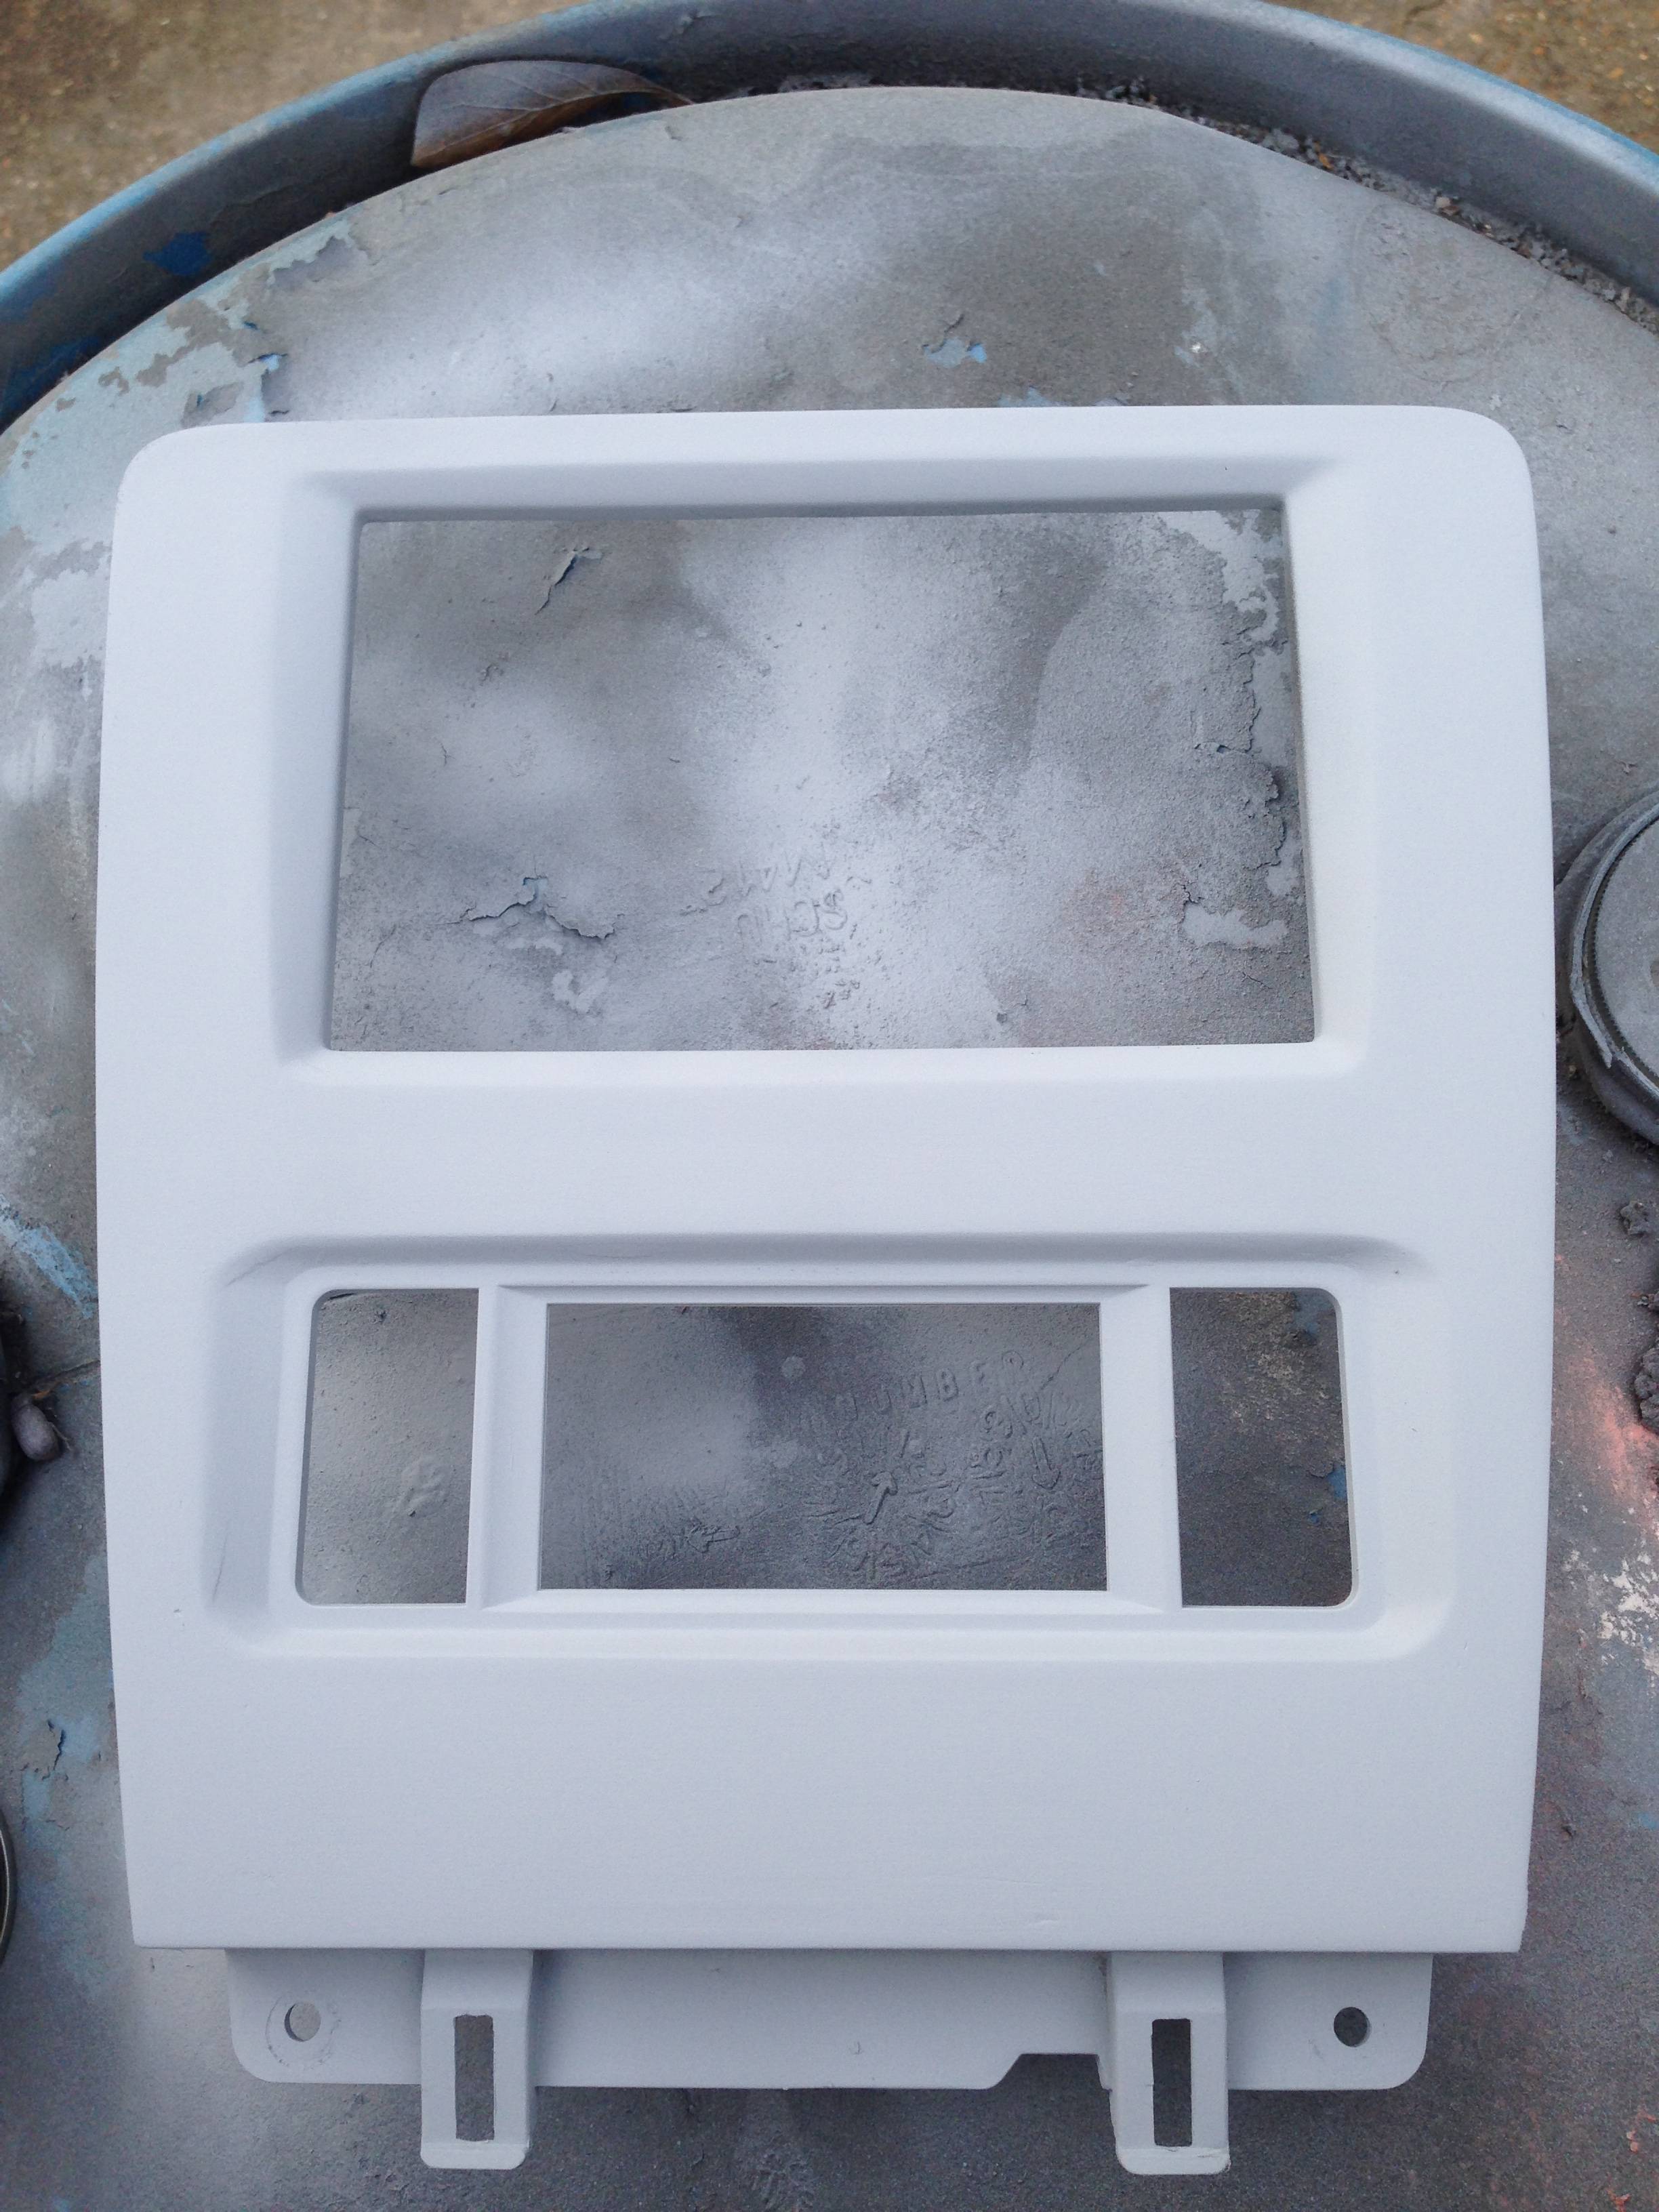
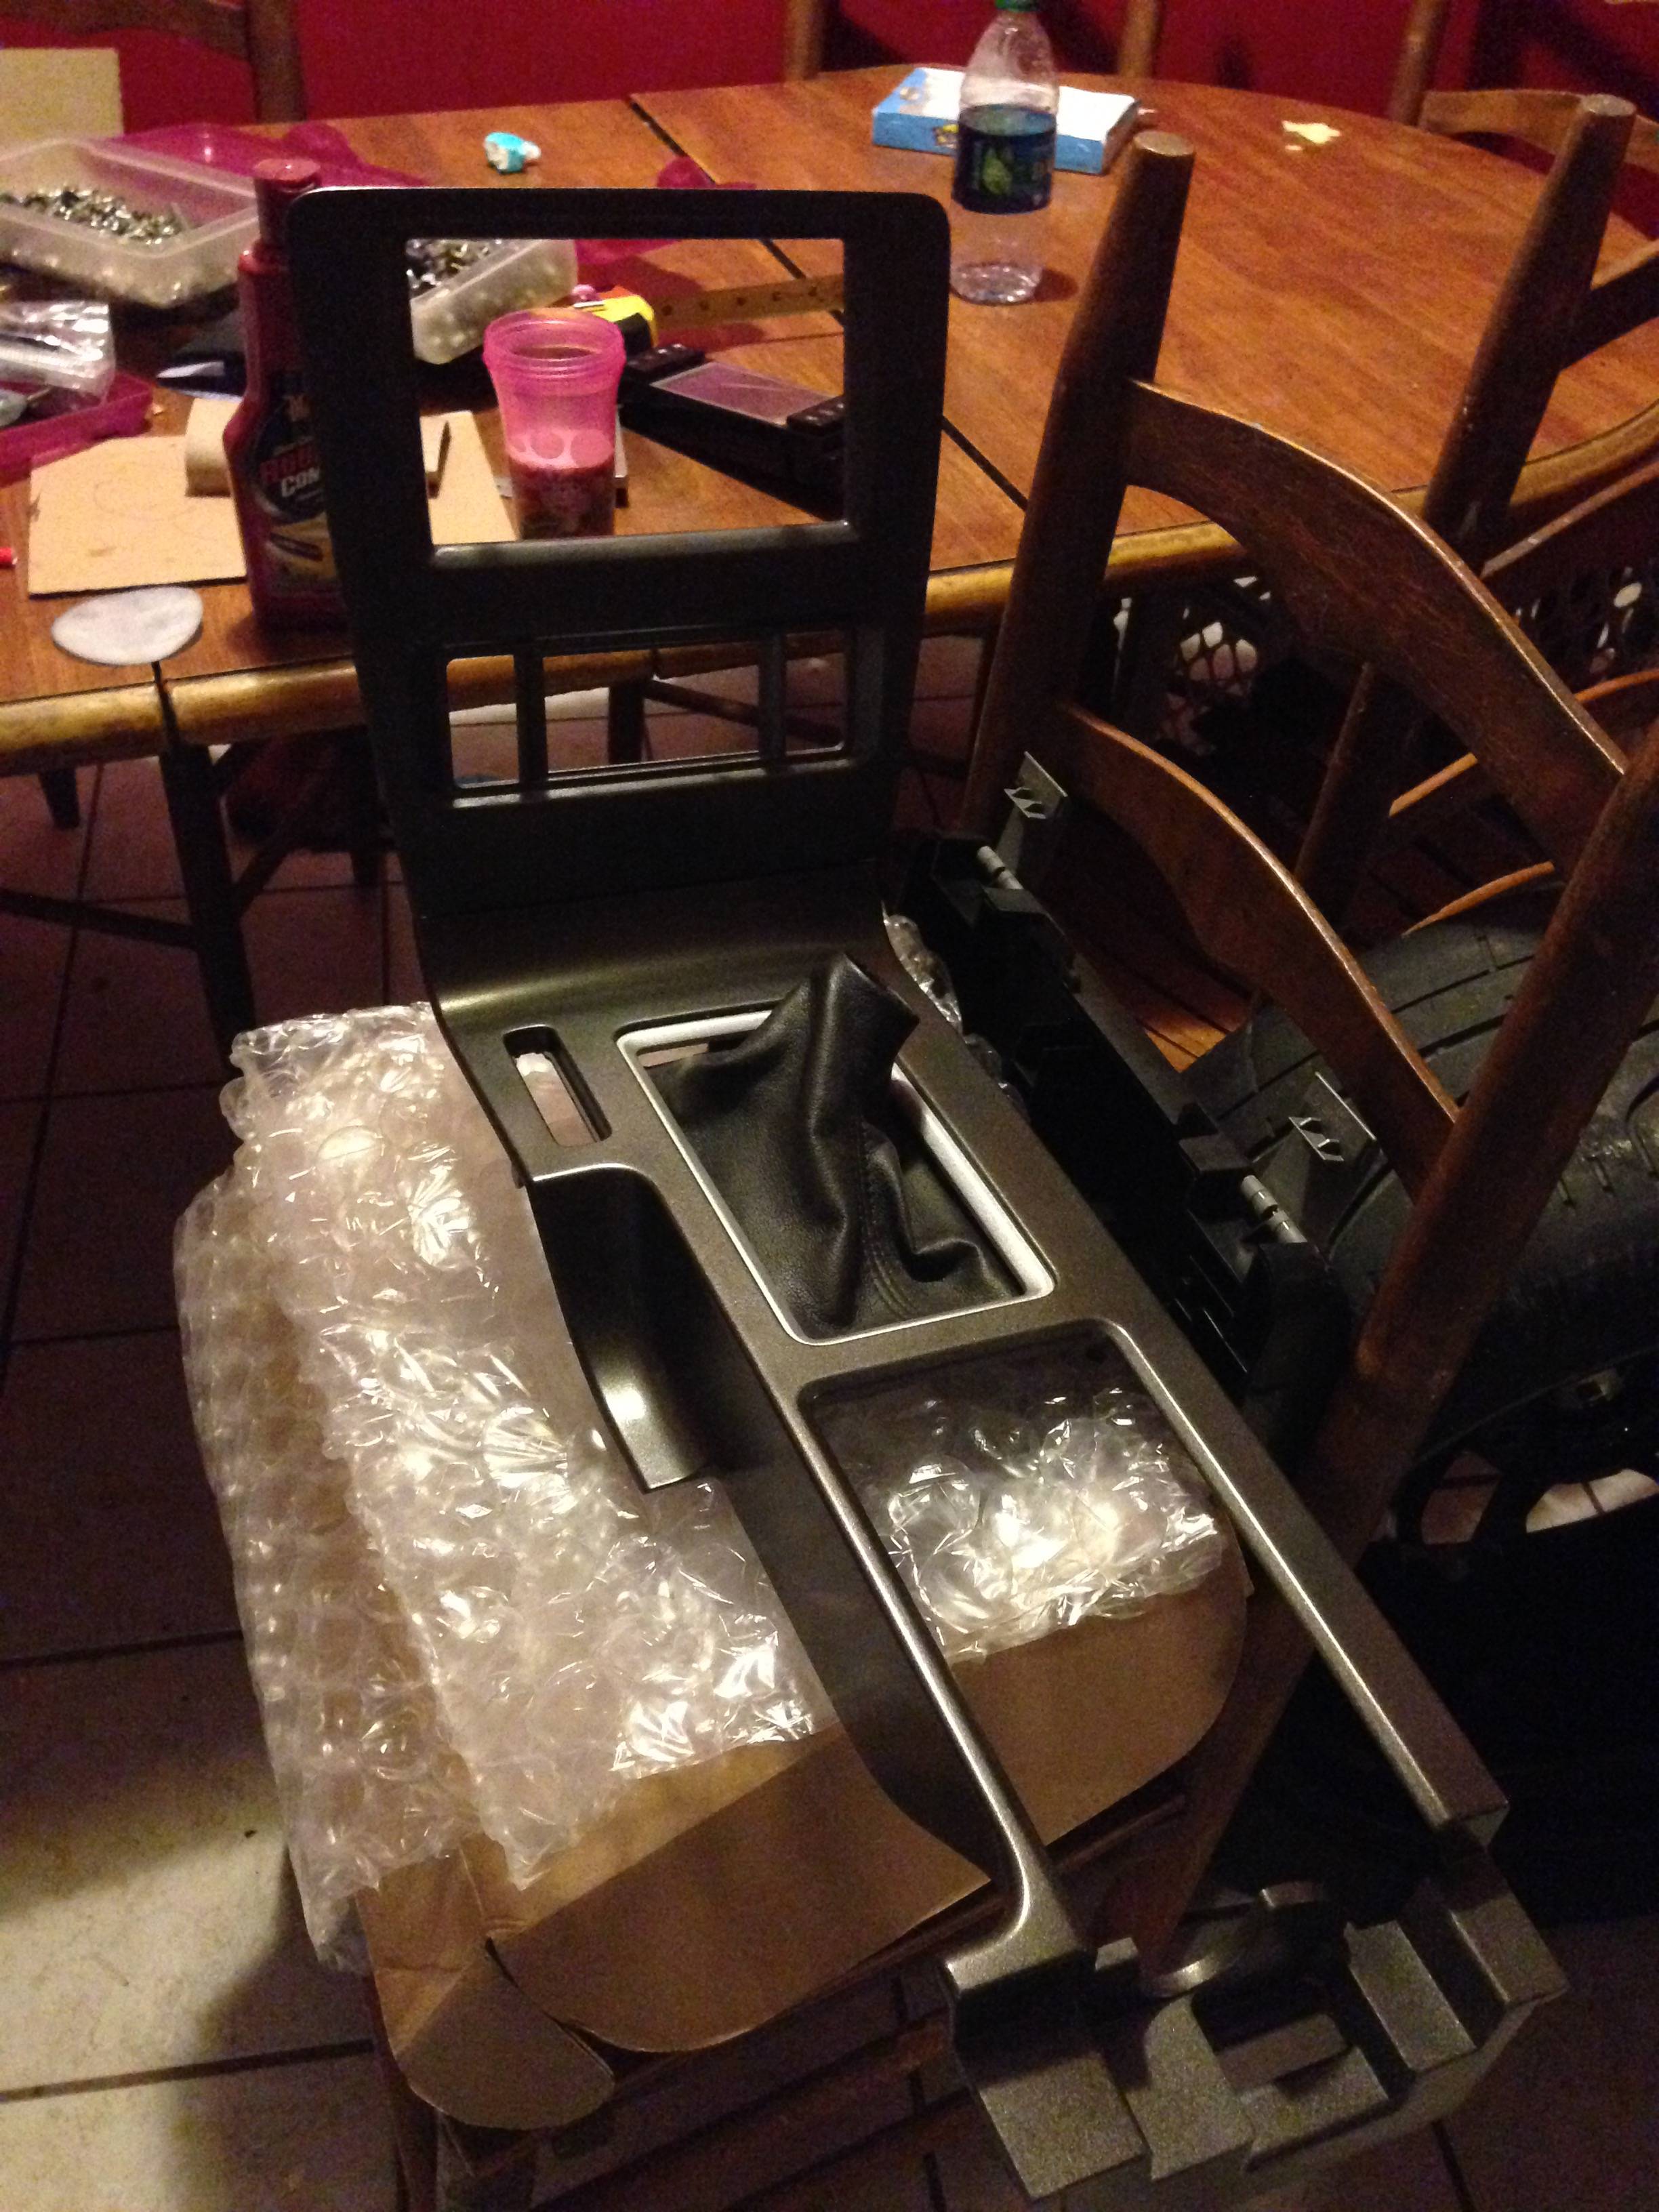
This is how the project started. Here you see the Scosche AC controls secition mounted inside a NAV bezel. Here is was a little off center and I ended up dremeling out the glue and replacing by aligning the centers of both parts.
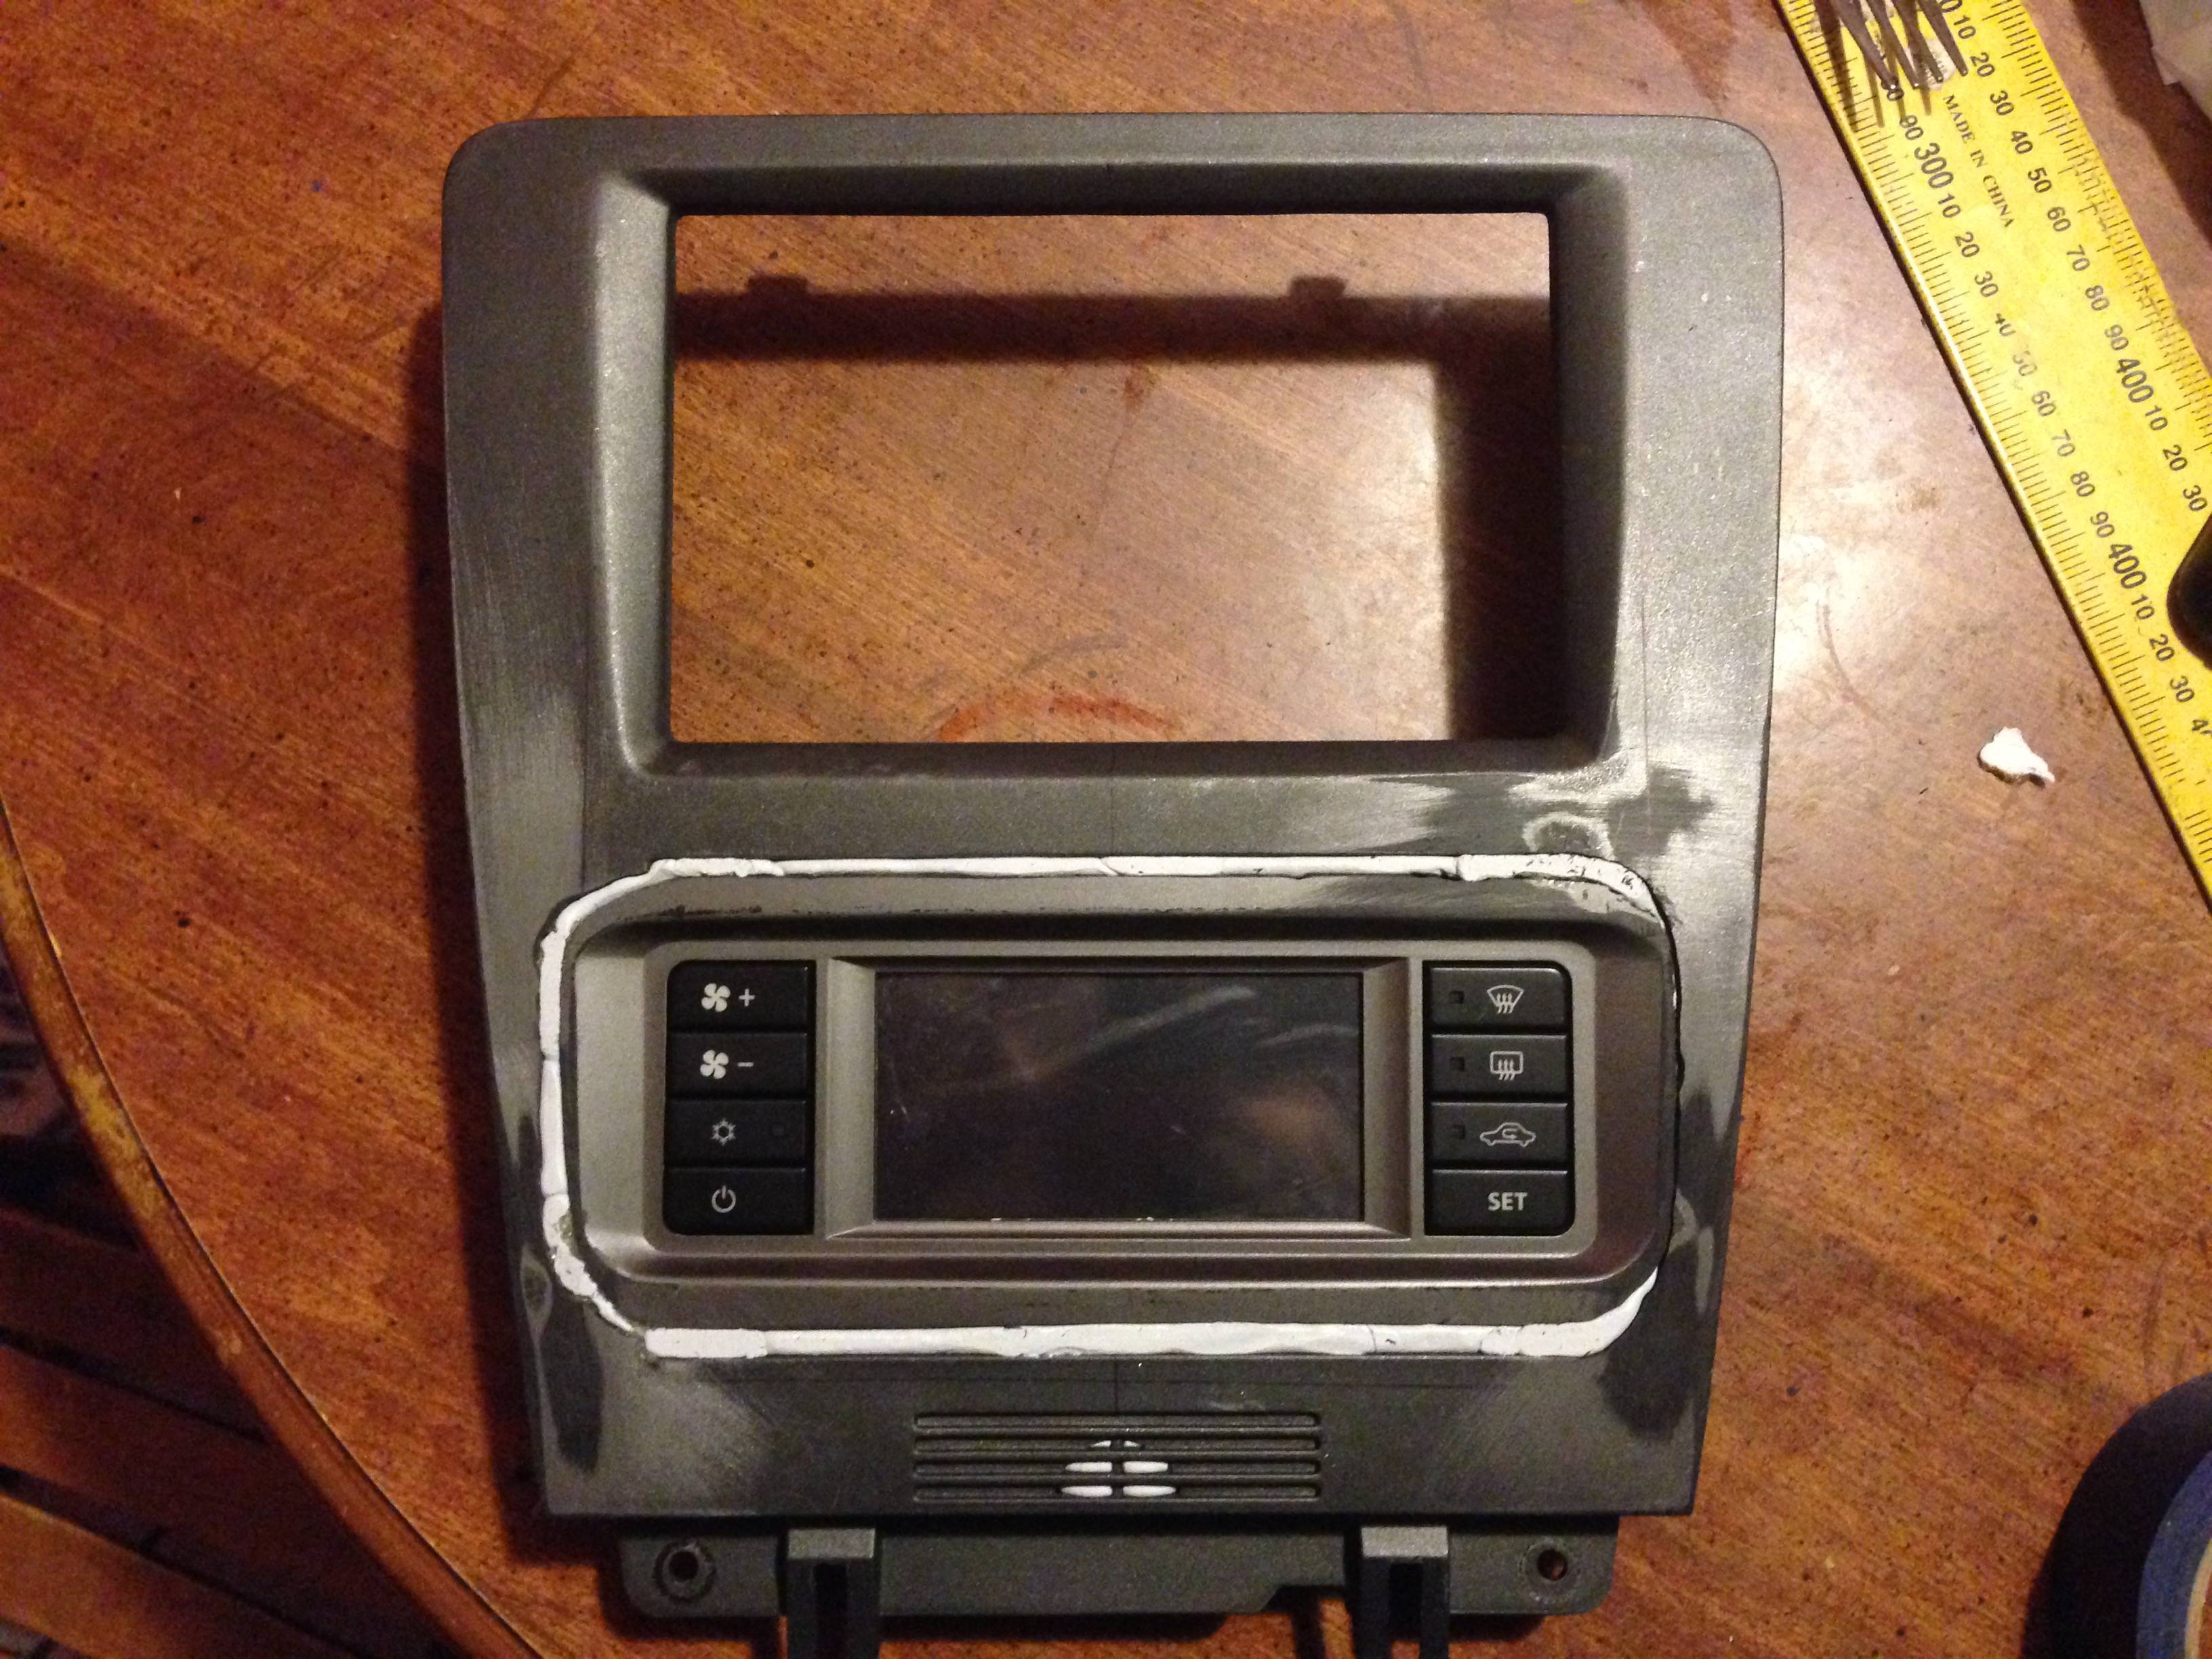
I ended up buying some JB Weld Plastic Weld putty. Once I centered the 2 pieces together I used the putty to fill in the gaps and attach the 2 pieces together. This stuff is supposed to bond very well and I put painters tape over all the gaps so the putty would only push through so far. This left me with only a very small amount of gaps to fill with body filler.
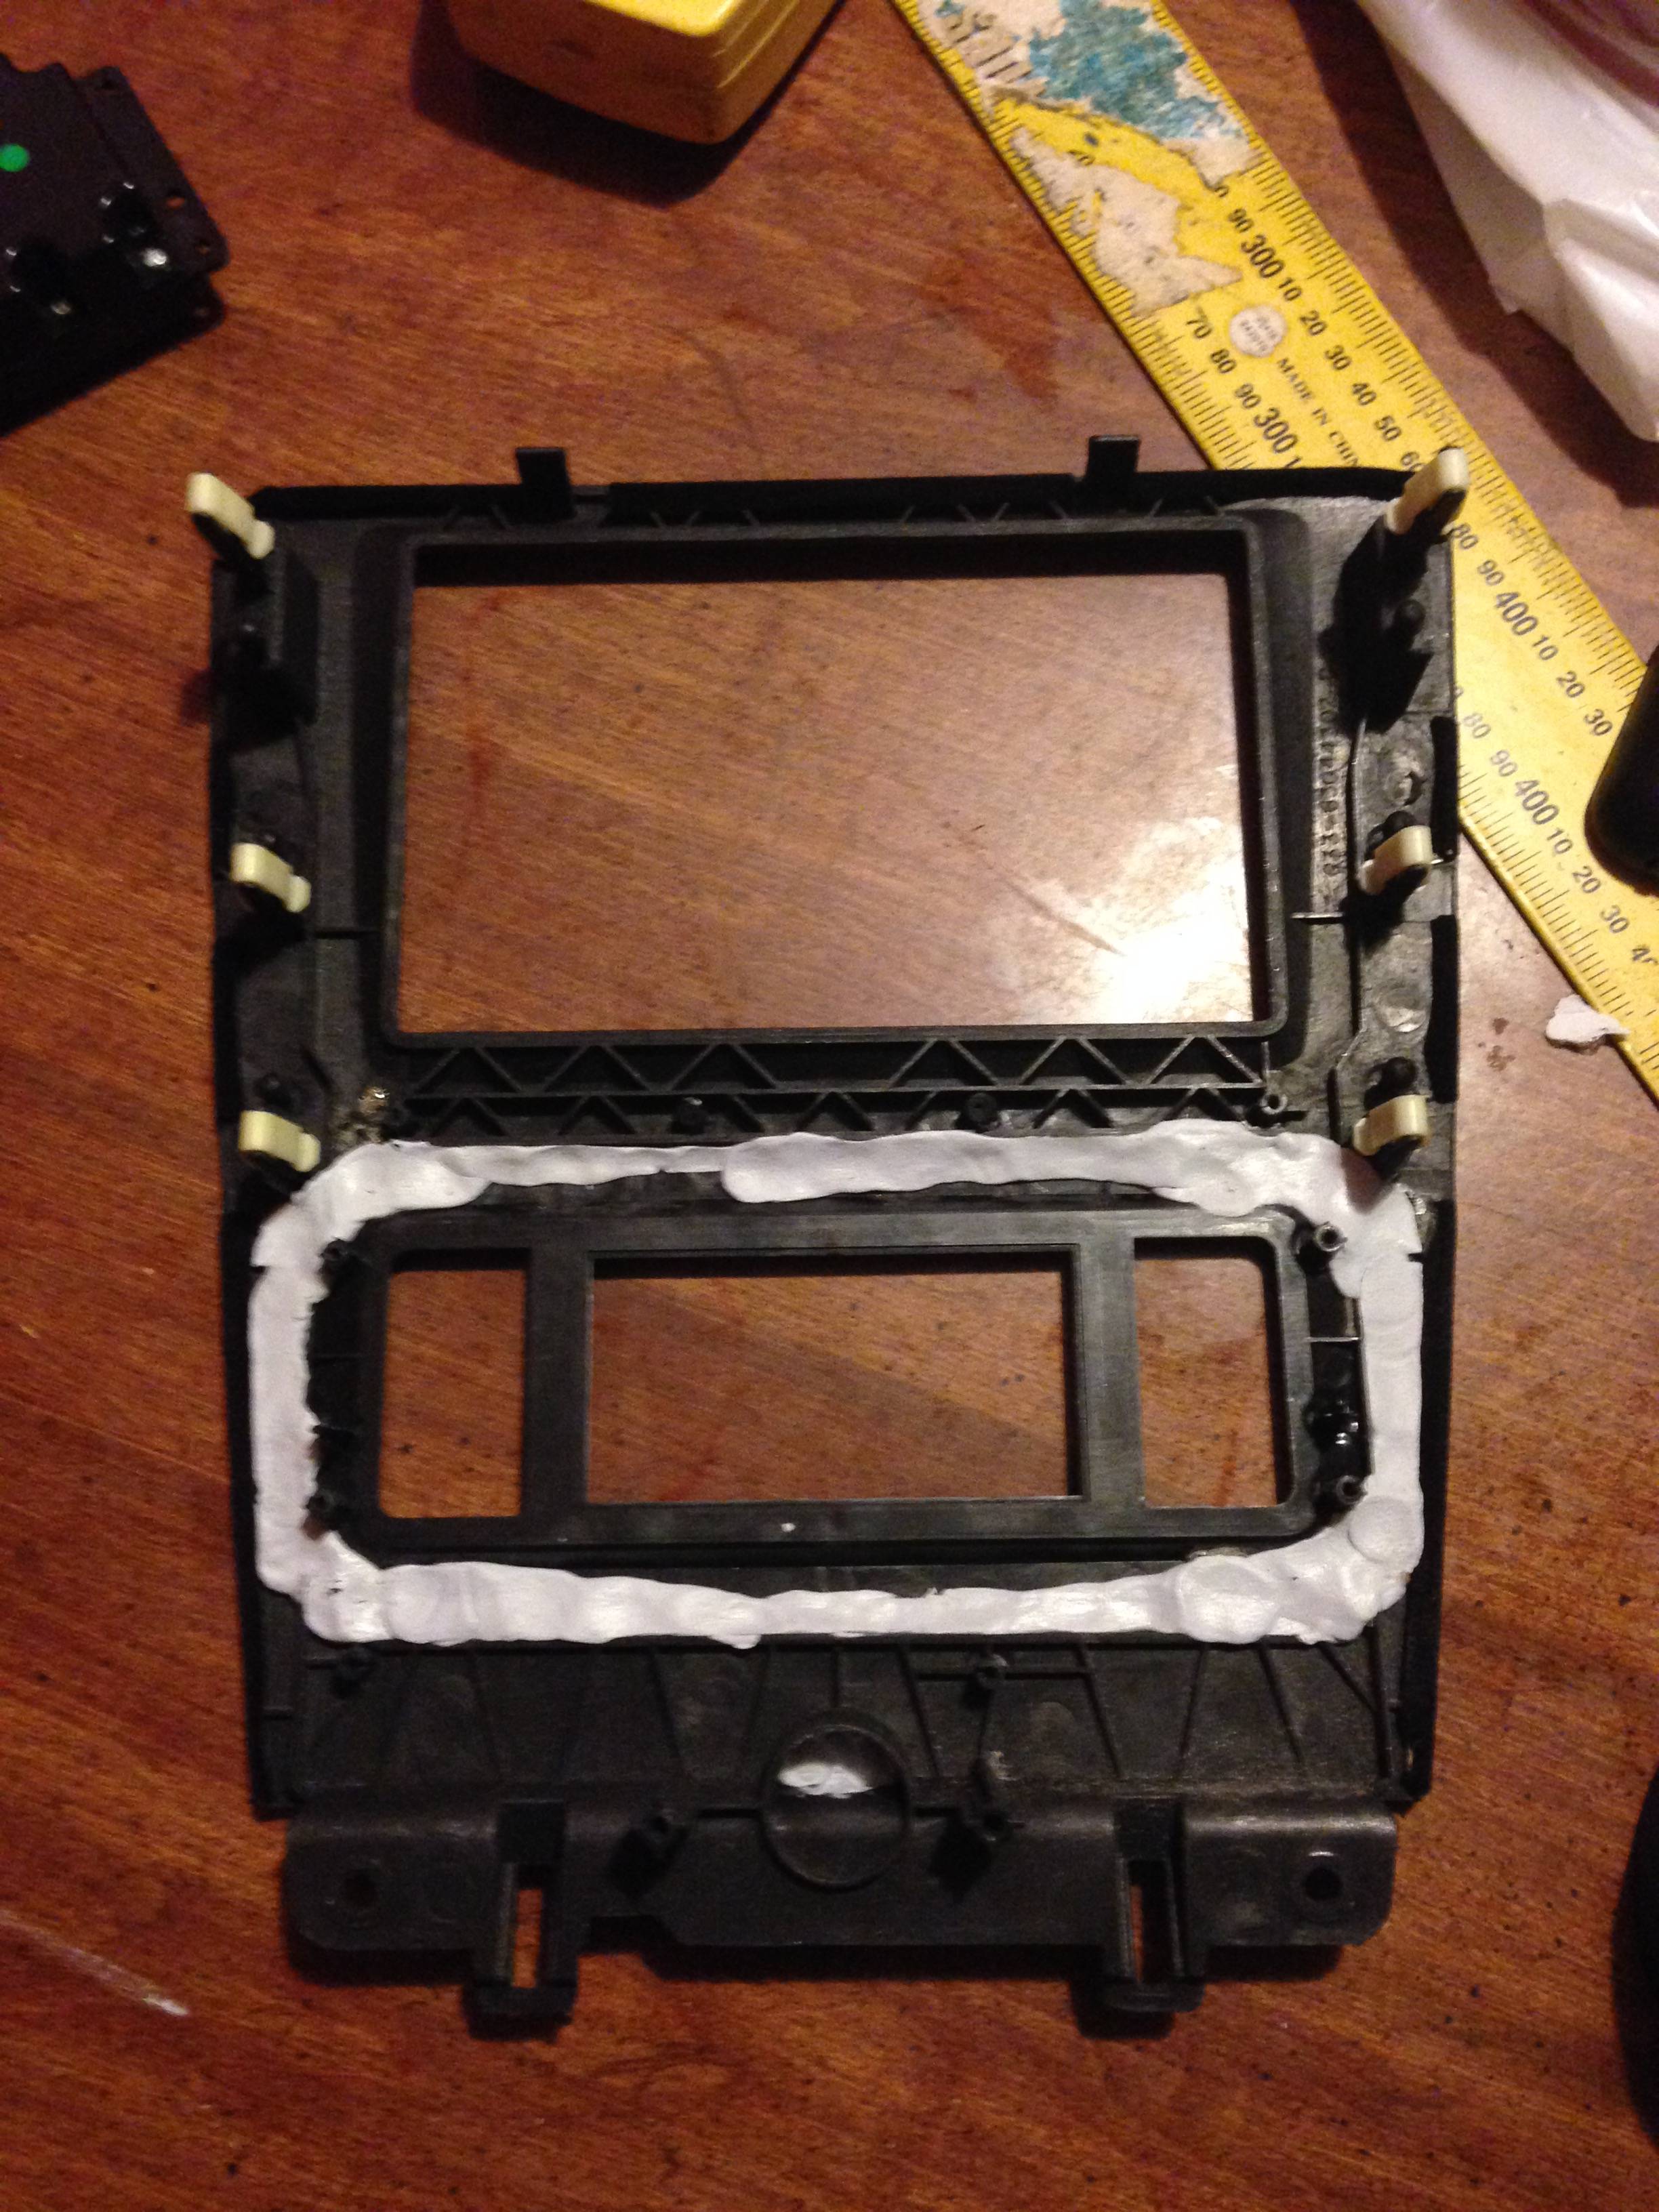
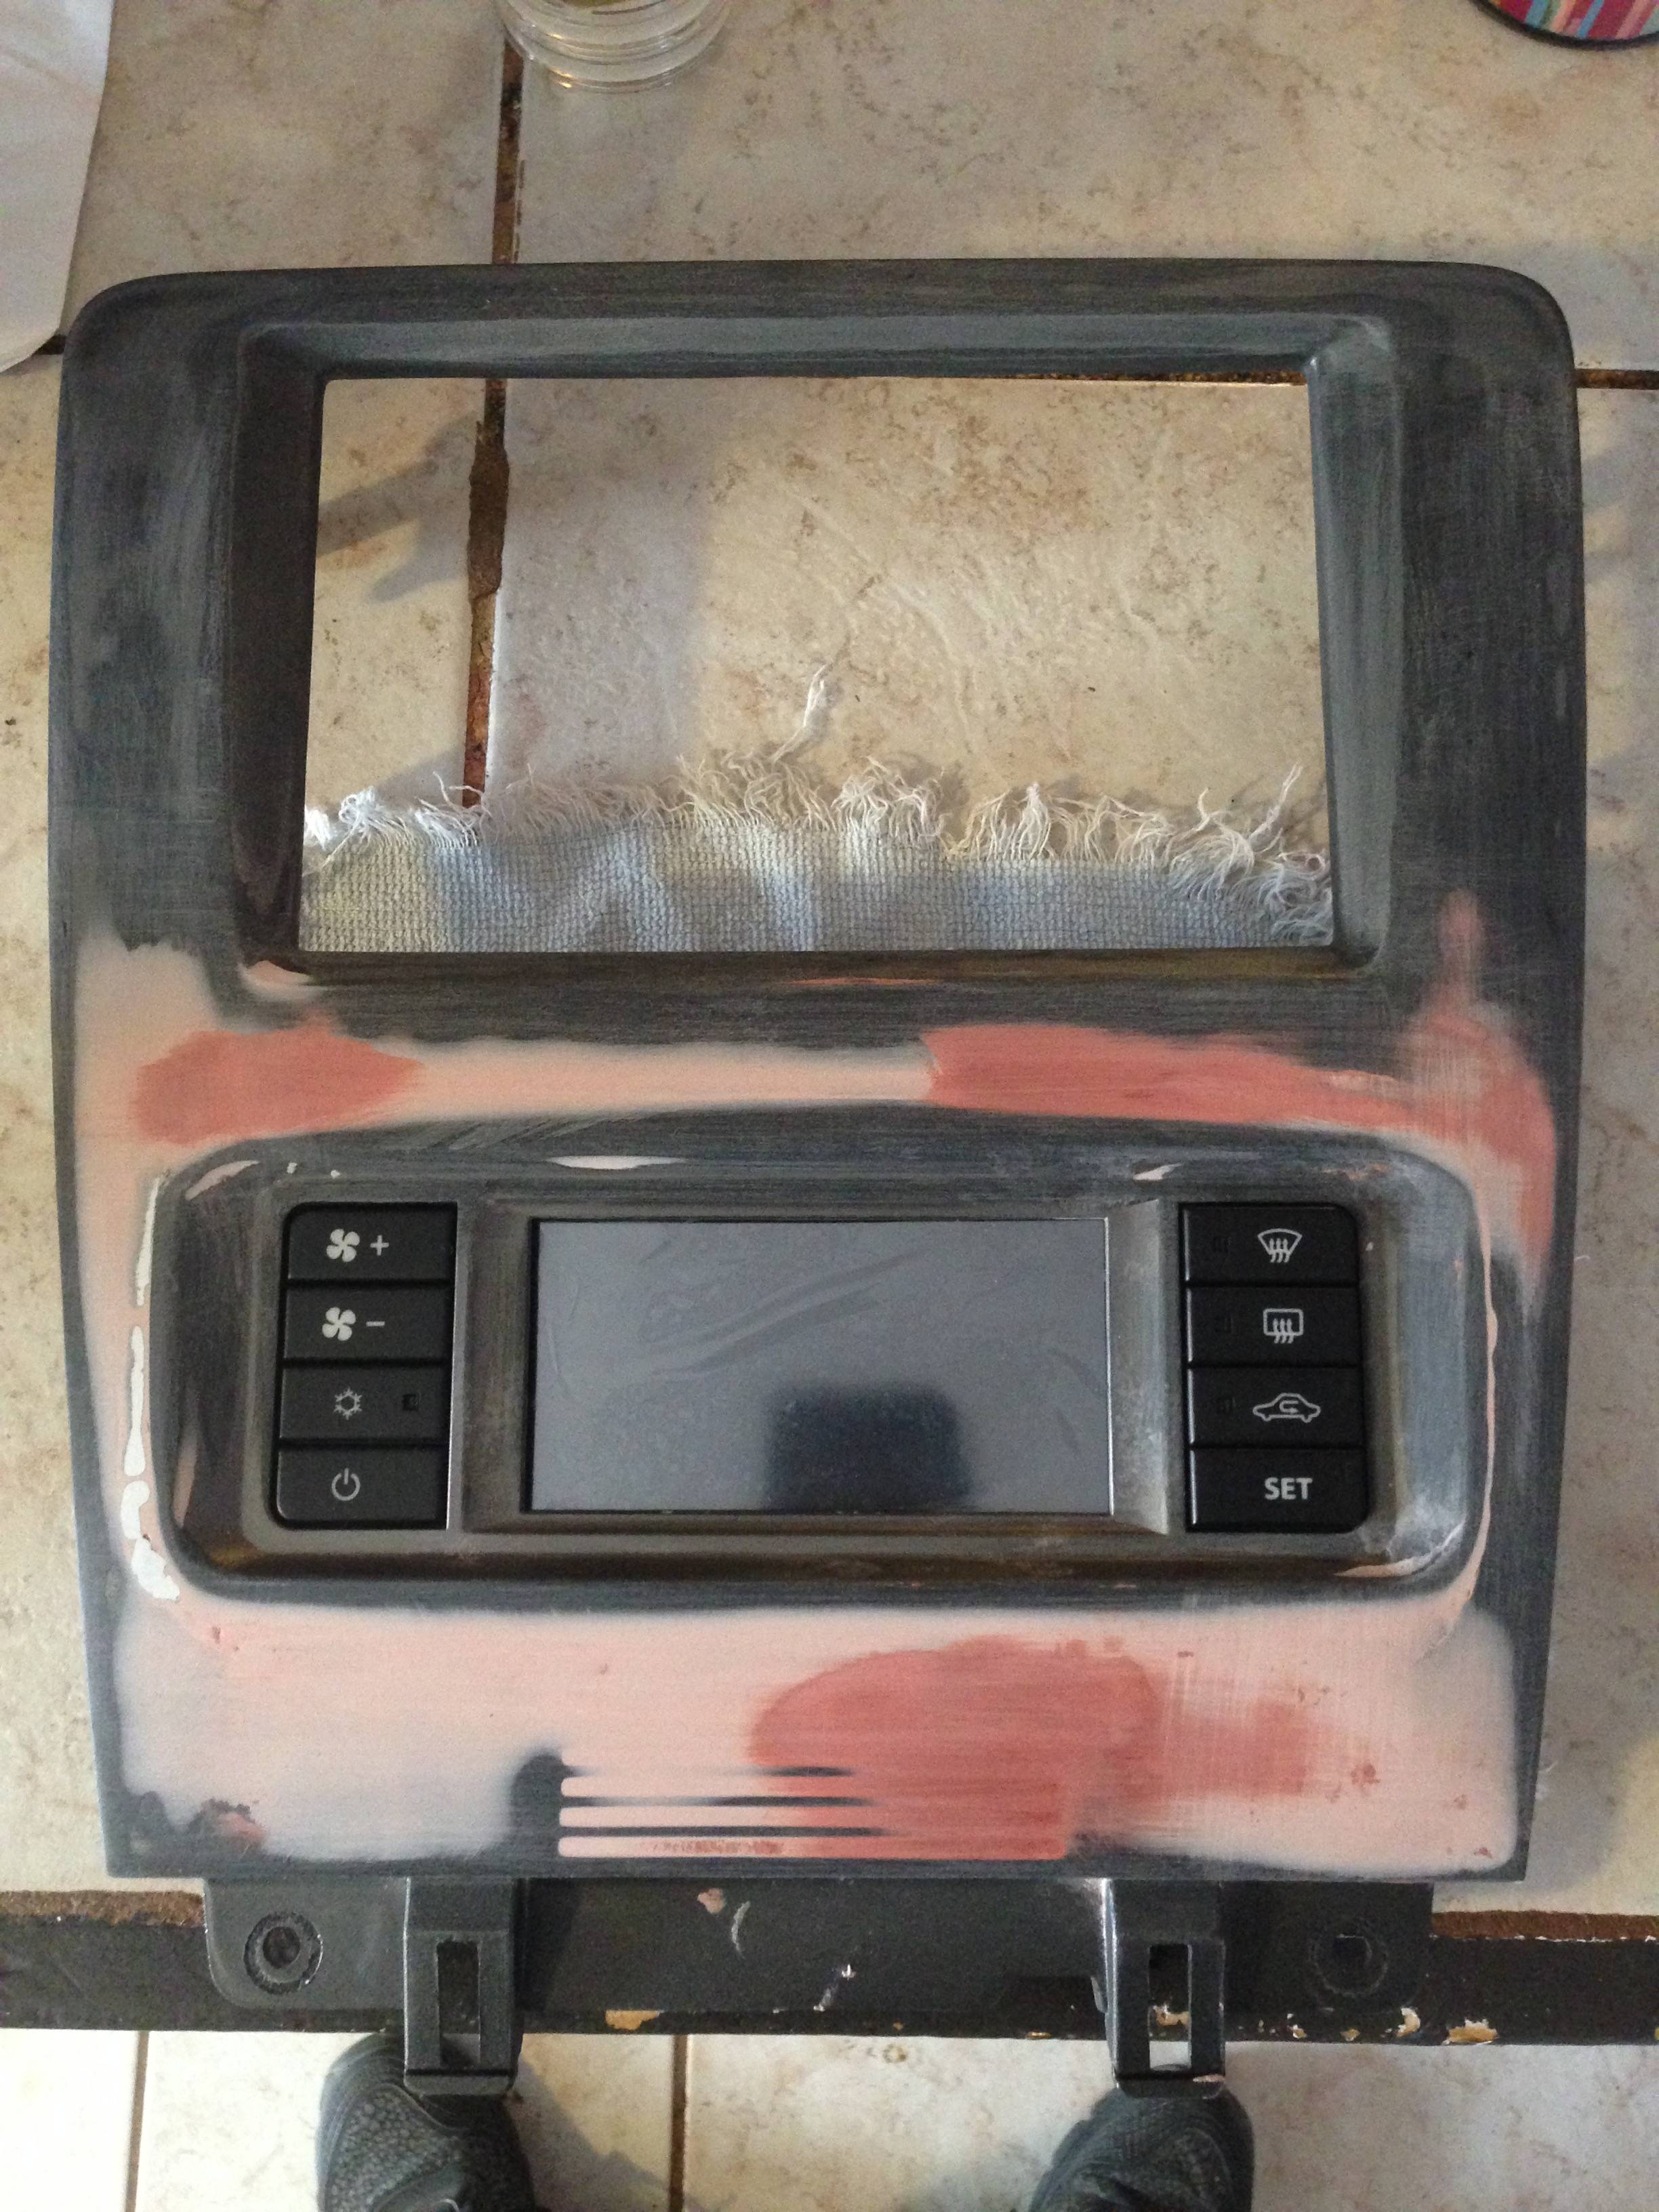
Once all the gaps were filled with bondo, I sprayed with some filler primer and sanded, then went with a second coat. This part was the most tedious since any imperfections will show when you paint.
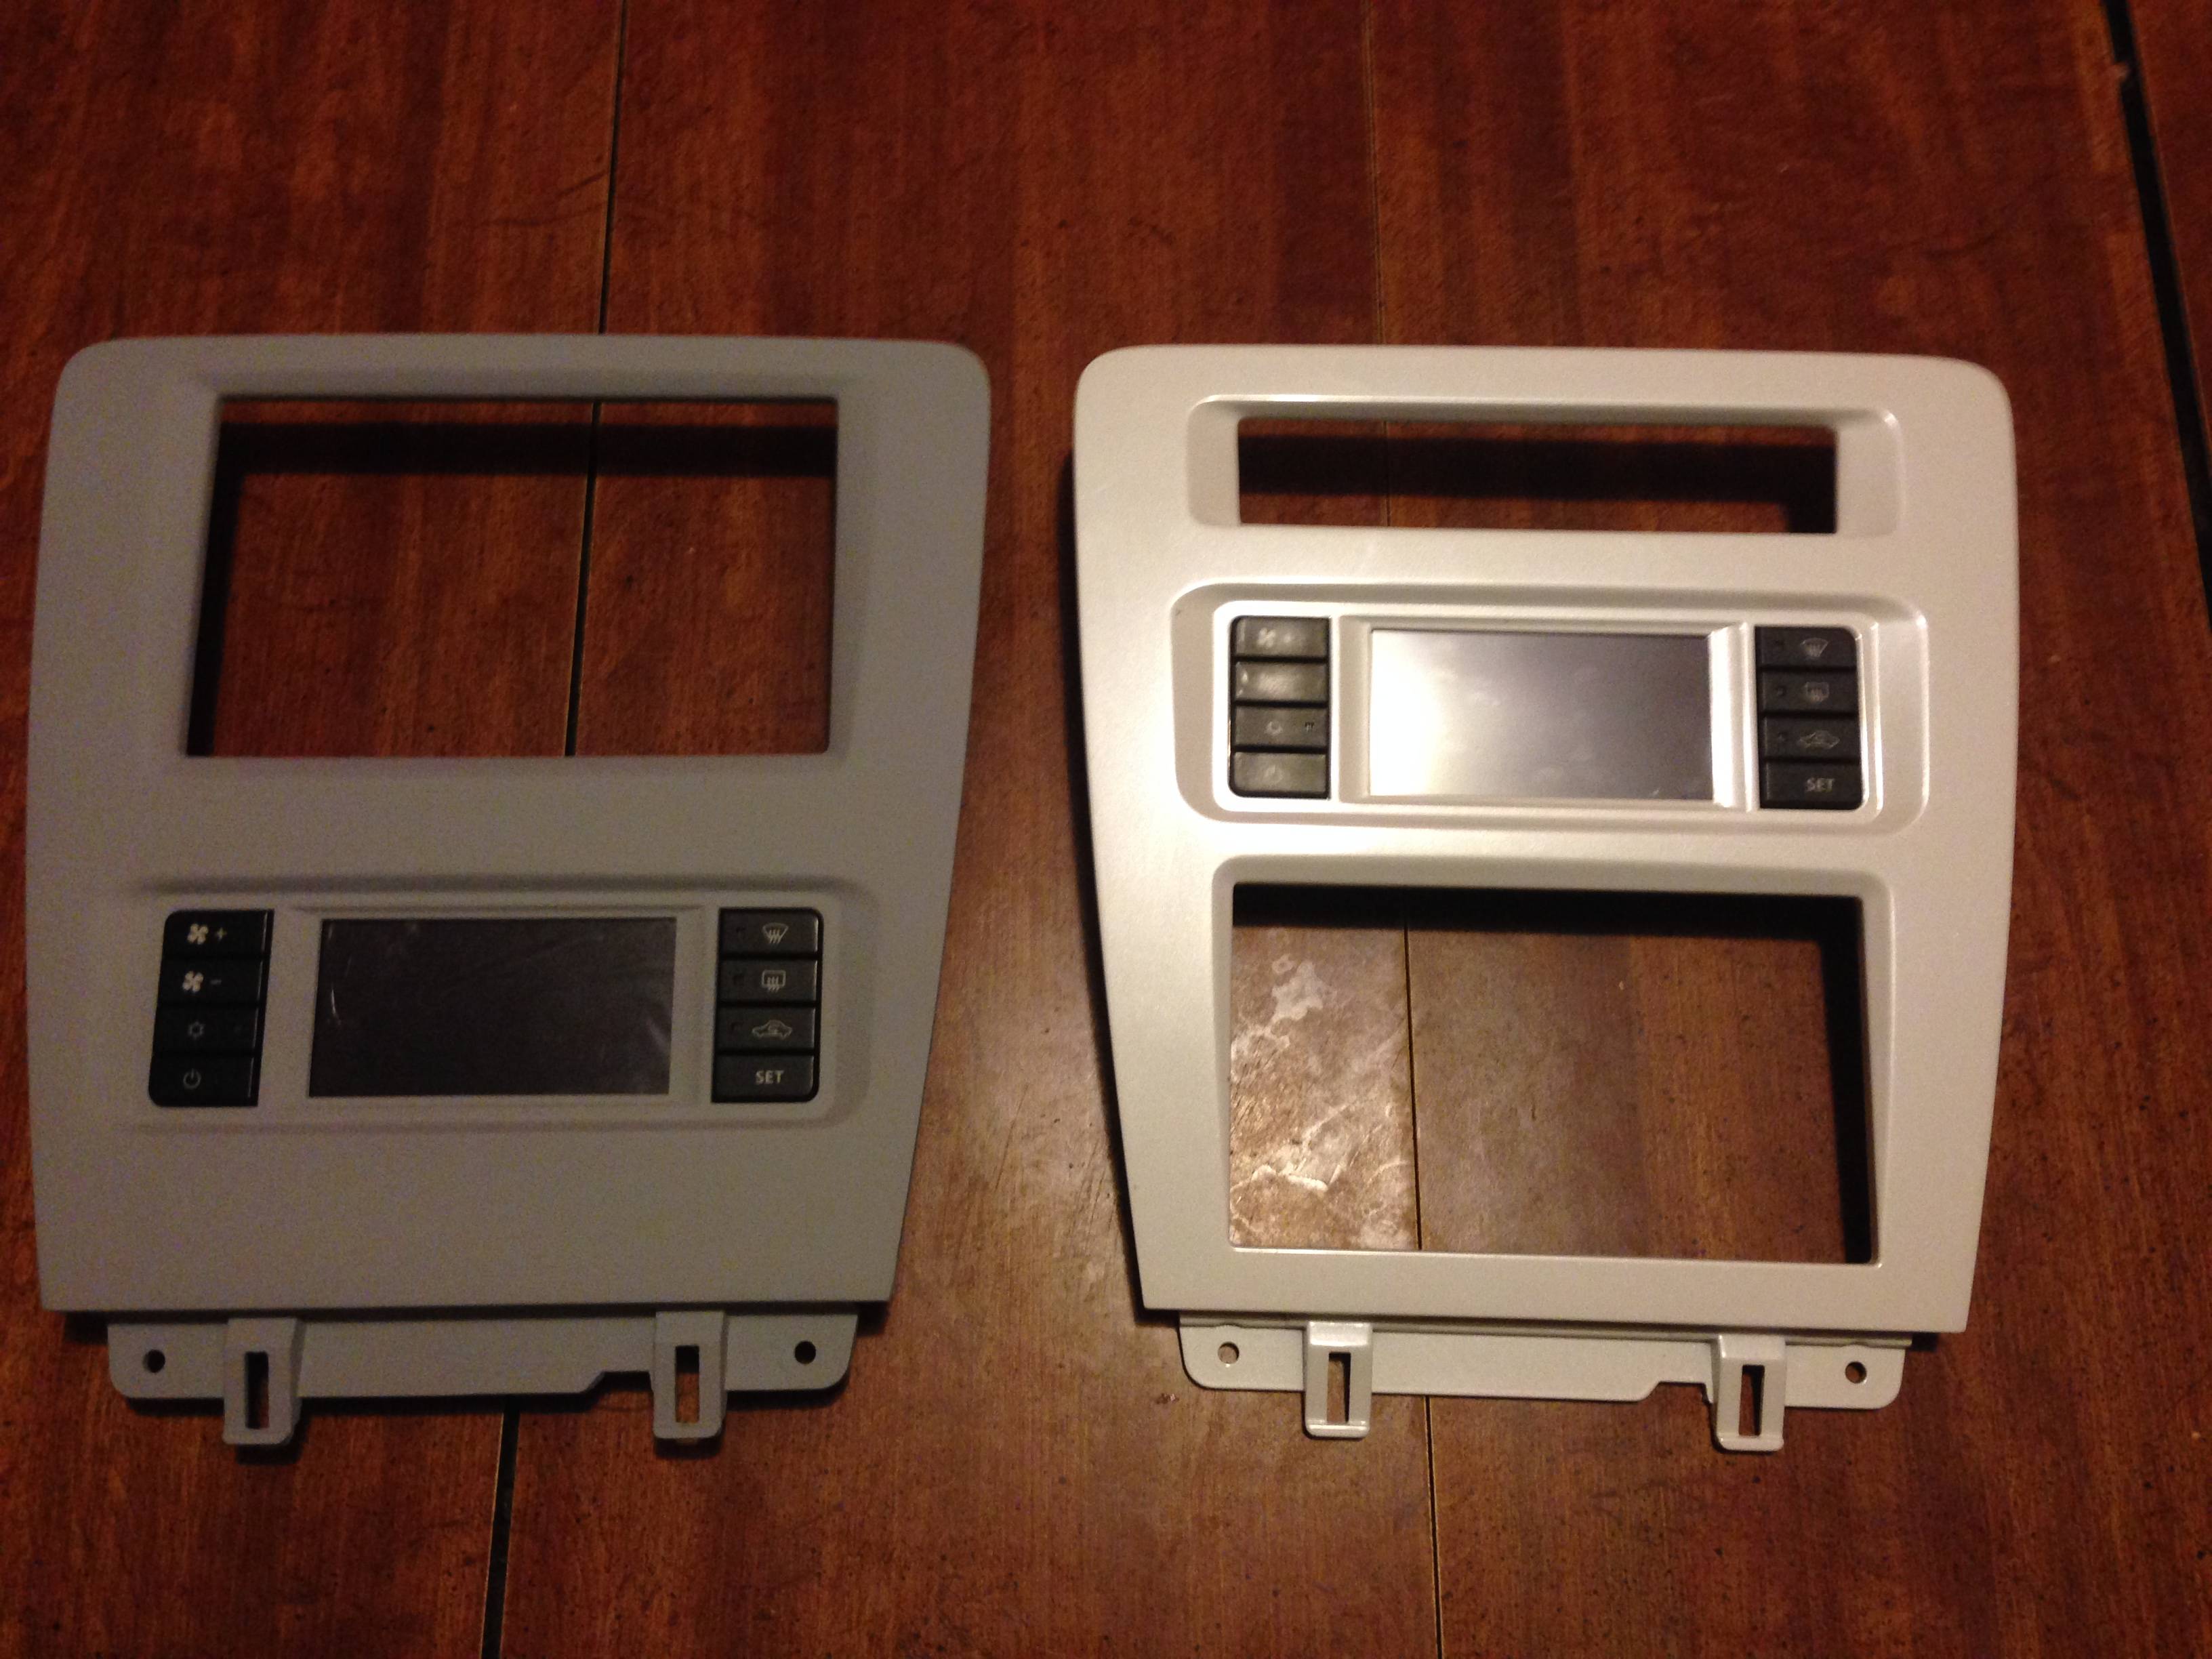
Here is the comparison of the modded part compared to the Scosche kit.
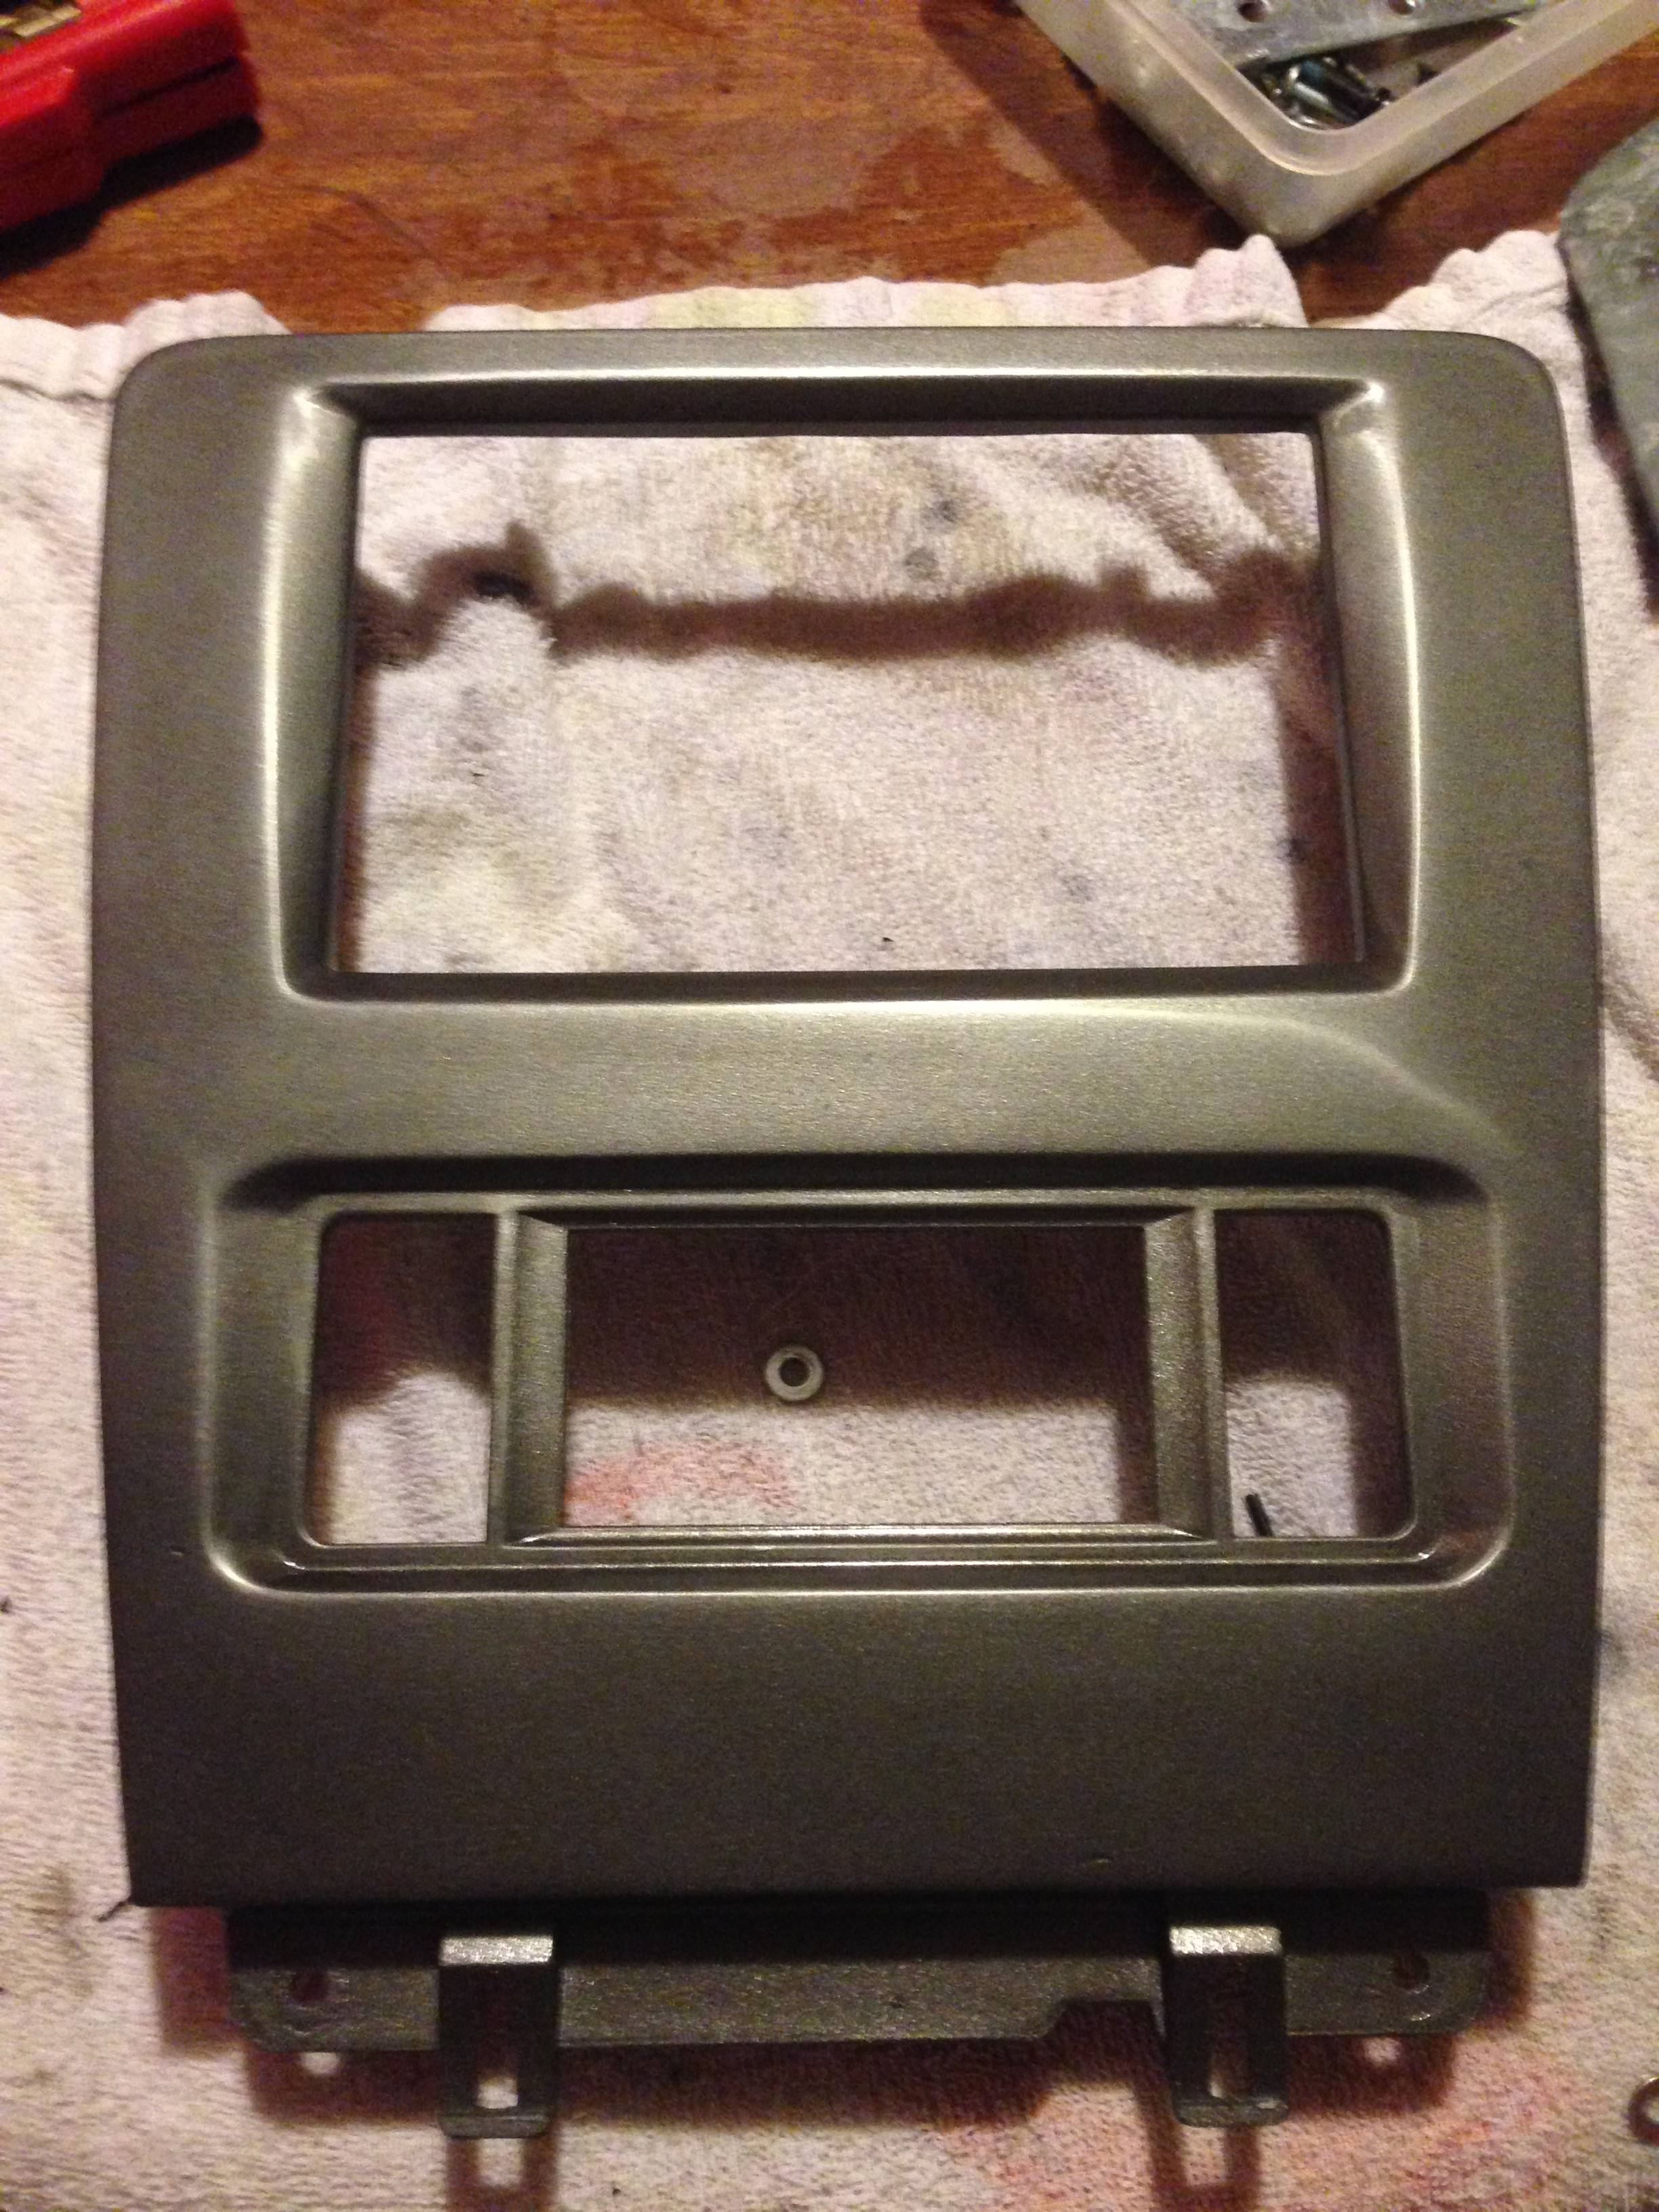
The finished product, this is after spraying with some Graphite Grey paint, sanded to a smooth finish and then clear coated. I still need to buff and polish to really bring the gloss out.
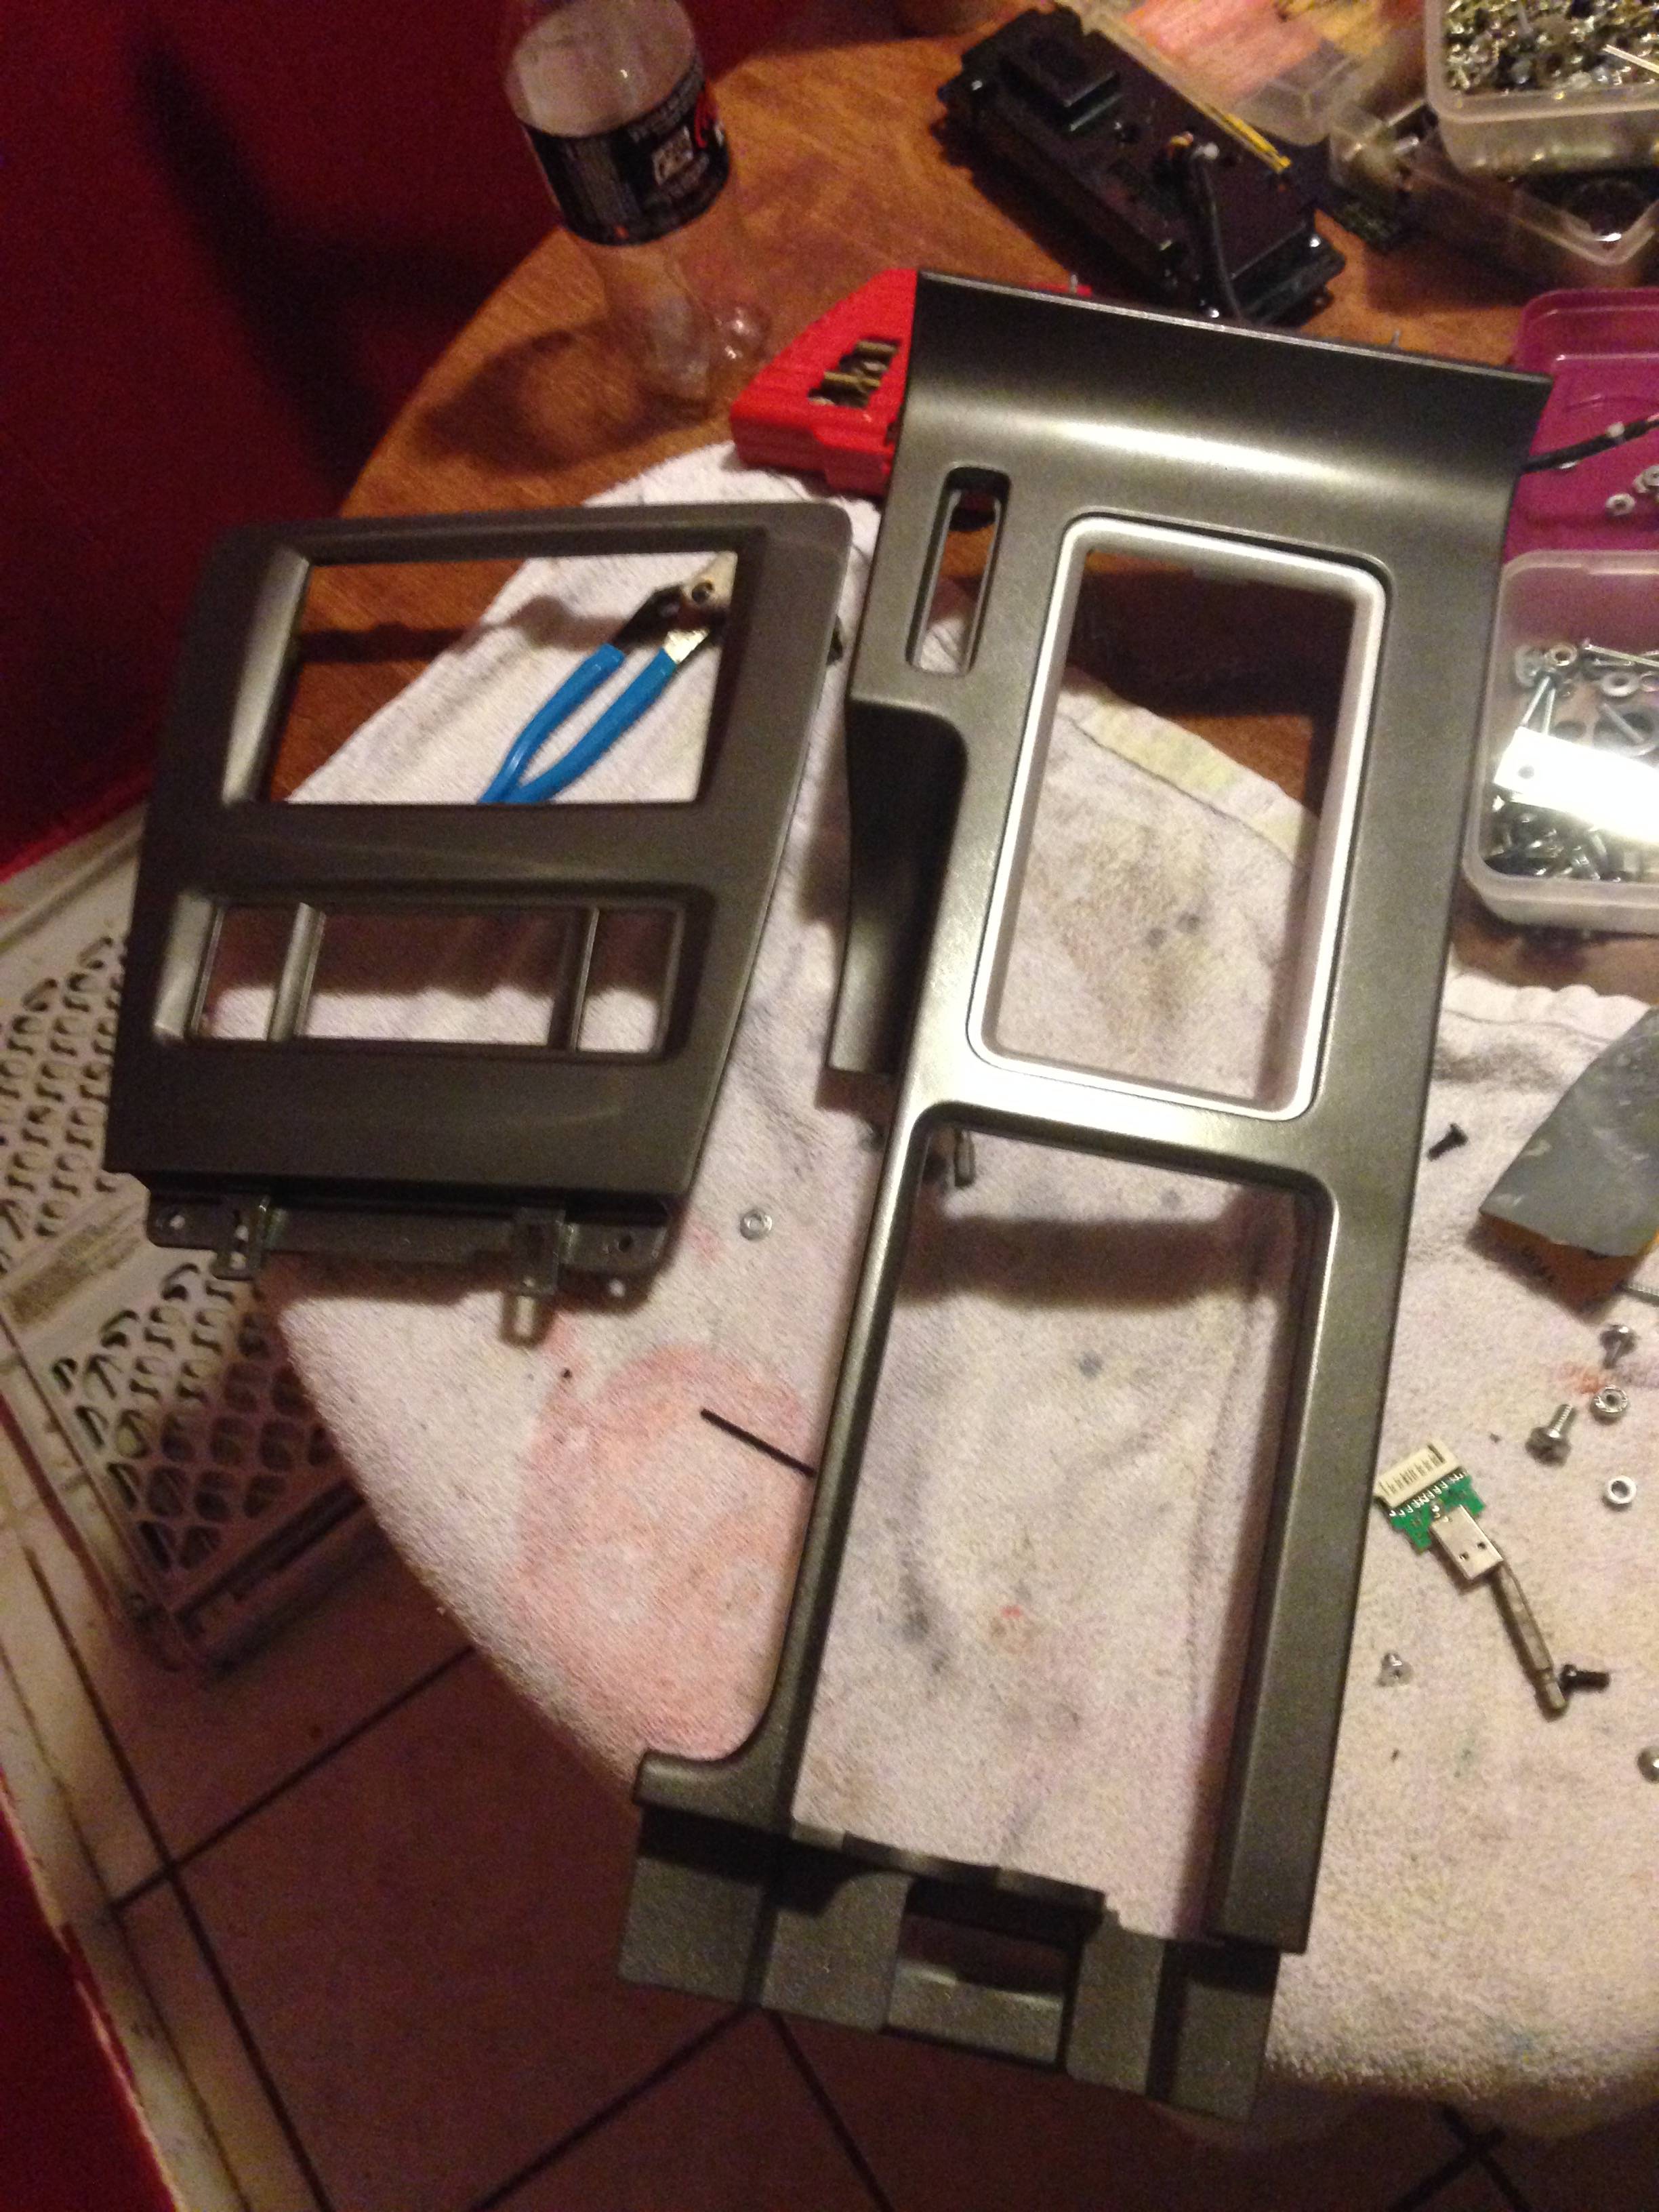
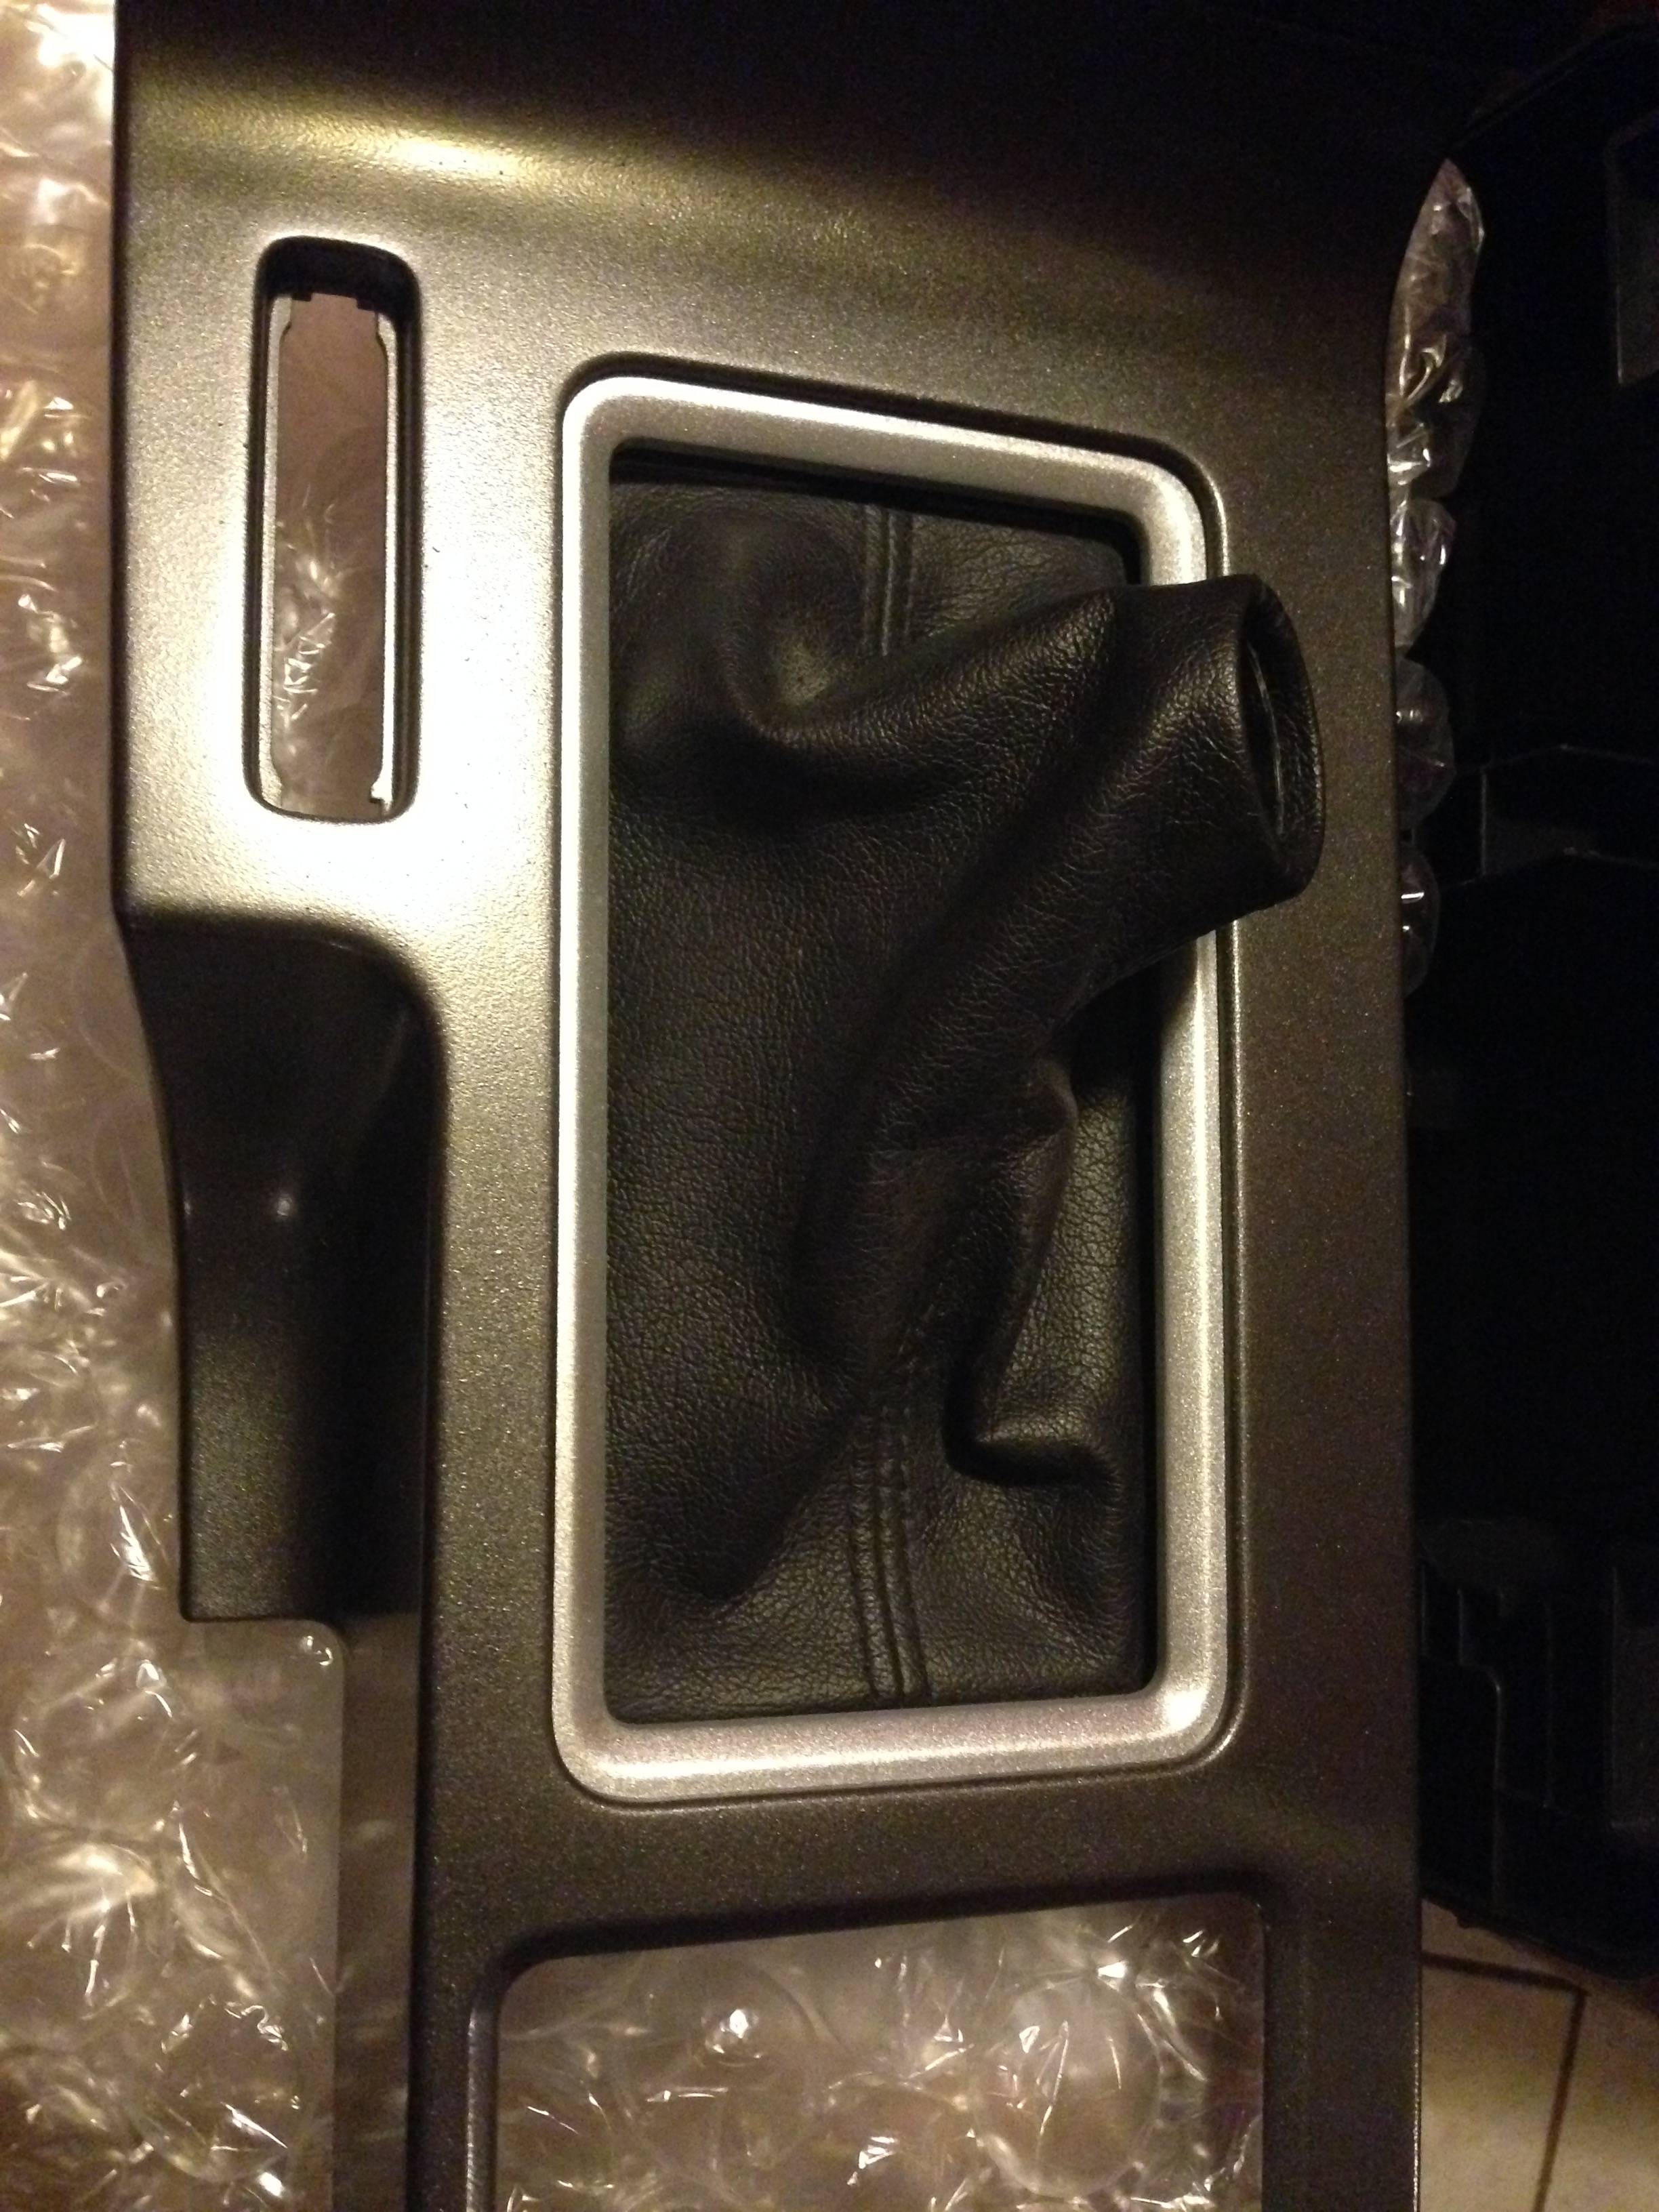
I also did a once over to the center console and the trim ring for the shifter boot. Both had scratches and wear from the car being 4 years old. I also got rid of the Sync badge and will be replacing it with a different badge.
Now to the dash modifications.
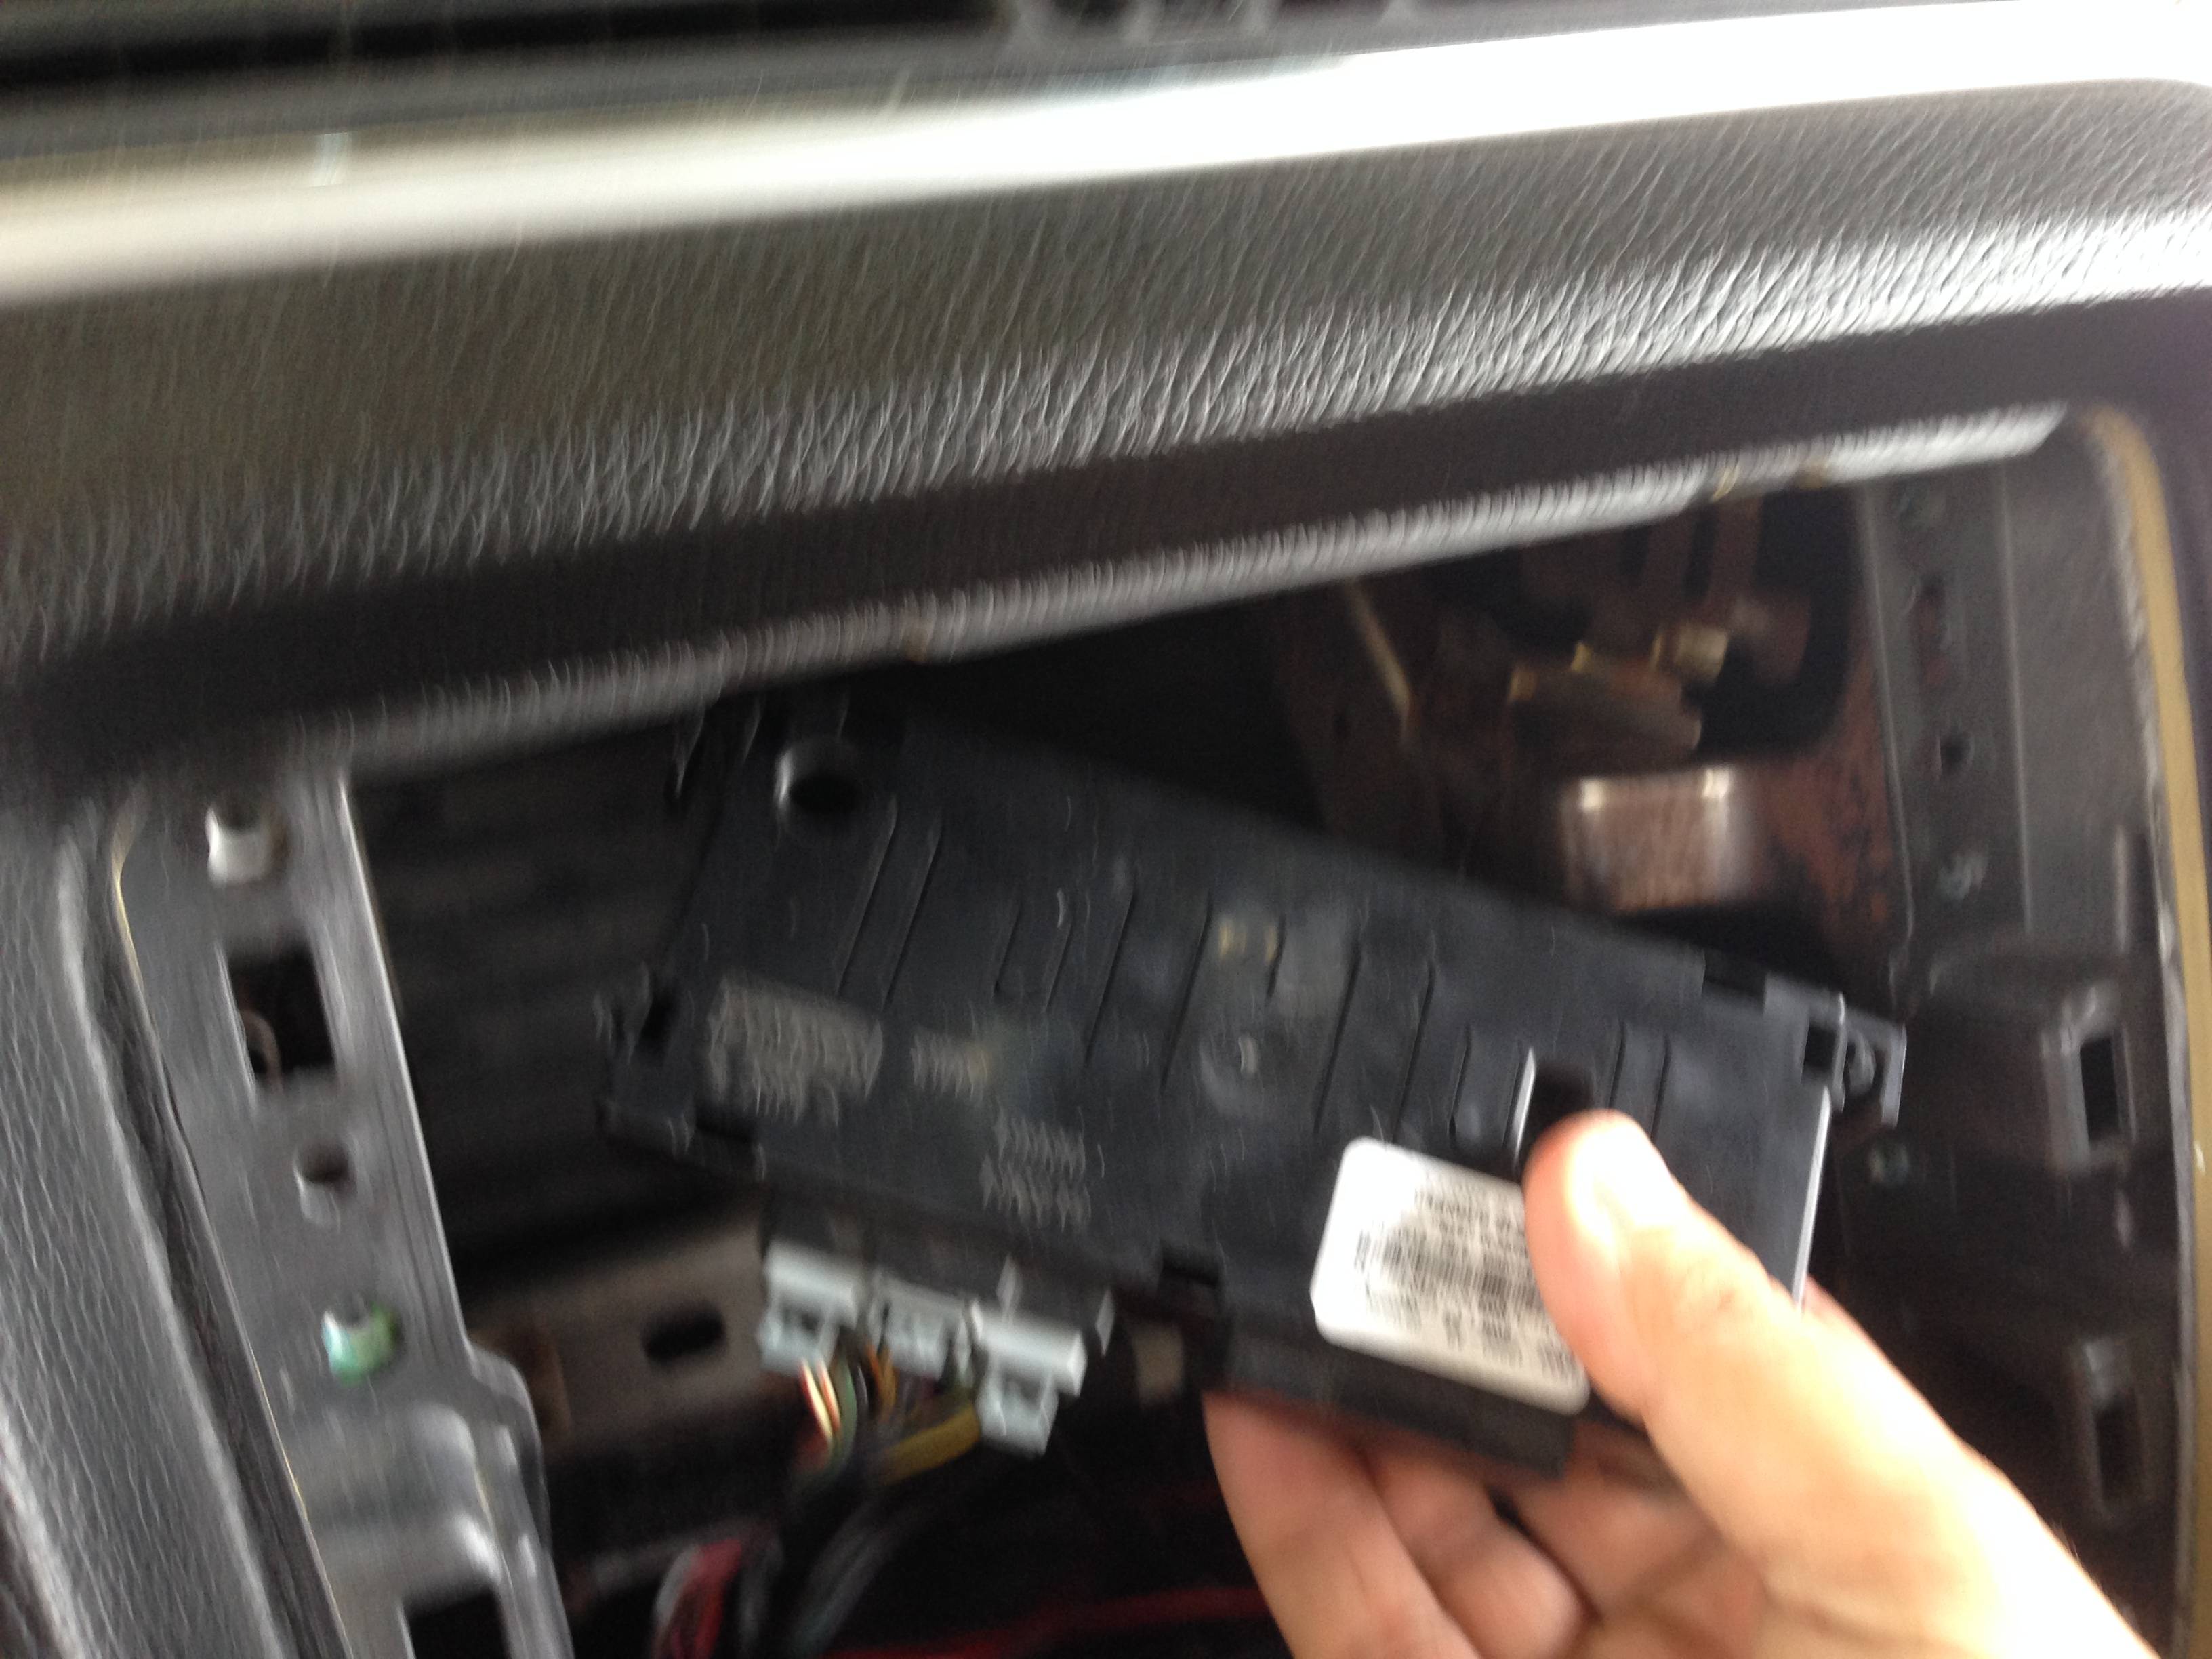
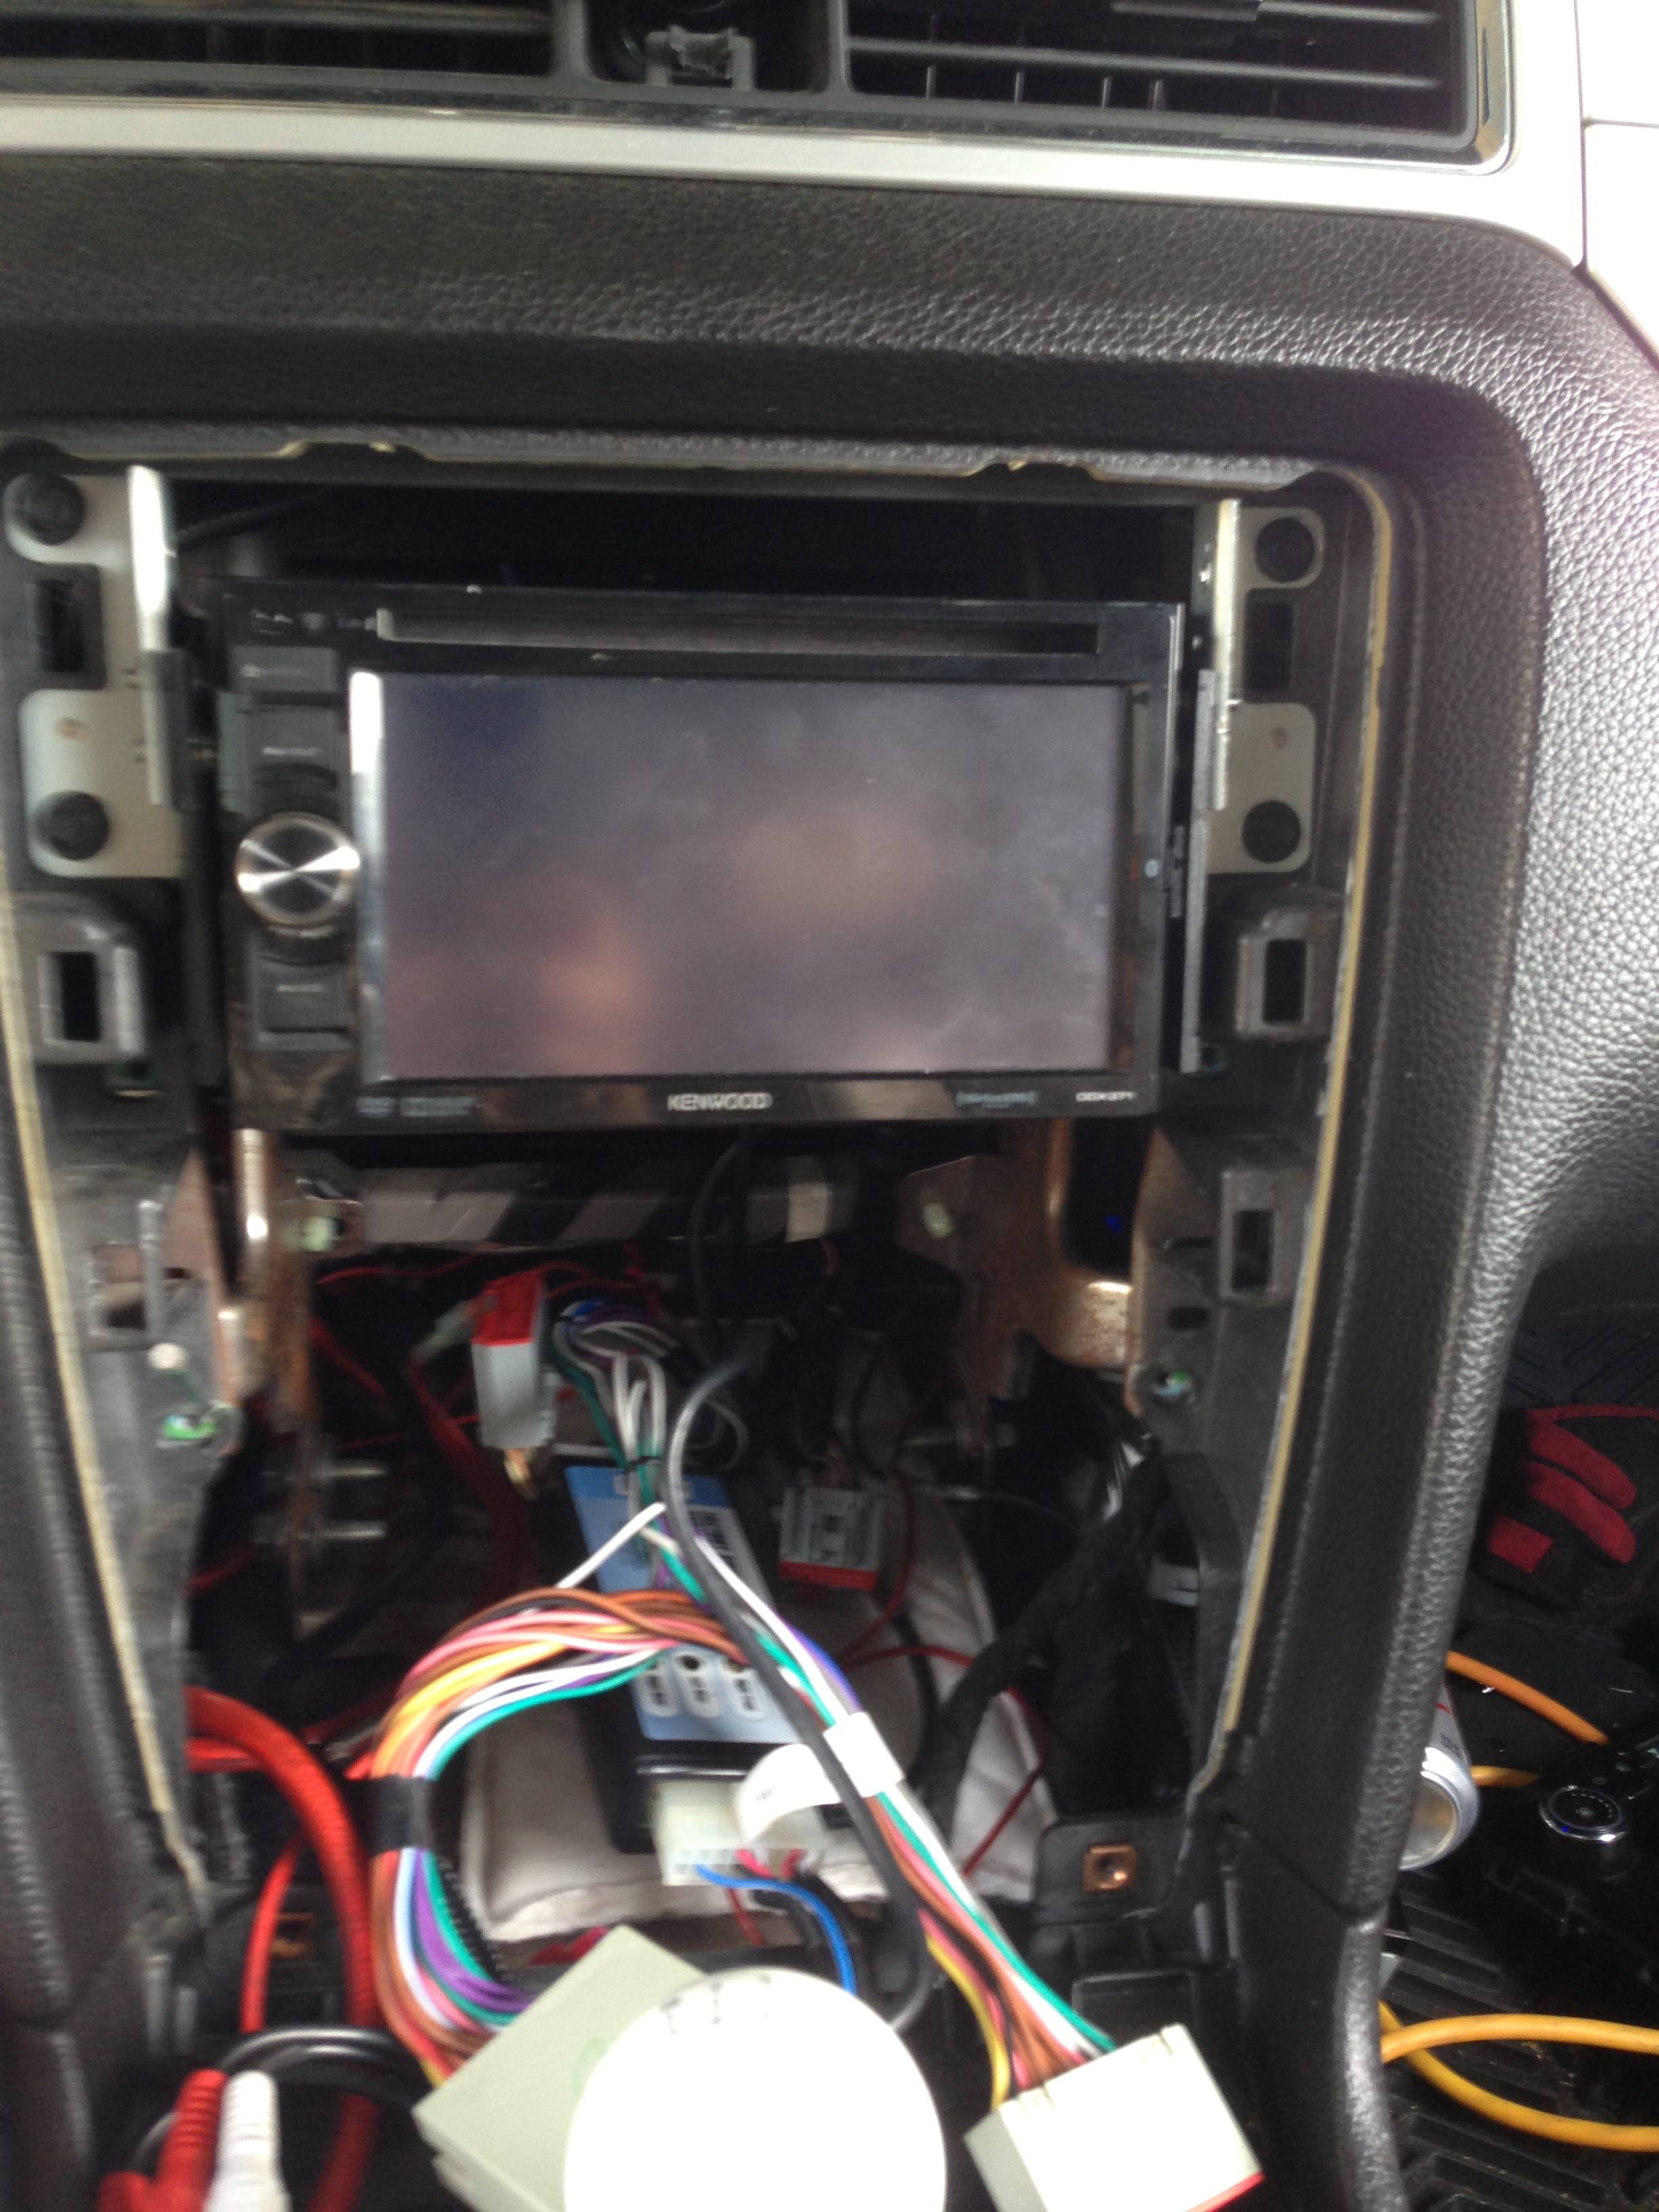
This picture is of the Climate Control Module behind the info screen.
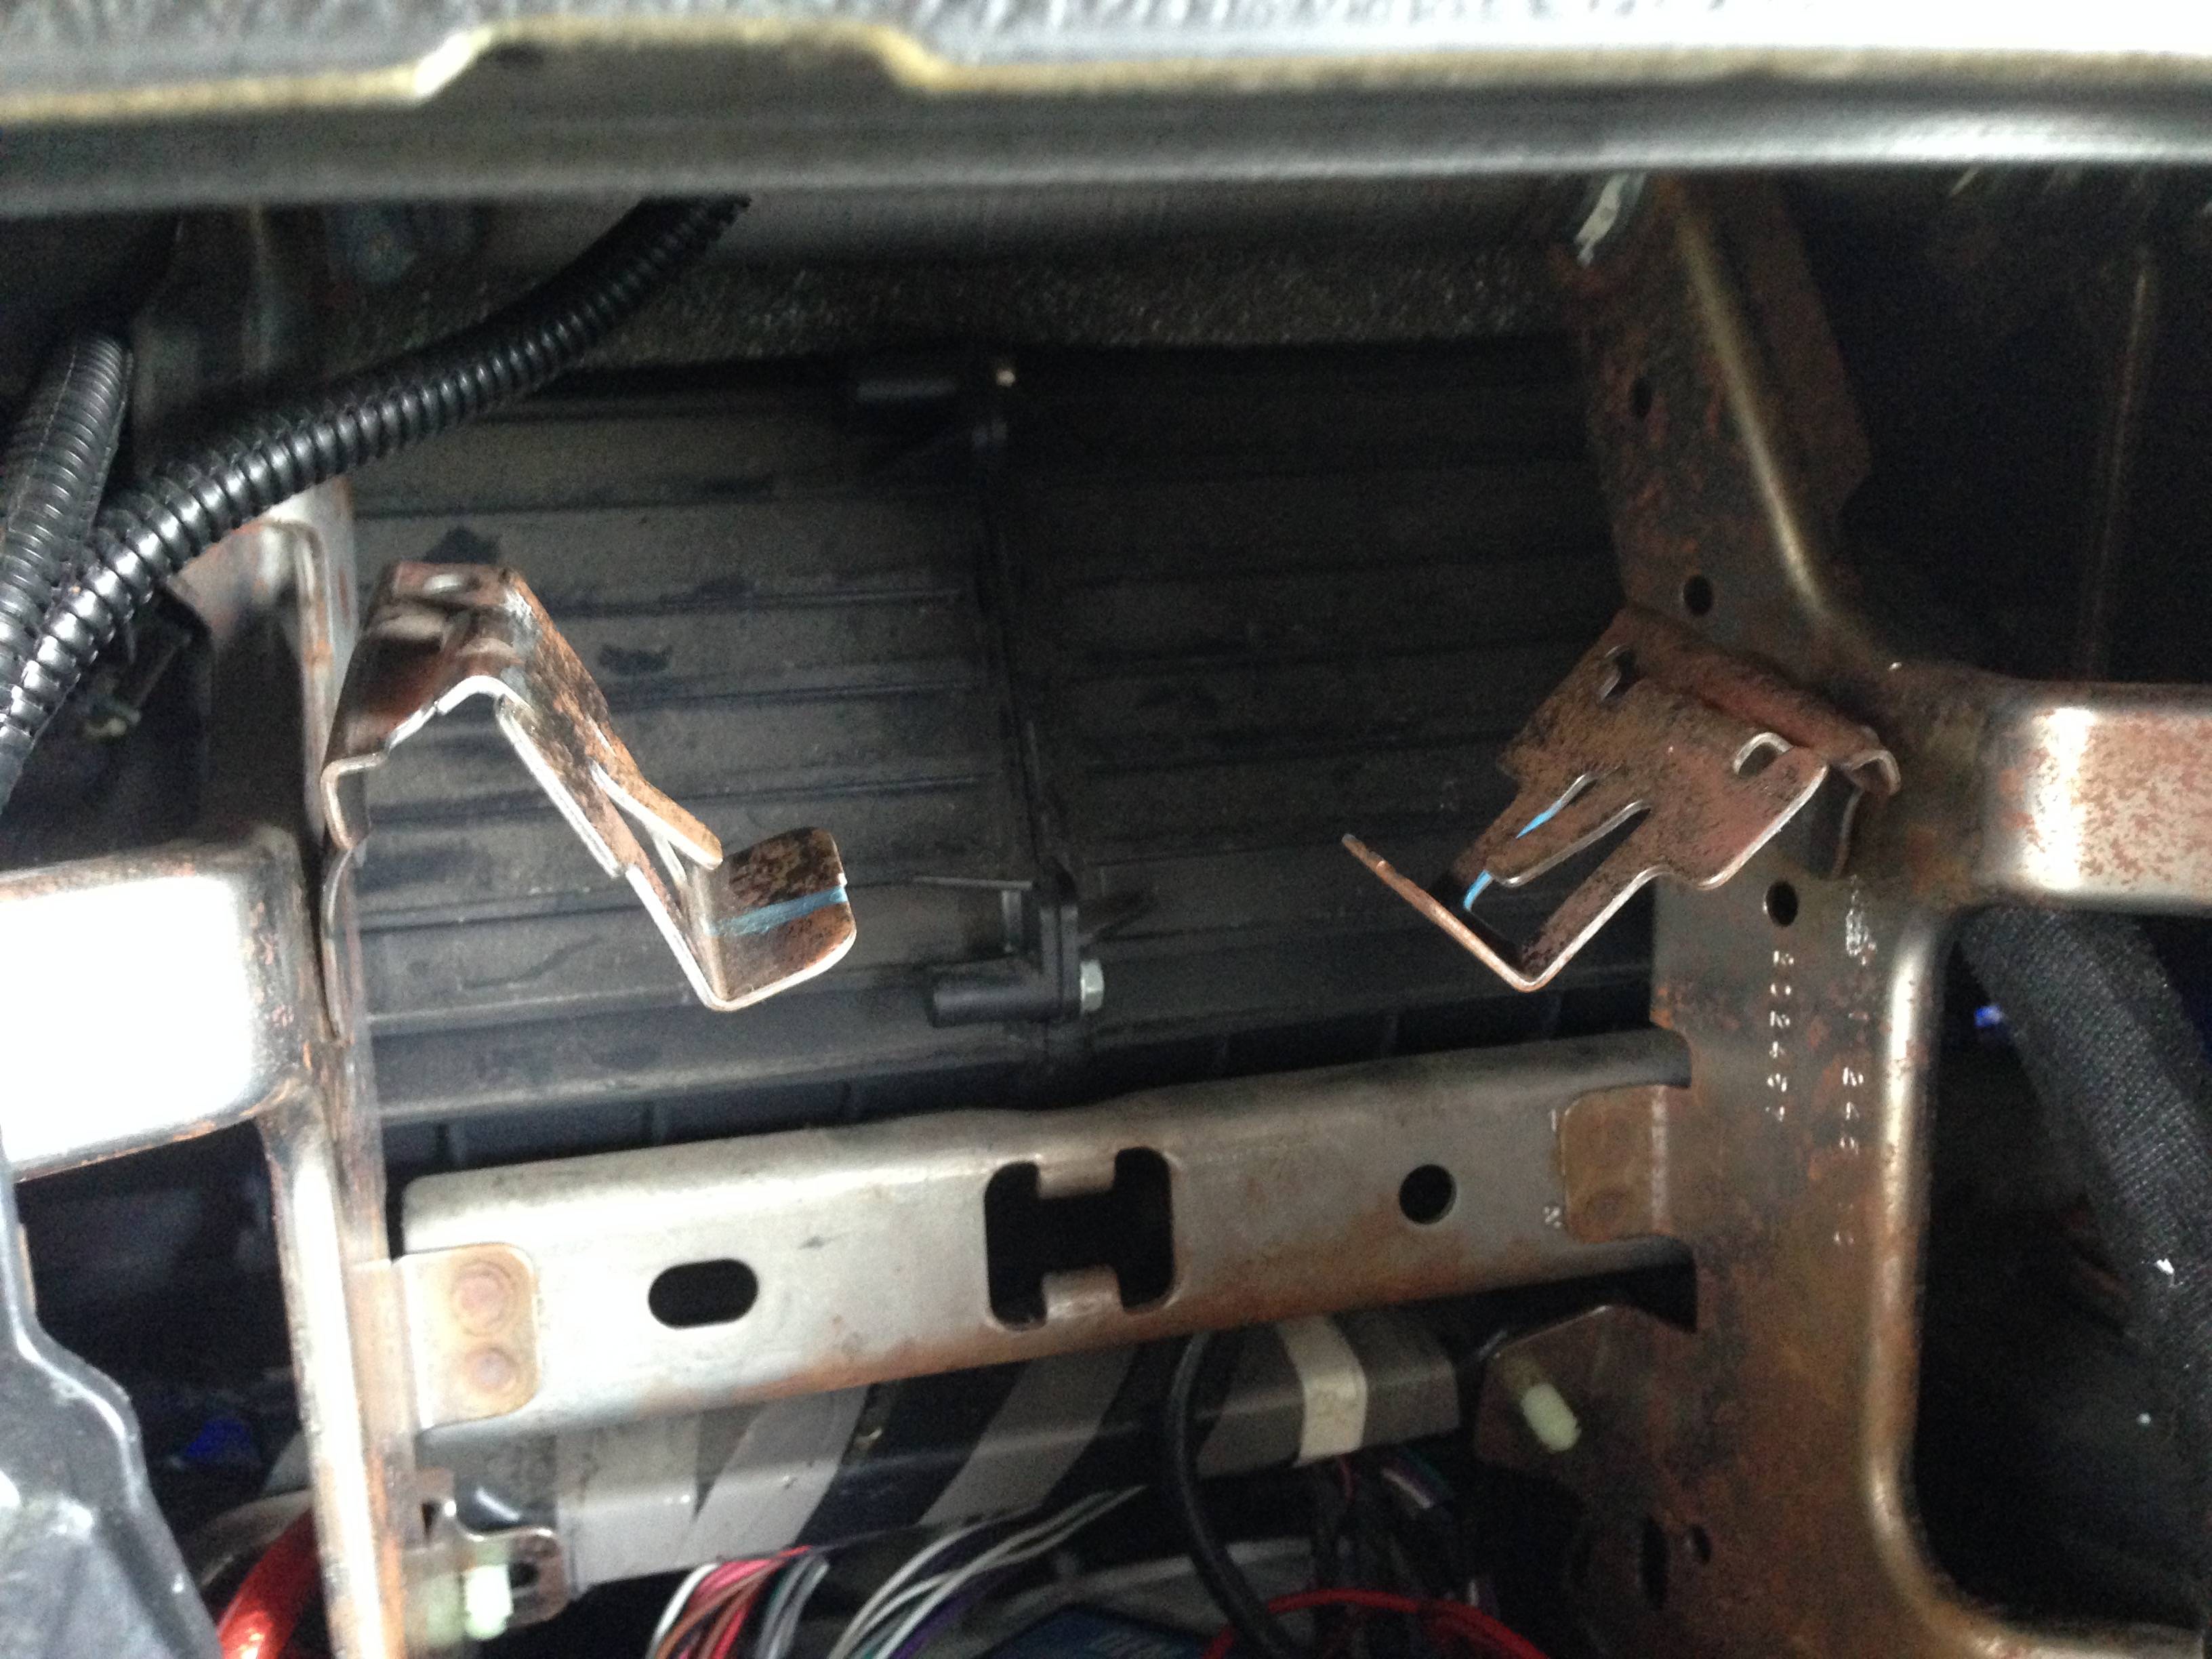
These pictures are of the brackets that hold the Climate Control Module. As you can see I just bent them up and out of the way. This clears out the top section of the dash so the radio will fit without obstruction.
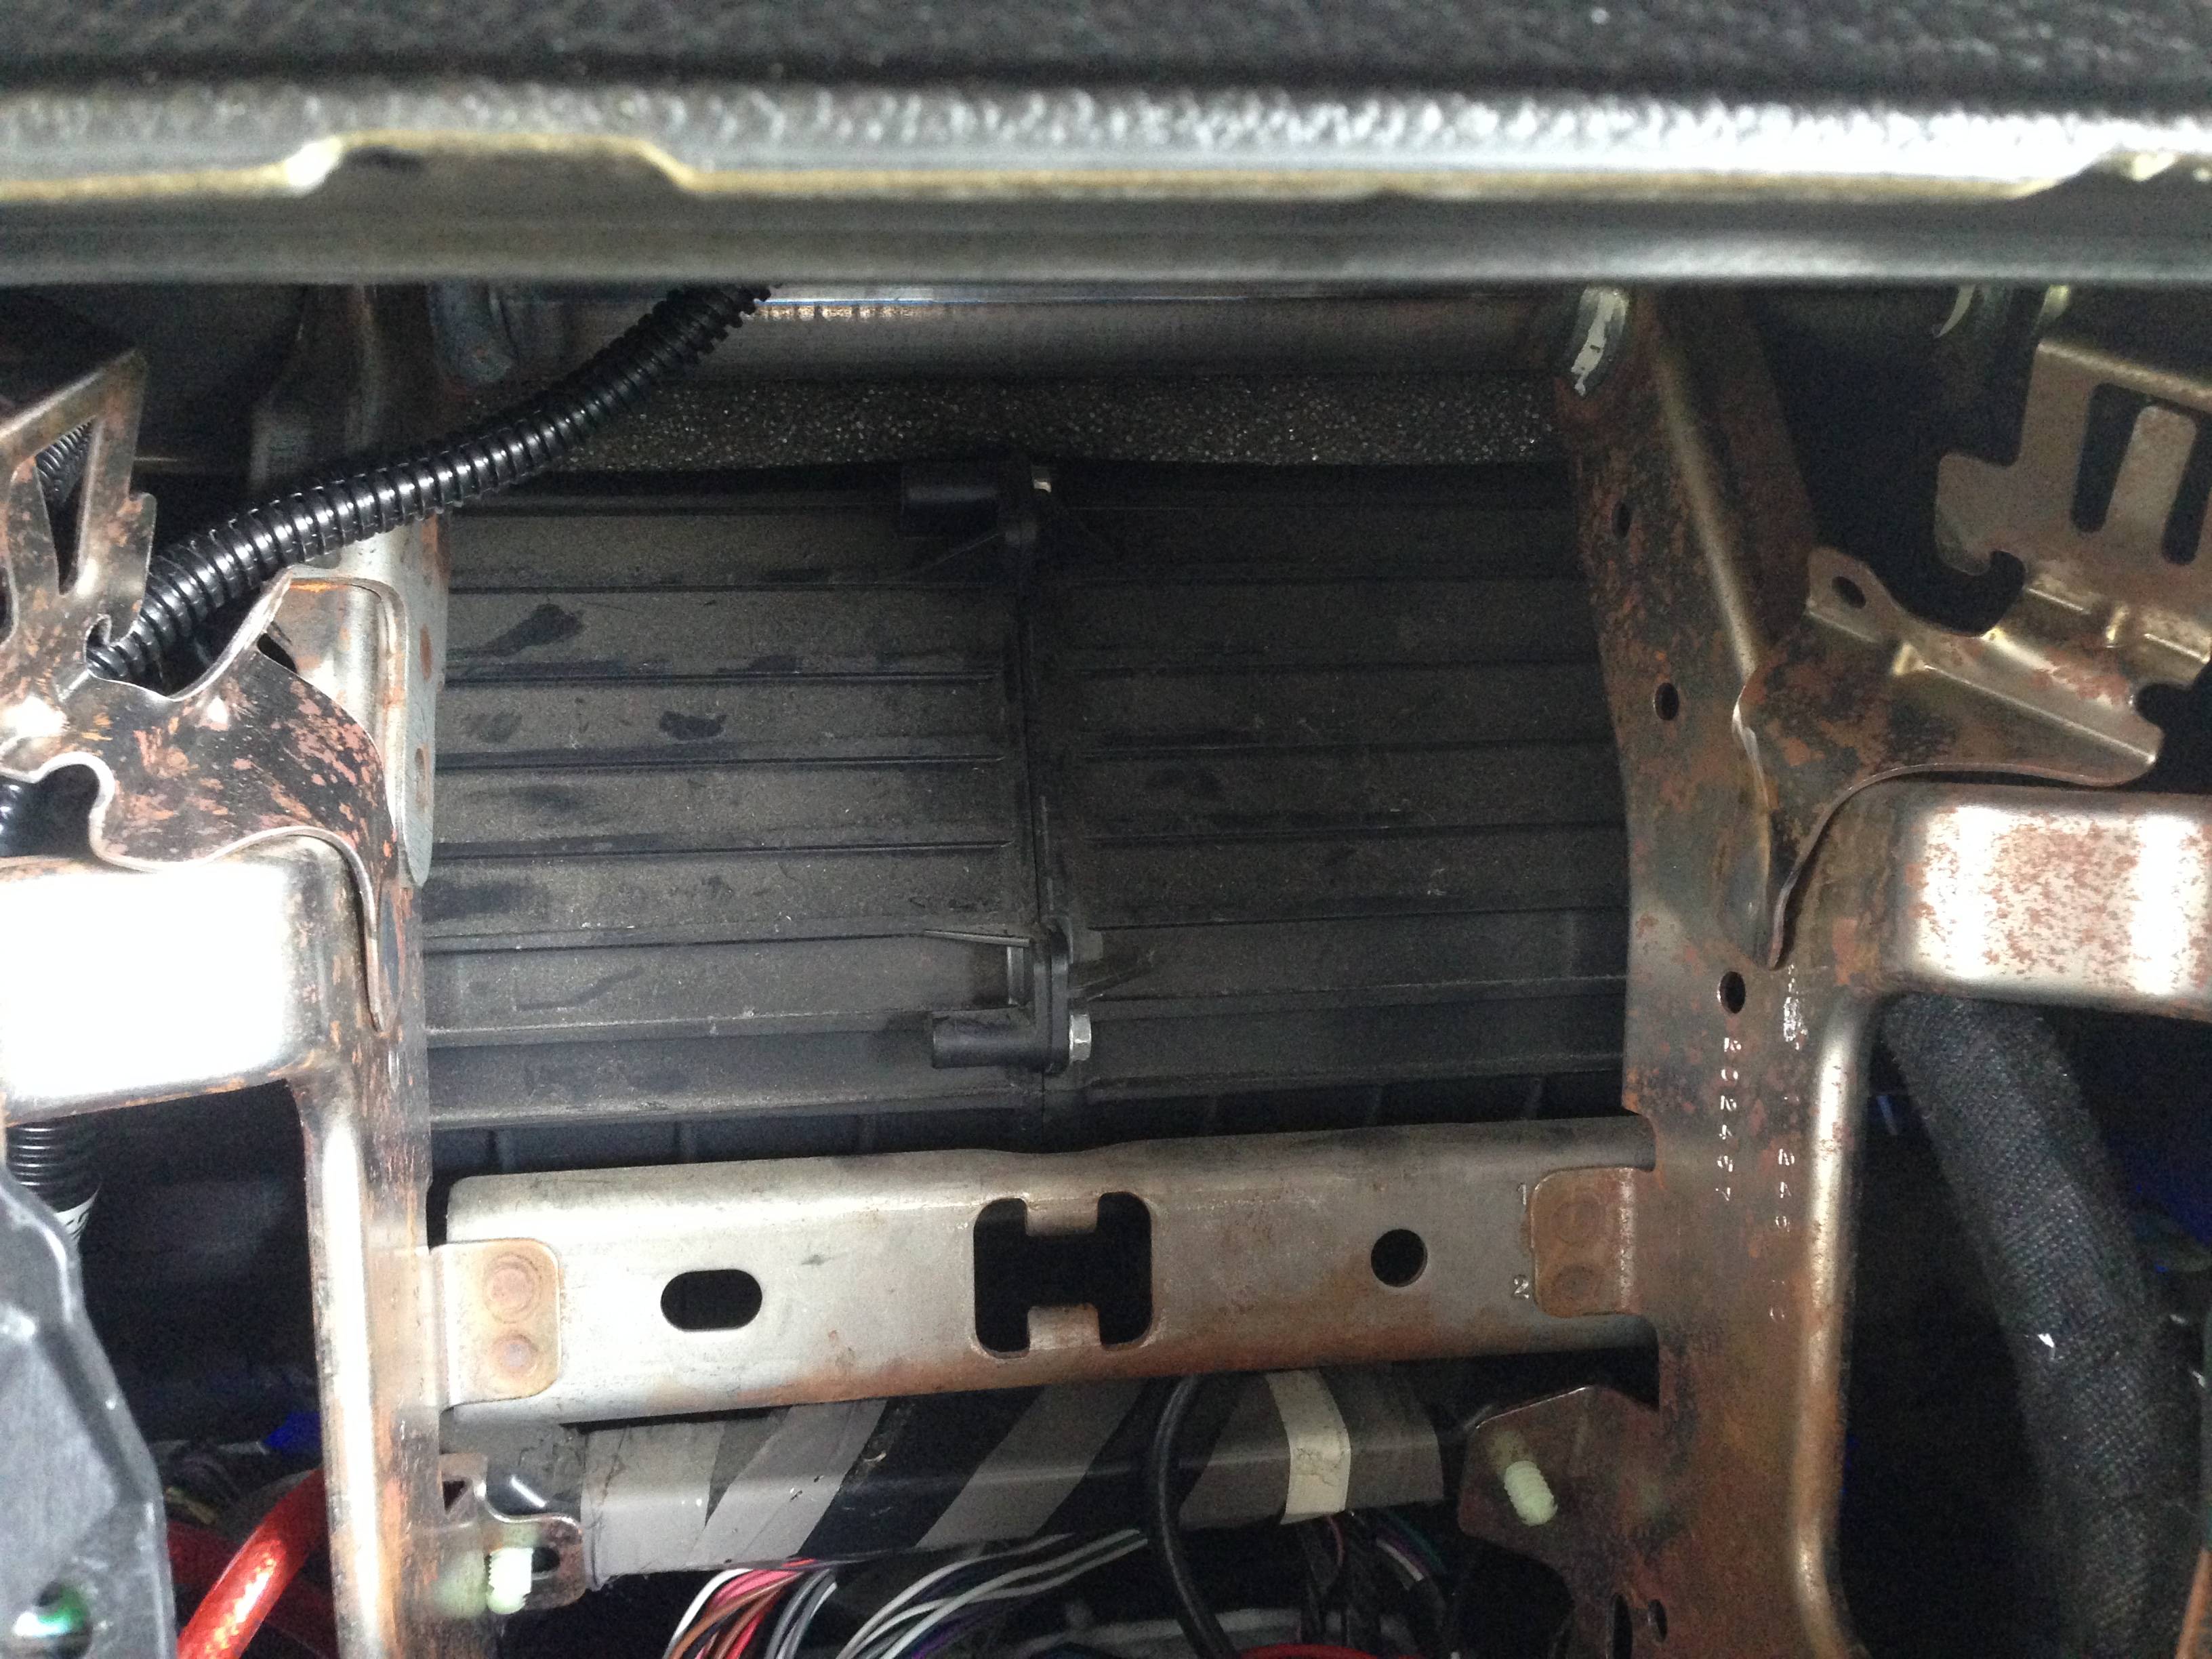
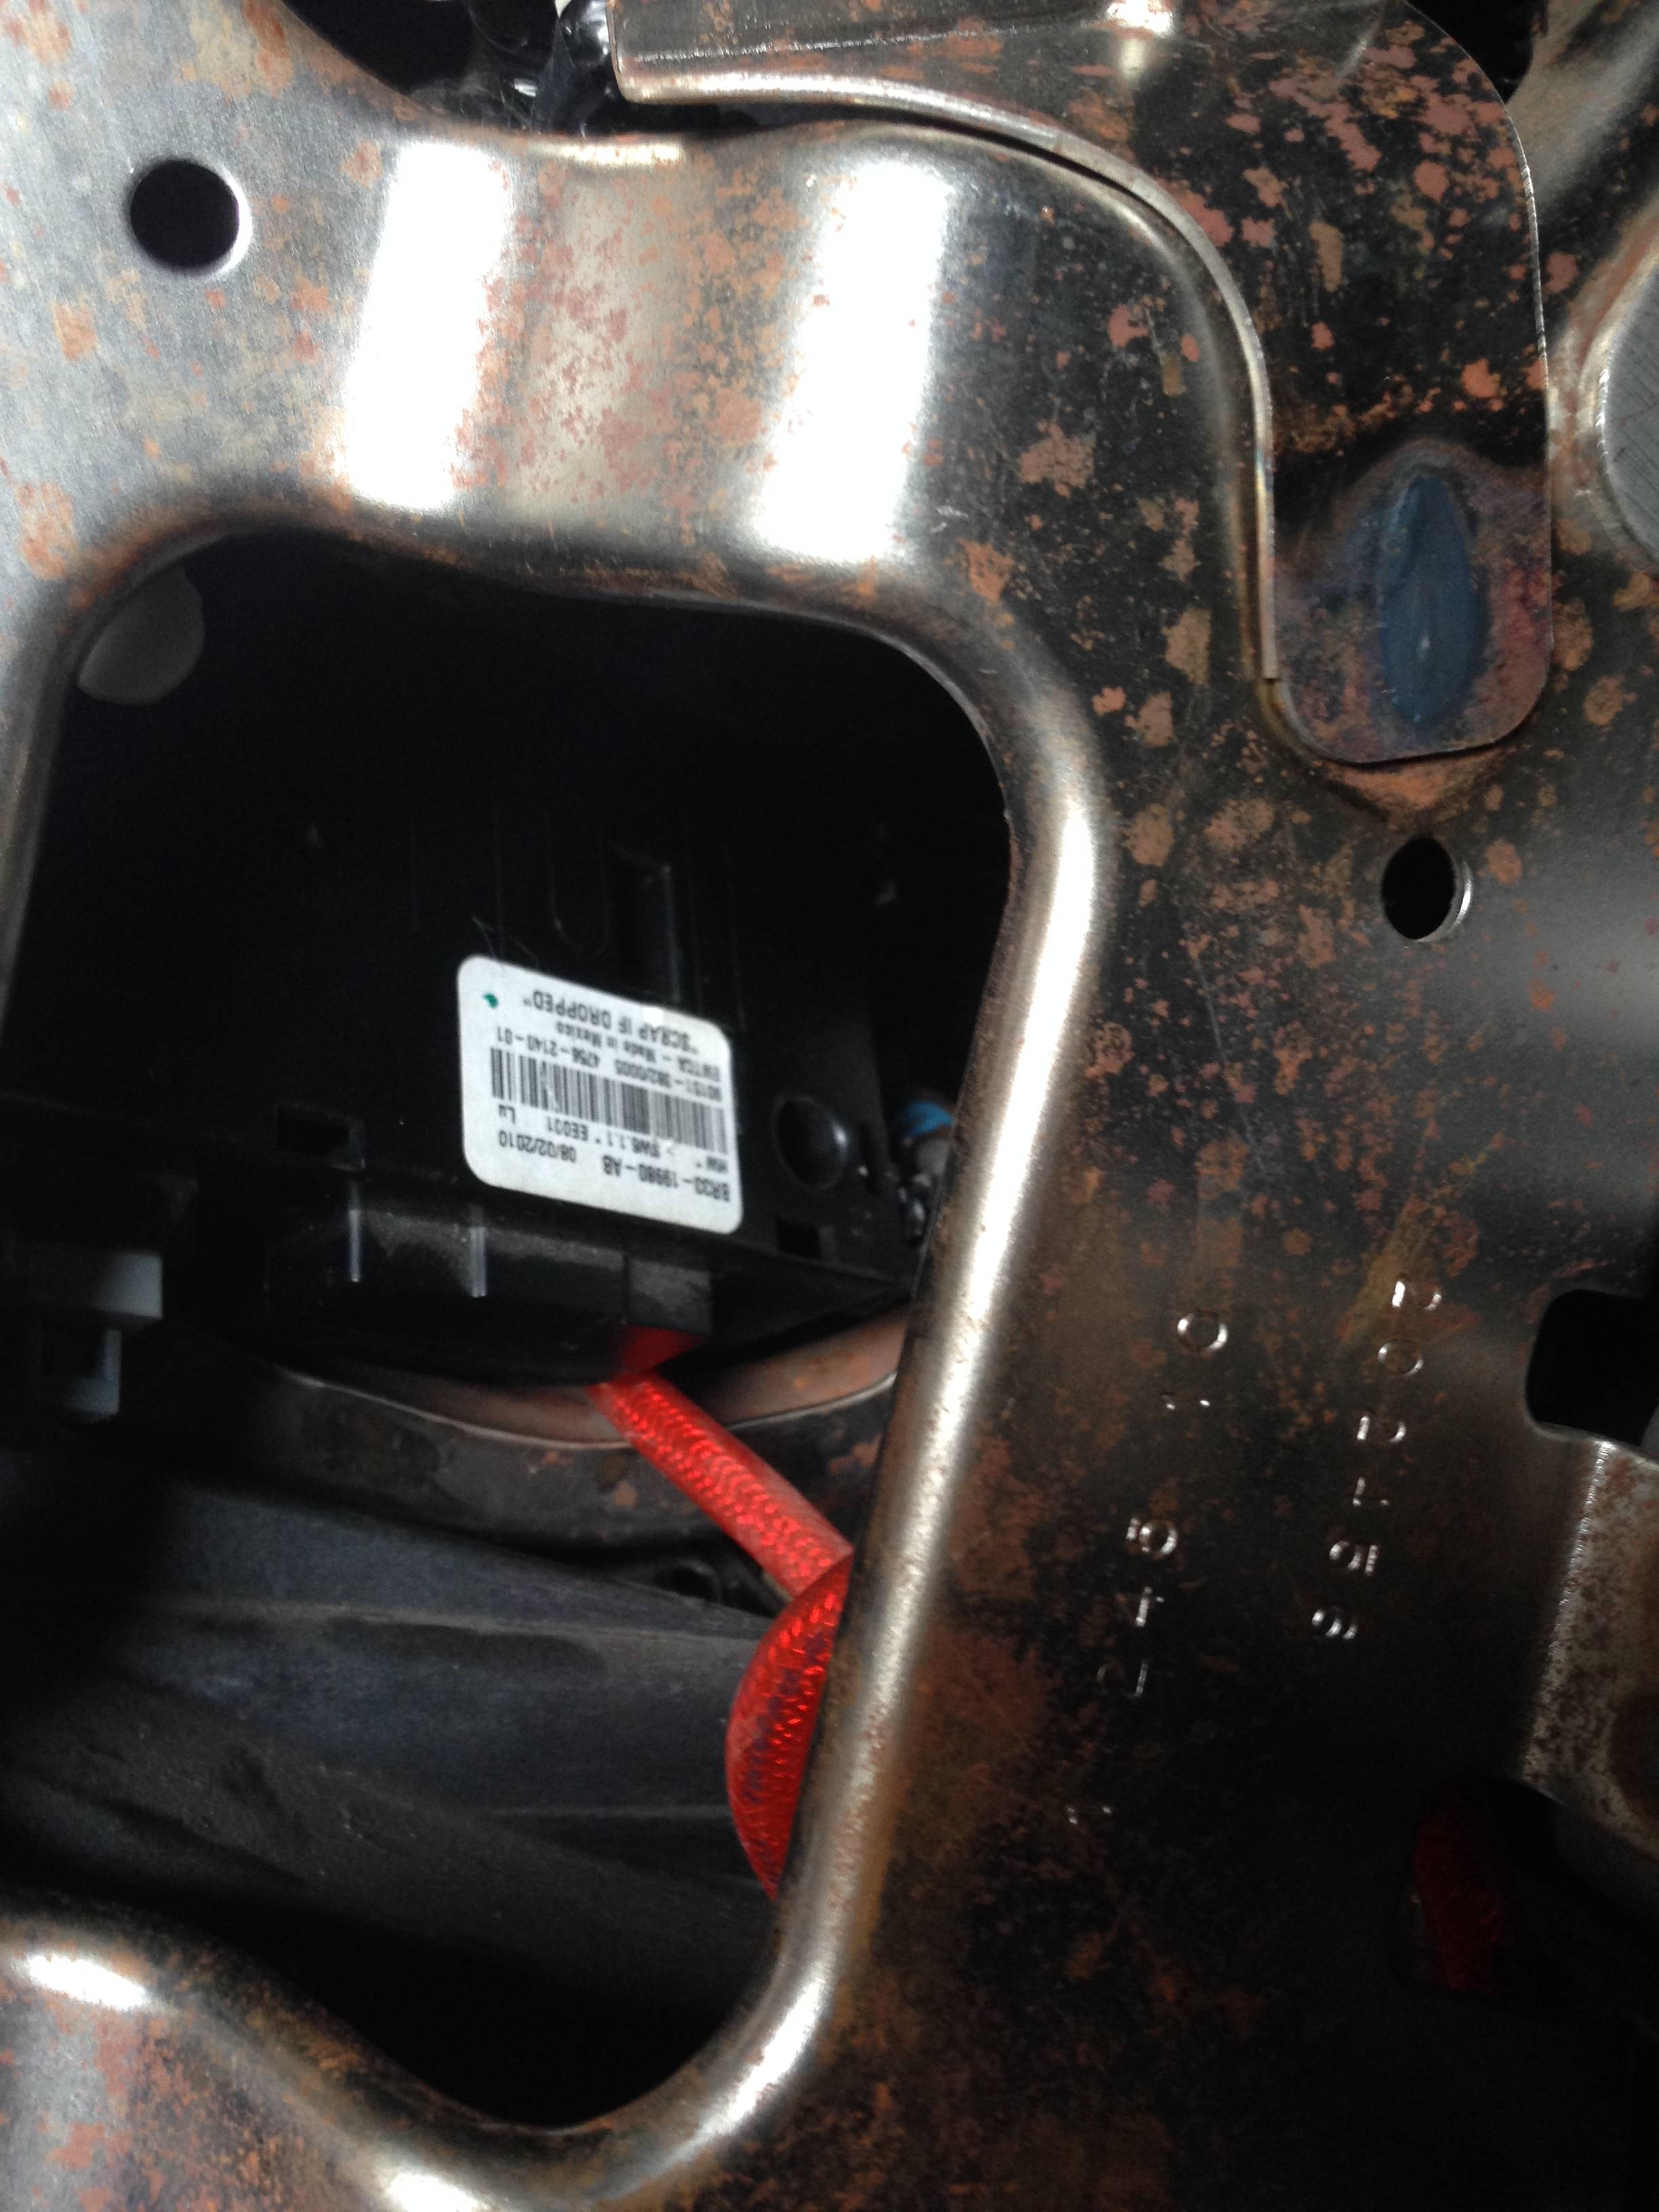
This little hole is on the left hand side of the inner dash. The wire harness for the Climate Control Module comes through this hole. I was able to fit the CCM into that hole and tuck it safely away there. You can also leave it in the dash if you like. But I find its better off tucked out of the way.
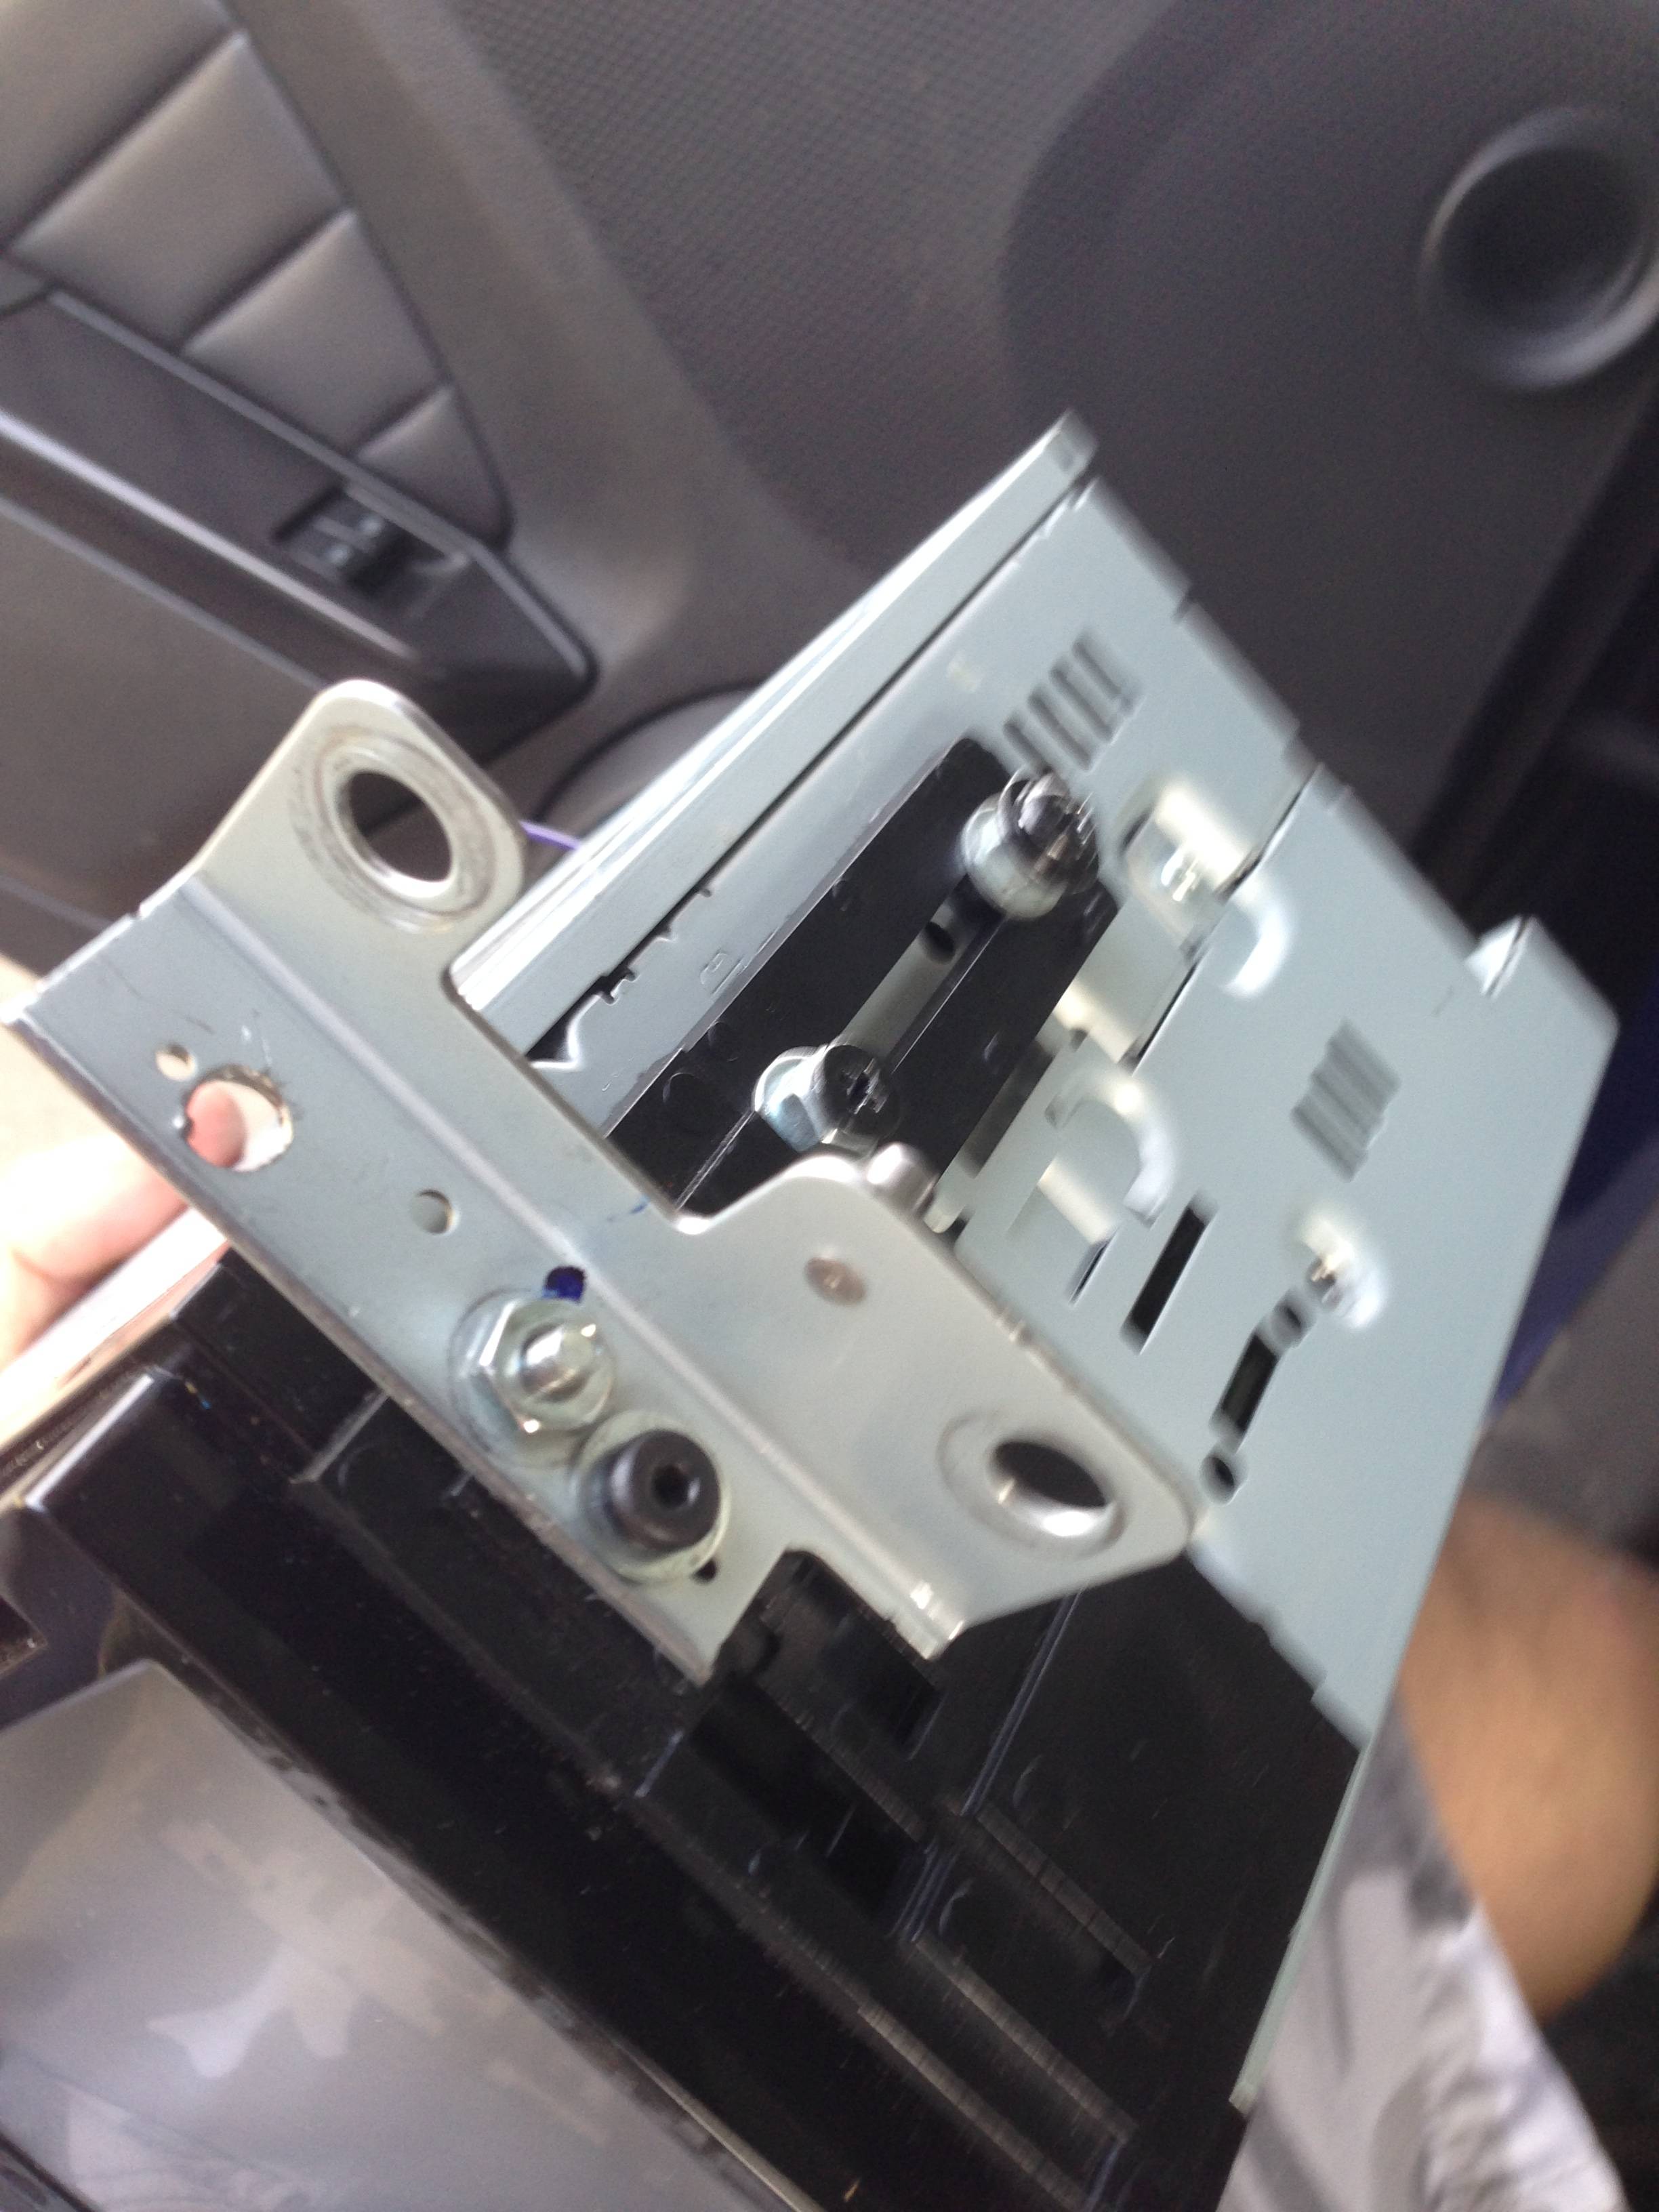
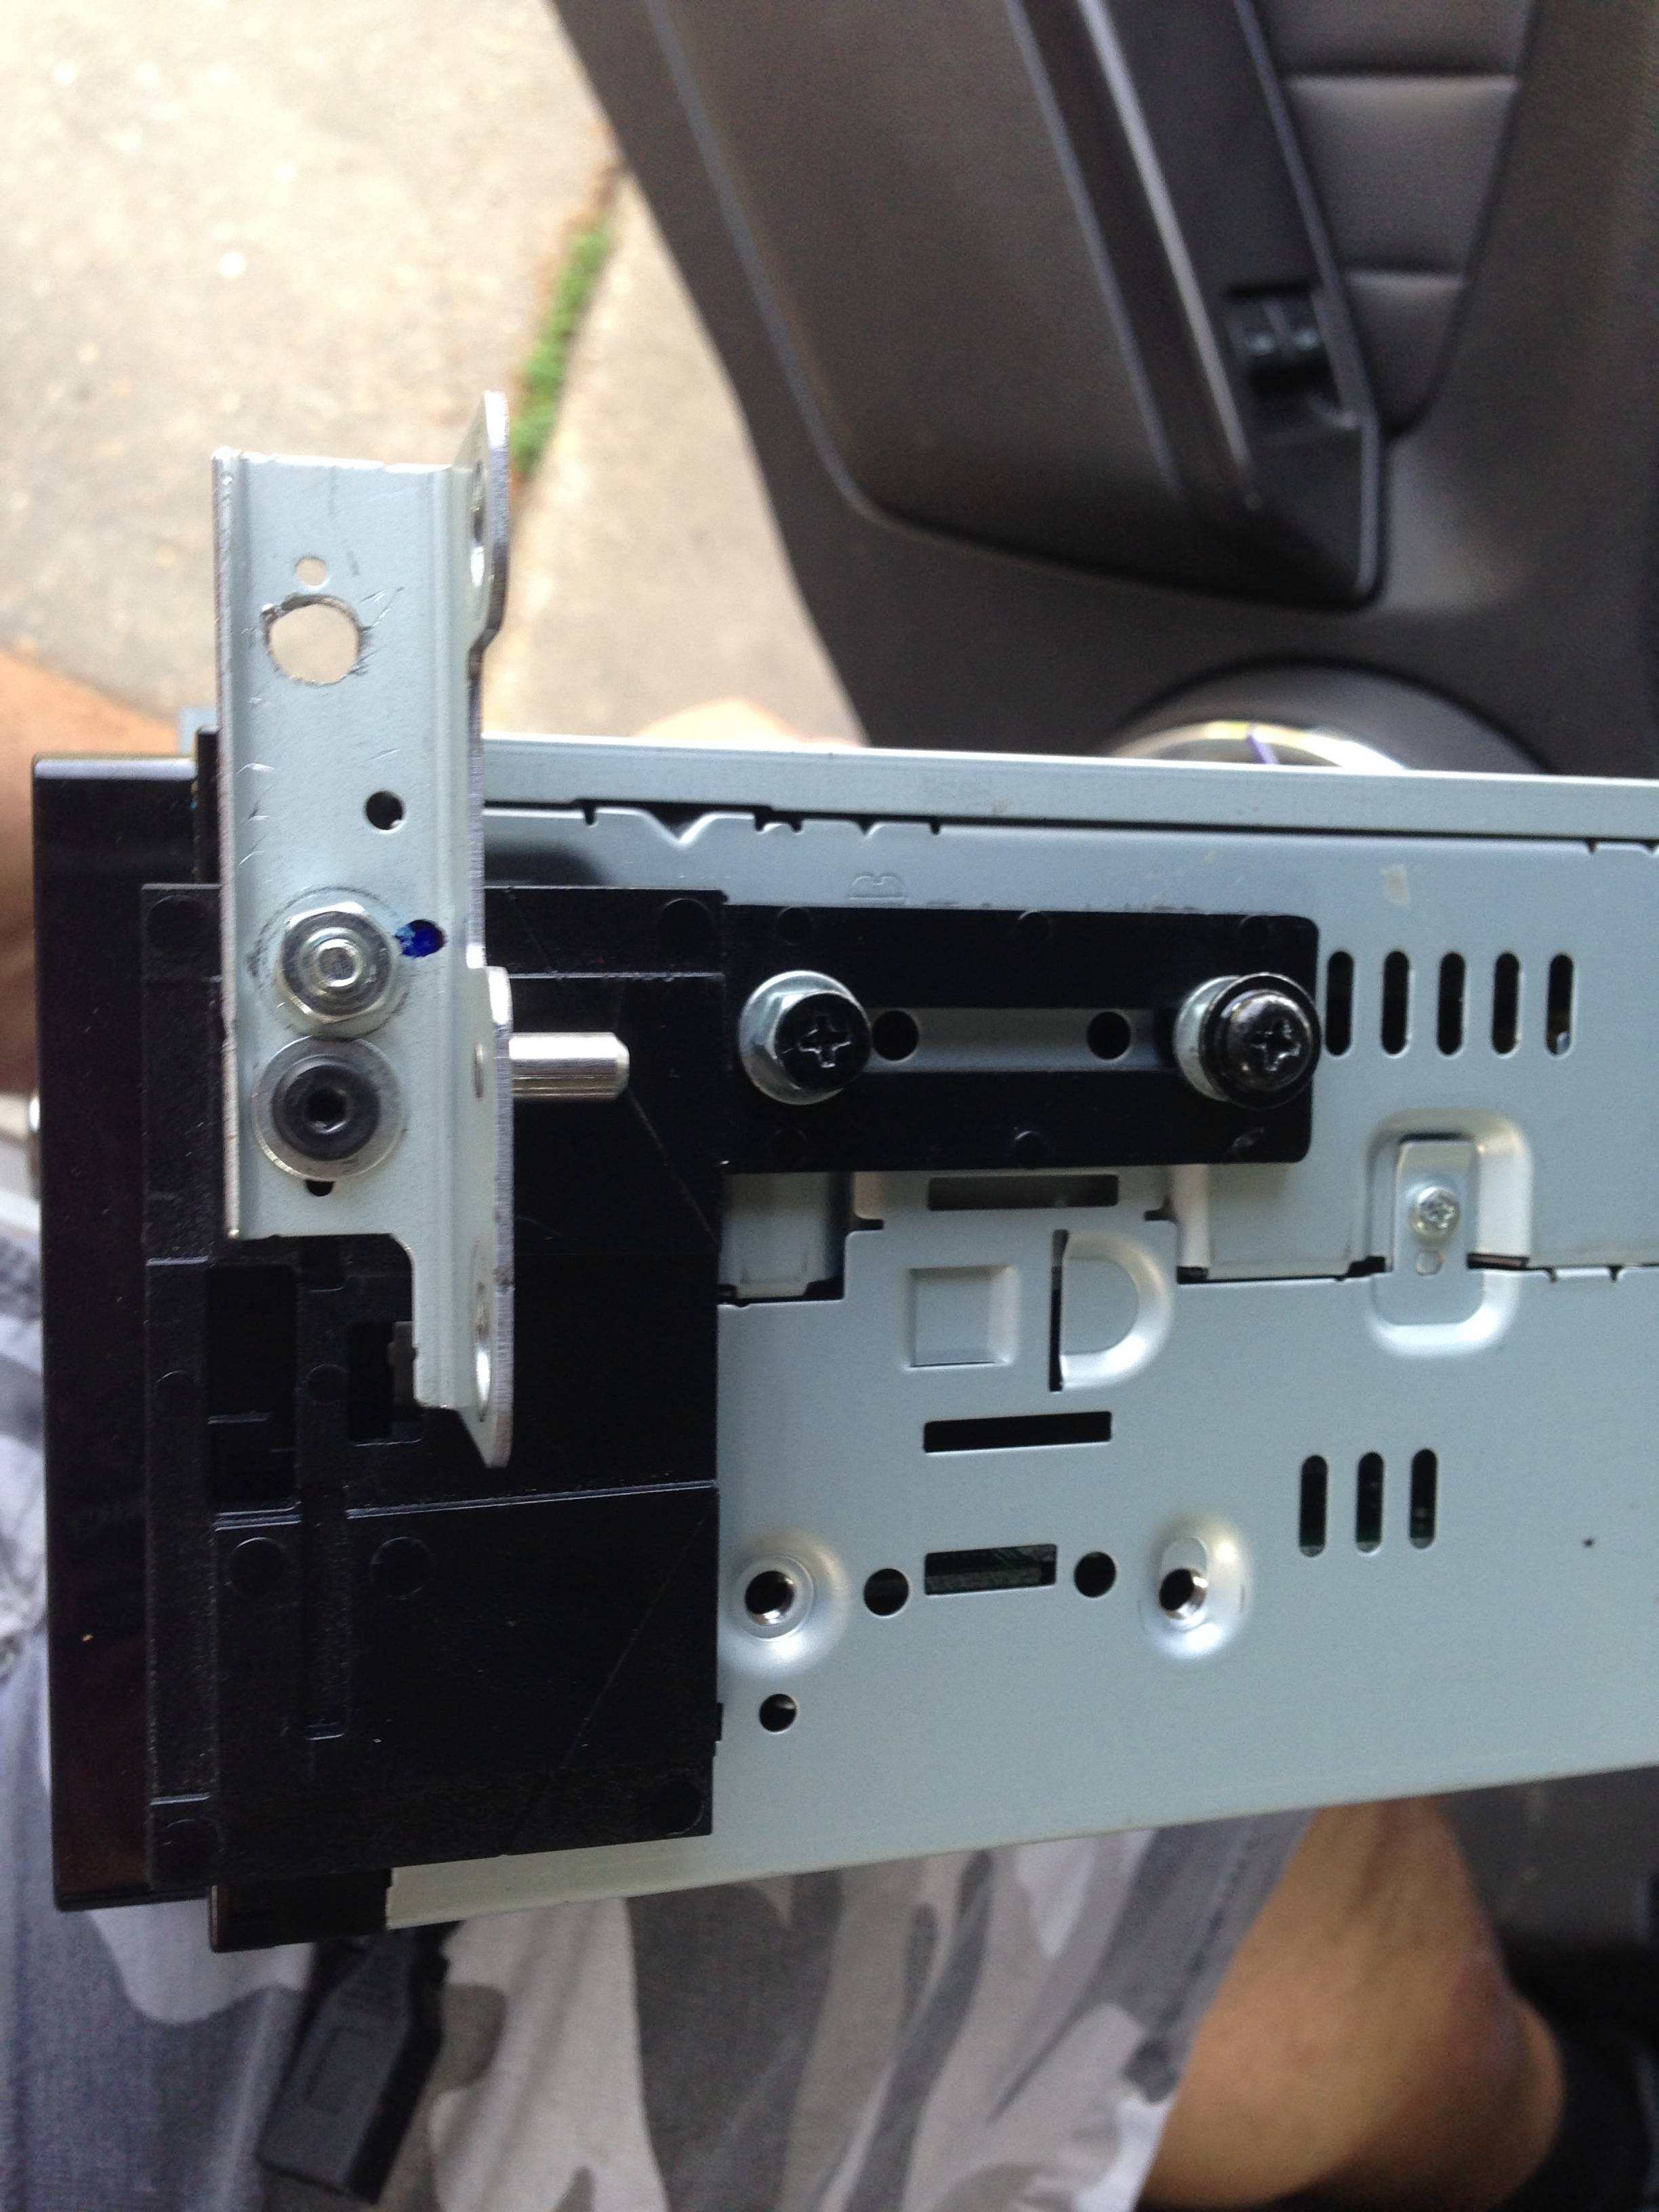
I was able to use the brackets for the info screen connected to some plastic pieces from a GM Metra dash kit. Basically the info screen is 7.5 inches wide and the radio is 7 inches so you need to have a 1/4" spacer on either side, but you also need something to attach to the side of the radio/screen. These parts were perfect for that.
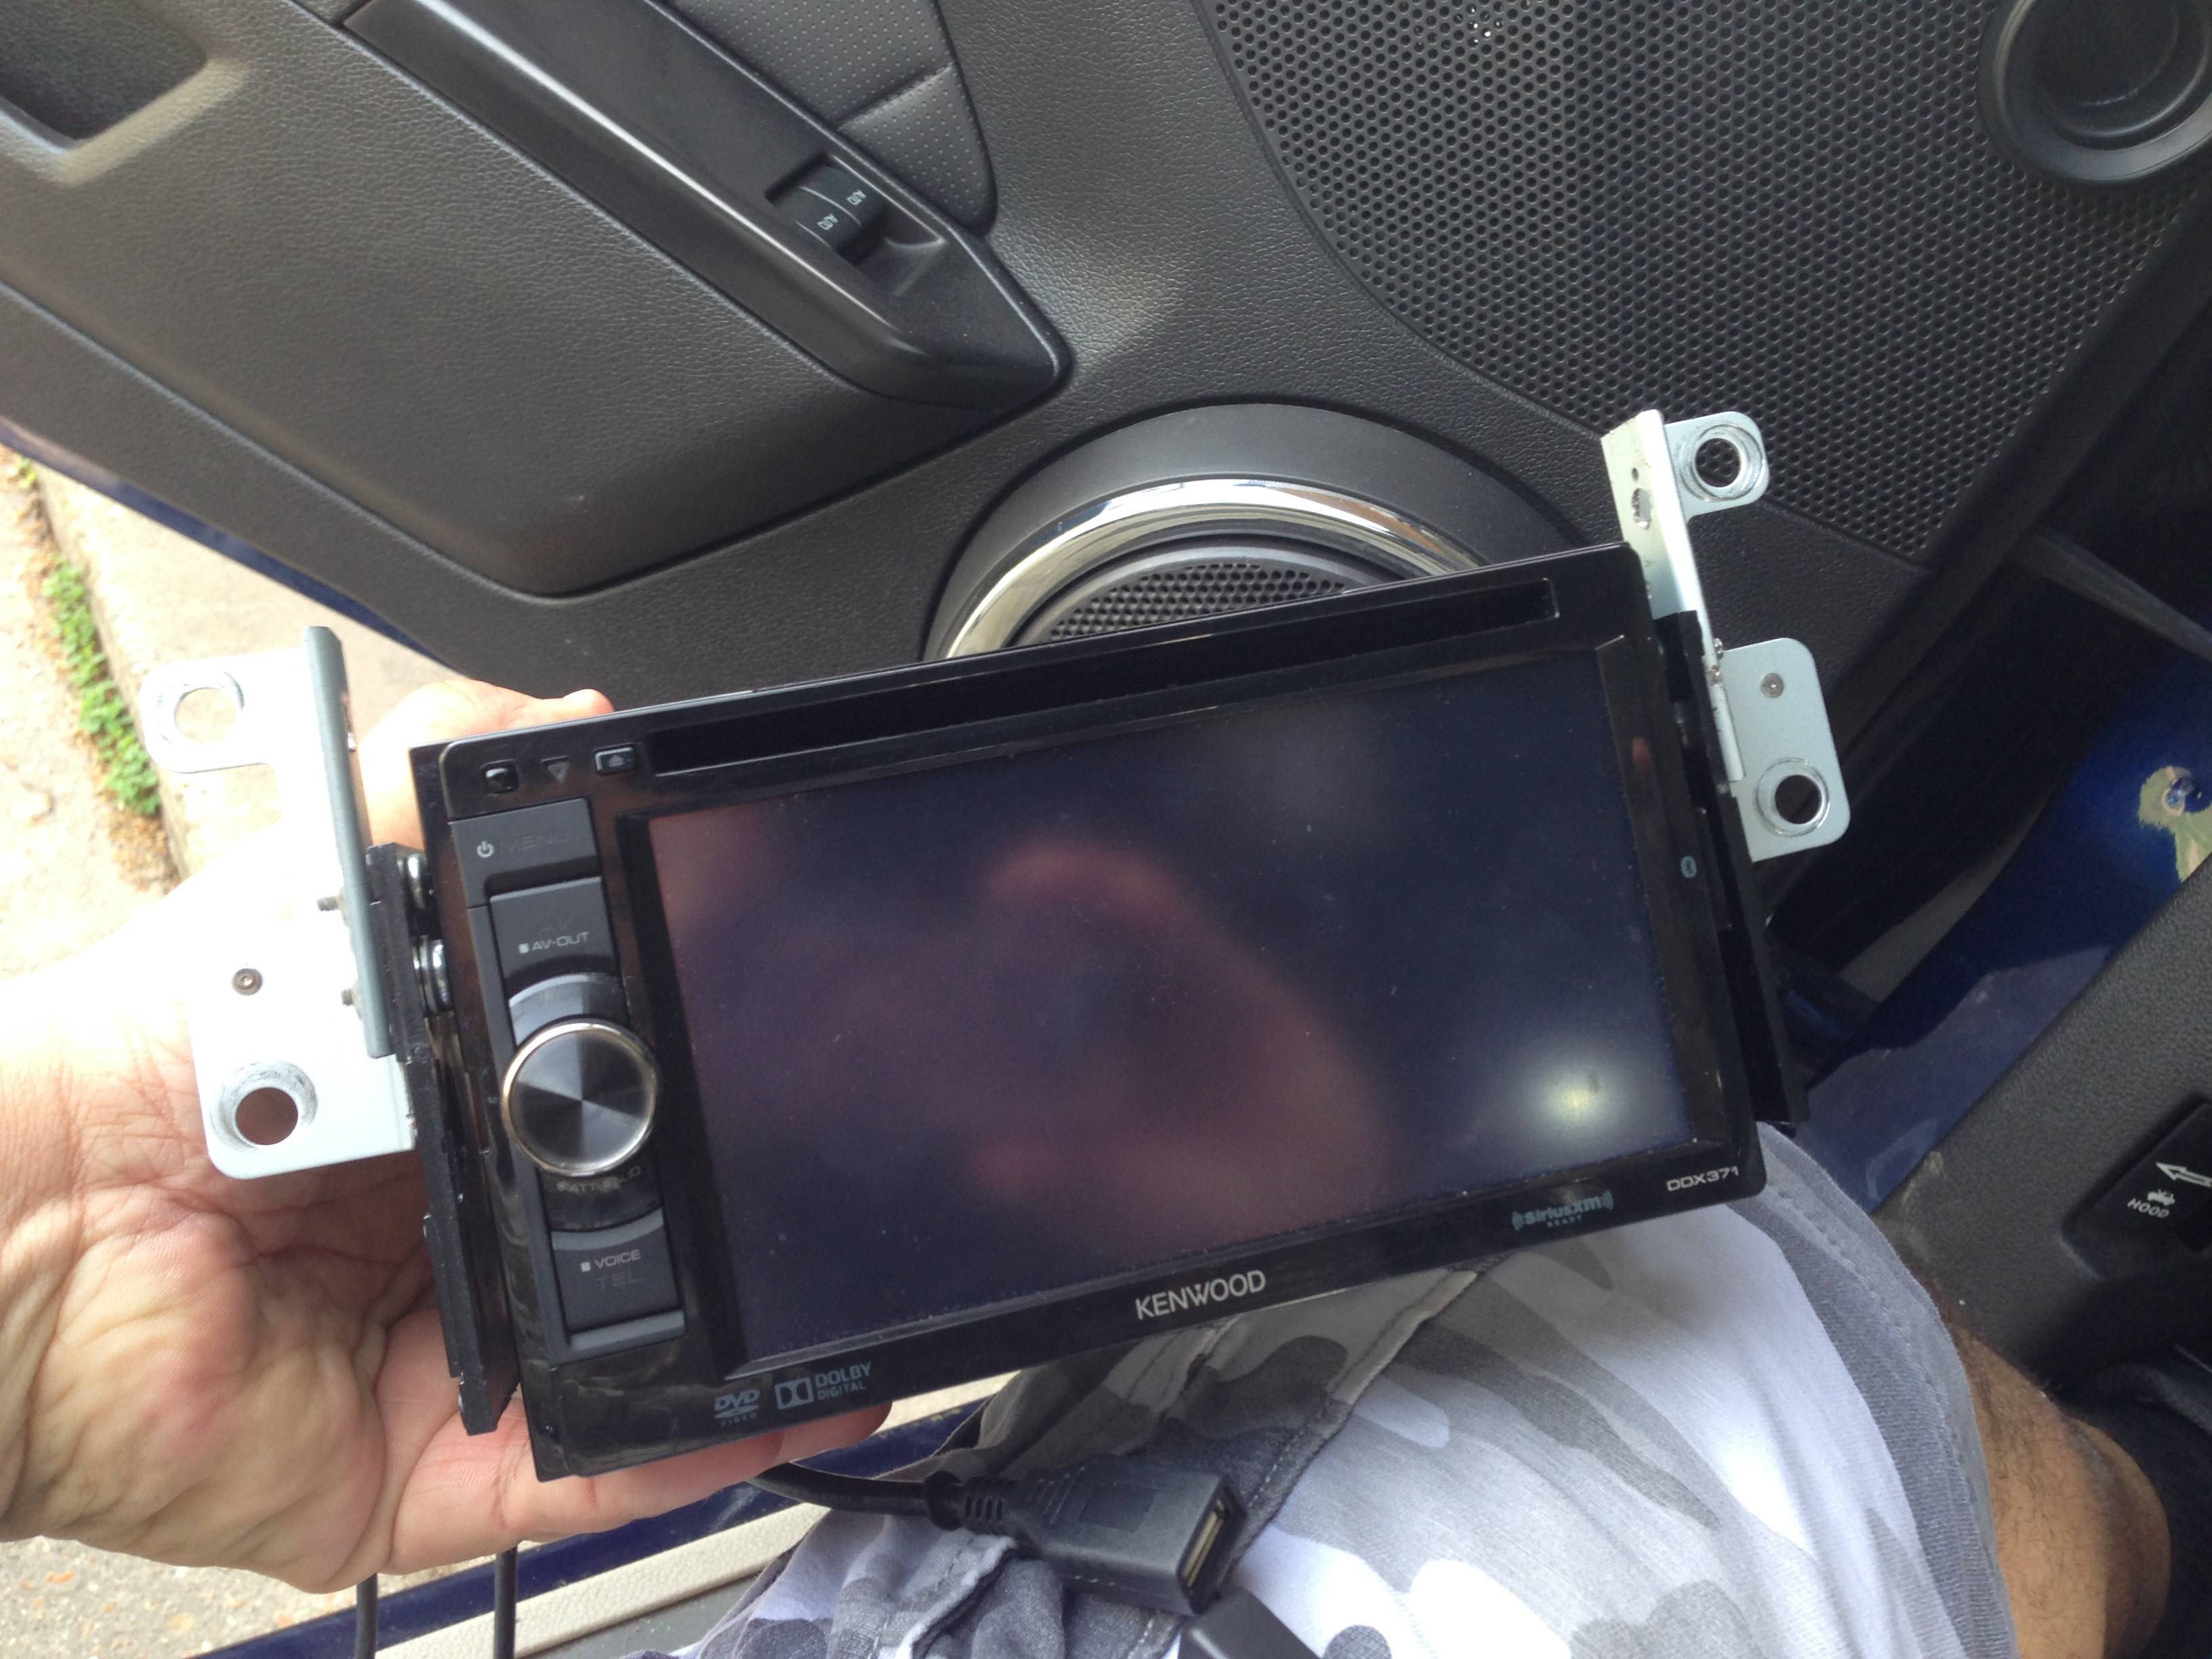
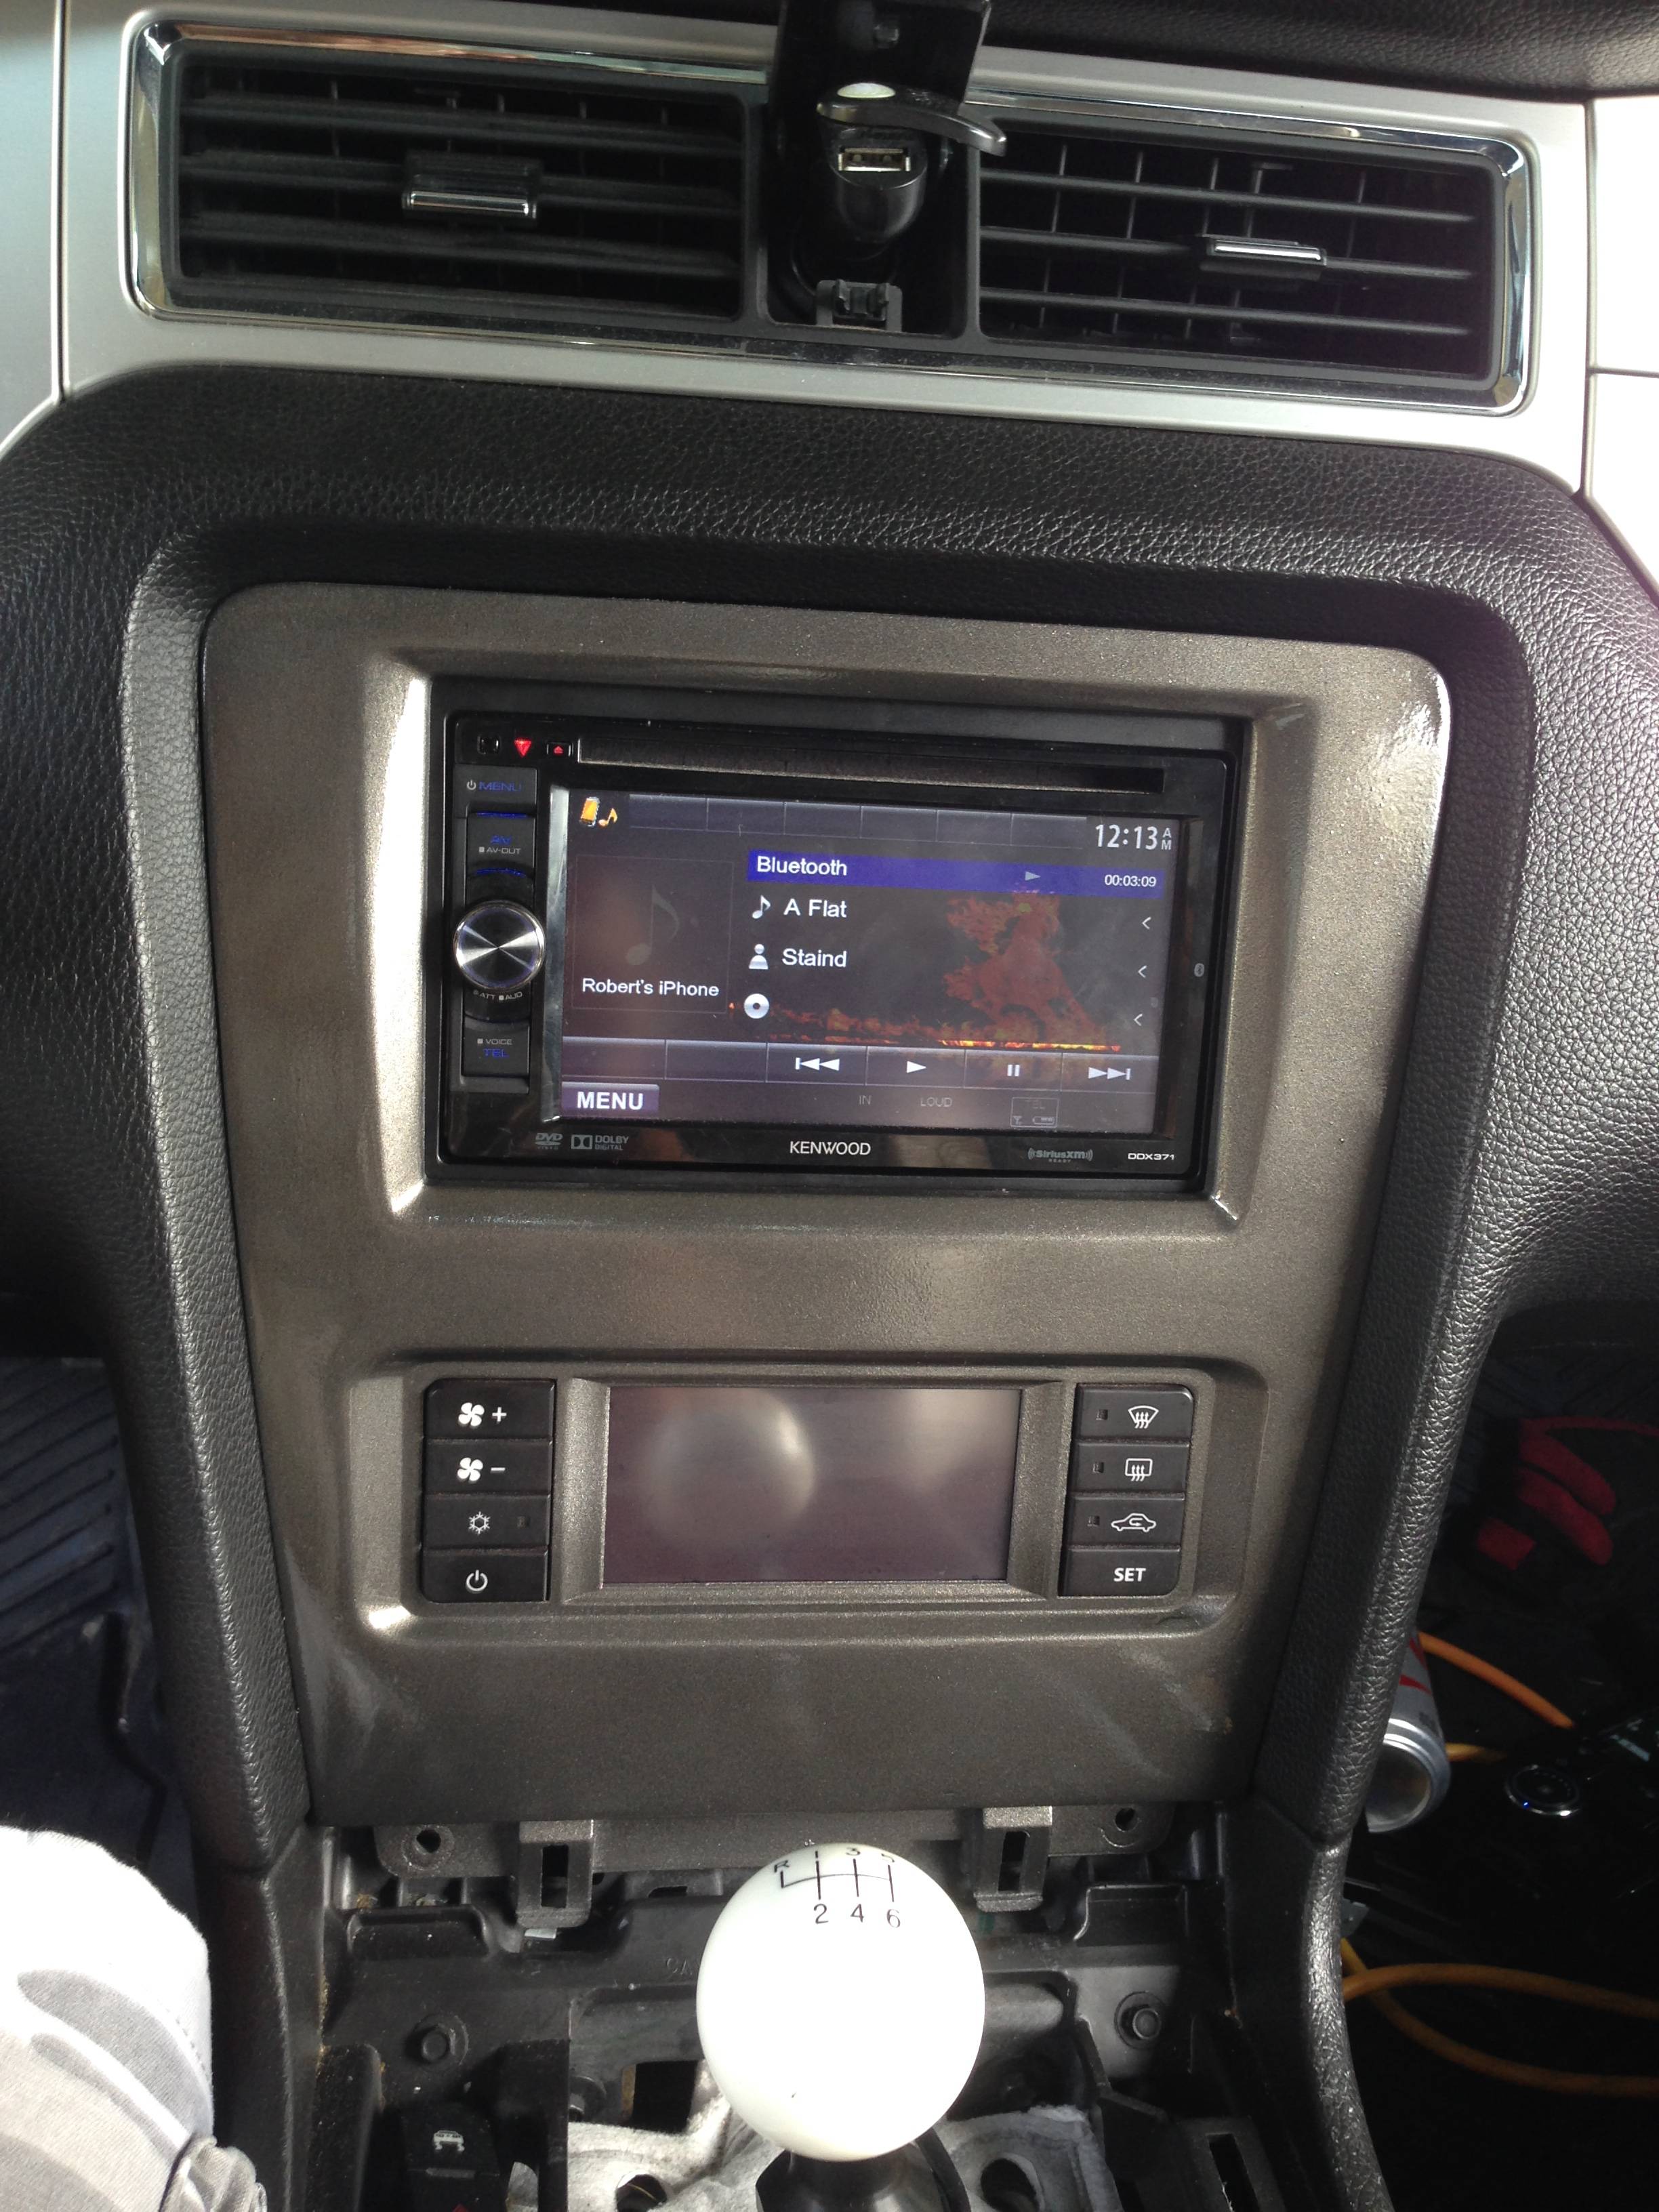
Here is the radio mounted in the correct spot.
The NAV bezel opening where the screen goes is a little too big for the Kenwood radio but the radio came with a trim ring so I put it on and that was perfect to fill in the gaps.
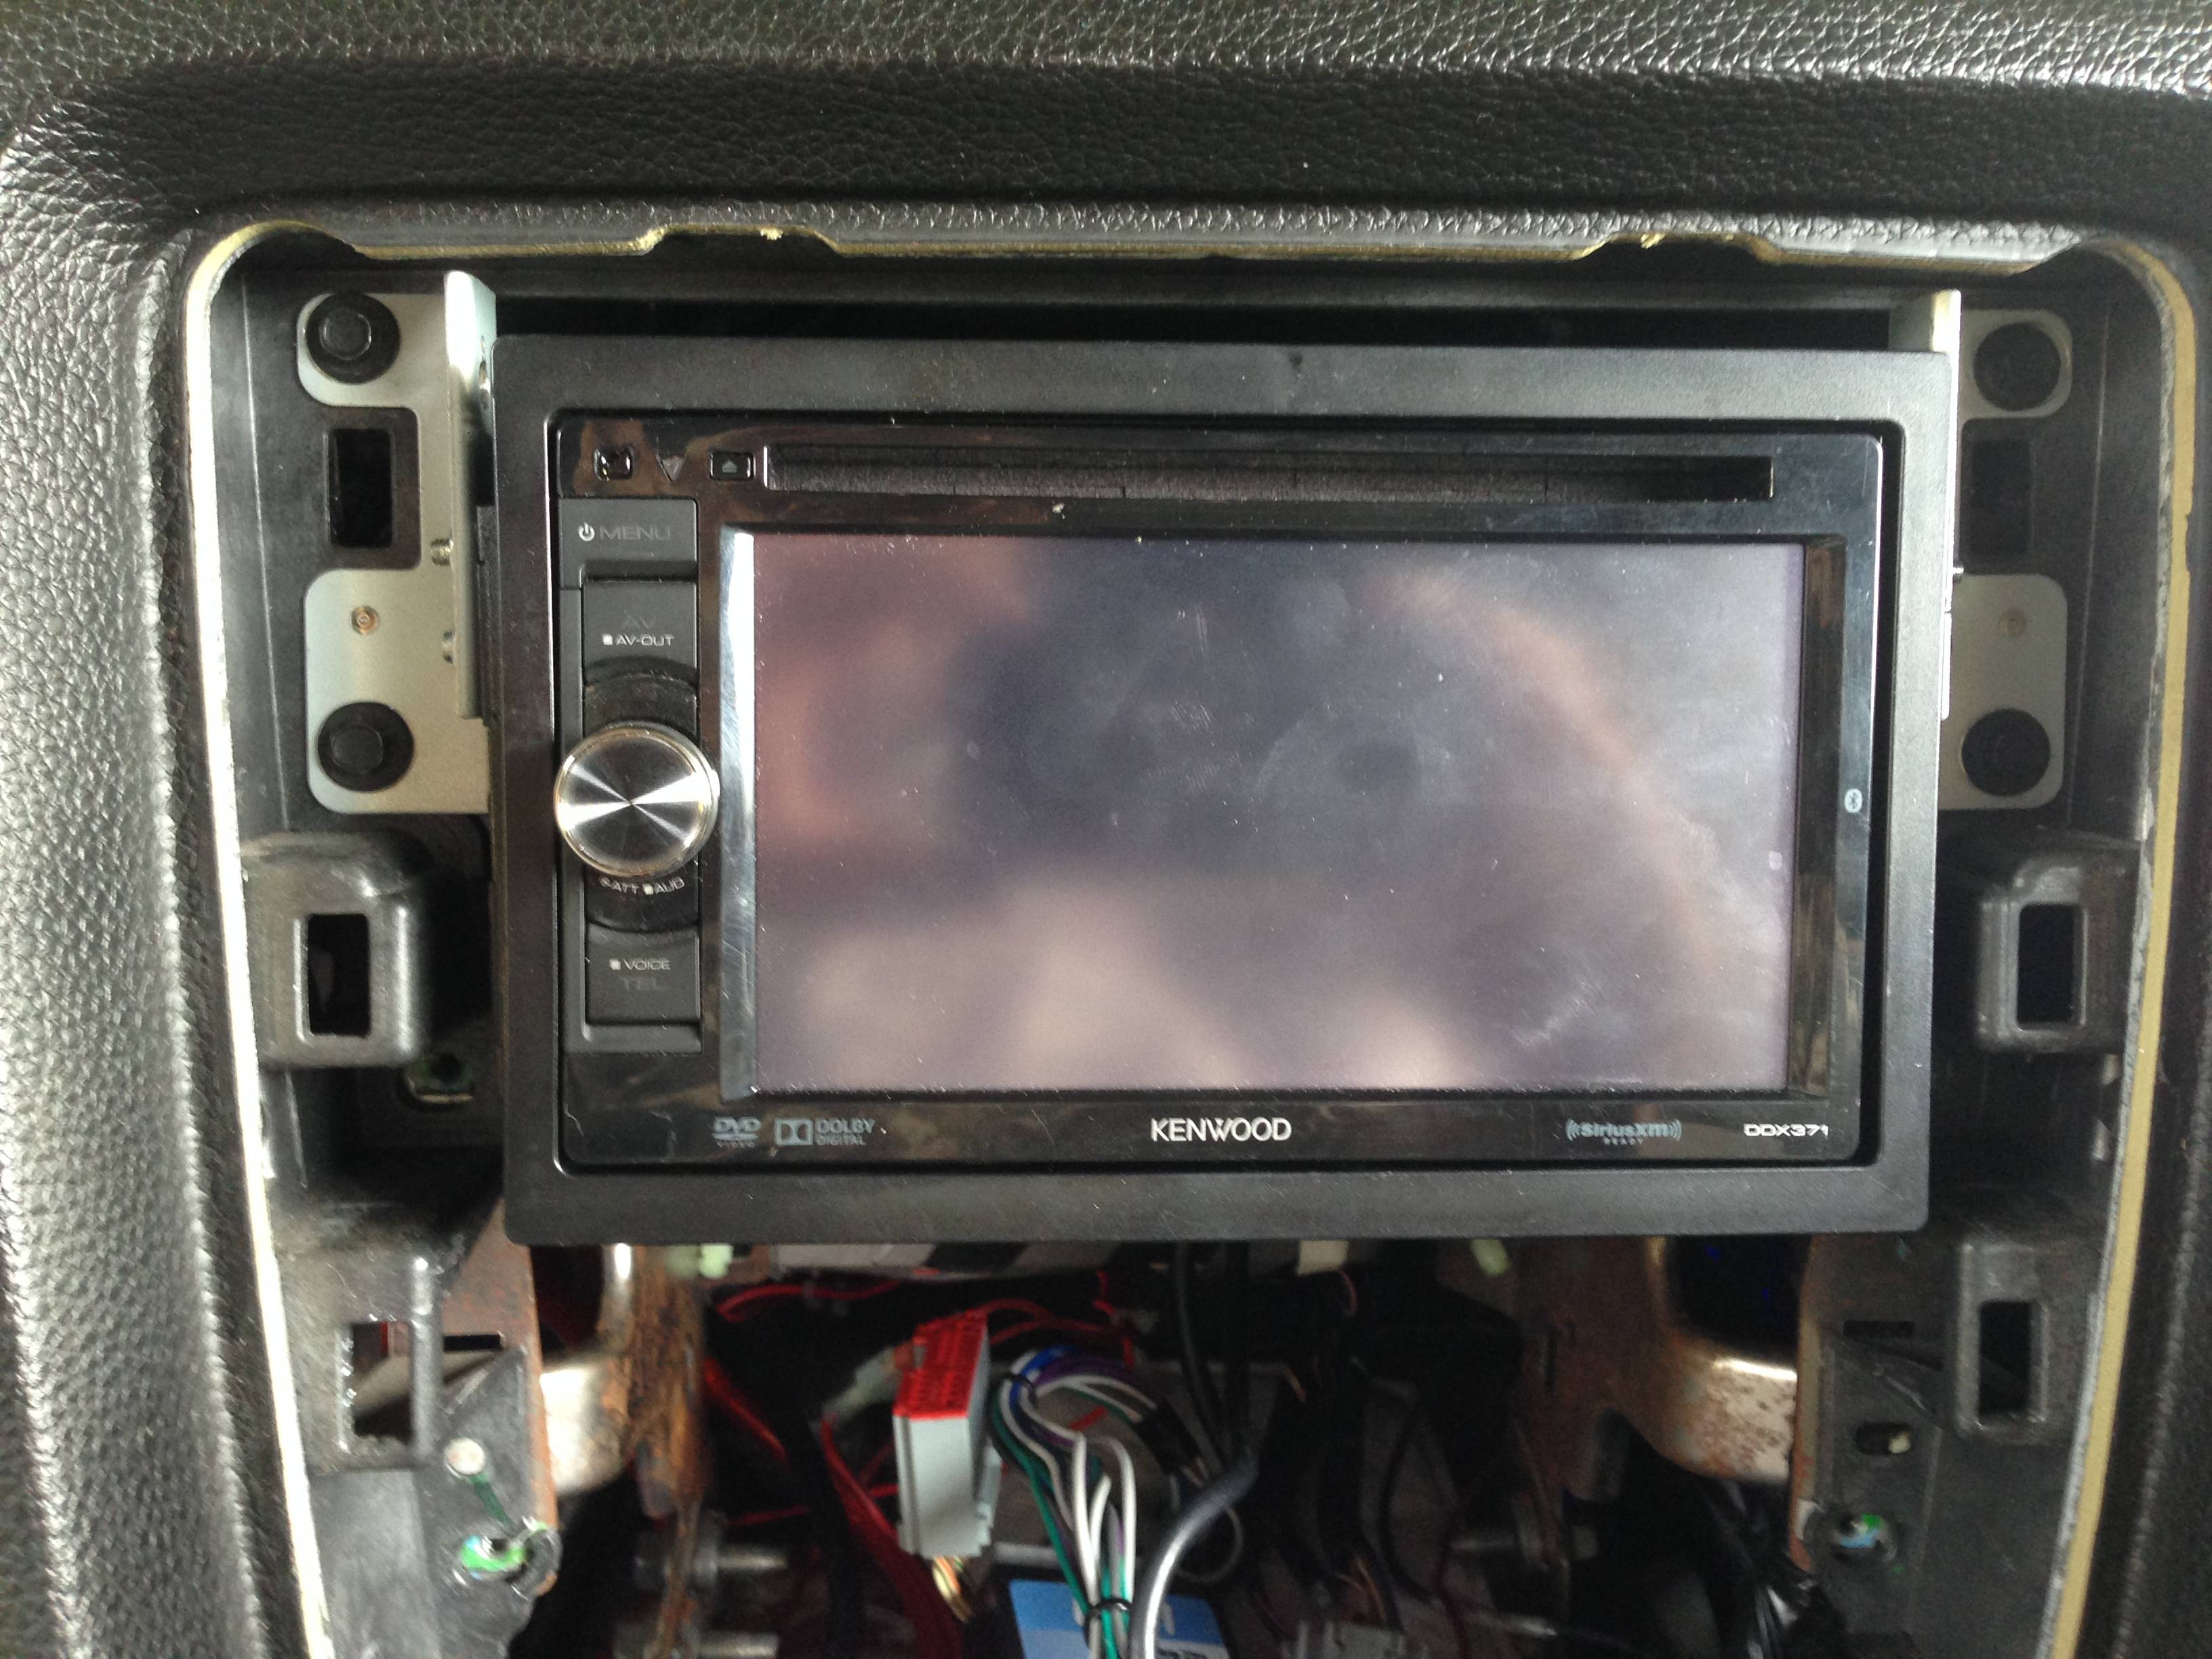
Here is the bezel installed, and the AC controls on. One bad thing that happened is I bricked the AC controls trying to update them. But I called Scosche and a new UAC unit can be purchased directly from them for $130 dollars. So I will be doing that as soon as I can.
I hope you guys like this. I know I love it. I am also working on creating a dash kit with the Shaker 500 bezel as well. Once I get the 1st prototype worked out I will post pictures here as well.
Now before you even think about trying this please understand a few things. 1. You have to be willing to lose the information screen. I don't even use the Sync system anymore so I have no use for the screen.
2. You will have to bend or cut some brackets that hold the Climate Control Module (Little black box behind the info screen).
This mod is not for the faint of heart and I do not recommend it for someone that isn't willing to work with these parts and willing to cut things up with a dremel. But my feeling is that the payoff is fantastic and I hope you think so to!
This is how the project started. Here you see the Scosche AC controls secition mounted inside a NAV bezel. Here is was a little off center and I ended up dremeling out the glue and replacing by aligning the centers of both parts.
I ended up buying some JB Weld Plastic Weld putty. Once I centered the 2 pieces together I used the putty to fill in the gaps and attach the 2 pieces together. This stuff is supposed to bond very well and I put painters tape over all the gaps so the putty would only push through so far. This left me with only a very small amount of gaps to fill with body filler.
Once all the gaps were filled with bondo, I sprayed with some filler primer and sanded, then went with a second coat. This part was the most tedious since any imperfections will show when you paint.
Here is the comparison of the modded part compared to the Scosche kit.
The finished product, this is after spraying with some Graphite Grey paint, sanded to a smooth finish and then clear coated. I still need to buff and polish to really bring the gloss out.
I also did a once over to the center console and the trim ring for the shifter boot. Both had scratches and wear from the car being 4 years old. I also got rid of the Sync badge and will be replacing it with a different badge.
Now to the dash modifications.
This picture is of the Climate Control Module behind the info screen.
These pictures are of the brackets that hold the Climate Control Module. As you can see I just bent them up and out of the way. This clears out the top section of the dash so the radio will fit without obstruction.
This little hole is on the left hand side of the inner dash. The wire harness for the Climate Control Module comes through this hole. I was able to fit the CCM into that hole and tuck it safely away there. You can also leave it in the dash if you like. But I find its better off tucked out of the way.
I was able to use the brackets for the info screen connected to some plastic pieces from a GM Metra dash kit. Basically the info screen is 7.5 inches wide and the radio is 7 inches so you need to have a 1/4" spacer on either side, but you also need something to attach to the side of the radio/screen. These parts were perfect for that.
Here is the radio mounted in the correct spot.
The NAV bezel opening where the screen goes is a little too big for the Kenwood radio but the radio came with a trim ring so I put it on and that was perfect to fill in the gaps.
Here is the bezel installed, and the AC controls on. One bad thing that happened is I bricked the AC controls trying to update them. But I called Scosche and a new UAC unit can be purchased directly from them for $130 dollars. So I will be doing that as soon as I can.
I hope you guys like this. I know I love it. I am also working on creating a dash kit with the Shaker 500 bezel as well. Once I get the 1st prototype worked out I will post pictures here as well.
GT Member
Joined: August 7, 2013
Posts: 156
Likes: 1
From: Atlanta
That looks great. Great work integrating everything, and I love that you painted the center console to match. I think it looks way better with the radio up top than the kit as it comes with the radio at the bottom. Makes me tempted to do something similar. I have an alpine processor attached to the stock setup, but I just haven't been happy with the results and the way that Sync works.

Bullitt Member
Joined: March 11, 2013
Posts: 326
Likes: 22
From: Houston, Tx.
HA u did the exact same thing i was planning to do! been searching for a nav bezel on ebay for a few days now
I plan to mount a single din behind the scosche ac controls after they are relocated down low and permanently mount a jailbroken ipad mini in the ford nav bezel which will display carplay (ignition) and have control of the single din sony or pioneer radio (app control in ipad which displays everything needed) that would be unaccessable behind the hvac control...
I plan to mount a single din behind the scosche ac controls after they are relocated down low and permanently mount a jailbroken ipad mini in the ford nav bezel which will display carplay (ignition) and have control of the single din sony or pioneer radio (app control in ipad which displays everything needed) that would be unaccessable behind the hvac control...
Last edited by DeeJayTJ; Mar 19, 2015 at 04:13 PM.


GT Member
Joined: March 13, 2011
Posts: 139
Likes: 3
I love the way it came out! I would have attached a Samsung Galaxy tab 4 instead of a double din radio. I have a 2012 Ford Focus and I replaced the dash face plate with a metra dash face plate and installed a black 7" Samsung Galaxy tab 4. It connects via Bluetooth. I added a Bluetooth adapter which connects to my focus via the aux port. The Bluetooth adapter gets power from the power port that I connected to the interior fuse junction box. I was able to keep the factory radio installed and total cost for everything was $315. Would you be willing to make and sell some to us forum members?
Last edited by amplifier28; Mar 28, 2015 at 06:48 AM.
Legacy TMS Member
Joined: January 6, 2006
Posts: 14,053
Likes: 166
From: Bay Area, CA
Nice job! I would've used a textured paint to look more factory though - would also hide any imperfections in the finish, which are made more obvious with a gloss panel. Still great job though and it looks much better with the radio up top!
Thread Starter
Mach 1 Member
Joined: January 25, 2011
Posts: 1,075
Likes: 1
From: Ville Platte, Louisiana
Thanks guys. Money has been tight lately so I haven't gotten a new AC control yet so no install pictures just yet. Been working like crazy as well so I haven't had time to work on the Shaker bezel either. I'll be home later this week and will continue with the project and update as I make progress. One thing I was thinking of working on was a way to work this into a full kit but I don't have enough time to do that effectively. Although if it could be mass produced I know it would make money. But I already have a full time gig. Such is life I guess.
Member
Joined: May 26, 2015
Posts: 11
Likes: 0
From: Houston Area
cool. I was wondering if there was enough to mount the stereo up there. I was wanting to use the lower part of the factory bezel for climate control and make my own face plate for the stereo. My only question is regarding the pcba and if I can saw it in half and have it still work.
GT Member
Joined: May 31, 2012
Posts: 182
Likes: 1
From: Indianapolis
cool. I was wondering if there was enough to mount the stereo up there. I was wanting to use the lower part of the factory bezel for climate control and make my own face plate for the stereo. My only question is regarding the pcba and if I can saw it in half and have it still work.
Member
Joined: May 26, 2015
Posts: 11
Likes: 0
From: Houston Area
well that sucks. I guess if I had a schematic I could do trace cuts and wire mods but that's a bit extreme. I'm not worried about sync and wasn't going to use the text screen. has anyone tried it?
Bullitt Member
Joined: March 11, 2013
Posts: 326
Likes: 22
From: Houston, Tx.
it does work, you have to do it right, its not by cutting in half tho.
here is an extra bezel i made using factory a/c controls, i should have left the txt screen tho.

I have a whole thread on a nexus 7 install with the scosche ac controls.
Member
Joined: May 26, 2015
Posts: 11
Likes: 0
From: Houston Area
Cool, that's more of what I'm looking for. the head unit I have has a 7" screen and would fit inside the 05-09 dash without using the trim bezel so it's too big for the schoche and metra kits anyway. it also has 2 ***** located on the top left and right corner so it would match the factory ac controls so. I'll look up your nexus 7 thread and hopefully I'll be able to do it.
I'd like to keep the text screen for clock temp and compass if I can. sorry for the newb question but does it get that info from the radio or is there a separate box for that?
I'd like to keep the text screen for clock temp and compass if I can. sorry for the newb question but does it get that info from the radio or is there a separate box for that?
Bullitt Member
Joined: March 11, 2013
Posts: 326
Likes: 22
From: Houston, Tx.
Cool, that's more of what I'm looking for. the head unit I have has a 7" screen and would fit inside the 05-09 dash without using the trim bezel so it's too big for the schoche and metra kits anyway. it also has 2 ***** located on the top left and right corner so it would match the factory ac controls so. I'll look up your nexus 7 thread and hopefully I'll be able to do it.
I'd like to keep the text screen for clock temp and compass if I can. sorry for the newb question but does it get that info from the radio or is there a separate box for that?
I'd like to keep the text screen for clock temp and compass if I can. sorry for the newb question but does it get that info from the radio or is there a separate box for that?
the txt screen on top gets the compass and clock on its own and has its own connection.
that bezel i made - the opening is from the scosche kit - as for my nexus install it looks identical to what the one in this thread looks like, and made from a factory ford navigation bezel combined with scosche for the ac controls.

Last edited by DeeJayTJ; Jun 10, 2015 at 09:10 AM.
Member
Joined: May 26, 2015
Posts: 11
Likes: 0
From: Houston Area
cool, sounds like all I need is to figure out how to keep the factory climate controls without the top half of the board being there. I thought about using one from an F150 but I didn't like the ***** and I'm not sure what color the led's are.
Thanks neighbor.
Thanks neighbor.
Bullitt Member
Joined: March 11, 2013
Posts: 326
Likes: 22
From: Houston, Tx.
well, for a tablet yeah its okay for the top half to be there. for a double din radio then no, it wouldnt be okay to be there... but really your best bet is to just make a mold using the scoche ac controls. i can put a double din in there up top now without any trouble.