2013 mustang shaker pro retrofit help.
#1
Right now Im in the process of retrofitting a 2013 Shaker Pro into a 2012 mustang that just recently got a factory nav put in. The factory nav came from a car equipped with a shaker pro system. Which is why I picked one up on ebay.
Looks like an easy install except for one snag. Where the 2 bottom amp bolts should go there is a black hardened tar like substance that shaker pro cars do not come with and I believe it is going to interfere with the installation of the bracket. I have cracked through to the point where i have the both bolt holes open but I was wondering if anyone had a better idea on how to get it off other than using a screwdriver lol.
Its easy to find, its on the passenger side right where the shaker 1000 or shaker pro would sit when you lift up the little trunk carpet.
I just don't want to spend hours out in the cold trying to pry it with a screwdriver.
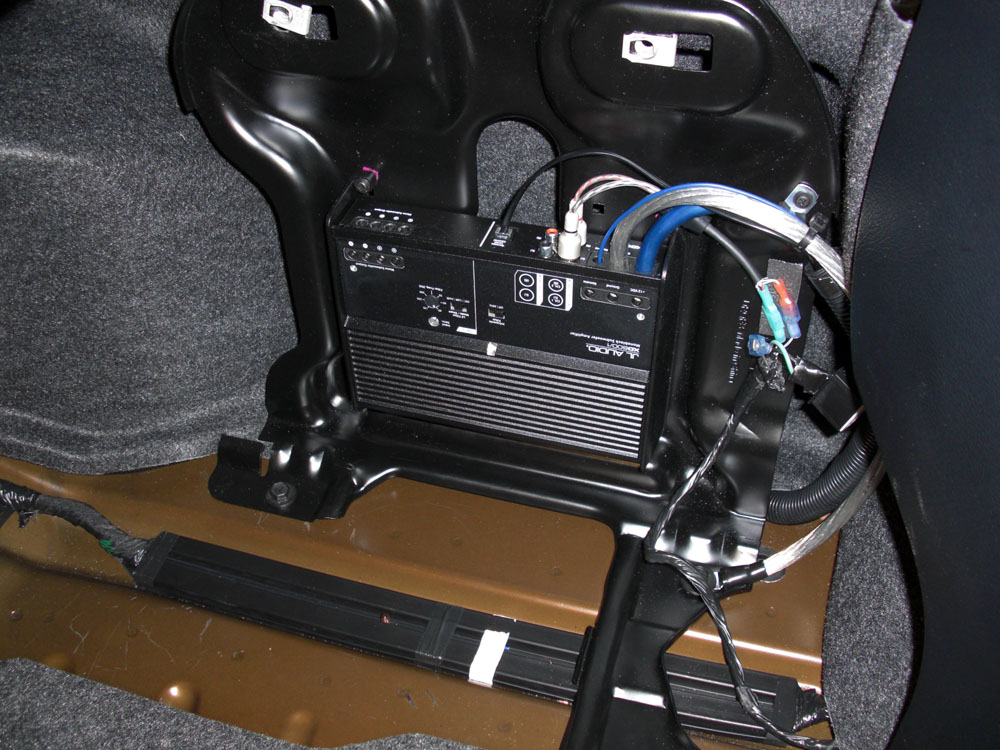
This was the best picture i could find of the trunk with a shaker system in it.

Last edited by awoychosky123; 3/7/17 at 11:35 AM. Reason: Adding images/title change
#3
I thought I would keep this updated. My rear speakers were supposed to come in today but they got mixed up my rear speakers with fog lamps from a Toyota or something.
In preparation for my Shaker Pro sub coming in on Monday I stopped by home Depot and picked up some 22-4 shielded cable. That should cover the wiring for the amp and my factory rear camera.
I also swapped the cars around in the garage so I could get access to my passenger door again. Since I will have to remove all the trim on the passenger side to run wire and get the the rear deck.
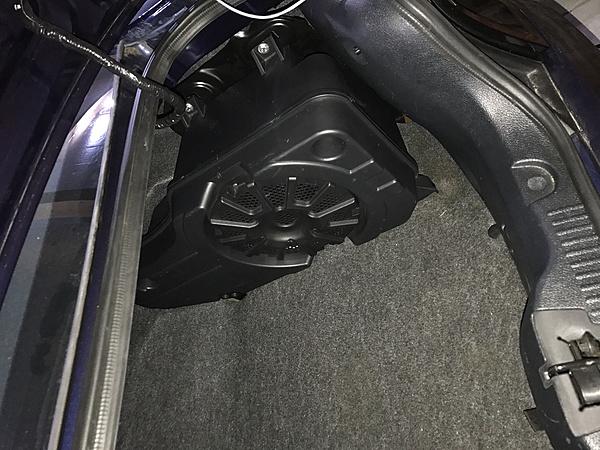
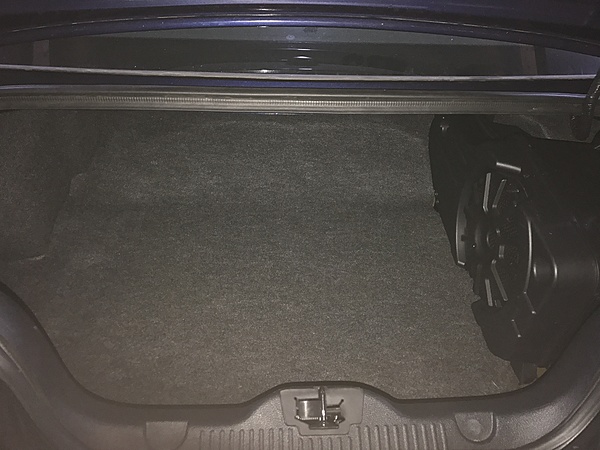
Lastly I took the carpet out of my trunk and started prep work for mounting the sub and amp. Took the shop-vac to it and some rubbing alcohol to get the sticky adhesive off the body where some stickers where covering the bolt holes for the subwoofer.
I decided I would see how the amp and everything mounts first before trying to remove that black tar. I'm hoping that there is enough play in the mounting holes that it wont mind that 1/16th lip. But if I do have to remove it, I think I can get it off with a heat gun and a 5 way tool.
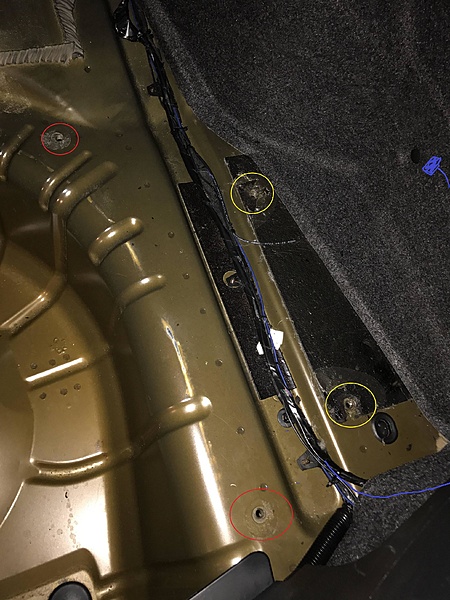
Here is a picture of the trunk prepped for the amp and sub. Red is for The subwoofer bolts and yellow is for the amp bolts. The blue is how I plan to run the cable. Which will be tucked under all of the trim.

The following users liked this post:
Jonas lj (1/12/23)
#4
Well I ran into a snag. The amp and woofer bolt right up perfectly but I guess ford decided to only make one universal harness for the mustang with the nav system or something. I have wires coming out of my nav unit for the sub from the factory, but the radio head does not send out the audio signal still. Sooooooo after spending all day yesterday and today making sure all my ducks were in a row, I tried to program the nav through IDS. But it wouldn't give me the correct entry fields for the nav unit under as-built. So I gave up on reprogramming and decided to call up the guys at 4D Tech. They said that the have played with it before and might be able to reprogram my radio head for the sub enable but there not sure. So I will update this when I have some news to report. But fingers crossed I can get this working.
#5
Right now Im in the process of retrofitting a 2013 Shaker Pro into a 2012 mustang that just recently got a factory nav put in. The factory nav came from a car equipped with a shaker pro system. Which is why I picked one up on ebay.
Looks like an easy install except for one snag. Where the 2 bottom amp bolts should go there is a black hardened tar like substance that shaker pro cars do not come with and I believe it is going to interfere with the installation of the bracket. I have cracked through to the point where i have the both bolt holes open but I was wondering if anyone had a better idea on how to get it off other than using a screwdriver lol.
Its easy to find, its on the passenger side right where the shaker 1000 or shaker pro would sit when you lift up the little trunk carpet.
I just don't want to spend hours out in the cold trying to pry it with a screwdriver.
This was the best picture i could find of the trunk with a shaker system in it.

Looks like an easy install except for one snag. Where the 2 bottom amp bolts should go there is a black hardened tar like substance that shaker pro cars do not come with and I believe it is going to interfere with the installation of the bracket. I have cracked through to the point where i have the both bolt holes open but I was wondering if anyone had a better idea on how to get it off other than using a screwdriver lol.
Its easy to find, its on the passenger side right where the shaker 1000 or shaker pro would sit when you lift up the little trunk carpet.
I just don't want to spend hours out in the cold trying to pry it with a screwdriver.
This was the best picture i could find of the trunk with a shaker system in it.

What's the JL Audio piece?
Shouldn't that be uglier and say Ford on it if it was factory?
#7
#9
No way that I can modify it myself even with ids, the tool won't show the correct as built data entry fields. So I am in contact with 4D Tech to see if we can program the radio using a custom in house program to enable the audio signal coming from the radio.
But other than the head unit problem, everything else is good.
But other than the head unit problem, everything else is good.
#11
#15
Little update, Since I'm running on a time constraint to get my car back together and drivable, I talked with 4D Tech and it looks like we agreed that the best way to go since I need this done sooner rather than later is to buy a nav headunit out of a car with the shaker pro. Then after I test to make sure that the woofer works, Send it too them or get a remote flash, to accept my backup camera instead.
I lucked out and found a nav headunit on lkq that came out of a car that had the shaker pro. (Double checked by running the vin through ford etis) So I think thats what I'm going to do to get the sub and my camera working.
I lucked out and found a nav headunit on lkq that came out of a car that had the shaker pro. (Double checked by running the vin through ford etis) So I think thats what I'm going to do to get the sub and my camera working.
#18
Success! I have got the Shaker Pro working today after ordering a head unit from LKQ. Here is a short video (Warning Audio Levels Vary thanks to the bass levels.)
I really enjoy this factory setup, Its not so bass heavy that I feel self-conscious at a stop light, but it still adds quite a kick to my music. all in all I don't think its worth the $1200 Ford wants but it was worth the $300 I paid for the woofer and the $150 to $200 I will be paying the get my rear camera back.
I know some people would say I could get a much better aftermarket setup with that cash but honestly I think they look out of place and add more than Im looking for. Im very happy with this setup. Im glad I could pick up that subwoofer, It's not everyday you find one on eBay for such a good price.
If anyone is looking to do this in the future and needs help, just ask and I will try my best to accommodate.
#19
I've been toying with the idea of doing this. Here's a few questions if you don't mind:
1. How much was the new Nav head?
2. Did you have to change your SYNC module?
3. Did you use the Shaker Pro amp? If so, did your existing harness have a connection already?
4. How invasive was the install?
1. How much was the new Nav head?
2. Did you have to change your SYNC module?
3. Did you use the Shaker Pro amp? If so, did your existing harness have a connection already?
4. How invasive was the install?
#20
1. How much was the new Nav head?
I paid $150 for the head unit off LKQ I ran vin numbers through ford ETIS until I found one that had the navi and "High Performance Audio" if you have a non nav car you won't need a new head unit you can just get it reprogrammed with a IDS tool.
2. Did you have to change your SYNC module?
Nope! As far as I know Sync does not handle anything related to that. I am switching it out for a module that came out of the same car my new head unit did just to keep everything the same part numbers. But it's not necessary.
3. Did you use the Shaker Pro amp? If so, did your existing harness have a connection already?
I did use the factory Shaker Pro amp. The company I bought the shaker System off of provided the pig tail for the amp, and the entire harness for the sub. On the car itself, I did have pins in C210 near the SJB coming off the dash harness, But I didn't have any on the body harness. (I think I had them coming off the dash harness because my car has the navi)
4. How invasive was the install?
It honestly was not to bad, I had the whole think done in about 3-4 hours of work out in the cold. It will take some soldering. And you will probably need to get your own mounting hardware. In terms of disassembly, I took out my passenger side kick panel, my sill plate, my passenger side interior quarter panel, and the trunk panel. I ran wire from the trunk down to the passenger footwell, from there I took power from the SJB on the 2013-14 there is an unused 25 amp fuse that is used to power the amp on 2010-12 cars. I used that for power, then I ran my audio cables in to C210 AFTER I knew there were wires coming in for it. Then I ran my ground to one of the common grounds in the trunk.
If you need to do anything with the head unit or run a connector up to it (Non nav cars) you will need to remove the center console bezel and the radio faceplate + ACM.
After getting a preprogrammed head unit thats all it needed to work, however you should check to make sure you have the wires in the dash harness for it. If not you should be prepared to run it all the way to your radio instead and get a plug for it.
Last edited by awoychosky123; 3/4/17 at 08:20 AM.


