
My Plasti-Dip projects :-)

Thread Starter
Legacy TMS Member
Joined: August 7, 2011
Posts: 5,246
Likes: 567
From: NC
Mach 1 Member
Joined: January 10, 2011
Posts: 561
Likes: 0
From: Houston
I just plasti dipped my faux gas cap tonight. I think it looks real sharp.
This is my first attempt and I'm not very patient so there are a couple of imperfections, but the beauty of plasti dip means I can remove and try again!
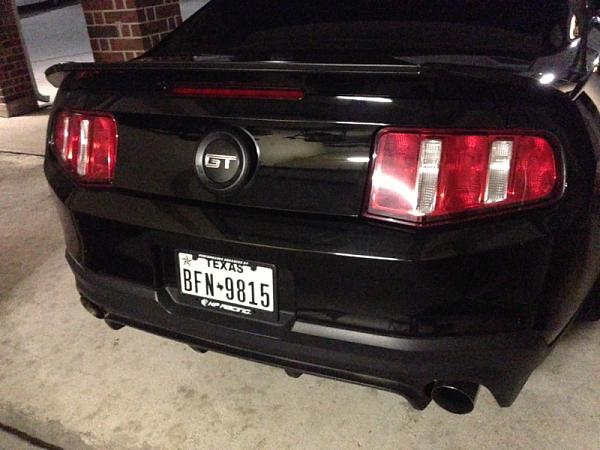
I had my wonderful girlfriends help too!
This is my first attempt and I'm not very patient so there are a couple of imperfections, but the beauty of plasti dip means I can remove and try again!

I had my wonderful girlfriends help too!


Banned
Joined: March 9, 2011
Posts: 16,242
Likes: 6
Ummmmm pretty sure the cap is removable.
Mach 1 Member
Joined: January 10, 2011
Posts: 561
Likes: 0
From: Houston
Banned
Joined: March 9, 2011
Posts: 16,242
Likes: 6
 can't take off the cap, posting links instead of typing lol haha
Banned
Joined: March 9, 2011
Posts: 16,242
Likes: 6
Mach 1 Member
Joined: January 10, 2011
Posts: 561
Likes: 0
From: Houston
Cobra Member
Joined: September 6, 2005
Posts: 1,296
Likes: 2
From: Colorado
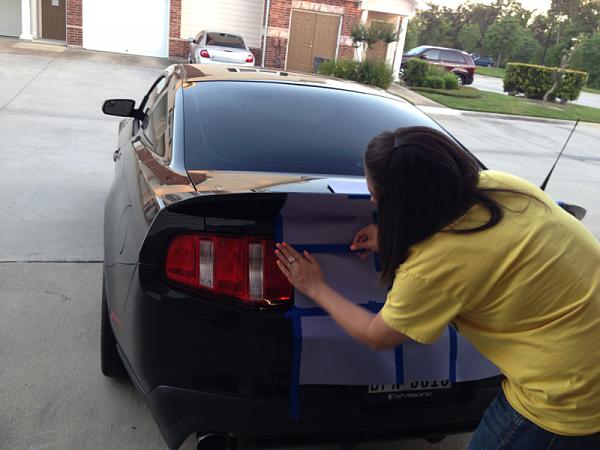
Looks good! This is what I have been thinking about doing too... Any other pics (closer or maybe a straight shot)? Did you take the piece off, or just tape it off?

Mach 1 Member
Joined: January 10, 2011
Posts: 561
Likes: 0
From: Houston
Even if he removed the rear bumper, he would still have to tape it off, so I can assume he taped it off while it was still on the car. It looks very good.

Bullitt Member
Joined: February 25, 2013
Posts: 394
Likes: 2
I taped off most of the bumper, but I carefully razorbladed along the inside of the diffuser lip and peeled off the rest to get the crisp line that you see there.
Cobra Member
Joined: September 6, 2005
Posts: 1,296
Likes: 2
From: Colorado
Mach 1 Member
Joined: January 10, 2011
Posts: 561
Likes: 0
From: Houston
Interesting, I thought the 13+ rear bumpers were one piece. Do you leave the bumper on when replacing the diffuser? I know for my 11 I had to remove the entire bumper cover.
Cobra Member
Joined: September 6, 2005
Posts: 1,296
Likes: 2
From: Colorado
