
Installing GT/CS front valence, GT500 rear valence, GT500 a/b exhaust today

Bullitt Member
Joined: March 14, 2011
Posts: 415
Likes: 1
From: Orlando, FL
 Thanks!

Thread Starter
Member
Joined: January 30, 2011
Posts: 36
Likes: 0
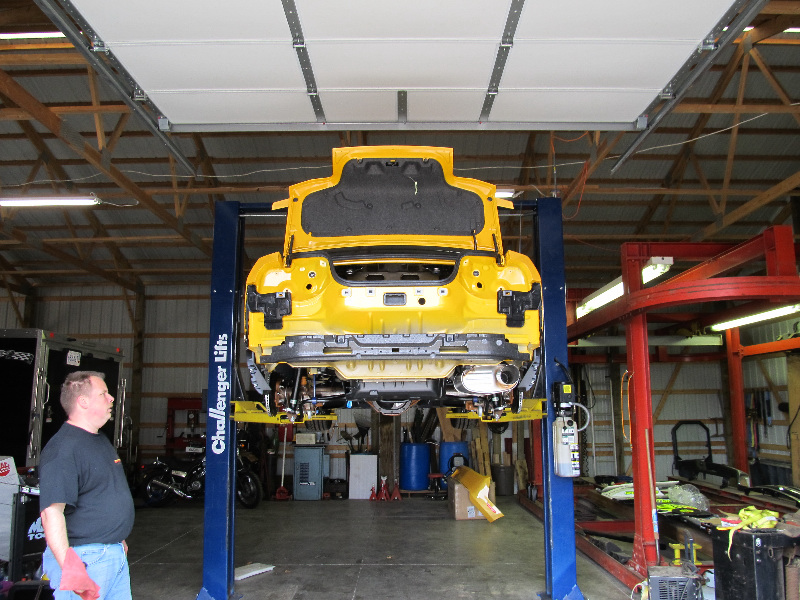
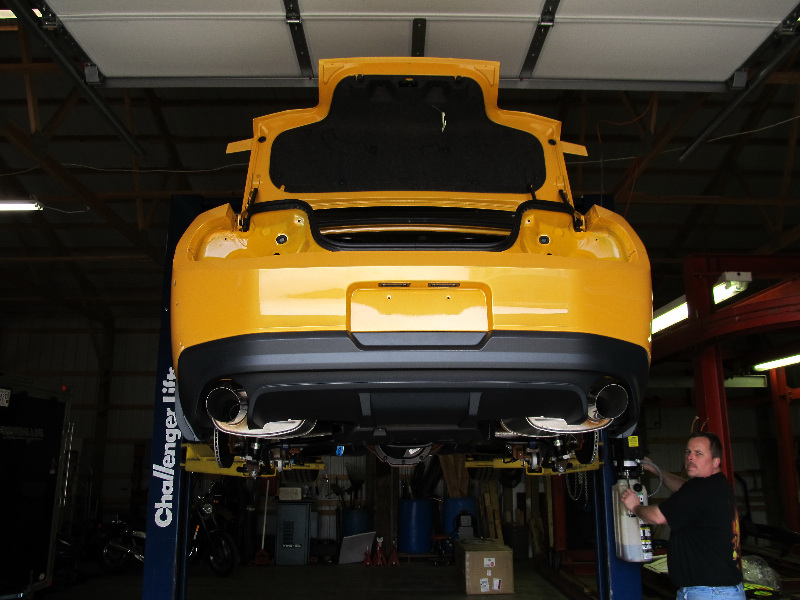
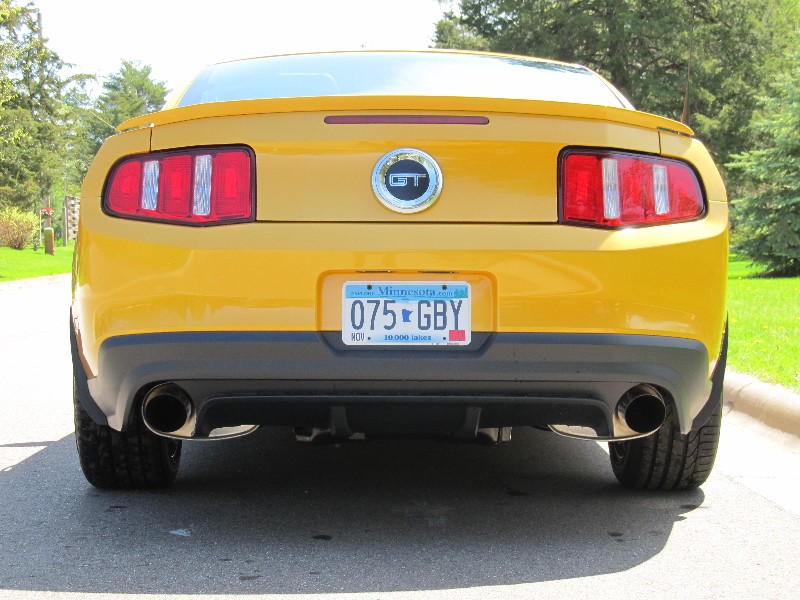
OK, we got'er done in about 3 hours. We did the rear first. If you're going to do axle backs and the rear valence, remove the valence first, then do the mufflers, it's MUCH easier.
Rear valence:
-Remove rear trunk liner. There are two push pins, and two thumb screws that hold it in. The push pins you just have to pull loose. Be careful and you can reuse them. Don't do it in the cold. Then, lift straight up. Disconnect the connector at the light.
-Remove the tail lights. Not sure if this was absolutely necessary, but it makes getting the bumper off much easier. Disconnect the connector, push the rubber grommet out of the hole. Remove the three nuts, pull straight back.
-Remove the rear wheels.
-Remove the screws that hold the valence on.
-Remove the push pins that hold the valence on. Note there are two in the center.
-Remove the white clips that hold the valence in the center. These might break, Ford gives you new ones with the new rear valence.
-Disconnect the wiring harness in the trunk that runs the running lights (center). Remove christmas tree clip. Push rubber grommet out.
That should be everything you need to loosen. The bumper just snaps on from there. Start at one corner of the car and work your way around to the center. Repeat on the other side. The four remaining clips in the center should now be removed. Remove the entire bumper assembly.
-Remove the now accessible remaining push pins.
-Remove the two christmas trees each side that go into the valence for the running light harness.
Start removing the valence from the bumper. Most of the slide in clips came out easy, the 4 center ones behind the license plate were kind of a pain, ended up having to do those with a screw driver, very carefully.
The new valence goes on in reverse order.
While the valence was off, I did the mufflers. Don't need to remove anything except the stock mufflers. A BIG waterpump pliers makes easy work pushing the pins out of the rubber hangers. I marked with a sharpie (so I could get the pipe in the exact same place on reassembly) the exhaust clamp on the drivers side by the crossover. Then loosen the clamp. On the pass side, the new muffler went in with little drama. The right muffler we wrestled with and finally gave up and lopped a 1/4" off the hanger without the nub on the end.
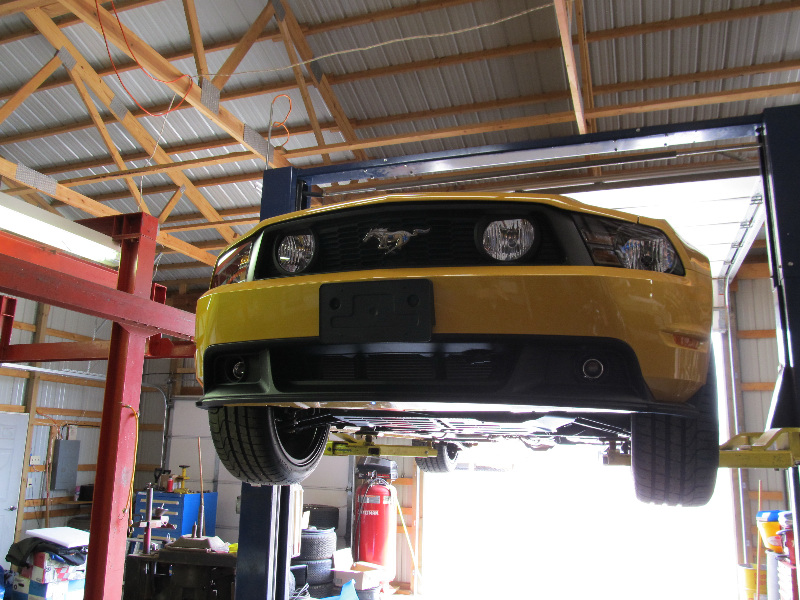
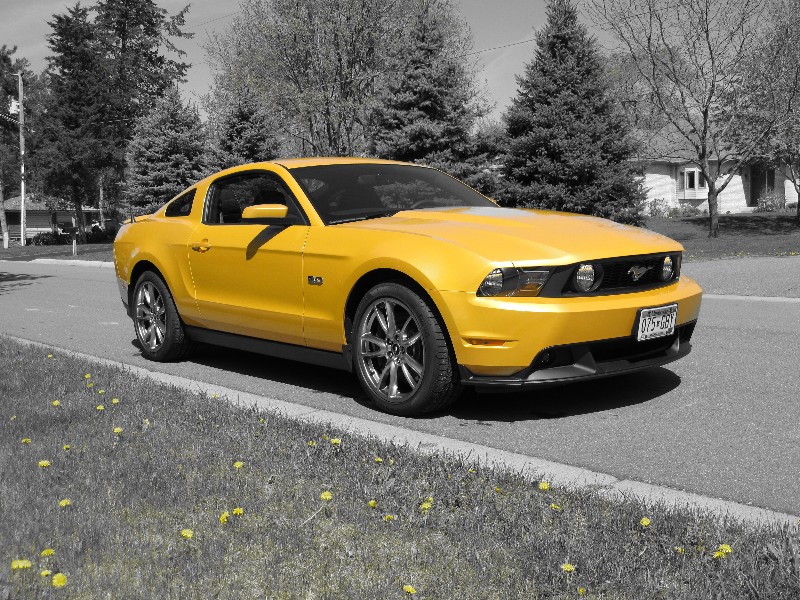
The front valence has been written up a couple of times, so I will skip the details, but it is stupid easy. The rear valence took us about 1.5 hours, the front took literally 20 minutes. The only hard part was getting the screws out that hold the valence vertically at the corners. An air ratchet with a screwdriver tip worked well enough tho. On reassembly, we purposely switched the phillips head screws with the 7MM hex head screws, do we could use a socket to tighten those screws back down.
Observations:
While a hoist is not necessary, it probably saved us 1/2 a day.
The right tools make all the difference (brother works for Mac Tools)
Disassembling a car with less than 100 miles on it feels kinda dirty
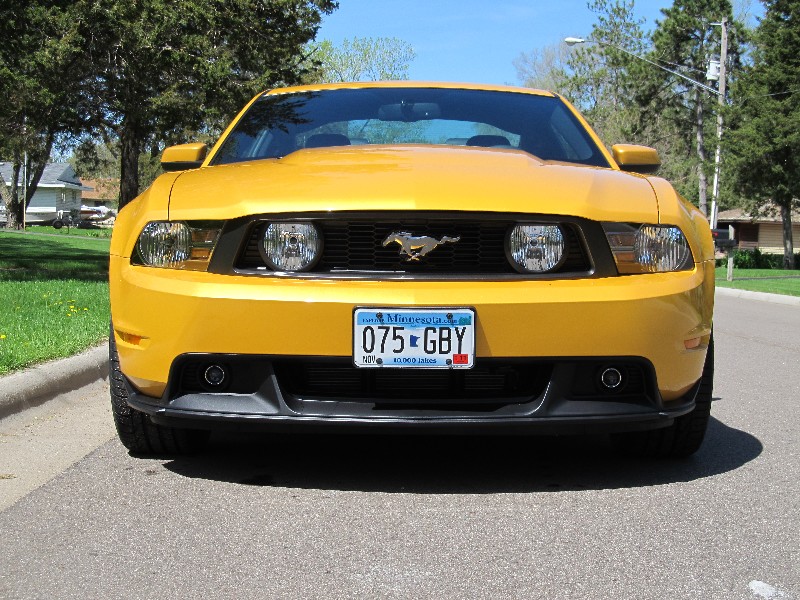
GT500s sound awesome, car looks nice. Will shoot some better pics once the weather lets the sun poke through.

Rear valence:
-Remove rear trunk liner. There are two push pins, and two thumb screws that hold it in. The push pins you just have to pull loose. Be careful and you can reuse them. Don't do it in the cold. Then, lift straight up. Disconnect the connector at the light.
-Remove the tail lights. Not sure if this was absolutely necessary, but it makes getting the bumper off much easier. Disconnect the connector, push the rubber grommet out of the hole. Remove the three nuts, pull straight back.
-Remove the rear wheels.
-Remove the screws that hold the valence on.
-Remove the push pins that hold the valence on. Note there are two in the center.
-Remove the white clips that hold the valence in the center. These might break, Ford gives you new ones with the new rear valence.
-Disconnect the wiring harness in the trunk that runs the running lights (center). Remove christmas tree clip. Push rubber grommet out.
That should be everything you need to loosen. The bumper just snaps on from there. Start at one corner of the car and work your way around to the center. Repeat on the other side. The four remaining clips in the center should now be removed. Remove the entire bumper assembly.
-Remove the now accessible remaining push pins.
-Remove the two christmas trees each side that go into the valence for the running light harness.
Start removing the valence from the bumper. Most of the slide in clips came out easy, the 4 center ones behind the license plate were kind of a pain, ended up having to do those with a screw driver, very carefully.
The new valence goes on in reverse order.
While the valence was off, I did the mufflers. Don't need to remove anything except the stock mufflers. A BIG waterpump pliers makes easy work pushing the pins out of the rubber hangers. I marked with a sharpie (so I could get the pipe in the exact same place on reassembly) the exhaust clamp on the drivers side by the crossover. Then loosen the clamp. On the pass side, the new muffler went in with little drama. The right muffler we wrestled with and finally gave up and lopped a 1/4" off the hanger without the nub on the end.
The front valence has been written up a couple of times, so I will skip the details, but it is stupid easy. The rear valence took us about 1.5 hours, the front took literally 20 minutes. The only hard part was getting the screws out that hold the valence vertically at the corners. An air ratchet with a screwdriver tip worked well enough tho. On reassembly, we purposely switched the phillips head screws with the 7MM hex head screws, do we could use a socket to tighten those screws back down.
Observations:
While a hoist is not necessary, it probably saved us 1/2 a day.
The right tools make all the difference (brother works for Mac Tools)
Disassembling a car with less than 100 miles on it feels kinda dirty
GT500s sound awesome, car looks nice. Will shoot some better pics once the weather lets the sun poke through.
Thread Starter
Member
Joined: January 30, 2011
Posts: 36
Likes: 0
Yeah, you really don't have to go down with anything. You should be able to get everything on your back. Make sure you have a helper though. The bodywork stuff would be **** near impossible with a second set of hands.
Bullitt Member
Joined: March 14, 2011
Posts: 415
Likes: 1
From: Orlando, FL
Alright cool, thanks for the info! Hopefully will order this stuff soon and it'll be here before my car lol
GTR Member
Joined: September 28, 2009
Posts: 6,284
Likes: 1
Taking the front bumper off is a breeze once you do it once. 5-10 minutes if you're taking your time.
Nice write ups. Going through these installs, you're roughly the same as I was in terms of time. I can mention, for those of you doing these without the help of a lift, using a set of ramps will make your life much easier as well. No need to jack the car up.
If you need further clarification, you can consult Roush's rear diffuser install, or LRS's CS lower fascia install for more detail.
Bullitt Member
Joined: March 14, 2011
Posts: 415
Likes: 1
From: Orlando, FL
I have about an inch of clearance on the plastic lip under the stock front bumber (a little more for the bumper itself). Does the gt/cs valance significantly reduce clearance? And about how much?
Cobra R Member
Joined: June 17, 2010
Posts: 1,666
Likes: 0
From: Southeastern Virginia
Man that thing looks great! Just exactly the mods I would like to do, but first I have to figure out whether I am keeping my car and if I replace it, whether it'll be with another Mustang.
Bullitt Member
Joined: January 18, 2011
Posts: 305
Likes: 0
From: TN
This mod goes so sweet with Yellow Blaze. Well done!
Bullitt Member
Joined: March 14, 2011
Posts: 415
Likes: 1
From: Orlando, FL
Okay thanks, I was just worried because it sticks out further than the stock bumper so it reduces the approach angle. I have to come up my driveway at an angle right now to keep from scraping the stock fascia. I actually just got back from a dealer near me where I took measurements of the CS fascia so i can do a cardboard cut-out to test with lol also had him start up a Shelby so i could hear the exhaust in person. I like how it keeps the low OE rumble at idle.

