2008 S-197 Gen 1 FORD MUSTANG Dark Candy Apple Red Picture Gallery
 6/24/13, 09:41 PM
#1
Mach 1 Member
Thread Starter
Join Date: June 22, 2013
Location: the beautiful "Shenandoah Valley of Virginia"
Posts: 577
Received 101 Likes
on
74 Posts
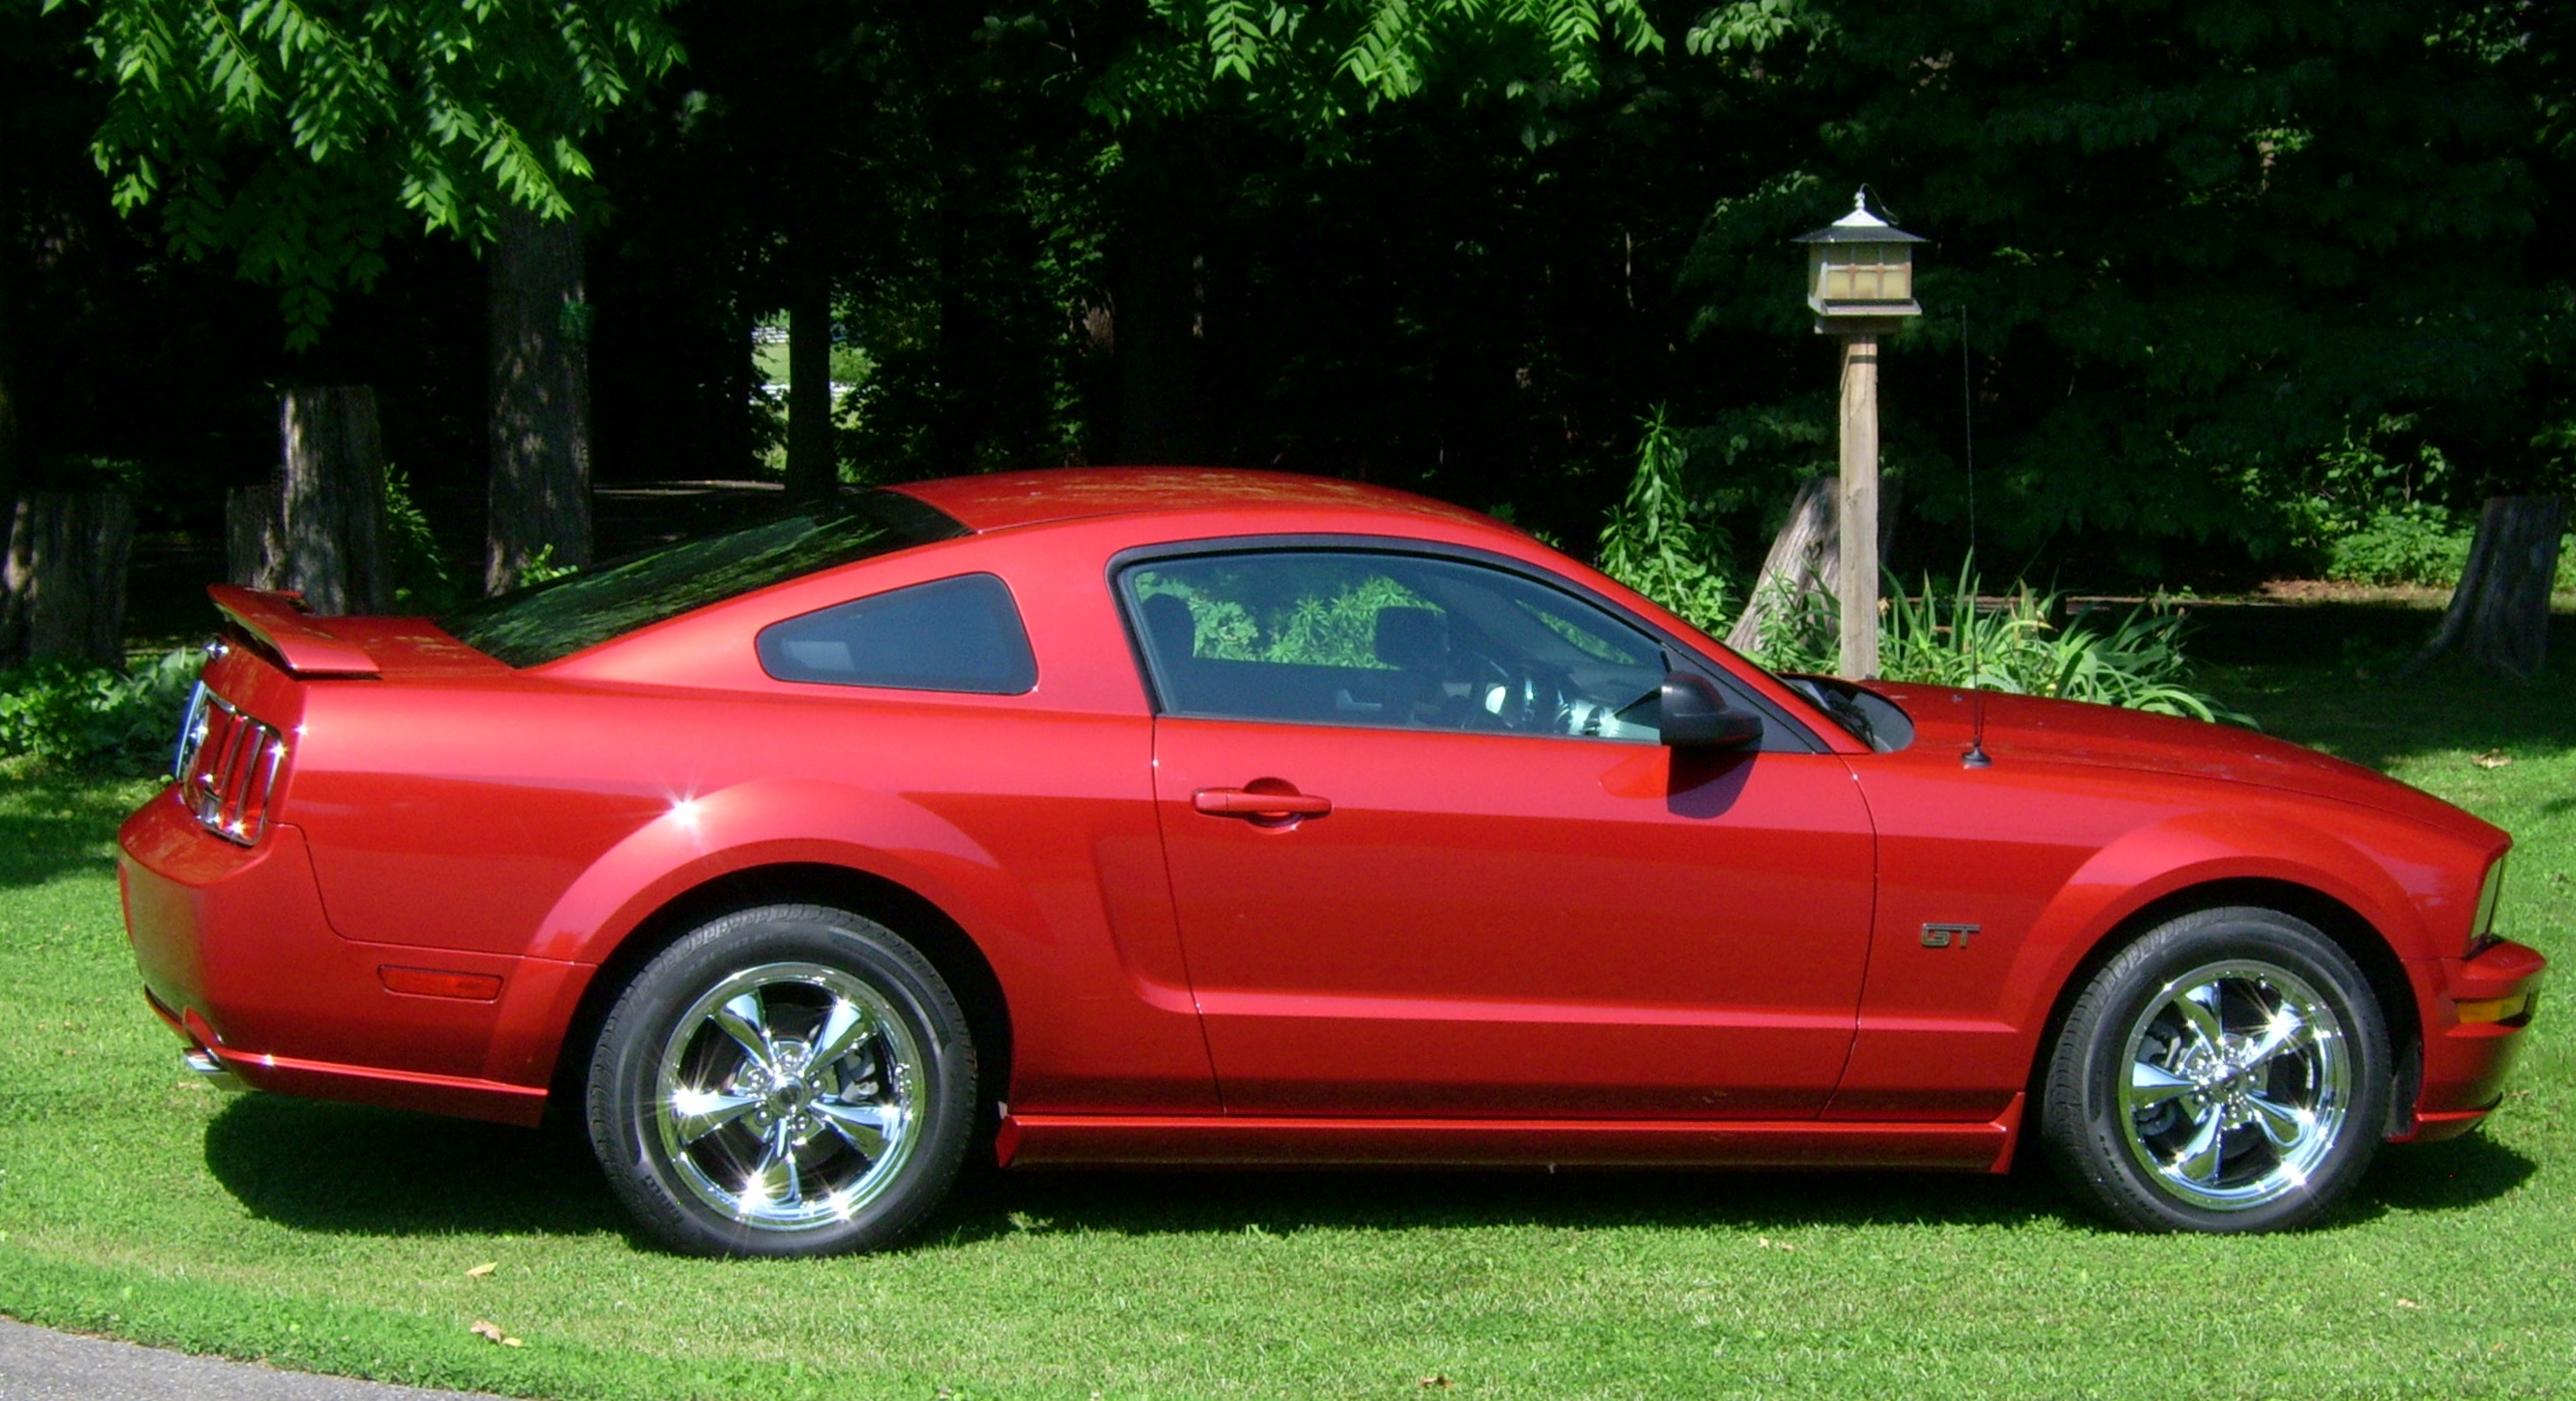
2008 S-197 Gen 1 FORD MUSTANG Dark Candy Apple Red Picture Gallery
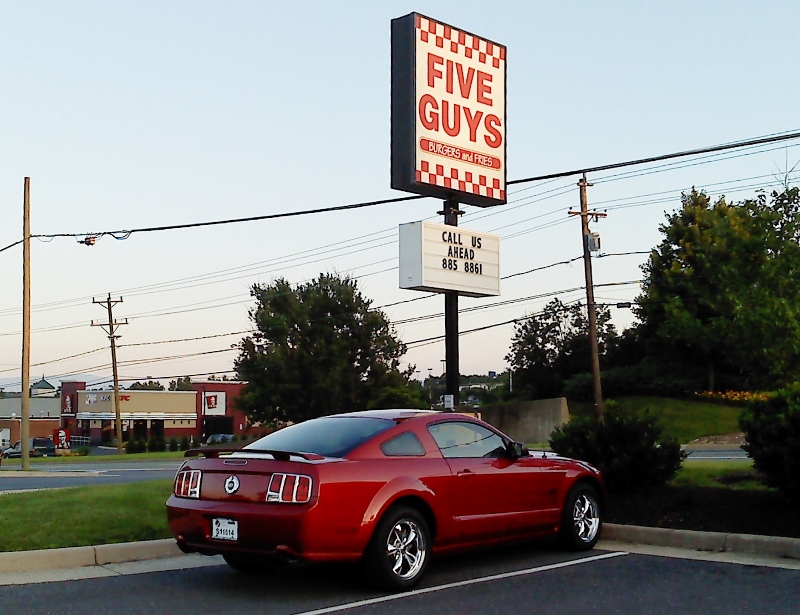
Here's a few pics of our "new to us" 2008 GT 5spd, it's been well taken care of and low mileage. With it's arrival, we now have something for every day .... too many, so one of my Thunderbirds will go.
Anyways .... It's dark candy apple red. We have been looking at Mustangs a long time, but the 2005-09s are our favorite late models.
She found this one the 17th and we bought it the 19th and brung it home ... it rained. Friday I did a quick wash and Saturday we both worked on it some, her in the interior and I did a better wash and wax.

Then we went for supper.
Anyways .... It's dark candy apple red. We have been looking at Mustangs a long time, but the 2005-09s are our favorite late models.
She found this one the 17th and we bought it the 19th and brung it home ... it rained. Friday I did a quick wash and Saturday we both worked on it some, her in the interior and I did a better wash and wax.


Then we went for supper.

Last edited by tbear853; 12/22/13 at 01:30 PM.
 6/25/13, 06:47 PM
#3
Mach 1 Member
Thread Starter
Join Date: June 22, 2013
Location: the beautiful "Shenandoah Valley of Virginia"
Posts: 577
Received 101 Likes
on
74 Posts
Thanks ... and she's definitely a keeper.

We met December 26, 1978 and married in August 1979, she has always loved cars. She had a Pontiac Trans Am when we met, I had a '67 Chevelle SS.
Back in 2009 I decided to pull the plug and put in my papers with the state after 31 plus years retiring effective 01-01-10, so in June 2009 she started pushing me towards a new truck ..... as my old truck is a '77 F150 4X4 I've had since 1986.
I started looking at 1990s models, she pushed for newer ..... I saw a lot of nice trucks at car lots up to 100 miles distance on days off, some nights we'd just go a different direction. Drove a few, almost bought one, then in August 2009 I was pulling through a lot at Christiansburg Motor Mile, saw my first Raptor there ...
..... and suddenly she shouted "there it is" .... and never having seen a Raptor before, thinking it looked like a strange steroid fed F150 I asked "Yeah, but what is it?" ....
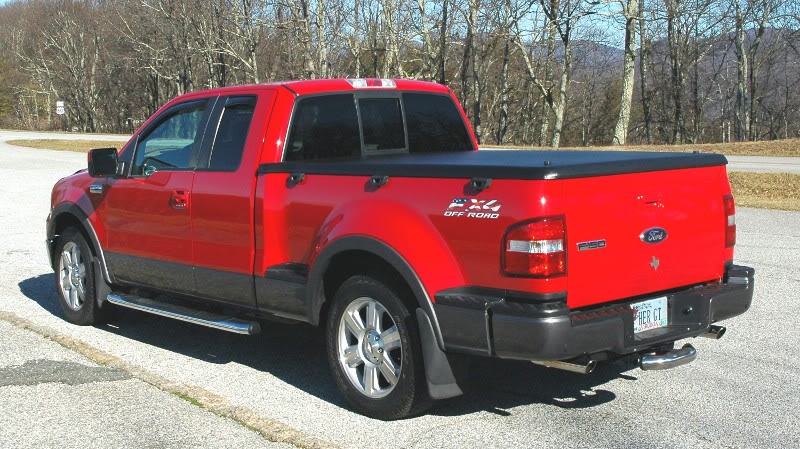
..... and then I looked over at her and she was pointing across the roadway at a Red 2007 F150 Supercab Flareside (stepside like) FX4.

We crossed the roadway for a closer look and it was sharp .... and of 50-60 or more trucks we had looked at, it was the only one she beat me out of the car to look at., she was excited that night (just like she did when she saw this Mustang last week!) and as we test drove it, I told her that with all the vehs we had, if we bought the truck it likely meant no Mustang and she said"That's OK, I'd rather have the truck" (hence my getting the "Her GT" tag later as a gag .... which she wants back now).
Now, many times she has said something in mixed company about how she loved Mustangs, but she never would agree to us getting one .... until now. We had a 1977 F150, 2001 Merc GM since Dec 2001, 1985, 1992 and 1995 Thunderbirds (1985 since near new), a 2003 Forester, and that night we added a 2007 F-150 FX4. (I later sold the 1985)
She really liked it when I lowered the truck a few inches.

Last edited by tbear853; 2/18/14 at 08:49 PM.
7/22/13, 11:16 PM
#4
Mach 1 Member
Thread Starter
Join Date: June 22, 2013
Location: the beautiful "Shenandoah Valley of Virginia"
Posts: 577
Received 101 Likes
on
74 Posts
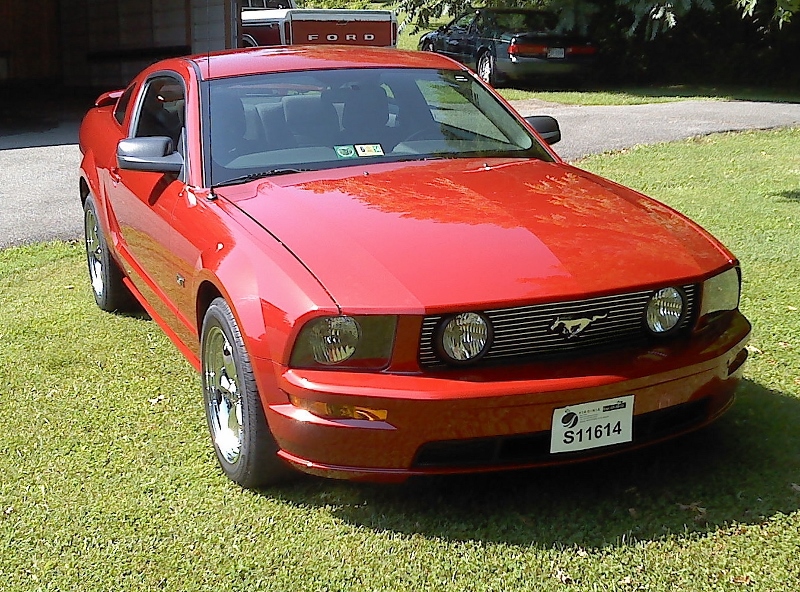
Well, recently ... since last posting .... the new DMV tags and title and such arrived at the car lot and I drove down and picked them up. The next day while she was at work, I went to our DMV and swapped the new generic tag to my 2007 FX4 and swapped the "HER GT" tags to the Mustang for the "Wife Unit" ....
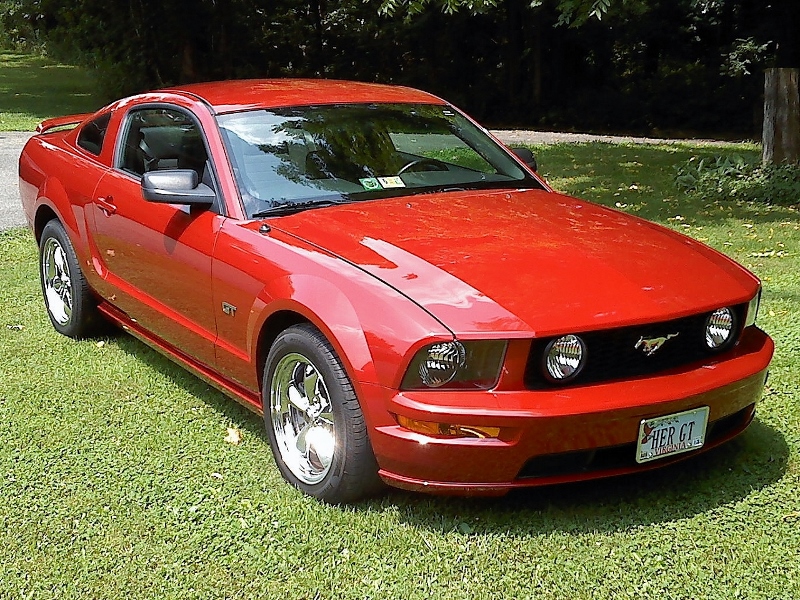
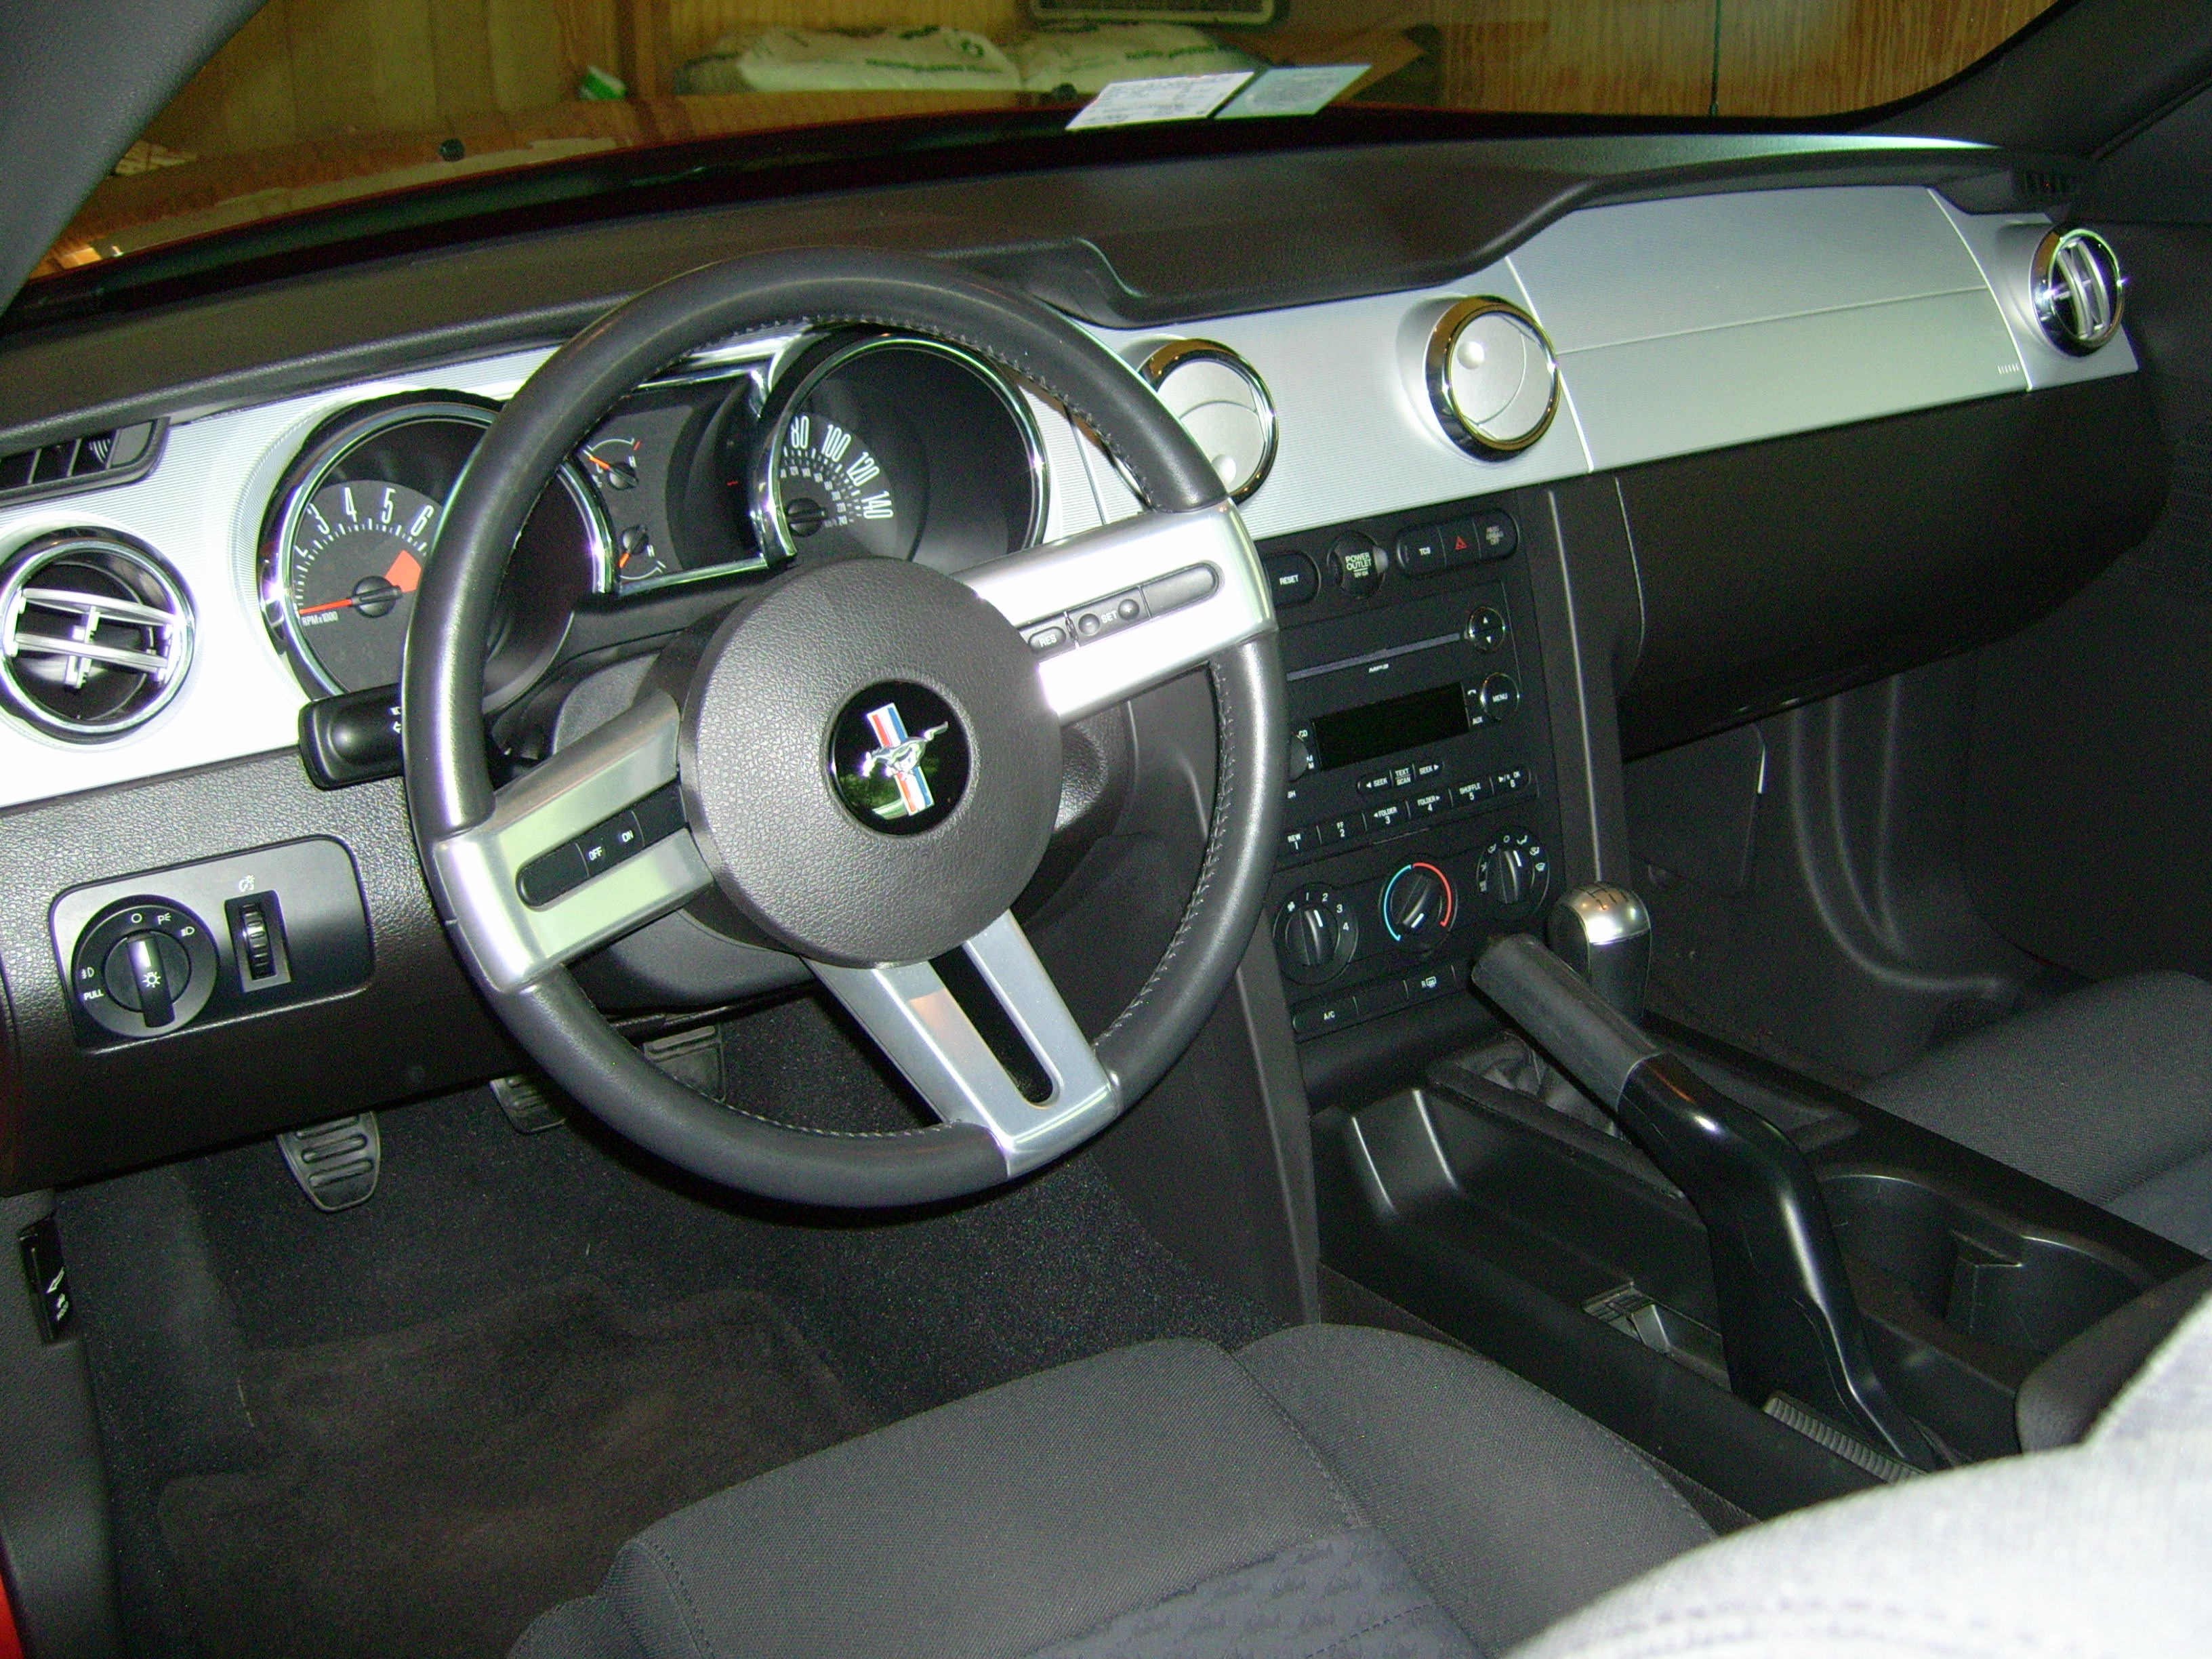
I also removed that "billet aluminum" grille overlay from the stock grille (hung it's 3 parts in basement) and I made a front tag lower mount to support the lower part of front tag .... and I installed a Hurst Billet Shifter.

I also removed that "billet aluminum" grille overlay from the stock grille (hung it's 3 parts in basement) and I made a front tag lower mount to support the lower part of front tag .... and I installed a Hurst Billet Shifter.
The following users liked this post:
tbear853 (12/29/20)
7/25/13, 06:19 PM
#7
Super Boss Lawman Member
I am on the F150Forums too. Have been a truck guy forever till recently. Still love the luxury of the F150, especially when you just wanna get somewhere in quiet style. They own the highway too. no trouble passing almost anything on the freeways.
8/28/13, 06:19 PM
#9
Mach 1 Member
Thread Starter
Join Date: June 22, 2013
Location: the beautiful "Shenandoah Valley of Virginia"
Posts: 577
Received 101 Likes
on
74 Posts
Looked a lot, looked at cars here, on the street, and googled a bunch. I never before realized so many styles of just simple stripes ....
.... so to start I ordered the 20 piece Lemans Stripes kit from Graphic Express yesterday ....
( http://www.graphic-express.com/k_lemans_racing_stripes.asp )
.... in Silver Metallic.
We'll see how it goes, may place a second order for the GT front bumber kit along with something on sides .... not sure yet.
Will post pics when they get on the car.
8/29/13, 11:41 PM
#10
Super Boss Lawman Member
Looked a lot, looked at cars here, on the street, and googled a bunch. I never before realized so many styles of just simple stripes ....
.... so to start I ordered the 20 piece Lemans Stripes kit from Graphic Express yesterday ....
( http://www.graphic-express.com/k_lemans_racing_stripes.asp )
.... in Silver Metallic.
We'll see how it goes, may place a second order for the GT front bumber kit along with something on sides .... not sure yet.
Will post pics when they get on the car.
.... so to start I ordered the 20 piece Lemans Stripes kit from Graphic Express yesterday ....
( http://www.graphic-express.com/k_lemans_racing_stripes.asp )
.... in Silver Metallic.
We'll see how it goes, may place a second order for the GT front bumber kit along with something on sides .... not sure yet.
Will post pics when they get on the car.
 9/12/13, 03:05 PM
#11
Mach 1 Member
Thread Starter
Join Date: June 22, 2013
Location: the beautiful "Shenandoah Valley of Virginia"
Posts: 577
Received 101 Likes
on
74 Posts
Nice choice. I went for the similar stripes on mine. I hope you like them.
http://i1235.photobucket.com/albums/...ps702fd8f7.jpg
http://i1235.photobucket.com/albums/...ps702fd8f7.jpg
Those look great .... I'll have to share the side stripes with the "Wife Unit" for her input ..... where did they come from if I may ask?

Maybe I overlooked them at Graphic Express?
 9/12/13, 10:42 PM
#12
Super Boss Lawman Member
I had a graphic shop custom design and apply the stripes based on the 2013 shelby. He simply removed the 500 from the sides and stretched out the GT letters. He did a superior job to most kits or factory applied.
9/14/13, 07:04 PM
#13
Mach 1 Member
Thread Starter
Join Date: June 22, 2013
Location: the beautiful "Shenandoah Valley of Virginia"
Posts: 577
Received 101 Likes
on
74 Posts
He did a great job for you, unique and looking good! 
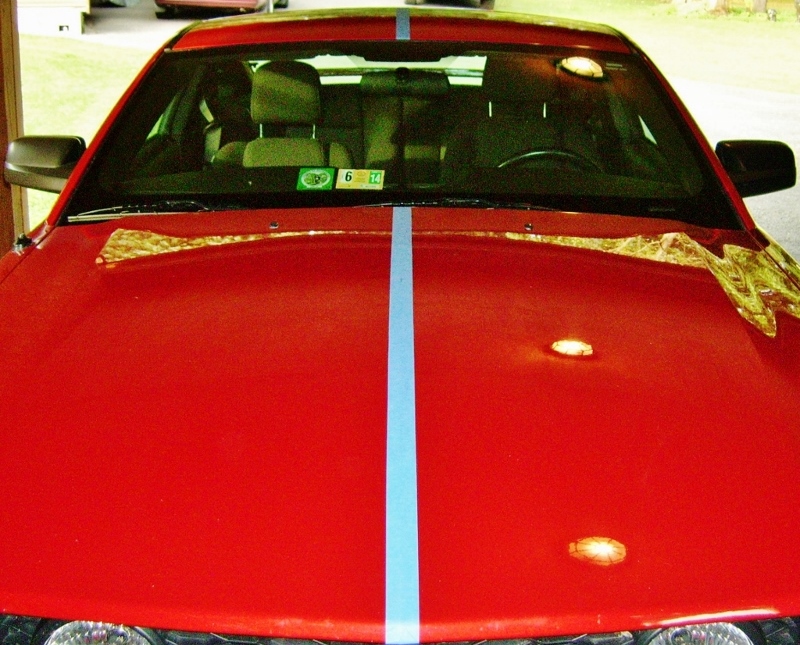
Sunday I started with preliminary steps to install my Silver Metalic Le Mans stripe set from Graphic Express ( http://www.graphic-express.com/00-ford_motor_company.asp ) and found out that finding and marking a dead straight dead center guide stripe isn't so "fast and easy" if you really want it straight and centered. I ran out of time and then I worked today, but I have a 1.44" wide ( they don't sell 1.5" wide tape here no more ) blue center stripe that is straight and centered as desired.
I completely lined the back side of a flexible aluminum 36" long "yardstick" with a couple layers masking tape to not scratch the car and and used masking tape to mark on, finding center in about 5 places on the hood, 4 on the roof, and a few out back. Then I measured 3/4" off either side, and placed short pieces masking on each side, then used the yard stick to make sure my marks all agreed.
Do not put weight on roof when leaning over it from a stool.
I used a lot of masking on both right and left sides of hood, roof, trunk to mark consistent measure points as edges are no parallel. Finally ..... several hours later I have a super straight and perfectly centered 1.44" wide blue masking tape center stripe.


Last edited by tbear853; 9/17/13 at 03:47 PM.
9/17/13, 12:18 PM
#14
Super Boss Lawman Member
He did a great job for you, unique and looking good!
Sunday I started with preliminary steps to install my Silver Metalic Le Mans stripe set from Graphic Express ( http://www.graphic-express.com/00-ford_motor_company.asp ) and found out that finding and marking a dead straight dead center guide stripe isn't so "fast and easy" if you really want it straight and centered. I ran out of time and then I worked today, but I have a 1.44" wide ( they don't sell 1.5" wide tape here no more ) blue center stripe that is straight and centered as desired.
I completely lined the back side of a flexible aluminum 36" long "yardstick" with a couple layers masking tape to not scratch the car and and used masking tape to mark on, finding center in about 5 places on the hood, 4 on the roof, and a few out back. Then I measured 3/4" off either side, and placed short pieces masking on each side, then used the yard stick to make sure my marks all agreed.
Do not put weight on roof when leaning over it from a stool.
I used a lot of masking on both right and left sides of hood, roof, trunk to mark consistent measure points as edges are no parallel. Finally ..... several hours later I have a super straight and perfectly centered 1.44" wide blue masking tape center stripe.

 9/17/13, 03:51 PM
#15
Mach 1 Member
Thread Starter
Join Date: June 22, 2013
Location: the beautiful "Shenandoah Valley of Virginia"
Posts: 577
Received 101 Likes
on
74 Posts
There was when I finished the post ..... not sure what happened, but it's fixed.
I wanted to install the stripes starting tonight but it's gonna get into low 40s here and instructions say no lower than 45 for 48 hours .... so I hope to start the actual install tomorrow evening and maybe finish Thursday when I get off early. It surprised me how long the layup took ..... LOL.
This part time job in my retirement has me working 35-40 hours a week ..... the store is short handed it seems.
I just want to say ..... "LOVELY BIKE!" .... like them Ducs.
http://i1235.photobucket.com/albums/...16d1d4.jpg?895


Last edited by tbear853; 9/17/13 at 03:57 PM.
9/21/13, 11:59 PM
#17
Mach 1 Member
Thread Starter
Join Date: June 22, 2013
Location: the beautiful "Shenandoah Valley of Virginia"
Posts: 577
Received 101 Likes
on
74 Posts
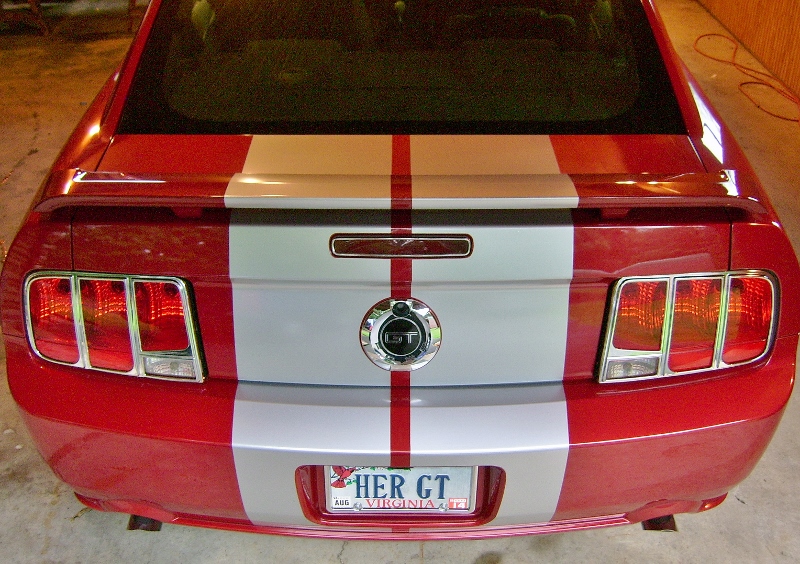
Well, on Thursday 09-19-13 I got off work early enough that when I got home I assembled my tools and app mix and tackled the smaller stripe parts back at the rear .... 14 pieces of 20 went back here. I have a few small bubbles like under the spoiler where I can't smooth them and a few in that first piece that fits between the tail lights ..... if the sun don't fix them I may install one of the black honey comb filler panels ..... still thinking on that.
I think it would look great ..... maybe someone with photoshop can show me?
Getting the trunk pieces in place accurately even under the spoiler was a real trick .... I'm still not sure how I did it but suddenly, they were in place correctly.
On the spoiler, I slid the narrow rear pieces up and let them lap over on top of the spoiler and then laid the top pieces to overlap on top. That was in reverse of what the instructions said, but I wanted the front leading edge of the spoiler covered too and some overlap, not simple "butt" joints.
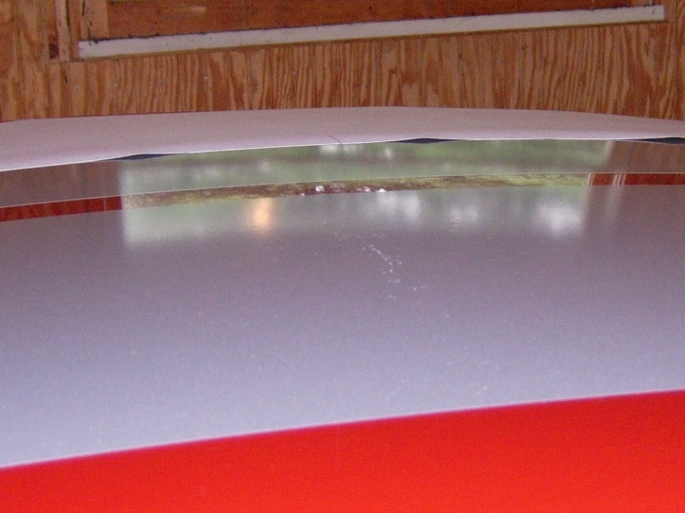
Then on Saturday 09-21-13 I tackled the rest, starting with the roof. Sad part is when I pulled my rolled up stripes out, seems somehow the roof pieces had buckled or bunched up and I'm not able to swear I didn't do it in rerolling them Thursday night.

Since I had already installed some of the stripe set, I decided to try to make the best of them, and the pass side came out OK, the drivers side roof has a few small wrinkles across the center where that wrinkle or bunched up part was .... worked awhile on it .... if the sun doesn't help smooth them few wrinkles I'll get a replacement set of just the roof stripes from Graphic Express (likely on "my dime", though the longer hood stripes rolled up with them came out perfect .... I just don't see how I did that, but can't say I didn't?)
When installing these, besides lots of the wetting "Splash" solution, I held up the half while I squeegeed the other half .... pausing to add wet stuff. Then I worked towards the front squeegeeing as I went along easing stripe into position. I had already made several marks on masking release tape backing and blue masking.
Anyway, "Wife Unit" says I only notice it because I'm looking for it and that I should give it some time before pulling the stripe off for a redo, and Graphics Express says "Please be patient" .... so maybe they will get better with some time? We'll see.
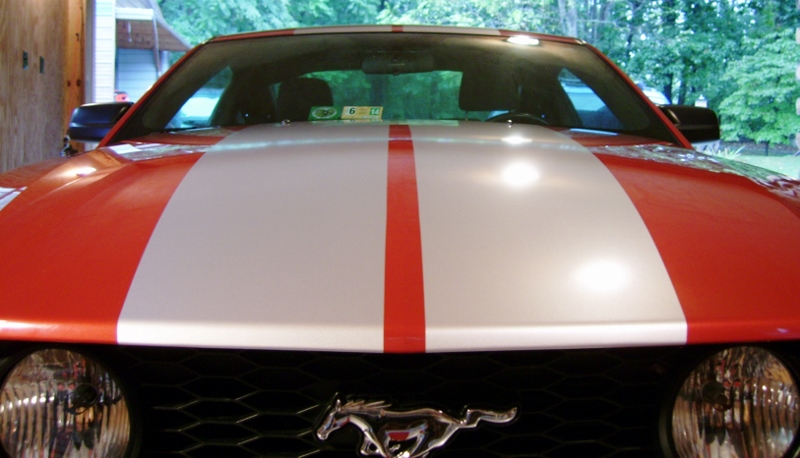
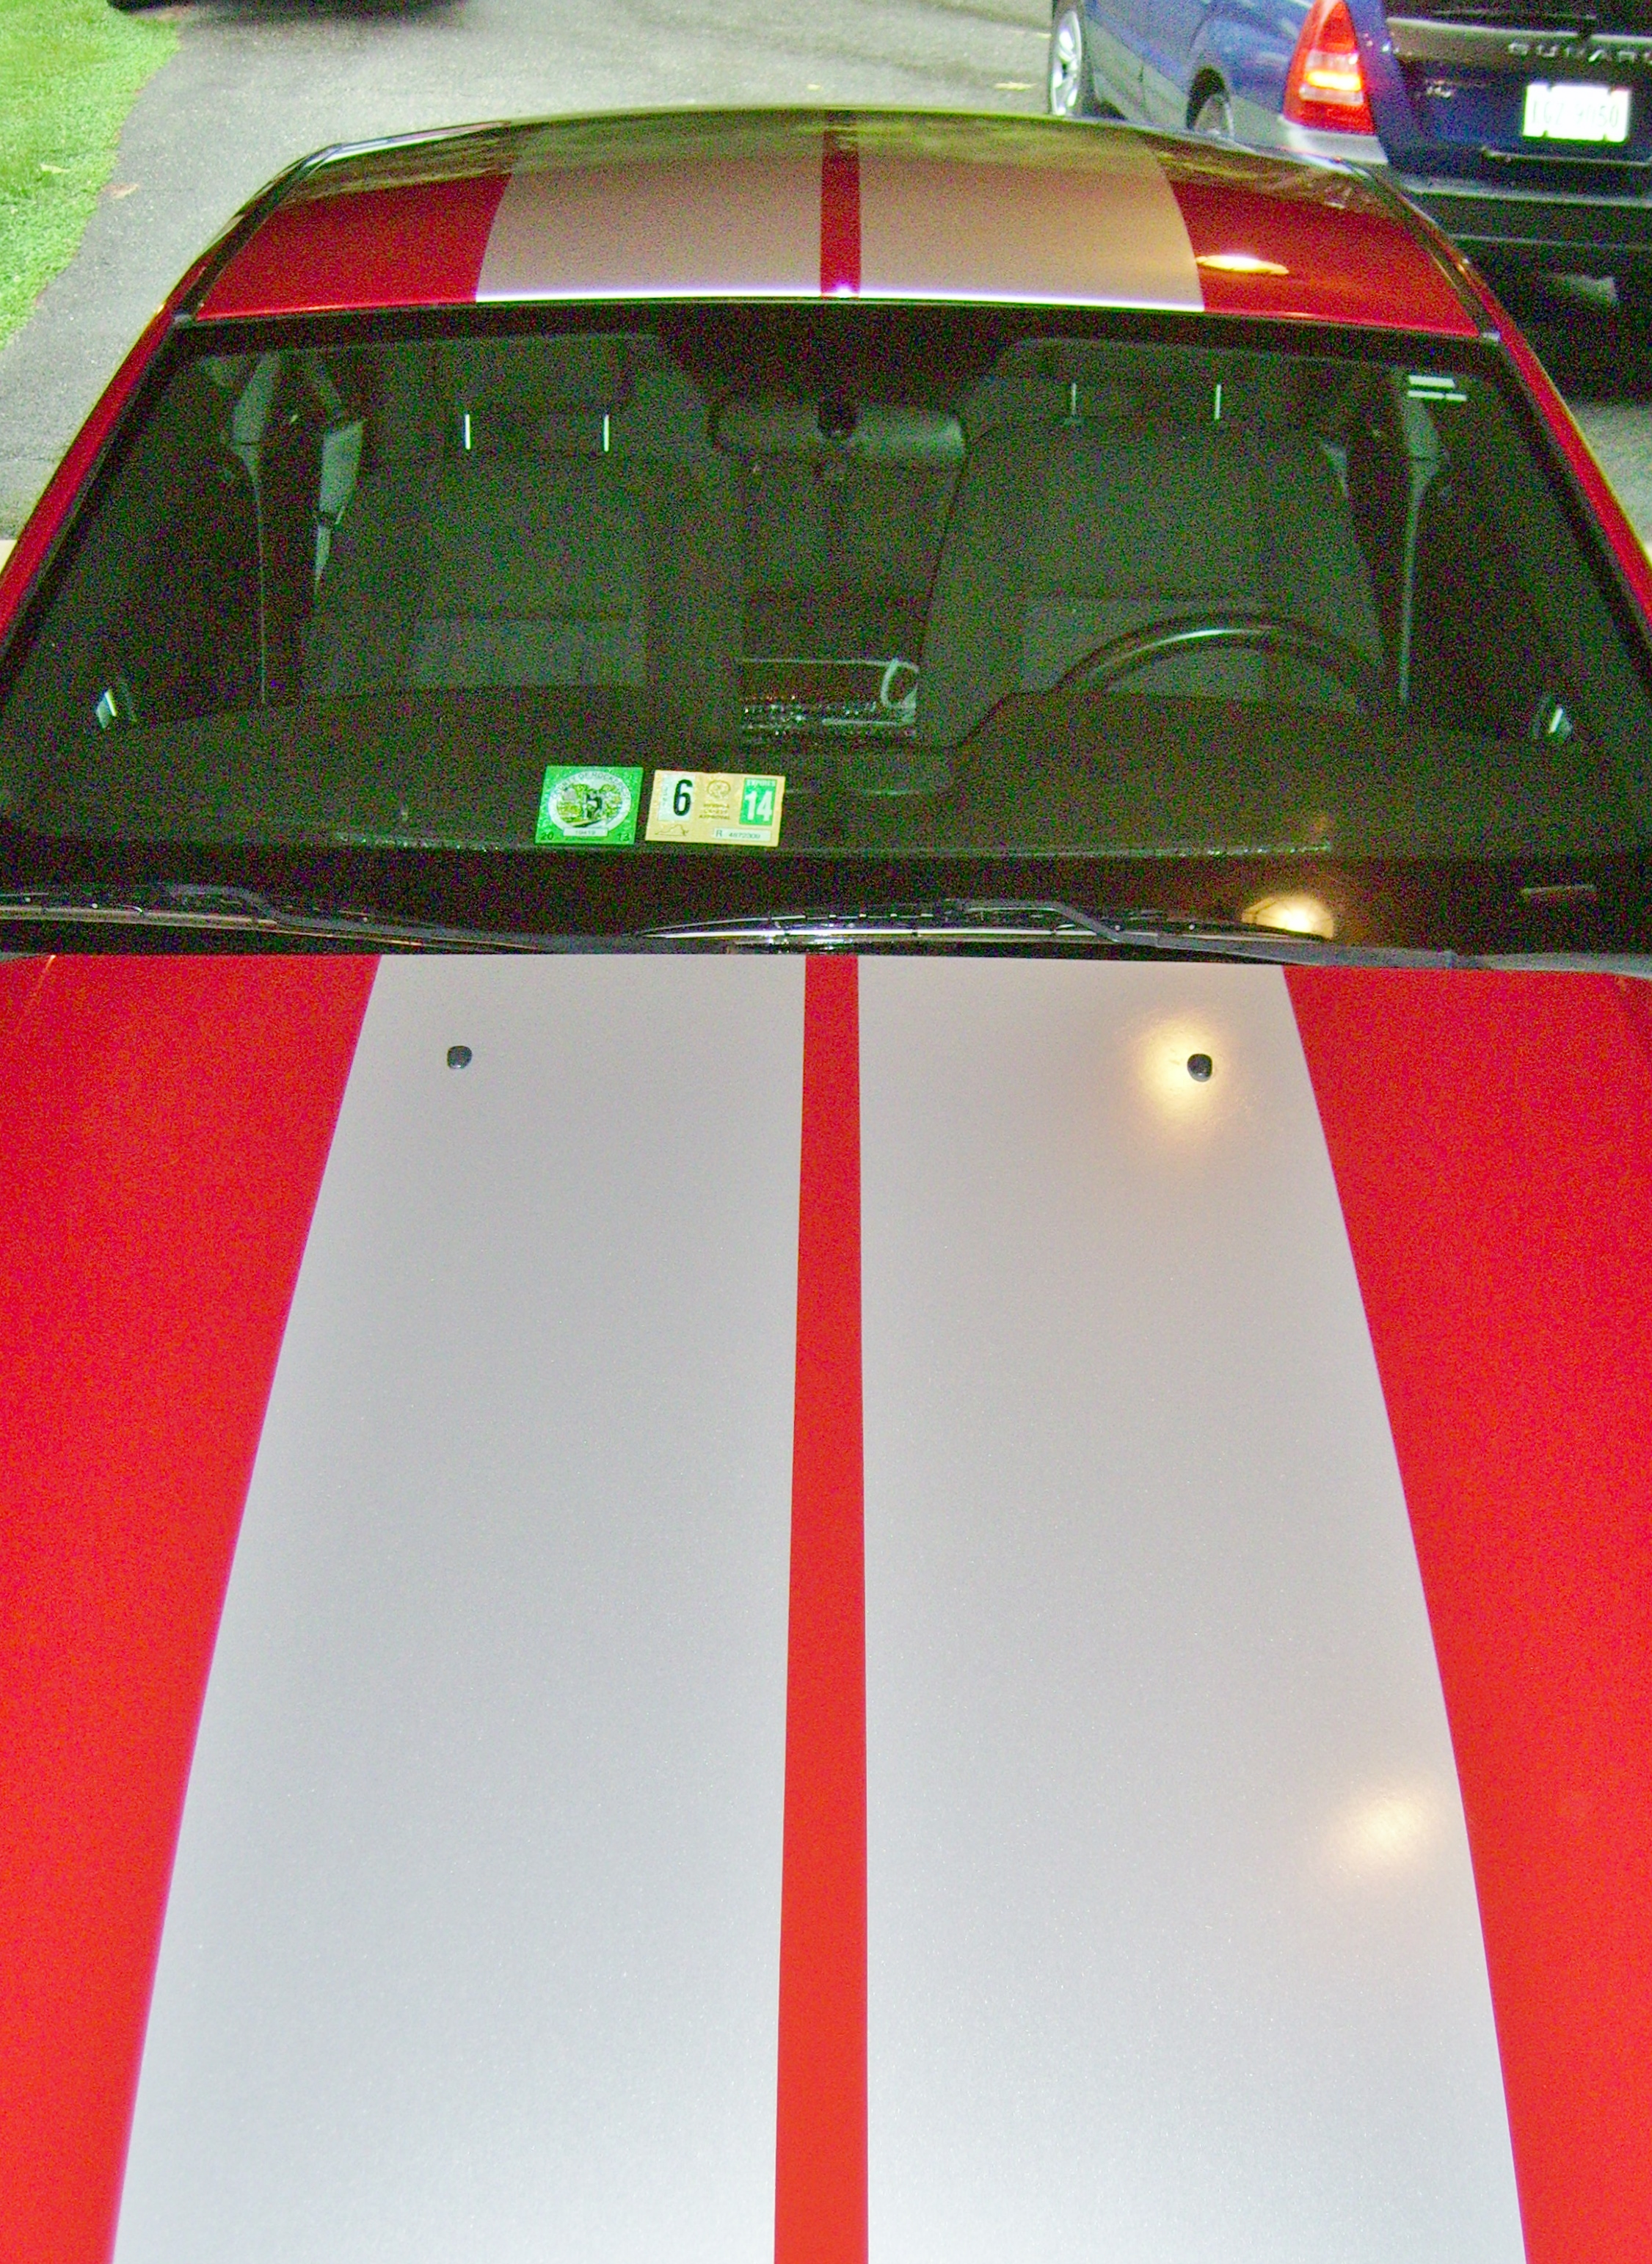
Wife did help when I did the hood, and again I had trim ed the sheets to the edge along the side where they set against the 1.44" wide blue center stripe guide. I held off maybe 1/32. I must say the "Wife Unit" 's help was absolutely necessary on the longer hood pieces .... and they came out virtually wrinkle and bubble free ..... near prefect .... and measure almost exactly 1-1/2" apart their whole length.
I used about 1/2 gallon of that "Splash" liquid I mixed (8 oz "Splash" with 120 oz water = 1 gallon or 128 oz.) .... so I have enough for redoing the roof if I do .... and I likely will and whatever side stripes we decide on.
Over all, I am pleased .... I'm willing to give the sun some time to help.
To anyone doing their own, use a lot of wet stuff and follow directions ..... and clean all wax with a clean microfiber towel and Naphtha ..... t-hey say 10 times with a clean towel each time.
EDITED 01-08-2021:
Just wanted to throw in for anyone interested, the bubbles completely cured them selves within a few month's time, even on the roof. I know it's been 6 or 7 years now, lot of good it does now., but I was looking for a post, read back through, and realized I never did post an update on the stripes & the bubbles. Yeah, they healed.
I think it would look great ..... maybe someone with photoshop can show me?
Getting the trunk pieces in place accurately even under the spoiler was a real trick .... I'm still not sure how I did it but suddenly, they were in place correctly.
On the spoiler, I slid the narrow rear pieces up and let them lap over on top of the spoiler and then laid the top pieces to overlap on top. That was in reverse of what the instructions said, but I wanted the front leading edge of the spoiler covered too and some overlap, not simple "butt" joints.

Then on Saturday 09-21-13 I tackled the rest, starting with the roof. Sad part is when I pulled my rolled up stripes out, seems somehow the roof pieces had buckled or bunched up and I'm not able to swear I didn't do it in rerolling them Thursday night.

Since I had already installed some of the stripe set, I decided to try to make the best of them, and the pass side came out OK, the drivers side roof has a few small wrinkles across the center where that wrinkle or bunched up part was .... worked awhile on it .... if the sun doesn't help smooth them few wrinkles I'll get a replacement set of just the roof stripes from Graphic Express (likely on "my dime", though the longer hood stripes rolled up with them came out perfect .... I just don't see how I did that, but can't say I didn't?)
When installing these, besides lots of the wetting "Splash" solution, I held up the half while I squeegeed the other half .... pausing to add wet stuff. Then I worked towards the front squeegeeing as I went along easing stripe into position. I had already made several marks on masking release tape backing and blue masking.

Anyway, "Wife Unit" says I only notice it because I'm looking for it and that I should give it some time before pulling the stripe off for a redo, and Graphics Express says "Please be patient" .... so maybe they will get better with some time? We'll see.
Wife did help when I did the hood, and again I had trim ed the sheets to the edge along the side where they set against the 1.44" wide blue center stripe guide. I held off maybe 1/32. I must say the "Wife Unit" 's help was absolutely necessary on the longer hood pieces .... and they came out virtually wrinkle and bubble free ..... near prefect .... and measure almost exactly 1-1/2" apart their whole length.


I used about 1/2 gallon of that "Splash" liquid I mixed (8 oz "Splash" with 120 oz water = 1 gallon or 128 oz.) .... so I have enough for redoing the roof if I do .... and I likely will and whatever side stripes we decide on.
Over all, I am pleased .... I'm willing to give the sun some time to help.
To anyone doing their own, use a lot of wet stuff and follow directions ..... and clean all wax with a clean microfiber towel and Naphtha ..... t-hey say 10 times with a clean towel each time.
EDITED 01-08-2021:
Just wanted to throw in for anyone interested, the bubbles completely cured them selves within a few month's time, even on the roof. I know it's been 6 or 7 years now, lot of good it does now., but I was looking for a post, read back through, and realized I never did post an update on the stripes & the bubbles. Yeah, they healed.
Last edited by tbear853; 1/7/21 at 10:29 PM.
The following users liked this post:
tbear853 (8/2/21)
9/22/13, 04:42 PM
#20
Mach 1 Member
Thread Starter
Join Date: June 22, 2013
Location: the beautiful "Shenandoah Valley of Virginia"
Posts: 577
Received 101 Likes
on
74 Posts

The pieces on the roof look better as well, the pass side almost OK too .... but that driver's side stripe still shows enough that if not cleared up in a month or so, I'll replace it because it's directly in line with where I look across at my wife as getting in or out and it just bugs me ..... even if no one else ever notices.

Thank You, and I like their product as well. I am gonna order some side stripes as the wife says she wants them, so I'll likely order roof replacement stripes as well .... and I may get some for accents for one of the T-birds.
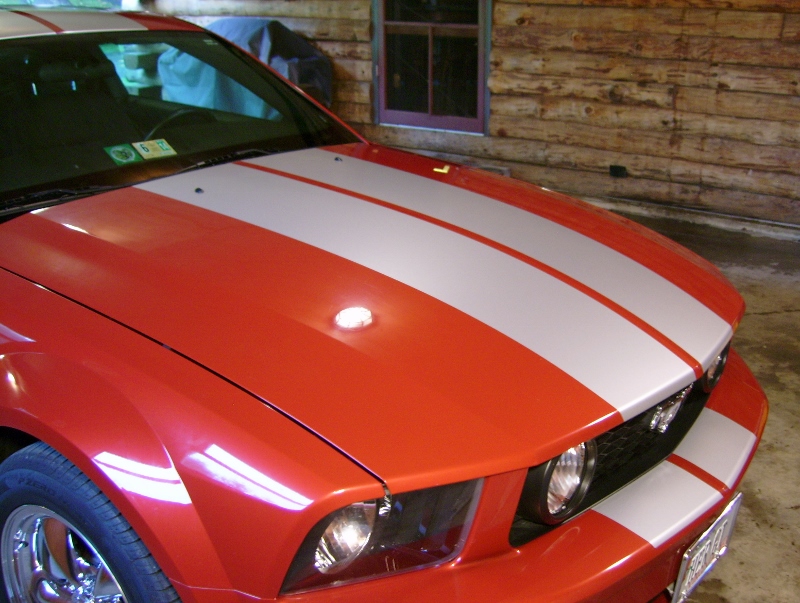
Here are a few pics today, evening light .... for anyone looking at Silver Metallic Stripes on a Dark Candy Apple Red Mustang (very last one was with flash which lit up reflectors).


Last edited by tbear853; 9/22/13 at 06:39 PM.