Metra amplified antenna install
 12/25/06, 08:45 PM
#1
Thread Starter

Metra amplified antenna install
Metra amplified antenna install
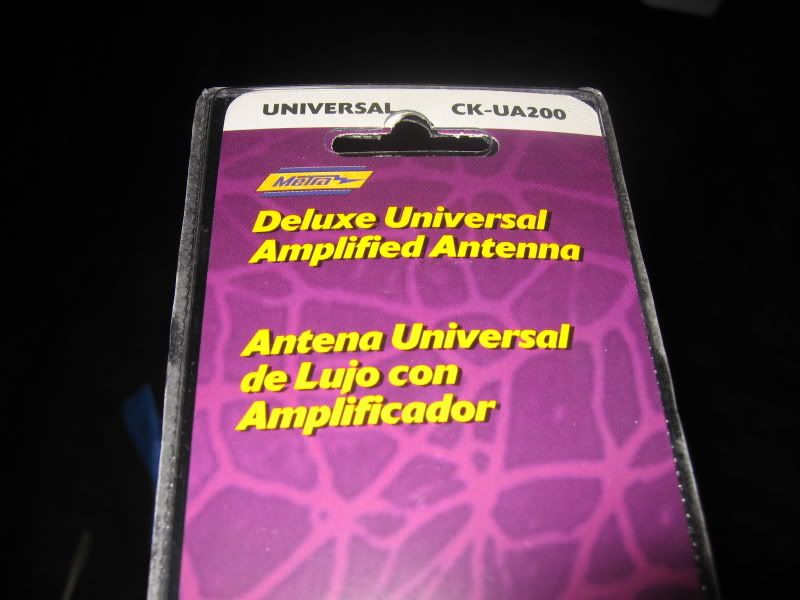
This kit can be found at Autozone for around $20.
After installing my UPR stubby antenna, my reception was limited to only a couple radio stations. Since I mostly listen to CD's, it really didn't bother me. But, after seeing how simple and effective on how this amplified antenna works from Leo (Leo_06GT), I had to get one myself. So, this is how I installed it:
Unscrew the shift **** by grasping right below the silver washer at the base of the **** (otherwise the whole boot will start to twist).
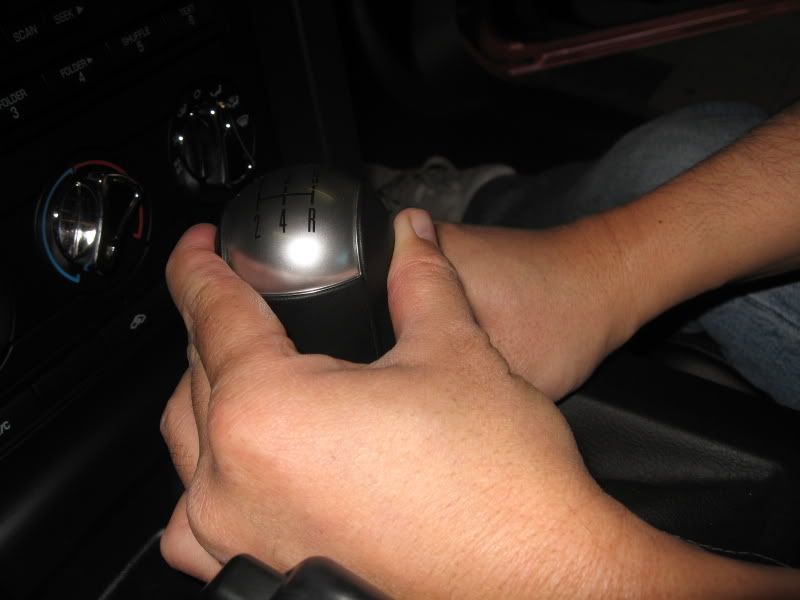
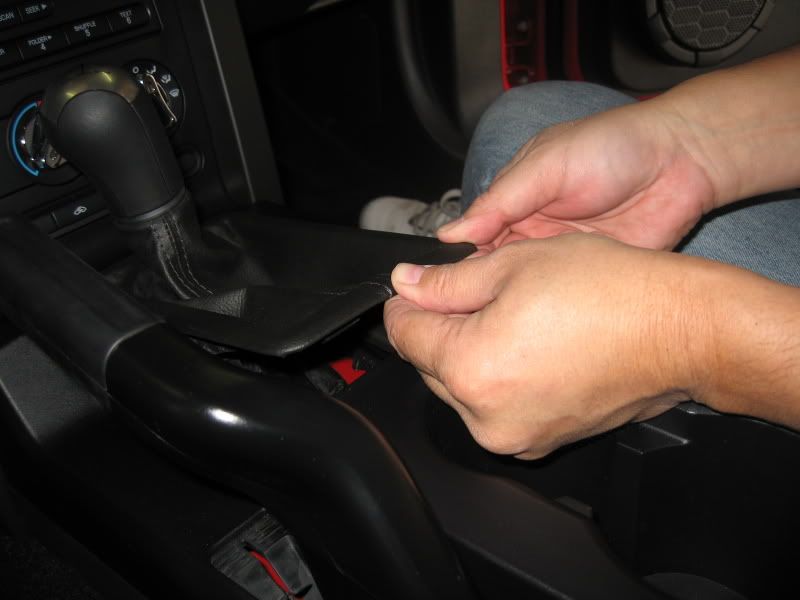
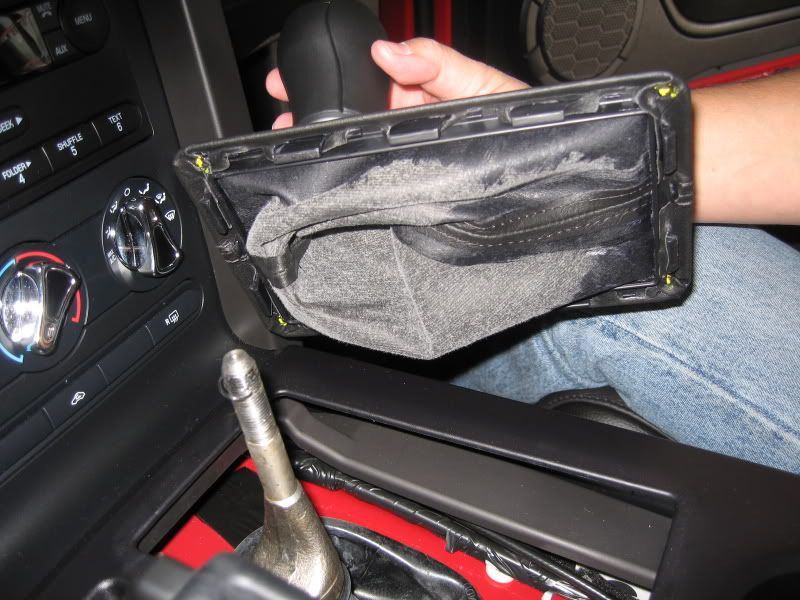
Once unscrewed, lift up the boot trim ring (it un-snaps pretty easily). Remove the ****/boot assembly and set aside.
EDIT: 03-14-08
SEE POST 61 ON THE MGW SHIFTER INSTALL FOR SPECIAL INSTRUCTIONS FOR THOSE WITH THE AMBIENT LIGHTING OPTION.
Remove the 2 screws at the base of the center armrest.

From here on out, use care when dealing with all the plastic stuff to avoid scratches, cracks, etc.
Lift up the forward section of the console where the shifter is.
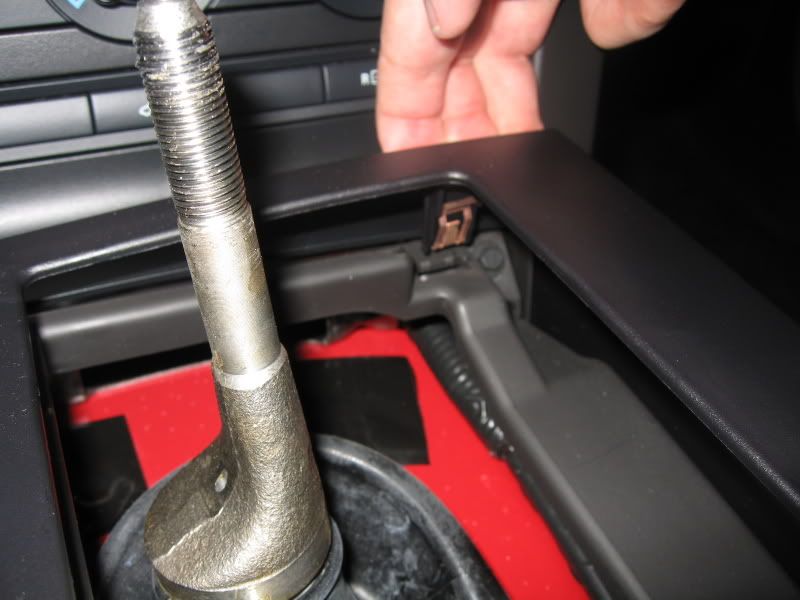
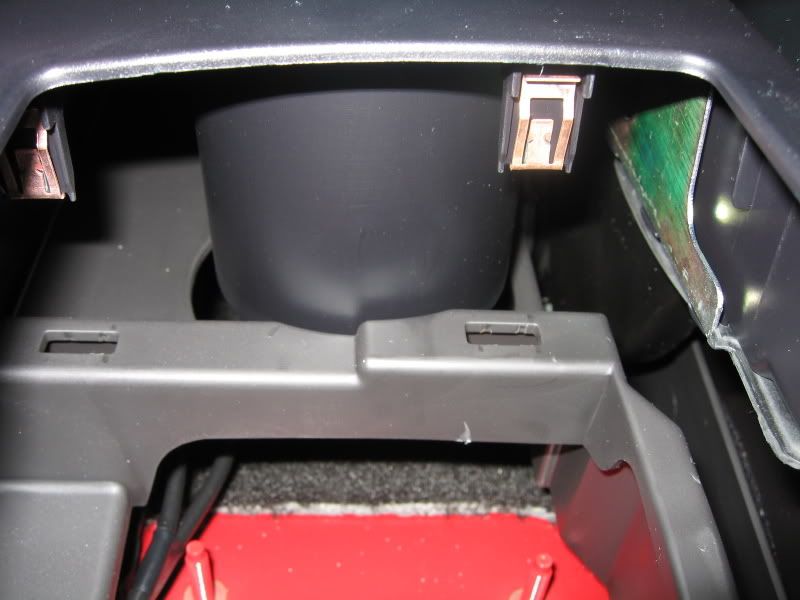
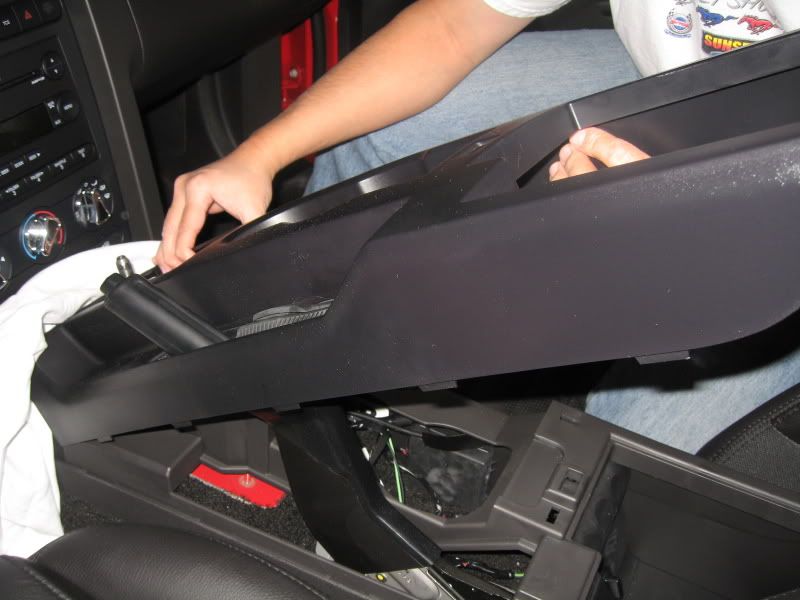
Then unsnap the rear section where the cup holders are.
Carefully lift the center armrest console out. Raising the e-brake as high as it will go will help. As you see in the pic, I placed a rag at the forward section of the console to avoid scratching.
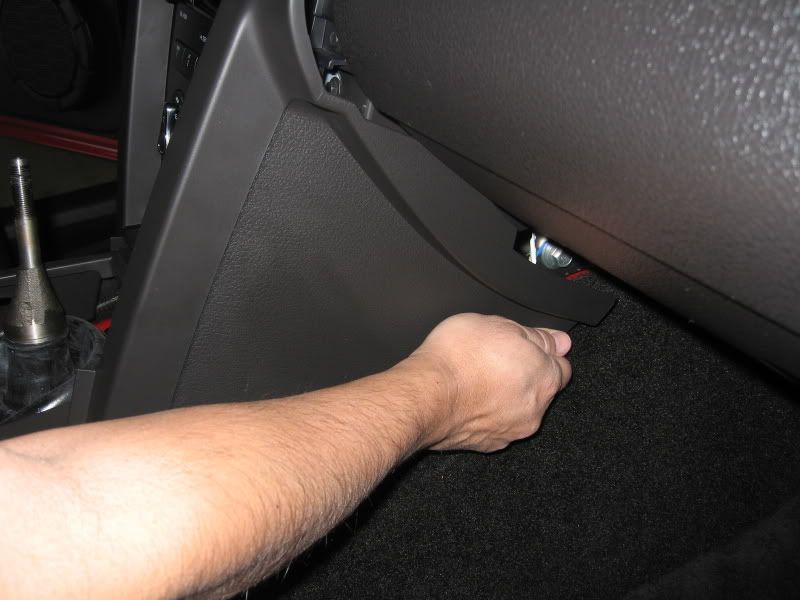
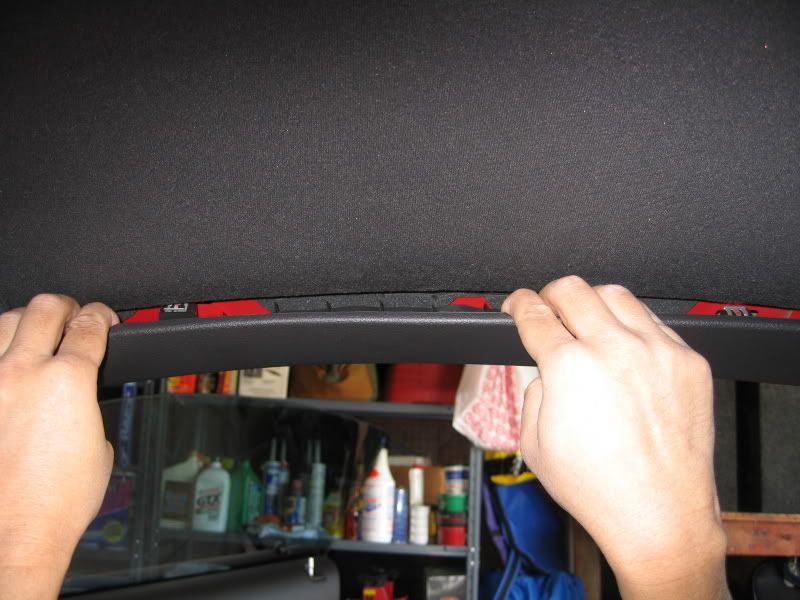
Once the armrest console is out, its time to remove both left and right 'sail' panels adjacent to the center console. Simply grasp the lower section and pull straight back toward the rear.
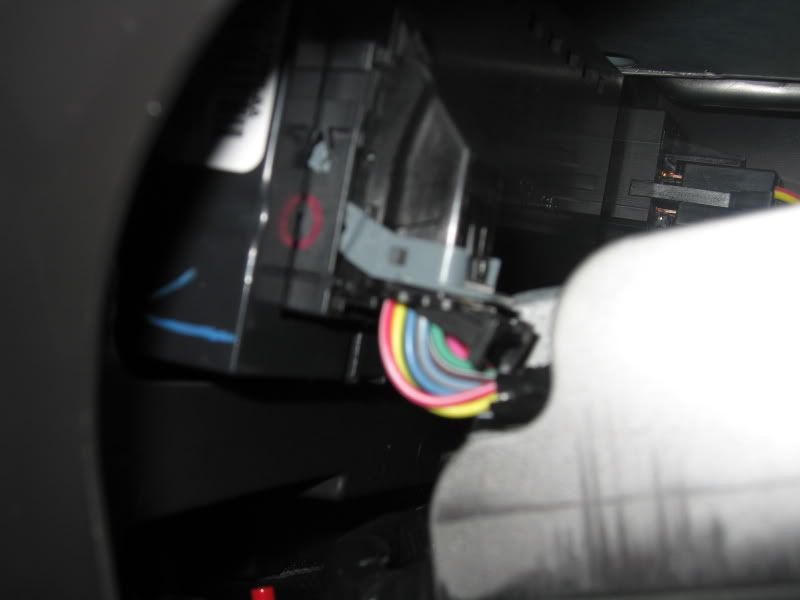
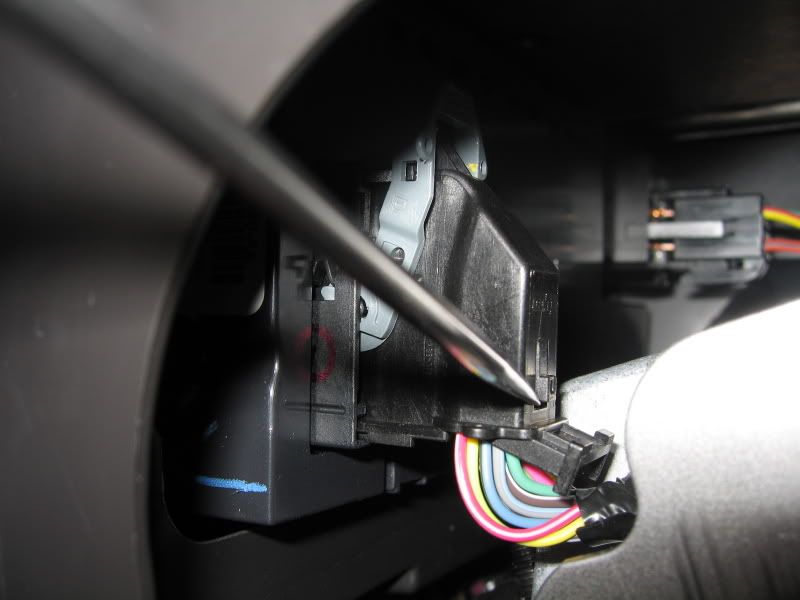
This part is a bit of a pain… unplug the 2 wiring harnesses that are behind the A/C and rear defroster switches.
Tip: The plug behind the defroster has a gray lever. A release button must be depressed before attempting to raise the gray lever all the way up to release the plug.
The A/C has a release button only.

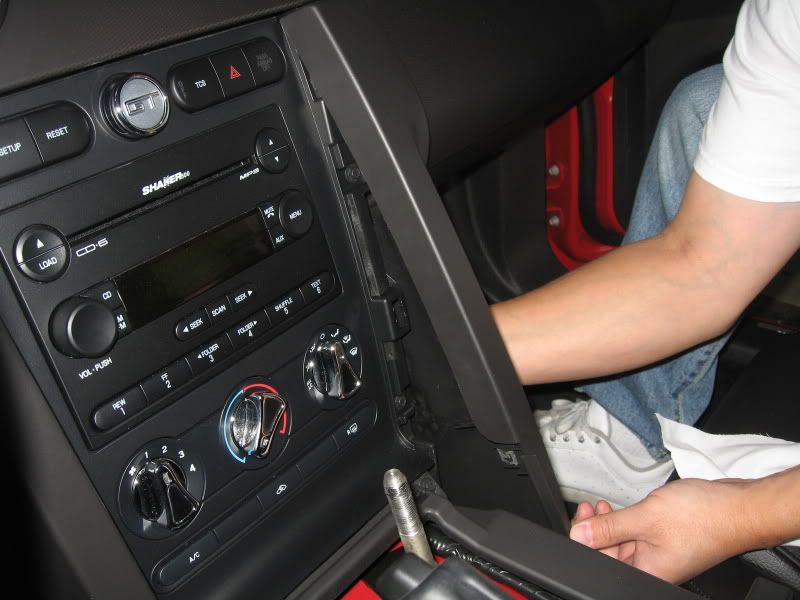
Remove the (6) 7mm bolts (3 each side) that holds the center console to the dash. I removed my 'GT' 12V plug too; not sure if I needed to, but it was simple enough.

Carefully pull away the center console from the dash (you can leave the A/C ***** on).
Note the center tab on the console that's under the dash.
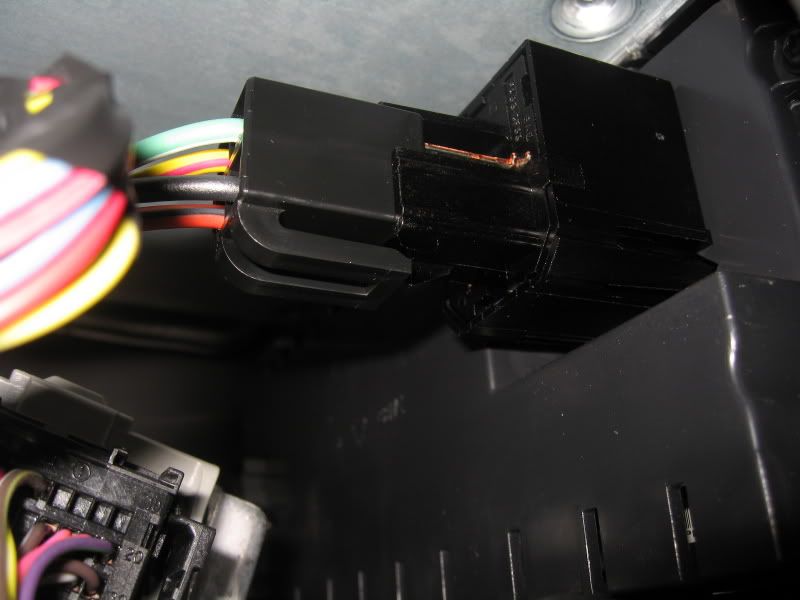
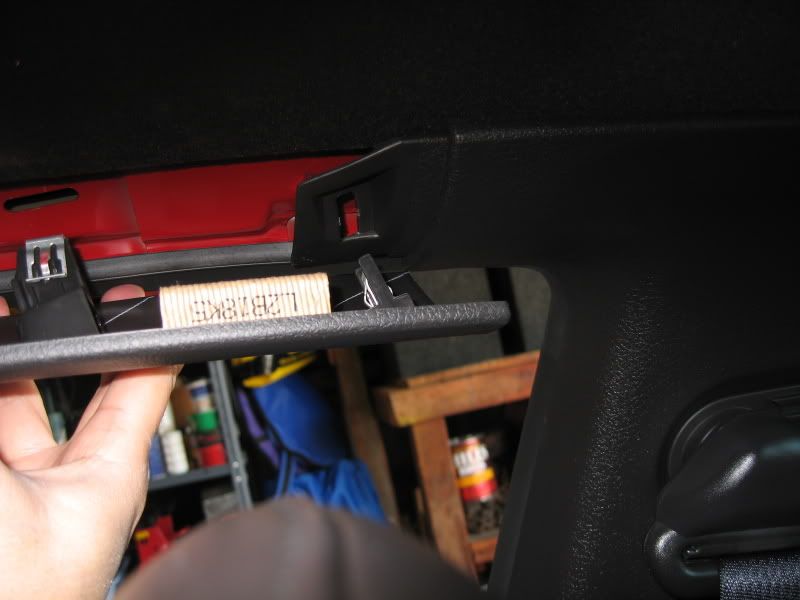
Unplug the 3 wiring harnesses from the top of the console, they're all push button release type.


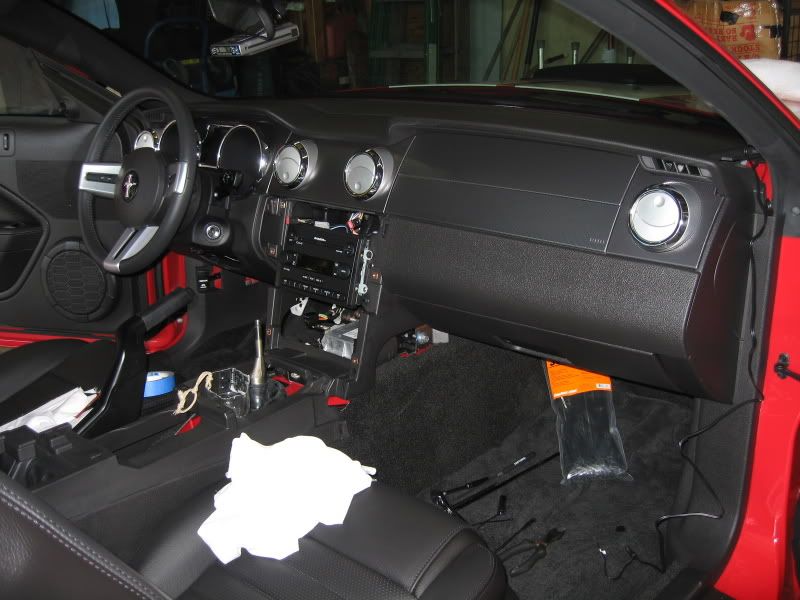
Finally, the (4) bolts that secure the Shaker head unit can now be accessed. They are also 7mm bolts, same as the other (6) removed earlier.
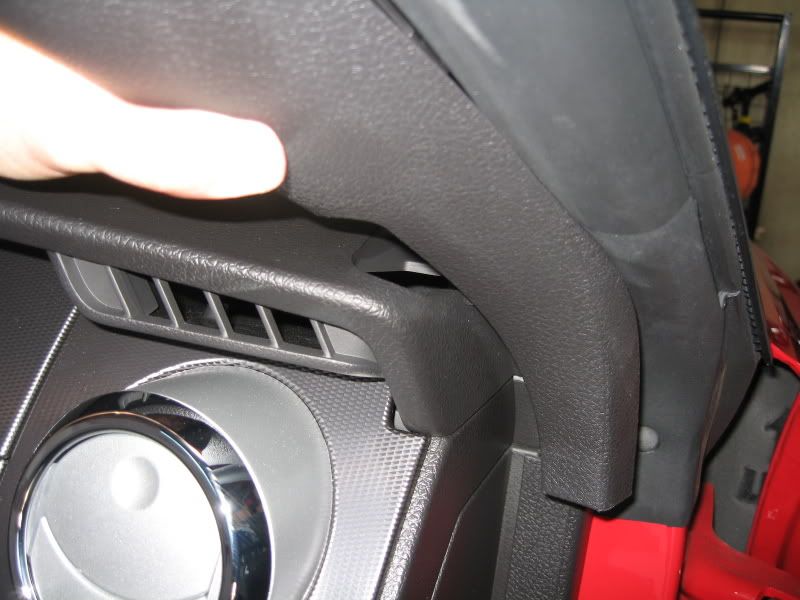
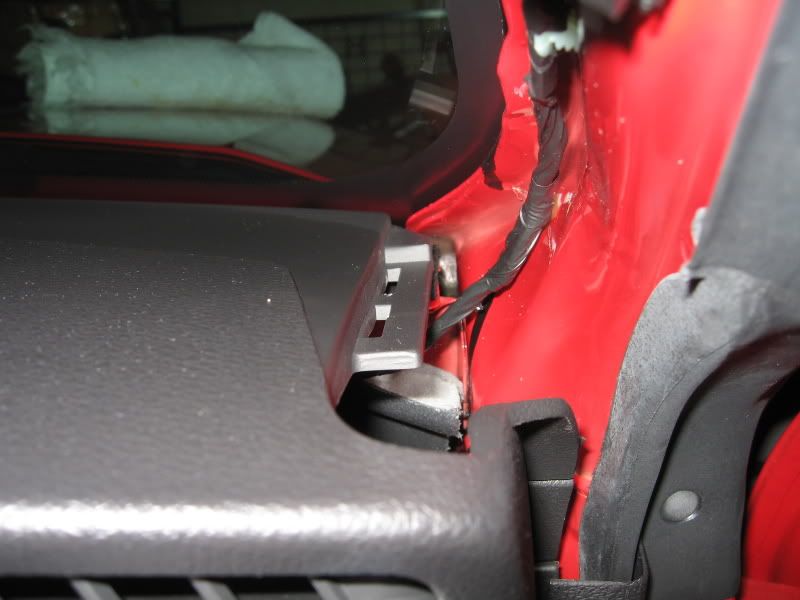
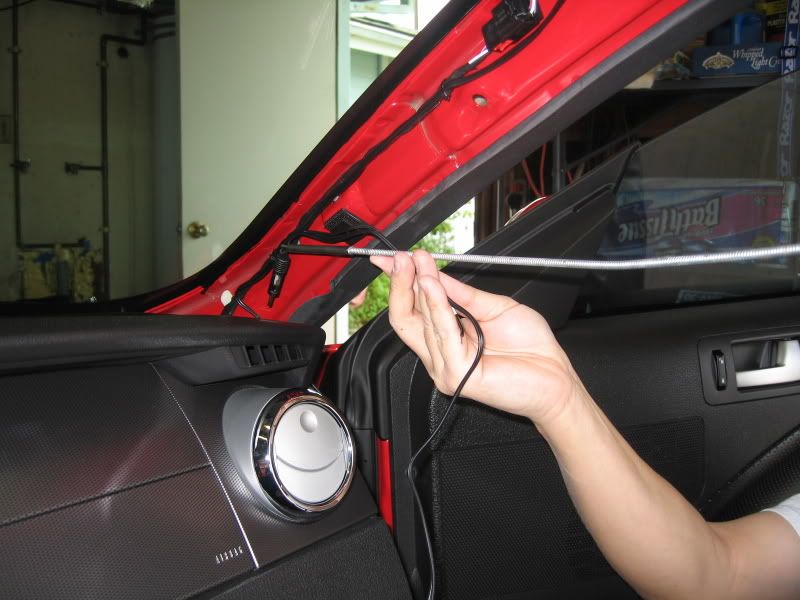
The A-Pillar trim was removed for clean wire routing.
The pillar simply un-clips from the body. Use care at the rear where it attaches to the B-Pillar trim.
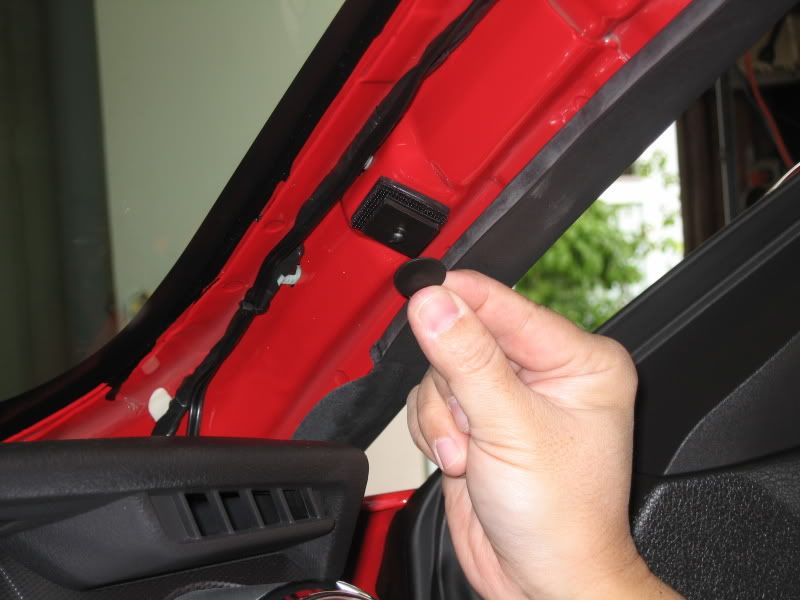
Also, along the A-Pillar, there's an index point where a fork in the pillar slides over. Didn't know about it, so I cracked it. No big deal as it's only used to index the pillar, there's plenty of clips to hold it in place.
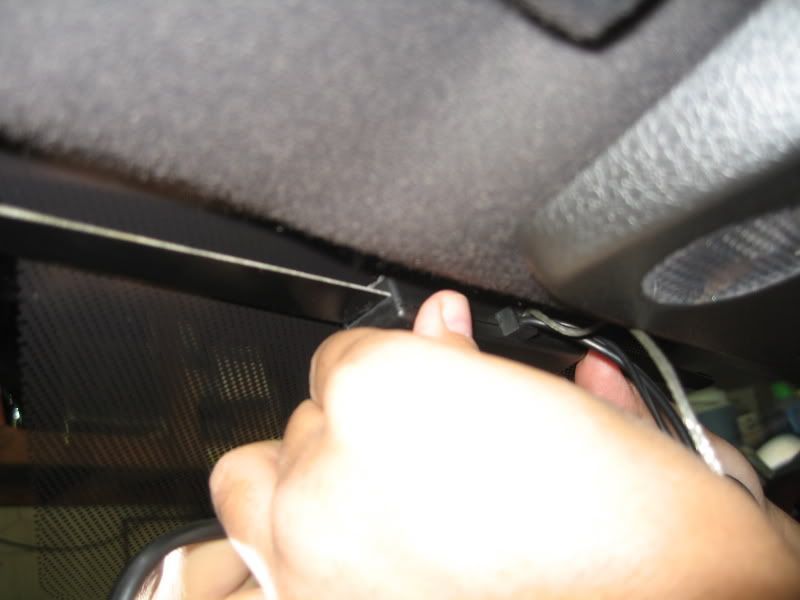
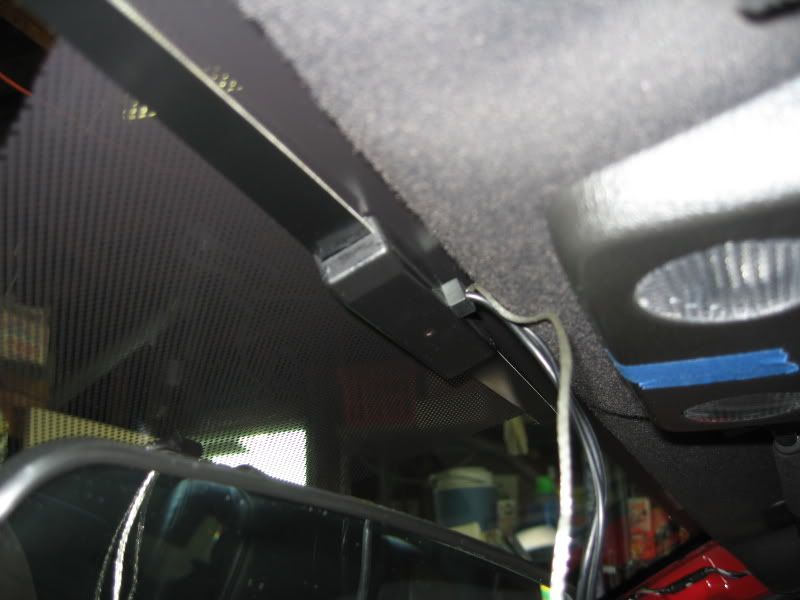
Finally, it's time for the amplified antenna placement and wiring.
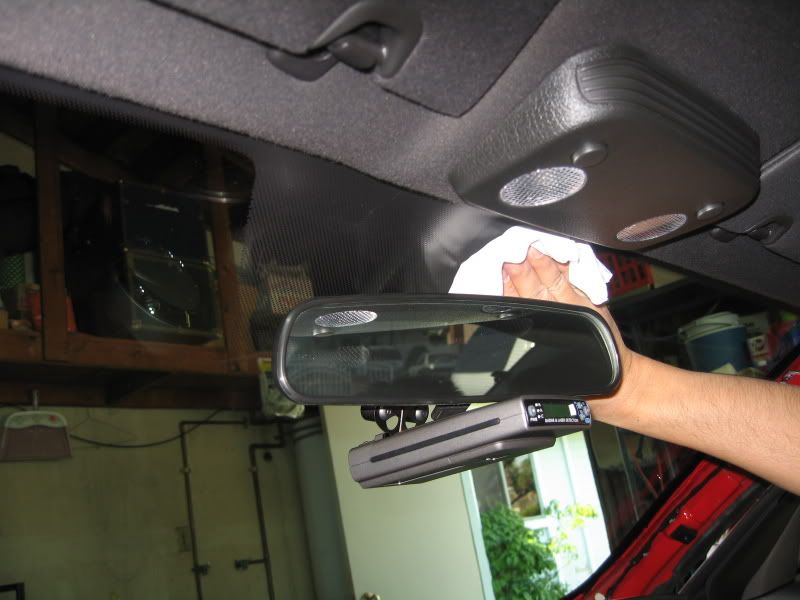
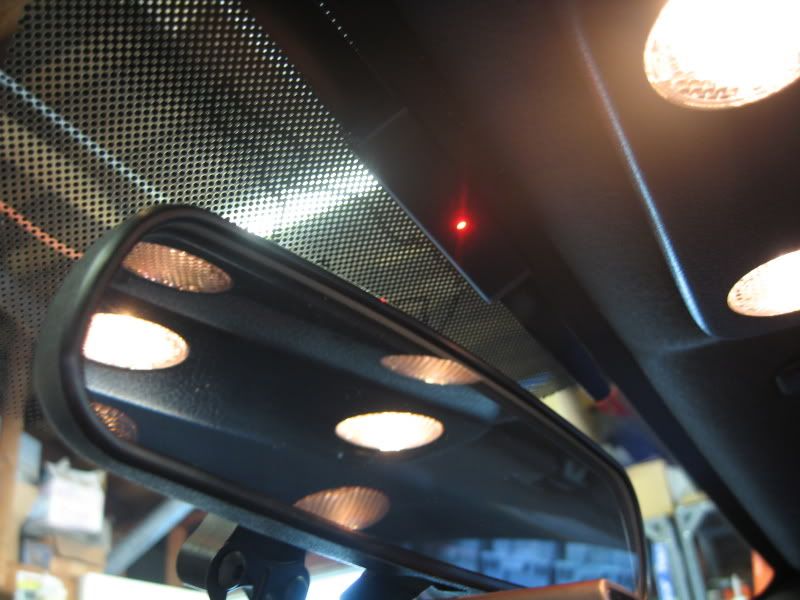
Clean the windshield where the antenna will mount to, then using the Pony (in the dot matrix in the windshield) and the center of the map lights as reference, stick the amplified antenna to the glass using the supplied double stick tape. Note: Wire end toward headliner.
As a side note, there are 2 wires that exit the antenna, the power lead and a ground wire. I just tucked the ground wire in with the power lead into the headliner.

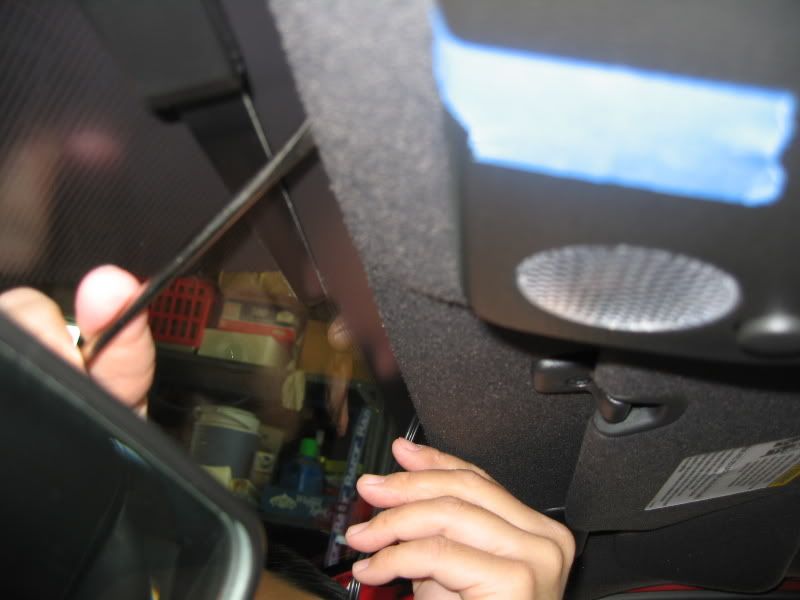
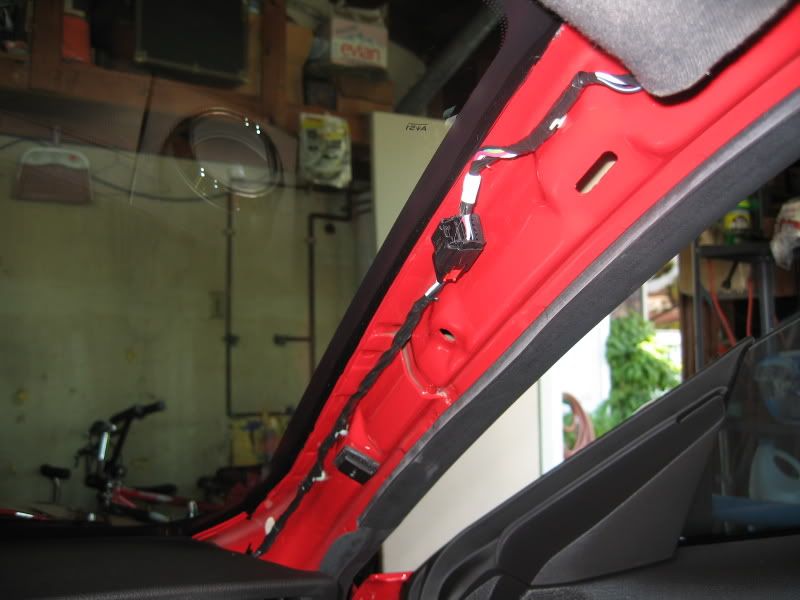
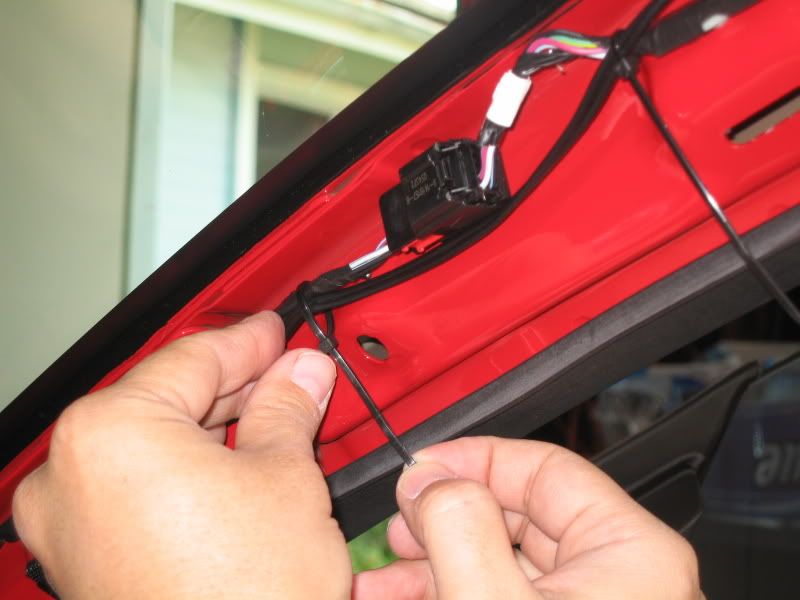
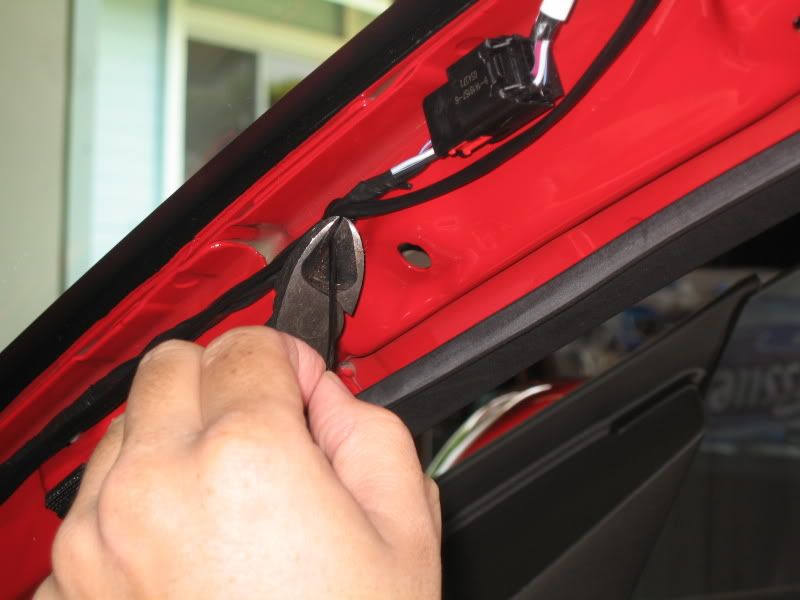
Route the antenna power lead down the A-pillar. I used a few tie-straps to secure the wire.
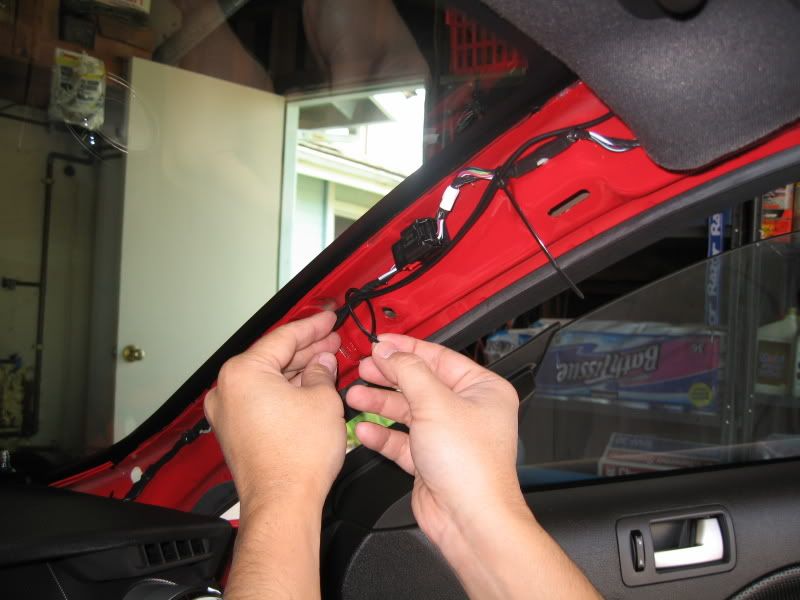
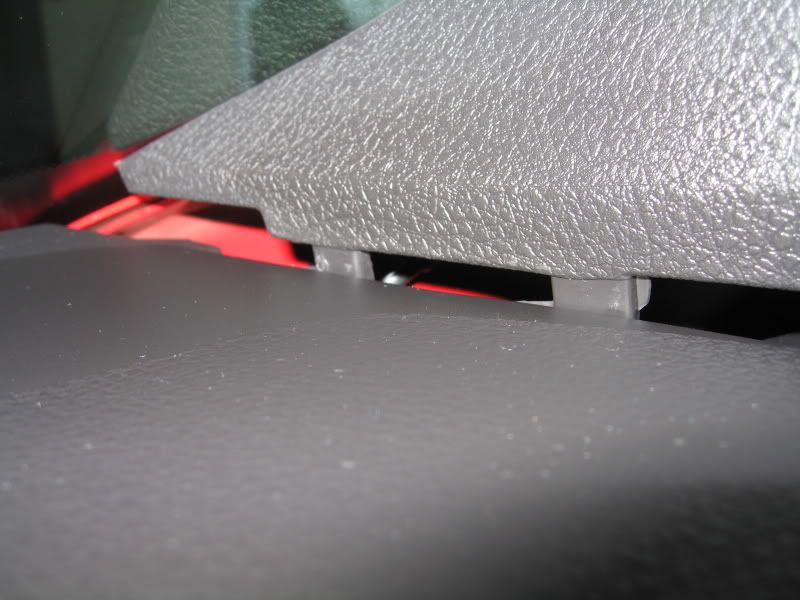
Here's a pic of the index pin that I broke.
Continued on Post #2.
This kit can be found at Autozone for around $20.
After installing my UPR stubby antenna, my reception was limited to only a couple radio stations. Since I mostly listen to CD's, it really didn't bother me. But, after seeing how simple and effective on how this amplified antenna works from Leo (Leo_06GT), I had to get one myself. So, this is how I installed it:
Unscrew the shift **** by grasping right below the silver washer at the base of the **** (otherwise the whole boot will start to twist).
Once unscrewed, lift up the boot trim ring (it un-snaps pretty easily). Remove the ****/boot assembly and set aside.
EDIT: 03-14-08
SEE POST 61 ON THE MGW SHIFTER INSTALL FOR SPECIAL INSTRUCTIONS FOR THOSE WITH THE AMBIENT LIGHTING OPTION.
Remove the 2 screws at the base of the center armrest.
From here on out, use care when dealing with all the plastic stuff to avoid scratches, cracks, etc.
Lift up the forward section of the console where the shifter is.
Then unsnap the rear section where the cup holders are.
Carefully lift the center armrest console out. Raising the e-brake as high as it will go will help. As you see in the pic, I placed a rag at the forward section of the console to avoid scratching.
Once the armrest console is out, its time to remove both left and right 'sail' panels adjacent to the center console. Simply grasp the lower section and pull straight back toward the rear.
This part is a bit of a pain… unplug the 2 wiring harnesses that are behind the A/C and rear defroster switches.
Tip: The plug behind the defroster has a gray lever. A release button must be depressed before attempting to raise the gray lever all the way up to release the plug.
The A/C has a release button only.
Remove the (6) 7mm bolts (3 each side) that holds the center console to the dash. I removed my 'GT' 12V plug too; not sure if I needed to, but it was simple enough.
Carefully pull away the center console from the dash (you can leave the A/C ***** on).
Note the center tab on the console that's under the dash.
Unplug the 3 wiring harnesses from the top of the console, they're all push button release type.
Finally, the (4) bolts that secure the Shaker head unit can now be accessed. They are also 7mm bolts, same as the other (6) removed earlier.
The A-Pillar trim was removed for clean wire routing.
The pillar simply un-clips from the body. Use care at the rear where it attaches to the B-Pillar trim.
Also, along the A-Pillar, there's an index point where a fork in the pillar slides over. Didn't know about it, so I cracked it. No big deal as it's only used to index the pillar, there's plenty of clips to hold it in place.
Finally, it's time for the amplified antenna placement and wiring.
Clean the windshield where the antenna will mount to, then using the Pony (in the dot matrix in the windshield) and the center of the map lights as reference, stick the amplified antenna to the glass using the supplied double stick tape. Note: Wire end toward headliner.
As a side note, there are 2 wires that exit the antenna, the power lead and a ground wire. I just tucked the ground wire in with the power lead into the headliner.
Route the antenna power lead down the A-pillar. I used a few tie-straps to secure the wire.
Here's a pic of the index pin that I broke.
Continued on Post #2.
Last edited by TacoBill; 3/14/08 at 01:58 PM. Reason: Note added for console removal for those with the Ambient Lighting option.
 12/25/06, 08:47 PM
#2
Thread Starter
Part 2
My mess.
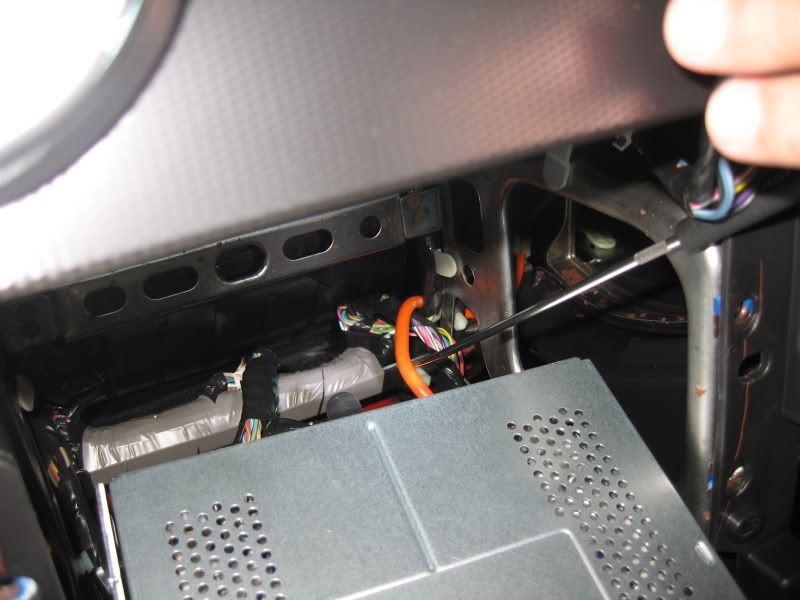
I used one of those recovery claws to route the antenna wire down to under the dash.
Follow the routing of the OEM antenna wire (colored ORANGE) and tie-strap as necessary.
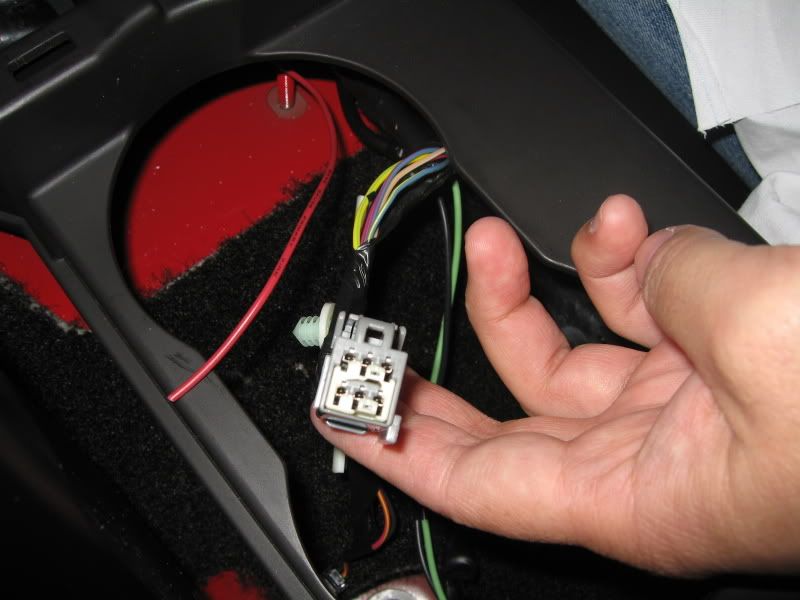
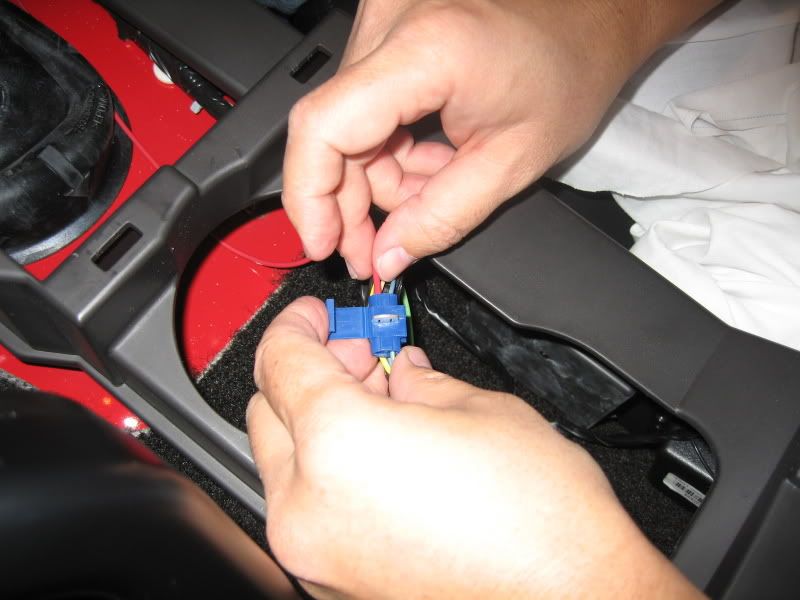
After wasting an hour trying to locate a keyed 12V power source, I used an empty plug in the center console (under the cup holders) that I suspect is used for autos.
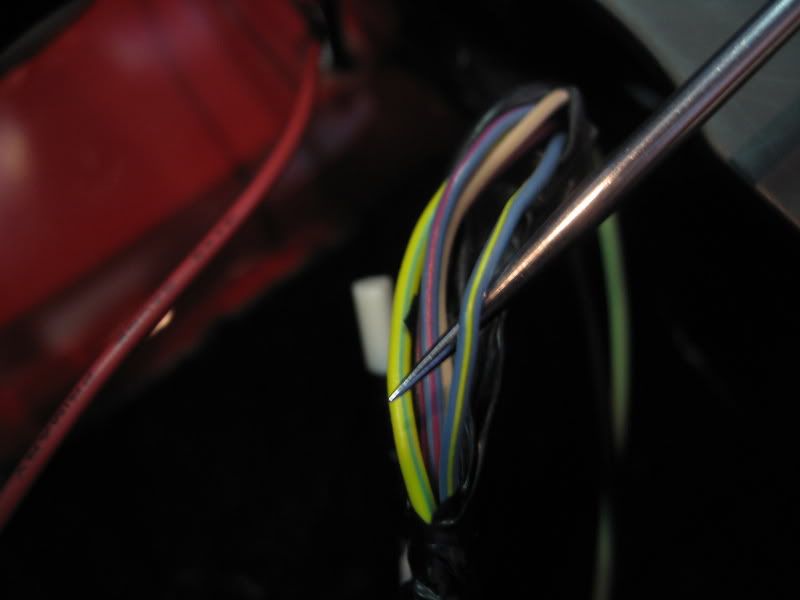
So, the official keyed 12V wire is the BLUE with YELLOW stripe.
I couldn't believe I wasn't able to find a switched 12V source that went to the radio!
Due to the location of the plug I found, the 12V lead off the amplified antenna jack wasn't long enough to reach it. I used some extra wire (18 GA) to splice in the extra length I needed.
NOTE from odiaz: (thanks odiaz!)
The only thing I did differently was that I tapped into the power for the radio. I wanted the antenna to only be powered when the radio was powered. If the radio was off, I wanted the antenna to be off. I used pin2 of the J1 connector on the Shaker 500..
Here ia a pin out of the shaker connectors:
http://www.cherod.com/mustang/HowTo/Shaker500.pdf
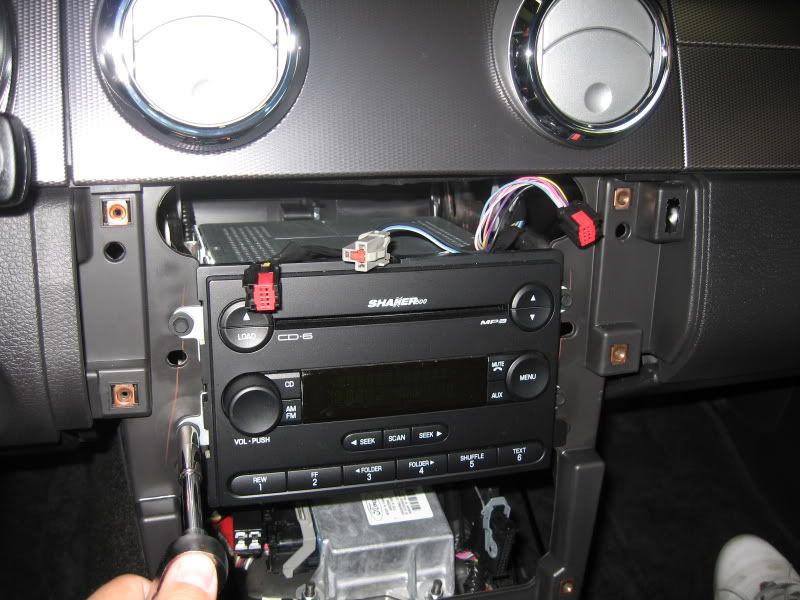
Temporarily re-install the radio with all harnesses attached including the new antenna jack. Note: The OEM 'orange' jack can be tie-strapped so it doesn't rattle when driving.
Turn the key to the 'ON' position and you should see a red LED light on the amplified antenna light up. Confirm the radio's reception.
Finally, re-install all the trim pieces, console, and dash in reverse order. Don't rush the re-installation or else you may scratch or crack something. Use rags to cover adjacent plastic pieces when fitting pieces as a precaution, you'll be glad you did.
I used one of those recovery claws to route the antenna wire down to under the dash.
Follow the routing of the OEM antenna wire (colored ORANGE) and tie-strap as necessary.
After wasting an hour trying to locate a keyed 12V power source, I used an empty plug in the center console (under the cup holders) that I suspect is used for autos.
So, the official keyed 12V wire is the BLUE with YELLOW stripe.
I couldn't believe I wasn't able to find a switched 12V source that went to the radio!
Due to the location of the plug I found, the 12V lead off the amplified antenna jack wasn't long enough to reach it. I used some extra wire (18 GA) to splice in the extra length I needed.
NOTE from odiaz: (thanks odiaz!)
The only thing I did differently was that I tapped into the power for the radio. I wanted the antenna to only be powered when the radio was powered. If the radio was off, I wanted the antenna to be off. I used pin2 of the J1 connector on the Shaker 500..
Here ia a pin out of the shaker connectors:
http://www.cherod.com/mustang/HowTo/Shaker500.pdf
Temporarily re-install the radio with all harnesses attached including the new antenna jack. Note: The OEM 'orange' jack can be tie-strapped so it doesn't rattle when driving.
Turn the key to the 'ON' position and you should see a red LED light on the amplified antenna light up. Confirm the radio's reception.
Finally, re-install all the trim pieces, console, and dash in reverse order. Don't rush the re-installation or else you may scratch or crack something. Use rags to cover adjacent plastic pieces when fitting pieces as a precaution, you'll be glad you did.
Last edited by TacoBill; 3/14/08 at 01:00 PM. Reason: added note on 12V tap
12/26/06, 08:24 AM
#6
Thread Starter
It was the perfect little project to kill a couple hours before Christmas dinner!
btw- I noticed that you already have Sirius, why bother with 'old school' radio? I too have Sirius in my Tacoma... it's all I listen to, never switched to FM in over a year.
12/26/06, 07:21 PM
#7
Shelby GT350 Member
Join Date: June 4, 2006
Location: McAllen, TX
Posts: 2,243
Likes: 0
Received 0 Likes
on
0 Posts
good point, eh i guess i will just use this guide to make my foot well lights, another thing dude is where did you get the braket for your Solo S2? thinking of buying that radar detector and like how you did yours
12/26/06, 08:18 PM
#9
Thread Starter
Thanks Leo.
You actually were the first, so it wasn't too bad.
12/27/06, 10:17 PM
#10
Legacy TMS Member
Enjoyed the thread but only one thing was left out. The final impression on how the antenna improved reception.  So I'll ask the 64 dollar question, did it improve your radio's range over the previous shortened antenna?
BB
Semper Fi
So I'll ask the 64 dollar question, did it improve your radio's range over the previous shortened antenna?B
BSemper Fi
12/27/06, 11:49 PM
#11
Thread Starter

I would say that my radio reception is as good and strong (I think) as the stock antenna.
Compared to my stubby antenna, there was a 1000% improvement.
 12/28/06, 10:56 PM
#12
Legacy TMS Member
Thanks, I'm considering it as an option on my '07 GT vert when it arrives.
From the rocket ranch
B
BSemper Fi
12/29/06, 08:30 AM
#13
Bullitt Member
Join Date: May 30, 2005
Posts: 419
Likes: 0
Received 0 Likes
on
0 Posts
Great write up Bill. I installed mine a year and a half ago and I think it works great. I totally got rid of my antenna.
The only thing I did differently was that I tapped into the power for the radio. I wanted the antenna to only be powered when the radio was powered. If the radio was off, I wanted the antenna to be off. I used pin2 of the J1 connector on the Shaker 500..
Here ia a pin out of the shaker connectors:
http://www.cherod.com/mustang/HowTo/Shaker500.pdf
I wrote up instructions but they are not nearly as detailed as yours.
http://www.cherod.com/mustang/HowTo/...a%20Delete.htm
12/29/06, 10:12 AM
#14
Thread Starter
Great write up Bill. I installed mine a year and a half ago and I think it works great. I totally got rid of my antenna.
The only thing I did differently was that I tapped into the power for the radio. I wanted the antenna to only be powered when the radio was powered. If the radio was off, I wanted the antenna to be off. I used pin2 of the J1 connector on the Shaker 500..
Here is a pin out of the shaker connectors:
The only thing I did differently was that I tapped into the power for the radio. I wanted the antenna to only be powered when the radio was powered. If the radio was off, I wanted the antenna to be off. I used pin2 of the J1 connector on the Shaker 500..
Here is a pin out of the shaker connectors:
I'm sure it'll help future amplified antenna installers.
8/24/07, 04:15 AM
#15

Bill,
Isn't that a blue wire with yellow stripe wire going to the 12v accessory port? Can that be used a keyed 12V power source. I'm asking because I'm gonna install a couple gauges that need a keyed source.
Isn't that a blue wire with yellow stripe wire going to the 12v accessory port? Can that be used a keyed 12V power source. I'm asking because I'm gonna install a couple gauges that need a keyed source.
8/24/07, 07:05 AM
#16
Thread Starter

The blue w/yellow striped wire I used was off of an unused plug. In my case, that wire is a switched 12V. The 12V power port wire is a constant 12.
Locating a switched 12V source in within the center console area is a little tough... at least it was for me.
 8/24/07, 05:07 PM
#18
Bullitt Member
Join Date: August 8, 2006
Location: Good ole L.A.
Posts: 353
Likes: 0
Received 0 Likes
on
0 Posts
Hey Bill since you mentioned your stubby antenna...where did you get that from? I hardly ever use my radio cuz I have my Sirius, but cant just remove the antenna without it looking dumb. Where do you get a stubby one?
PS nice tutorial as always.
PS nice tutorial as always.
8/24/07, 06:02 PM
#19
Thread Starter
http://www.uprproducts.com/shopping/...%2BAntenna%27s
As small as it is, I was still able to pick up a couple strong stations.
