B&M Megashifter Install, How I did It!
 11/7/08, 03:30 PM
#1
Bullitt Member
Thread Starter

Join Date: July 29, 2006
Posts: 343
Likes: 0
Received 0 Likes
on
0 Posts
B&M Megashifter Install, How I did It!
well here is my attempt to show a few more details on what I did to mount one of B&Ms Megashifters in my car, I wanted to have something besides the stock shifter and decided to see if I could make one work, I bought the shifter used from Craigslist so I am uncertain of the actual part number and have been trying to research exactly which one I got but just cant be sure, from what I can tell there isn't too much difference in the shifters, I didn't have the AOD kit I dont think, I did get a bunch of different adapters as well as a shift cable which I didn't use. I am sure that many would not want to try this or may think I was foolish for doing it myself, I cut the tunnel opening in the car and I also have screwholes in the top of my console that can be hidden but of course they are there non the less. One thing to note is that I did not use the locking solenoid off the stock shifter since the Megashifter requires you to pull up a lever to move the gear handle from park. As I started to figure out how to do a write up I realised that what I thought was fairly easy was actually somewhat involved when trying to do a step by step process so what I am just going to do is provide some general highlights and if anybody may be interested in some additional info or pictures I will give them any I can to help. I even asked for some tips from the wite-up guru Tacobill himself and jsut got to be more than I thought anybody might want to see. This type of mod made me feel like being back in the old days when "customising" meant just that, not all the off the shelf bolt on stuff so I enjoyed it as a true challenge to do the work and actually have it perform, in my everloving quest to continually mod stuff I have taken the shifter back out to come up with a different type of boot or something to change the boot out, with the shifter lowered like I installed it the boot bunches up and I dont like that, of course when B&M does put theirs out I will be swapping it out anyway most likely, I am still one of the lone hold outs. LOL Well anyway here it goes.
The shifter and parts, will throw out some others at the pictures.
B&M Megashifter 80690 or similar
B&M 80629 neutral switch (I actually used a Radio Shack 275-017 roller switch because of availability)
B&M T-Handle with button 4440
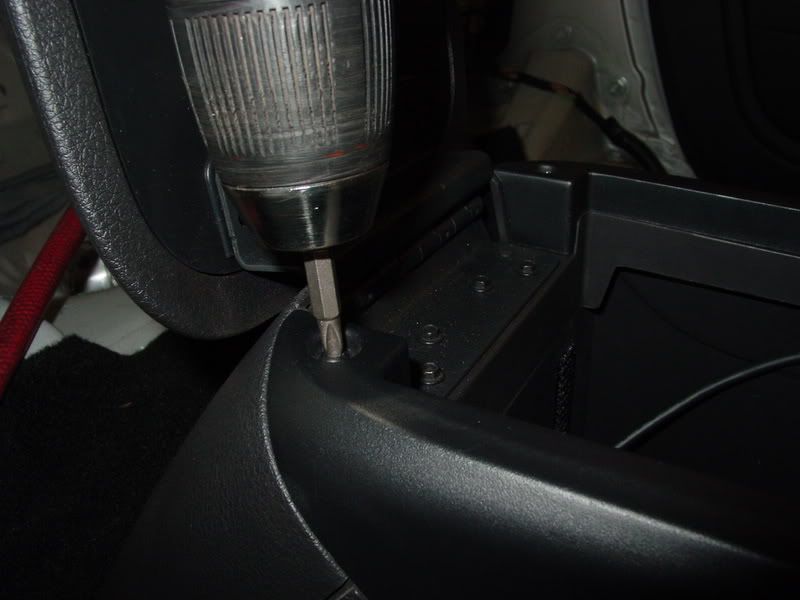
First is to remove the console top portion, only has 2 phillips screwws, then lifts and pulls, the section around the e-brake handle is tricky and I dont have any secret other than be careful, I sctched the crap out of mine
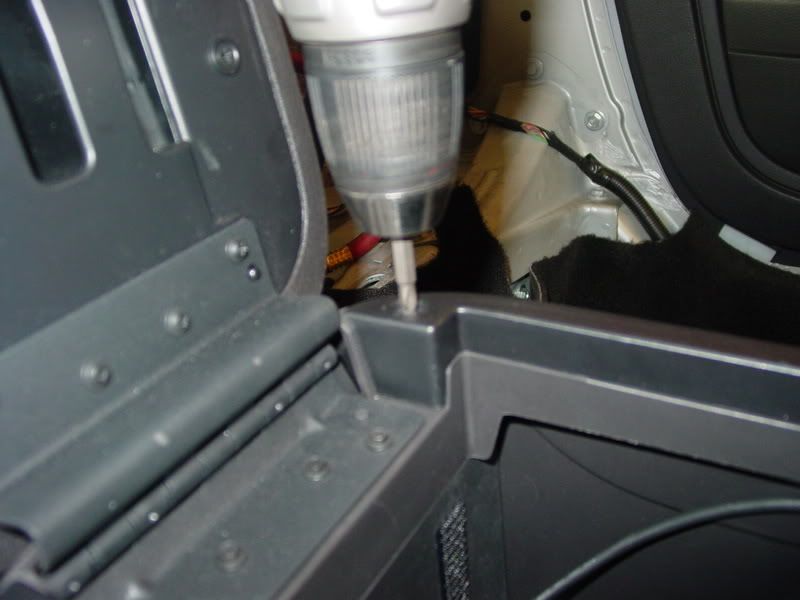
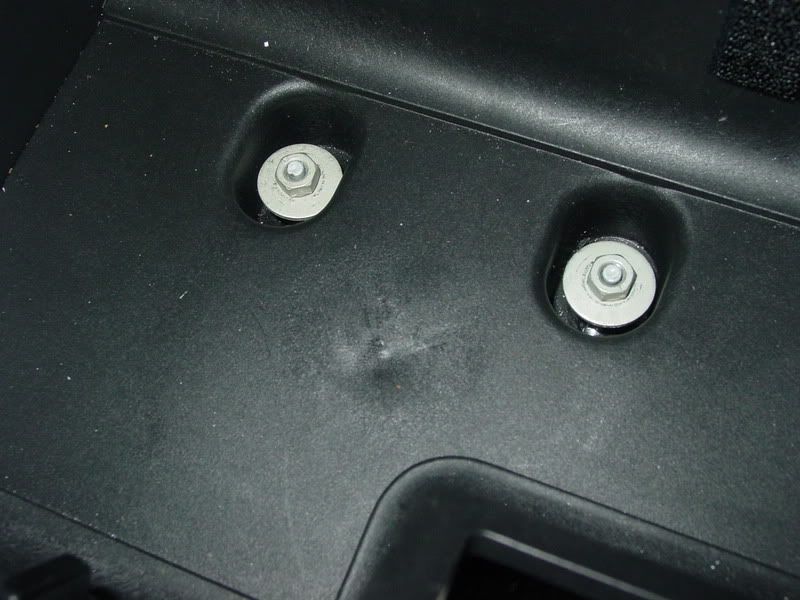
next is to remove the lower section of the console, there are 2 10mm nuts in the bottom of the compartment and 2 7mm screw toward the front under the a/c control, also you have to remove the wiring for the power plug in the compartment, the release piece is on the bottom of the harness, kind of sucky

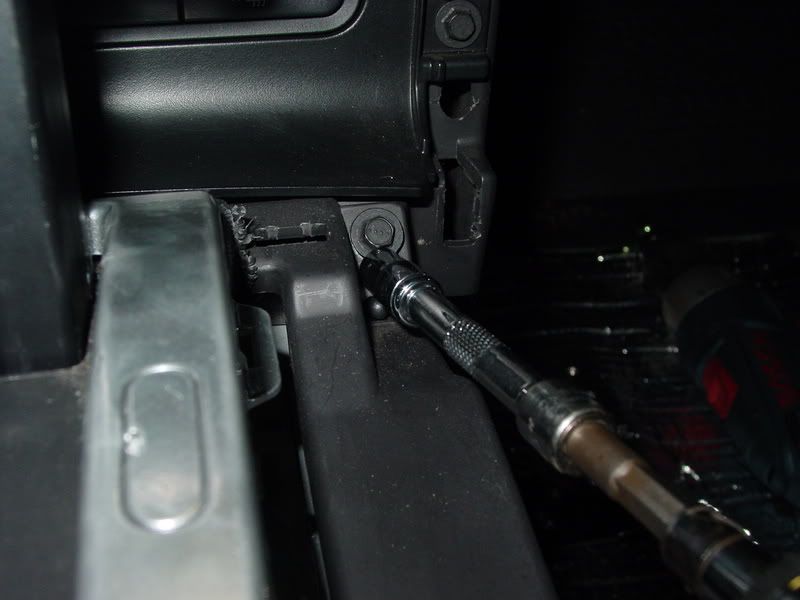
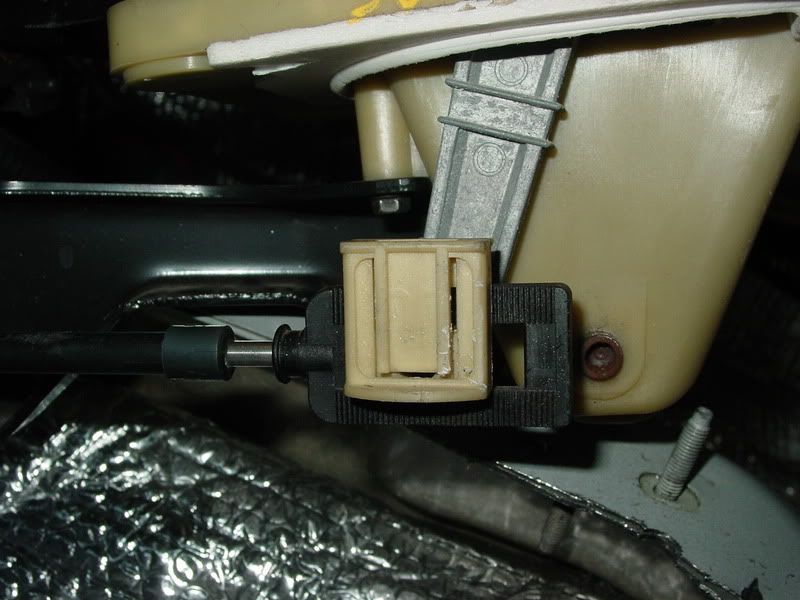
next I removed the stock shifter, linkage and wiring, a small screwdriver will help with the linkage removal and the shifter is bolted in with 2-10mm nuts and 2-10mm bolts
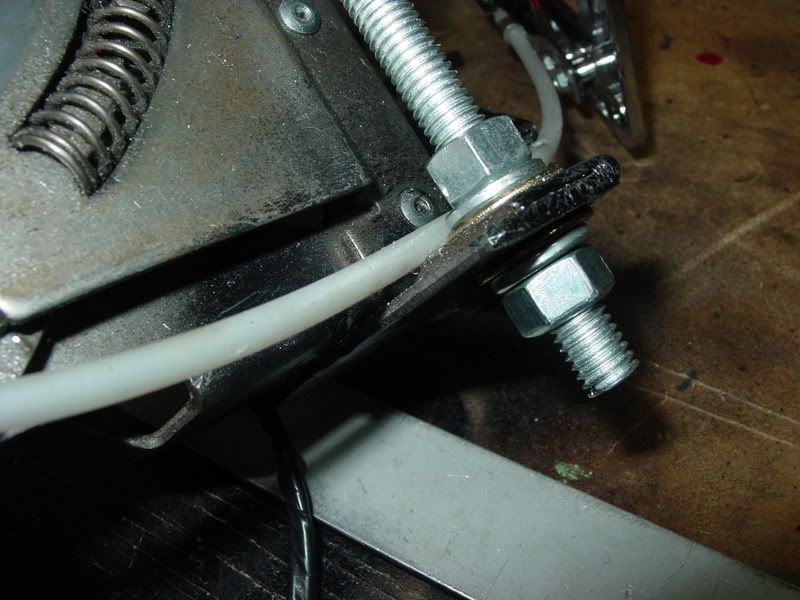
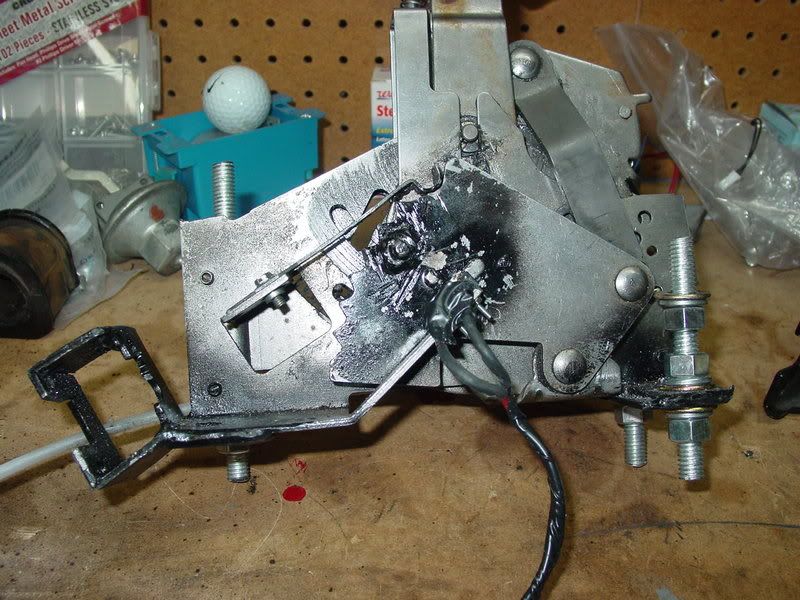
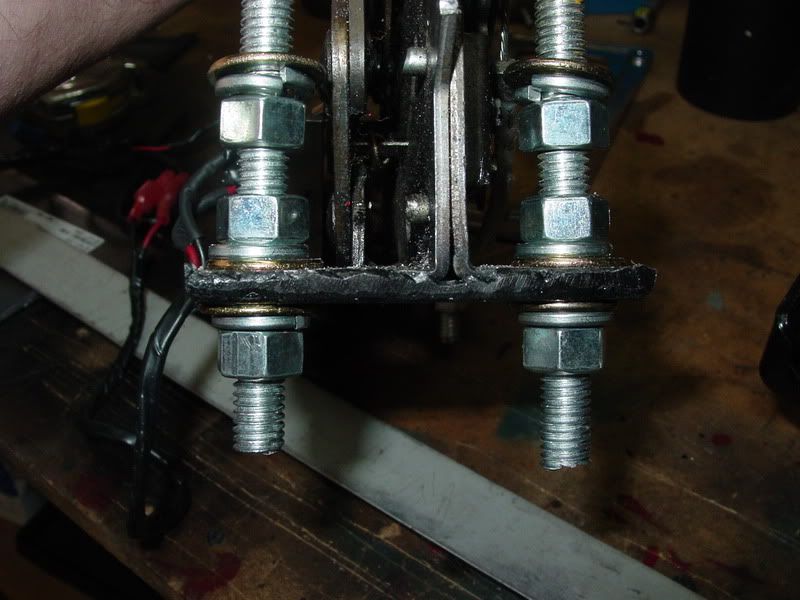
next I modified the B&M shifter and added the 3/8" threaded rod for mounting, this was part of what I did during experimentation to ensure the shifter would be mouted sturdy enough to not fall out, bend, flex, etc., one part of the modification was to allow me to use the stock linkage which involved extending the shifter, I used my welder but I could have used nuts and bolts for the extension with some more work, as I mentioned this wont be for everybody
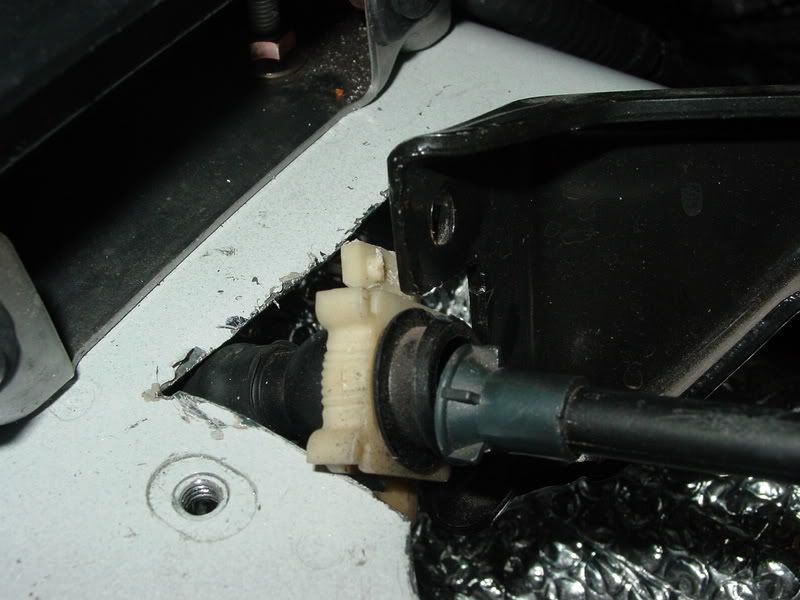
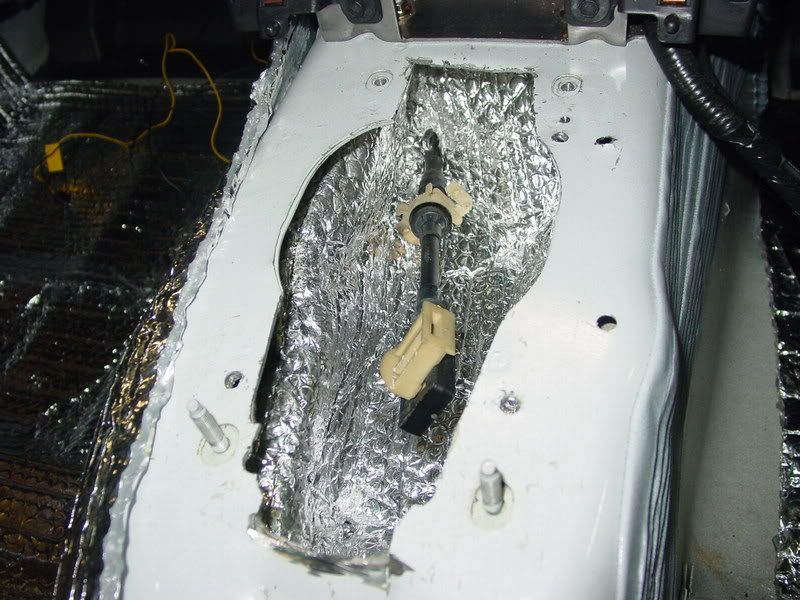
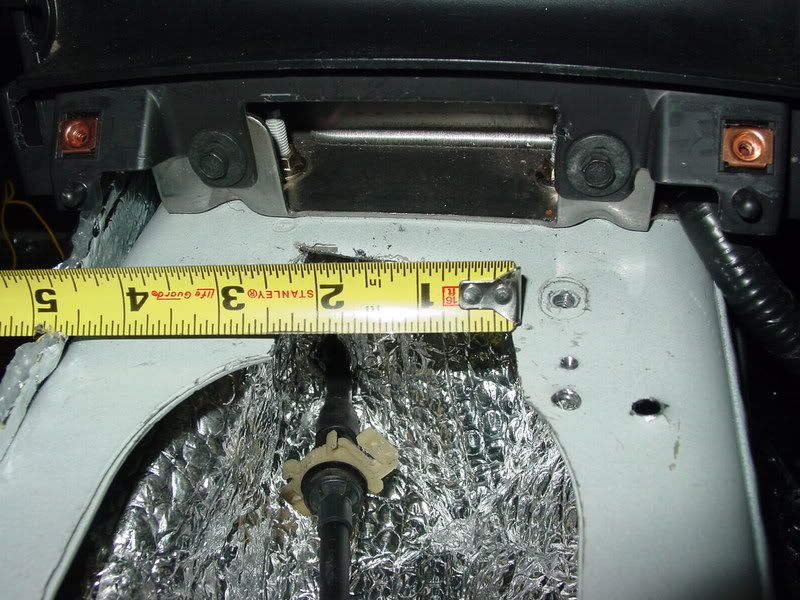
next I cut the tunnel out some around the existing shifter hole, how much actually needed cutting might have been different if I would have tken the driveshft out, I tend to do things the hard and lazy way though, "trim to fit" would be my suggestion for any that do it
overall view
some measurements
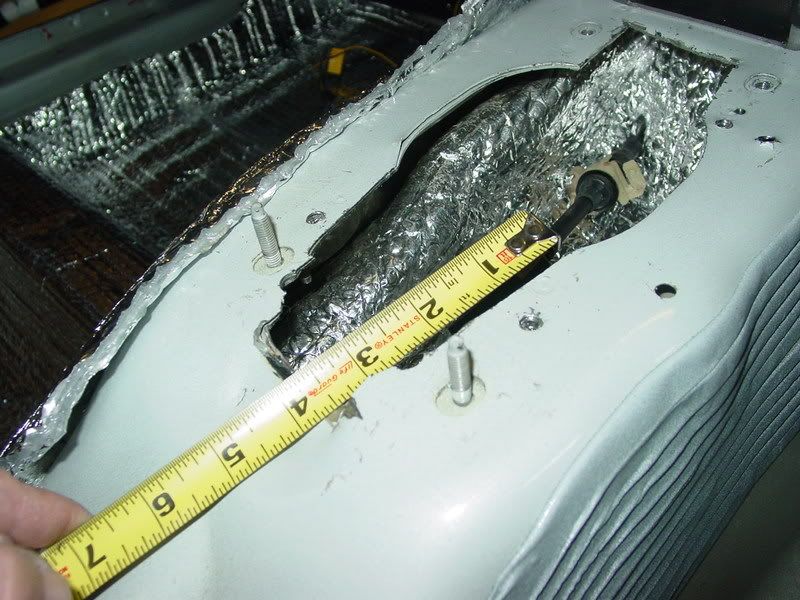
more measurements
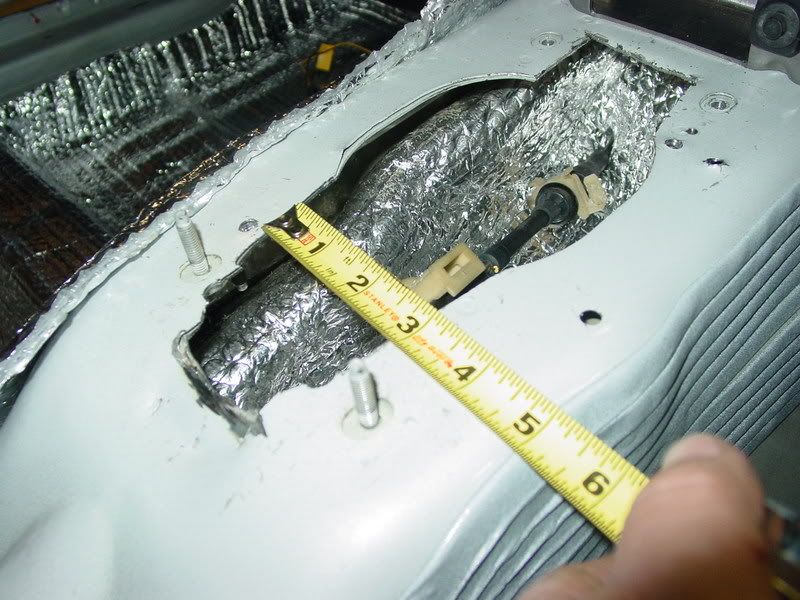
more measurments
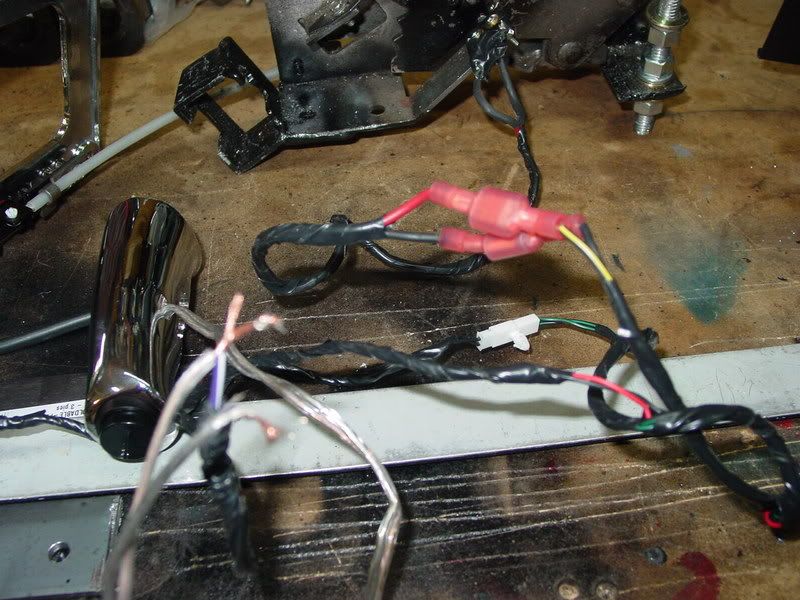
next I modifyed the wiring, this is going to be a wek part with picts, quite honestly I have weak photo skills as well as weak narrator skills. LOL
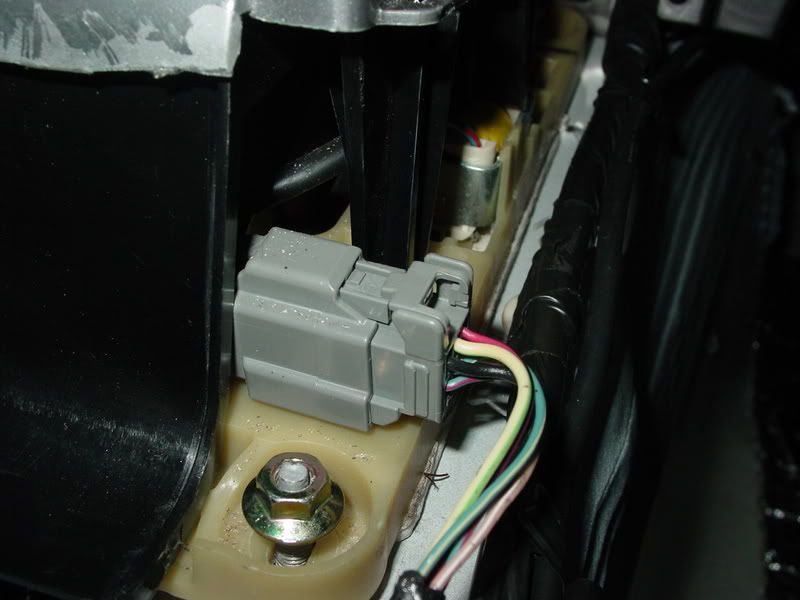
the wiring needs to be removed from the stock shifter, I have a 2005 and unsure if there are other wire colors but what you want to end up with is something similar to the pict and wired as such
(I know, very poor example)
from the plug that is on the stock shifter (there are 2 black wires in one socket) there are also 2 black/green wire but not in the same socket. the blue/red wire is unused from the old switch and the green/white wire is also unused, these 2 were for the solenoid
black - to light
black - to common on neutral switch (new switch)
black/red - to light
black/yellow - to N/C on new neutral switch
black/green - (2) these are the 2 wires for the O/D kill button
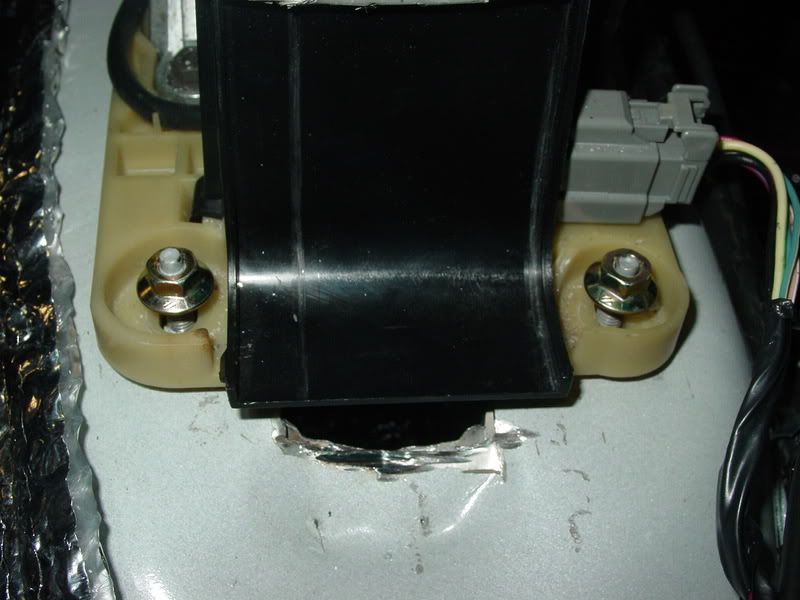
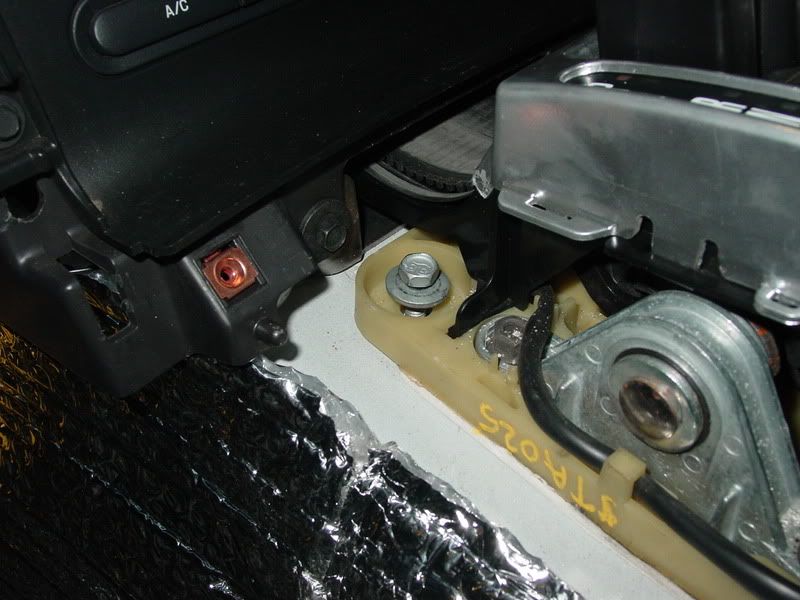
mount the new shifter and attach the linkage, I used 3 pieces of 3/8" threaded rod to mount the shifter, it gave me strength and also adjustment on height, the rear was mounted with 2 pieces 3 1/2" long while I used a piece 5 1/2" inches long in the front, the front is tilted lower, I still have another inch or so I could lower the shifter and still maintain clearance from the driveshaft, this would be so much easier to do if the driveshaft is removed, was too lazy to do so and I was able to make it work

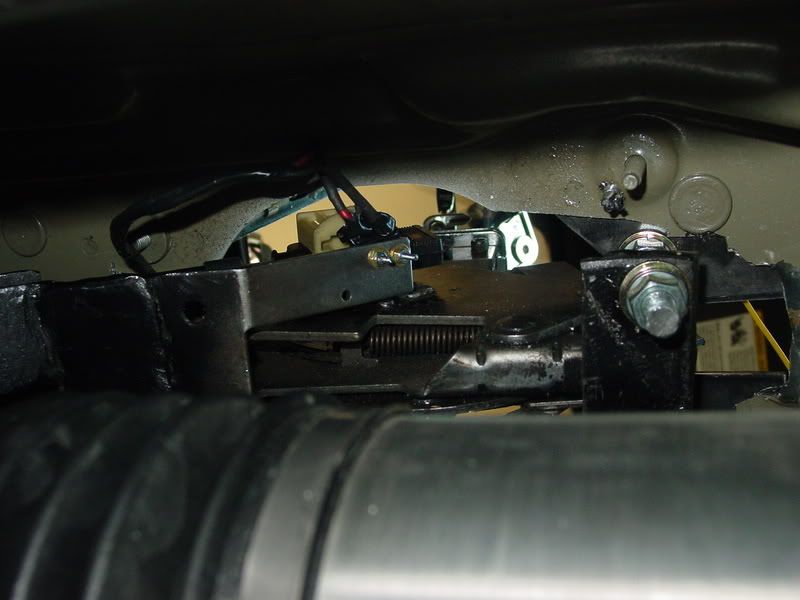
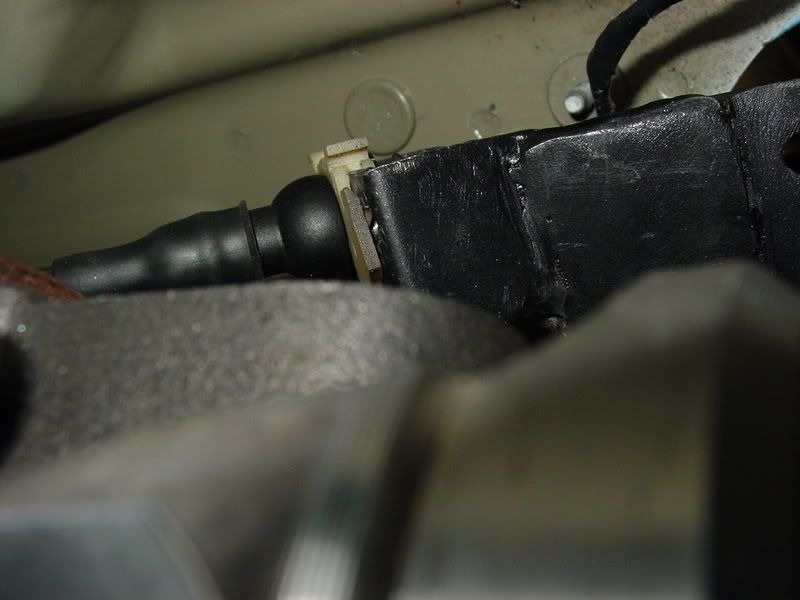
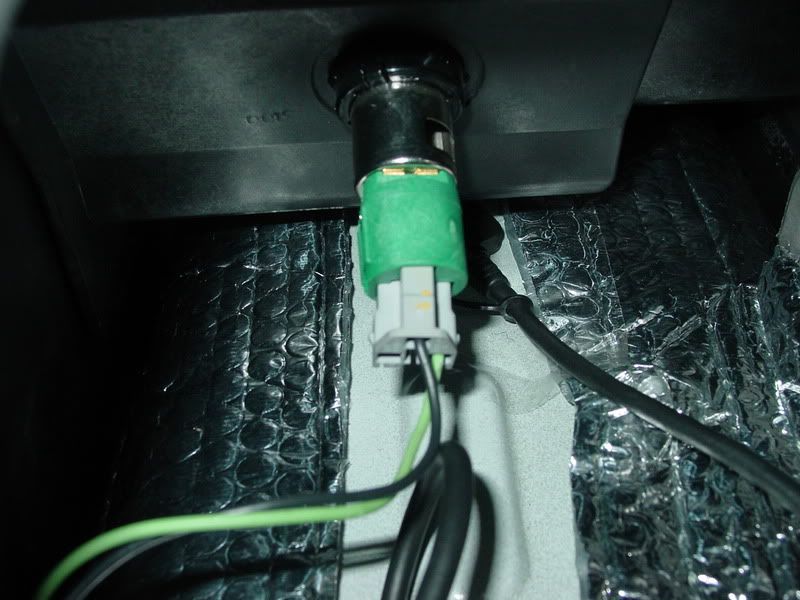
plug in the wiring, probably should have showed where this was on removing the shifter (sorry)
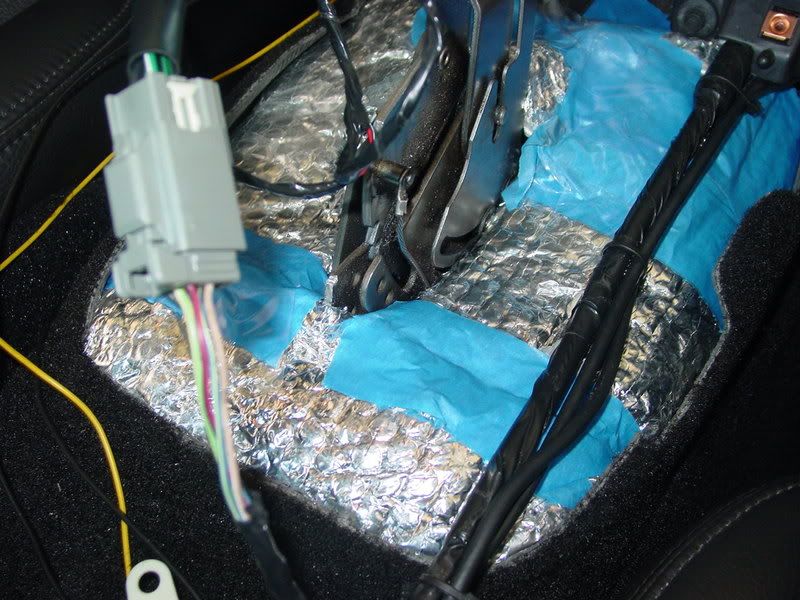
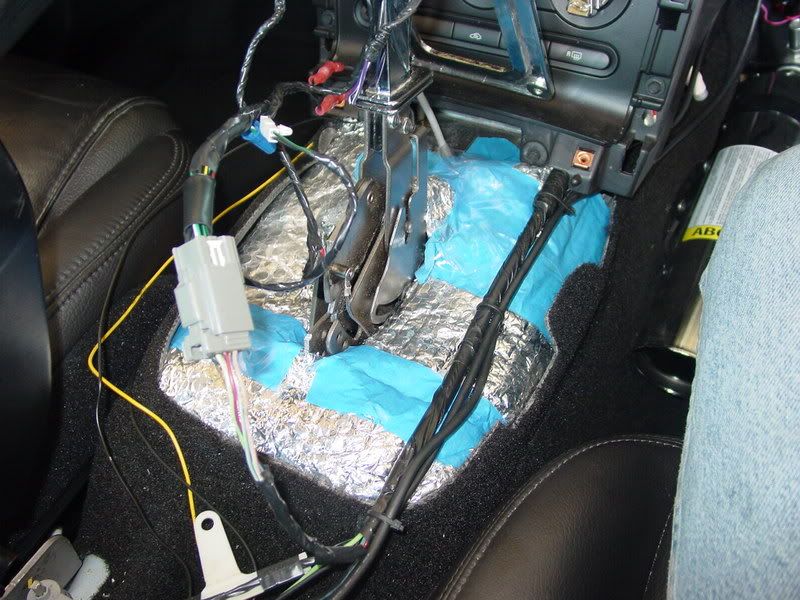
insulate, I used some 5/16's think insulation called Reflectiz I got from OSH, I put double layers on the top and also from the bottom of the shifter, I almost eliminated all of the excessive heat by doing so, I plan on adding some of this insulation to the tunnel area of my othe rcar also, what a benefit!
Next, Reverse the removal steps of the console to re-install the entire console, you will have to hold the bezel plate up the the shifter opening while installing
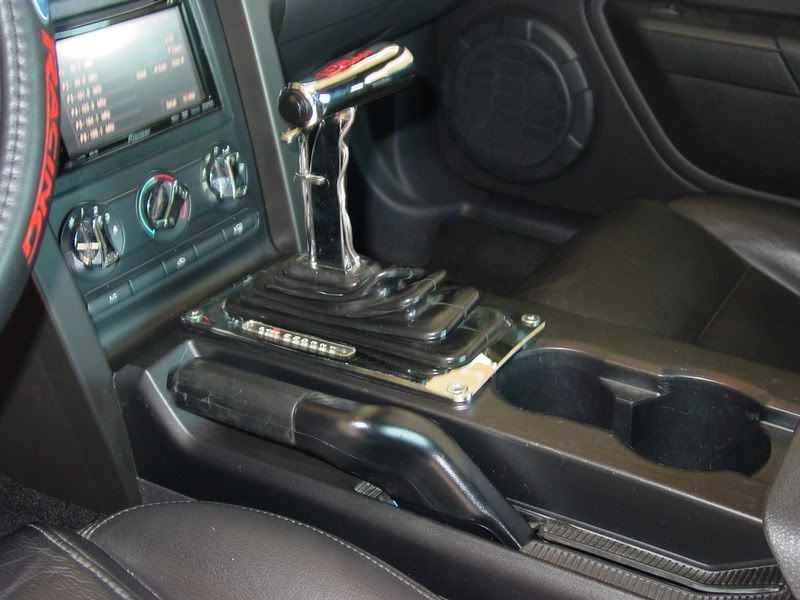
mount the new shifter bezel, here I just screwed right into the top of my console with some 1" long countersink screws, pretty freakin crazy!
Well Thats it, hopefully it gives some an Idea of yes it can be done, others I guess it will just let you know I may just be nuts , good luck to any that try it and may find this useful,
The shifter and parts, will throw out some others at the pictures.
B&M Megashifter 80690 or similar
B&M 80629 neutral switch (I actually used a Radio Shack 275-017 roller switch because of availability)
B&M T-Handle with button 4440
First is to remove the console top portion, only has 2 phillips screwws, then lifts and pulls, the section around the e-brake handle is tricky and I dont have any secret other than be careful, I sctched the crap out of mine
next is to remove the lower section of the console, there are 2 10mm nuts in the bottom of the compartment and 2 7mm screw toward the front under the a/c control, also you have to remove the wiring for the power plug in the compartment, the release piece is on the bottom of the harness, kind of sucky
next I removed the stock shifter, linkage and wiring, a small screwdriver will help with the linkage removal and the shifter is bolted in with 2-10mm nuts and 2-10mm bolts
next I modified the B&M shifter and added the 3/8" threaded rod for mounting, this was part of what I did during experimentation to ensure the shifter would be mouted sturdy enough to not fall out, bend, flex, etc., one part of the modification was to allow me to use the stock linkage which involved extending the shifter, I used my welder but I could have used nuts and bolts for the extension with some more work, as I mentioned this wont be for everybody
next I cut the tunnel out some around the existing shifter hole, how much actually needed cutting might have been different if I would have tken the driveshft out, I tend to do things the hard and lazy way though, "trim to fit" would be my suggestion for any that do it
overall view
some measurements
more measurements
more measurments
next I modifyed the wiring, this is going to be a wek part with picts, quite honestly I have weak photo skills as well as weak narrator skills. LOL
the wiring needs to be removed from the stock shifter, I have a 2005 and unsure if there are other wire colors but what you want to end up with is something similar to the pict and wired as such
(I know, very poor example)
from the plug that is on the stock shifter (there are 2 black wires in one socket) there are also 2 black/green wire but not in the same socket. the blue/red wire is unused from the old switch and the green/white wire is also unused, these 2 were for the solenoid
black - to light
black - to common on neutral switch (new switch)
black/red - to light
black/yellow - to N/C on new neutral switch
black/green - (2) these are the 2 wires for the O/D kill button
mount the new shifter and attach the linkage, I used 3 pieces of 3/8" threaded rod to mount the shifter, it gave me strength and also adjustment on height, the rear was mounted with 2 pieces 3 1/2" long while I used a piece 5 1/2" inches long in the front, the front is tilted lower, I still have another inch or so I could lower the shifter and still maintain clearance from the driveshaft, this would be so much easier to do if the driveshaft is removed, was too lazy to do so and I was able to make it work
plug in the wiring, probably should have showed where this was on removing the shifter (sorry)
insulate, I used some 5/16's think insulation called Reflectiz I got from OSH, I put double layers on the top and also from the bottom of the shifter, I almost eliminated all of the excessive heat by doing so, I plan on adding some of this insulation to the tunnel area of my othe rcar also, what a benefit!
Next, Reverse the removal steps of the console to re-install the entire console, you will have to hold the bezel plate up the the shifter opening while installing
mount the new shifter bezel, here I just screwed right into the top of my console with some 1" long countersink screws, pretty freakin crazy!
Well Thats it, hopefully it gives some an Idea of yes it can be done, others I guess it will just let you know I may just be nuts
, good luck to any that try it and may find this useful,


 11/7/08, 04:18 PM
#3
Cobra Member
Join Date: October 15, 2008
Location: Brew City
Posts: 1,373
Likes: 0
Received 0 Likes
on
0 Posts
nice write up and initiative to do something different. In looking at those photos, looks like you had to do some on the fly "engineering" to get it in there and make everything work. I am not an auto guy, but really like the look and functionality of those shifters.
IMO, the rubber boot looks out of place in these cars. Any thoughts to getting something like a custom leather boot? Not sure if that would work with the action of that shifter, just an observation.
IMO, the rubber boot looks out of place in these cars. Any thoughts to getting something like a custom leather boot? Not sure if that would work with the action of that shifter, just an observation.
11/7/08, 04:22 PM
#4
Bullitt Member
Thread Starter
Join Date: July 29, 2006
Posts: 343
Likes: 0
Received 0 Likes
on
0 Posts
@ doogie, I have some thoughts on something old style but havent found the way to make it yet, been shopping at the auto parts stores and the hardware stores fro inspiration. LOL I need bristles. LOL
11/10/08, 05:01 PM
#8
Bullitt Member
Thread Starter
Join Date: July 29, 2006
Posts: 343
Likes: 0
Received 0 Likes
on
0 Posts
I will say this, eventhough we all know that the ratchet action cannot beat the computer in shifting, the added fun of being able to up/downshift easily sure makes a difference to me when driving around town and in some bump and go traffic, makes the accel/decel a lot quicker!
11/10/08, 05:33 PM
#9
Mach 1 Member
Join Date: December 3, 2005
Location: Culver City
Posts: 867
Likes: 0
Received 0 Likes
on
0 Posts
I will say this, eventhough we all know that the ratchet action cannot beat the computer in shifting, the added fun of being able to up/downshift easily sure makes a difference to me when driving around town and in some bump and go traffic, makes the accel/decel a lot quicker!
Glad to see someone's finally got a ratchet shifter in there, I remember probably 2 years back or so? I was hoping for the B&M shifter to come out... I'm glad I went for the manual and didn't wait


Thread
Thread Starter
Forum
Replies
Last Post
tj@steeda
2015 - 2023 MUSTANG
0
9/10/15 12:44 PM