
Saleen Install Begins!
 7/25/08, 08:41 PM
#1
Mach 1 Member
Thread Starter
Join Date: November 7, 2007
Location: Brigantine, NJ
Posts: 591
Likes: 0
Received 0 Likes
on
0 Posts
Saleen Install Begins!
Well, took a while for me to make up my mind, but I ended up pulling the trigger on a Stage 2 Saleen package from Brenspeed. This is the first blower install for me, a bit nervous, but I'm up for the challenge!! Thought I'd share some of the fun with you all...
My welcome home present sitting on the front porch.

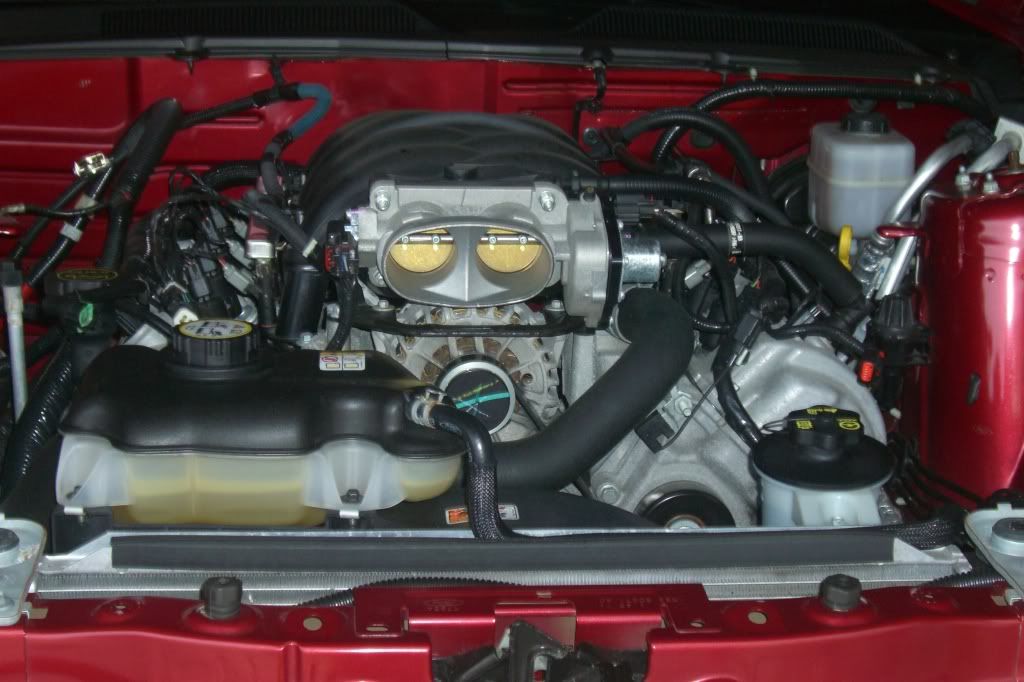
And the break down begins...
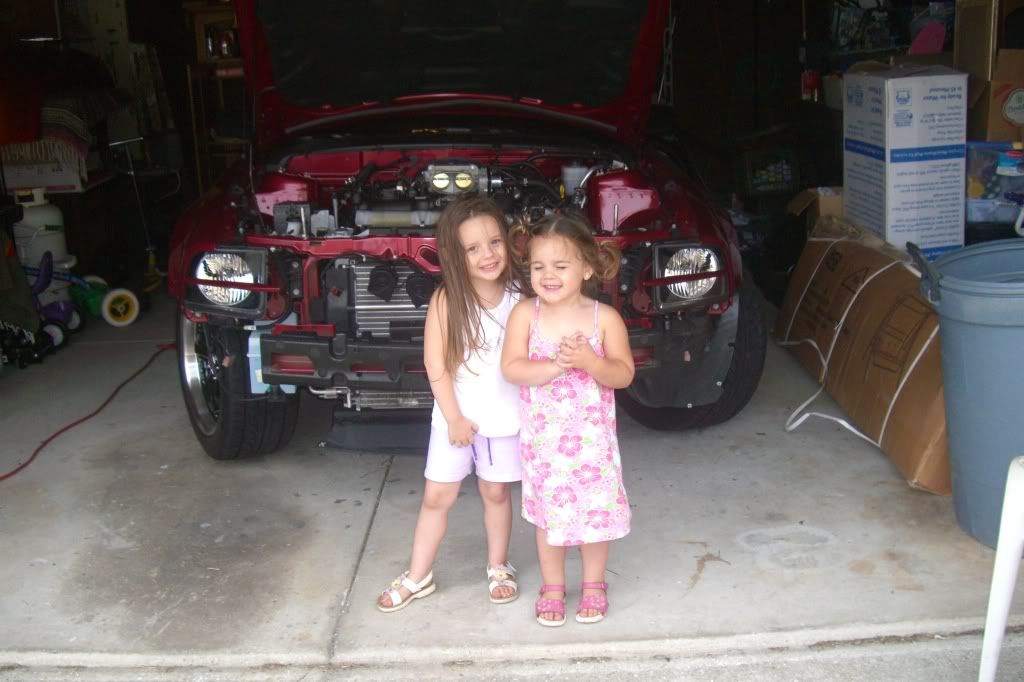
My girls just had to get in the picture.
She's looked better...
Gotta make room for the new goodies...
Pulley pulley, who's got the pulley?
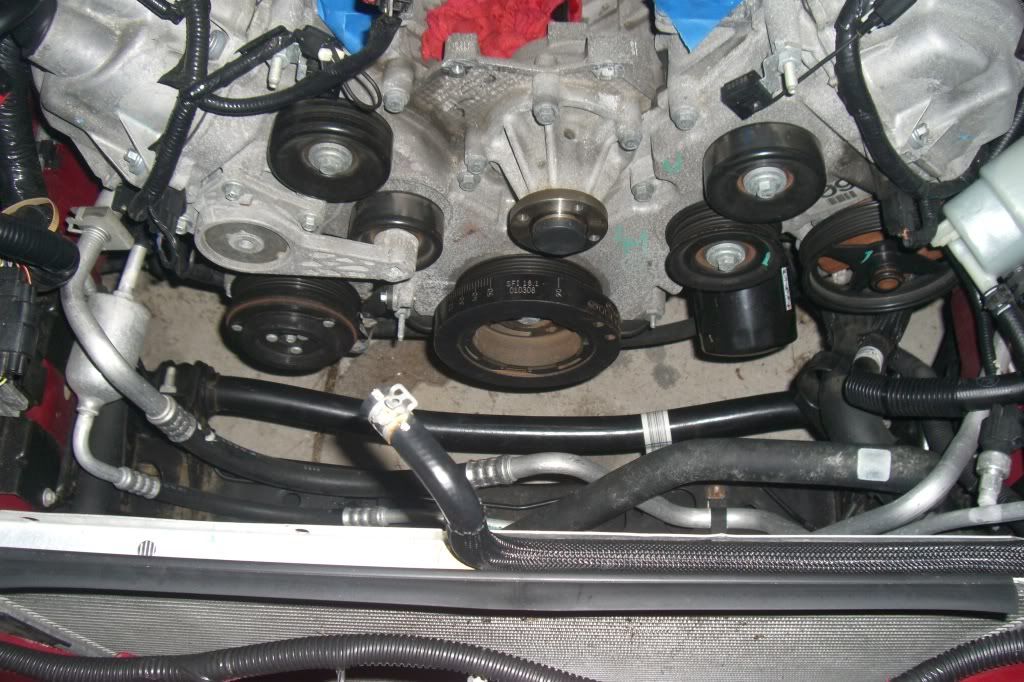
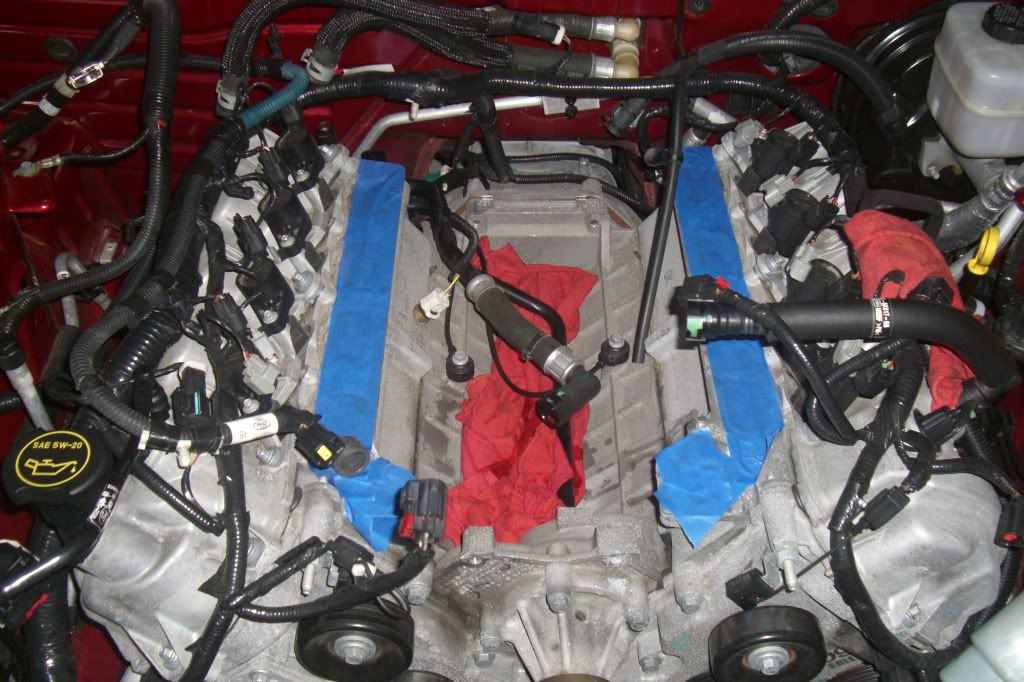
Just about done with the break down, now the fun starts.
Got the heat exchanger, water pump, water tubes and hoses installed, no pics yet, got too dark tonight. Next is to find someone that I trust to give me a hand hoisting that beast onto the engine. I have to say so far it has been relatively smooth, and enjoyable. Especially now that new things are getting installed.
One note on the overall package. Brenspeed did a bangup job getting it together and out to me. Saleen on the other hand... like I've seen in other posts on here, they forgot to send the alternator pulley removal tool. Called Brenspeed, they are overnighting one to me. Also, because I have an 07, there is a conversion kit. Saleen seems to have everything necessary, but they just bagged bolts where ever. Not fun having to continually search for parts in multiple bags. Makes it difficult keeping everything neat and in it's place since all the bags have been opened for one reason or another. A bit of a pain, but it's working out fine.
If anyone is still interested, I'll continue updating this thread on the install progress. Either way, I'll be sure to post some pics and vids once it's done!!!
My welcome home present sitting on the front porch.
And the break down begins...
My girls just had to get in the picture.
She's looked better...
Gotta make room for the new goodies...
Pulley pulley, who's got the pulley?
Just about done with the break down, now the fun starts.
Got the heat exchanger, water pump, water tubes and hoses installed, no pics yet, got too dark tonight. Next is to find someone that I trust to give me a hand hoisting that beast onto the engine. I have to say so far it has been relatively smooth, and enjoyable. Especially now that new things are getting installed.
One note on the overall package. Brenspeed did a bangup job getting it together and out to me. Saleen on the other hand... like I've seen in other posts on here, they forgot to send the alternator pulley removal tool. Called Brenspeed, they are overnighting one to me.
Also, because I have an 07, there is a conversion kit. Saleen seems to have everything necessary, but they just bagged bolts where ever. Not fun having to continually search for parts in multiple bags. Makes it difficult keeping everything neat and in it's place since all the bags have been opened for one reason or another. A bit of a pain, but it's working out fine.If anyone is still interested, I'll continue updating this thread on the install progress. Either way, I'll be sure to post some pics and vids once it's done!!!
Last edited by EastCoast07GtCs; 7/26/08 at 08:48 AM.


 7/26/08, 05:20 AM
#6
I would have been pissed at the delivery company that left a Saleen Supercharger kit on my fron porch. Just imagine if someone saw with an S197 Mustang saw that tempting morsel left out just waiting to be snatched up! It looks like things are going smooth so far. Here are a couple of suggestions from me to help you. When you splice into your wiring harnesses make sure you stagger the cuts like the instructions say and do a good job of soldering them together. Also buy some liquid rubber to seal them when you are done. Electrical tape will eventually get loose and come apart and it will expose your splices. When you install the water tube that sits in the valley between the heads make **** sure that it is in right or else you will have to pull the blower out to fix the leak. I used a hangar to pull up on the front end that attaches to the hose that will be hard to reach when you attach it. You will know the one I am talking about when you get to it. You will find that splicing the harness and doing that tube are the most critical and skill oriented steps unless you do the guages and when you drill into your dash don't miss the target! Lastly now you have to decide if you want the Saleen Super Shaker kit and how to get it with out pissing off the wife. Any ideas on that will help me out! Here's a pic of my work.
Last edited by mustang_lurkers; 7/26/08 at 05:23 AM.
7/26/08, 05:50 AM
#8
Mach 1 Member
Thread Starter
Join Date: November 7, 2007
Location: Brigantine, NJ
Posts: 591
Likes: 0
Received 0 Likes
on
0 Posts
I would have been pissed at the delivery company that left a Saleen Supercharger kit on my fron porch. Just imagine if someone saw with an S197 Mustang saw that tempting morsel left out just waiting to be snatched up! It looks like things are going smooth so far. Here are a couple of suggestions from me to help you. When you splice into your wiring harnesses make sure you stagger the cuts like the instructions say and do a good job of soldering them together. Also buy some liquid rubber to seal them when you are done. Electrical tape will eventually get loose and come apart and it will expose your splices. When you install the water tube that sits in the valley between the heads make **** sure that it is in right or else you will have to pull the blower out to fix the leak. I used a hangar to pull up on the front end that attaches to the hose that will be hard to reach when you attach it. You will know the one I am talking about when you get to it. You will find that splicing the harness and doing that tube are the most critical and skill oriented steps unless you do the guages and when you drill into your dash don't miss the target! Lastly now you have to decide if you want the Saleen Super Shaker kit and how to get it with out pissing off the wife. Any ideas on that will help me out! Here's a pic of my work.
As for the delivery, my wife and kids were home, and I got it a day earlier than expected so I hadn't made room in the garage for it (not that I'd let the delivery guy stack boxes around my car lol).I like the liquid rubber idea, will have to pick some up. As for the water tube, I know which one you mean, got that installed last night as well. Made sure I got it pulled up as far as it would go over the nipple. Hopefully that will do. Not too concerned about the splicing, actually I'm not very experienced with it, which means I will pay particular attention to detail. lol I do have to get something to compress the alternator cable extension though. It's obviously a much larger gauge than the normal 18 guage wires I'm used to dealing with. Haven't decided about gauge mounting yet, maybe the SoS dash pod, maybe the piller pod, maybe the Roush vent pods.
Now as for the new supershaker... who knows what the future will bring?
 But at least now I know that I will have the extra horsepower to get away fast if the wife starts throwing things when I ask her about it.
  7/26/08, 05:52 AM
#9
Mach 1 Member
Thread Starter
Join Date: November 7, 2007
Location: Brigantine, NJ
Posts: 591
Likes: 0
Received 0 Likes
on
0 Posts
7/26/08, 08:21 AM
#10
GT Member

Join Date: November 25, 2004
Posts: 173
Likes: 0
Received 0 Likes
on
0 Posts
be sure you have all the tools they said you will need as some arnt easy to find.be sure you get the vacumn lever up to get to the rear bolt.you will need the swivel socket to get it on.i would cover all the open slots on the sc after you get it on till you finish so you dont drop anything in there like i did.and it will take 2 people to get the sc on.good luck.
7/26/08, 08:46 AM
#11
Mach 1 Member
Thread Starter
Join Date: November 7, 2007
Location: Brigantine, NJ
Posts: 591
Likes: 0
Received 0 Likes
on
0 Posts
be sure you have all the tools they said you will need as some arnt easy to find.be sure you get the vacumn lever up to get to the rear bolt.you will need the swivel socket to get it on.i would cover all the open slots on the sc after you get it on till you finish so you dont drop anything in there like i did.and it will take 2 people to get the sc on.good luck.
Thanks for the input..
7/26/08, 08:51 AM
#13
Mach 1 Member
Thread Starter
Join Date: November 7, 2007
Location: Brigantine, NJ
Posts: 591
Likes: 0
Received 0 Likes
on
0 Posts
Most definately gonna hit the dyno. Not sure which one though, there are a few around here that I've heard good things about, just not sure about having someone messing with Brent's tune too much...
7/26/08, 12:27 PM
#14
Legacy TMS Member
Join Date: January 9, 2005
Location: New Carlisle, Ohio (20 miles north of Dayton)
Posts: 6,982
Likes: 0
Received 6 Likes
on
6 Posts
I wouldn't let anyone mess with Brent's tune. Just get it dyno'd and get a good A/F ratio and contact Brent if there is an issue and he will adjust your tune as required for free. But my bet is his canned tune will be spot on!!!
Scott

 7/27/08, 06:24 AM
#20
Mach 1 Member
Thread Starter
Join Date: November 7, 2007
Location: Brigantine, NJ
Posts: 591
Likes: 0
Received 0 Likes
on
0 Posts
Well, things are really coming along now!! Overall feeling on the install: Nothing in this install is rocket science. Time consuming, yes. Especially for someone like me that has never done a blower install before. I'm sort of applying my own version of the old addage, measure twice, cut once. The best advice I could give to anyone attempting something like this for the first time is to not only make sure you understand what you are trying to accomplish in in the cirrent step of the install, but to read ahead a couple more steps so you understand how what you are currently doing will affect or be affected by what is coming up. Makes life alot easier if you've routing hoses just right, positioned clamps correctly, etc. So here's where we stand as of last night...
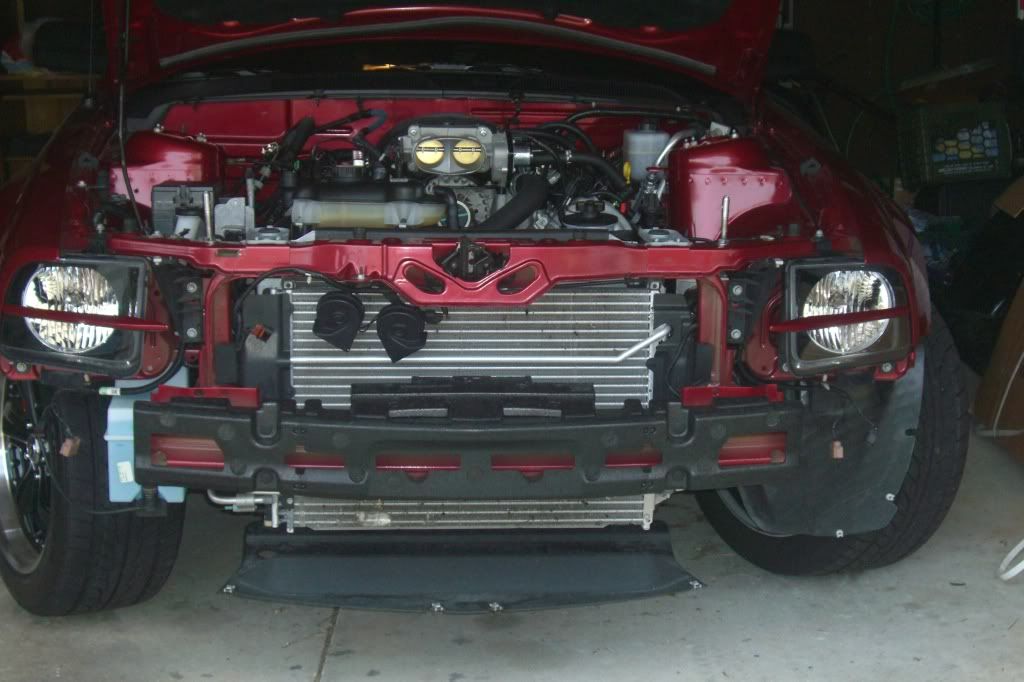
Intercooler and new water pump installed. Had to make some modifications because the 07 bumber bolts are considered too short to hold the intercooler, nothing big, just removal of the bumper pad in order to get to the holes for the bolts.
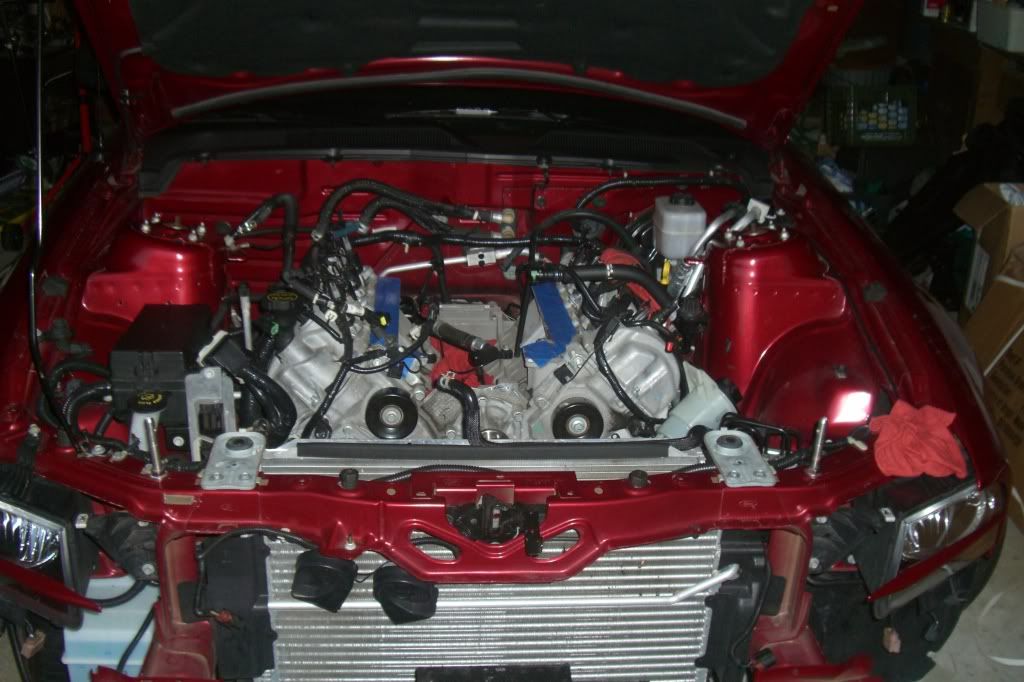
Water tubes installed in the valley of the engine. Again, pay attention the the clamp positioning, it is important that the lower clamp isn't in the way when dropping the SC in, and the top clamp need to be accessable for attaching to the new water crossover.
Instructions say to re-use the original intake gaskets on the SC, but I didn't need to do that. The SC came with a new set.
Called a buddy to help me get the SC hoisted on to the engine in the morning. He finally showed up around 3...
The SC install intself wasn't bad at all, but one other tip... I didn't remove the hood for the install, and am still using the old hood prop. Not a good idea here. Ended up using some rope and tied it off to the garage door so we had room to lift it in. Took a little tinkering to get it lined up (note the tip above about clamp positioning), but once we got it lined up, put the bolts in, pulled it as far forward as possible, and torqued it down. At this point it's starting to look like something!!!!
Added in the new water crossover, along with the new pulleys and alternator bracket.
As promised, Brenspeed overnighted the alternator pulley removal tool, so I literally took it from the Fedex guy and ran back to the garage. Impact wrench + correct removal tool = extremely easy pulley removal!! Hat's off to those I've read about that came up with their own method of removing it. I would have been pi**ed if I had to figure that one out, especially since I have no idea how to weld!!!
At this point I was stalled, because I didn't rent an underdrive pulley early, and my local shops didn't have one in stock. Had them call around and there is one available for me at another store, so I'll be picking that up this morning.
I didn't want to stop last night though, so I began routing hoses. Again, nothing difficult, but it pays to take your time since they are molded to clear as long as they are positioned properly. Also had to keep in mind that I need to convert most of the hosing back to the 05-06 since that is how the package was shipped. Ended there last night, my back was killing me, and the greenheads (PITA flies that bite like crazy for those of you not familiar with the southern jersey shore) where out in full force so I figured I'd start fresh this morning.
I'll upload pics in a few, have to pull them off the camera.
More to come!!!!
Intercooler and new water pump installed. Had to make some modifications because the 07 bumber bolts are considered too short to hold the intercooler, nothing big, just removal of the bumper pad in order to get to the holes for the bolts.
Water tubes installed in the valley of the engine. Again, pay attention the the clamp positioning, it is important that the lower clamp isn't in the way when dropping the SC in, and the top clamp need to be accessable for attaching to the new water crossover.
Instructions say to re-use the original intake gaskets on the SC, but I didn't need to do that. The SC came with a new set.
Called a buddy to help me get the SC hoisted on to the engine in the morning. He finally showed up around 3...
The SC install intself wasn't bad at all, but one other tip... I didn't remove the hood for the install, and am still using the old hood prop. Not a good idea here. Ended up using some rope and tied it off to the garage door so we had room to lift it in. Took a little tinkering to get it lined up (note the tip above about clamp positioning), but once we got it lined up, put the bolts in, pulled it as far forward as possible, and torqued it down. At this point it's starting to look like something!!!!
Added in the new water crossover, along with the new pulleys and alternator bracket.
As promised, Brenspeed overnighted the alternator pulley removal tool, so I literally took it from the Fedex guy and ran back to the garage. Impact wrench + correct removal tool = extremely easy pulley removal!! Hat's off to those I've read about that came up with their own method of removing it. I would have been pi**ed if I had to figure that one out, especially since I have no idea how to weld!!!
At this point I was stalled, because I didn't rent an underdrive pulley early, and my local shops didn't have one in stock. Had them call around and there is one available for me at another store, so I'll be picking that up this morning.
I didn't want to stop last night though, so I began routing hoses. Again, nothing difficult, but it pays to take your time since they are molded to clear as long as they are positioned properly. Also had to keep in mind that I need to convert most of the hosing back to the 05-06 since that is how the package was shipped. Ended there last night, my back was killing me, and the greenheads (PITA flies that bite like crazy for those of you not familiar with the southern jersey shore) where out in full force so I figured I'd start fresh this morning.
I'll upload pics in a few, have to pull them off the camera.
More to come!!!!