When you click on links to various merchants on this site and make a purchase, this can result in this site earning a commission. Affiliate programs and affiliations include, but are not limited to, the eBay Partner Network.
Mustang Owners in the UK Help With MOT Tail Light Modifications
Hi there.
My name is Adil. I moved back to the UK in 2017, and brought my beloved California registered 1998 Mustang convertible with me.
Everything was OK at the beginning, but I have just had an overzealous MOT tester fail my Mustang for having red indicators - instead of amber.
Has anyone else had a similar issue? I cannot find anything to convert my lights to the UK standard and was looking for advice.
I love my car and do not want to stop using it in the UK.
Thanks in anticipation. Adil
I am not from the UK, but did a Google search for converting the taillights to UK standards and came across this site that might connect you with those that can help...
Red indicators on American cars was ok up to some point in the 60's I think
Anthing built after that has to have the familiar amber
I have a 2001 now but have had 2 earlier SN95 4.6 GT's and I have 2 S10 pick-ups
Also have a CJ7 Jeep and a 53 F100 pick-up
The common thread is the red flashing brake light indicator and fire hazard wiring done by some chimp at a so called "specialist"
Every car I've had has been done badly or it's been dangerous
The answer in most cases and certainly with the SN95 is to swap the use of the reverse lights to indicators by fitting amber bulbs
You may well need to run new wires to do this - add one for the fog lamp too - something else you have to have after 86
You'll need to add a fog lamp and a reverse light - found some very neat Hella units - will sort some pictures later
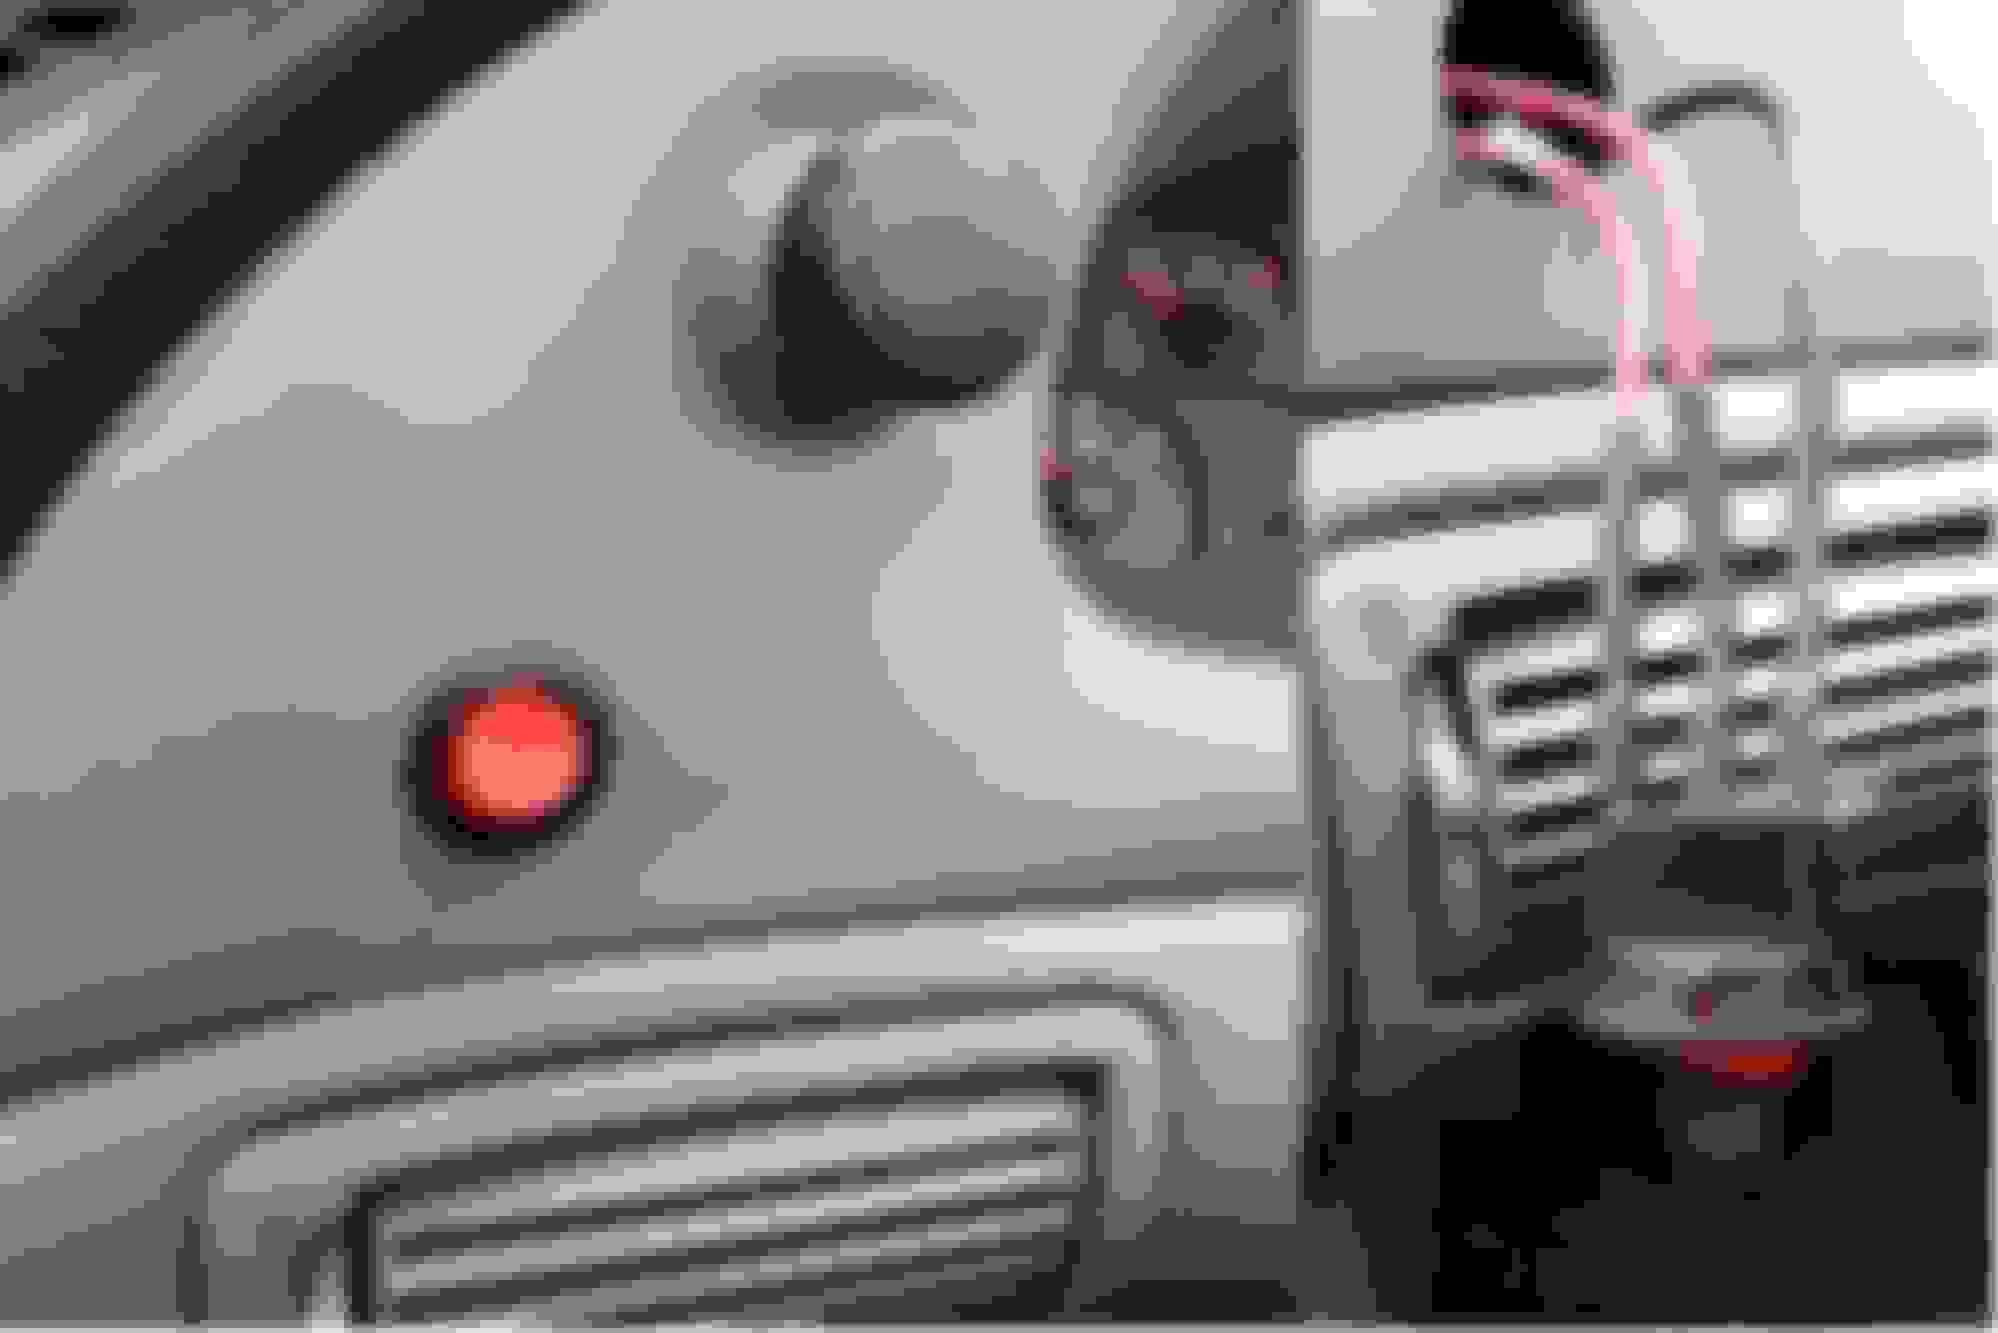
Something else that is an issue with the Mustang rear lights - there are 2 bulbs on each side so the flasher unit expects to see this
if you only connect 1, it will think a bulb has failed and flash quickly - the answer to this is to connect a resistor in parallel with the bulb
Again - picture to follow
Will be back later with pictures
Neil
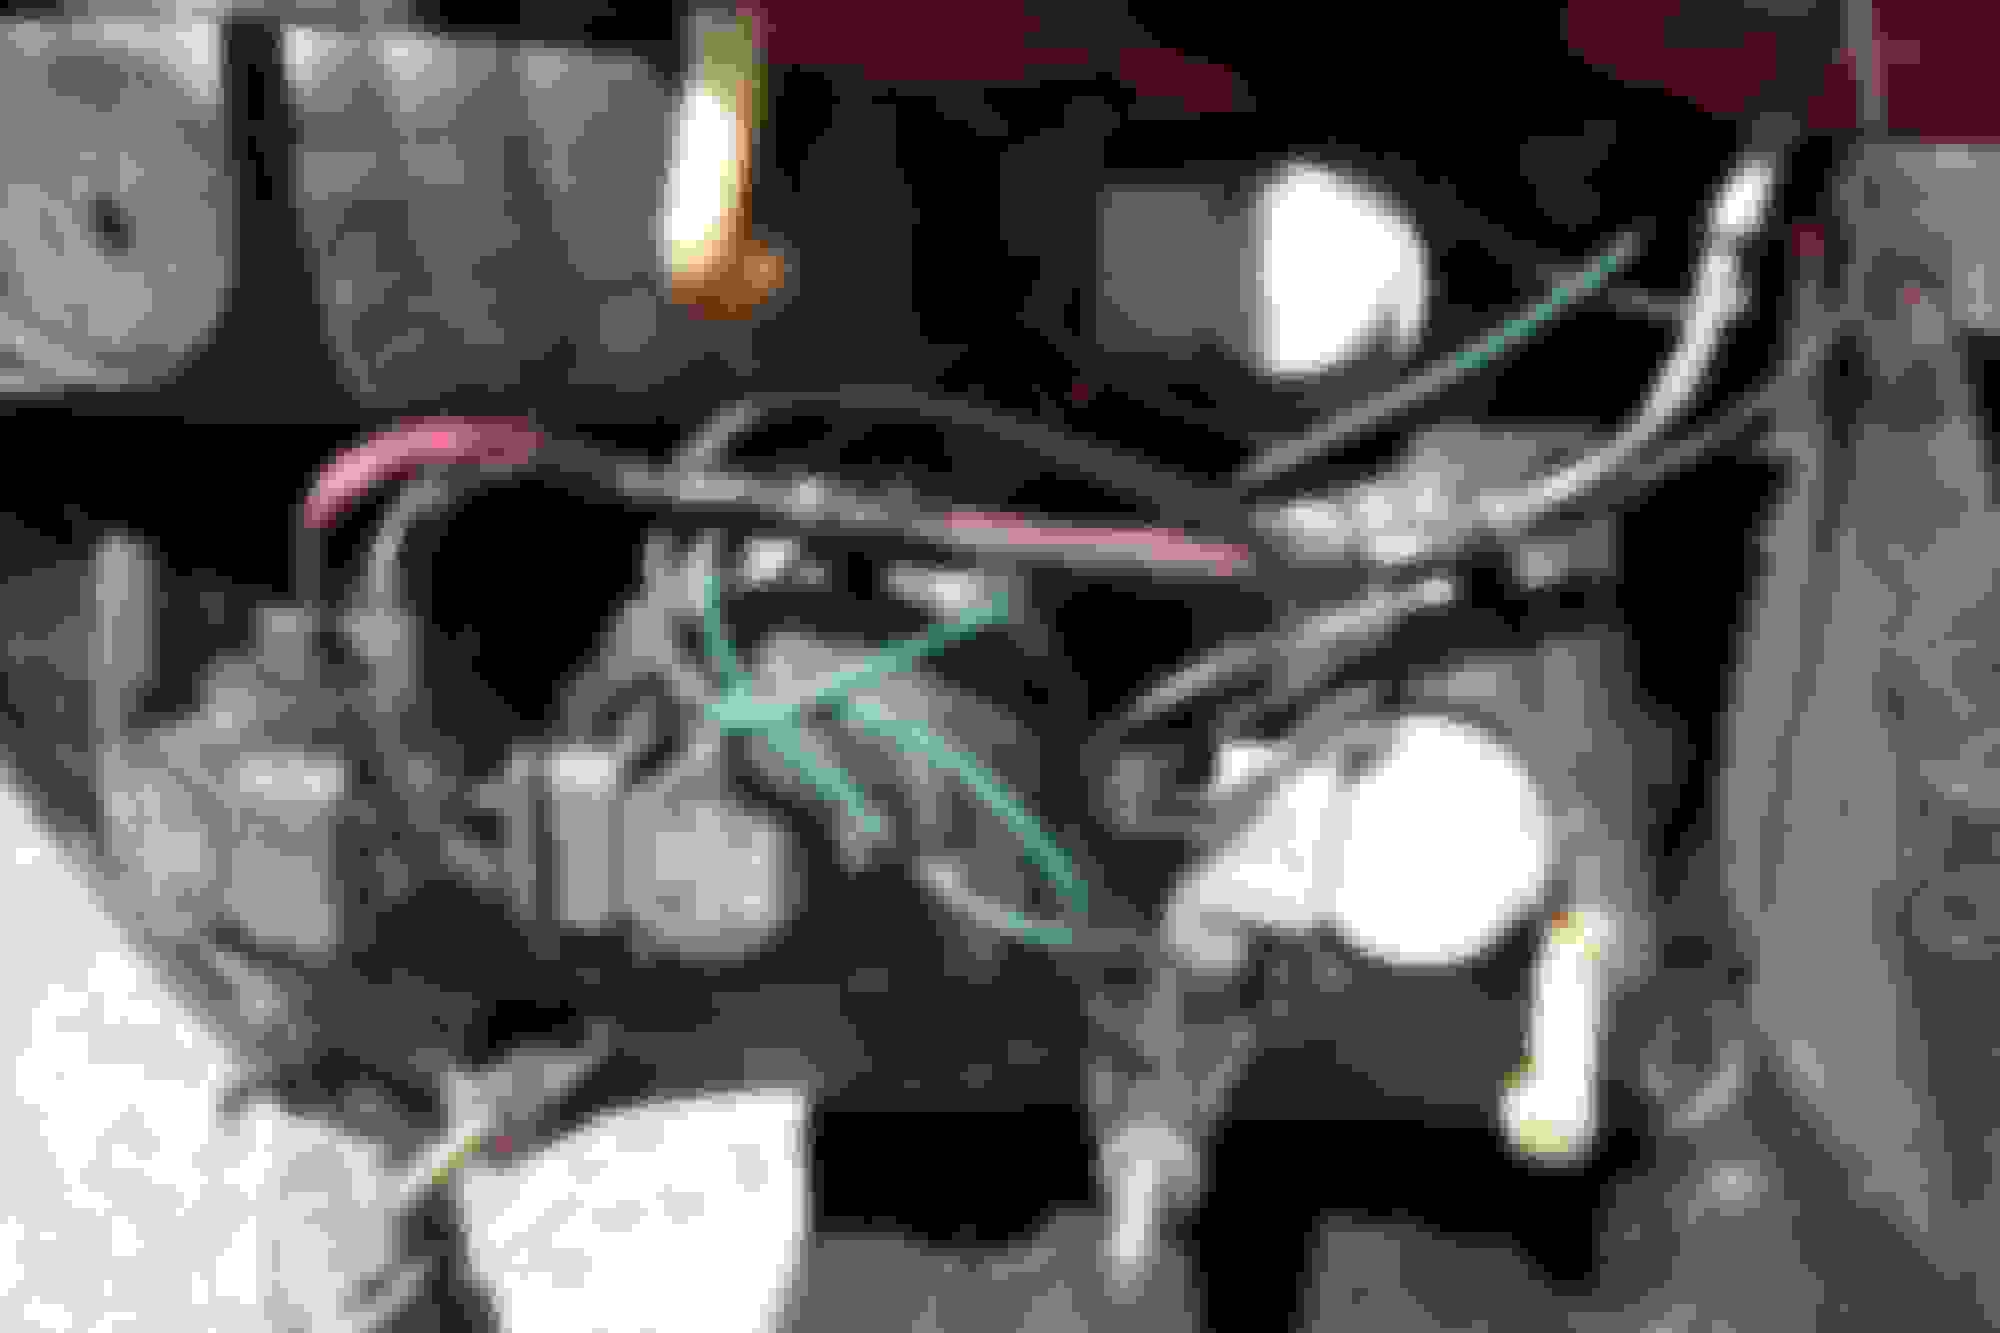
OK - here we go
A - original brake light wires now used for the indicator which is in place of the reverse light - also connected to the resistor
B - New brake light wire from the pedal switch
C - New brake light wire connected to original wires on bulb holder
As well as a new brake light wire, you'll need to add a wire for the fog lamp which is also a requirement after 1986 - side repeaters are required at this time too
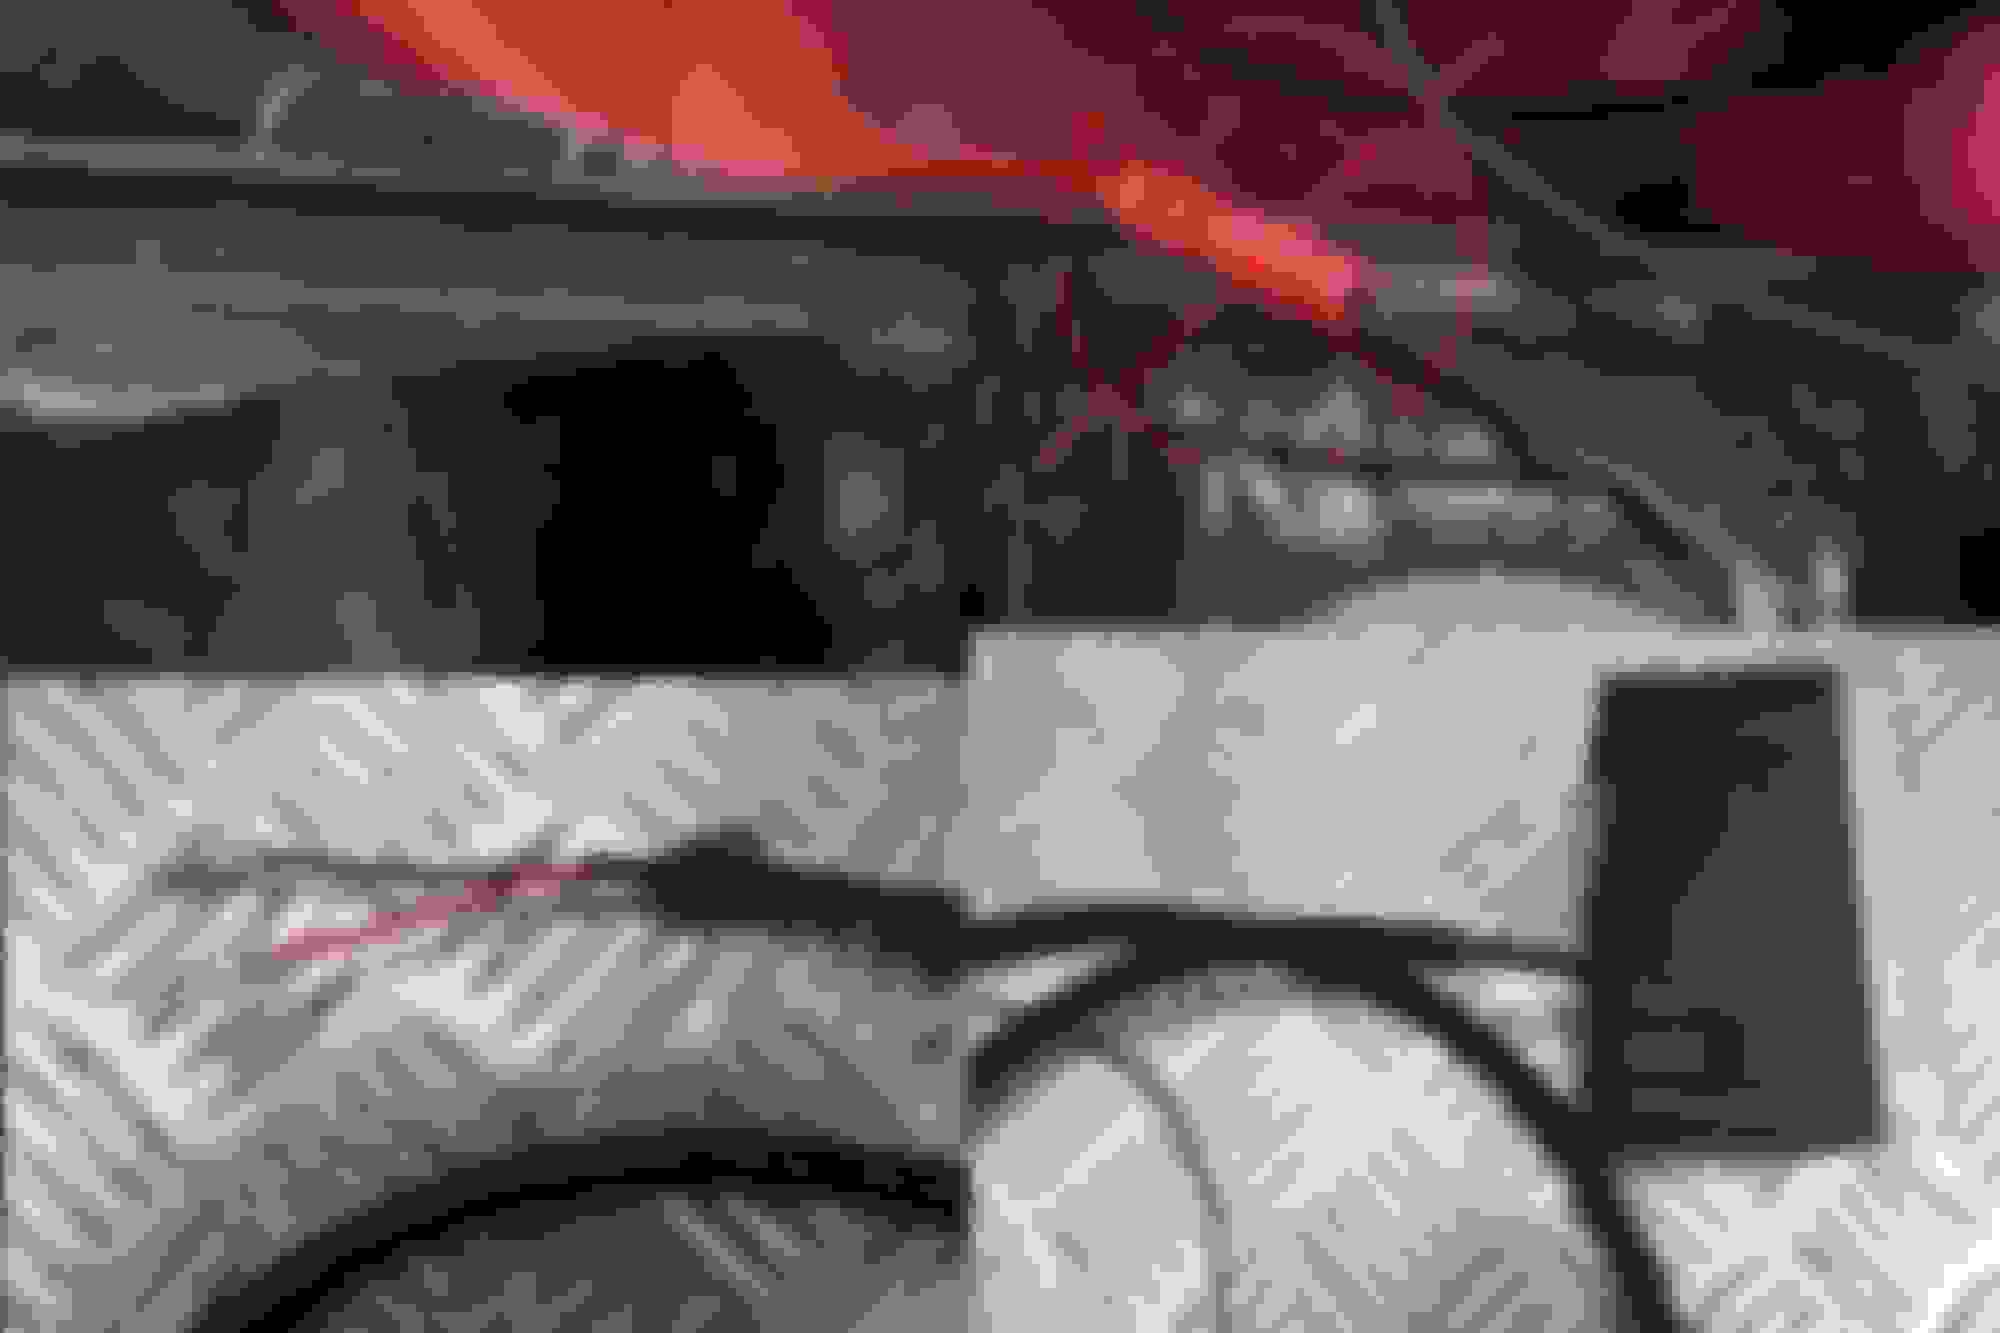
This is one of my pet hates - crimps - corrosion issues just waiting to cause you problems
Wiring that's going to remain reliable looks like the bottom pictures - soldered joints with heat shrink to protect
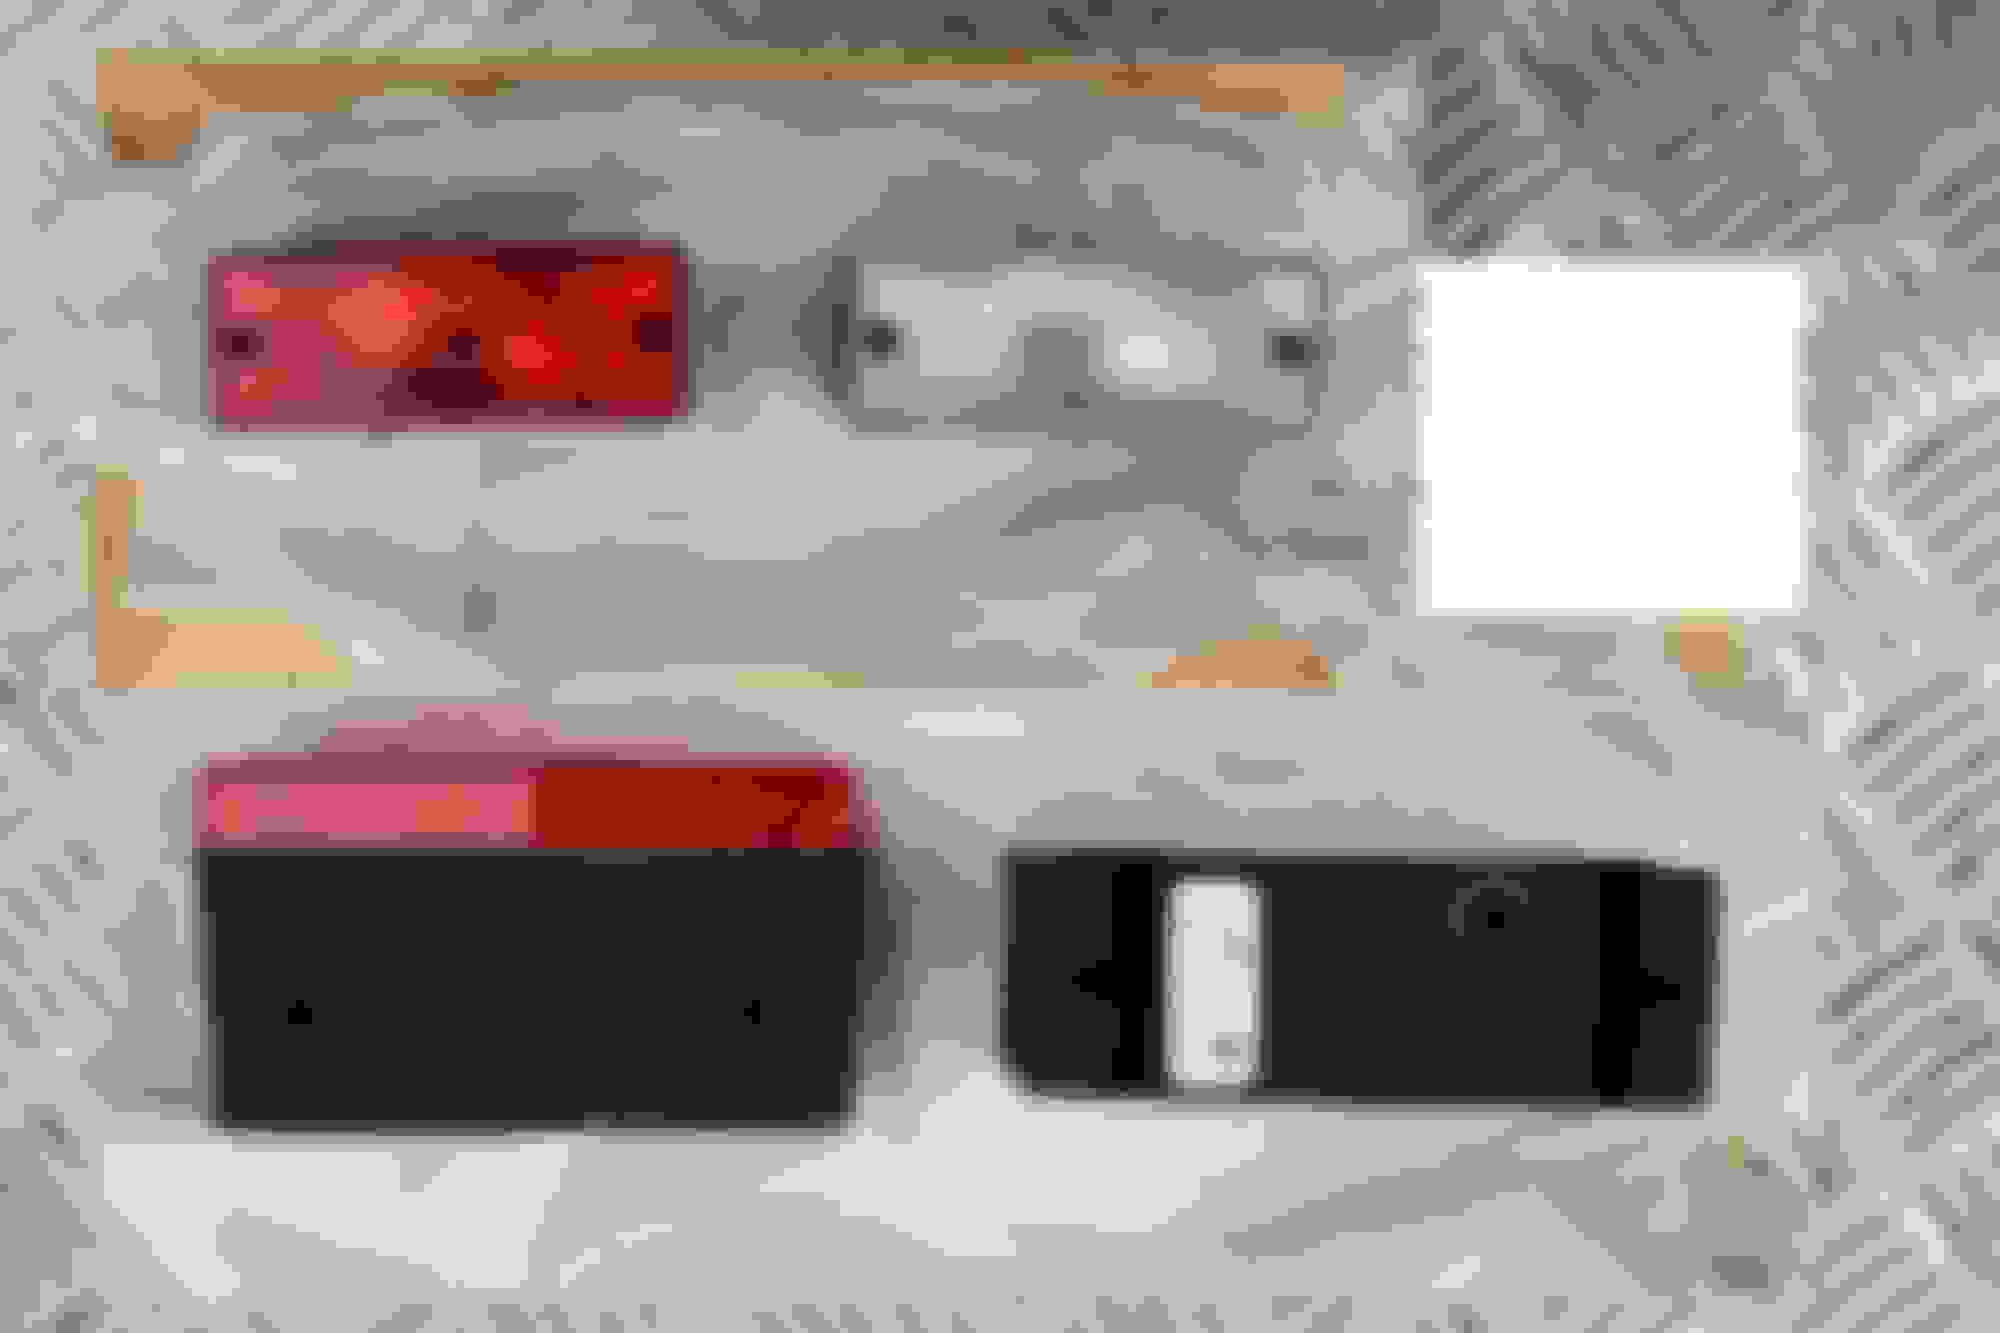
This is a power resistor which is used to mimic the extra bulb so the flasher relay will work correctly - it's 50 Watt - 6 Ohms
You can find them on ebay for a couple of quid - the splodges are just wax to stop the screws corroding
These are the Hella lamps I found on ebay same as already fitted - neat and easy to work with - again pretty good value - less than �30
Made some fixing brackets out of a bit of stainless I had spare - so that the proper fixings on the lamps could be used and to tuck them under the bumper a little
As it turned out ~ I needed to do the job anyway for my MOT due in a couple of weeks
Sorry it took me so long to get on it ~ had a couple of days work stripping a 53 Land Rover for a chassis change
The weather is warm hear right now so it was very hot and dirty
Let's just say it was heavy going as I'm not as young as I used to be ~ needed a couple of days to get over it
As the car was already done and I'm just tidying up, there's some info missing which I'll sort out today
Later
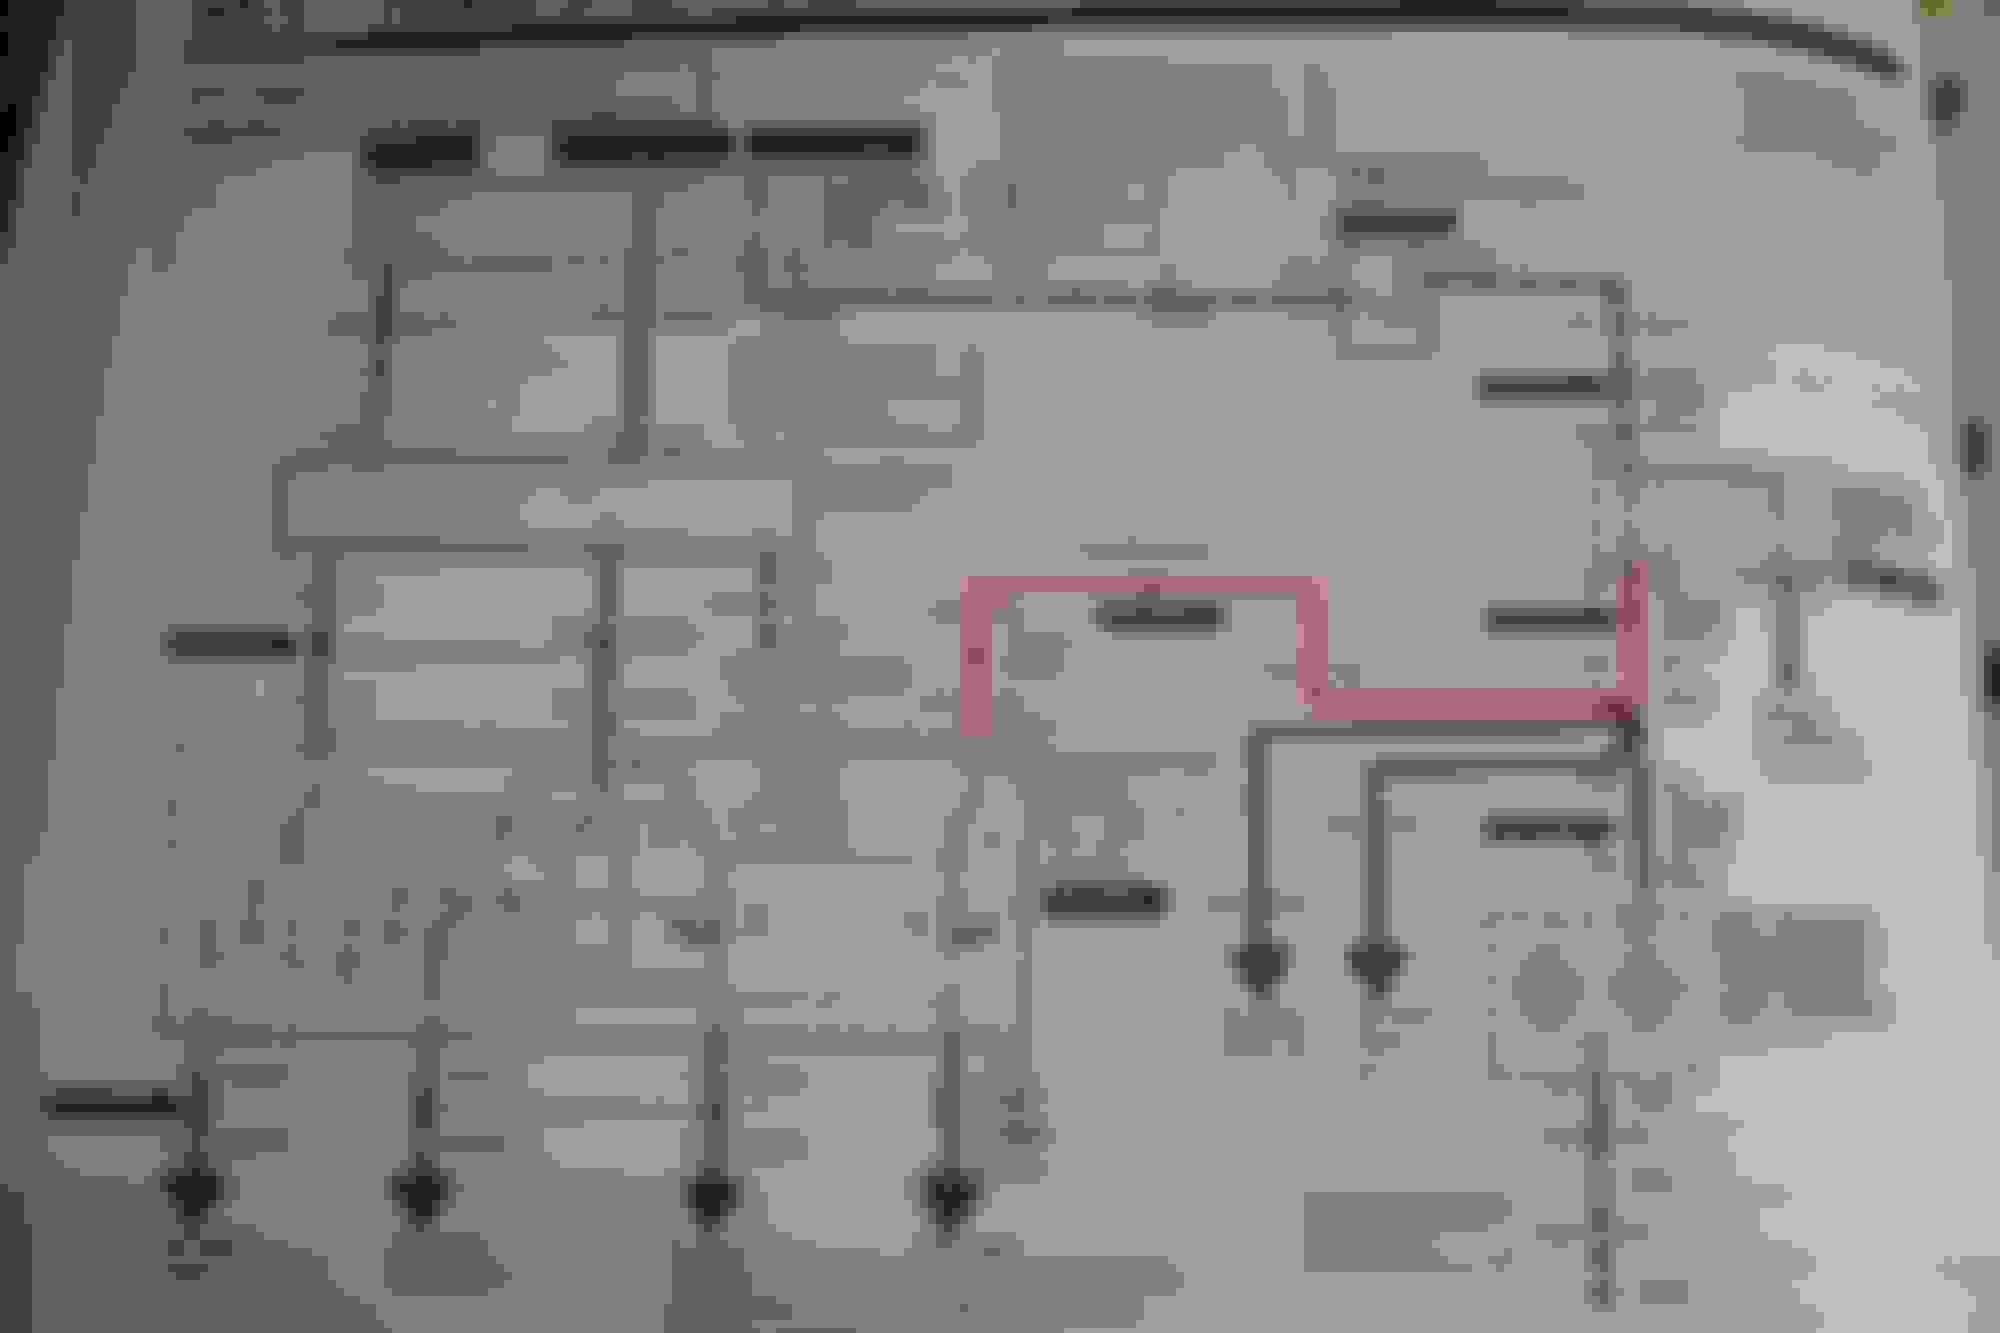
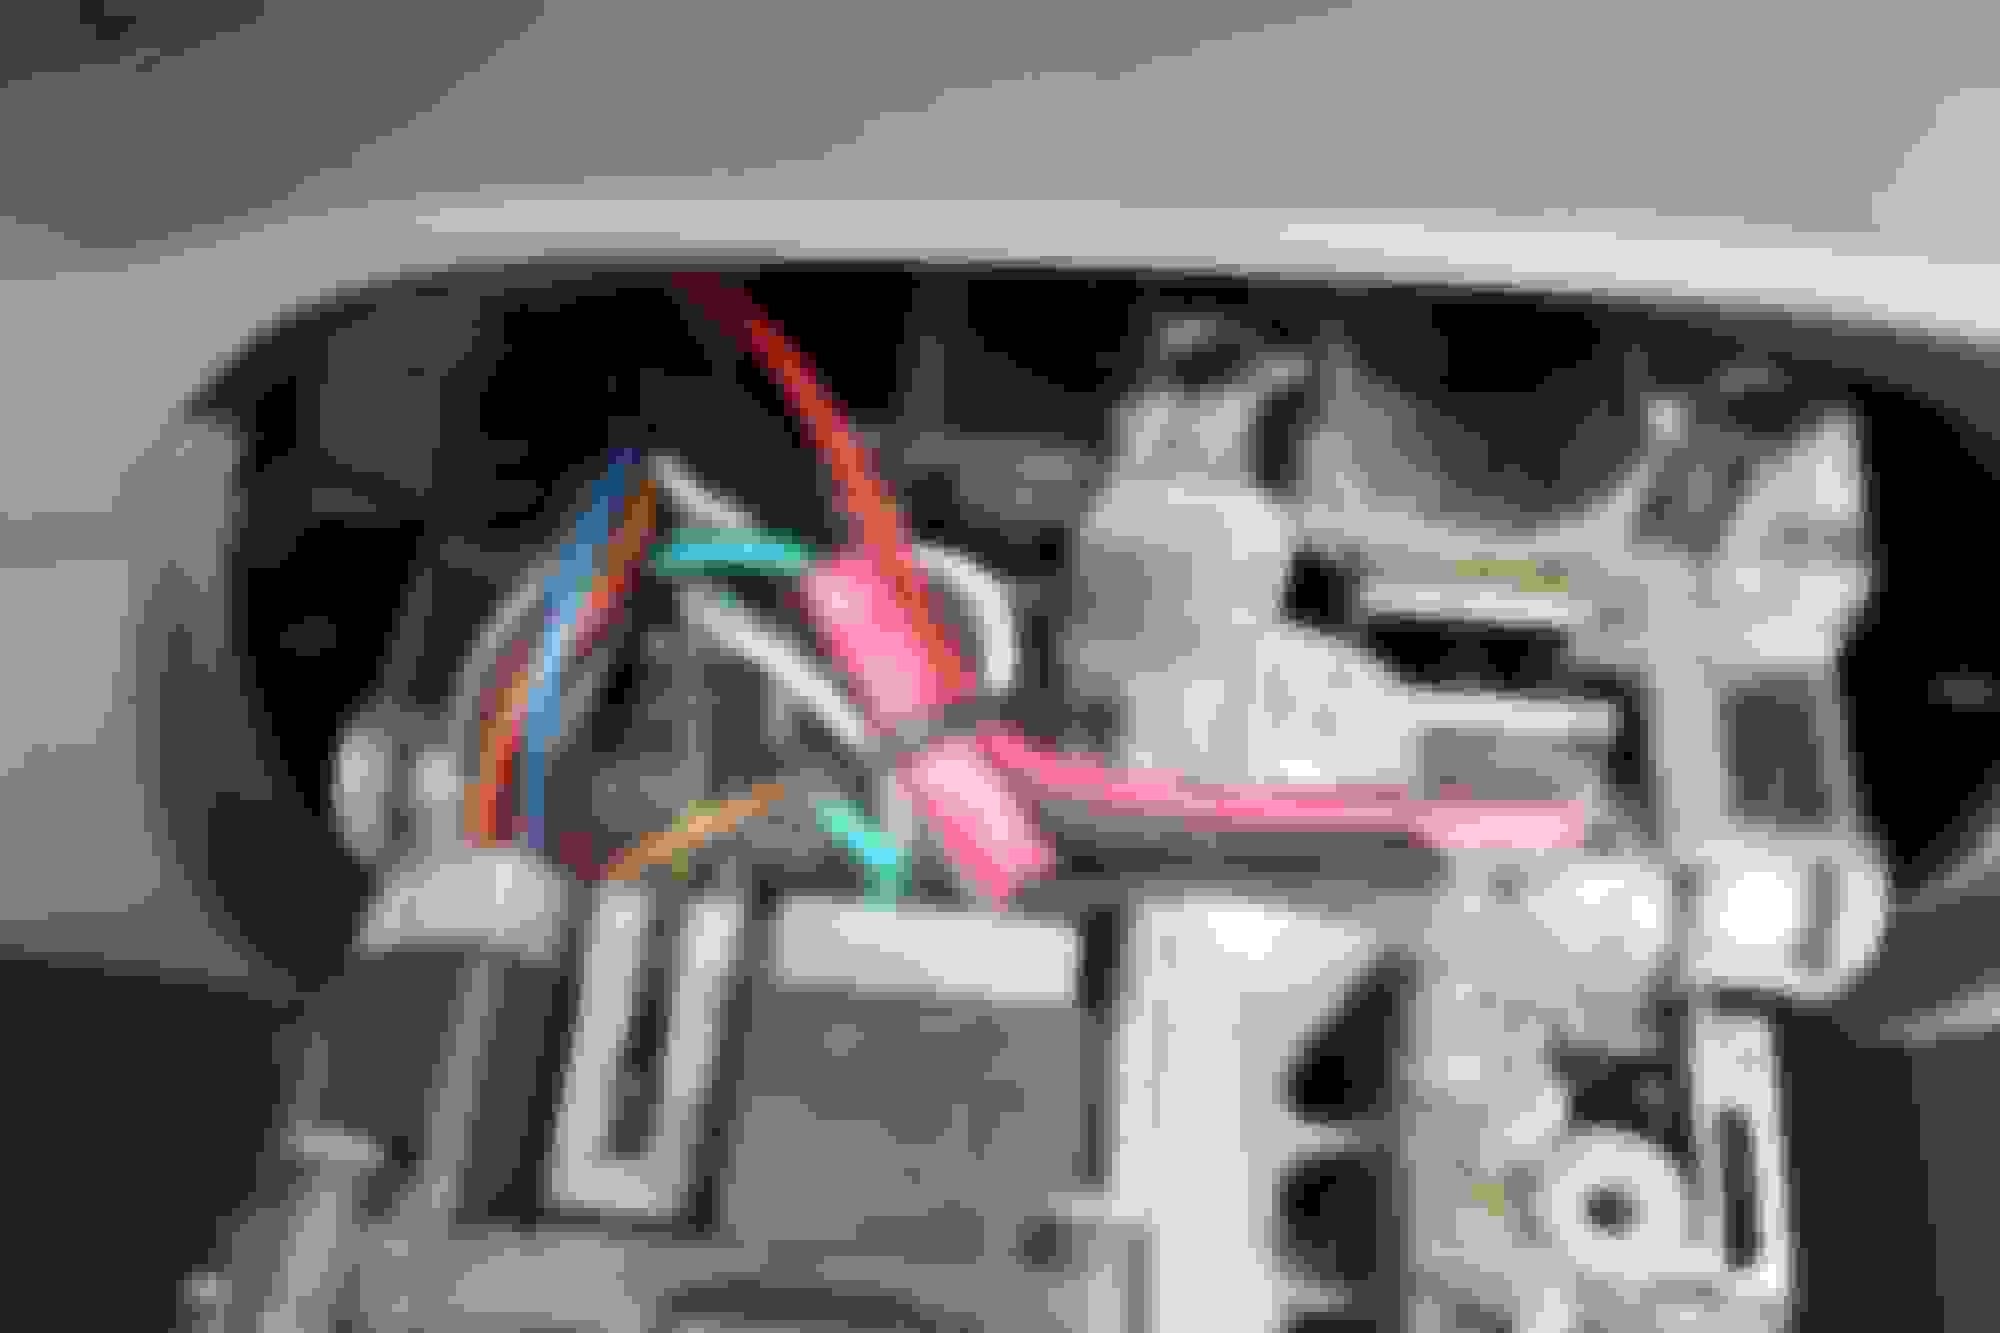
OK - here it is - separating the indicator flashing from the brake lights - would suggest you pull the earth lead off the battery before launching into this as some wires in the column remain live all the time
This is from a 2000 manual and my car is 2001 but would think this info will cover many model years of the SN95
The wire marked in Red is the connection from the brake pedal switch to the indicator switch on the column - by breaking this connection, the indicators will work as if you never put your foot on the brake
You can then use the connection from the pedal switch to run the brake lights - make sure the wire is at least 1mm section as the 4 bulbs and the high level brake light will add up to around 8 amps
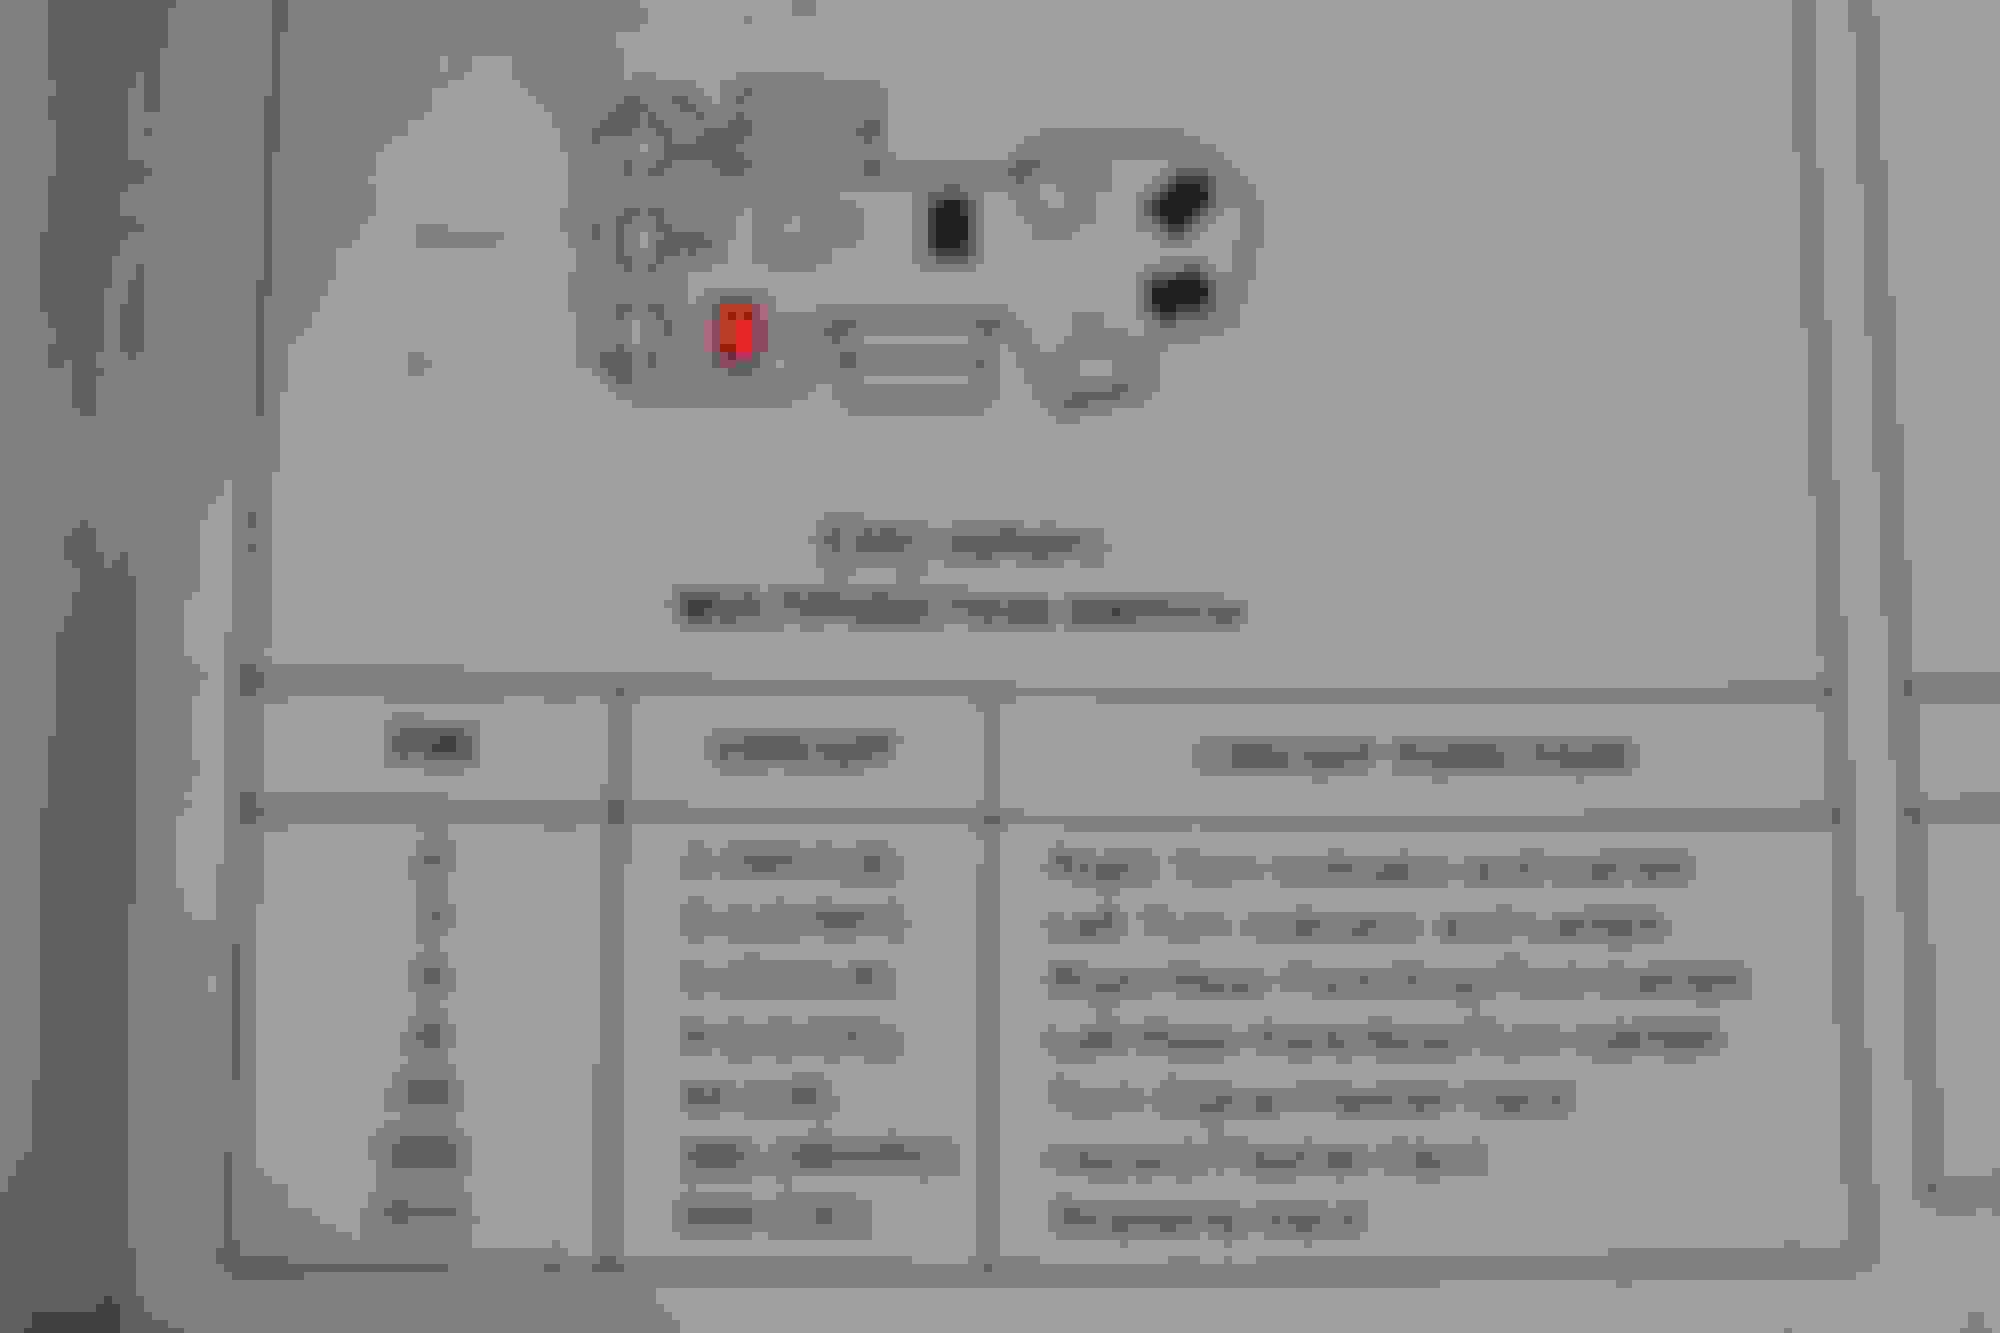
Note - pin 511 with dark green wire in connector C241 on the column switch
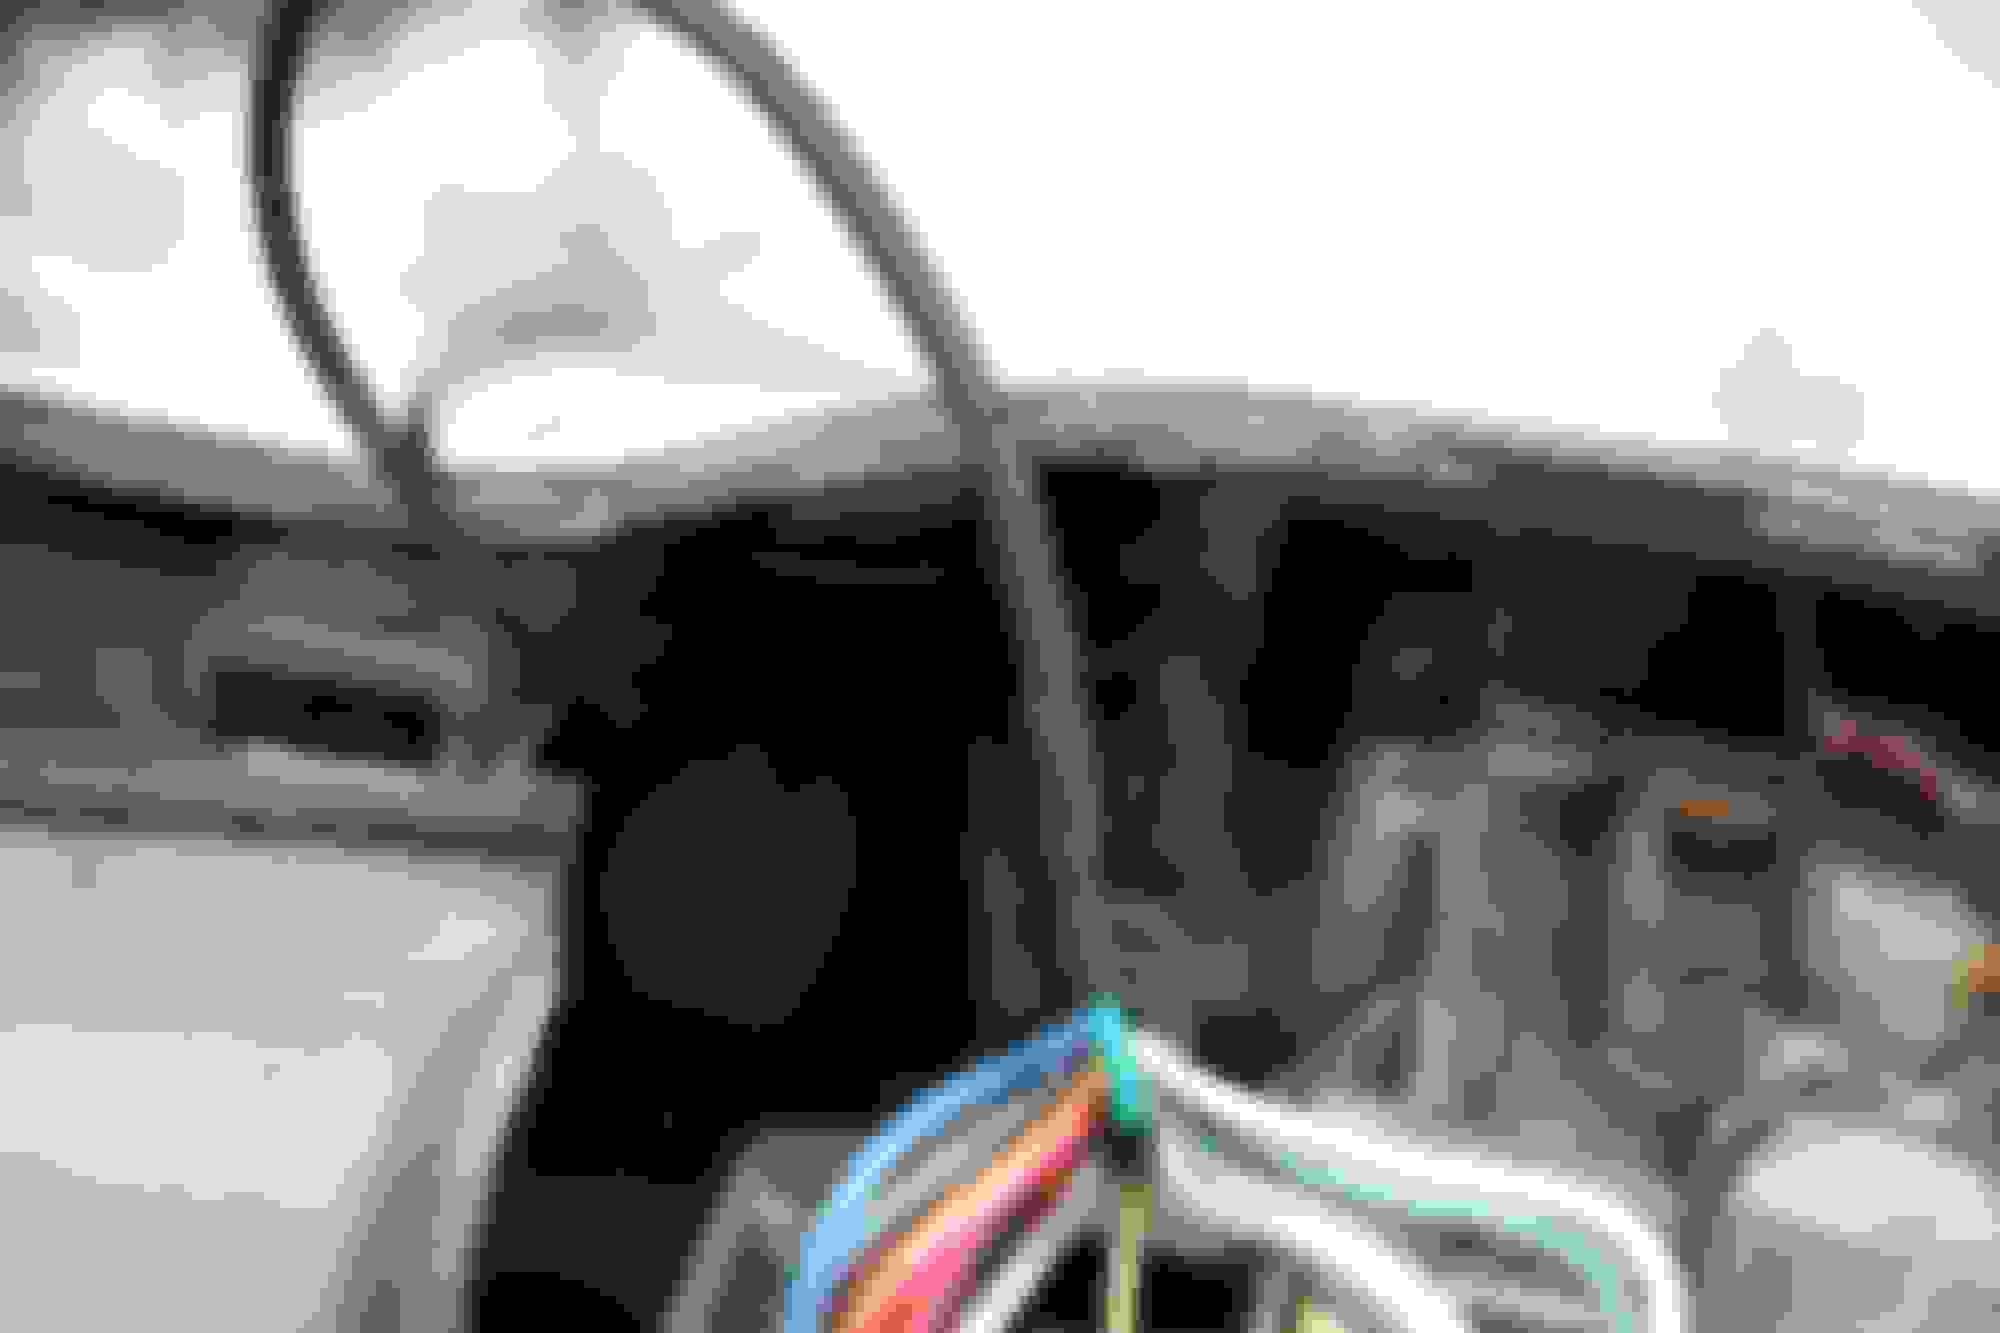
This is the detail of the plug on the steering column indicator switch so the next thing is to gain access to it - this requires pulling the lock barrel out to get the top trim off
If you need info on this - ask
This next one is what I found checking my car
Imagine my surprise to find the right wire disconnected - no surprise it's done badly
Wiring made safe and reliable - put it all back
Next - fog lamp switch
This was already done - remember - the fog lamp should only work with head lights on so you can take the power from the headlamp switch
This position is quite sensible as it turns out
It should have a warning light so an illuminated switch like this is ideal
The side repeaters are a simple piggyback of the front indicators so that should be straight forward - lots to choose from on ebay - check out lamps from Audi A3
nice and neat - easy to fit and available with legal clear lenses
Hope all this makes sense - any questions - just ask
 8/16/22, 11:13 AM