
Redline Tuning hood strut install question

Thread Starter
Bullitt Member
Joined: October 30, 2006
Posts: 492
Likes: 1
Redline Tuning hood strut install question
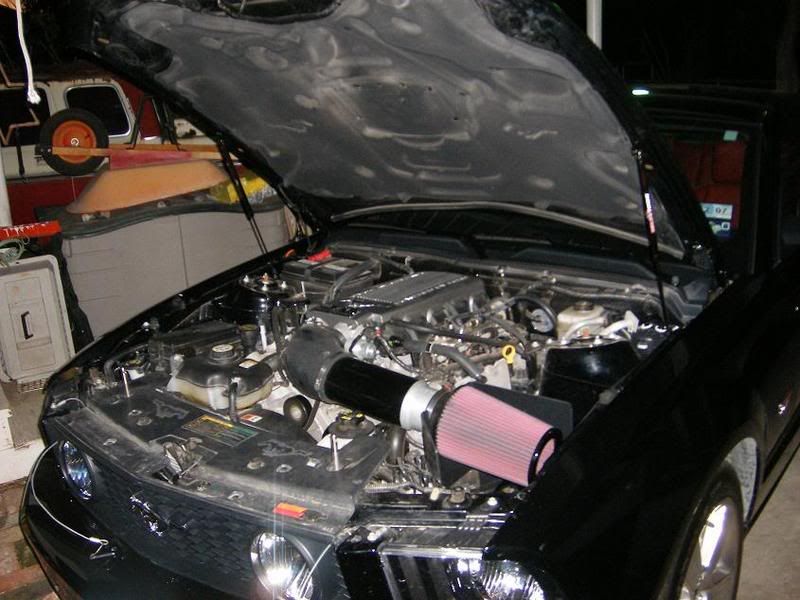
Opted to go with Redline QuickLIFT (with rivets) vs. MRT to eliminate risk of misaligning hood. Now looking for any lessons learned during Redline strut install. I'll need to go out and snag a pop rivet gun (either a Pittsburgh @ Harborfreight or a Craftsman @ Sears). Never rivet'd before, so looking for any words of wisdom. Thx

Cobra Member
Joined: February 18, 2007
Posts: 1,301
Likes: 0
From: SE PA
Practice on something other than the car until you get the feel for it. Generally speaking the force required increases exponentially as you near the point of shearing the shaft and setting the rivet. It's at that point that it's easy for the tool to jump or go in a direction you didn't intend. Try it and you'll see what I mean.
GT Member
Joined: April 15, 2006
Posts: 129
Likes: 1
+1 on the possibility of scratching...these are some fairly stout rivets in the kit. I painted my mounting plates to match and made some faint little scratches on 2 of the brackets you may want to apply some painters tape to the local area just in case...it can't hurt and you are supposed to have some out for the first few steps anyway. But mine have been on for over a year and I couldn't be happier with them.

Team Mustang Source
Joined: June 19, 2004
Posts: 6,840
Likes: 2
From: Phoenixville, PA
A few tips for you. When you get the drill bit out, wrap ALOT of electrical tape around the bit, with just about 1/4" showing, so when you do go through the hood, you won't go all the way through, and pierce the top.
Second, get yourself a large old blanket and cover the ENTIRE engine compartment! You will thank me later, after you see all the shaving coming down from the hood. Remember, the hood is aluminum, and a magnet won't pick them up. You can use the magnet for when you have to drill into the inner fender, where the bottom mounts go. And when your done drilling the holes, remember to touch up the area where you drilled with paint. Its an easy install, and you can say goodbye to the prop-rod forever!!!
Second, get yourself a large old blanket and cover the ENTIRE engine compartment! You will thank me later, after you see all the shaving coming down from the hood. Remember, the hood is aluminum, and a magnet won't pick them up. You can use the magnet for when you have to drill into the inner fender, where the bottom mounts go. And when your done drilling the holes, remember to touch up the area where you drilled with paint. Its an easy install, and you can say goodbye to the prop-rod forever!!!

Thread Starter
Bullitt Member
Joined: October 30, 2006
Posts: 492
Likes: 1
Great input... Thx for the tips. on the painters tape & on the drill bit tape & alum shavings tip. You're so right... I never would have thought of alum shavings until they were falling all over the engine bay!
Why Redline? Initially I was thinking of the MRTs.. but have seen multiple posts about the risk of hood misalignment (all it takes is a 16th of a inch shift). Only negative I've seen with the Redlines are the drilling and riveting.
on the painters tape & on the drill bit tape & alum shavings tip. You're so right... I never would have thought of alum shavings until they were falling all over the engine bay!Why Redline? Initially I was thinking of the MRTs.. but have seen multiple posts about the risk of hood misalignment (all it takes is a 16th of a inch shift). Only negative I've seen with the Redlines are the drilling and riveting.
Shelby GT350 Member
Joined: June 4, 2006
Posts: 2,244
Likes: 0
From: McAllen, TX
measure, measure and measure again mine are off by a little but only i notice it. another thing is get some touch up paint cause you will need it and also the most important item you need is a center punch YOU WILL need it or else you will cause more damage drilling then you will riveting and blue painters tape and a sharpie for the measuring
GTR Member
Joined: April 20, 2005
Posts: 4,660
Likes: 2
From: Tampa,FL
Great input... Thx for the tips. on the painters tape & on the drill bit tape & alum shavings tip. You're so right... I never would have thought of alum shavings until they were falling all over the engine bay!
Why Redline? Initially I was thinking of the MRTs.. but have seen multiple posts about the risk of hood misalignment (all it takes is a 16th of a inch shift).
.
on the painters tape & on the drill bit tape & alum shavings tip. You're so right... I never would have thought of alum shavings until they were falling all over the engine bay!Why Redline? Initially I was thinking of the MRTs.. but have seen multiple posts about the risk of hood misalignment (all it takes is a 16th of a inch shift).
Only negative I've seen with the Redlines are the drilling and riveting

Shelby GT350 Member
Joined: June 4, 2006
Posts: 2,244
Likes: 0
From: McAllen, TX

this is the kit you will more than likely be getting since the kit Jadeuel has has been discontinued and the one i bought is the new kit which looks alot better and is not so long, if your kit somes with 4 rivet brackets instead of 2 brakets and 2 ball joints then you can send it back to RedLine for their new kit


Legacy TMS Member
Joined: October 17, 2004
Posts: 922
Likes: 1
From: Northmapton, PA
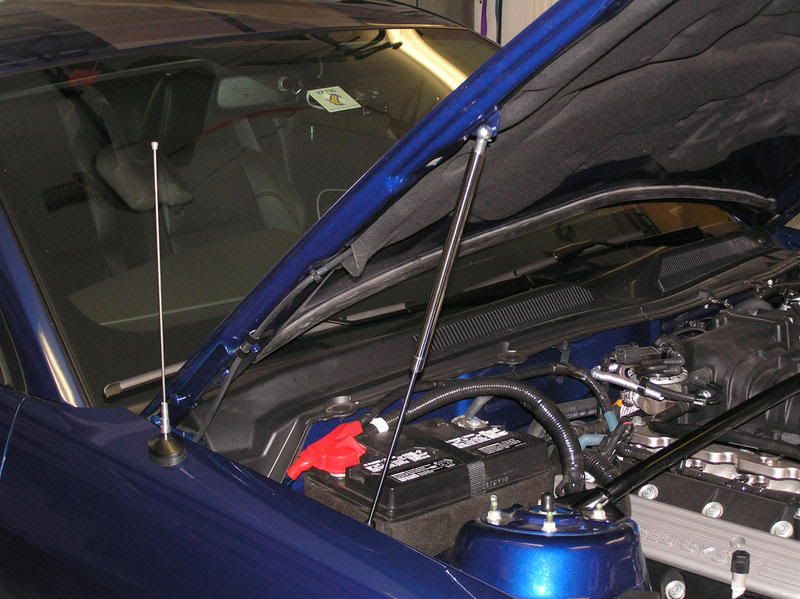
I have the Redline and love them.
The MRT kit was not available back when I got mine, but that being said - the Redlines are nice. Just take your time - measure twice - drill once.
The MRT kit was not available back when I got mine, but that being said - the Redlines are nice. Just take your time - measure twice - drill once.
GTR Member
Joined: April 20, 2005
Posts: 4,660
Likes: 2
From: Tampa,FL
this is the kit you will more than likely be getting since the kit Jadeuel has has been discontinued and the one i bought is the new kit which looks alot better and is not so long, if your kit somes with 4 rivet brackets instead of 2 brakets and 2 ball joints then you can send it back to RedLine for their new kit