
2010-2014 Mustang How to disassemble your car for a stereo install {PICS}


Thread Starter
Member
Joined: January 30, 2011
Posts: 36
Likes: 0
2010-2014 Mustang How to disassemble your car for a stereo install {PICS}
So, you've decided to put a stereo in your Mustang to fix the horribly deficient
Shaker 500 system that came stock with your car. I am in the same process myself,
and while all this information is kind of out there on the internet, it's stuff you
have to search for, so I figured, why not put it all down in one place?
Please note, all text and most images (except where noted) are mine. You are free to
distribute, print, use, etc, to your hearts content, but please leave this note and
the link to the original page in place. The original can be found here:
http://www.fast351.com/11GT/stereoin...tructions.html
Stage 1: Routing your amplifier wiring.
You need to run amplifiers off their own power cable sourced directly from the battery. The
easiest way to route the cables is using existing wiring locations, there's plenty of
room. Here we go:
Step 1: Open the hood, locate the battery, disconnect ground (this is optional,
but if you're leary about working on a live 12V system, it's safest).
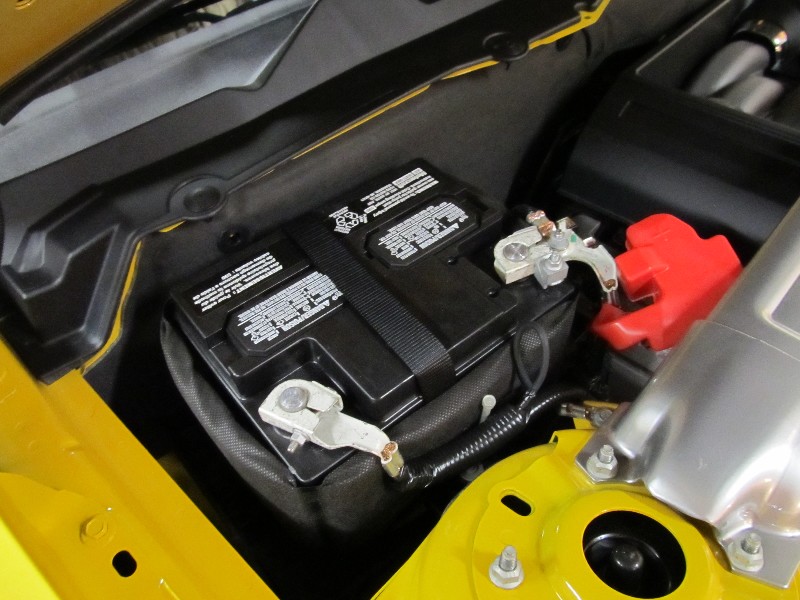
Battery
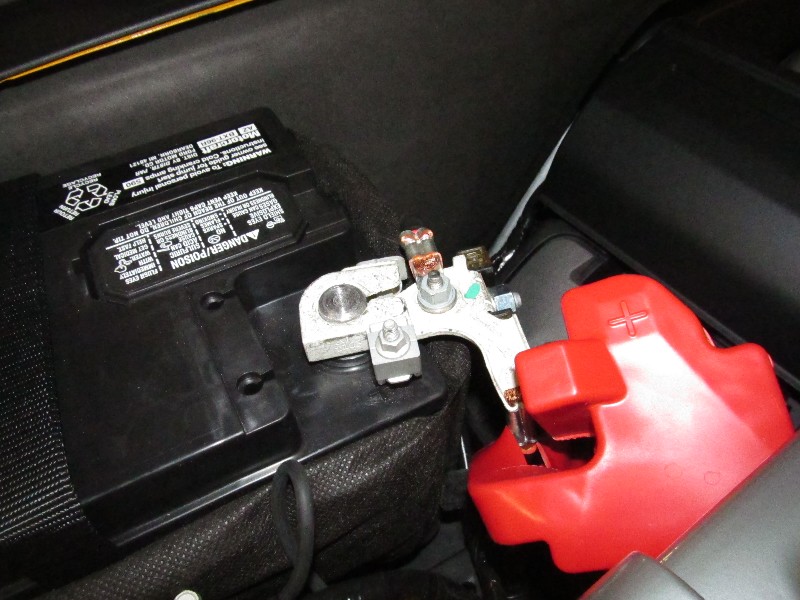
Closeup of positive post (where you will hook your cables)
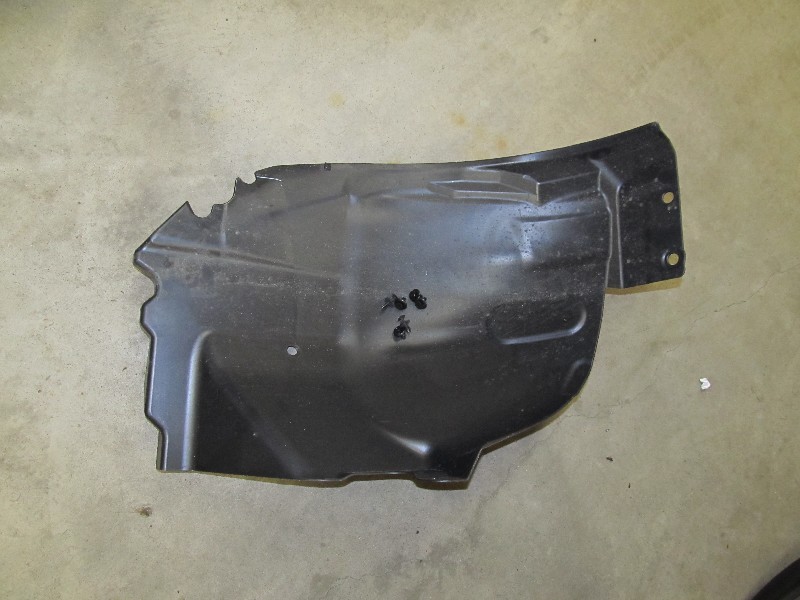
There are two places where you can run your battery cables. When you remove the fender liner
in the next step, you will see the choices clearly, but the factory harness that goes into the
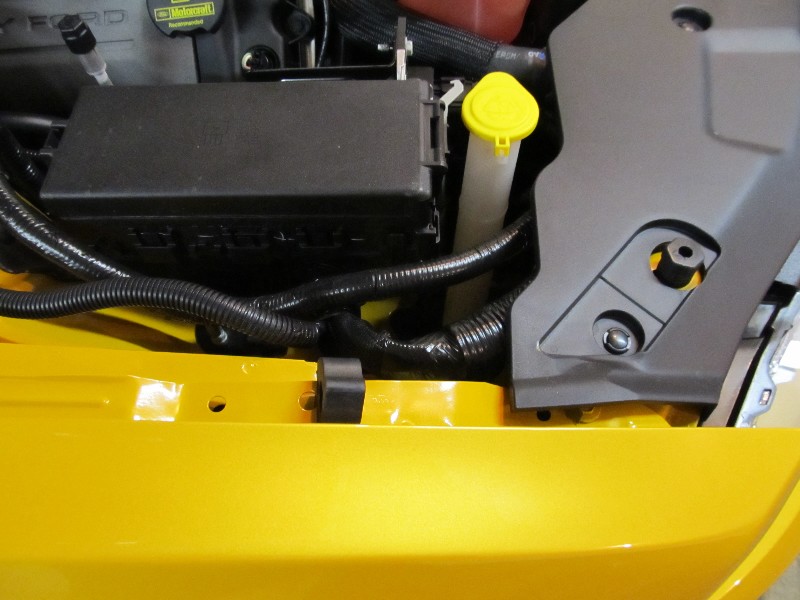
car comes under this fuseblock at the front right headlight, then goes down (see next picture).
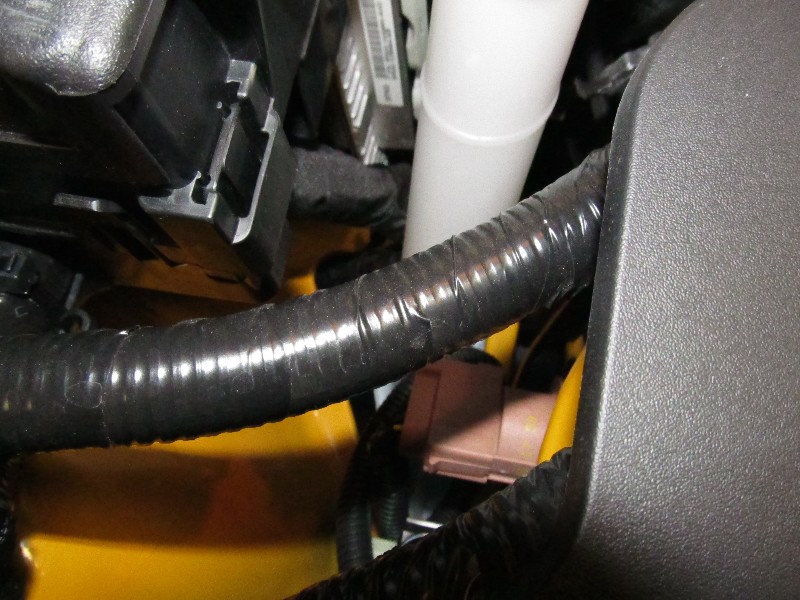
Closeup of where harness going to the passenger compartment goes out of the engine bay (the cloth-
wrapped one next to the computer).
Step 2: Remove the passenger side wheel. Remove the fender liner. The fender liner is held in with 6 fasteners. Two run
through the rock guard, and are pushpin type. Take a small screwdriver and pull the center of the pin,
then remove the whole pin. The other four are slightly different with a phillips head. The phillips
head just releases the center pin. Turn it 1/4 turn counterclockwise and remove the pin. Now, the
fender liner will be stuck behind the rock guard, which is part of the rocker panel. The easiest way
to remove it is to start at the front, roll it up like a taco shell, then rotate it out from behind
the rock guard:
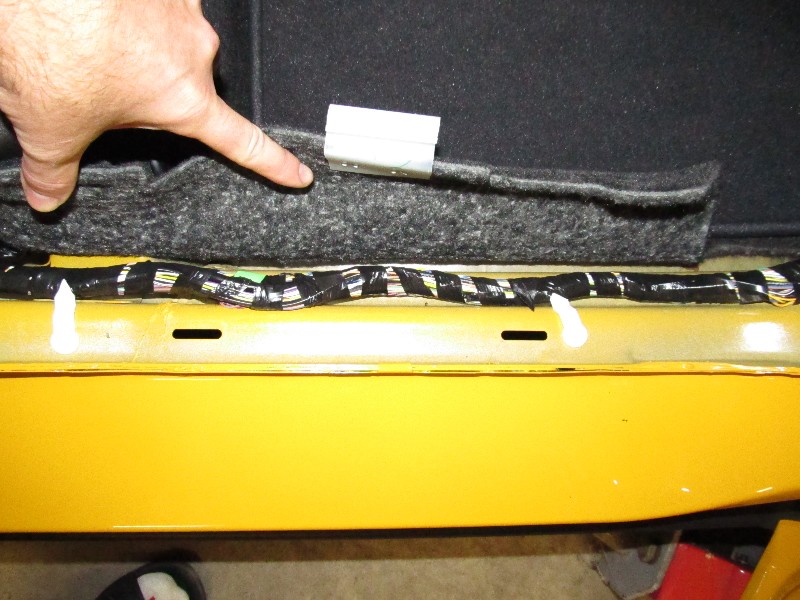
Fender liner removed, with it's 6 fasteners.
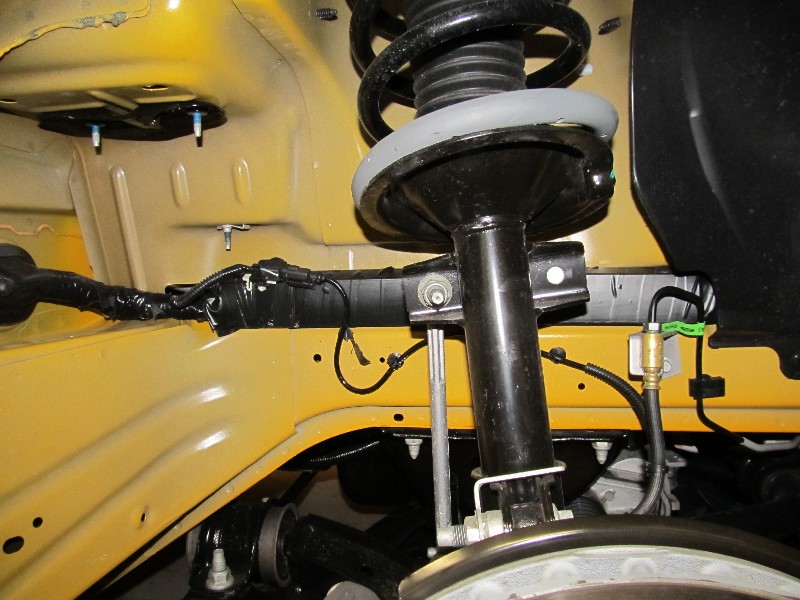
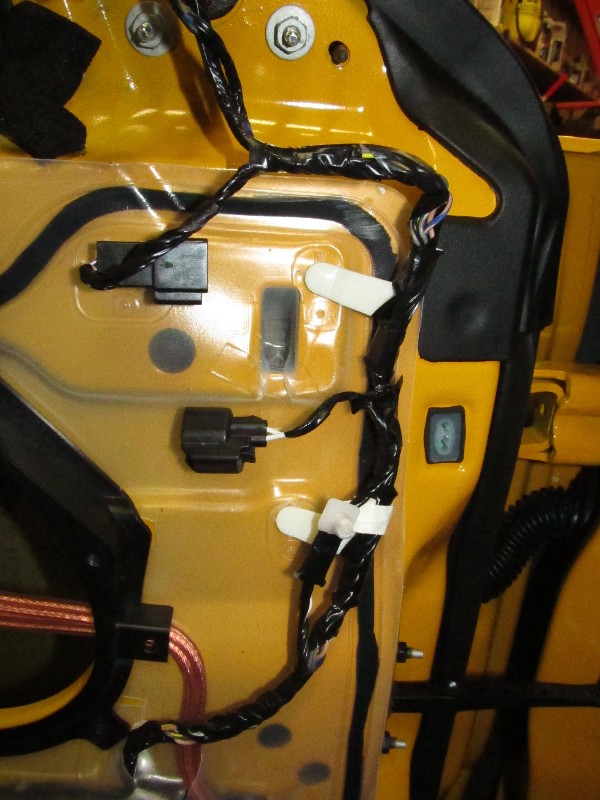
Here is where the factory harness runs. You could run your new cables on top and zip-tie to the
existing harness channel.
This is the grommet that runs into the car. There is a nub there which can be cut off to expose a
hole in the grommet that will enter the car. Also note there is a gap between the firewall and
inner fender. You could run the cables here as well. I haven't decided where I will run mine yet.
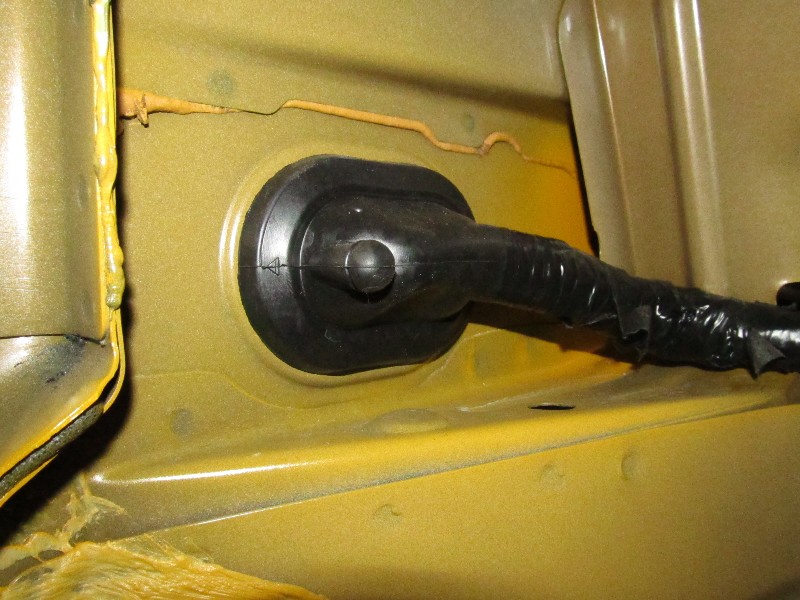
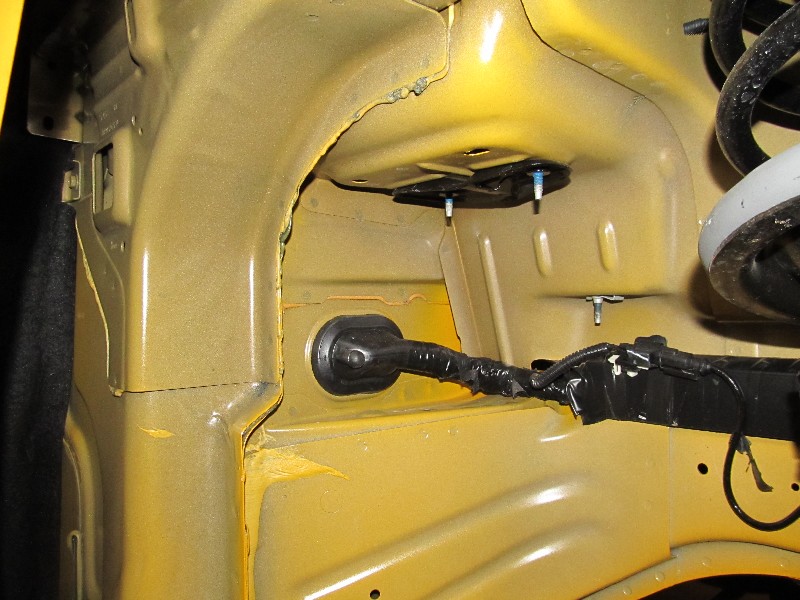
Closeup of body grommet.
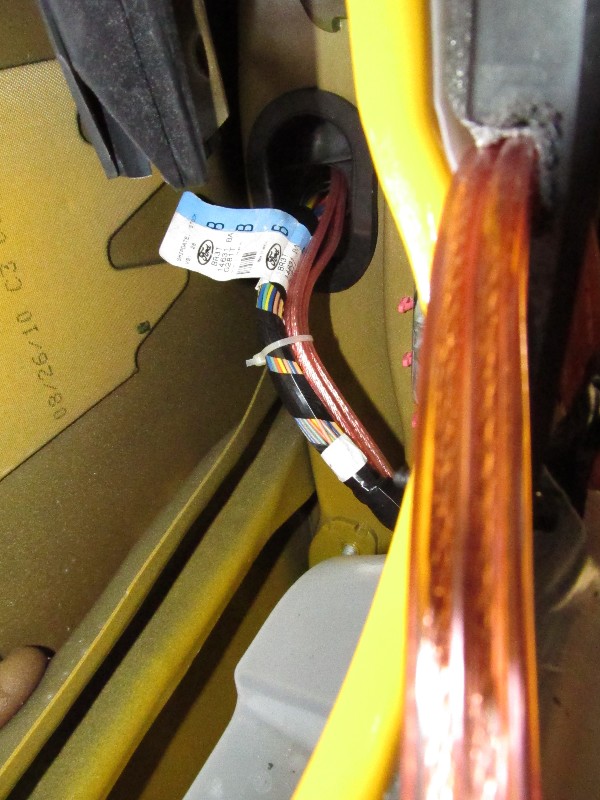
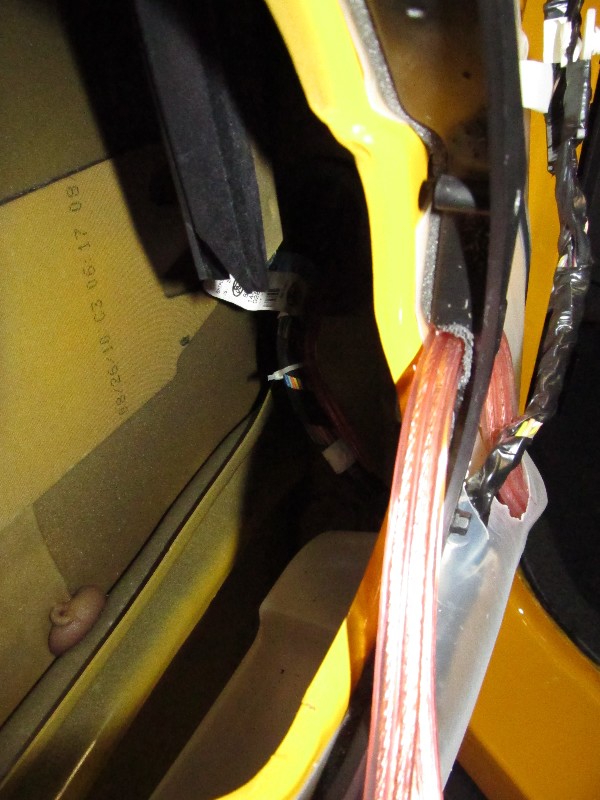
Where the grommet comes out inside the car, in the passenger side footwell.
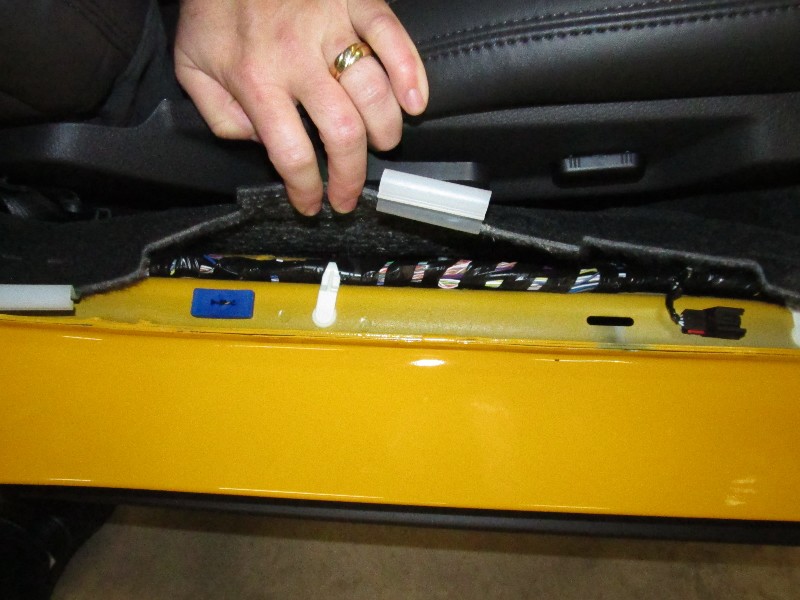
Step 3: Remove the passenger side sill plate. This plate "simply" pulls off. It is held
on by four clips. You will think that you are breaking your car. Trust me, you're not, it's just really
on there good. It is held on with double sided foam tape on the paint, which is what makes it hard
to remove. Just start pulling at the front of the sill plate, on the inside of the car,
and it will come off. Disconnect the ambient lighting connector and remove:
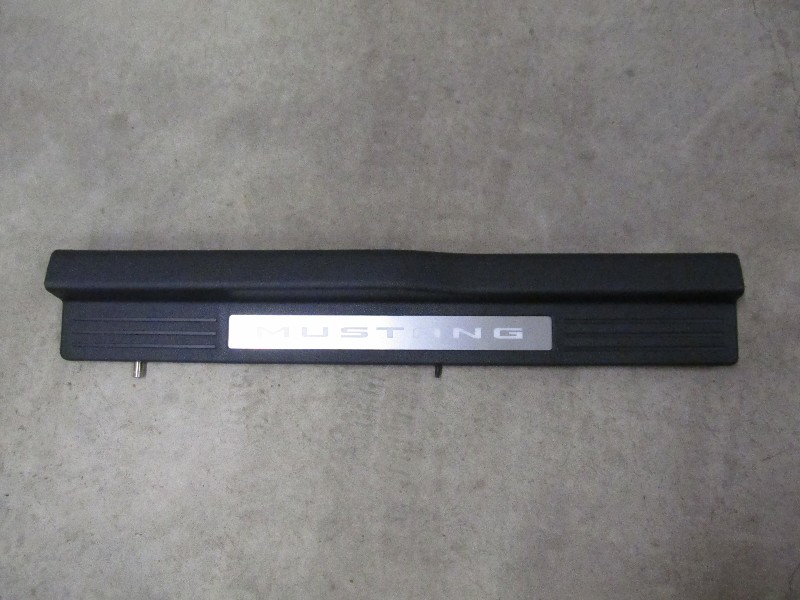
Sill plate.
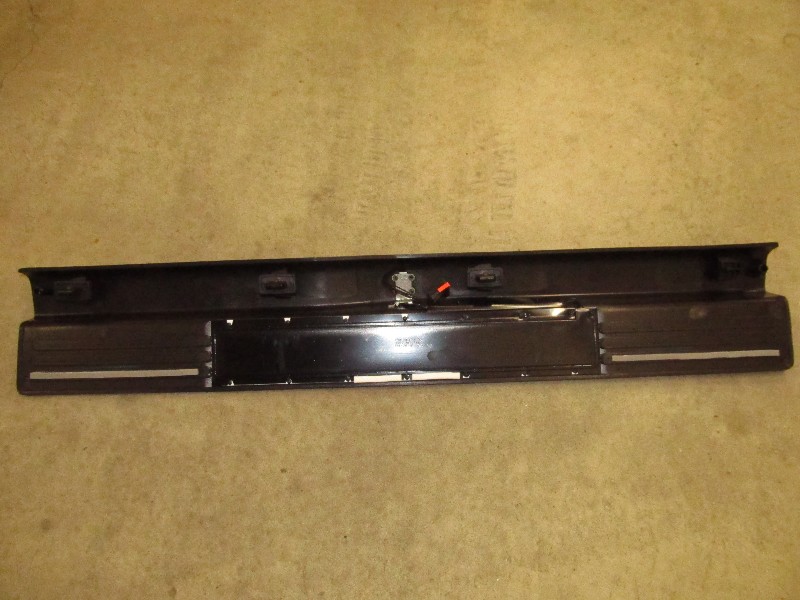
Sill plate when removed. Note the four clips and the double sided tape.
Step 4: Remove the passenger side kick panels (footwell). These just pull off. Start with the
cover plate, then remove the vertical piece.
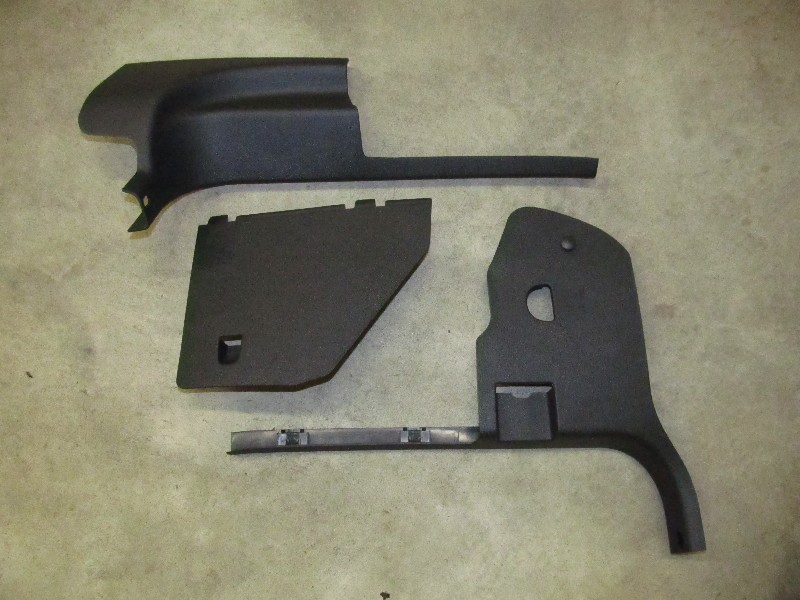
Kick panel and plate (drivers side also shown)
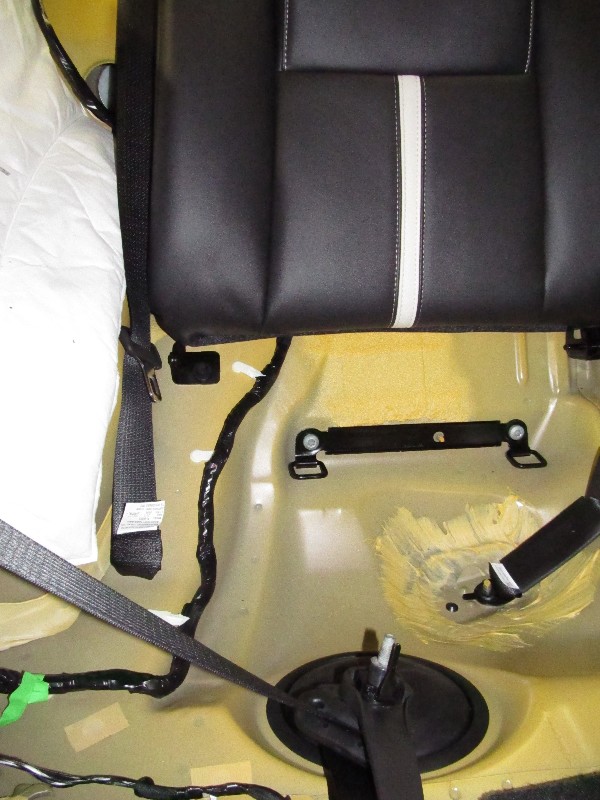
Step 5: Remove the rear seat bottom. The seat bottom is held in with two clips at the front.
Once released, the entire seat bottom comes out. Press the clip release by pushing with your finger
under the seat about six inches from each outside edge.
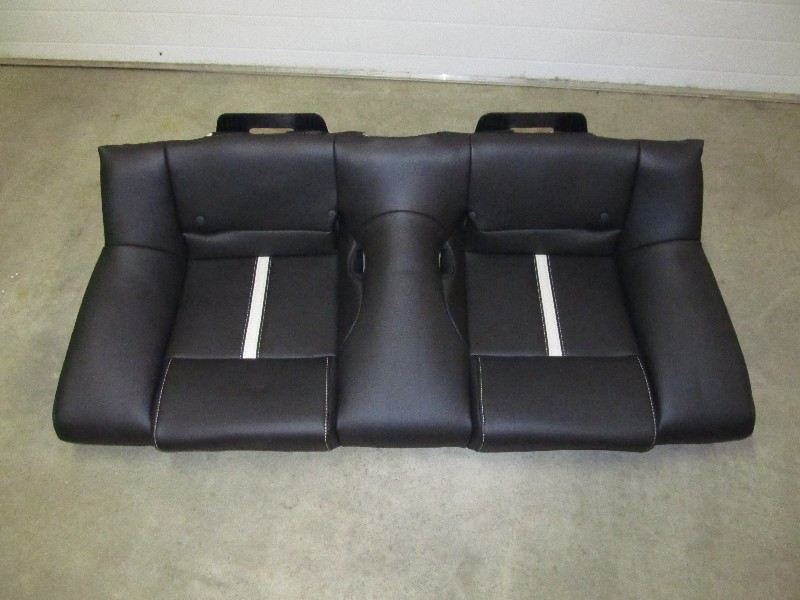
The rear seat when removed.
Closeup of the clips you need to release.
Seat bottom.
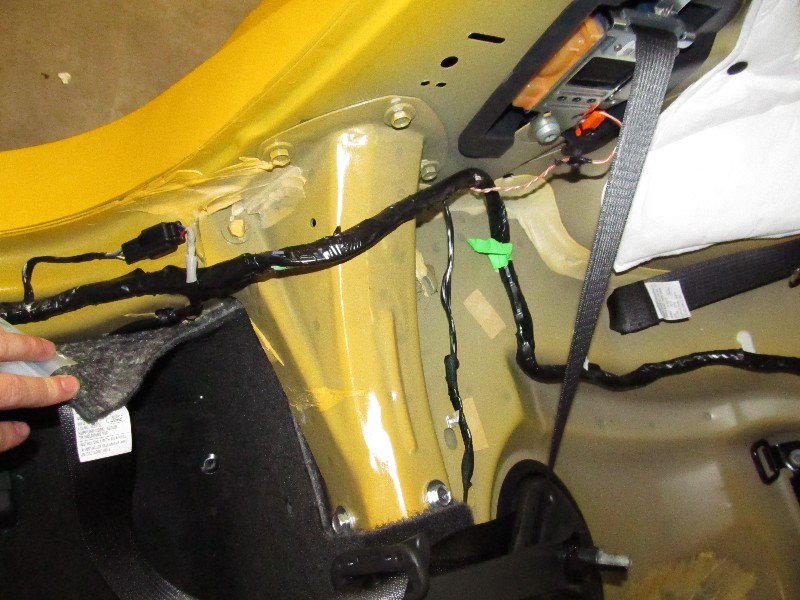
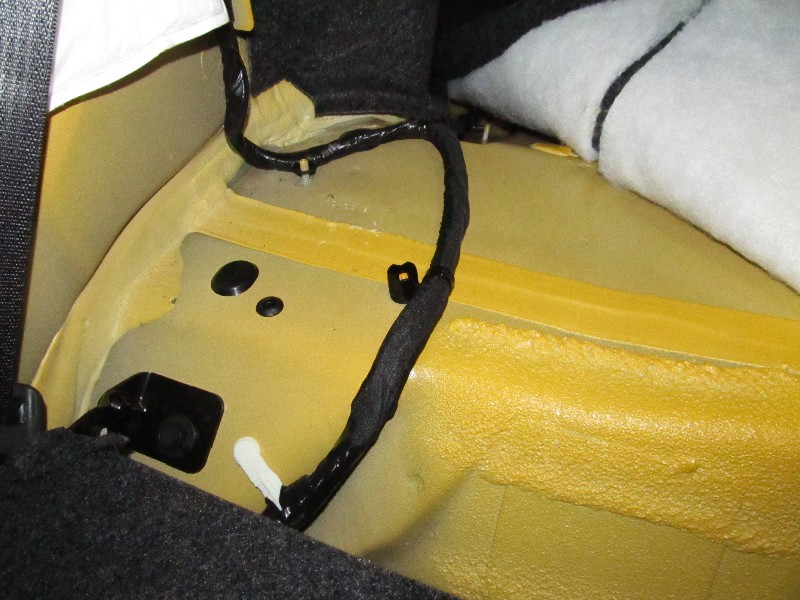
Step 6: Remove the rear passenger side kick panel. There are three push pins you need to remove in
order to get the panel loose. Once those are out, pull the plastic around the lip by the trunk push pin
Then work from front to rear. Get the panel loose from the body seam in the door opening. Then pull away
from the body towards the center of the car. The whole panel will just pop loose. Removing it from the
sail panel cover is a little tricky, but look where the clips hook in in the pictures below, and just
work it loose.
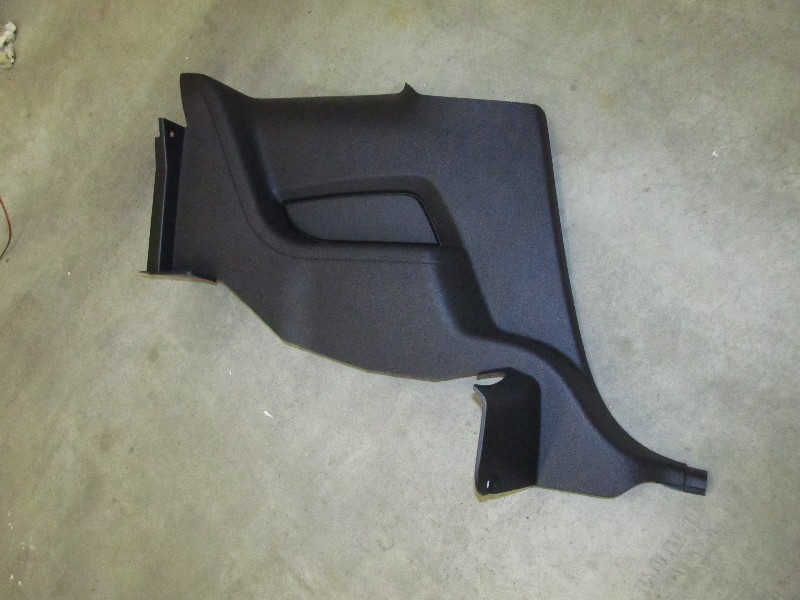
Rear kick panel when removed.
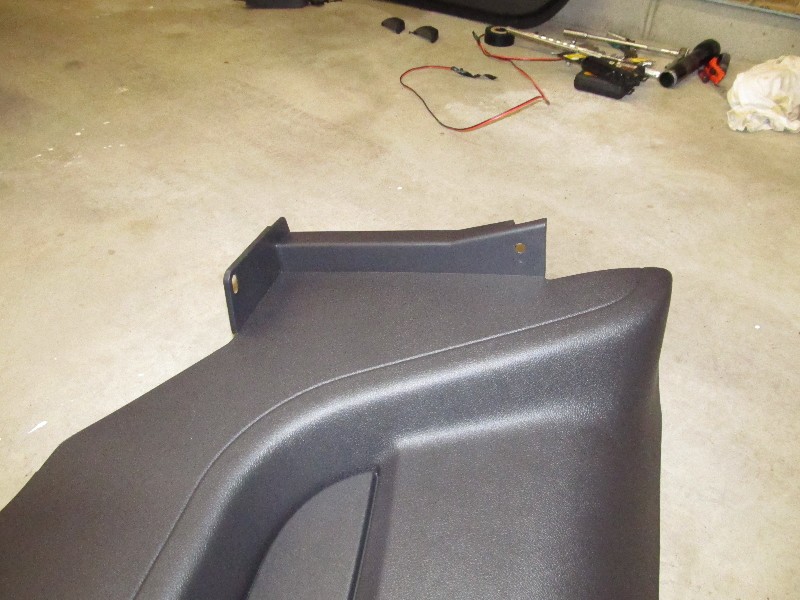
Here are the two push pins that you will need to remove which are behind the seat back.
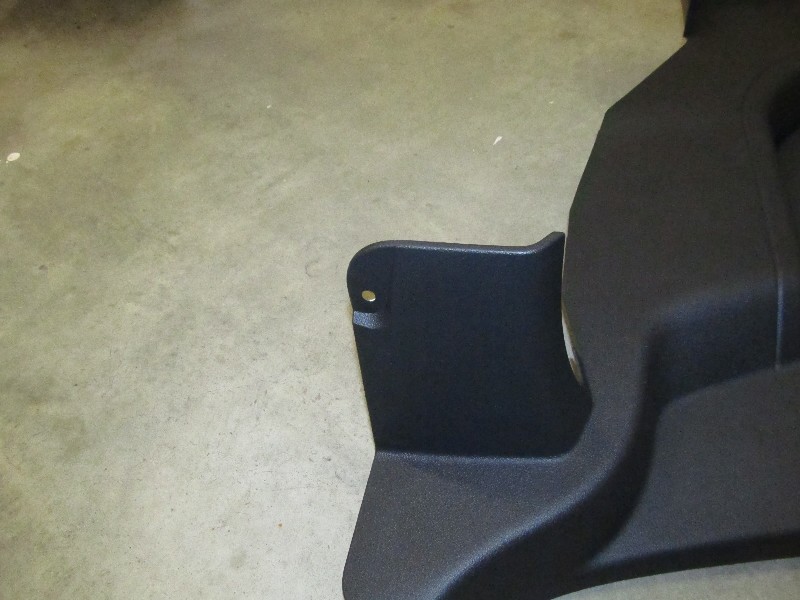
The single push pin that needs to be removed from the footwell.
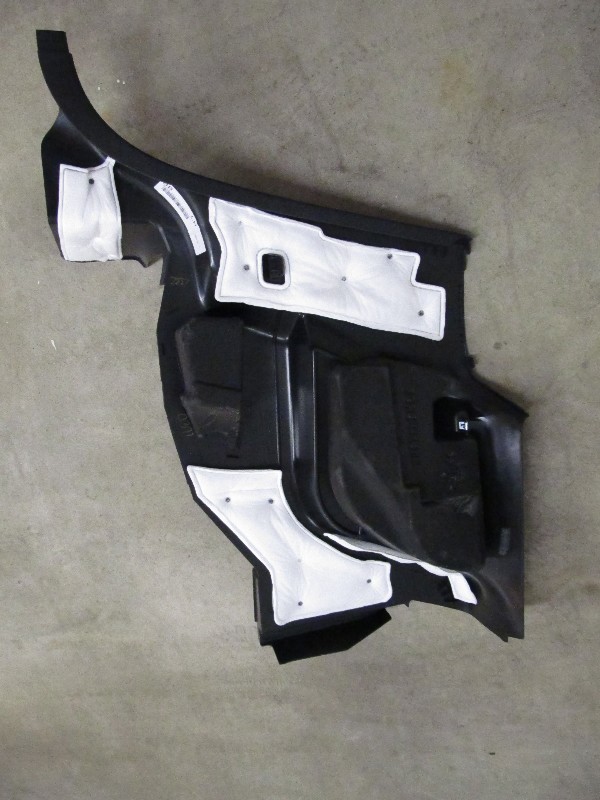
Backside view of the panel, note the locations where the panel fastens to the body.
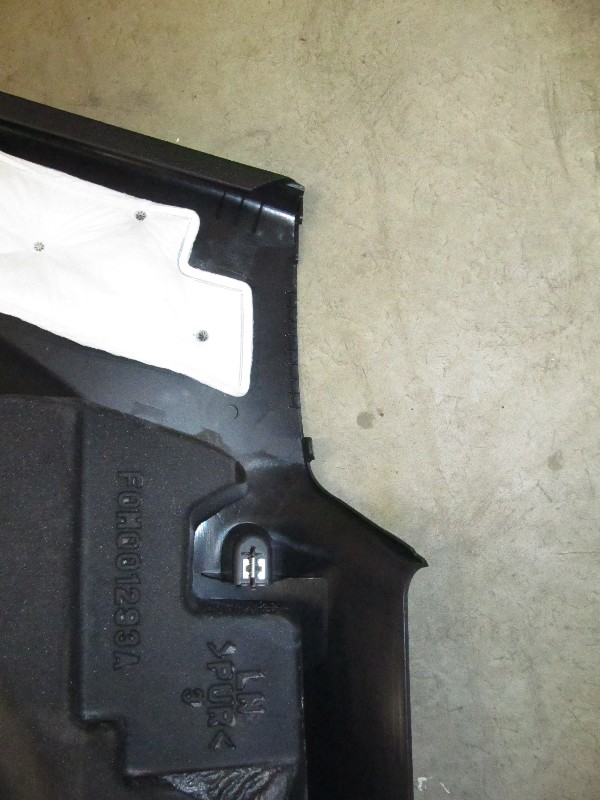
This is where the kick panel fastens to the sail panel cover. You have to work these a bit to get them loose.
That's it!!! The whole process shouldn't take more than about an hour. The following pictures
show the wire routing from the passenger side footwell to the rear of the car.
Shaker 500 system that came stock with your car. I am in the same process myself,
and while all this information is kind of out there on the internet, it's stuff you
have to search for, so I figured, why not put it all down in one place?
Please note, all text and most images (except where noted) are mine. You are free to
distribute, print, use, etc, to your hearts content, but please leave this note and
the link to the original page in place. The original can be found here:
http://www.fast351.com/11GT/stereoin...tructions.html
Stage 1: Routing your amplifier wiring.
You need to run amplifiers off their own power cable sourced directly from the battery. The
easiest way to route the cables is using existing wiring locations, there's plenty of
room. Here we go:
Step 1: Open the hood, locate the battery, disconnect ground (this is optional,
but if you're leary about working on a live 12V system, it's safest).
Battery
Closeup of positive post (where you will hook your cables)
There are two places where you can run your battery cables. When you remove the fender liner
in the next step, you will see the choices clearly, but the factory harness that goes into the
car comes under this fuseblock at the front right headlight, then goes down (see next picture).
Closeup of where harness going to the passenger compartment goes out of the engine bay (the cloth-
wrapped one next to the computer).
Step 2: Remove the passenger side wheel. Remove the fender liner. The fender liner is held in with 6 fasteners. Two run
through the rock guard, and are pushpin type. Take a small screwdriver and pull the center of the pin,
then remove the whole pin. The other four are slightly different with a phillips head. The phillips
head just releases the center pin. Turn it 1/4 turn counterclockwise and remove the pin. Now, the
fender liner will be stuck behind the rock guard, which is part of the rocker panel. The easiest way
to remove it is to start at the front, roll it up like a taco shell, then rotate it out from behind
the rock guard:
Fender liner removed, with it's 6 fasteners.
Here is where the factory harness runs. You could run your new cables on top and zip-tie to the
existing harness channel.
This is the grommet that runs into the car. There is a nub there which can be cut off to expose a
hole in the grommet that will enter the car. Also note there is a gap between the firewall and
inner fender. You could run the cables here as well. I haven't decided where I will run mine yet.
Closeup of body grommet.
Where the grommet comes out inside the car, in the passenger side footwell.
Step 3: Remove the passenger side sill plate. This plate "simply" pulls off. It is held
on by four clips. You will think that you are breaking your car. Trust me, you're not, it's just really
on there good. It is held on with double sided foam tape on the paint, which is what makes it hard
to remove. Just start pulling at the front of the sill plate, on the inside of the car,
and it will come off. Disconnect the ambient lighting connector and remove:
Sill plate.
Sill plate when removed. Note the four clips and the double sided tape.
Step 4: Remove the passenger side kick panels (footwell). These just pull off. Start with the
cover plate, then remove the vertical piece.
Kick panel and plate (drivers side also shown)
Step 5: Remove the rear seat bottom. The seat bottom is held in with two clips at the front.
Once released, the entire seat bottom comes out. Press the clip release by pushing with your finger
under the seat about six inches from each outside edge.
The rear seat when removed.
Closeup of the clips you need to release.
Seat bottom.
Step 6: Remove the rear passenger side kick panel. There are three push pins you need to remove in
order to get the panel loose. Once those are out, pull the plastic around the lip by the trunk push pin
Then work from front to rear. Get the panel loose from the body seam in the door opening. Then pull away
from the body towards the center of the car. The whole panel will just pop loose. Removing it from the
sail panel cover is a little tricky, but look where the clips hook in in the pictures below, and just
work it loose.
Rear kick panel when removed.
Here are the two push pins that you will need to remove which are behind the seat back.
The single push pin that needs to be removed from the footwell.
Backside view of the panel, note the locations where the panel fastens to the body.
This is where the kick panel fastens to the sail panel cover. You have to work these a bit to get them loose.
That's it!!! The whole process shouldn't take more than about an hour. The following pictures
show the wire routing from the passenger side footwell to the rear of the car.
Thread Starter
Member
Joined: January 30, 2011
Posts: 36
Likes: 0
Please note, all text and most images (except where noted) are mine. You are free to
distribute, print, use, etc, to your hearts content, but please leave this note and
the link to the original page in place. The original can be found here:
http://www.fast351.com/11GT/stereoin...tructions.html
Stage 2: Removing the rear deck to install new speakers.
Everyone always says removing the rear deck is a royal pain, not worth doing, rear speakers
aren't that important, etc etc. Well, I disagree. It's really pretty simple and should
take no longer than an hour:
Step 1: Remove the sill plates and rear kick panels as described in
Stage 1, running amplifier cabling.
Step 2: Remove the sail panels:
This step is Optional, as the rear deck lid can slide underneath the sail panel.
I did it in my car for ease of installation, and therefore it is shown here.
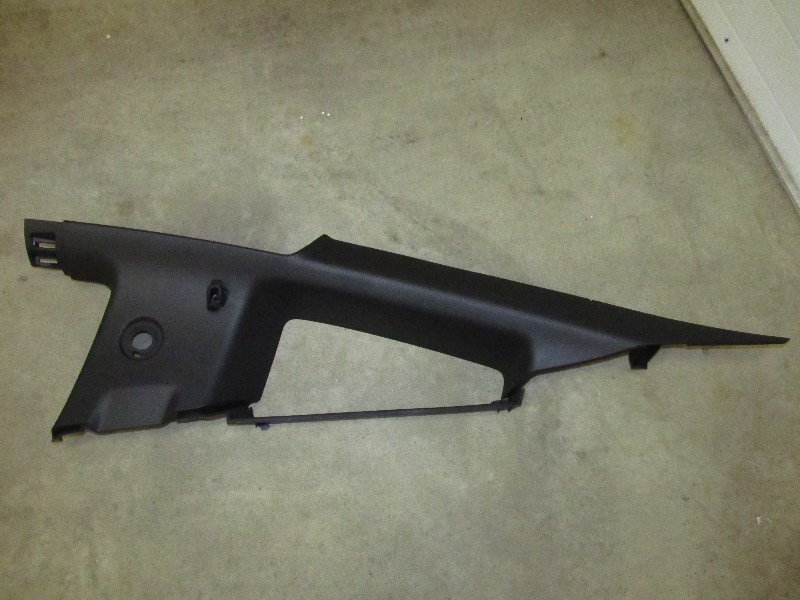
Sail panel when removed from car.
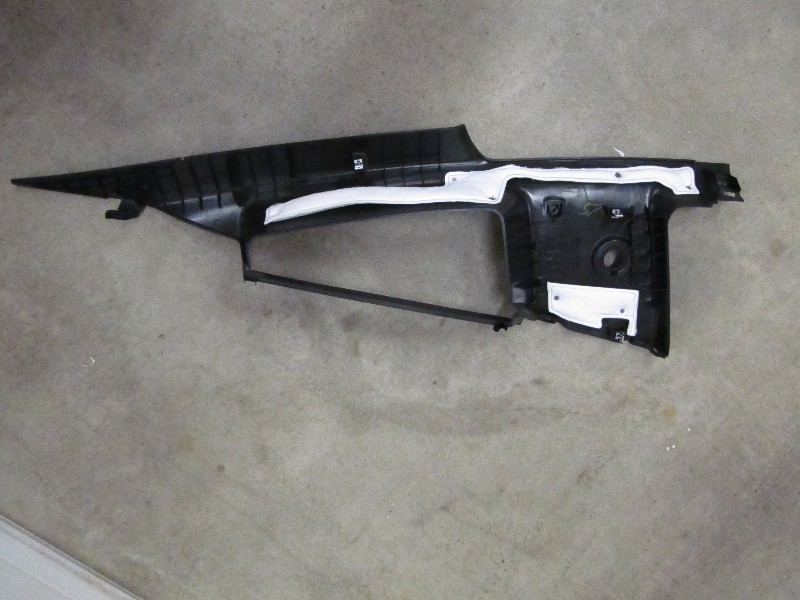
Back of sail panel. Note the clips at the front where it hooks into the A pillar, and the hook in the back
where it hooks into the body.
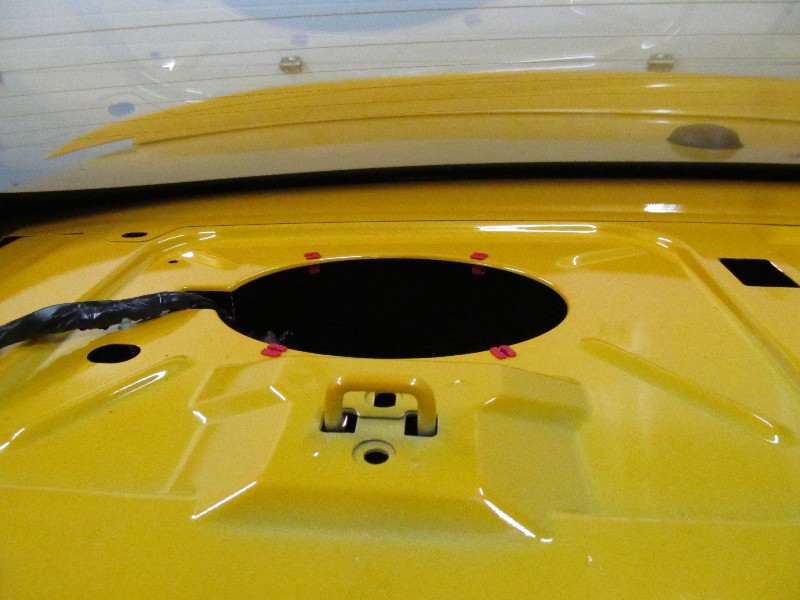
Step 3: Remove the rear deck. Pop the 4 pushpins holding the rear deck in place, remove the seatbelt
through the slot,and slide out.
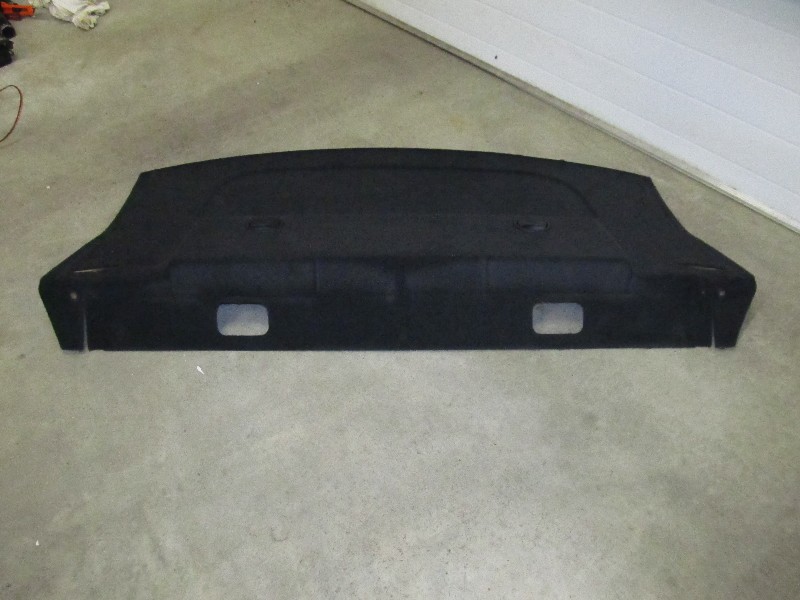
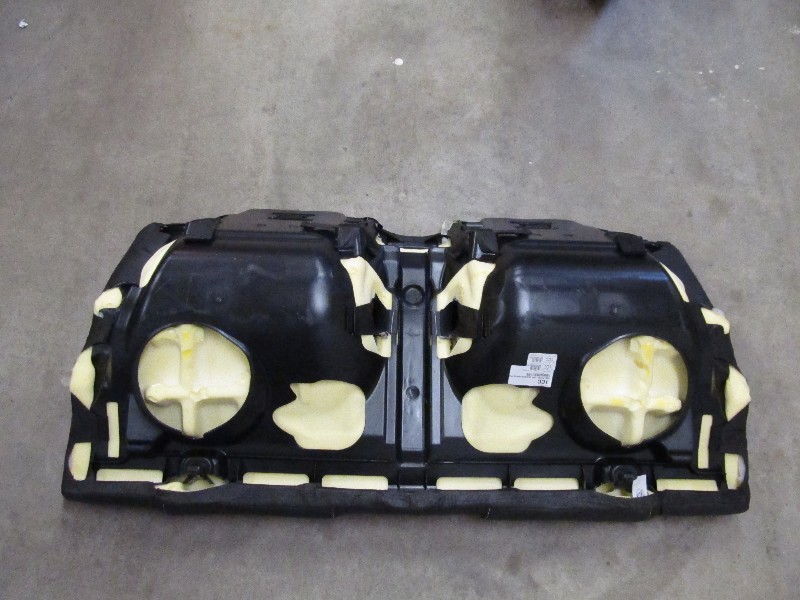
Rear deck cover when removed.
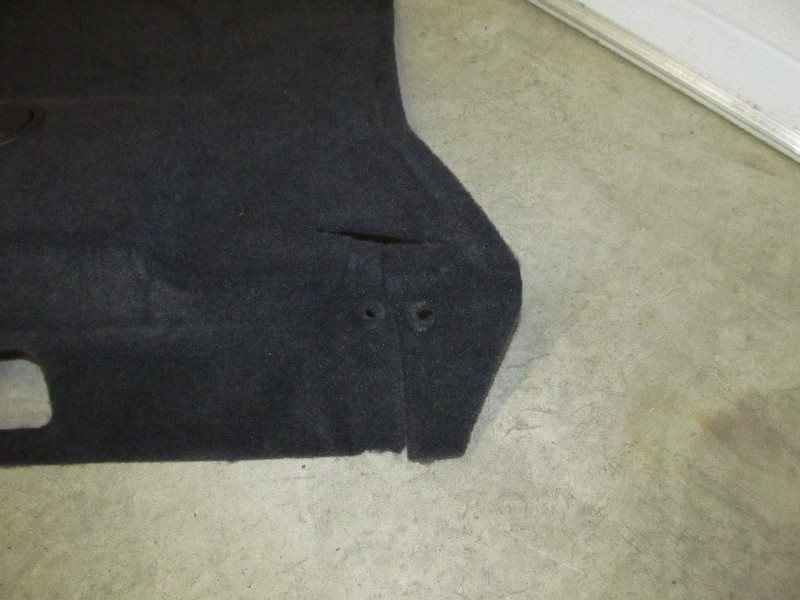
The pushpins that retain the rear deck cover. There are two on each side.
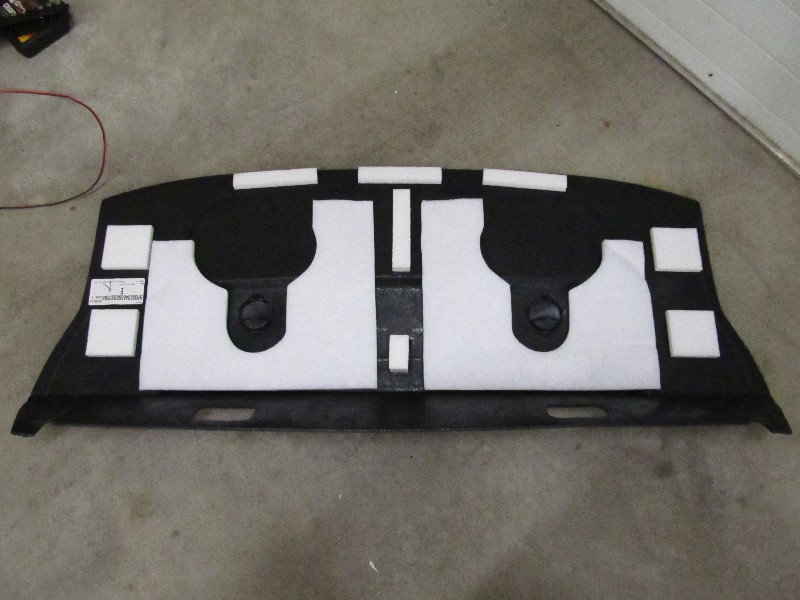
The underside of the rear deck cover.
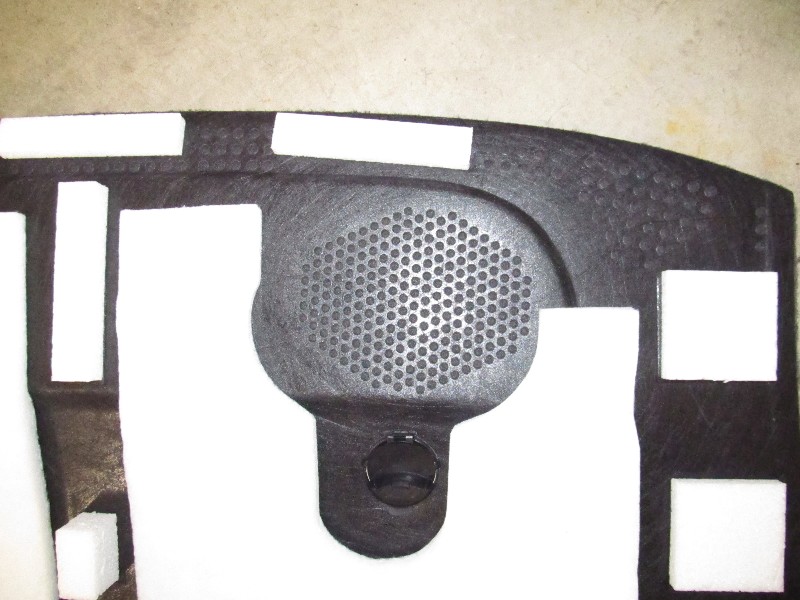
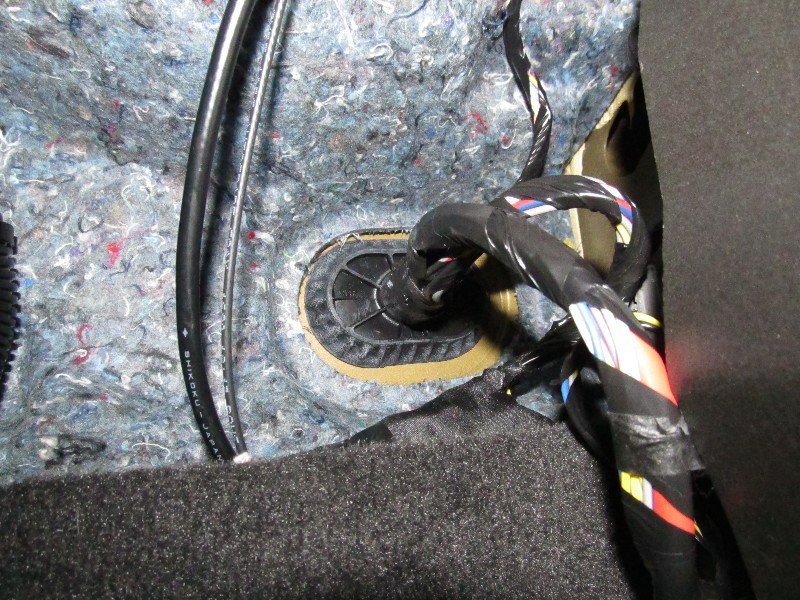
Where the sound comes through the rear deck cover.
That's it!!! The whole process shouldn't take more than about an hour (about 20 minutes if you already have the sill
plates and kick panels out for routing the amp wiring). The following pictures
show the car with the rear deck lid removed:
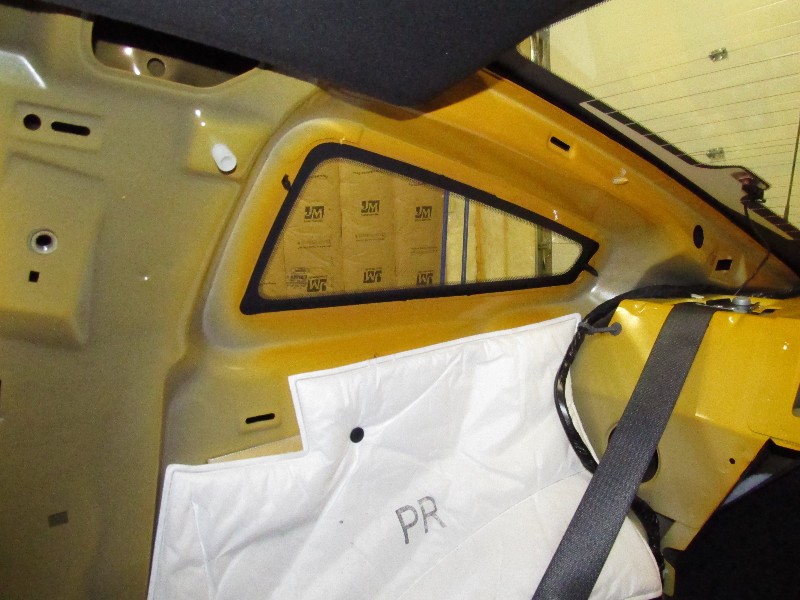
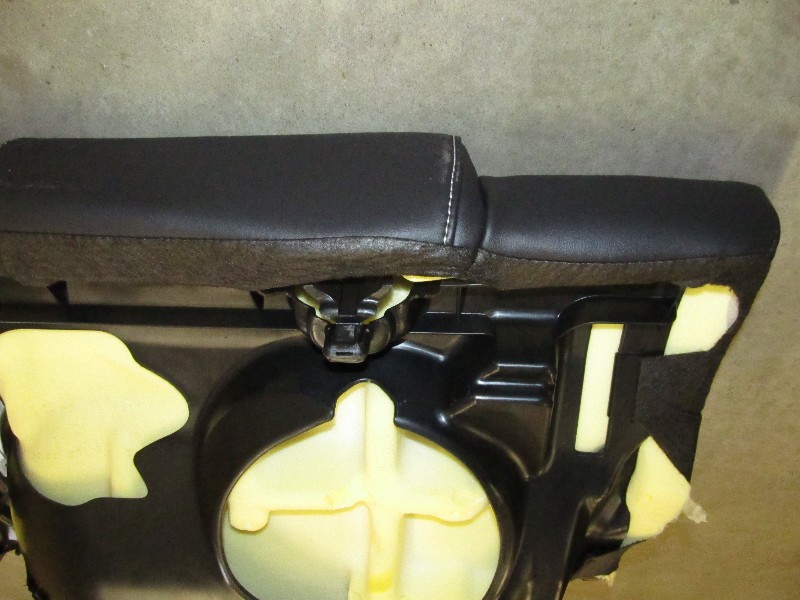
The area where the sail panel sits.
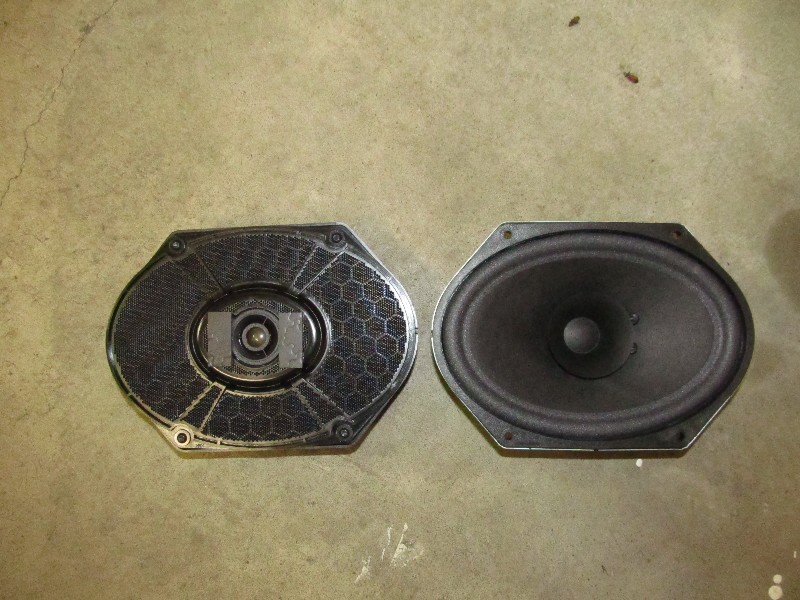
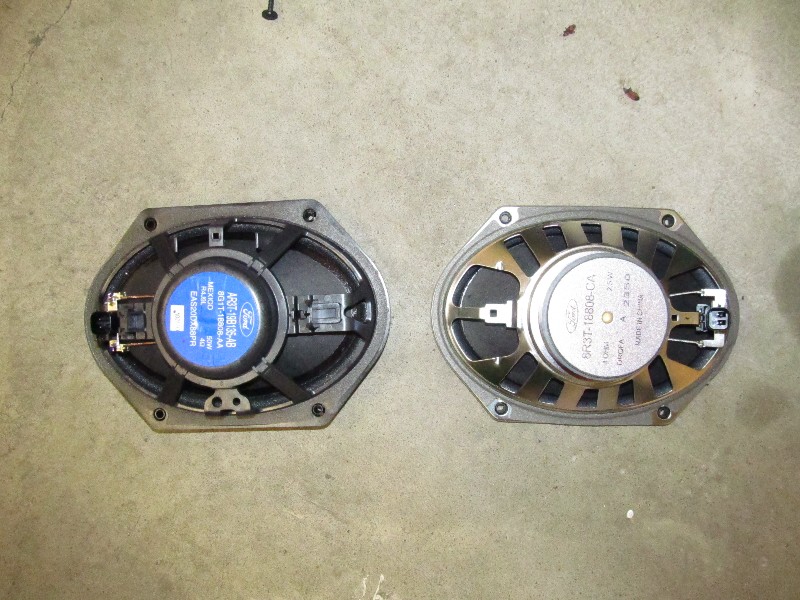
The rear speakers removed. They are held in with 4 6mm screws. A 1/4" drive ratchet with a short
6mm socket works great.
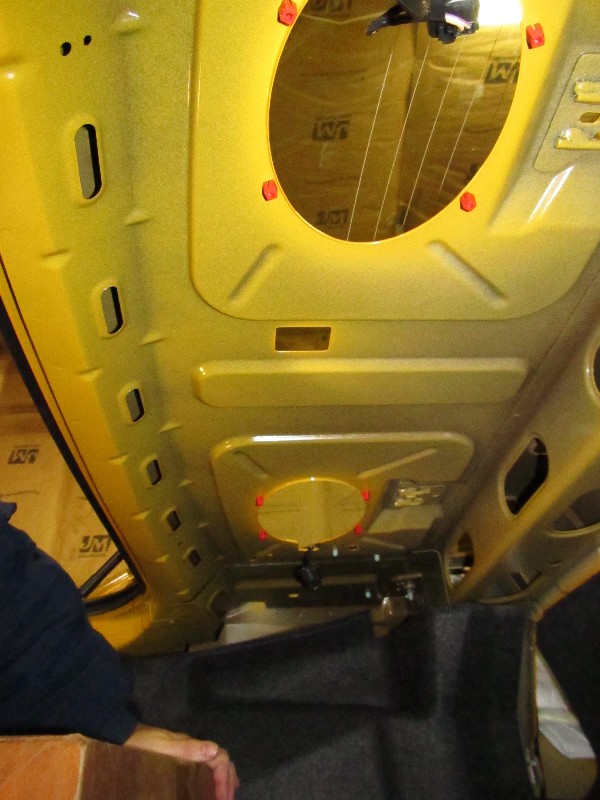
Underside of the trunk. This is where I'll be mounting the aimplifiers.
distribute, print, use, etc, to your hearts content, but please leave this note and
the link to the original page in place. The original can be found here:
http://www.fast351.com/11GT/stereoin...tructions.html
Stage 2: Removing the rear deck to install new speakers.
Everyone always says removing the rear deck is a royal pain, not worth doing, rear speakers
aren't that important, etc etc. Well, I disagree. It's really pretty simple and should
take no longer than an hour:
Step 1: Remove the sill plates and rear kick panels as described in
Stage 1, running amplifier cabling.
Step 2: Remove the sail panels:
This step is Optional, as the rear deck lid can slide underneath the sail panel.
I did it in my car for ease of installation, and therefore it is shown here.
- Remove the seatbelt by removing the cover and taking out the 14mm bolt.
- Remove the coat hanger fastener by removing the cover, and removing the T20 screw. (Hanger stays in place)
- Pull forward starting at the bottom of the front of the sail panel.
- Remove the sail panel clips from the A pillar (A pillar overlaps sail panel, pull the A pillar cover just far enough to unclip it)
- BE CAREFUL with the defroster leads. Pop the wire out of the cutout in the sail panel.
- Pull sail panel forward and out. It's hooked in the back (see pictures below)
Sail panel when removed from car.
Back of sail panel. Note the clips at the front where it hooks into the A pillar, and the hook in the back
where it hooks into the body.
Step 3: Remove the rear deck. Pop the 4 pushpins holding the rear deck in place, remove the seatbelt
through the slot,and slide out.
Rear deck cover when removed.
The pushpins that retain the rear deck cover. There are two on each side.
The underside of the rear deck cover.
Where the sound comes through the rear deck cover.
That's it!!! The whole process shouldn't take more than about an hour (about 20 minutes if you already have the sill
plates and kick panels out for routing the amp wiring). The following pictures
show the car with the rear deck lid removed:
The area where the sail panel sits.
The rear speakers removed. They are held in with 4 6mm screws. A 1/4" drive ratchet with a short
6mm socket works great.
Underside of the trunk. This is where I'll be mounting the aimplifiers.
Last edited by Fast_351; May 3, 2011 at 04:31 AM.
Thread Starter
Member
Joined: January 30, 2011
Posts: 36
Likes: 0
Please note, all text and most images (except where noted) are mine. You are free to
distribute, print, use, etc, to your hearts content, but please leave this note and
the link to the original page in place. The original can be found here:
http://www.fast351.com/11GT/stereoin...tructions.html
Stage 3: Removing the factory head unit.
Whether you are upgrading the head unit or just installing a line out converter, you will need
to remove the head unit to gain access to the connectors at the back of the unit. This is a simple
process, but there are a couple things along the way that will make it MUCH easier if you know about
them. Also, I removed the console assembly as well, because I was initially going to run wires across
the transmission tunnel (the RCA outs from my LOC), but decided against it when I saw how tight the
carpet is over the hump. I will still put the sub volume control in the console, and run it's flat cable
to the rear under the carpet, but you could run this along the sill plate as well.
Step 1: Remove the cupholder assembly from the center console (my car is a manual, this may be
different on an automatic):
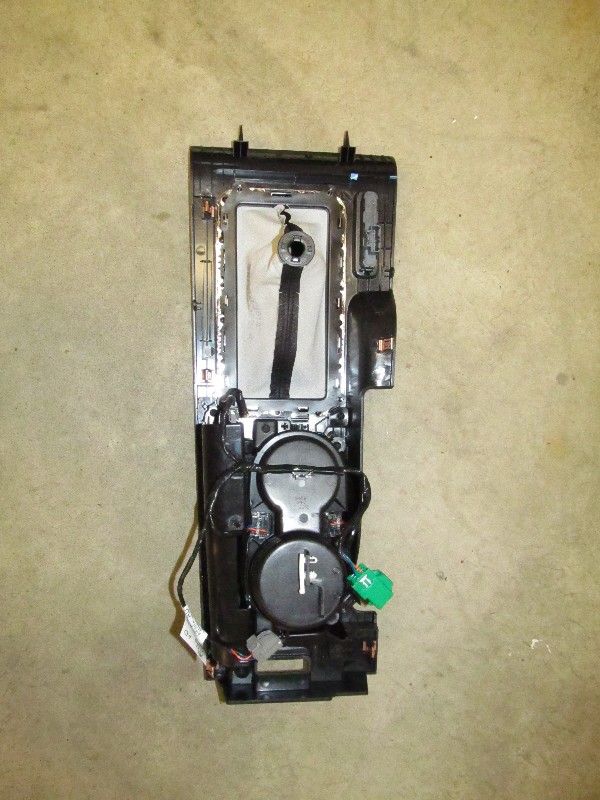
Cup holder when removed from the car. Note the connector clip on the bottom of the cupholder.
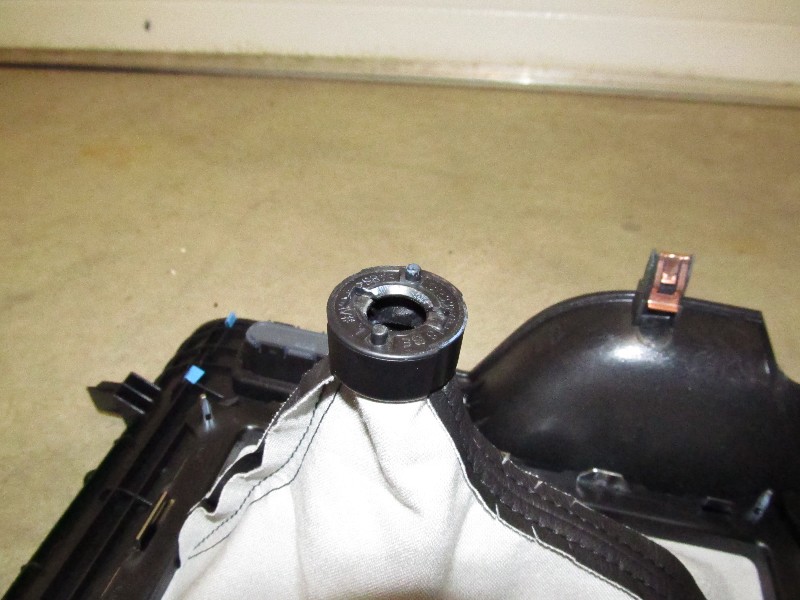
The locating ears on the shift boot ring. Lift this straight up while wiggling the ring to clear the shifter.
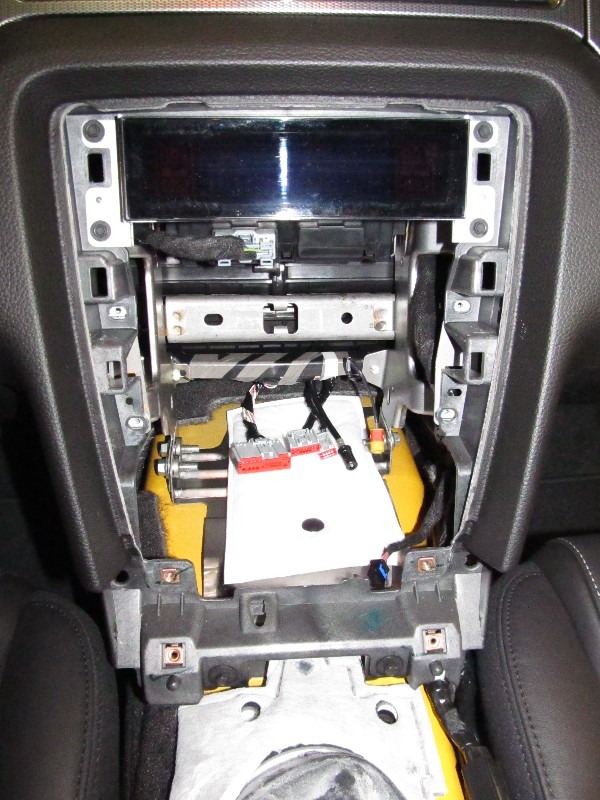
Step 2: Remove the radio faceplate:
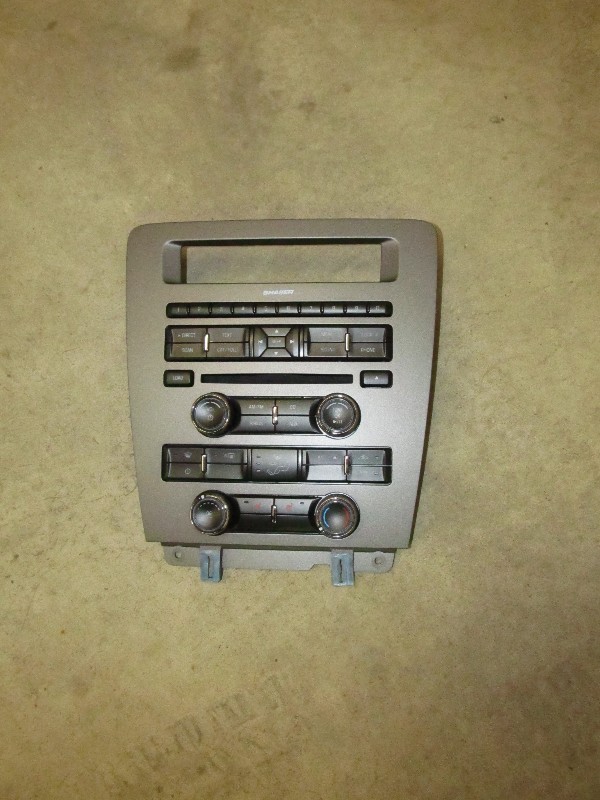
Faceplate when removed from car.
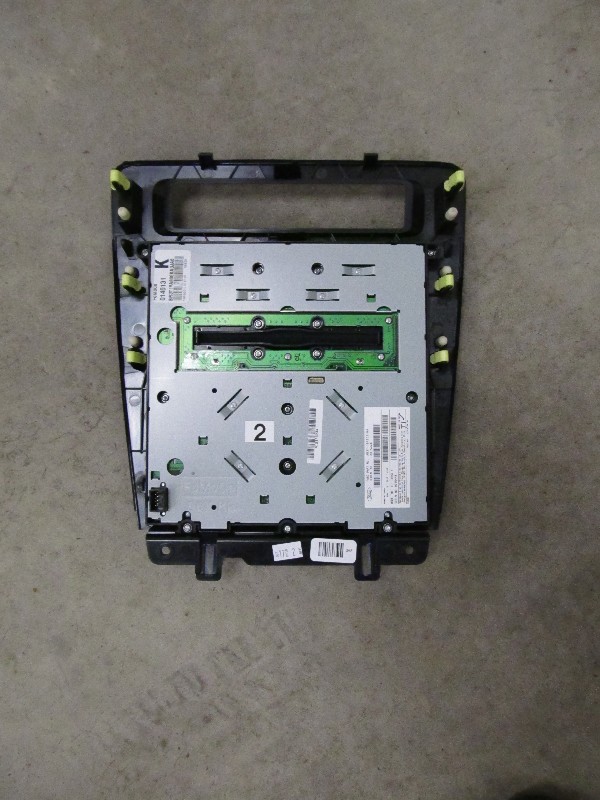
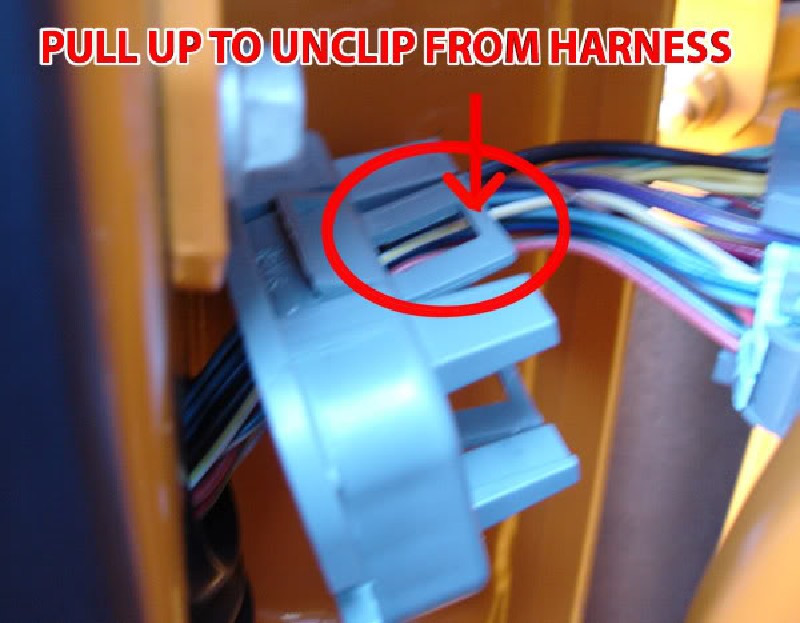
Back of faceplate. Note the connector at the lower left where the harness plugs in.
Step 3: Remove the radio. Remove the 4 7mm screws from the head unit. Then unplug the 5 connectors
at the back of the radio. Note that you will NOT be able to pull the radio out far enough to unplug
them by looking at them, you have to do it by feel. (Yay, plugging it back in will be fun).

Front of radio, showing 4 screws.
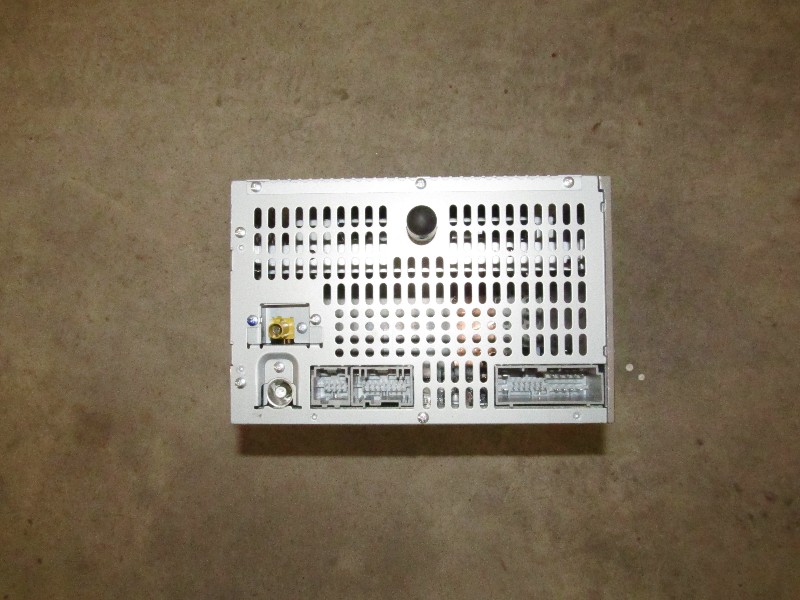
Here are the 5 connectors. Three "normal" connectors, and two antennae. (Radio and Sirius)
You can see the connectors here in the hole. The latches are all at the top, except the main antenna,
which has a circular locking ring.
Step 4: Removing the console. If you can avoid doing this, you'll save yourself some futzing
around. Getting the console off the e-brake handle is a pain. If you have to do it, here are some tips:
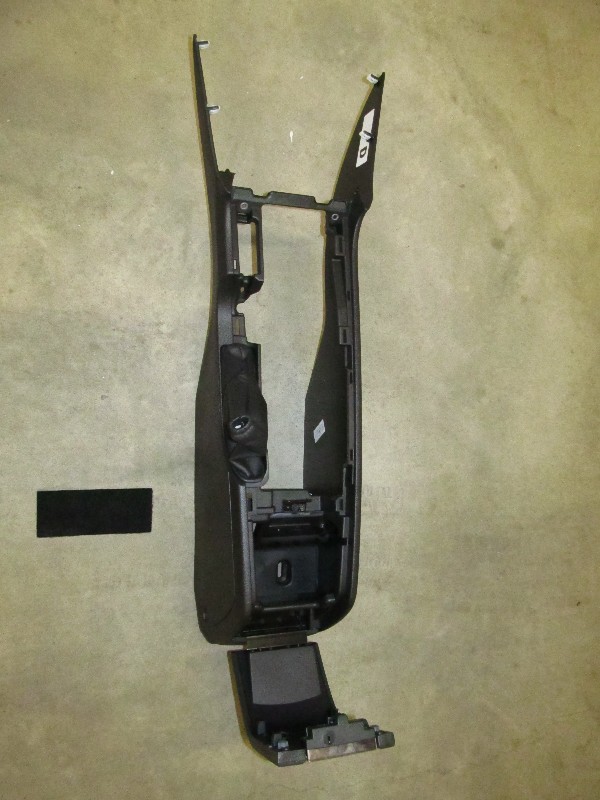
The entire console when removed from the car.
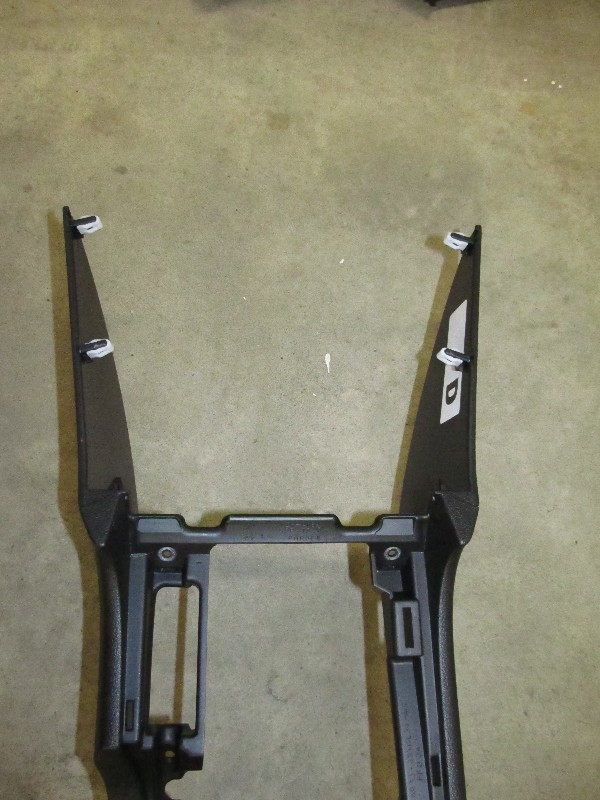
Front detail showing the 4 clips that attach to the radio pod, and the two screw holes.
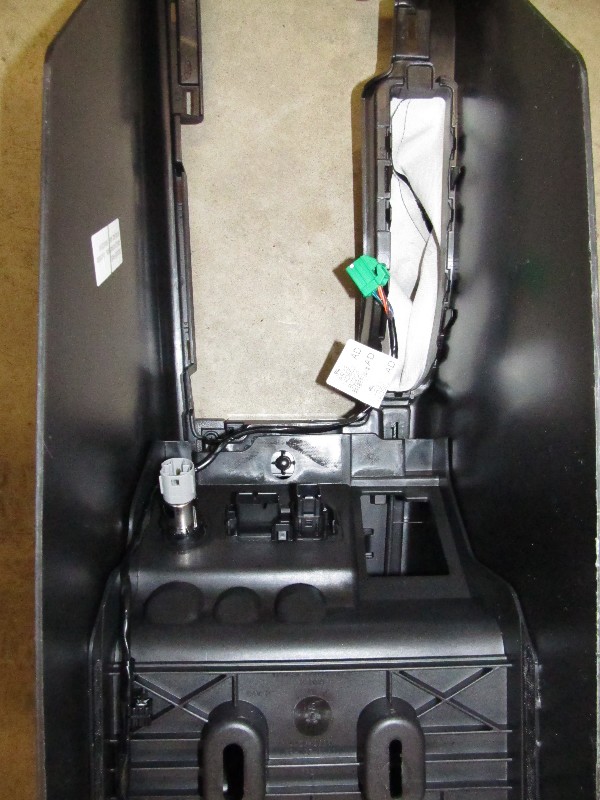
Rear detail showing the carpet piece and the location for the two nuts.
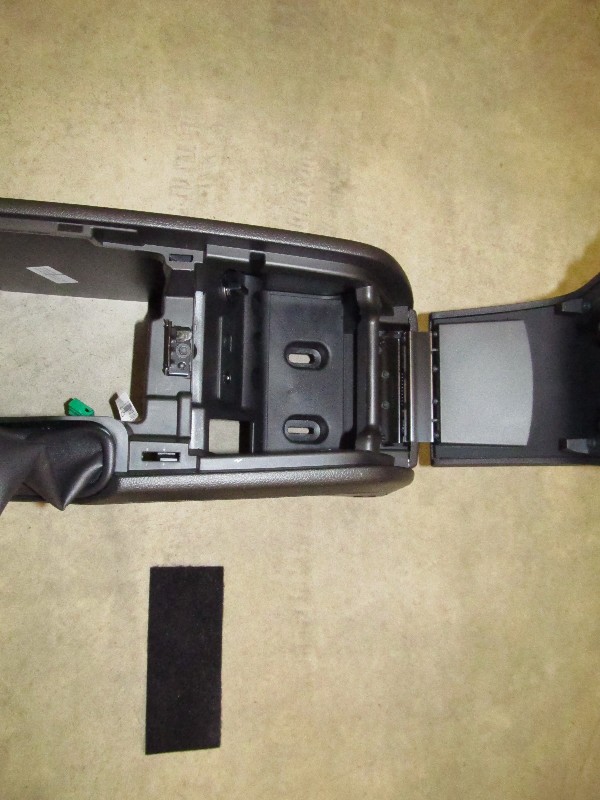
Underside of console showing electrical connectors.
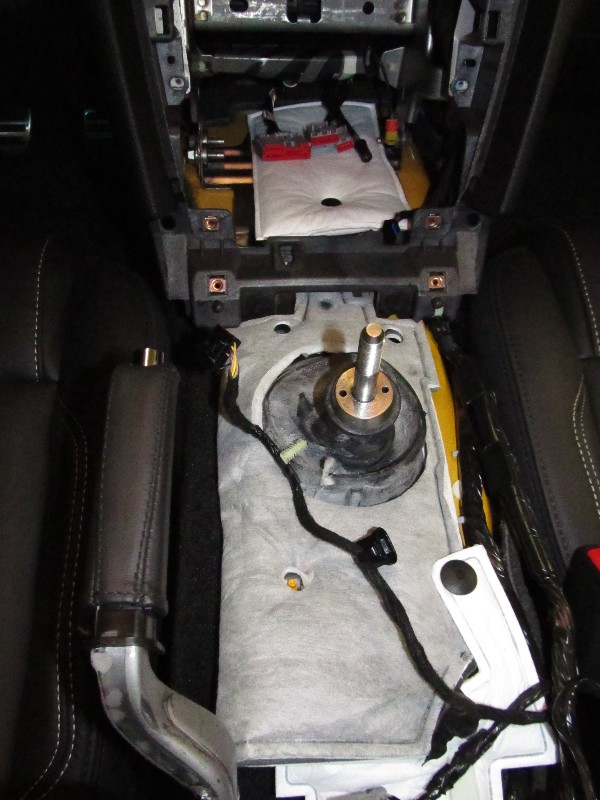
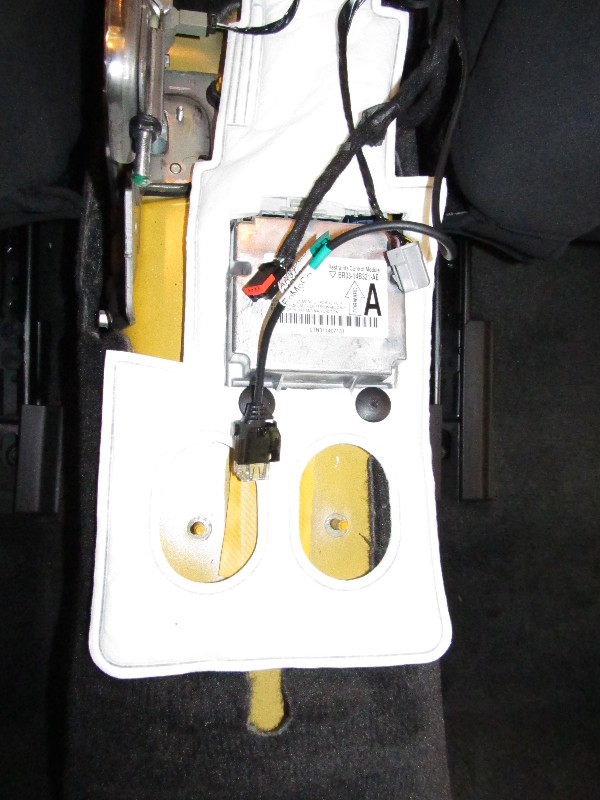
USB, Aux In, and cigarrette lighter connectors.
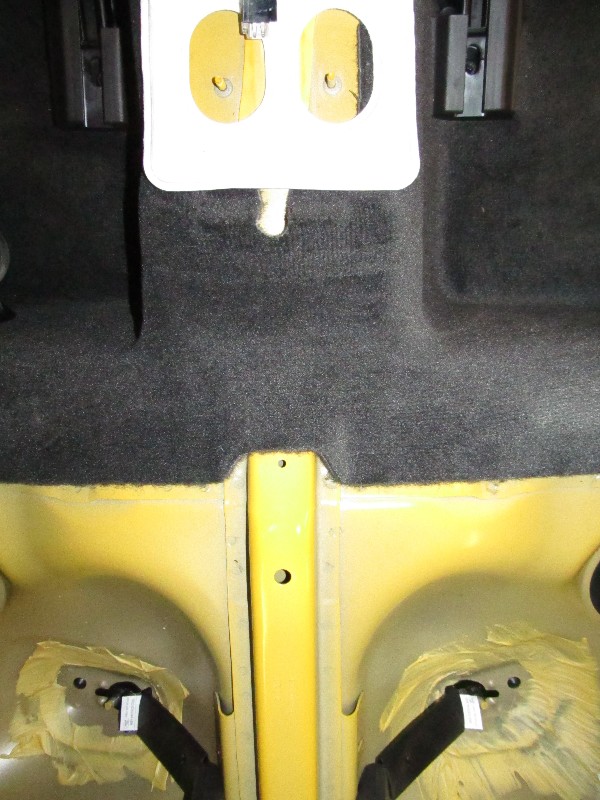
Where you might like to run wires, but probably not practical. The carpet is REALLY tight across the
transmission tunnel
distribute, print, use, etc, to your hearts content, but please leave this note and
the link to the original page in place. The original can be found here:
http://www.fast351.com/11GT/stereoin...tructions.html
Stage 3: Removing the factory head unit.
Whether you are upgrading the head unit or just installing a line out converter, you will need
to remove the head unit to gain access to the connectors at the back of the unit. This is a simple
process, but there are a couple things along the way that will make it MUCH easier if you know about
them. Also, I removed the console assembly as well, because I was initially going to run wires across
the transmission tunnel (the RCA outs from my LOC), but decided against it when I saw how tight the
carpet is over the hump. I will still put the sub volume control in the console, and run it's flat cable
to the rear under the carpet, but you could run this along the sill plate as well.
Step 1: Remove the cupholder assembly from the center console (my car is a manual, this may be
different on an automatic):
- Place the car in second gear.
- Unscrew the shift ball by turning it counterclockwise. (Holy crap, I thought it was welded on, but it does rotate off)
- Starting inside the cubbie hole in the console, lift up on the rear of the cupholder assembly.
- Once you have the cupholder assembly high enough, disconnect all the electrical connectors. There should be three, the traction control harness and two ambient light plugs.
- Remove the body side connector from the bottom of the cupholder by either removing the double christmas tree clip, or removing the clip from the connector.
- IMPORTANT Lift the cupholder assembly up to expose the black ring holding the boot to the shifter. Wiggle the black ring while sliding the ring straight up the shaft. There are two locating ears that are easy to snap off!
- Remove the assembly from the car.
Cup holder when removed from the car. Note the connector clip on the bottom of the cupholder.
The locating ears on the shift boot ring. Lift this straight up while wiggling the ring to clear the shifter.
Step 2: Remove the radio faceplate:
- Remove the two 7mm screws at the bottom of the faceplate.
- Starting at the bottom, pull the faceplate away from the dash.
- When completely loose, disconnect the front plate connector.
Faceplate when removed from car.
Back of faceplate. Note the connector at the lower left where the harness plugs in.
Step 3: Remove the radio. Remove the 4 7mm screws from the head unit. Then unplug the 5 connectors
at the back of the radio. Note that you will NOT be able to pull the radio out far enough to unplug
them by looking at them, you have to do it by feel. (Yay, plugging it back in will be fun).
Front of radio, showing 4 screws.
Here are the 5 connectors. Three "normal" connectors, and two antennae. (Radio and Sirius)
You can see the connectors here in the hole. The latches are all at the top, except the main antenna,
which has a circular locking ring.
Step 4: Removing the console. If you can avoid doing this, you'll save yourself some futzing
around. Getting the console off the e-brake handle is a pain. If you have to do it, here are some tips:
- Pull the e-brake handle as HIGH as you can get it. Don't break the cable, but you should feel like you're close!
- Remove the chunk of carpet from the bottom of the cubby hole, and remove the 2 10mm nuts.
- Remove the two 7mm screws at the front of the console.
- Pull the 4 body clips away from the side of the dash radio pod.
- Remove the plugs from the cigarette lighter, USB, and Aux in jack. (Note the WHOLE USB jack comes out of the plastic)
- Work the e-brake boot up around the handle (the grip does not come off, but the nose of the boot is elastic)
- Start lifting the console starting at the rear. The console will be tipped forward when removed.
- Remove any remaining electrical connectors as you lift the console from the car.
The entire console when removed from the car.
Front detail showing the 4 clips that attach to the radio pod, and the two screw holes.
Rear detail showing the carpet piece and the location for the two nuts.
Underside of console showing electrical connectors.
USB, Aux In, and cigarrette lighter connectors.
Where you might like to run wires, but probably not practical. The carpet is REALLY tight across the
transmission tunnel
Thread Starter
Member
Joined: January 30, 2011
Posts: 36
Likes: 0
Please note, all text and most images (except where noted) are mine. You are free to
distribute, print, use, etc, to your hearts content, but please leave this note and
the link to the original page in place. The original can be found here:
http://www.fast351.com/11GT/stereoin...tructions.html
Stage 4: Replacing the front speaker wires. Think long and hard about if you need to do
this. This is a difficult operation, and will probably result in swearing, beer drinking, and
blood loss. You will need to be patient. This will probably take three hours to do. If you have
really big hands this won't be fun. OK, enough warnings, you still decided you need to do this,
here we go:
Step 1: Remove the door skins. There are plenty of pages out there on how to do this, but
I'll kind of go over the steps and then give you a link to a video that explains it best:
A video showing you all of this: (don't remove the woofer trim ring, not needed)
JLT Performance shows you how to dress up your door panels
Step 2: Remove the stock speaker and set aside. It's held in with 4 T15 screws.
Step 3: Remove the subwoofer amp. Remove the two connectors to the amp. There are three
nuts that hold it in place. Remove the three nuts and pull the amplifier out of the way. Access is
needed to route the speaker wires.
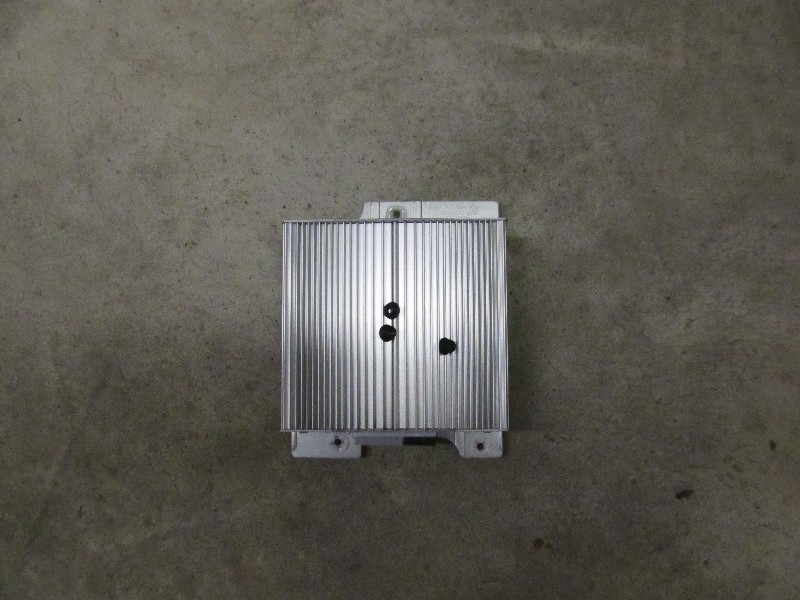
This is the subwoofer amplifier when removed.
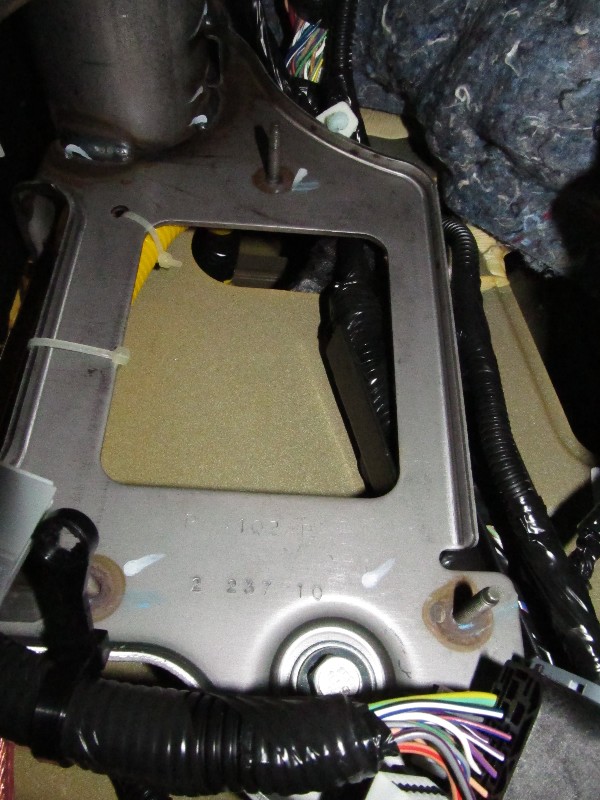
Where the sub amp mounts. This is just up and to the left of the clutch pedal.
Step 4: Remove the retainer plug from the body side of the door tube. I cannot take
credit for figuring this out, and as a matter of fact,
without this thread I would never have gotten it. The pictures below belong to the original author,
many thanks to his posting them (love the color of your car BTW sir!)
Tips:
Your generous working area! Big hands are not a bonus here!
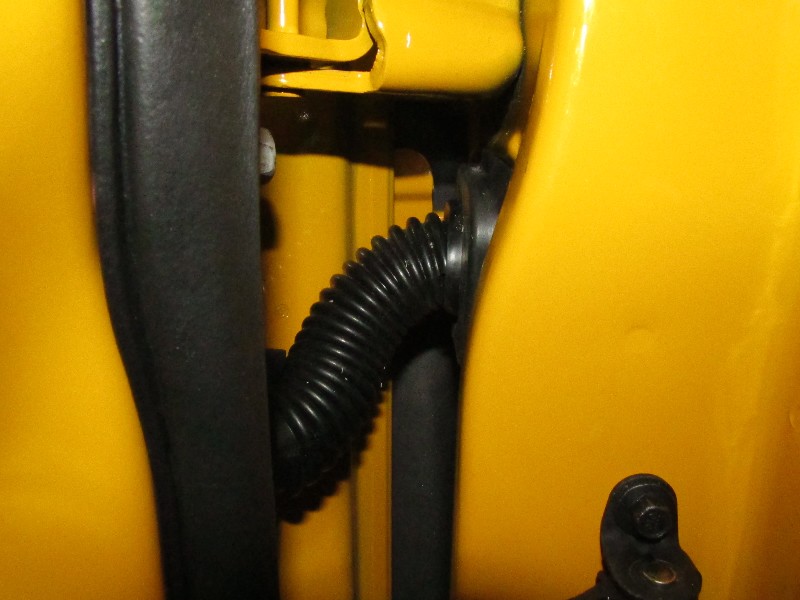
OK, the fun begins, remove the boot from the plug (pass side shown).
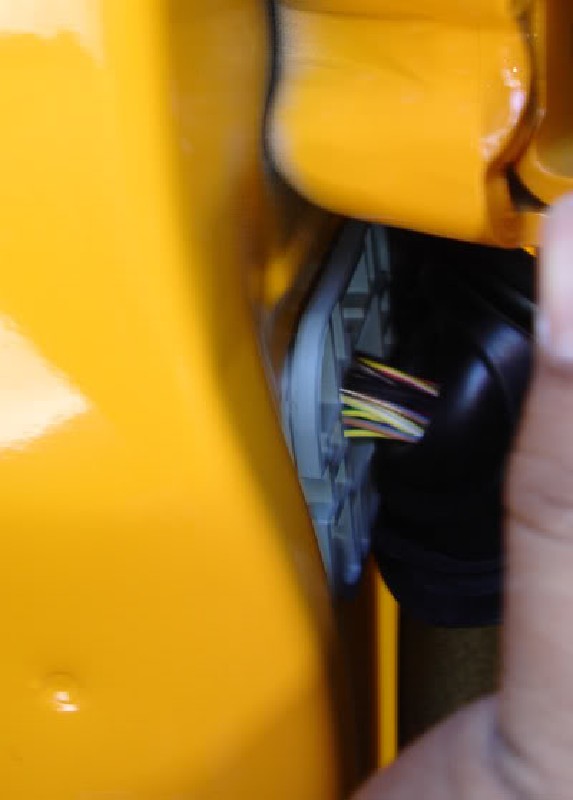
Remove the bulkhead from the car.
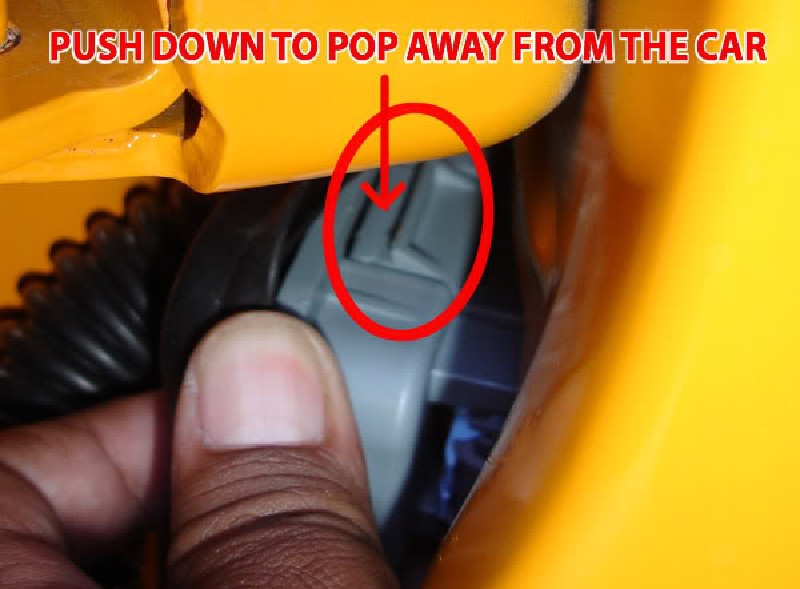
Remove the outside clip from the connector (it sound so simple doesn't it?)
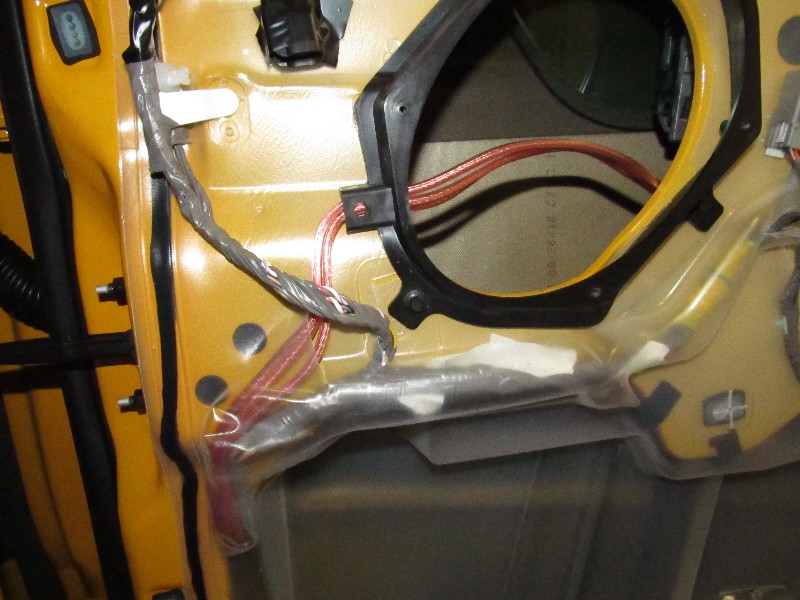
Step 5: Feed the speaker wire through the tube and into the car:
Watch your hands, the metal inside the car is sharp!!!
Starting from inside the door, feed the wires into the car.
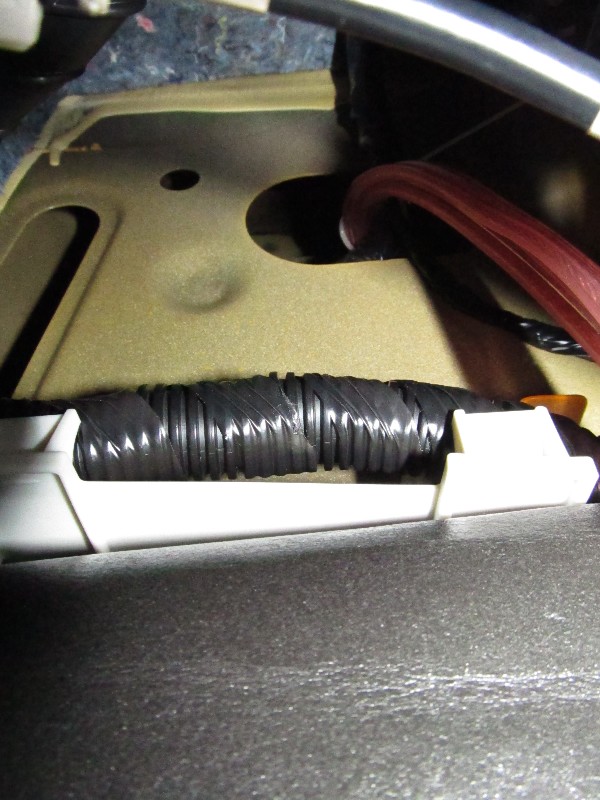
Wires secured, note the (yellow!) wire loom protecting the wires. This area is not deburred and REALLY sharp!
Step 6: Reinsert the tube back into the door and body:
Viola! Rinse and repeat for passenger side door!
Step 7: Route the wires into the speaker area:
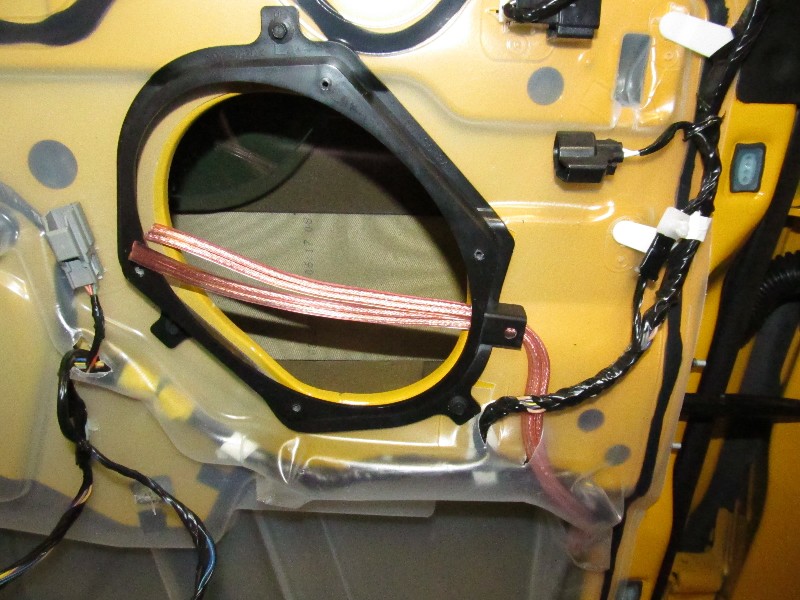
Note the slit in the plastic and the routing near the factory wires.
Factory clip taped out of the way.
New wires through an enlarged hole in the mounting ring.
Step 8: Repeat for passenger side!
This side was significantly easier. Less bulk in the connector? Second time doing it? Not sure, but it took less
than half the time.
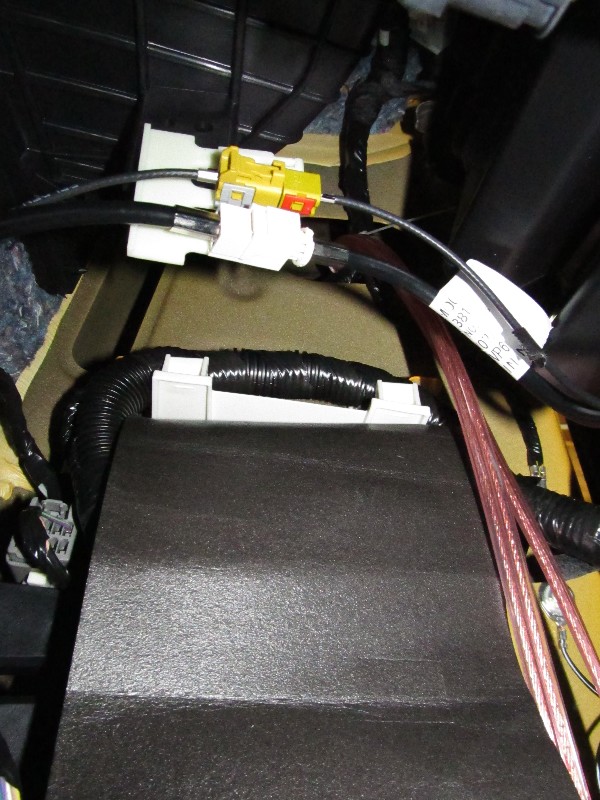
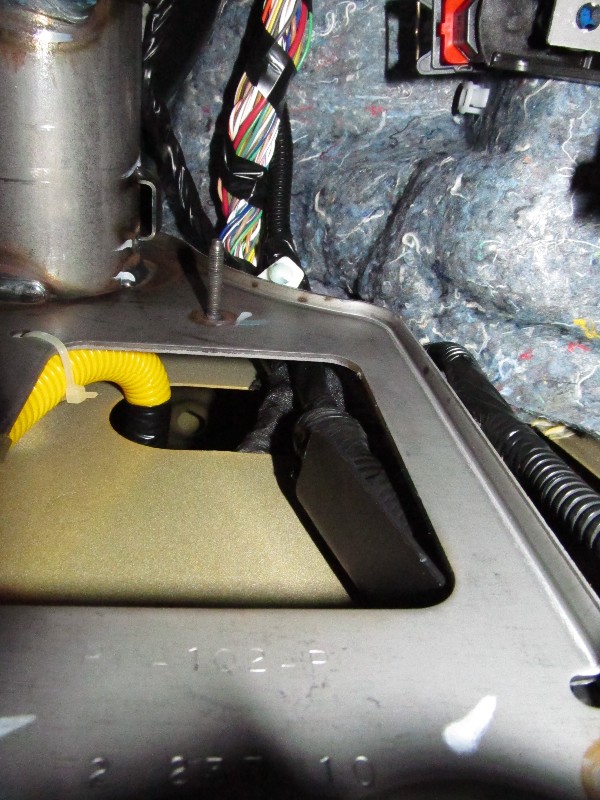
Inside the passenger side footwell, above the body module.
Detail where the wires come though. Wire loom was not needed here, just zip ties to the existing harness.
Door showing wire routing.
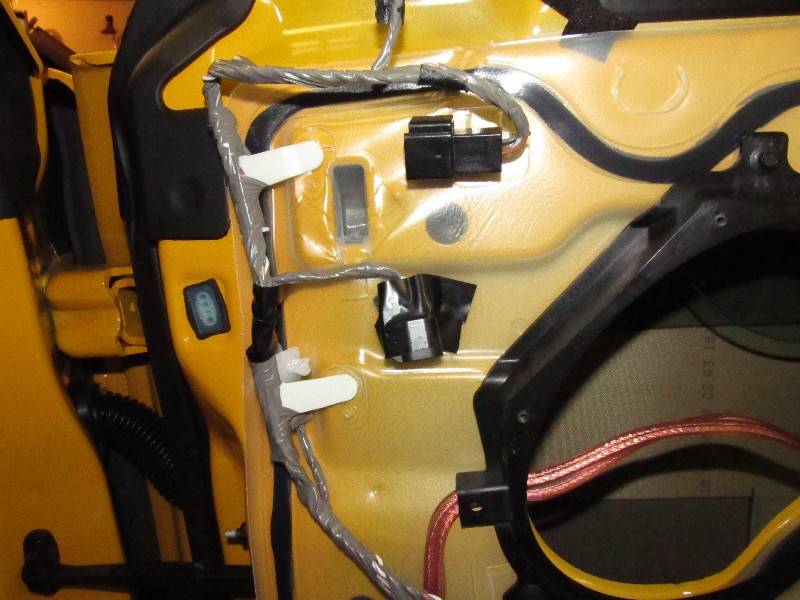
Factory harness taped out of the way.
The carnage! All the parts off the car awaiting new stuff from the UPS and Fedex guys:
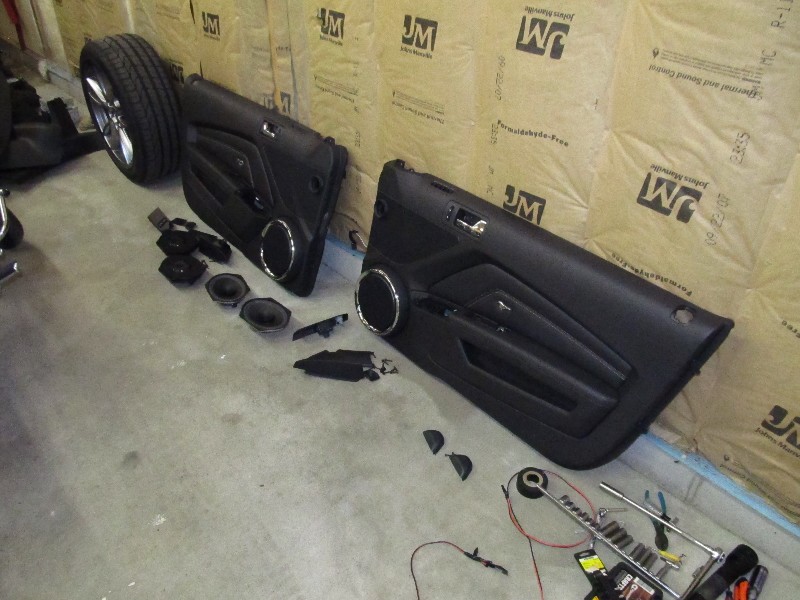
"premium" speakers LOL!
"premium" speakers LOL!
distribute, print, use, etc, to your hearts content, but please leave this note and
the link to the original page in place. The original can be found here:
http://www.fast351.com/11GT/stereoin...tructions.html
Stage 4: Replacing the front speaker wires. Think long and hard about if you need to do
this. This is a difficult operation, and will probably result in swearing, beer drinking, and
blood loss. You will need to be patient. This will probably take three hours to do. If you have
really big hands this won't be fun. OK, enough warnings, you still decided you need to do this,
here we go:
Step 1: Remove the door skins. There are plenty of pages out there on how to do this, but
I'll kind of go over the steps and then give you a link to a video that explains it best:
- Remove sail panel cover.
- Remove power window panel, and disconnect wiring.
- Remove door lock pushbutton trim ring.
- Remove door close handle cover plate.
- Remove door open handle cover plate.
- Remove two T30 bolts from door close and door open handle areas.
- Remove 7mm screw from power window panel area (it's there, just hidden)
- Remove 5 7mm scews from front and bottom of door panel.
- Uncover rear two screws using small screw driver and remove.
- At this point you should have eight (8) 7mm screws and two (2) T30 torx bolts!
- Lift up on door panel and unhook from top, allow lower hooks to sit in door metal to help while you unhook wires and cables.
- Remove 3 wire harnesses: Subwoofer, auto door locks, and ambient lighting.
- Remove door open cable from handle. Easiest to use a small screwdriver to pry the two ears IN.
A video showing you all of this: (don't remove the woofer trim ring, not needed)
JLT Performance shows you how to dress up your door panels
Step 2: Remove the stock speaker and set aside. It's held in with 4 T15 screws.
Step 3: Remove the subwoofer amp. Remove the two connectors to the amp. There are three
nuts that hold it in place. Remove the three nuts and pull the amplifier out of the way. Access is
needed to route the speaker wires.
This is the subwoofer amplifier when removed.
Where the sub amp mounts. This is just up and to the left of the clutch pedal.
Step 4: Remove the retainer plug from the body side of the door tube. I cannot take
credit for figuring this out, and as a matter of fact,
without this thread I would never have gotten it. The pictures below belong to the original author,
many thanks to his posting them (love the color of your car BTW sir!)
- Pull door side tube plug from sheetmetal, this will give you more room to work
- Remove the tube boot from the gray plastic plug on the body side (see second picture).
- Remove the gray bulkhead from the car body (see third picture).
- Remove the outside clip from the connector (inside part) by unlatching the clips (see picture 4)
Tips:
- You will need to partially to fully open the car door while doing this to get the gray connector out far enough to disconnect the outside clip.
- Shove a couple picks (or nails, or whatever) under the retaining clips that will allow you to work the outside clip off the connector.
- The connector will stay in the car, not connected to the outside clip when done.
Your generous working area! Big hands are not a bonus here!
OK, the fun begins, remove the boot from the plug (pass side shown).
Remove the bulkhead from the car.
Remove the outside clip from the connector (it sound so simple doesn't it?)
Step 5: Feed the speaker wire through the tube and into the car:
- Feed a pulling wire through the outside clip from the body side of the boot into the door.
- Feed the other end of that pulling wire into the car, fishing for it with your other hand inside the car.
- Once the pulling wire is in place, tape your permanent wire to the pulling wire with strong electrical tape, in the door.
- Pull the wire from the door to the hinge area.
- Once you have enough in the hinge area, pull it into the car.
- Put wire loom around the wire where it goes into the body, and secure with zip ties.
Watch your hands, the metal inside the car is sharp!!!
Starting from inside the door, feed the wires into the car.
Wires secured, note the (yellow!) wire loom protecting the wires. This area is not deburred and REALLY sharp!
Step 6: Reinsert the tube back into the door and body:
- Put the black boot back around the gray outside clip
- Push the door side tube plug back into the sheetmetal (this has a direction indicator, the flag labelled "UP", goes up)
- Push the outside clip with the boot attached back into the body. You will NOT be reconnecting the connector in the body!
Viola! Rinse and repeat for passenger side door!
Step 7: Route the wires into the speaker area:
- Remove the mounting ring.
- Remove the factory plug from the ring, tape it to the power mirror harness so it doesn't rattle in the door.
- File out the ring for bigger wires.
- Put a slit in the plastic close to where the other wire comes through, and route your wire in.
- Reinstall ring with new wire.
- Ziptie wires to existing harness.
Note the slit in the plastic and the routing near the factory wires.
Factory clip taped out of the way.
New wires through an enlarged hole in the mounting ring.
Step 8: Repeat for passenger side!
This side was significantly easier. Less bulk in the connector? Second time doing it? Not sure, but it took less
than half the time.
Inside the passenger side footwell, above the body module.
Detail where the wires come though. Wire loom was not needed here, just zip ties to the existing harness.
Door showing wire routing.
Factory harness taped out of the way.
The carnage! All the parts off the car awaiting new stuff from the UPS and Fedex guys:
"premium" speakers LOL!
"premium" speakers LOL!
Last edited by Fast_351; May 1, 2011 at 02:22 PM.
GTR Member
Joined: September 28, 2009
Posts: 6,284
Likes: 1
Great write up! One thing though; you don't need to take the rear quarter window trim out to take the rear speakers out. You can get the push pins out by removing the rear kick panels only. Other than that, the best 10+ install manual I've seen to date. I vote for sticky as well!


Thread Starter
Member
Joined: January 30, 2011
Posts: 36
Likes: 0
Great write up! One thing though; you don't need to take the rear quarter window trim out to take the rear speakers out. You can get the push pins out by removing the rear kick panels only. Other than that, the best 10+ install manual I've seen to date. I vote for sticky as well!

Mach 1 Member
Joined: January 25, 2011
Posts: 1,075
Likes: 1
From: Ville Platte, Louisiana
Dude this is an awesome write up! Would have been super helpful if i hadnt done most of it already. But i will be using this in the future as i change other things about my audio. I especially like the detail you put into the running of wires to the front doors of the car! Excellent excellent work! I vote for a sticky on this as well.

AMAZING WRITE UP!!!
*sub.T*
*sub.T*
Thread Starter
Member
Joined: January 30, 2011
Posts: 36
Likes: 0
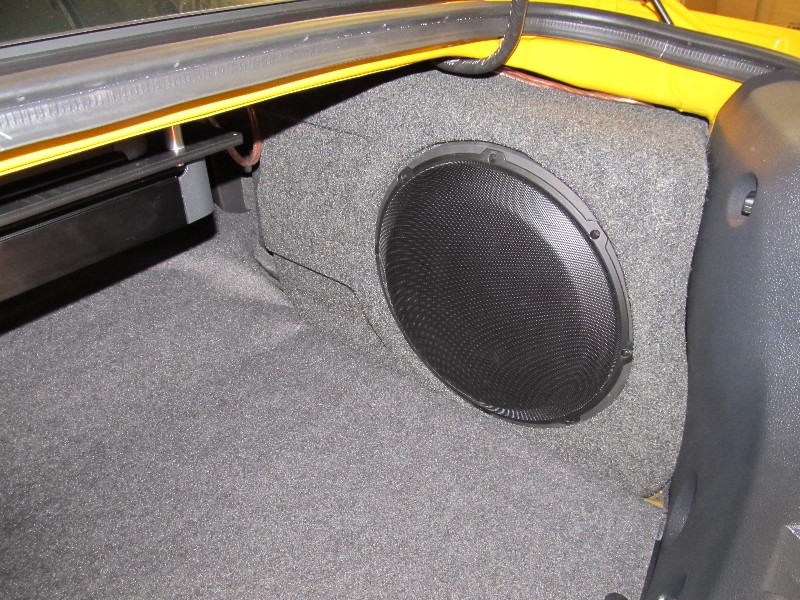
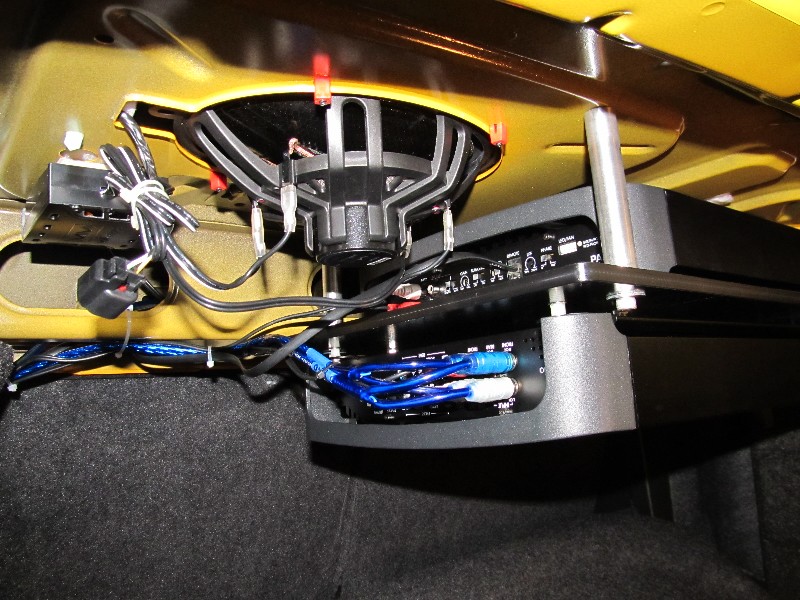
Final result (trunk is the only place to see anything, since the rest is mounted in stock locations):
JL Audio Stealthbox:
Amps hanging off a custom plate from the rear decklid:
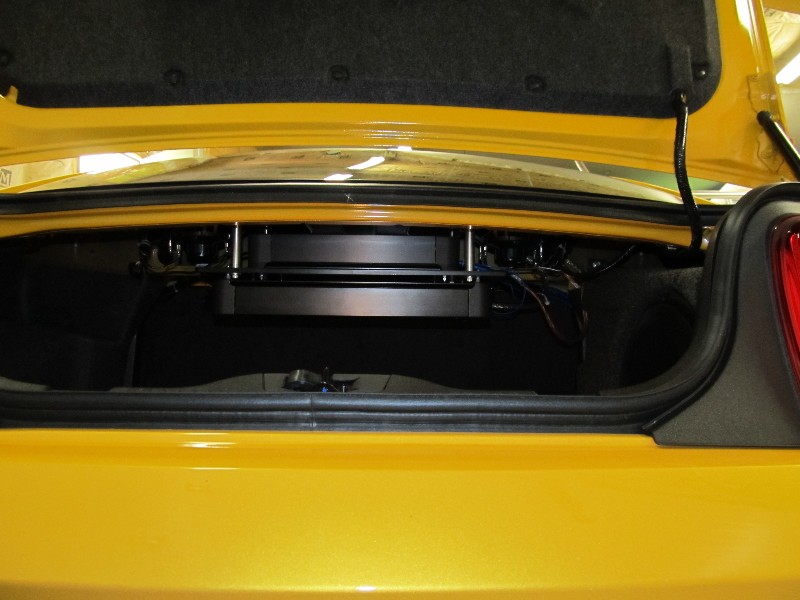
Closeup:
Bunch more pictures during the install:
http://www.fast351.com/11GT/stereoinstall/index2.html
JL Audio Stealthbox:
Amps hanging off a custom plate from the rear decklid:
Closeup:
Bunch more pictures during the install:
http://www.fast351.com/11GT/stereoinstall/index2.html
Shelby GT350 Member
Joined: July 9, 2011
Posts: 2,556
Likes: 2
From: IL
Thanks again for the detailed write up! Saved me a lot of time and headaches today. The part on the amp wire through the fender well was extremely helpful! I would never of thought of checking there.

Thread
Thread Starter
Forum
Replies
Last Post
TacoBill
05-09 Exterior Modifications
60
Nov 15, 2009 07:11 PM
Chaotic Bliss
05-09 Interior and Audio Mods
22
Apr 9, 2005 07:28 PM