
Suspension Modifications for 15 X 10 Race Stars and MT 325/50/15’s

Thread Starter
Mach 1 Member
Joined: April 1, 2010
Posts: 841
Likes: 16
From: King City, Ontario, Canada
Suspension Modifications for 15 X 10 Race Stars and MT 325/50/15’s
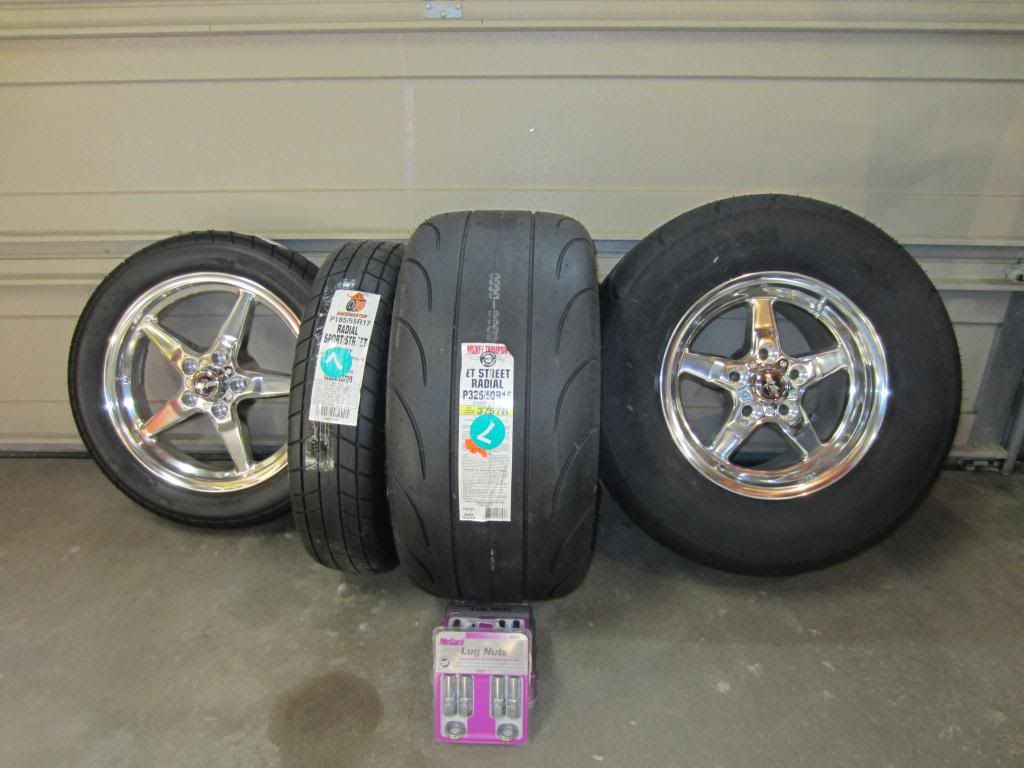
I am getting ready to install 15 X 10 Race Star wheels on the back of my S197 with Mickey Thompson ET Street Radials 325/50/15’s. To accommodate the rims and tires I have to make a few changes:
1. Longer wheel studs (safety).
2. Fabricate new Jounce Bumper plates for the axle housing that relocates the Jounce Bumpers to under the frame rails (maintain Jounce Bumper functionality)
3. Trim the bottom off of the OEM sway bar mounting points and install a Sway Bar relocation kit. (clearance for the 15” rims)
4. Remove the Bump Stop Bracket on the frame rail (tire clearance)
I covered the long wheel studs in this thread: https://themustangsource.com/f730/ar...nstall-504930/
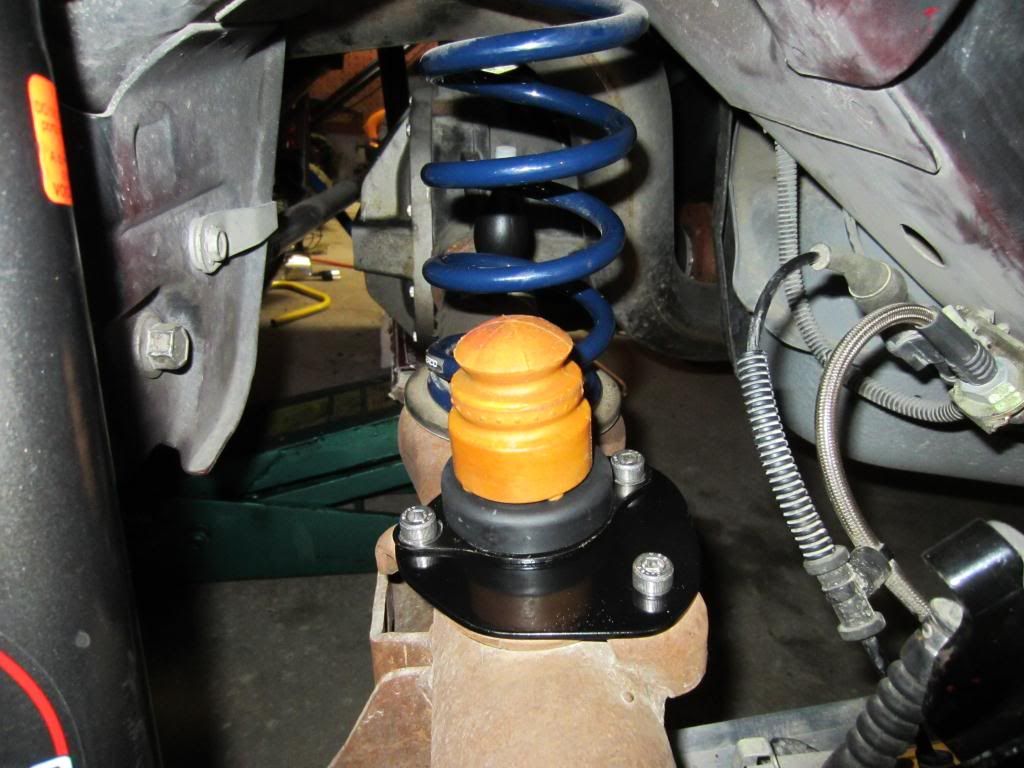
In this thread I will cover the new Jounce Bumper Plates and trimming the Sway Bar mounts and installing the relocation kit.
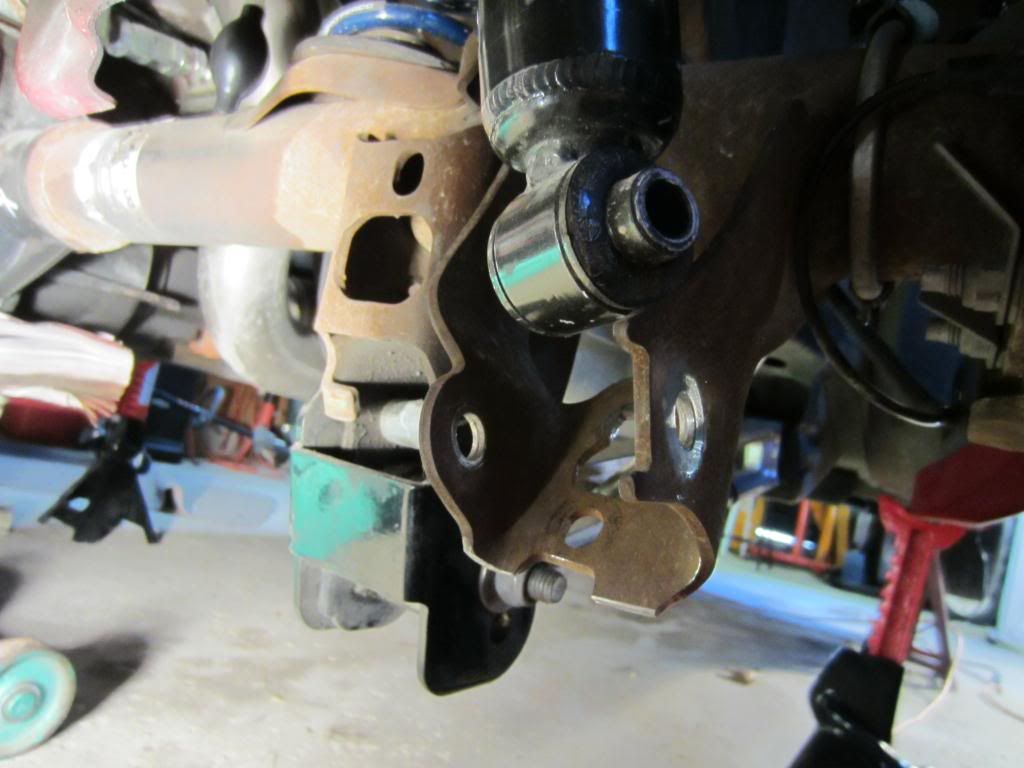
A before picture of the driver’s side OEM Jounce Bumper:
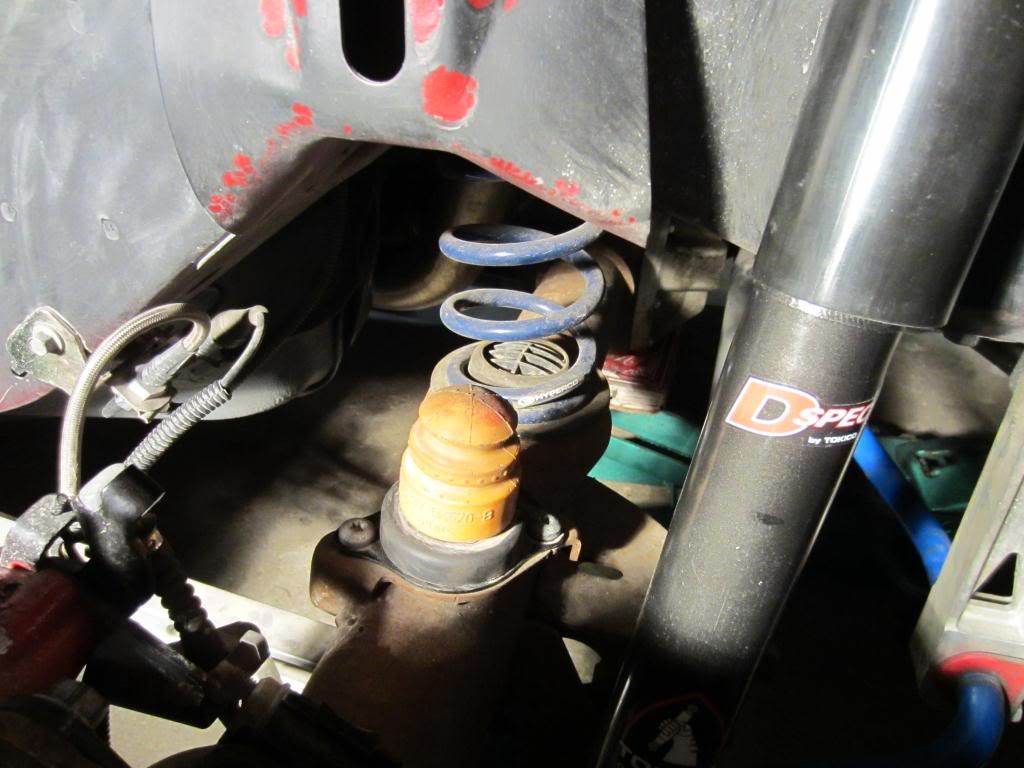
Jounce Bumper removed:
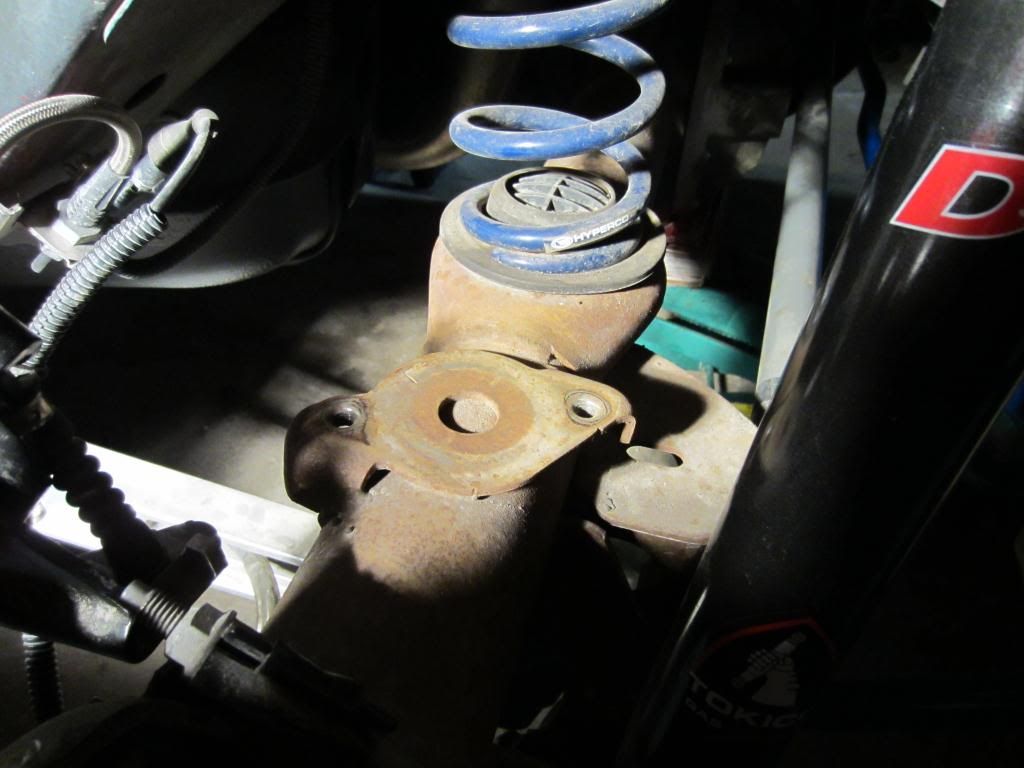
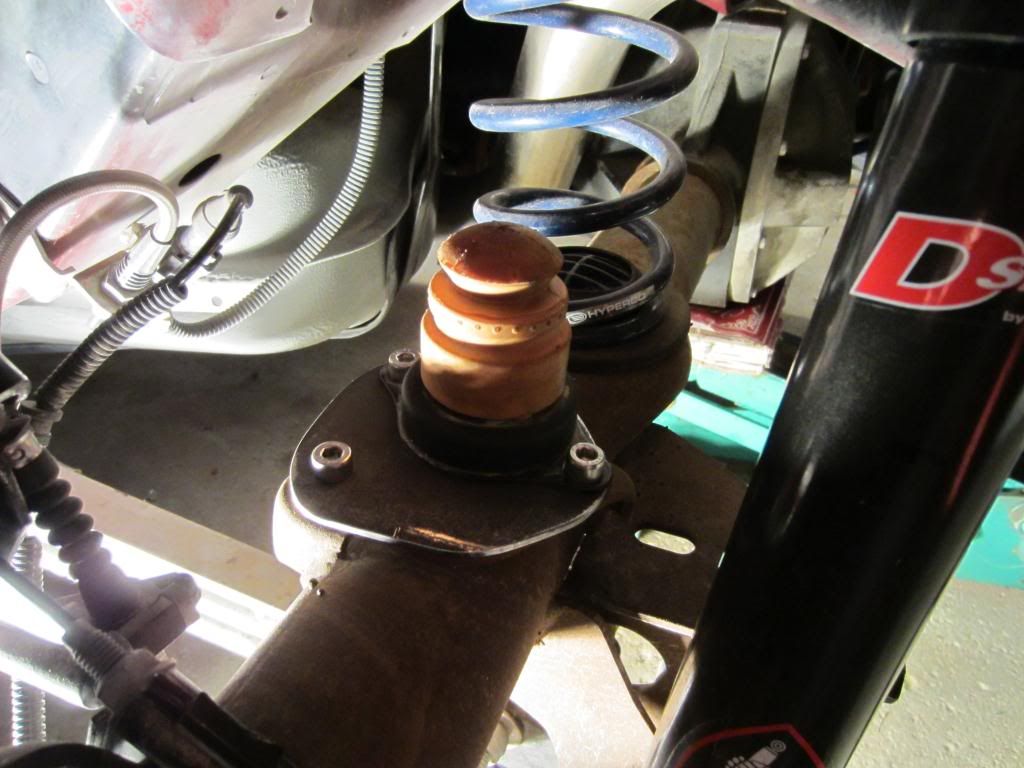
Plate fabricated and trial fit (still to be painted):
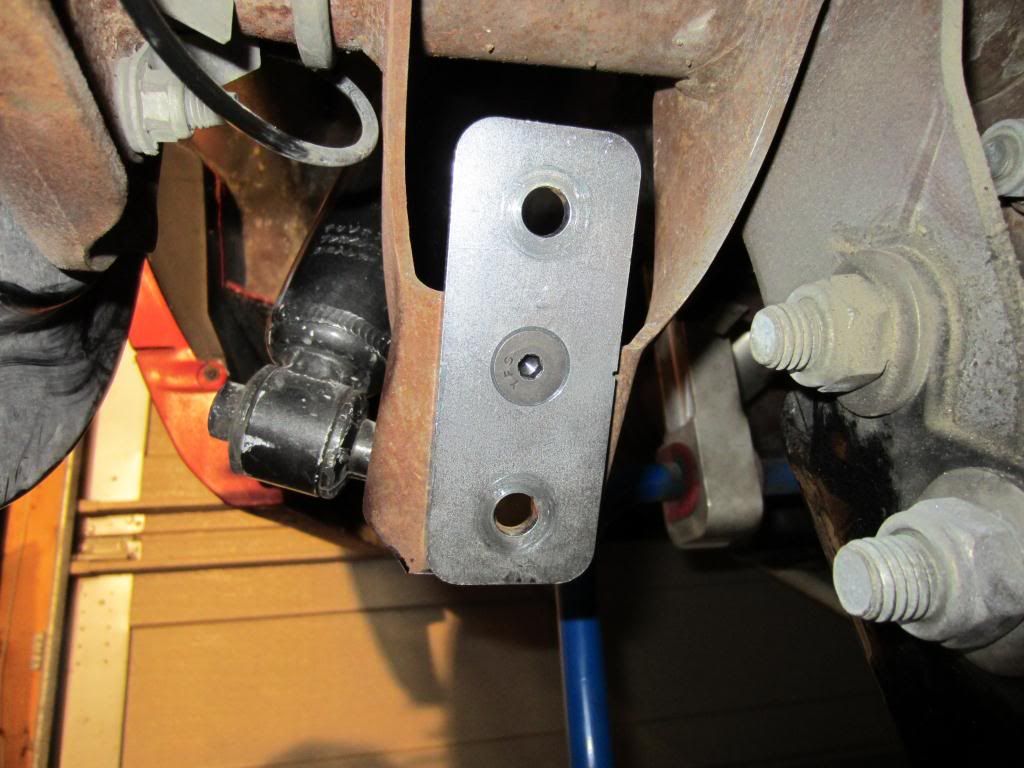
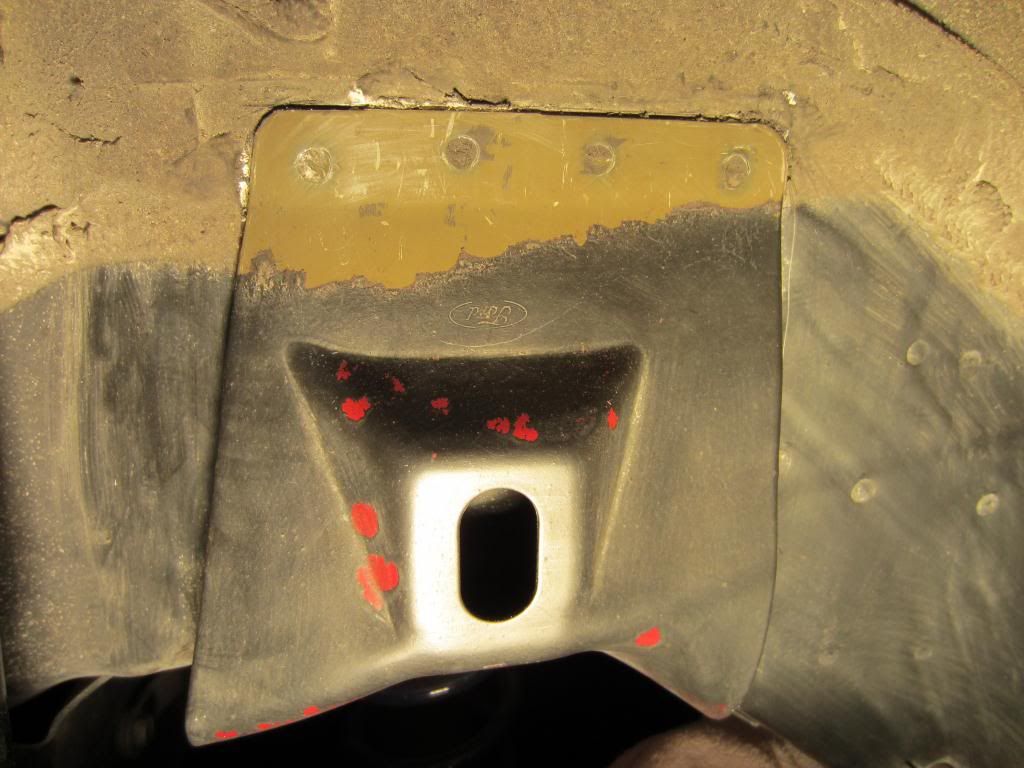
The passenger’s side OEM Sway Bar mount (from the top):
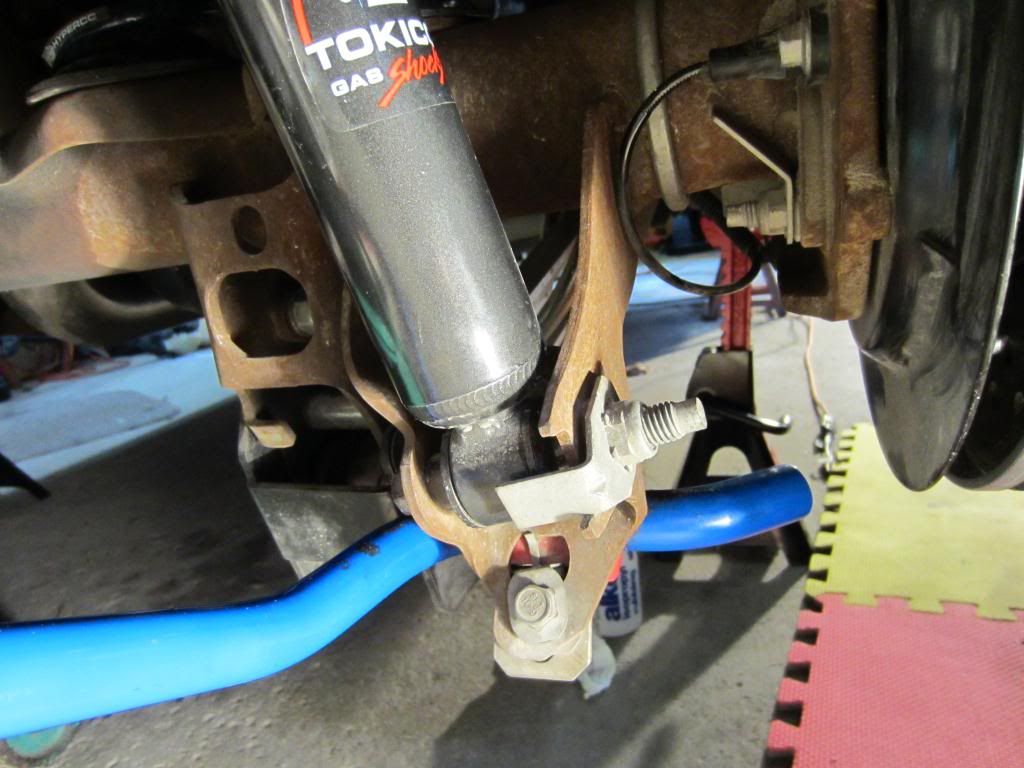
Sway Bar and Shock removed:

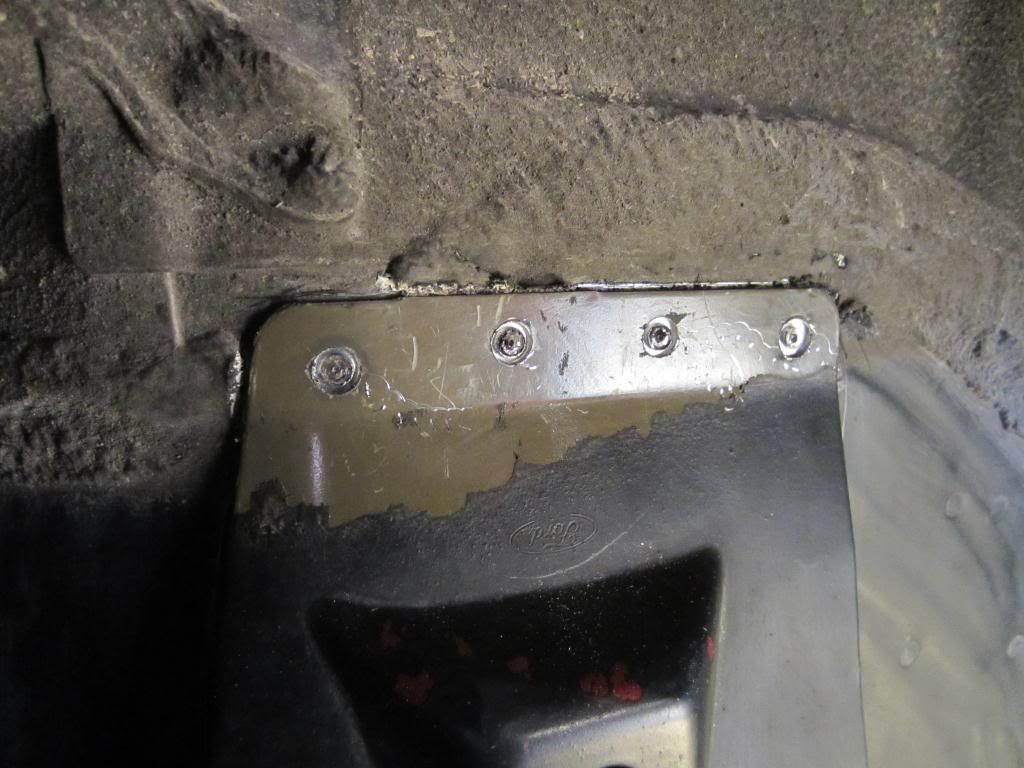
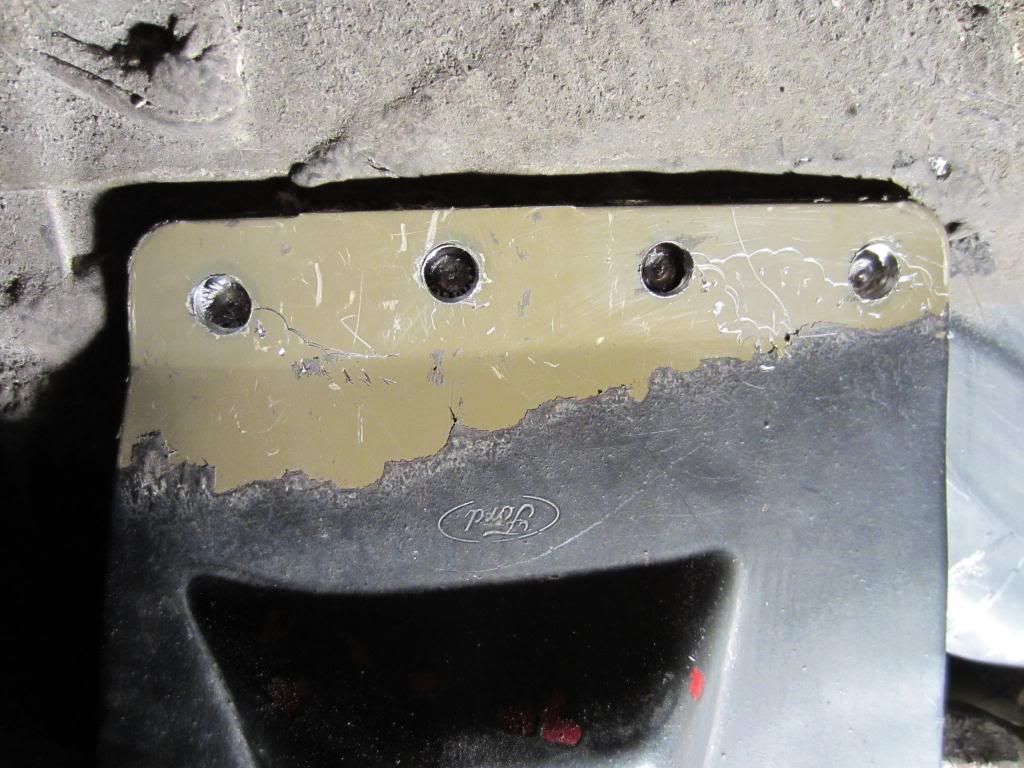
Bottom of the Sway Bar mount cut off (Relocation Plates used as a template for cutting):
Relocation plate installed (picture from the bottom):
Finished pictures of the Jounce Bumper plates, installed relocated Sway Bar and removal of the frame rail Bump Stop Bracket to follow.
1. Longer wheel studs (safety).
2. Fabricate new Jounce Bumper plates for the axle housing that relocates the Jounce Bumpers to under the frame rails (maintain Jounce Bumper functionality)
3. Trim the bottom off of the OEM sway bar mounting points and install a Sway Bar relocation kit. (clearance for the 15” rims)
4. Remove the Bump Stop Bracket on the frame rail (tire clearance)
I covered the long wheel studs in this thread: https://themustangsource.com/f730/ar...nstall-504930/
In this thread I will cover the new Jounce Bumper Plates and trimming the Sway Bar mounts and installing the relocation kit.
A before picture of the driver’s side OEM Jounce Bumper:
Jounce Bumper removed:
Plate fabricated and trial fit (still to be painted):
The passenger’s side OEM Sway Bar mount (from the top):
Sway Bar and Shock removed:
Bottom of the Sway Bar mount cut off (Relocation Plates used as a template for cutting):
Relocation plate installed (picture from the bottom):
Finished pictures of the Jounce Bumper plates, installed relocated Sway Bar and removal of the frame rail Bump Stop Bracket to follow.

Thread Starter
Mach 1 Member
Joined: April 1, 2010
Posts: 841
Likes: 16
From: King City, Ontario, Canada
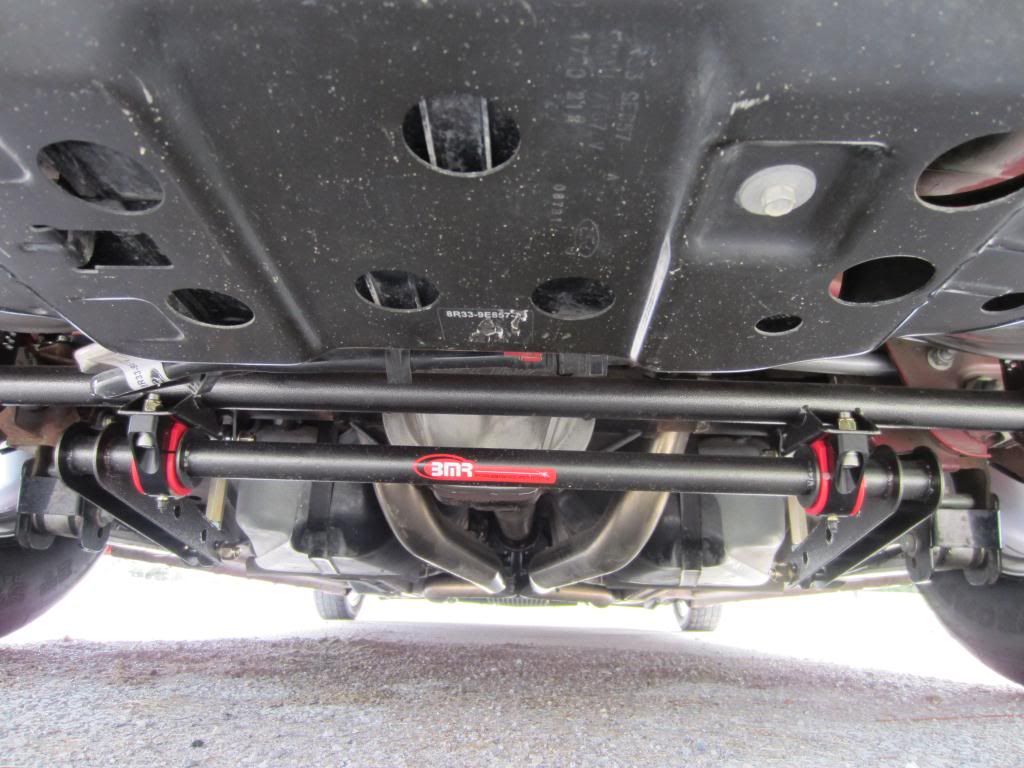
Thanks Rick. I am patiently waiting for delivery of my Race Stars and Tires (front tires are back ordered). Next up will be installation of a BMR Suspensions Xtreme Anti-Roll Bar. Just have to get my youngest daughters boyfriend to drop by with his MIG Welder.
Thread Starter
Mach 1 Member
Joined: April 1, 2010
Posts: 841
Likes: 16
From: King City, Ontario, Canada
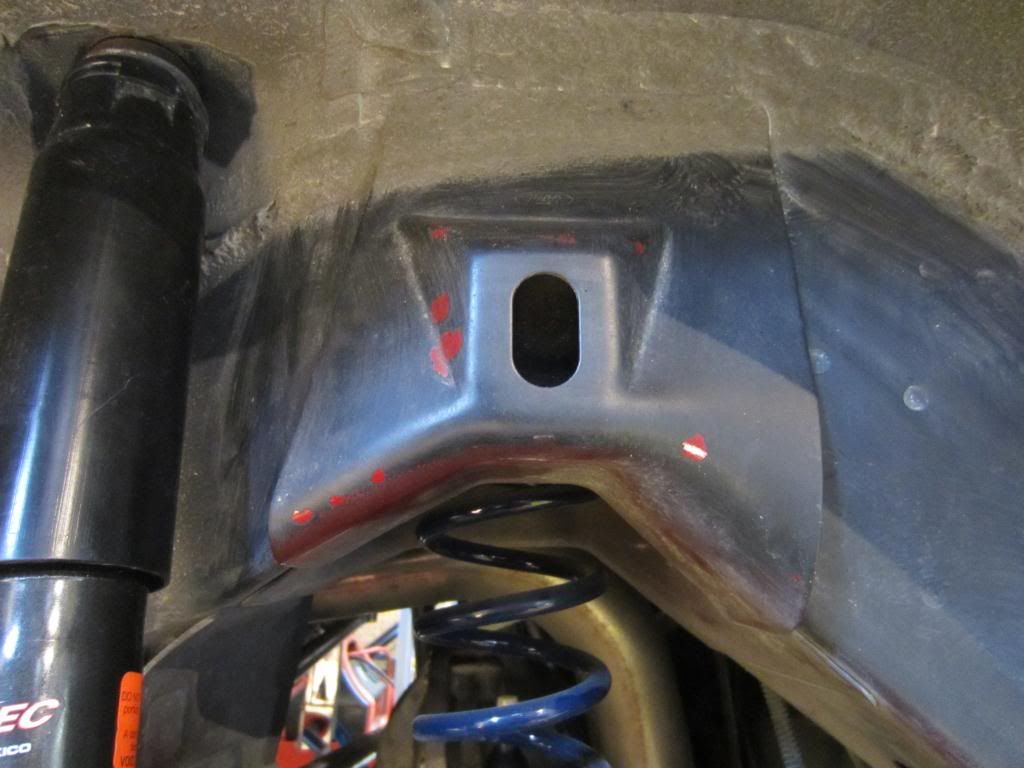
Started working on removing the Bump Stop brackets on the frame rails for tire clearance.
The bracket to be removed on each side:
Undercoating removed to expose the four spot welds:
Spot welds cut with a 5/16" spot weld cutter and 3/8" drill:
Spot welds broken loose thanks to a little persuasion with a hammer and chisel:
Next step is to cut the bottom of the Bump Stop Bracket as close to the frame rail as possible. I am still pondering what the best tool would be to make the cut without "hacking up" my baby too much. Any ideas?
Thread Starter
Mach 1 Member
Joined: April 1, 2010
Posts: 841
Likes: 16
From: King City, Ontario, Canada
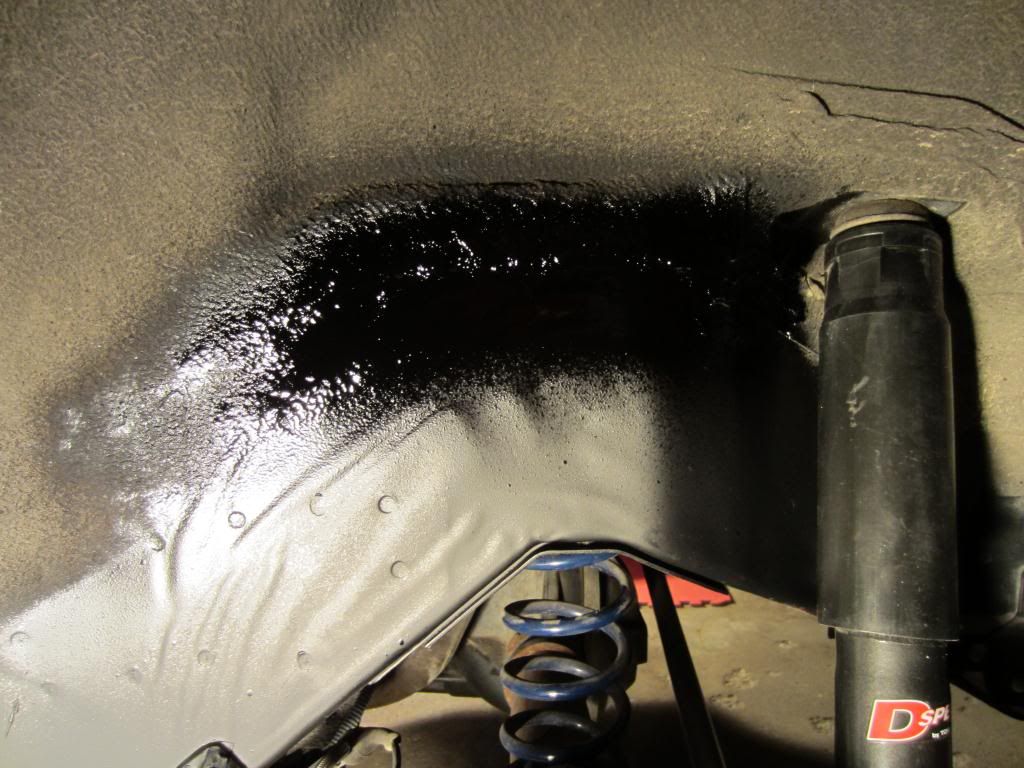
Have the bump stop brackets removed from both side now and spot weld residuals cleaned up.

Next up is some paint and a little undercoating.
Then I will be ready for the MT and Race Stars!!!!!
Next up is some paint and a little undercoating.
Then I will be ready for the MT and Race Stars!!!!!
Thread Starter
Mach 1 Member
Joined: April 1, 2010
Posts: 841
Likes: 16
From: King City, Ontario, Canada
Undercoating applied. All done this mod. Wheels and tries have shipped and should be here by end of day Wednesday the 14th.
Next mod is to install a BMR Suspensions Extreme Anti-Roll bar.
Next mod is to install a BMR Suspensions Extreme Anti-Roll bar.
Legacy TMS Member
Joined: May 16, 2004
Posts: 5,206
Likes: 18
From: Bristol, TN
Cool, by any chance do you know what make and model of your stem mounted TPMS units are? I want to make the jump to 20" Forgestars and its a bit cheaper to run the stem mounted sensors rather than getting a second set of band mounted sensors.
Also, not interested in a sensor bomb (a search of my posts on the subject will show I'm completely adverse to disabling the TPMS system).
Also, not interested in a sensor bomb (a search of my posts on the subject will show I'm completely adverse to disabling the TPMS system).
Thread Starter
Mach 1 Member
Joined: April 1, 2010
Posts: 841
Likes: 16
From: King City, Ontario, Canada
Cool, by any chance do you know what make and model of your stem mounted TPMS units are? I want to make the jump to 20" Forgestars and its a bit cheaper to run the stem mounted sensors rather than getting a second set of band mounted sensors.
Also, not interested in a sensor bomb (a search of my posts on the subject will show I'm completely adverse to disabling the TPMS system).
Also, not interested in a sensor bomb (a search of my posts on the subject will show I'm completely adverse to disabling the TPMS system).
http://www.americanmuscle.com/tpms-sensor-band-kit.html
I just mounted the tires on the car last night and have not completed TPMS Sensor Training. I therefore can not recommend them yet, but I have absolutely no reason to think they will not work properly.
Thread Starter
Mach 1 Member
Joined: April 1, 2010
Posts: 841
Likes: 16
From: King City, Ontario, Canada
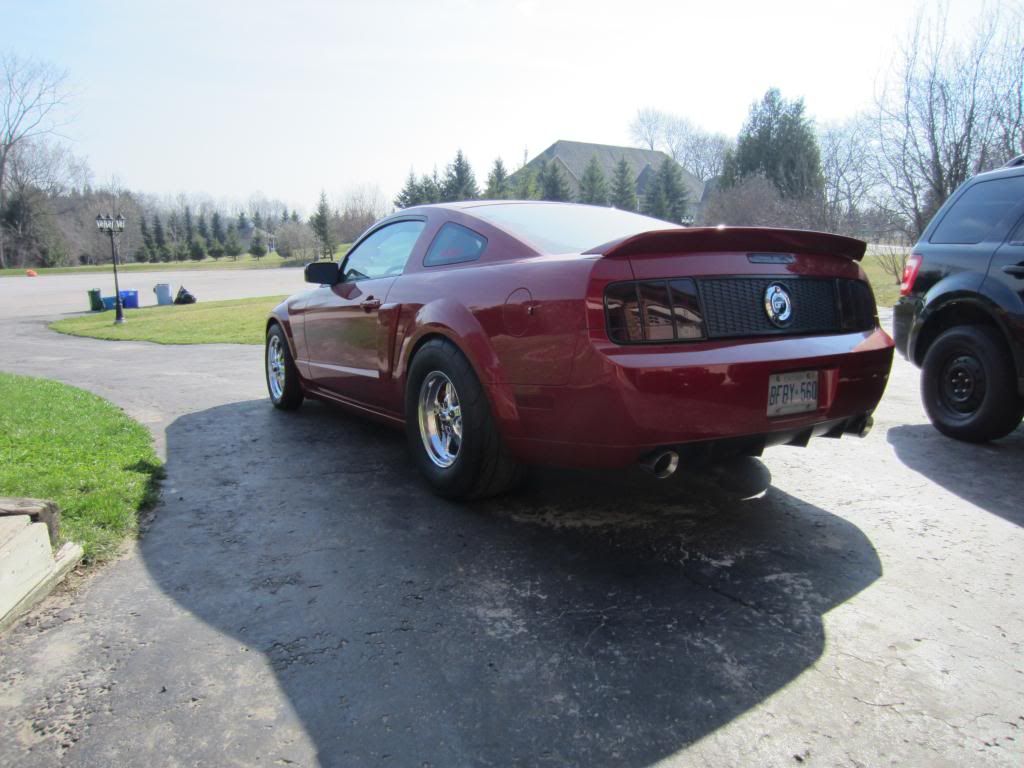
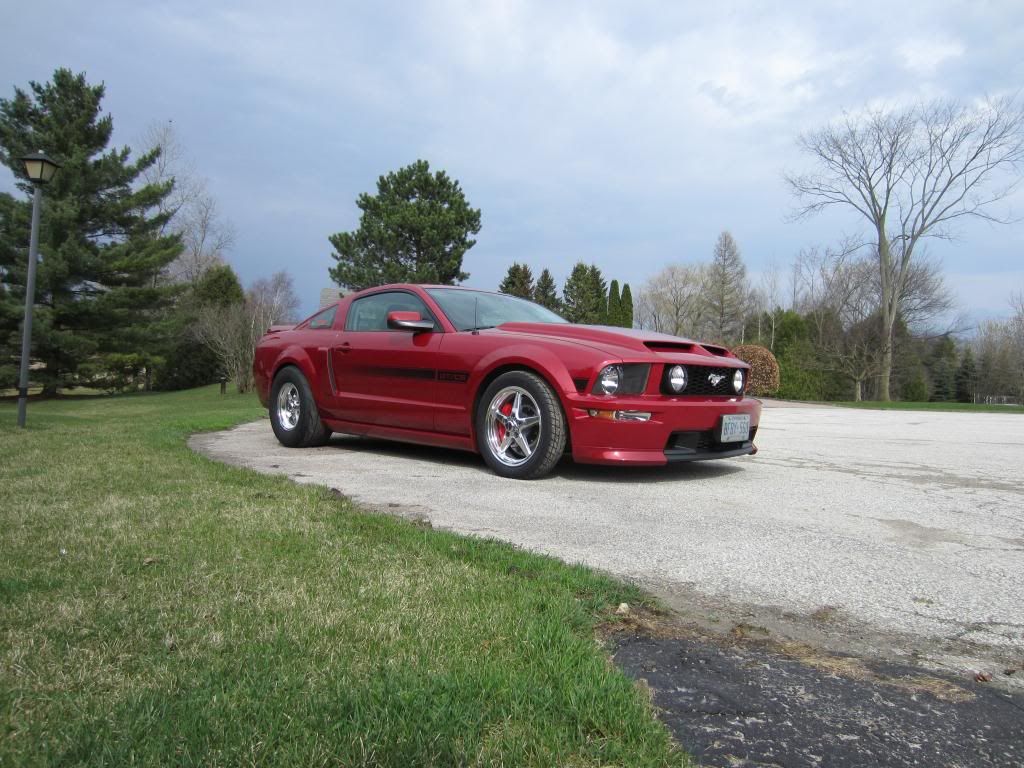
Race Stars and MT's finally on the car. She's out of the garage for the first time since last November. Just completed the BMR Suspensions Xtreme Anti-Roll Bar install as well. (please ignore the garbage in the first pic)!

Thread Starter
Mach 1 Member
Joined: April 1, 2010
Posts: 841
Likes: 16
From: King City, Ontario, Canada
https://themustangsource.com/f730/ar...nstall-504930/
In one of the pictures you will see that with the OEM stud none of the lug nut head will be engaged.
I agree multi-lug rims are tricky to install and take time to get the washers located correctly. You need to use the hub-centric-rings that locate the rims and install one washer nut combination at a time with the lug you are working on at the 6 o'clock position. The weight of the offset will properly position the washer. It is also my strong belief that using an impact wrench is a no no.
Cobra R Member
Joined: December 13, 2004
Posts: 1,708
Likes: 3
From: United States
Originally Posted by Scott2
I would not chance Race Star wheels with OEM Length studs. Take a look in this thread:
https://themustangsource.com/f730/ar...nstall-504930/
In one of the pictures you will see that with the OEM stud none of the lug nut head will be engaged.
I agree multi-lug rims are tricky to install and take time to get the washers located correctly. You need to use the hub-centric-rings that locate the rims and install one washer nut combination at a time with the lug you are working on at the 6 o'clock position. The weight of the offset will properly position the washer. It is also my strong belief that using an impact wrench is a no no.
Thread Starter
Mach 1 Member
Joined: April 1, 2010
Posts: 841
Likes: 16
From: King City, Ontario, Canada
Needs to be tightened enough to prevent the washer from moving. Also suggest you look at McGard washers and lug nuts, part number 63000. They are not as soft as the Race Star versions.

Thread
Thread Starter
Forum
Replies
Last Post
Evil_Capri
Mustang Motorsports
1
Sep 11, 2015 08:39 AM