Does anyone have a 2012 mustang yet?
#1
Does anyone have a 2012 mustang yet?
I was wondering if anyone who has a 2012 mustang with the homelink visor can post some info about how they are wired? I would like to know where it plug into on the wiring harness? Thanks
#4
I have one, and it has the homelink (it's not actually homelink, btw - it's a Lear Car2U system), but I haven't taken a look at how it hooks up. AFAIK, all of the circuitry is internal to the sun visor and it simply takes the power and leads from the visor light. Why do you want to know?
#6
I have one, and it has the homelink (it's not actually homelink, btw - it's a Lear Car2U system), but I haven't taken a look at how it hooks up. AFAIK, all of the circuitry is internal to the sun visor and it simply takes the power and leads from the visor light. Why do you want to know?
#7
Originally Posted by hawkeye18
I have one, and it has the homelink (it's not actually homelink, btw - it's a Lear Car2U system), but I haven't taken a look at how it hooks up. AFAIK, all of the circuitry is internal to the sun visor and it simply takes the power and leads from the visor light. Why do you want to know?
#8
Ok, I took the visor out to see what the skinny on it is.
Short version: It's not gonna be plug 'n play, but it'll be pretty easy to install nonetheless.
First, to remove the visor, you gotta work on this thing:
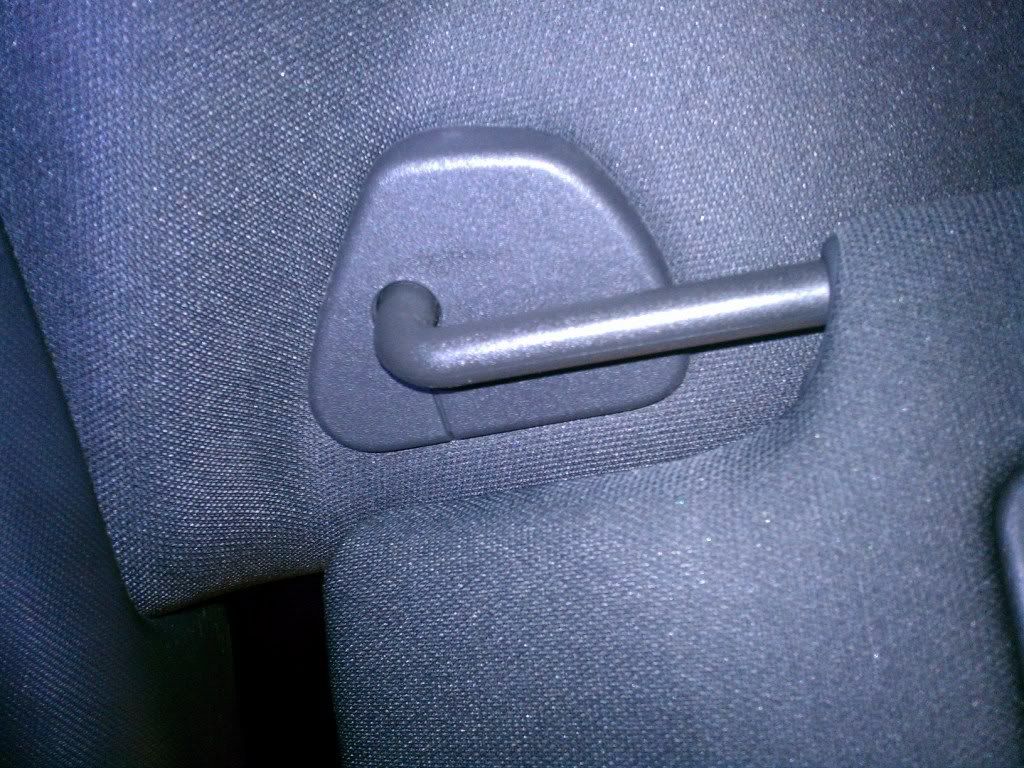
First, you open it up and flip it out to the side so it looks like this:
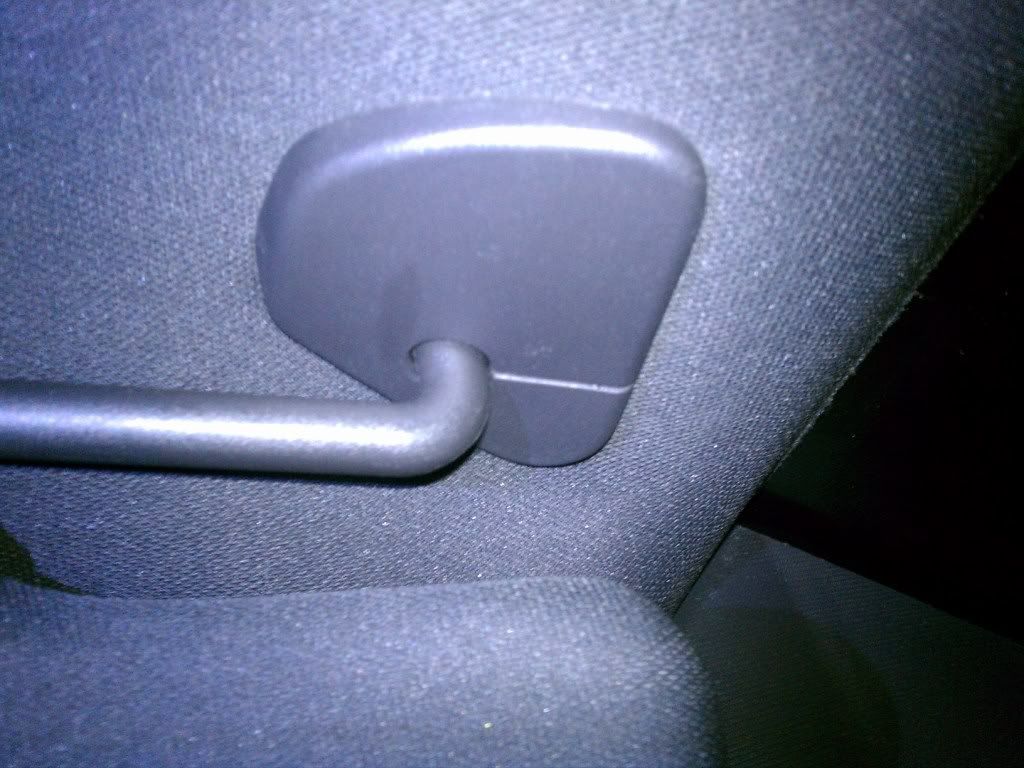
You'll notice there are no screws visible. That's because Ford decided that screws are ugly and you shouldn't see any. So, you'll have to pry the plastic cover off. How you do it is up to you, but here's what it looks like from the other side:
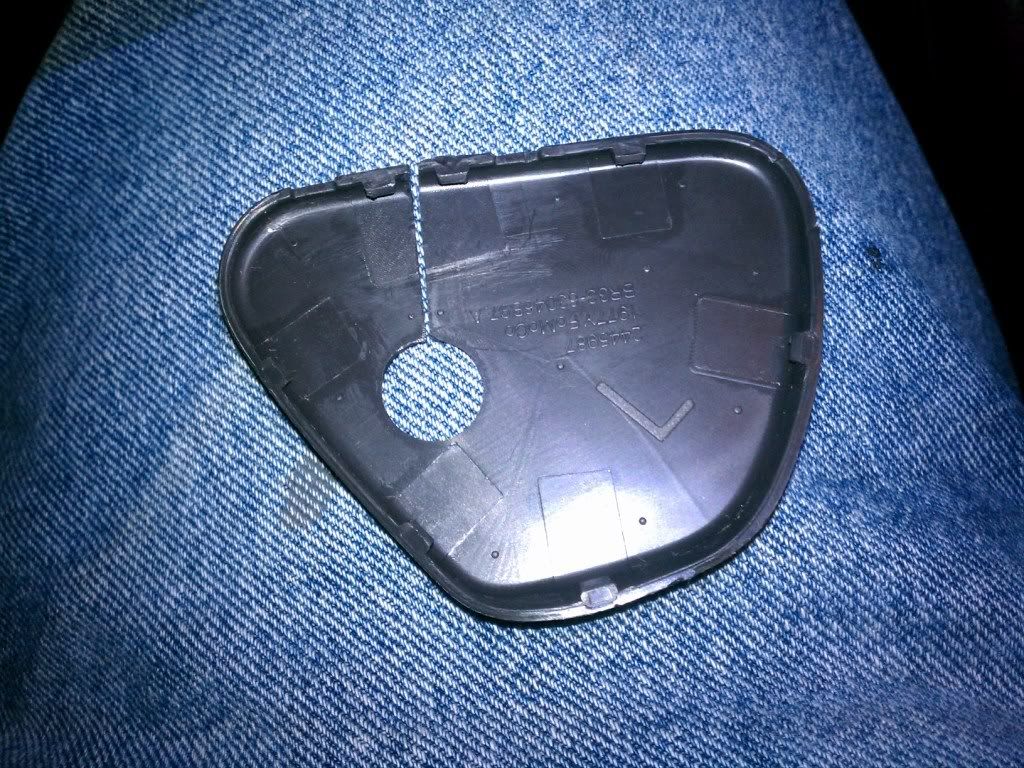
Obviously, you have to slip it over the arm of the visor.
Once you get that off, you are greeted with this:
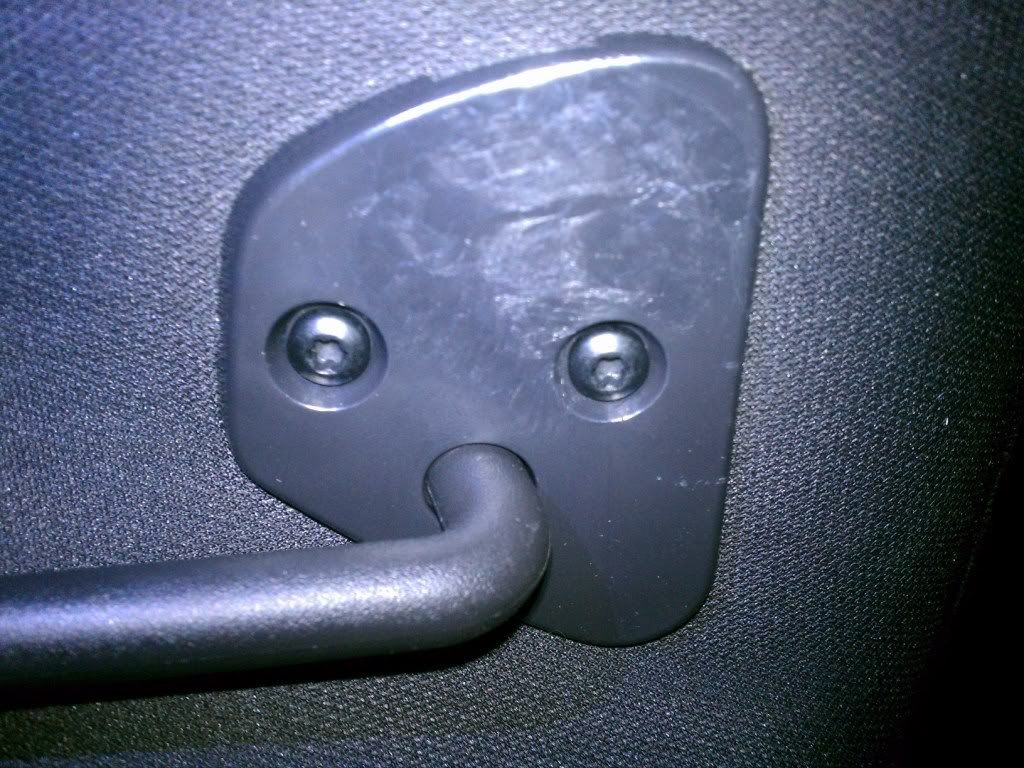
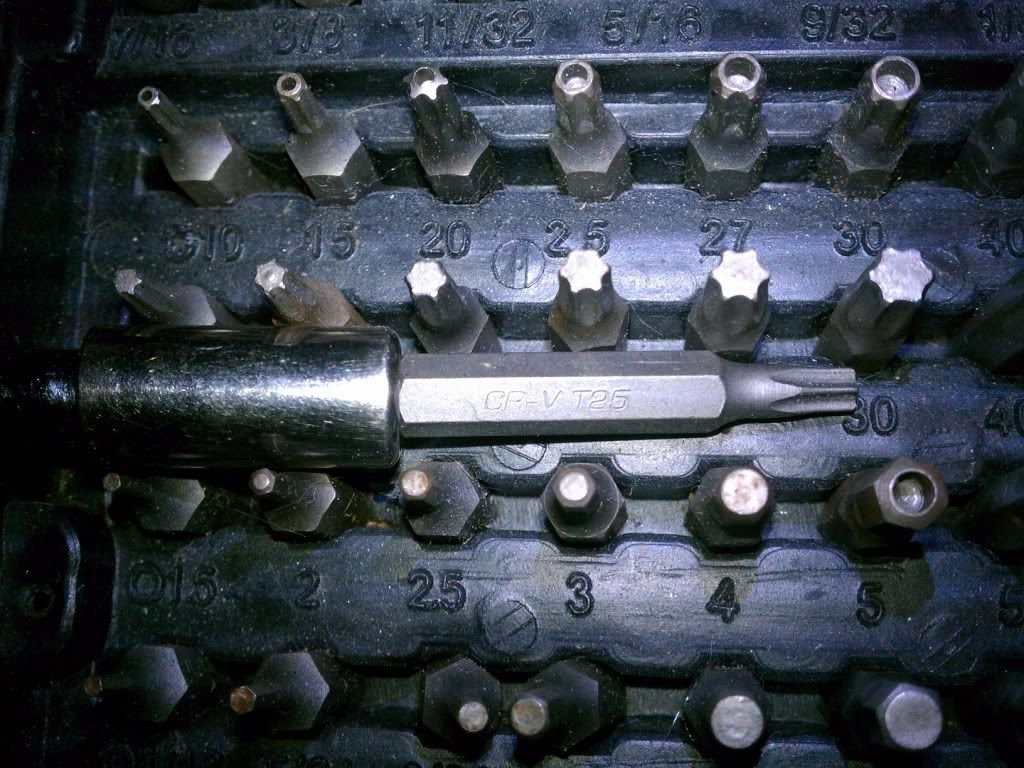
I guess Ford likes Torx bits, eh? These are T-25 screws:
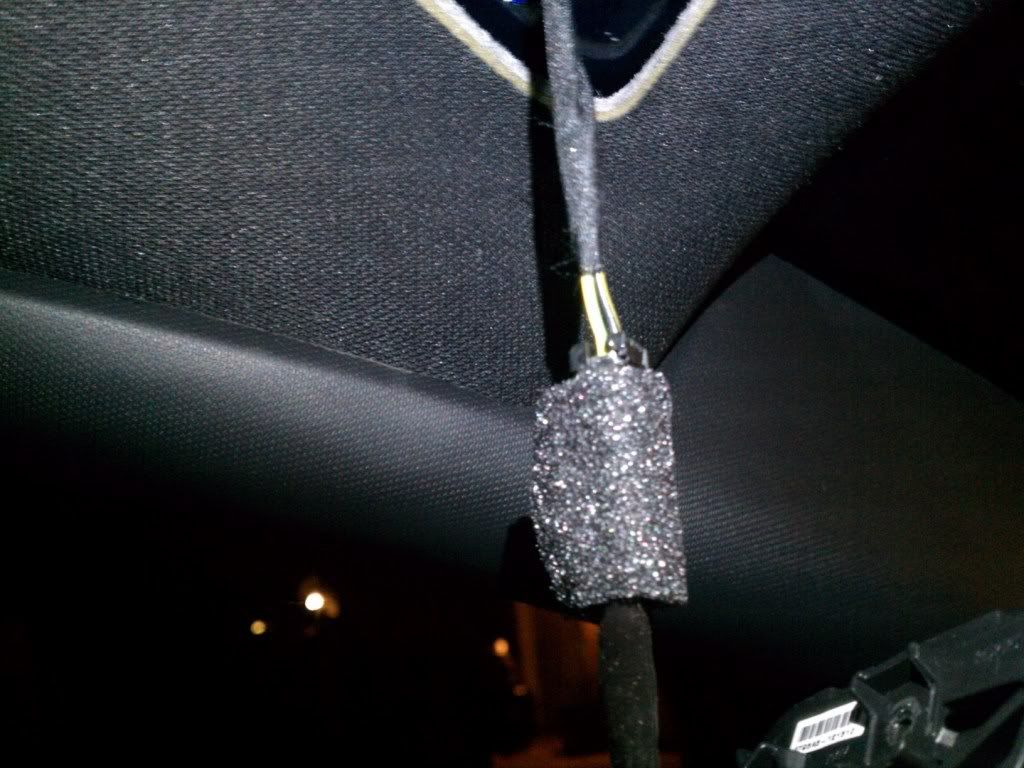
Once you get them out (they're pretty long), you can see that it is indeed a simple two-wire arrangement - power and ground. That's the good news; all the circuitry is internal to the visor. Pull on it a little more and the wires change color (the connector is hidden under some foam):
Here's the bad news. The two wires that go into the headliner simply go into the main rear-view mirror harness, like such:
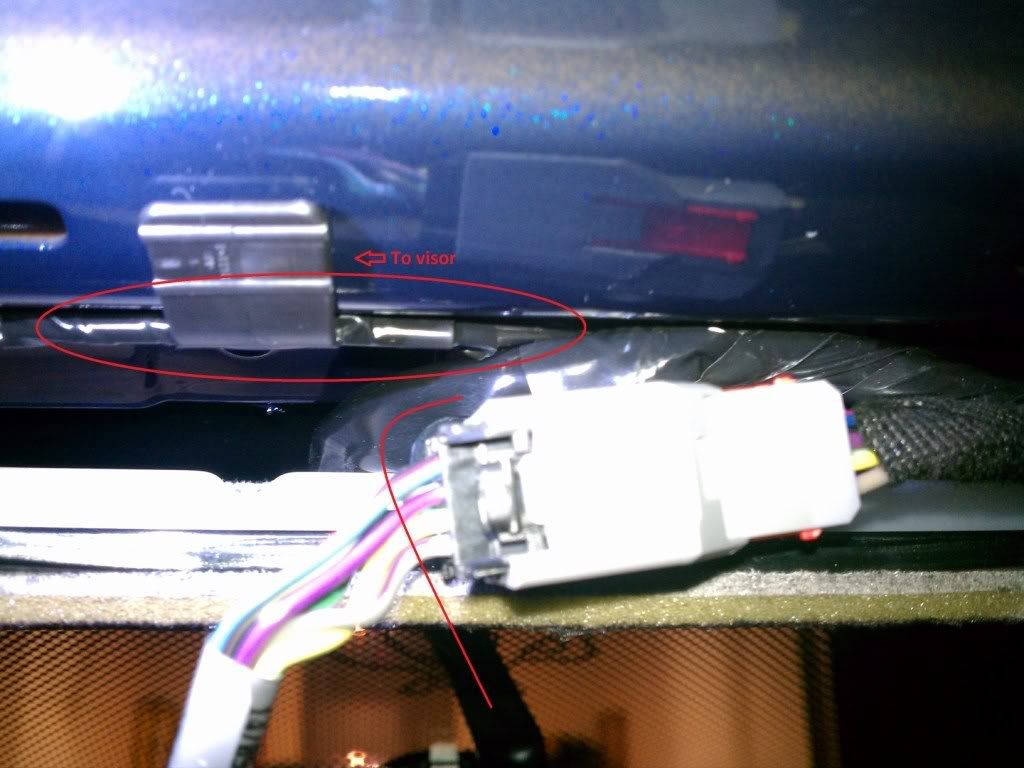
So you can't simply plug the visor in. However, since all you need is a power and a ground, you can simply splice off either the rear-view mirror power leads or the map light leads. Getting the connectors... well, that's up to you but if I had to do it, I'd just cut the connector off the visor wires and splice them into the wires spliced off the mirror leads. If I decided to not be lazy I might get a MOLEX connector and use that.
So there you have it.
Short version: It's not gonna be plug 'n play, but it'll be pretty easy to install nonetheless.
First, to remove the visor, you gotta work on this thing:

First, you open it up and flip it out to the side so it looks like this:

You'll notice there are no screws visible. That's because Ford decided that screws are ugly and you shouldn't see any. So, you'll have to pry the plastic cover off. How you do it is up to you, but here's what it looks like from the other side:

Obviously, you have to slip it over the arm of the visor.
Once you get that off, you are greeted with this:

I guess Ford likes Torx bits, eh? These are T-25 screws:

Once you get them out (they're pretty long), you can see that it is indeed a simple two-wire arrangement - power and ground. That's the good news; all the circuitry is internal to the visor. Pull on it a little more and the wires change color (the connector is hidden under some foam):

Here's the bad news. The two wires that go into the headliner simply go into the main rear-view mirror harness, like such:

So you can't simply plug the visor in. However, since all you need is a power and a ground, you can simply splice off either the rear-view mirror power leads or the map light leads. Getting the connectors... well, that's up to you but if I had to do it, I'd just cut the connector off the visor wires and splice them into the wires spliced off the mirror leads. If I decided to not be lazy I might get a MOLEX connector and use that.
So there you have it.
#11
Originally Posted by Overboost
I was under the impression that the '11s have the plug above the headliner, just not connected. IIRC, the lighted visors/garage door opener were pulled last minute.
#12
I have some possible good news for those who own a 2011 and want the Car2u visor. The wiring appears to be there as you can see by the pic. The visor's wiring can probably be spliced right into the harness right where the factory does it.
#13
There might be a connector under all that tape. It looks like the harness has been folded back on itself and taped up to protect the connector. That could mean it's plug-and-play after all.
#14
Originally Posted by WhiteBird00
There might be a connector under all that tape. It looks like the harness has been folded back on itself and taped up to protect the connector. That could mean it's plug-and-play after all.
#17
Ok, I took the visor out to see what the skinny on it is.
Short version: It's not gonna be plug 'n play, but it'll be pretty easy to install nonetheless.
First, to remove the visor, you gotta work on this thing:

First, you open it up and flip it out to the side so it looks like this:

You'll notice there are no screws visible. That's because Ford decided that screws are ugly and you shouldn't see any. So, you'll have to pry the plastic cover off. How you do it is up to you, but here's what it looks like from the other side:

Obviously, you have to slip it over the arm of the visor.
Once you get that off, you are greeted with this:

I guess Ford likes Torx bits, eh? These are T-25 screws:

Once you get them out (they're pretty long), you can see that it is indeed a simple two-wire arrangement - power and ground. That's the good news; all the circuitry is internal to the visor. Pull on it a little more and the wires change color (the connector is hidden under some foam):

Here's the bad news. The two wires that go into the headliner simply go into the main rear-view mirror harness, like such:

So you can't simply plug the visor in. However, since all you need is a power and a ground, you can simply splice off either the rear-view mirror power leads or the map light leads. Getting the connectors... well, that's up to you but if I had to do it, I'd just cut the connector off the visor wires and splice them into the wires spliced off the mirror leads. If I decided to not be lazy I might get a MOLEX connector and use that.
So there you have it.
Short version: It's not gonna be plug 'n play, but it'll be pretty easy to install nonetheless.
First, to remove the visor, you gotta work on this thing:

First, you open it up and flip it out to the side so it looks like this:

You'll notice there are no screws visible. That's because Ford decided that screws are ugly and you shouldn't see any. So, you'll have to pry the plastic cover off. How you do it is up to you, but here's what it looks like from the other side:

Obviously, you have to slip it over the arm of the visor.
Once you get that off, you are greeted with this:

I guess Ford likes Torx bits, eh? These are T-25 screws:

Once you get them out (they're pretty long), you can see that it is indeed a simple two-wire arrangement - power and ground. That's the good news; all the circuitry is internal to the visor. Pull on it a little more and the wires change color (the connector is hidden under some foam):

Here's the bad news. The two wires that go into the headliner simply go into the main rear-view mirror harness, like such:

So you can't simply plug the visor in. However, since all you need is a power and a ground, you can simply splice off either the rear-view mirror power leads or the map light leads. Getting the connectors... well, that's up to you but if I had to do it, I'd just cut the connector off the visor wires and splice them into the wires spliced off the mirror leads. If I decided to not be lazy I might get a MOLEX connector and use that.
So there you have it.
Thanks,
Manuel
#18
For my 2011, I bought a used sunvisor with a Homelink module in it. I removed it from this donor visor (paid a wopping $25.00 for it off ebay; any Homelink in a visor will work, no matter what brand (GM, Dodge, Ford, etc), and installed it in the center roof console (has the overhead lights and motion sensor for those with the factory security system).
You will want to program the Homelink first by temporarily connecting the hot lead and ground to your battery. Then install it in the center console. Connect the hot lead of the Homelink to the hot lead of the overhead lights, and connect the ground lead of the Homelink to a simple push switch (5 bucks at any parts store or hardware store). Connect a wire to the other post of the push switch, then connect it to the ground wire of the overhead lights in the console.
You drill a hole in the console to mount the tiny push switch, then re-install the overhead console.
A bunch cheaper that buying the visor. Looks factory too.
If you do a search here on Homelink, you'll see the install with pics from another member that did this.
Last edited by Bucko; 4/4/13 at 05:52 AM.


