New Product! Show-n-Go Retractable License Plate Holder
 2/22/08, 12:46 PM
#1
Former Vendor
Thread Starter
Join Date: October 11, 2004
Posts: 312
Likes: 0
Received 0 Likes
on
0 Posts
New Product! Show-n-Go Retractable License Plate Holder
New at Ninosport!
Show-n-Go Retractable License Plate Holder

Show-n-Go Retractable License Plate Holder
The Mustang is one of the best looking cars on the road today, and if you're like us you hate the front license plate holder because it ruins your Mustang's otherwise beautiful "face". Sure, you could run around with no front plate on, but why take the risk of getting a ticket?
With the Show-n-Go Retractable License Plate Holder by Altec you can display the front plate when you need to, and then easily retract it when you go to a show or gathering and want your Mustang to look its best. The retracting mechanism is made of top quality stainless steel with a satin black coating, while the license plate holder is made of a tough but nicely finished polymer composite. All necessary hardware is included and installation is super easy. Click the following link to play the YouTube video showing the Show-n-Go in action!
Ninosport is now a stocking dealer of the Altec Show-n-Go Retractable License Plate Holder and the response has been tremendous. We've almost sold out of our initial stock but we still have a few left. With Spring around the corner and all the car shows that come with it, it's sure to be a hot, hot item. Get yours today!
Show-n-Go Retractable License Plate Holder
Fits All Year Mustangs!
Only $54.95 with FREE Shipping!


 2/22/08, 03:15 PM
#3
Former Vendor
Thread Starter
Join Date: October 11, 2004
Posts: 312
Likes: 0
Received 0 Likes
on
0 Posts
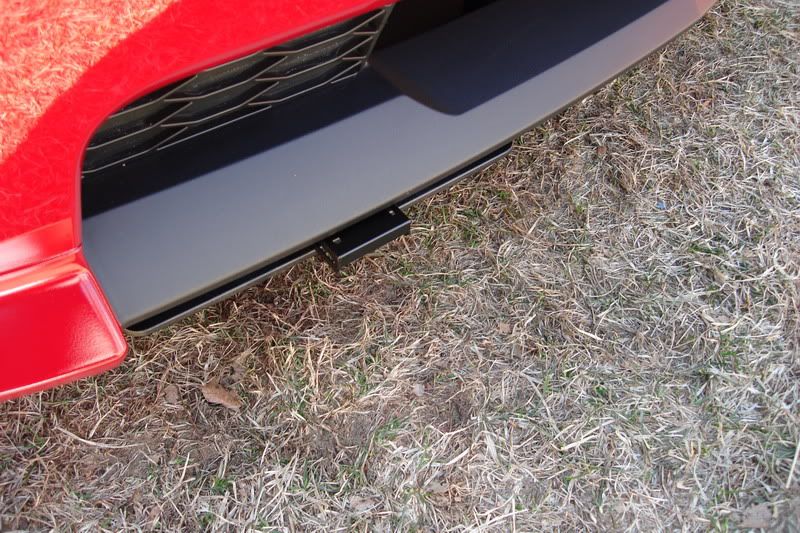
Actually, the height of the plate holder in the retracted position is only 1-1/8" so if it's installed as shown in the bottom picture, it will be no lower than the bottom of the bumper cover. If the bumper can clear the cement stop the plate holder will as well. I always stop at least one foot away from any cement stop anyway.
Also, the way it's shown in the picture is the easiest way to install it because there's a nice flat surface to attach it to, but you can install it anywhere as long as you can bolt it down somehow.
-Nino
Also, the way it's shown in the picture is the easiest way to install it because there's a nice flat surface to attach it to, but you can install it anywhere as long as you can bolt it down somehow.
-Nino
2/23/08, 09:02 AM
#5
Former Vendor
Thread Starter
Join Date: October 11, 2004
Posts: 312
Likes: 0
Received 0 Likes
on
0 Posts
2/23/08, 09:38 AM
#6
Mach 1 Member
Join Date: November 30, 2006
Location: Columbia, Missouri
Posts: 571
Likes: 0
Received 1 Like
on
1 Post
What it needs to do is be retracted until needed and remote for activation (spring loaded or somesuch) to put in place when you are pulled over...
I can just see the cop "Do you know why I pulled you over Sir?"
"No, I have no idea Officer..."
"You have no front license plate displayed as required by this State".
"Officer, I believe you may be mistaken, could you please check again?"
(Officer walks to front of Mustang, sees the extended plate, scratches his head, and walks back)
"It appears I made a mistake sir...have a good day, drive safely..."
3/29/08, 01:19 PM
#10
Bullitt Member
Join Date: September 2, 2007
Location: Ladera Ranch, CA.
Posts: 366
Likes: 0
Received 0 Likes
on
0 Posts
I recently got pulled over for not having a front plate and there's no way I want to drill into my front end. It looks so terrible. So I just purchased one of these off your site this morning.
I just hope it doesn't have to go to waste when I eventually get a chin spoiler.
Either way, just thought I'd share.
Thanks!
I just hope it doesn't have to go to waste when I eventually get a chin spoiler.
Either way, just thought I'd share.
Thanks!
 3/30/08, 09:35 AM
#12
Tasca Super Boss 429 Member
As a disclaimer, I purchased this holder from another vendor, but it is the same item. I am posting these pics for those who are interested in the item itself.
Installation is on a 2008 GT/CS
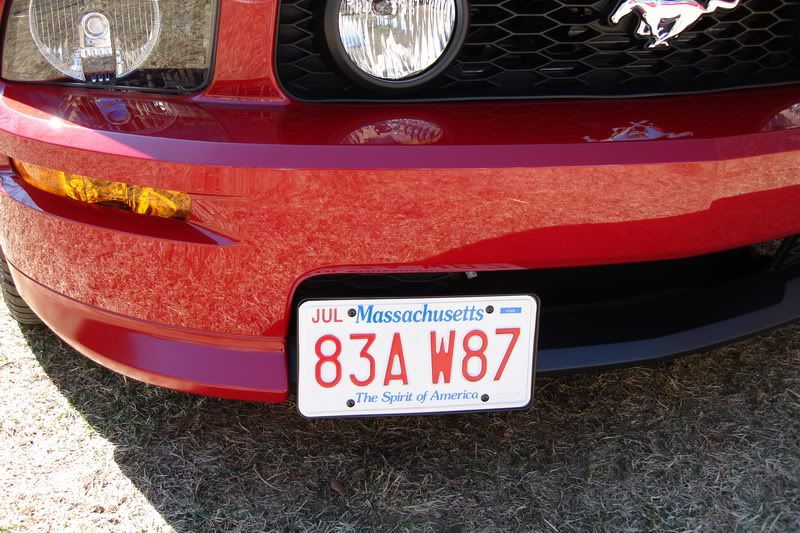
Here is the plate holder in the DOWN position

UP position:
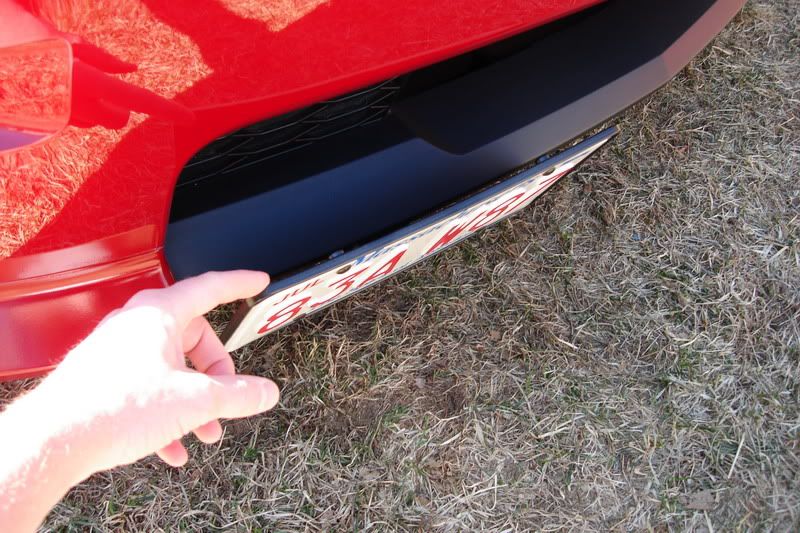
The process of putting it in the down position:
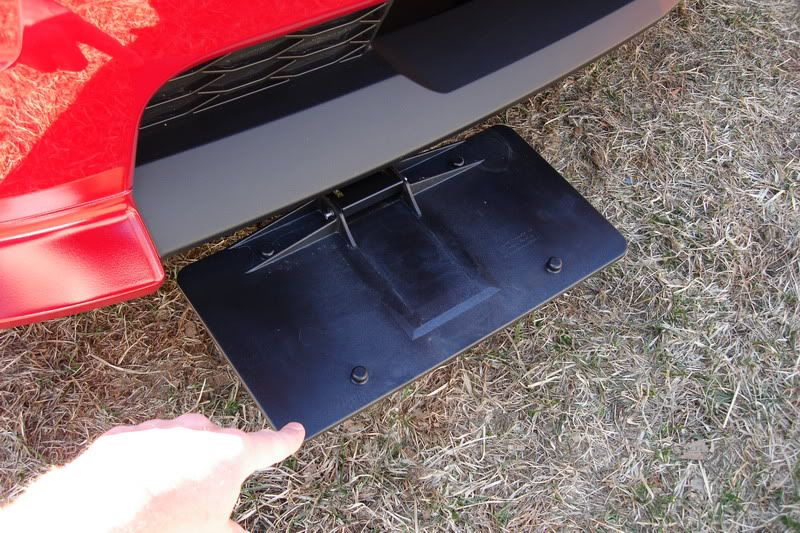
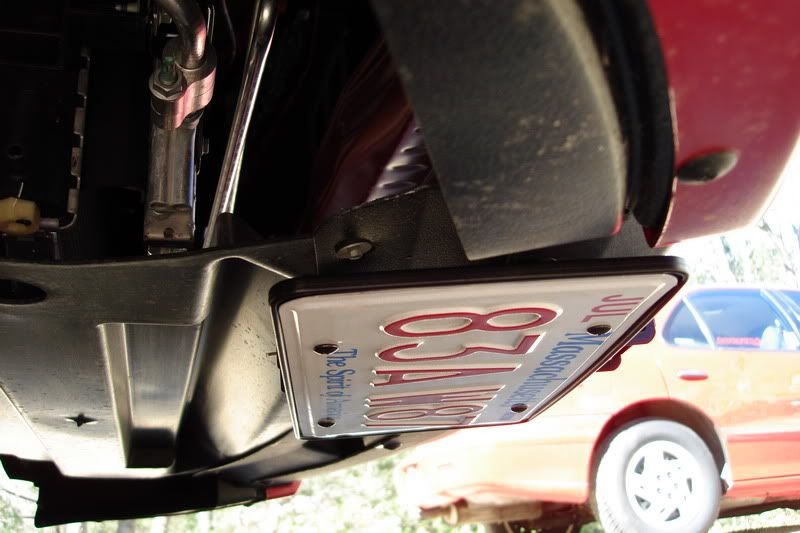
A view from underneath with the plate down:
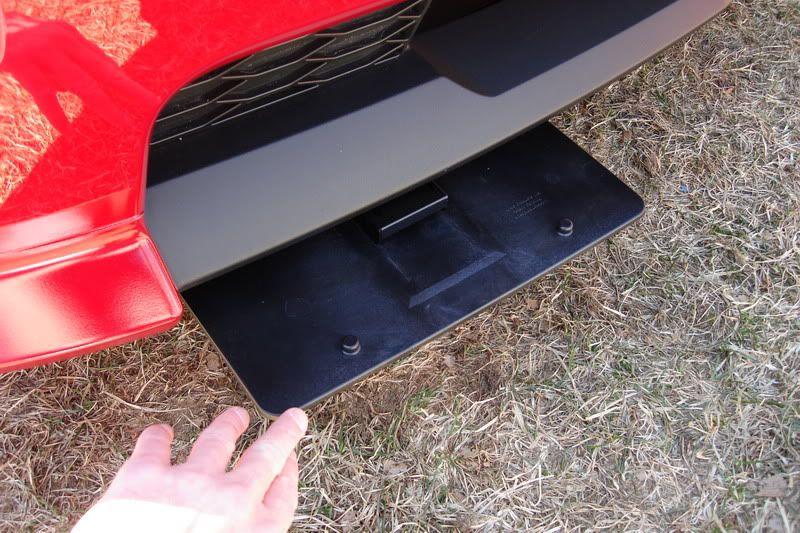
A view from underneath with the plate up:

Installation is, in my Boston area accent, wicked easy! I recommend 2 people as it will help to have one person position the plate holder in the desired position and hold it there while someone else is underneath drilling and/or marking the area to drill. 2 holes in the front of the bracket, 1 in the rear. I did need a longer screw (not included) for the rear and fashioned a plastic spacer (not included) to help keep the bracket level. Without the spacer, tightening the screw would have either bent the back of the bracket up a little or pulled the down a bit. For a nice clean level install, the spacer was used.
People that have seen it so far love it.
Also, I travel on a dirt, hole, and boulder driveway. I haven't bottomed out yet with the plate down, and a GT/CS front fascia sits about 1.5 inches lower than a regular GT.
It's a GREAT option and I recommend it!

Installation is on a 2008 GT/CS
Here is the plate holder in the DOWN position
UP position:
The process of putting it in the down position:
A view from underneath with the plate down:
A view from underneath with the plate up:
Installation is, in my Boston area accent, wicked easy! I recommend 2 people as it will help to have one person position the plate holder in the desired position and hold it there while someone else is underneath drilling and/or marking the area to drill. 2 holes in the front of the bracket, 1 in the rear. I did need a longer screw (not included) for the rear and fashioned a plastic spacer (not included) to help keep the bracket level. Without the spacer, tightening the screw would have either bent the back of the bracket up a little or pulled the down a bit. For a nice clean level install, the spacer was used.
People that have seen it so far love it.
Also, I travel on a dirt, hole, and boulder driveway. I haven't bottomed out yet with the plate down, and a GT/CS front fascia sits about 1.5 inches lower than a regular GT.
It's a GREAT option and I recommend it!
3/30/08, 12:14 PM
#13
Bullitt Member
Join Date: November 28, 2006
Location: Baldwin Park
Posts: 216
Likes: 0
Received 0 Likes
on
0 Posts
what I wonder is.... in the up position if your traveling a bummpy road will it bounce around and scuff the paint on my CDC painted chin spoiler? The the of the GT/CS is black plastic inthe center while mine is painted all the way across.
3/30/08, 02:38 PM
#14
Tasca Super Boss 429 Member
It comes with a few pieces of rubber to stick on the back or on your bumper to cushin it from rubbing. While measuring and tightening, my fingers were between the holder and the bumber so that when it was up, it's not near the bumper to even rub against it. That's why it's better to install with 2 people. One to hold in position, one to install.
3/30/08, 03:25 PM
#15
Legacy TMS Member
It comes with a few pieces of rubber to stick on the back or on your bumper to cushin it from rubbing. While measuring and tightening, my fingers were between the holder and the bumber so that when it was up, it's not near the bumper to even rub against it. That's why it's better to install with 2 people. One to hold in position, one to install.
3/30/08, 04:34 PM
#16
Tasca Super Boss 429 Member
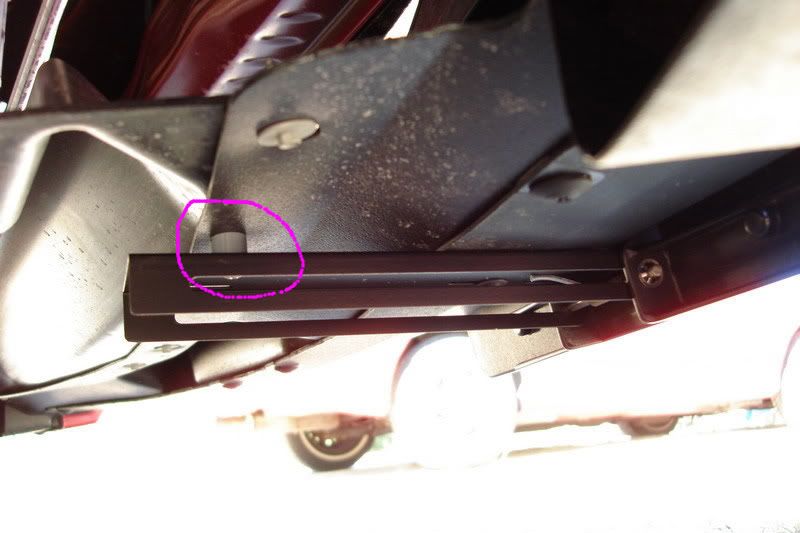
On the GT/CS, It looks like I could put it wherever I wanted except towards the middle.
This view is blurry, but this is what it looks like from the inside. Not an easy pic to take since I have to squeeze the camera in and hope i'm aimed properly. The mounting screws are in the purple box
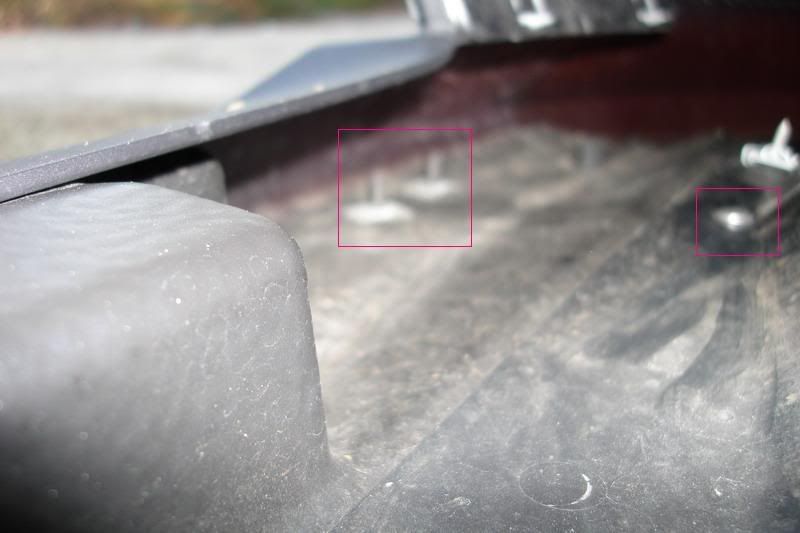
Here is another view with the installation screws marked. The other screws you see are factory screws.
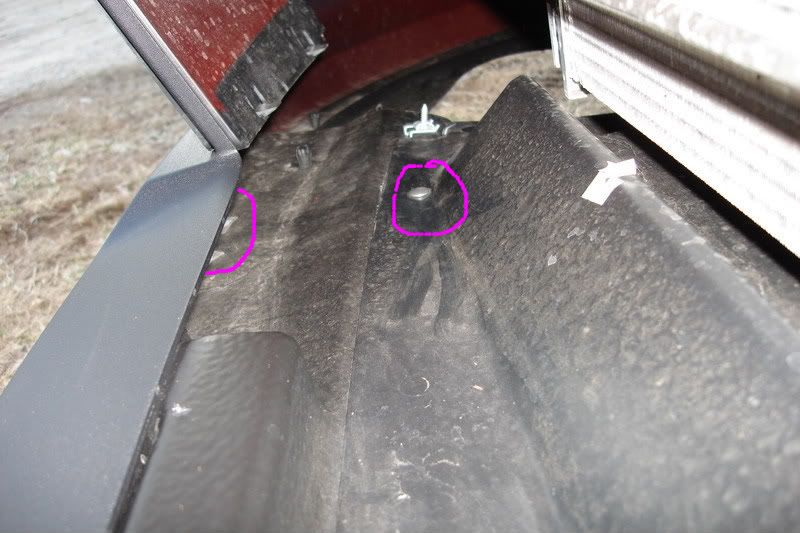
This view is blurry, but this is what it looks like from the inside. Not an easy pic to take since I have to squeeze the camera in and hope i'm aimed properly. The mounting screws are in the purple box
Here is another view with the installation screws marked. The other screws you see are factory screws.
Last edited by denlem; 3/30/08 at 04:34 PM. Reason: fix pic
4/2/08, 09:31 PM
#17
Bullitt Member
Join Date: September 2, 2007
Location: Ladera Ranch, CA.
Posts: 366
Likes: 0
Received 0 Likes
on
0 Posts
On the GT/CS, It looks like I could put it wherever I wanted except towards the middle.
This view is blurry, but this is what it looks like from the inside. Not an easy pic to take since I have to squeeze the camera in and hope i'm aimed properly. The mounting screws are in the purple box
Here is another view with the installation screws marked. The other screws you see are factory screws.
I lined up the license plate bracket with the underside of the bumper and it just didn't seem like I would be able to get all three drill points done because the leveling of the bumper isn't flat.
I didn't read through the directions, but maybe you can give me some insight.
4/3/08, 02:56 AM
#18
Tasca Super Boss 429 Member
Since I don't have a regular GT, I can't say for sure what to do. If you look at the pic above of the mounting underneath, you will see that the GT/CS is not level either. You will also see how I made a grey plastic spacer that was made to help keep the bracket level.
4/3/08, 11:19 AM
#19
Bullitt Member
Join Date: September 2, 2007
Location: Ladera Ranch, CA.
Posts: 366
Likes: 0
Received 0 Likes
on
0 Posts
What did you use to make the spacer? And why exactly couldn't it be centered on your bumper?
I'm hoping to be able to center it on mine.
Great looking GT/CS too!
Last edited by TheDarkKnight; 4/3/08 at 11:20 AM.
4/3/08, 11:50 AM
#20
Tasca Super Boss 429 Member
Ah. Thanks. I'll have to take a look at it this weekend and I'll report back with the installation progress.
What did you use to make the spacer? And why exactly couldn't it be centered on your bumper?
I'm hoping to be able to center it on mine.
Great looking GT/CS too!
What did you use to make the spacer? And why exactly couldn't it be centered on your bumper?
I'm hoping to be able to center it on mine.
Great looking GT/CS too!
I didn't center it on the bumper because I wanted it on the side. I think it looks better there.
Take a look at the first message in this thread. It's mounted on the side there as well.