Plasti Dip How To
 5/31/12, 10:01 PM
#1
Mach 1 Member
Thread Starter
Join Date: October 30, 2011
Location: Spokane, WA
Posts: 858
Likes: 0
Received 0 Likes
on
0 Posts
Plasti Dip How To
Well it seemed like my plastidip front bumper mod was pretty well liked, so I figured I'd post up a how-to for anybody else who's interested.
Again I just want to say that I don't like to take credit for other people's ideas and ZaksGT is the user who inspired this project for me.
I needed to redo it tonight anyhow because I wasn't happy with how the edges came out the first time.
-Step one is masking. The very first time I went overboard and covered pretty much the whole front end of the car with newspaper, but that's really not necessary. I used painters tape and masked the front of the car like this: However in hindsight I think if you're careful with spraying you wouldn't even have to mask above the lower grill at all.
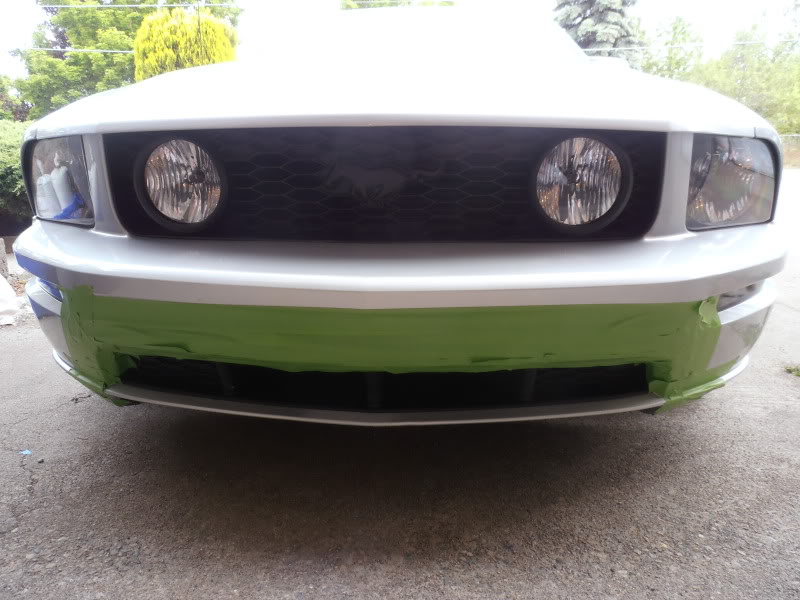
*Note here* as you're masking, save the parts in the corners where the dip will actually come into contact with the tape for very last. More on that shortly.
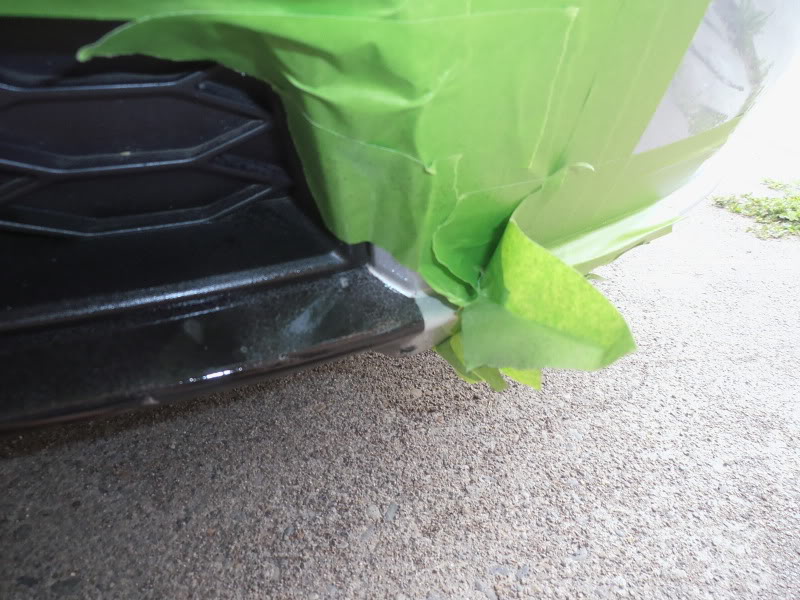
-Step two, spray your first coat. First coat should be lightest, and shouldn't even have 100% opacity. Now here's the important bit, As soon as you finish spraying the first coat, peel back the tape where it comes in contact with the dip! This is critical, and is what screwed me up the first couple times. The dip will bond with the tape and will never come out clean if allowed to dry against the tape.
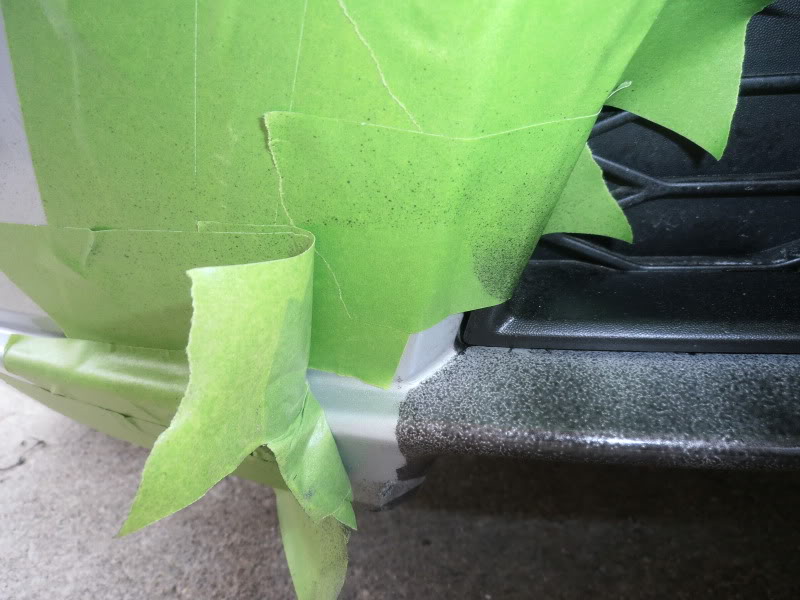
-Three, allow the first light coat to dry for 10 minutes or so, then reapply the tape, either fold it back if you can or lay down new tape, and spray your second coat. Second coat can be heavier than the first, and make sure to spray along the bottom of the bumper too. AGAIN, Peel back the tape as soon as you're done spraying!!
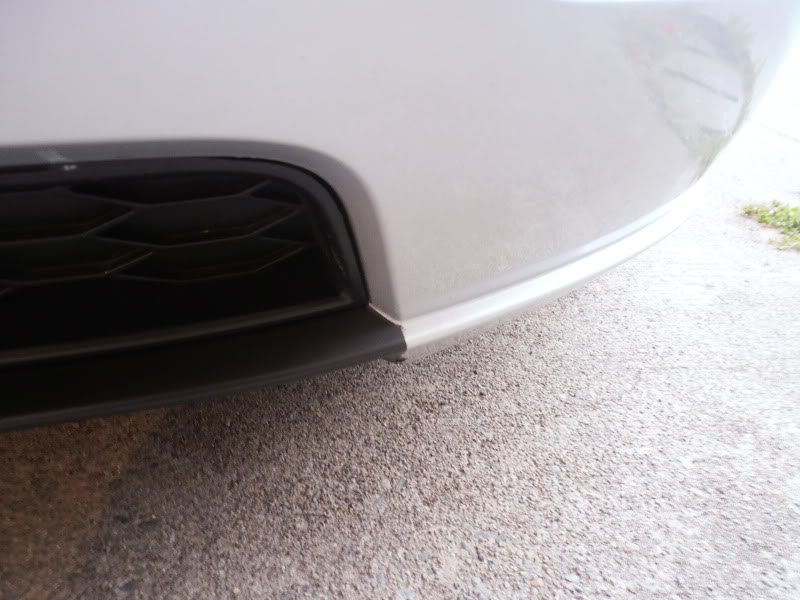
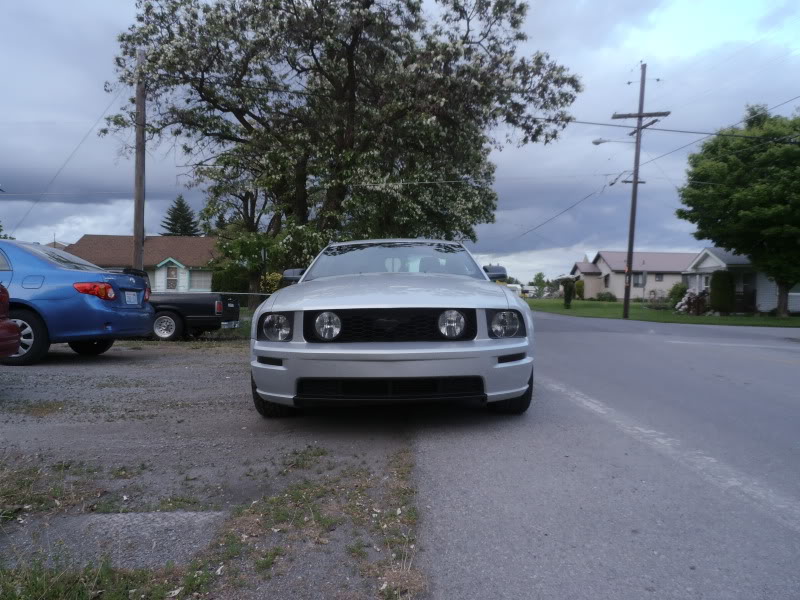
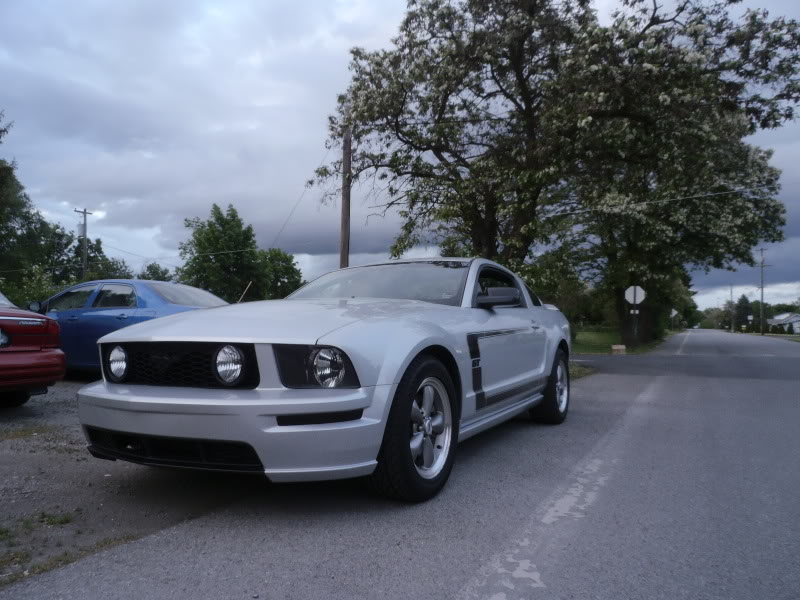
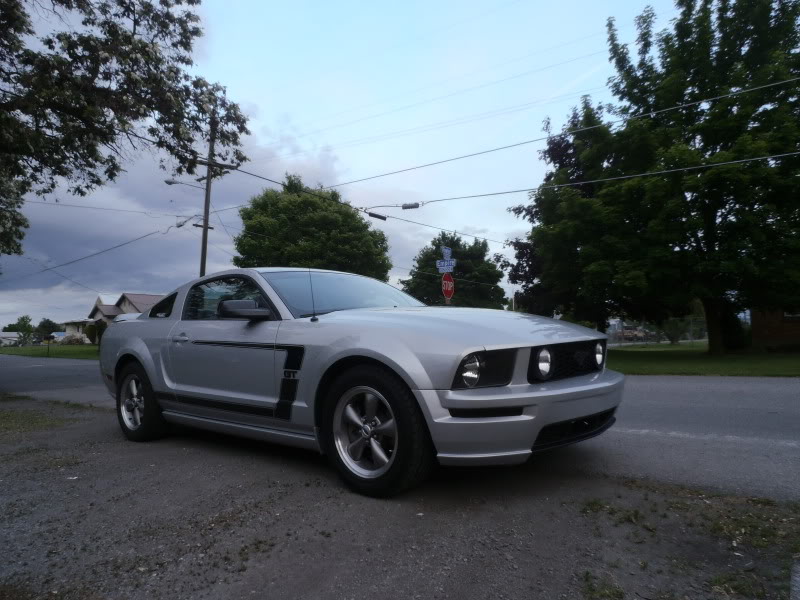
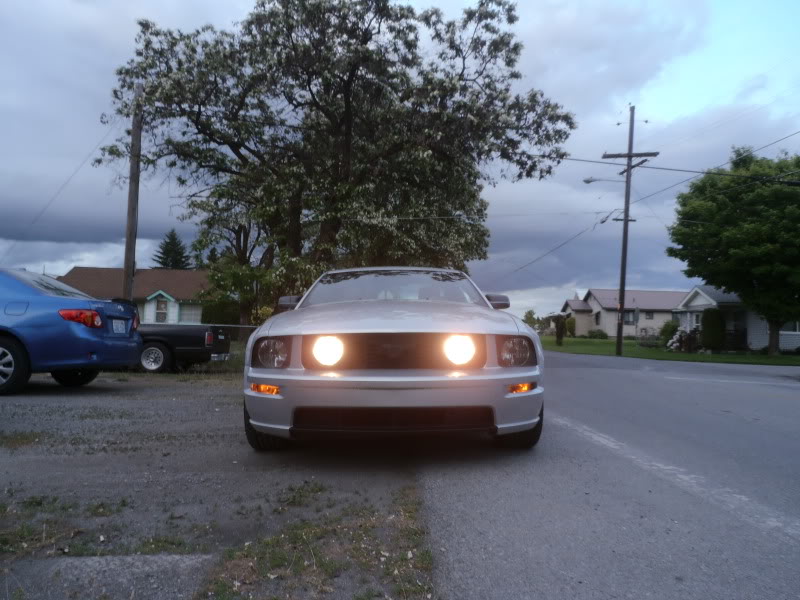
I sprayed three coats using this method and I'm very happy with the results. This is a <$10 way to get that GT/CS look from your GT fascia. I didn't bother masking the lower grill because when dried the dip is the exact same color and texture as the grill plastic.
Some results photos:
Again I just want to say that I don't like to take credit for other people's ideas and ZaksGT is the user who inspired this project for me.
I needed to redo it tonight anyhow because I wasn't happy with how the edges came out the first time.
-Step one is masking. The very first time I went overboard and covered pretty much the whole front end of the car with newspaper, but that's really not necessary. I used painters tape and masked the front of the car like this: However in hindsight I think if you're careful with spraying you wouldn't even have to mask above the lower grill at all.
*Note here* as you're masking, save the parts in the corners where the dip will actually come into contact with the tape for very last. More on that shortly.
-Step two, spray your first coat. First coat should be lightest, and shouldn't even have 100% opacity. Now here's the important bit, As soon as you finish spraying the first coat, peel back the tape where it comes in contact with the dip! This is critical, and is what screwed me up the first couple times. The dip will bond with the tape and will never come out clean if allowed to dry against the tape.
-Three, allow the first light coat to dry for 10 minutes or so, then reapply the tape, either fold it back if you can or lay down new tape, and spray your second coat. Second coat can be heavier than the first, and make sure to spray along the bottom of the bumper too. AGAIN, Peel back the tape as soon as you're done spraying!!
I sprayed three coats using this method and I'm very happy with the results. This is a <$10 way to get that GT/CS look from your GT fascia. I didn't bother masking the lower grill because when dried the dip is the exact same color and texture as the grill plastic.
Some results photos:
 5/31/12, 10:11 PM
#3
Mach 1 Member
Thread Starter
Join Date: October 30, 2011
Location: Spokane, WA
Posts: 858
Likes: 0
Received 0 Likes
on
0 Posts
Part TWO: How to dip your emblems.
I did this tonight as well because I thought that black GT emblems would flow better with the black stripes on my car.
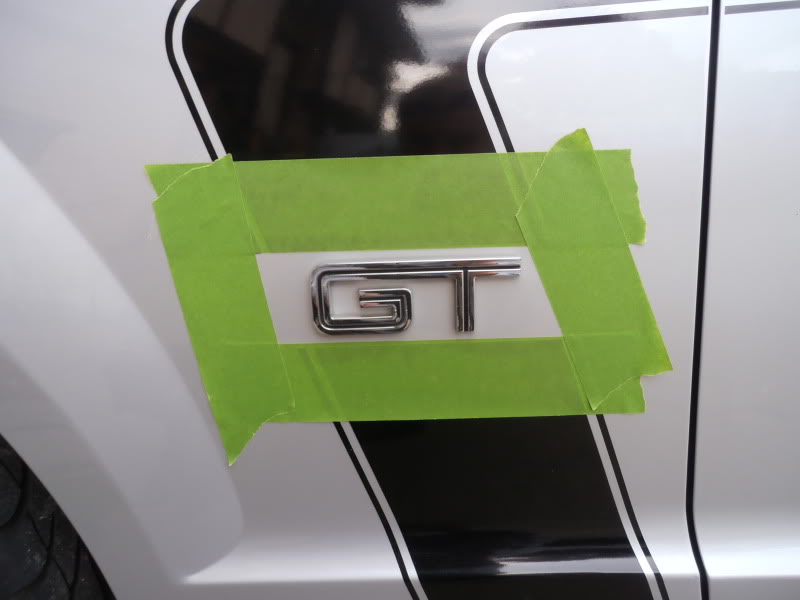
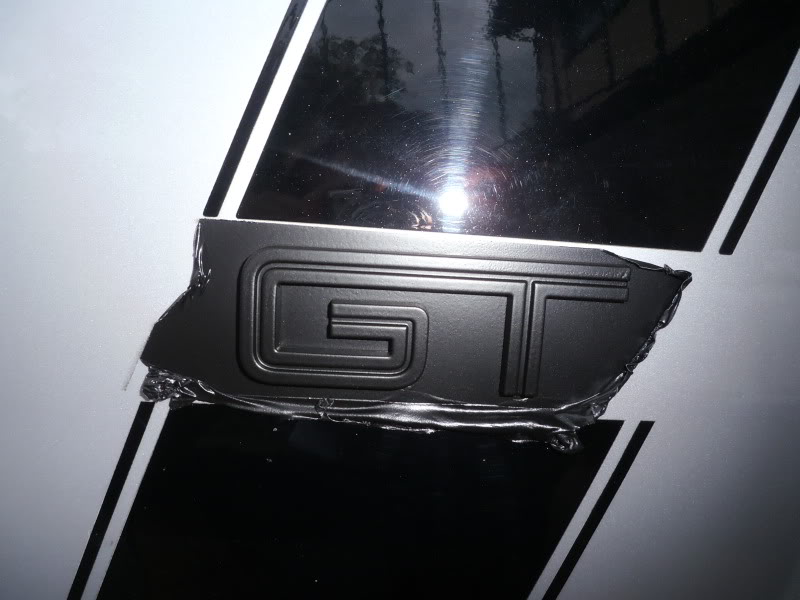
First step is masking. You want to start with a box of tape around the emblem like this:
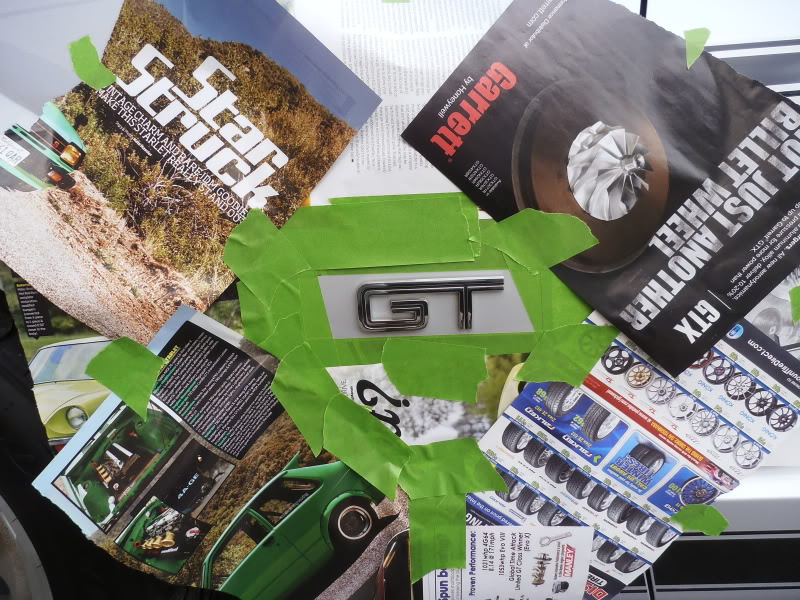
Then start adding newspaper or whatever to protect your paint, I used pages from an old magazine:
Spray your dip, starting with light coats, allowing time to dry between, I did three coats, just like my bumper. BUT DON'T PEEL BACK THE TAPE EACH TIME!
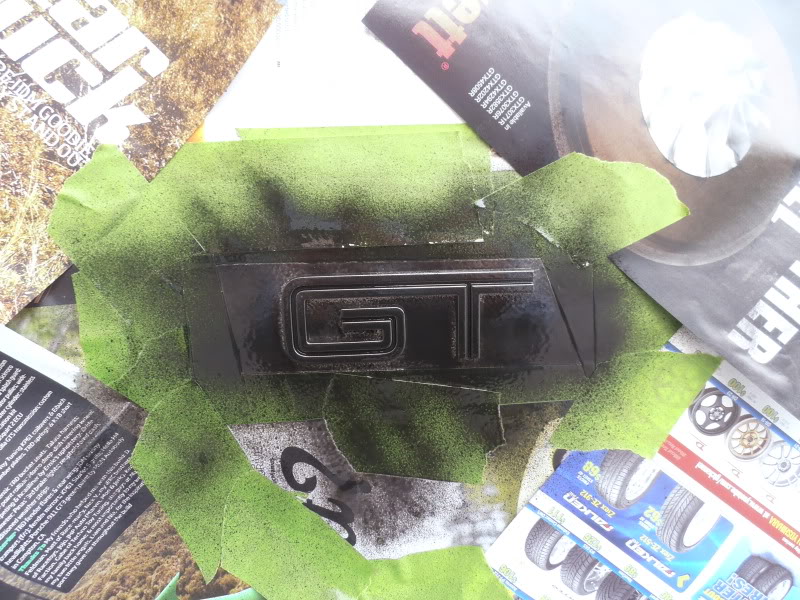
That pic is after the second coat. Make sure you're spraying from all the different angles to cover the sides/top/bottom of the emblem, chrome is a little harder to cover.
When you've got all your coats on and dry start taking off the masking, when you get to the last square of tape be careful as you separate it because the dip will be bonded to it.
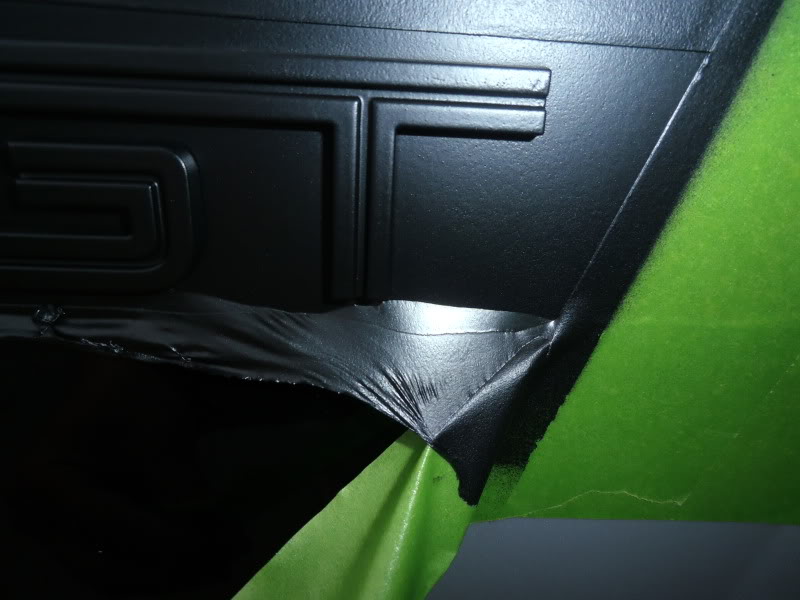
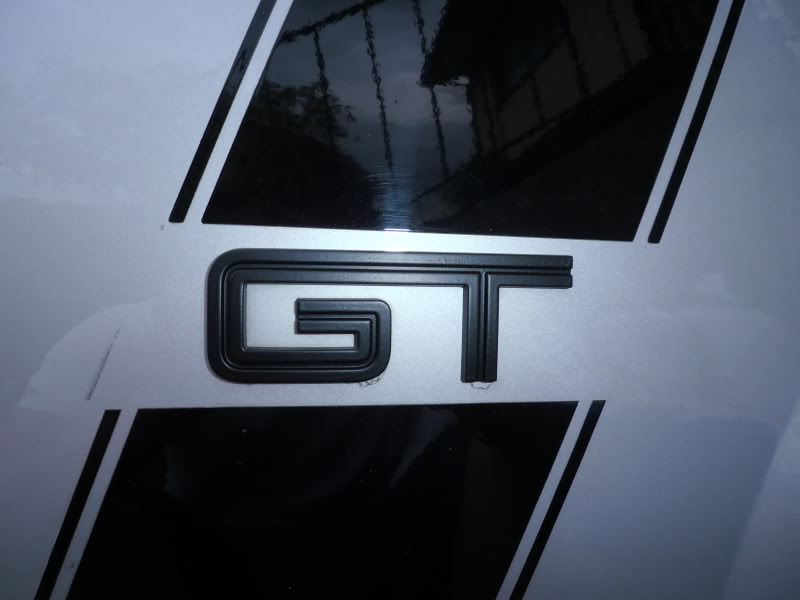
You should have something like this when you've got all the tape off:
Then by some magic that I don't entirely understand when you start to peel the dip off it comes right off your paint and rips along the edge of the emblems!
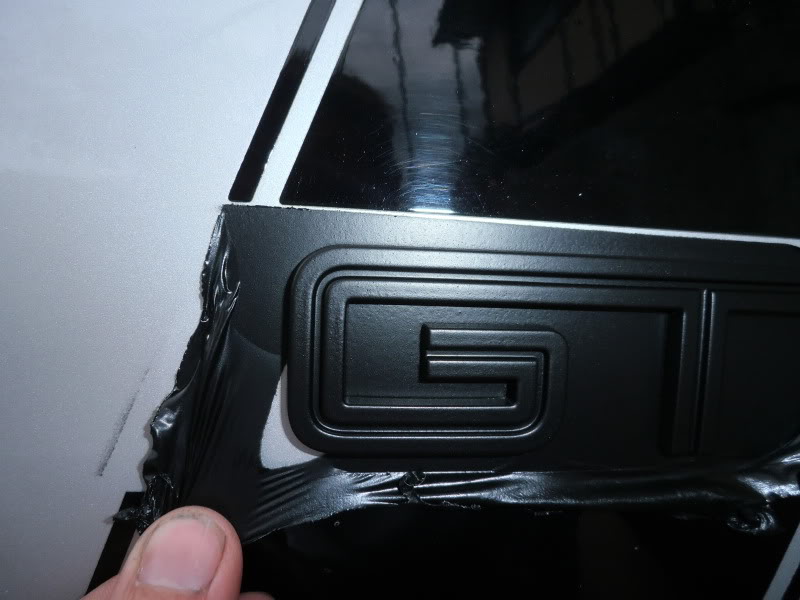
If you end up with a little overspray anywhere like I have in that shot above, spray some goo gone on a microfiber and wipe it off. It comes right off. DO NOT spray the goo gone on your paint though because if any of it comes in contact with your dip it will melt it and leave ugly bubbles and stuff.
I did this tonight as well because I thought that black GT emblems would flow better with the black stripes on my car.
First step is masking. You want to start with a box of tape around the emblem like this:
Then start adding newspaper or whatever to protect your paint, I used pages from an old magazine:
Spray your dip, starting with light coats, allowing time to dry between, I did three coats, just like my bumper. BUT DON'T PEEL BACK THE TAPE EACH TIME!
That pic is after the second coat. Make sure you're spraying from all the different angles to cover the sides/top/bottom of the emblem, chrome is a little harder to cover.
When you've got all your coats on and dry start taking off the masking, when you get to the last square of tape be careful as you separate it because the dip will be bonded to it.
You should have something like this when you've got all the tape off:
Then by some magic that I don't entirely understand when you start to peel the dip off it comes right off your paint and rips along the edge of the emblems!
If you end up with a little overspray anywhere like I have in that shot above, spray some goo gone on a microfiber and wipe it off. It comes right off. DO NOT spray the goo gone on your paint though because if any of it comes in contact with your dip it will melt it and leave ugly bubbles and stuff.
5/31/12, 10:14 PM
#4
Mach 1 Member
Thread Starter
Join Date: October 30, 2011
Location: Spokane, WA
Posts: 858
Likes: 0
Received 0 Likes
on
0 Posts
Originally Posted by UnrealFord
Can you post a picture of the type or brand your using to apply, thx
 6/1/12, 12:27 PM
#7
Mach 1 Member
Thread Starter
Join Date: October 30, 2011
Location: Spokane, WA
Posts: 858
Likes: 0
Received 0 Likes
on
0 Posts
Originally Posted by Zaksgt
Looks good man, I'm glade you liked the idea, I first thought of it as a cheap way to have a GT/CS look, yours looks great!! Mow
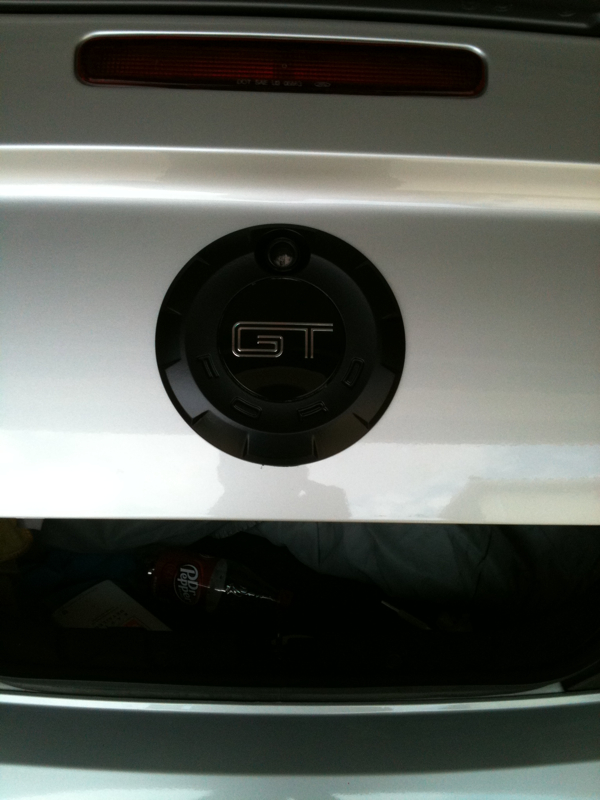
U need to do the rear medallion to lol
U need to do the rear medallion to lol
6/1/12, 02:21 PM
#8

I'm terrible at write up or how to's but it's pretty easy, I just taped everything up cleaned up the surface I was going to paint with light rubbing alcohol and spray a few light coats, then I took a sharp razor blade and cut all around the outside and remove the tape, hope that helps, told u I'm bad at write up's lol
6/1/12, 04:52 PM
#9
Mach 1 Member
Thread Starter
Join Date: October 30, 2011
Location: Spokane, WA
Posts: 858
Likes: 0
Received 0 Likes
on
0 Posts
Originally Posted by Zaksgt
I'm terrible at write up or how to's but it's pretty easy, I just taped everything up cleaned up the surface I was going to paint with light rubbing alcohol and spray a few light coats, then I took a sharp razor blade and cut all around the outside and remove the tape, hope that helps, told u I'm bad at write up's lol
6/1/12, 05:29 PM
#11
Shelby GT350 Member
Join Date: February 1, 2004
Location: Denton, TX
Posts: 3,392
Likes: 0
Received 18 Likes
on
18 Posts
Awesome job guys! I'm one of the ones that liked it in another thread. I've got a few ideas for Plasti Dip over the summer, so thanks for the tips. Oh and a question...When you get a chip in it, can you just spray the chip and it will blend with the rest? Or do I need to respray the whole thing?
6/1/12, 06:23 PM
#13
Mach 1 Member
Thread Starter
Join Date: October 30, 2011
Location: Spokane, WA
Posts: 858
Likes: 0
Received 0 Likes
on
0 Posts
Originally Posted by stupidgenius36
Awesome job guys! I'm one of the ones that liked it in another thread. I've got a few ideas for Plasti Dip over the summer, so thanks for the tips. Oh and a question...When you get a chip in it, can you just spray the chip and it will blend with the rest? Or do I need to respray the whole thing?
And to silverscoundrel, read my third post haha. I got it at home depot for 5 bucks and change.
6/1/12, 06:31 PM
#14
GTR Member
Originally Posted by Kevin509
I think you could get away with respraying the chip if it wasn't too big. When I was doing my lip I got a piece of grass in it from the wind and i sprayed over where it had been and you cant tell there was ever a mark there.
And to silverscoundrel, read my third post haha. I got it at home depot for 5 bucks and change.
6/1/12, 06:35 PM
#15
Mach 1 Member
Thread Starter
Join Date: October 30, 2011
Location: Spokane, WA
Posts: 858
Likes: 0
Received 0 Likes
on
0 Posts
Originally Posted by Agent MOO
Great job on the $5 GT/CS front! I wonder if it would be possible in the rear or if it would just look ghetto because the lines don't match up the same as they do in the front
And just another note I forgot to ad in my first post, if you're thinking about playing around with it, you want to put it on thick. I recommend at least three coats. It doesn't peel off if it's too thin, and you have to get it all off with goo gone....
6/1/12, 10:27 PM
#19
GTR Member
Originally Posted by Kevin509
Sweet! post some pics if you do anything with it tonight.
6/1/12, 10:33 PM
#20
Mach 1 Member
Thread Starter
Join Date: October 30, 2011
Location: Spokane, WA
Posts: 858
Likes: 0
Received 0 Likes
on
0 Posts
My experiences with rust are such that nothing ever works as good as you want it to unless you sand down all the rust first. But it would probably work great as a short term fix.