
Remote Trunk Switch Installation (w/pics)


Remote Trunk Switch Installation (w/pics)
Remote Trunk Switch Installation (w/pics)
This How-To will cover the installation of a trunk release switch similar to the ones available in prior generation Mustangs. I chose to install the switch on the outer frame of the glove box just like the older Mustangs.
Tools and parts needed:
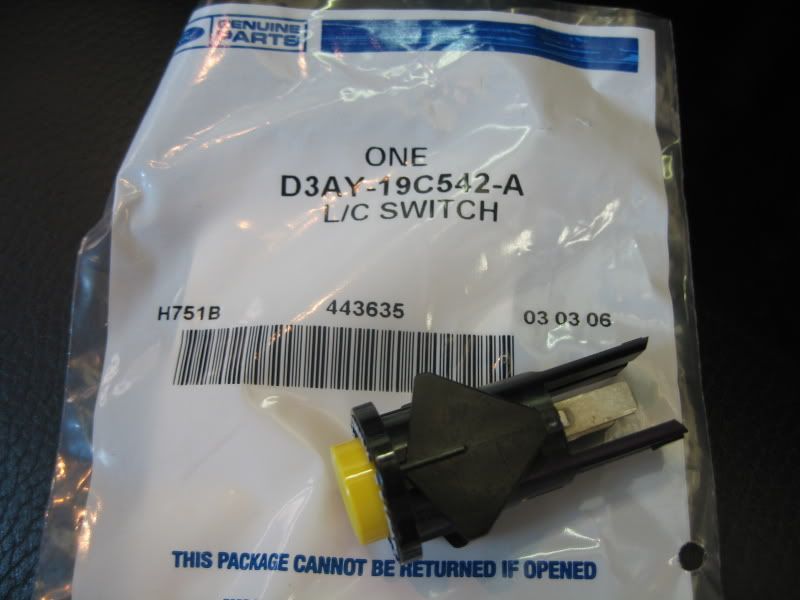
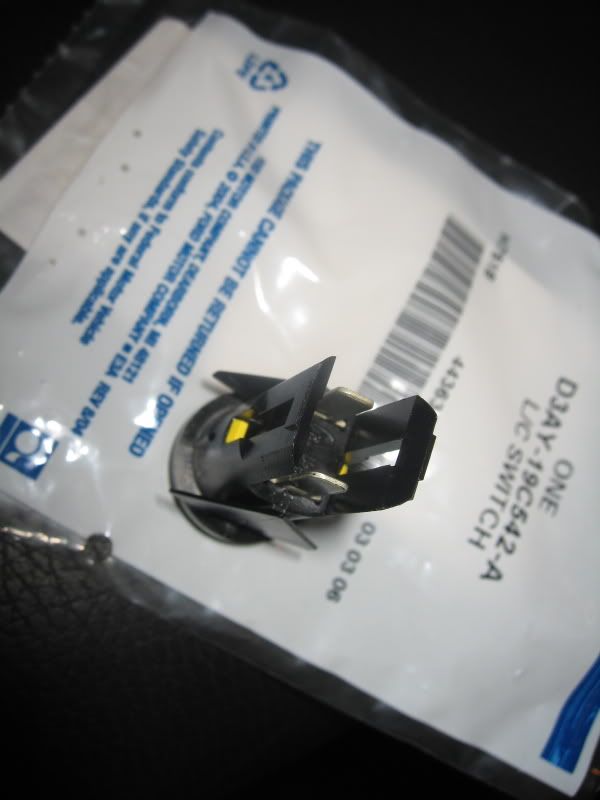
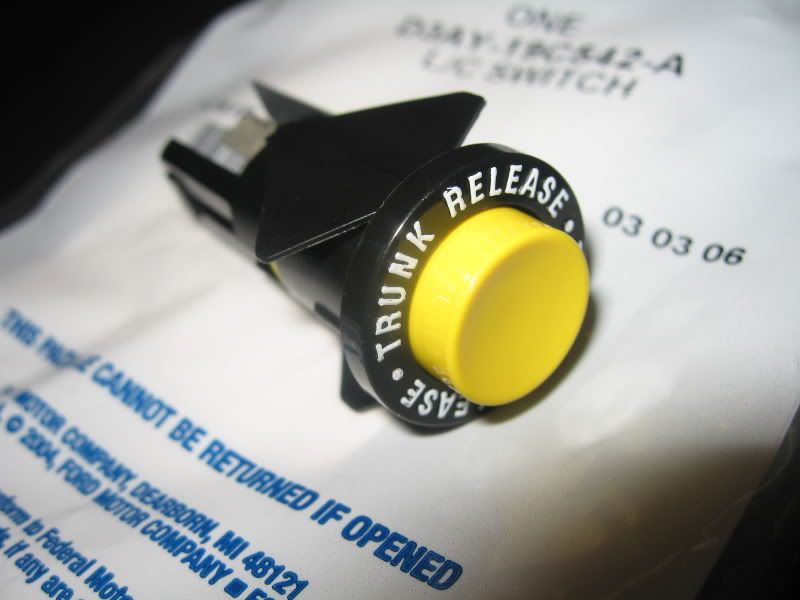
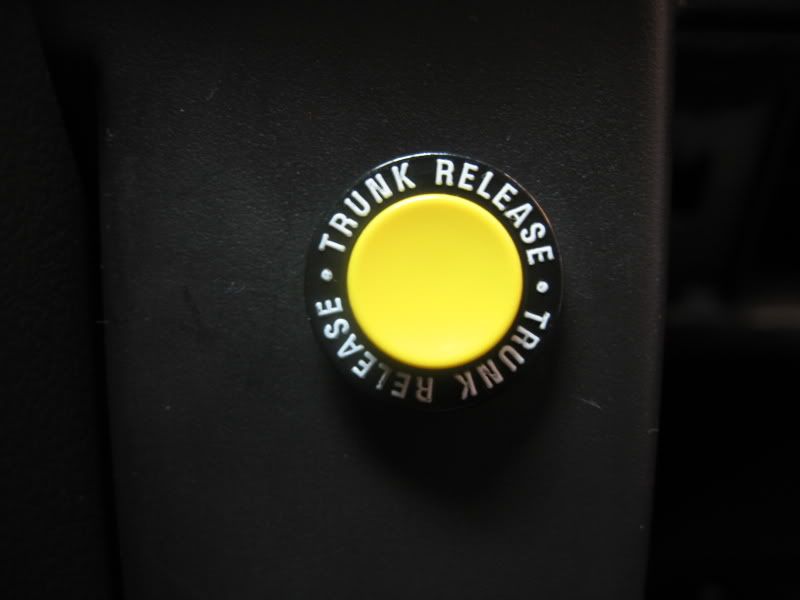
Ford trunk release switch D3AY-19C542-A (or any momentary switch)
Measuring tape
Masking tape
Drill motor
Dremel (optional)
5/8� Drill
Smaller drills (optional)
Wire cutter/stripper tool
2 pieces of wire (approx. 1� and 3�)
2 Spade terminals
1 U or eyelet terminal
1 inline splice or T-tap
10mm wrench
Several tie-straps
Ford factory switch (around $10 from Ford Dealer)
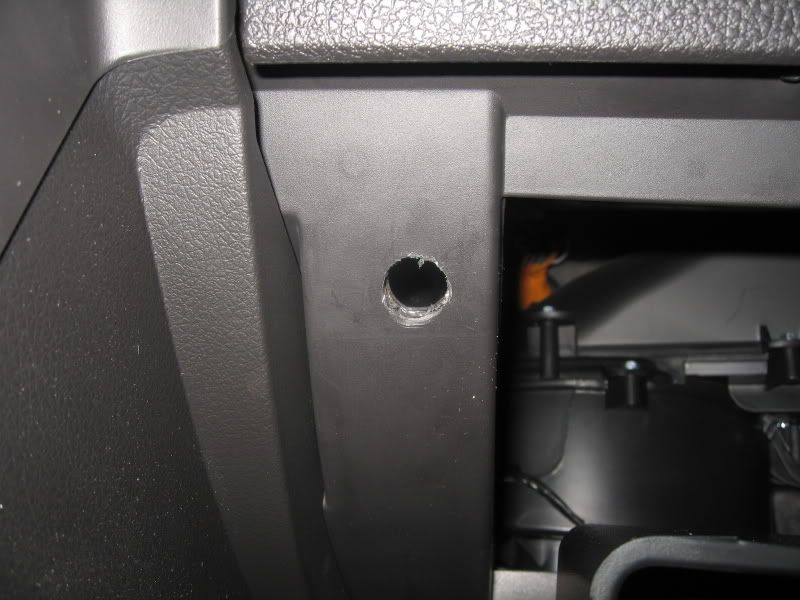
Baseline photo
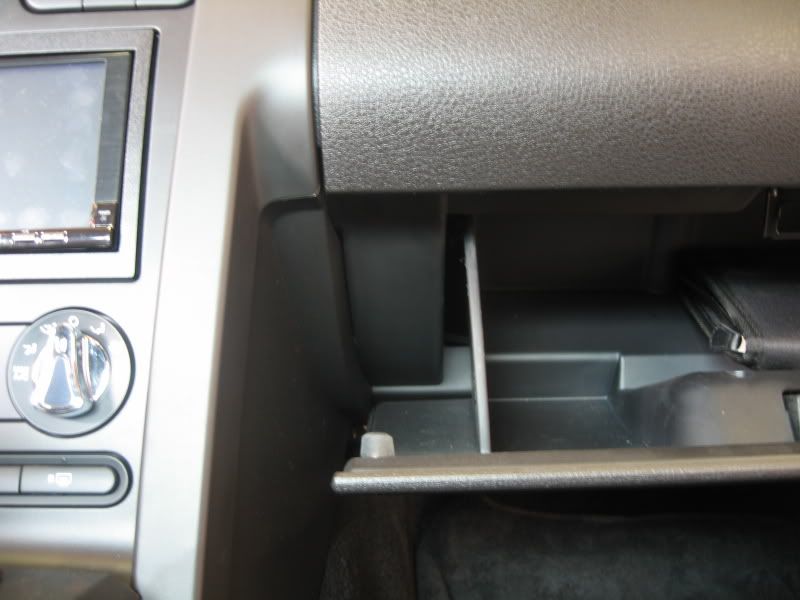
Press inwards on both sides of glove box to lower.

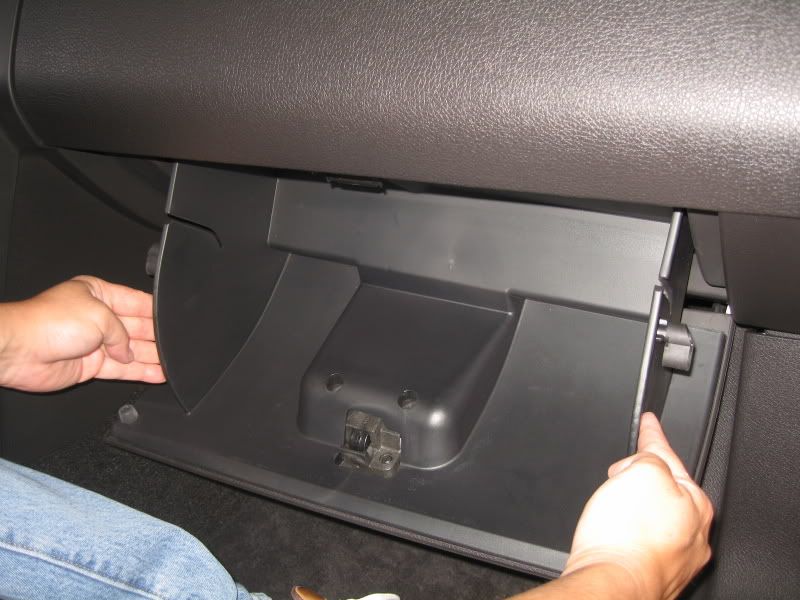
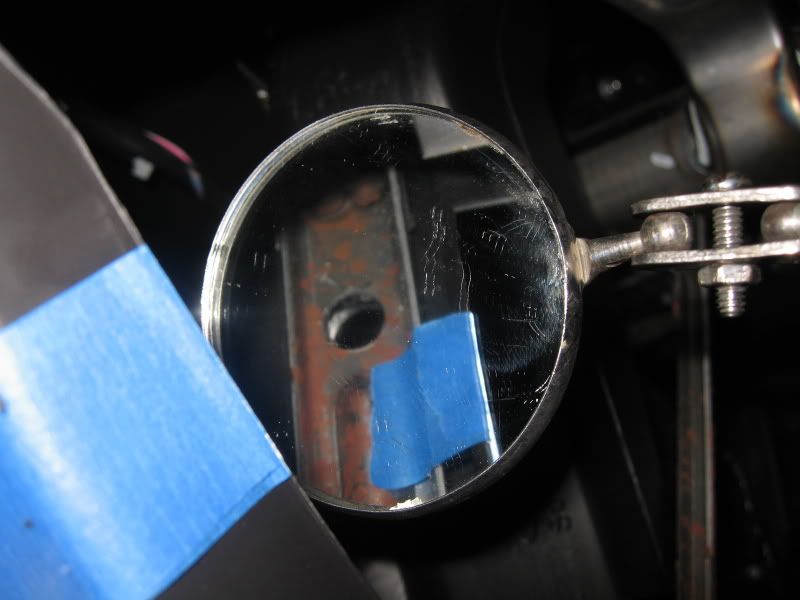
Note: Existing hole (approx. 3/16�) in metal frame.
I chose to center the switch installation to this existing hole.
Reason: The metal frame is not very wide. Centering the switch on the outer glove box frame may not be center to the frame, thus drilling the hole out to full size may break out from the frame. This may or may not be of concern to you, so use your own judgment here.
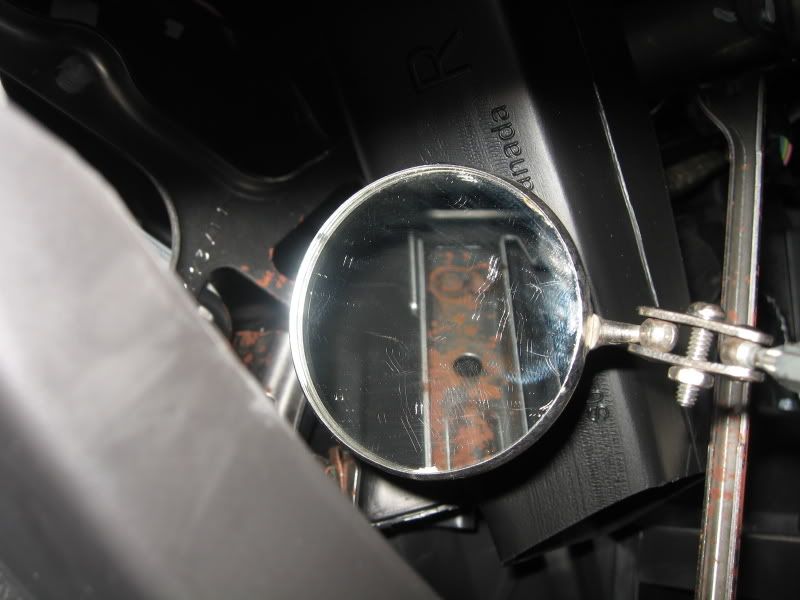
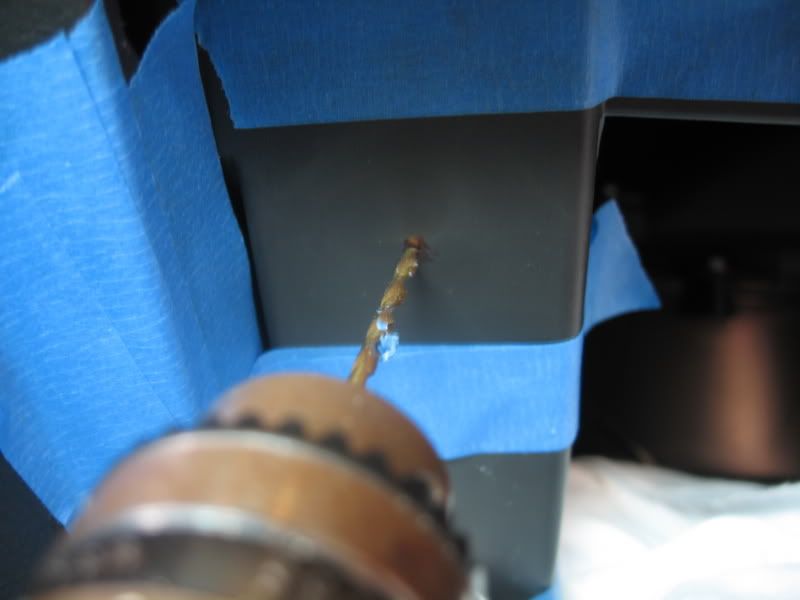
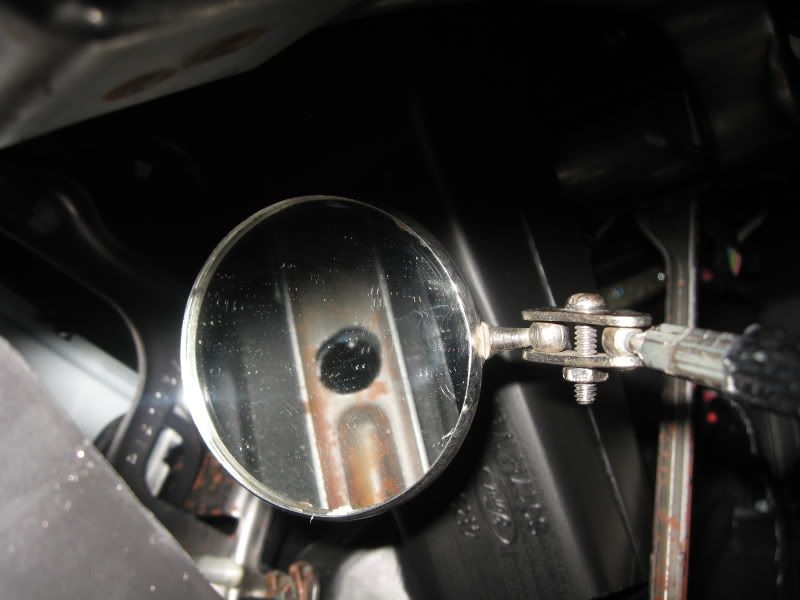
If you have a hole locator tool, use it. I did not, so I had to go by feel and mark approximately where I thought the frame hole would be.
Using a small drill, go for it. My drilled hole was a little high to the frame hole, so I used a Dremel to round the hole in the plastic to the frame hole.

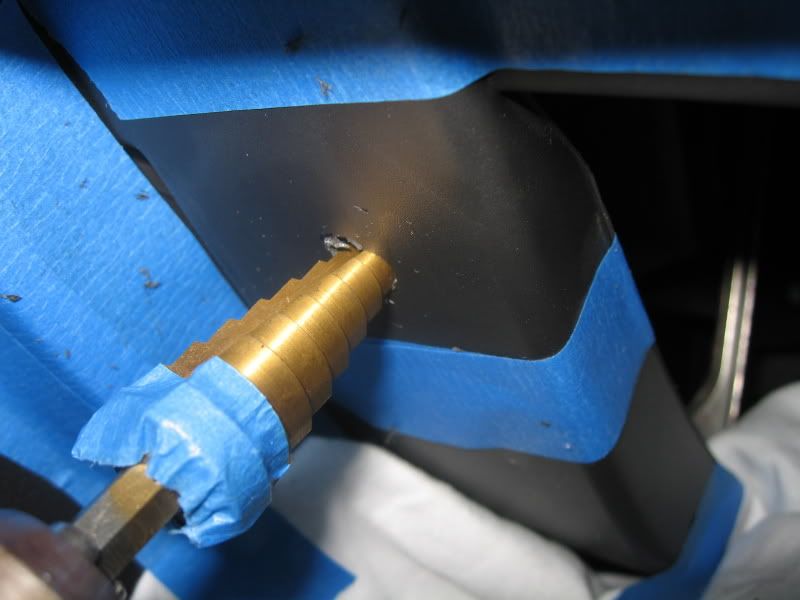
Once the hole was centered, I used a step drill to open the hole to 5/8�.
Problem: There�s a slight gap between the plastic frame to the metal frame behind it. So using a step drill like the one pictured did not work in making a 5/8� hole all the way through as the plastic hole would�ve been larger.
If you have a 5/8� drill bit, use it to go all the way through. If you only have a step drill, use a Dremel to open up the metal frame hole without elongating the hole in the plastic.
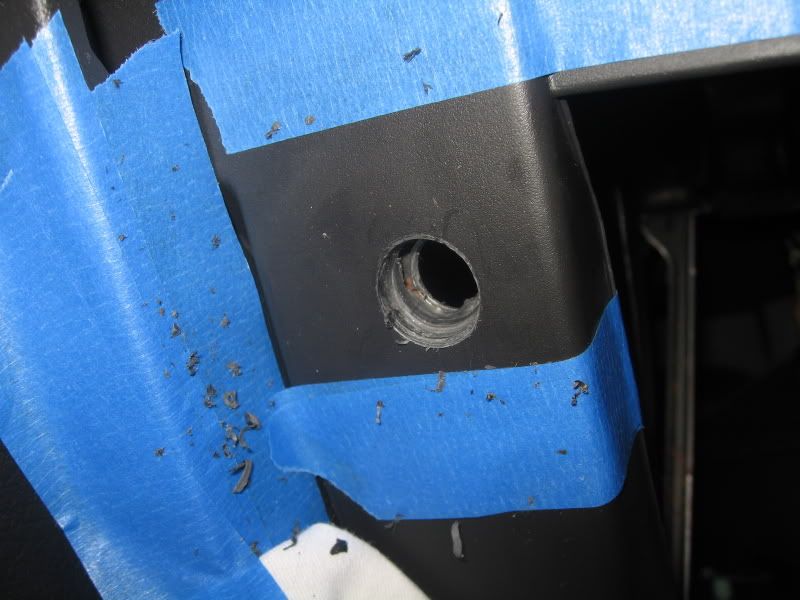
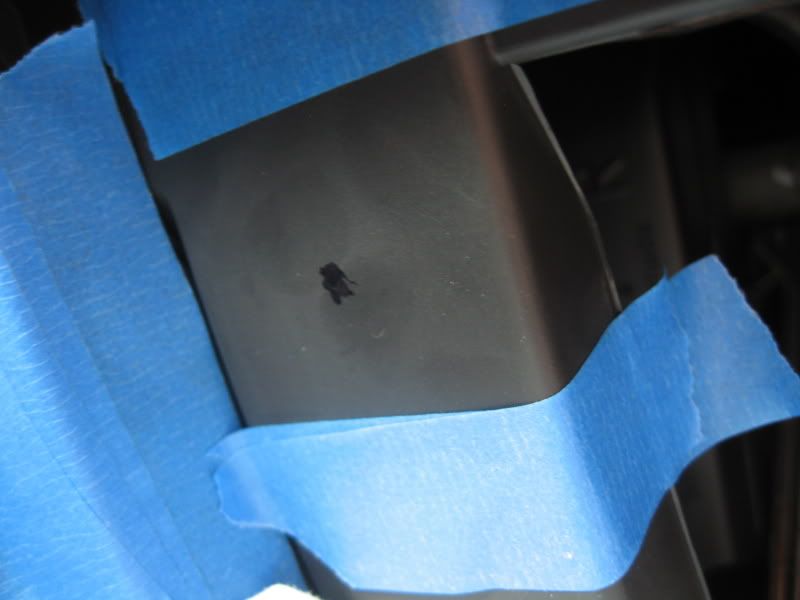
Test fit switch into the hole. Don�t press the switch all the way in, just check for fitment.
If it seems way too tight, open your 5/8� hole to a liberal 5/8�. Those �batwings� that are located on each side of the switch fold inwards as you press the switch into the hole.
In my case, there was no way the batwings were going to fit into the hole without further opening the 5/8� hole in the plastic frame.
I chose to trim out the wings using a Dremel as the tight fit would hold the switch in place without issue. It will also make it easier to push the switch back out if I need to check the connections or replace it in the future.
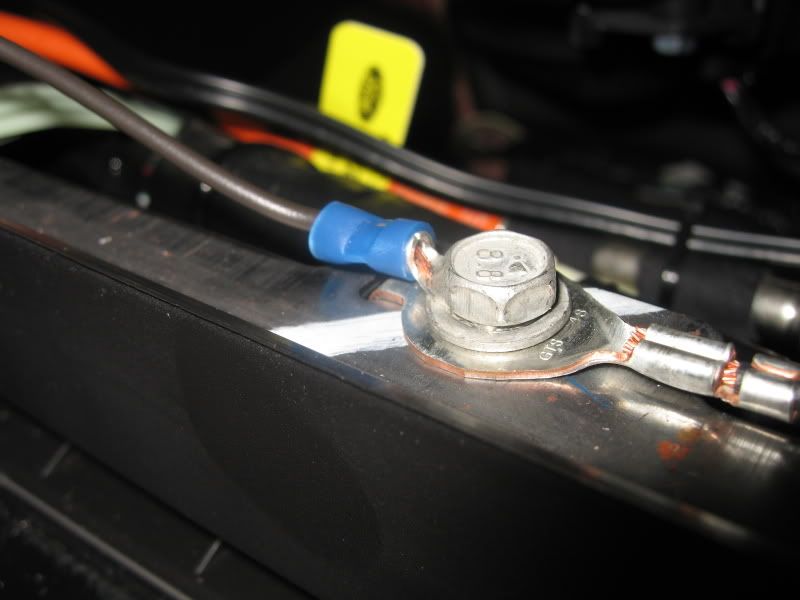
1� ground wire: Crimp one end with a spade terminal, opposite end with a U or eyelet terminal.
3� power wire: Crimp one end with a spade terminal, opposite end leave cut.
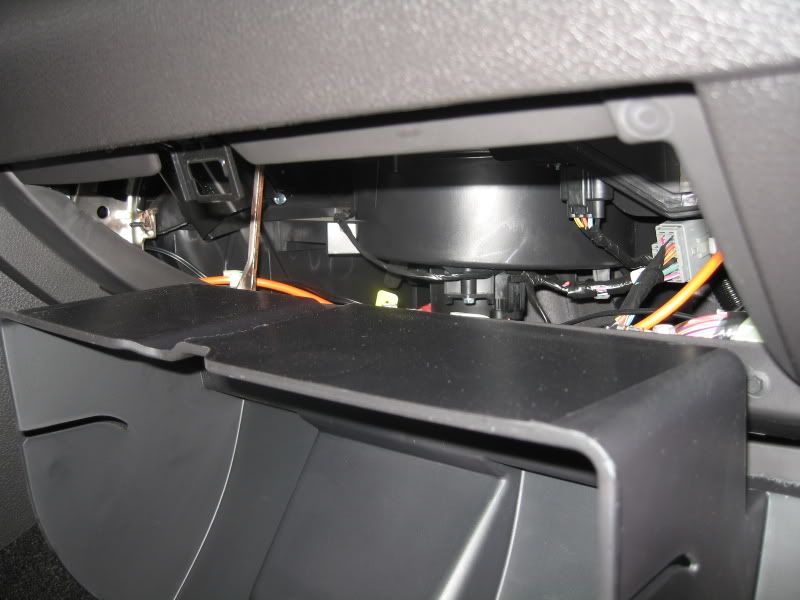
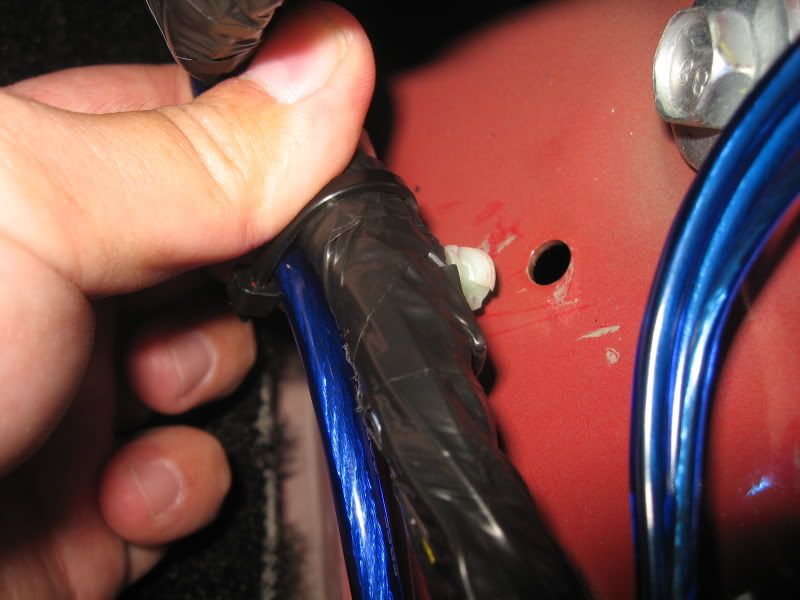
Attach one end of the ground wire to the existing ground nut as pictured.
Feed the spaded end of the ground wire out thru the 5/8� hole.
Remove door sill cover by pulling up on it with your fingers. There are approx 4 metal clips holding it in.

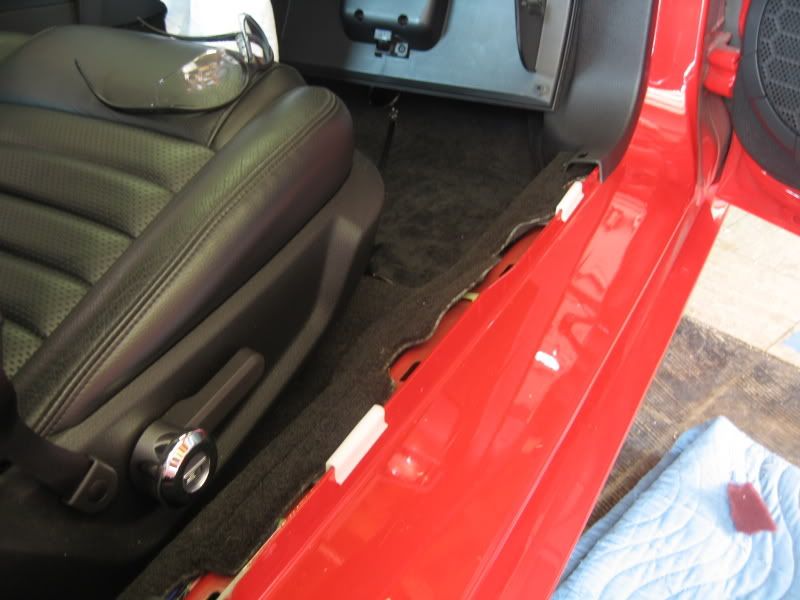
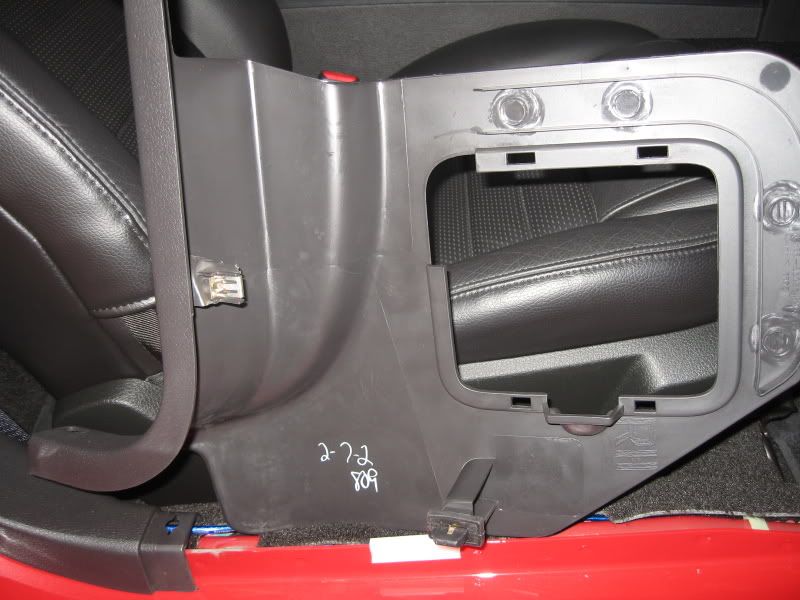
Remove the lower kick panel trim. Remove access door and pull straight out on the kick panel. There�s 1 additional retaining clip on the upper trim leading up to the dash.
Clip locations
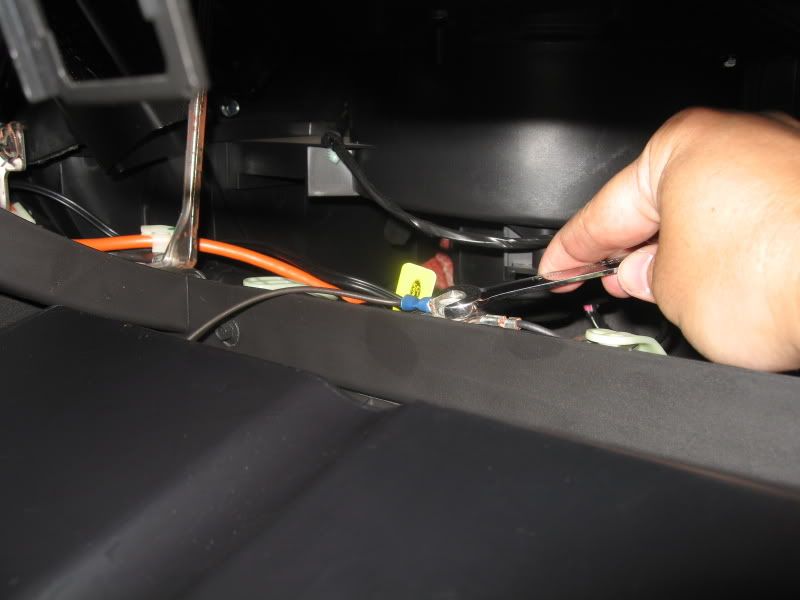
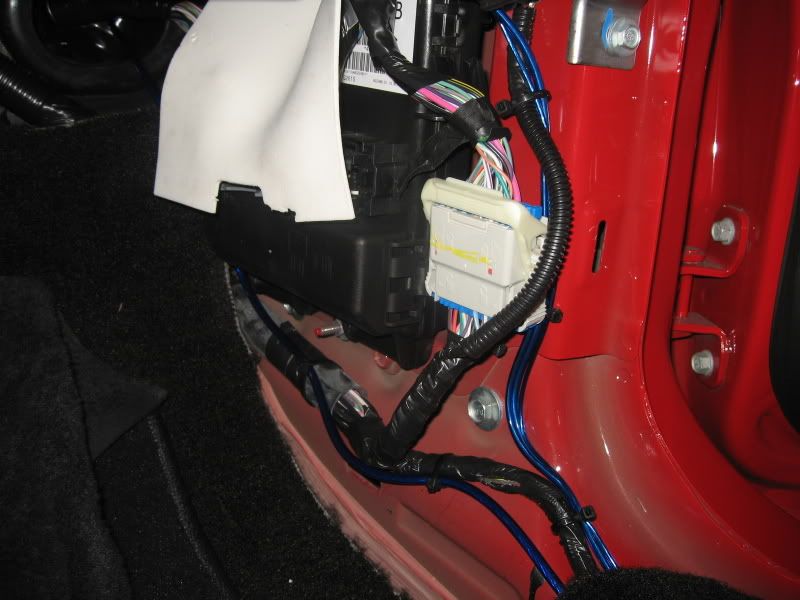
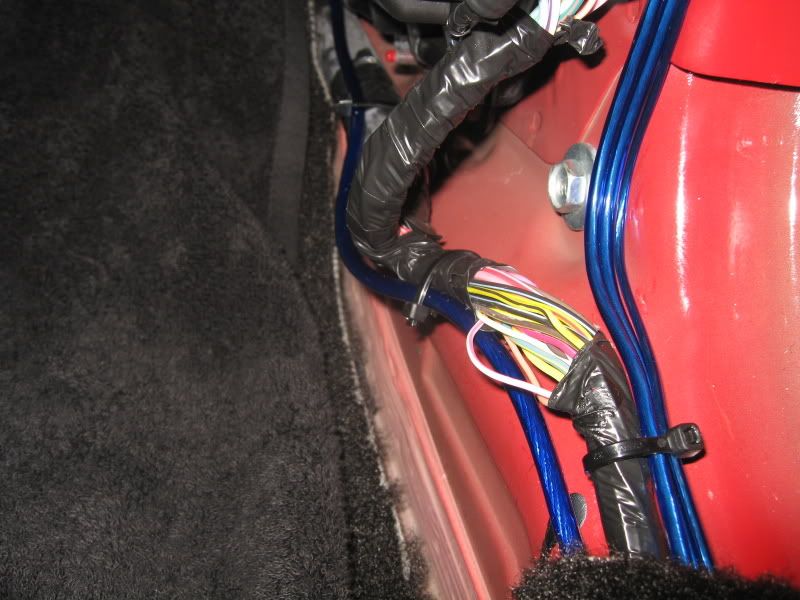
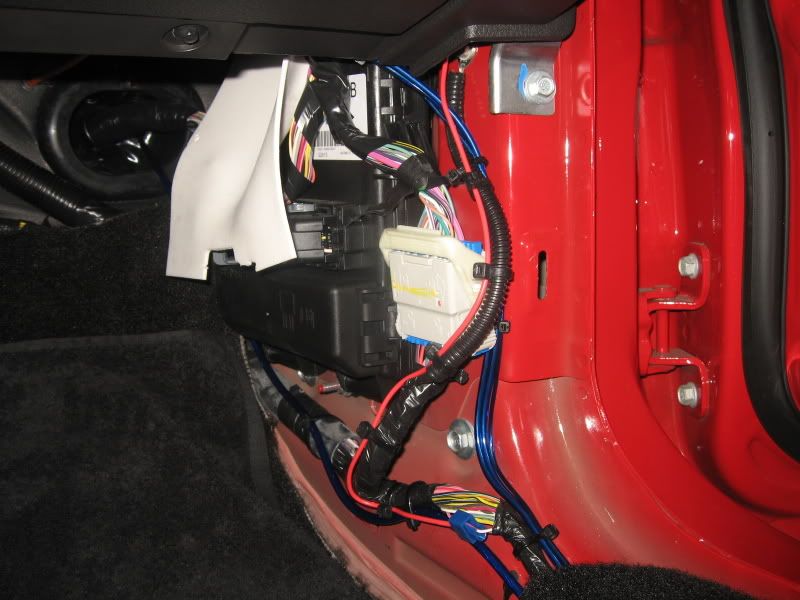
Locate wire bundle that leads to the back of the car.
Carefully remove a section of the black electrical tape off that bundle to expose the wiring.
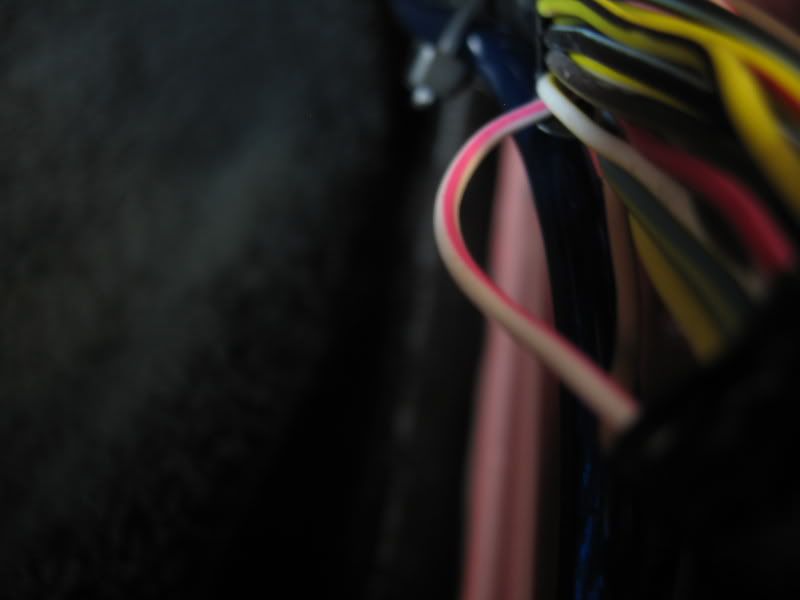
Isolate the WHITE wire with PINK STRIPE.
This is the wire that you�ll be tapping into for the switch. Before doing so, attach the ground and power wire spades to the switch.
Tip: Pull out the wire bundle push pin to make working on the wire easier.
Using a wire tap or T-tap, connect the switch�s power wire to the White w/Pink Stripe wire.
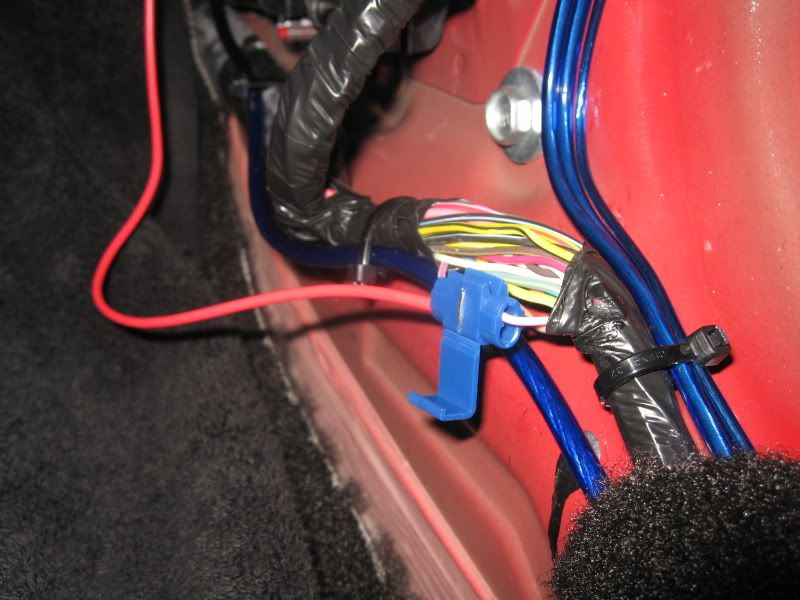
The switch is not hot. You can test for operation at this point.
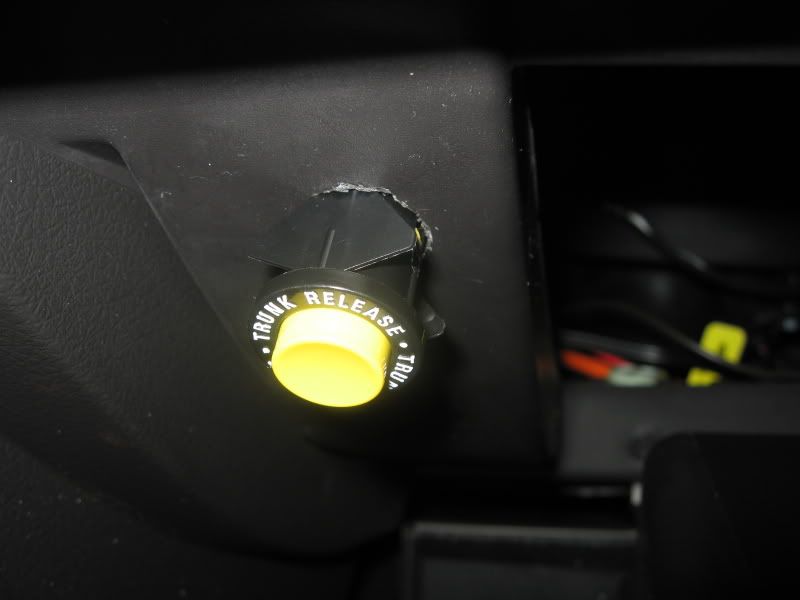
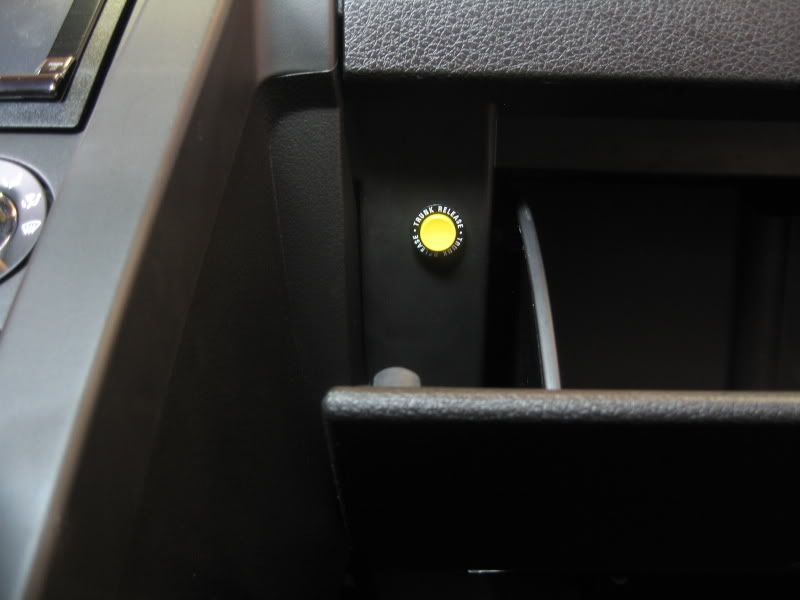
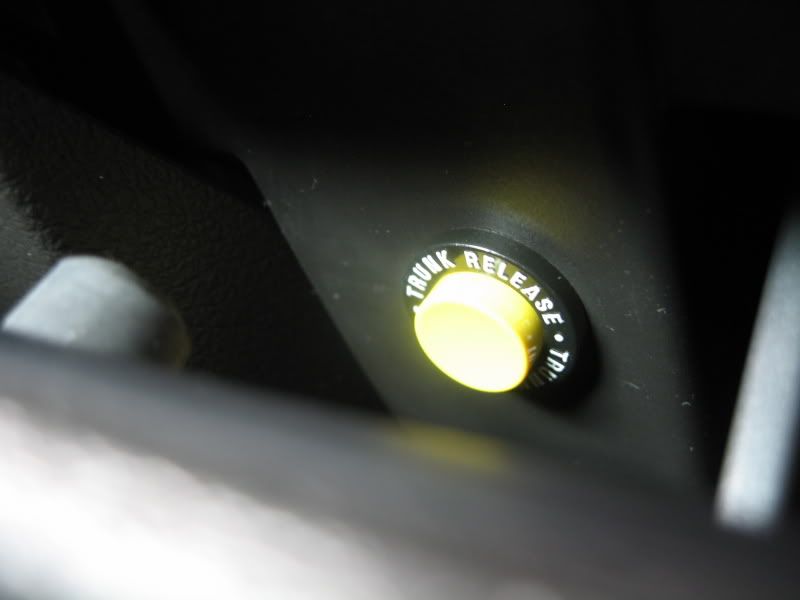
If all is good, Orientate the lettering on the switch as you desire and press it into it�s location.
Using tie-straps, clean up the installation of your ground and power wires.
Now vacuum up your mess, put your glove box back into position and enjoy your new trunk release switch!
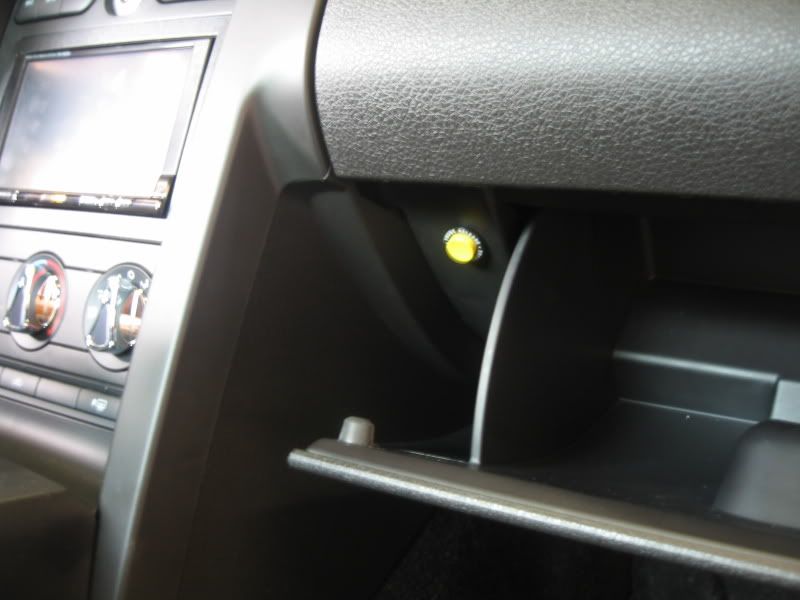
This How-To will cover the installation of a trunk release switch similar to the ones available in prior generation Mustangs. I chose to install the switch on the outer frame of the glove box just like the older Mustangs.
Tools and parts needed:
Ford trunk release switch D3AY-19C542-A (or any momentary switch)
Measuring tape
Masking tape
Drill motor
Dremel (optional)
5/8� Drill
Smaller drills (optional)
Wire cutter/stripper tool
2 pieces of wire (approx. 1� and 3�)
2 Spade terminals
1 U or eyelet terminal
1 inline splice or T-tap
10mm wrench
Several tie-straps
Ford factory switch (around $10 from Ford Dealer)
Baseline photo
Press inwards on both sides of glove box to lower.
Note: Existing hole (approx. 3/16�) in metal frame.
I chose to center the switch installation to this existing hole.
Reason: The metal frame is not very wide. Centering the switch on the outer glove box frame may not be center to the frame, thus drilling the hole out to full size may break out from the frame. This may or may not be of concern to you, so use your own judgment here.
If you have a hole locator tool, use it. I did not, so I had to go by feel and mark approximately where I thought the frame hole would be.
Using a small drill, go for it. My drilled hole was a little high to the frame hole, so I used a Dremel to round the hole in the plastic to the frame hole.
Once the hole was centered, I used a step drill to open the hole to 5/8�.
Problem: There�s a slight gap between the plastic frame to the metal frame behind it. So using a step drill like the one pictured did not work in making a 5/8� hole all the way through as the plastic hole would�ve been larger.
If you have a 5/8� drill bit, use it to go all the way through. If you only have a step drill, use a Dremel to open up the metal frame hole without elongating the hole in the plastic.
Test fit switch into the hole. Don�t press the switch all the way in, just check for fitment.
If it seems way too tight, open your 5/8� hole to a liberal 5/8�. Those �batwings� that are located on each side of the switch fold inwards as you press the switch into the hole.
In my case, there was no way the batwings were going to fit into the hole without further opening the 5/8� hole in the plastic frame.
I chose to trim out the wings using a Dremel as the tight fit would hold the switch in place without issue. It will also make it easier to push the switch back out if I need to check the connections or replace it in the future.
1� ground wire: Crimp one end with a spade terminal, opposite end with a U or eyelet terminal.
3� power wire: Crimp one end with a spade terminal, opposite end leave cut.
Attach one end of the ground wire to the existing ground nut as pictured.
Feed the spaded end of the ground wire out thru the 5/8� hole.
Remove door sill cover by pulling up on it with your fingers. There are approx 4 metal clips holding it in.
Remove the lower kick panel trim. Remove access door and pull straight out on the kick panel. There�s 1 additional retaining clip on the upper trim leading up to the dash.
Clip locations
Locate wire bundle that leads to the back of the car.
Carefully remove a section of the black electrical tape off that bundle to expose the wiring.
Isolate the WHITE wire with PINK STRIPE.
This is the wire that you�ll be tapping into for the switch. Before doing so, attach the ground and power wire spades to the switch.
Tip: Pull out the wire bundle push pin to make working on the wire easier.
Using a wire tap or T-tap, connect the switch�s power wire to the White w/Pink Stripe wire.
The switch is not hot. You can test for operation at this point.
If all is good, Orientate the lettering on the switch as you desire and press it into it�s location.
Using tie-straps, clean up the installation of your ground and power wires.
Now vacuum up your mess, put your glove box back into position and enjoy your new trunk release switch!
Team Mustang Source
Joined: July 20, 2004
Posts: 2,693
Likes: 0
From: New Jersey
this forum crashed when I began the install, so i was on my own without tacobills help here with the button. my dilemma was I drilled into disaster and came out satisfied. i tried to drill into the existing hole in the frame inside the glove box and I drilled 1cm too far and i drilled ino the 90* angle of the frame.
I also thought I drilled the hole in the vinyl too big and thought the button would slide through. so a few hours later with 5 different drill bits, a unibit and a chisel, i got the hole big enough for the button to slide through the frame. button works great
I also thought I drilled the hole in the vinyl too big and thought the button would slide through. so a few hours later with 5 different drill bits, a unibit and a chisel, i got the hole big enough for the button to slide through the frame. button works great

GT Member
Joined: September 17, 2009
Posts: 157
Likes: 0
From: Woodbridge, Virginia
this forum crashed when I began the install, so i was on my own without tacobills help here with the button. my dilemma was I drilled into disaster and came out satisfied. i tried to drill into the existing hole in the frame inside the glove box and I drilled 1cm too far and i drilled ino the 90* angle of the frame.
I also thought I drilled the hole in the vinyl too big and thought the button would slide through. so a few hours later with 5 different drill bits, a unibit and a chisel, i got the hole big enough for the button to slide through the frame. button works great
I also thought I drilled the hole in the vinyl too big and thought the button would slide through. so a few hours later with 5 different drill bits, a unibit and a chisel, i got the hole big enough for the button to slide through the frame. button works great

Member
Joined: October 3, 2007
Posts: 18
Likes: 0
This write-up came at a good time, I am just about to start the install of my switch. For those that are interested, Silver Horse Racing has put together a kit with the button, wiring etc. It is $29 so maybe a little more that if you buy the parts yourself, but I figured it was worth a few bucks to get everything at once.

Member
Joined: April 12, 2010
Posts: 1
Likes: 0
I know this thread is quite old now, but I'd just like to say thanks. I have an '06 vert that had it's only key/fob locked in the truck accidentally by my friends little cousin. (ie- there was zero way of getting into the trunk).
After getting it towed home, I was informed that I'd have to have the dealership cut and program a new key, etc. Google turned up this thread and within 10 minutes I shorted the white/pink wire to the chassis to pop the trunk. Tomorrow I'll add the switch to make the fix permanent.
THANK YOU! Saved me $100, at least.

And, you're welcome.
Member
Joined: October 7, 2009
Posts: 44
Likes: 0
From: Florida
I know this thread is quite old now, but I'd just like to say thanks. I have an '06 vert that had it's only key/fob locked in the truck accidentally by my friends little cousin. (ie- there was zero way of getting into the trunk).
After getting it towed home, I was informed that I'd have to have the dealership cut and program a new key, etc. Google turned up this thread and within 10 minutes I shorted the white/pink wire to the chassis to pop the trunk. Tomorrow I'll add the switch to make the fix permanent.
THANK YOU! Saved me $100, at least.
After getting it towed home, I was informed that I'd have to have the dealership cut and program a new key, etc. Google turned up this thread and within 10 minutes I shorted the white/pink wire to the chassis to pop the trunk. Tomorrow I'll add the switch to make the fix permanent.
THANK YOU! Saved me $100, at least.
Just wondering... not trying to be a smart a$$... hopefully not a dumba$$ either.
Legacy Tms Member

Joined: August 17, 2007
Posts: 1,271
Likes: 129
From: Aldie, VA

Member
Joined: November 16, 2011
Posts: 6
Likes: 0
Remote Trunk Switch Installation (w/pics)
This How-To will cover the installation of a trunk release switch similar to the ones available in prior generation Mustangs. I chose to install the switch on the outer frame of the glove box just like the older Mustangs.
Tools and parts needed:
Ford trunk release switch D3AY-19C542-A (or any momentary switch)
Measuring tape
Masking tape
Drill motor
Dremel (optional)
5/8� Drill
Smaller drills (optional)
Wire cutter/stripper tool
2 pieces of wire (approx. 1� and 3�)
2 Spade terminals
1 U or eyelet terminal
1 inline splice or T-tap
10mm wrench
Several tie-straps
Ford factory switch (around $10 from Ford Dealer)
Baseline photo
Press inwards on both sides of glove box to lower.
Note: Existing hole (approx. 3/16�) in metal frame.
I chose to center the switch installation to this existing hole.
Reason: The metal frame is not very wide. Centering the switch on the outer glove box frame may not be center to the frame, thus drilling the hole out to full size may break out from the frame. This may or may not be of concern to you, so use your own judgment here.
If you have a hole locator tool, use it. I did not, so I had to go by feel and mark approximately where I thought the frame hole would be.
Using a small drill, go for it. My drilled hole was a little high to the frame hole, so I used a Dremel to round the hole in the plastic to the frame hole.
Once the hole was centered, I used a step drill to open the hole to 5/8�.
Problem: There�s a slight gap between the plastic frame to the metal frame behind it. So using a step drill like the one pictured did not work in making a 5/8� hole all the way through as the plastic hole would�ve been larger.
If you have a 5/8� drill bit, use it to go all the way through. If you only have a step drill, use a Dremel to open up the metal frame hole without elongating the hole in the plastic.
Test fit switch into the hole. Don�t press the switch all the way in, just check for fitment.
If it seems way too tight, open your 5/8� hole to a liberal 5/8�. Those �batwings� that are located on each side of the switch fold inwards as you press the switch into the hole.
In my case, there was no way the batwings were going to fit into the hole without further opening the 5/8� hole in the plastic frame.
I chose to trim out the wings using a Dremel as the tight fit would hold the switch in place without issue. It will also make it easier to push the switch back out if I need to check the connections or replace it in the future.
1� ground wire: Crimp one end with a spade terminal, opposite end with a U or eyelet terminal.
3� power wire: Crimp one end with a spade terminal, opposite end leave cut.
Attach one end of the ground wire to the existing ground nut as pictured.
Feed the spaded end of the ground wire out thru the 5/8� hole.
Remove door sill cover by pulling up on it with your fingers. There are approx 4 metal clips holding it in.
Remove the lower kick panel trim. Remove access door and pull straight out on the kick panel. There�s 1 additional retaining clip on the upper trim leading up to the dash.
Clip locations
Locate wire bundle that leads to the back of the car.
Carefully remove a section of the black electrical tape off that bundle to expose the wiring.
Isolate the WHITE wire with PINK STRIPE.
This is the wire that you�ll be tapping into for the switch. Before doing so, attach the ground and power wire spades to the switch.
Tip: Pull out the wire bundle push pin to make working on the wire easier.
Using a wire tap or T-tap, connect the switch�s power wire to the White w/Pink Stripe wire.
The switch is not hot. You can test for operation at this point.
If all is good, Orientate the lettering on the switch as you desire and press it into it�s location.
Using tie-straps, clean up the installation of your ground and power wires.
Now vacuum up your mess, put your glove box back into position and enjoy your new trunk release switch!
i trying to figure this out for a while now i got the instruction from http://www.cherod.com/mustang/HowTo/TrunkRelease.htm i tried this out on my 07 v6 and it didnt work i got the same switch that you have and it didnt work for me and i spliced in to the same white/pink wire as you. any idea why its not working that you could help me out? i would appreciate the help. thanks in advance.
--------------------------------------------------------------------------
i trying to figure this out for a while now i got the instruction from http://www.cherod.com/mustang/HowTo/TrunkRelease.htm i tried this out on my 07 v6 and it didnt work i got the same switch that you have and it didnt work for me and i spliced in to the same white/pink wire as you. any idea why its not working that you could help me out? i would appreciate the help. thanks in advance.
i trying to figure this out for a while now i got the instruction from http://www.cherod.com/mustang/HowTo/TrunkRelease.htm i tried this out on my 07 v6 and it didnt work i got the same switch that you have and it didnt work for me and i spliced in to the same white/pink wire as you. any idea why its not working that you could help me out? i would appreciate the help. thanks in advance.
I'm still around to monitor my threads. 


Shelby GT350 Member
Joined: February 24, 2005
Posts: 2,227
Likes: 22
From: Delray Beach , FL


