
Driveshaft Pinion Flange Install (w/pics)


Driveshaft Pinion Flange Install (w/pics)
This install was performed on Brian's (habu) 2007 GT, 5-spd Manual.
This is the alternate (or primary, depending what view you have) method when installing a 1-pc driveshaft.
A 3.5" Shaftmasters 1-pc aluminum driveshaft with a replacement pinion flange was used for this installation.
This 'How-To' will only cover the removal and installation of the pinion flange only. The entire driveshaft install can be found here.
Note: This is how we performed the installation and is not meant to replace the Manufacturer's installation instructions or the Ford Service Manual, it is meant for reference only.
Tools required:
27mm socket (6-pt impact preferred)
1/2" drive ratchet
Impact gun
Harmonic balancer/gear puller
Threadlocker, red - High Strength
Torque wrench (up to 140 lbs-ft)
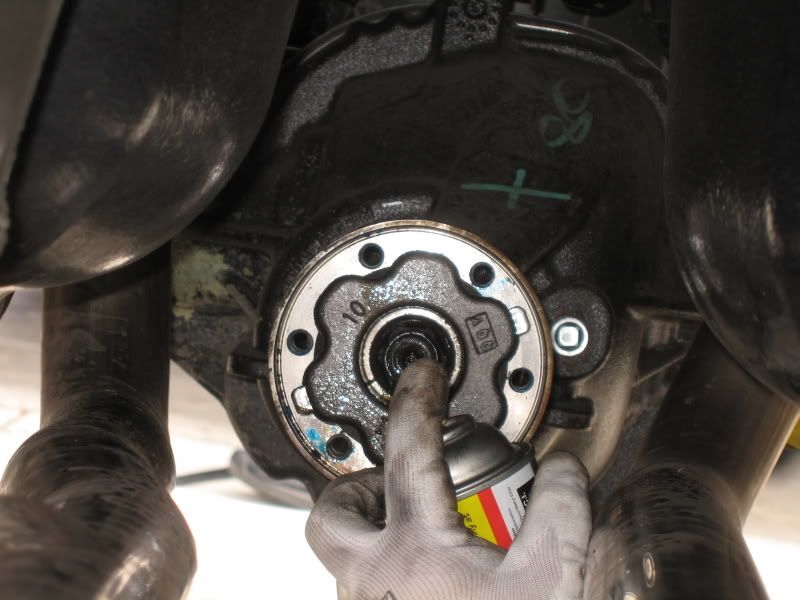
Apply penetrating oil on the pinion nut and let soak for a few minutes (we used PB Blaster).
Set e-brake.
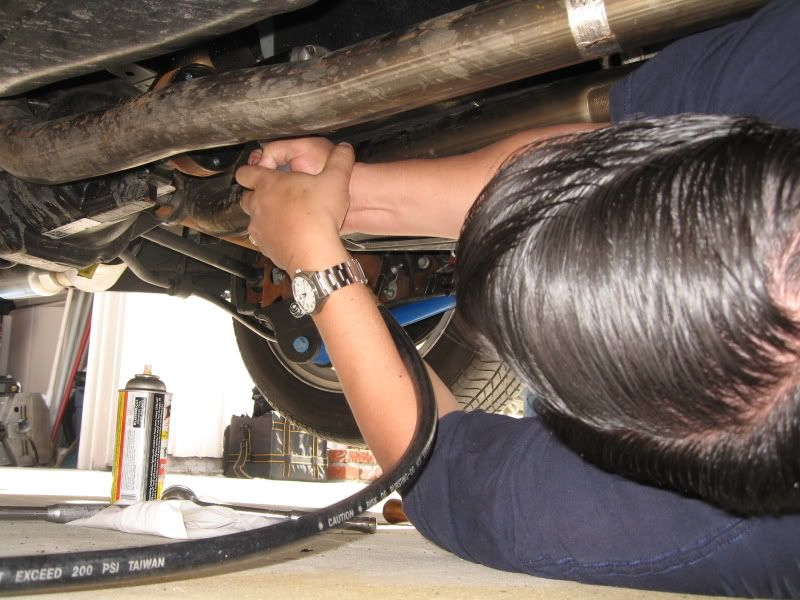
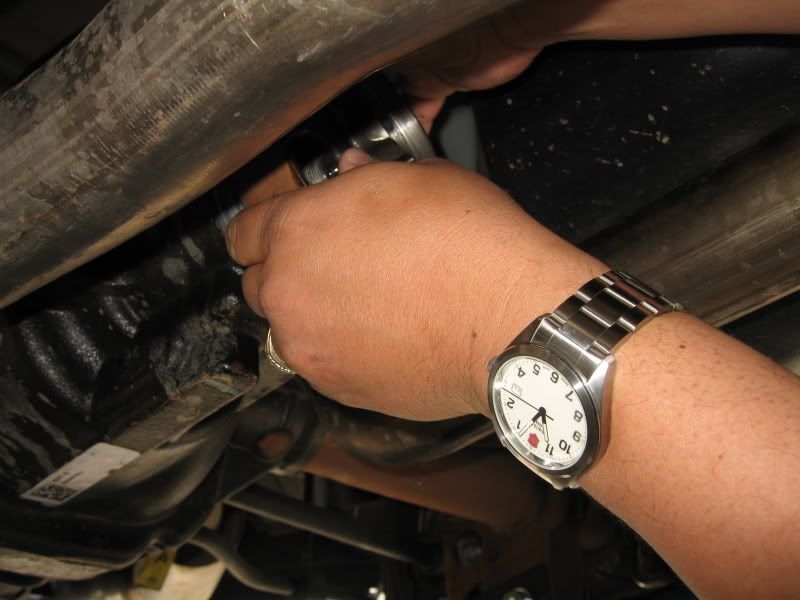
Using the impact gun with the 27mm socket, remove the pinion nut.
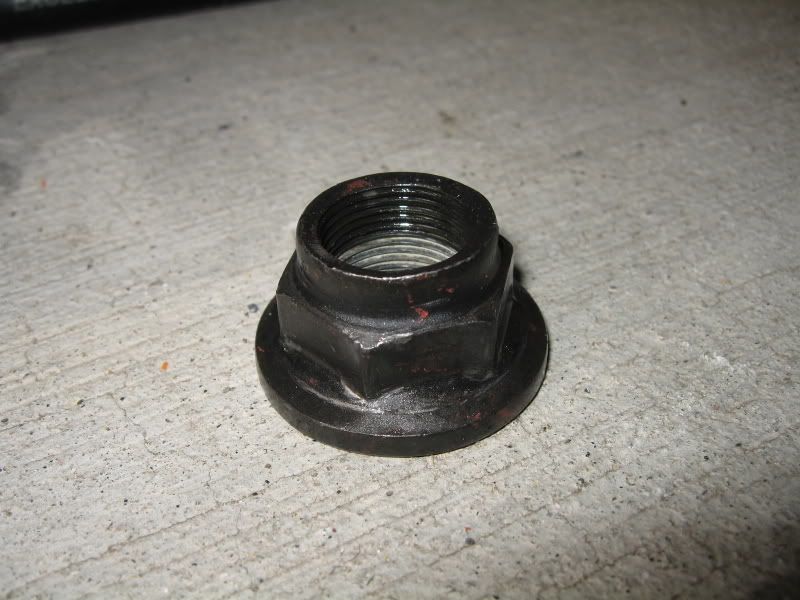
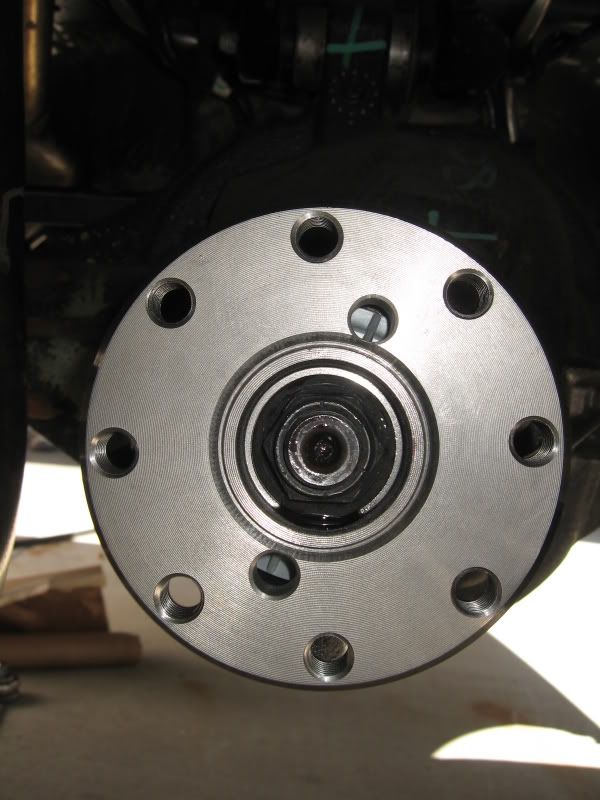
Pinion nut removed. Set aside, will be re-used.
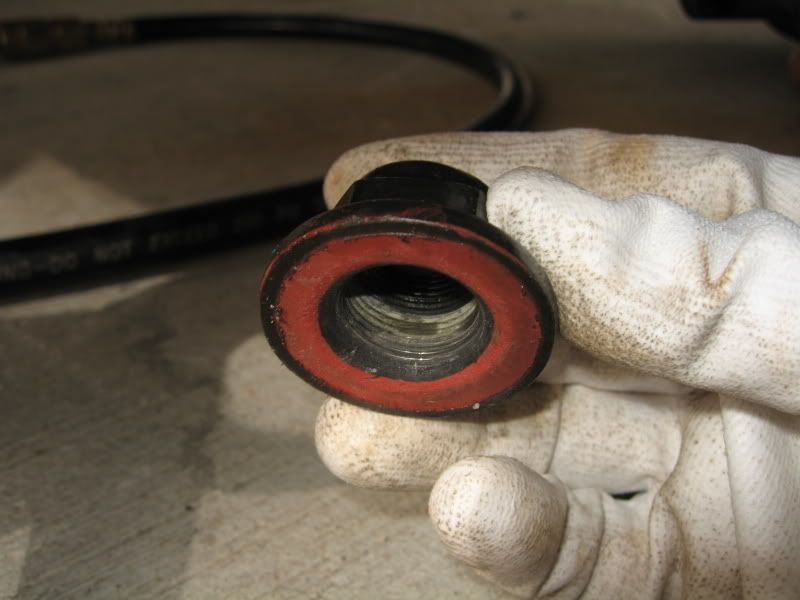
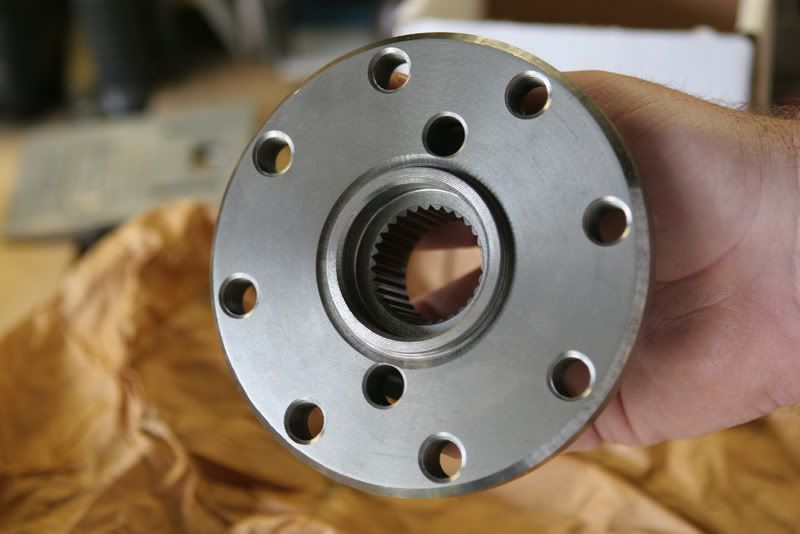
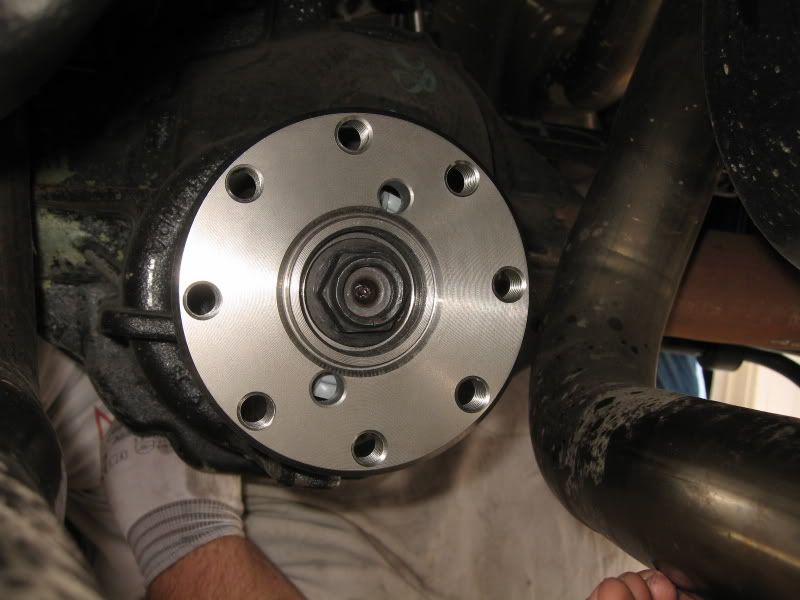
Get the new replacement pinion flange ready to install.

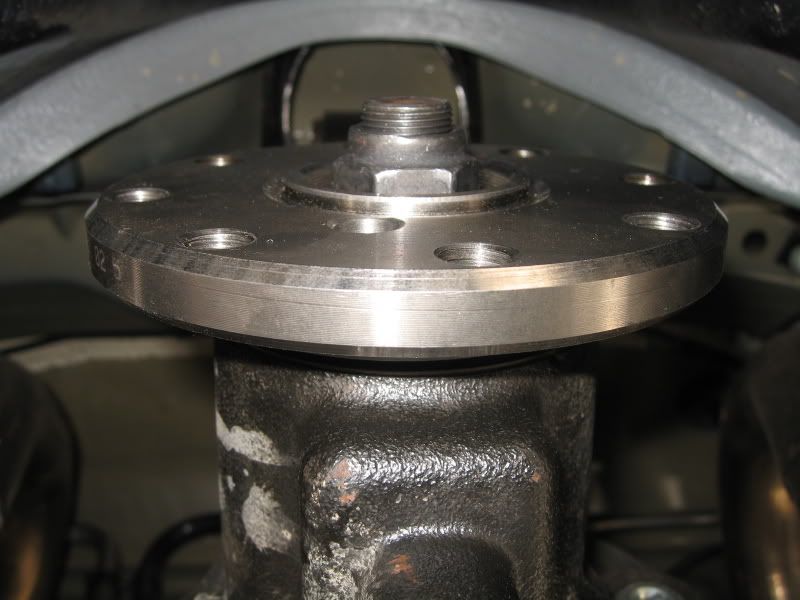
If you're fortunate, the stock pinion flange may simply pull out. No harm in giving this a quick try. If it does pull out, have the new flange ready to go.
The goal is to minimize gear oil loss when the stock flange is pulled out to when the new flange is installed.
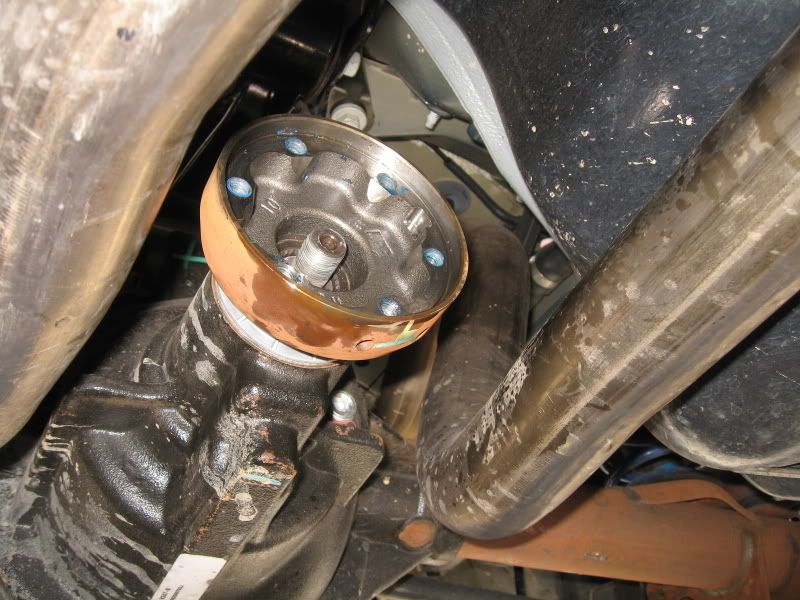
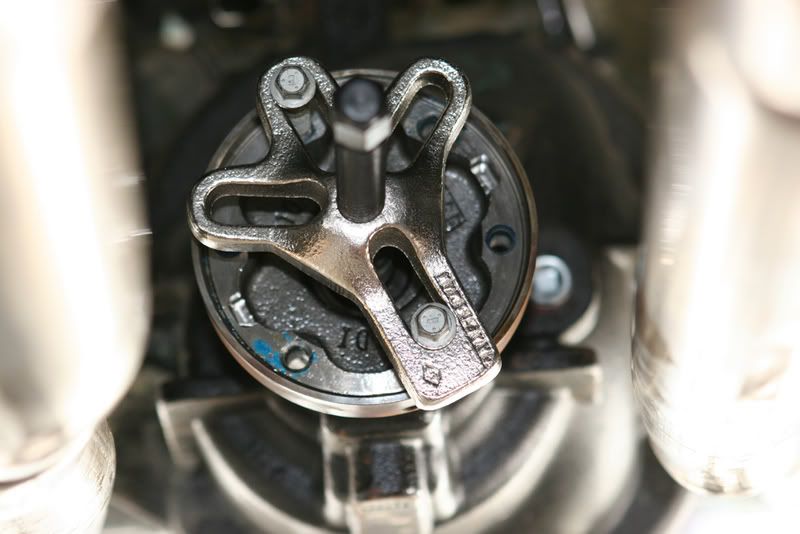
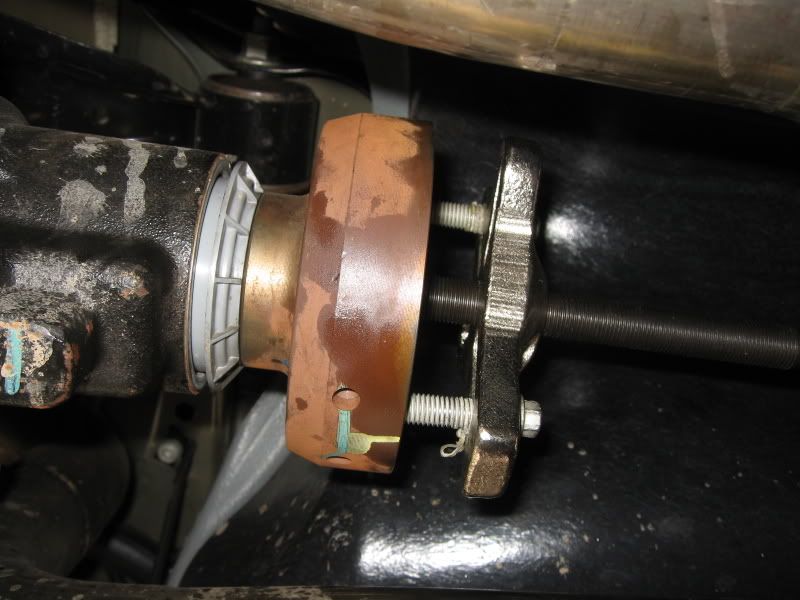
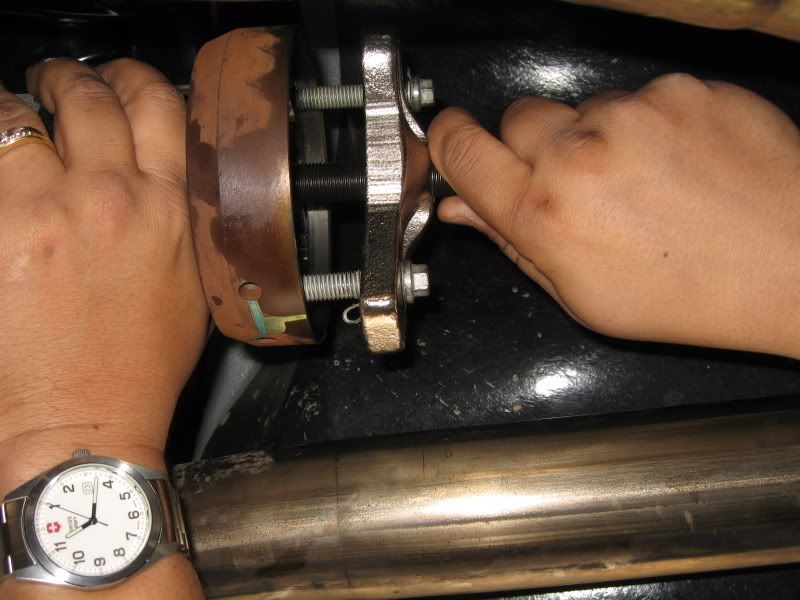
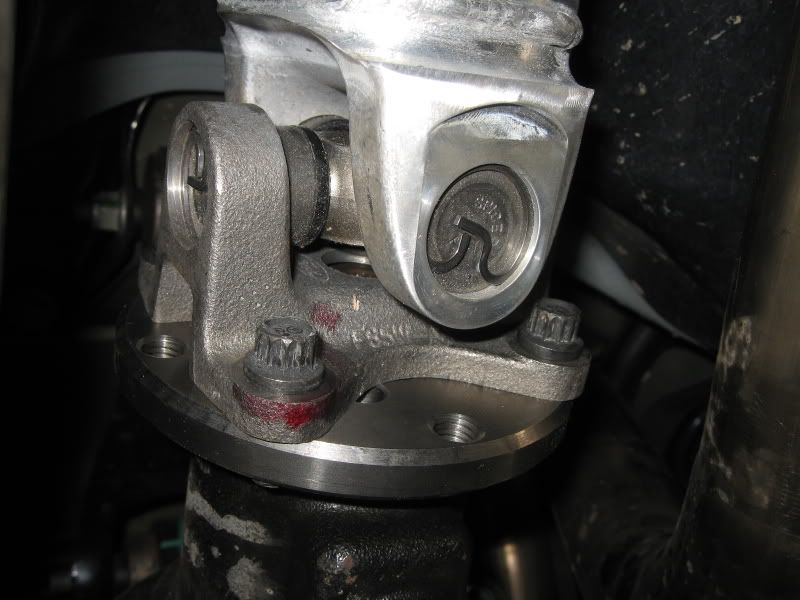
If you need the assist of a gear puller, install it at this point.
Pictured is one type of puller which utilizes the factory driveshaft to flange bolts. The 3-jaw puller should work just as easliy.
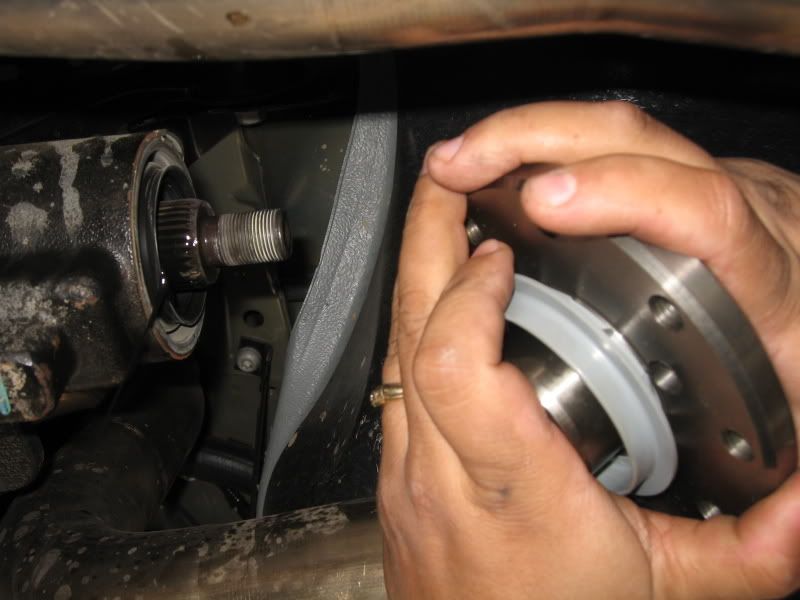
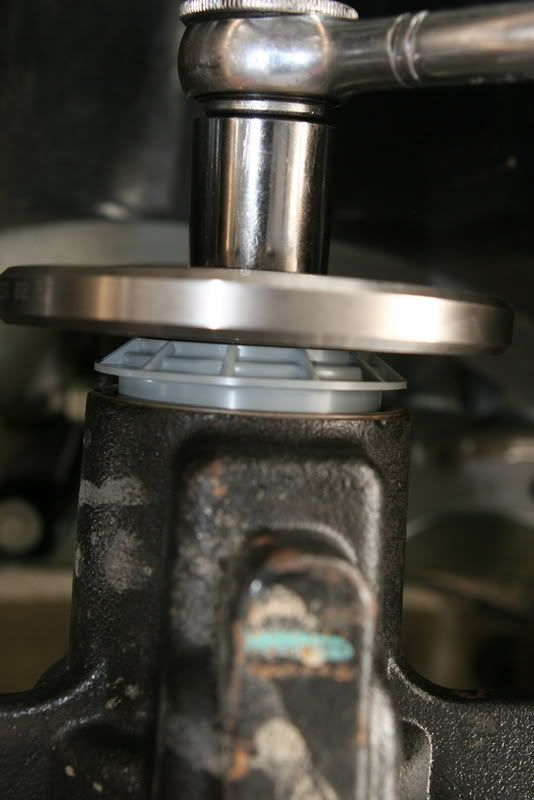
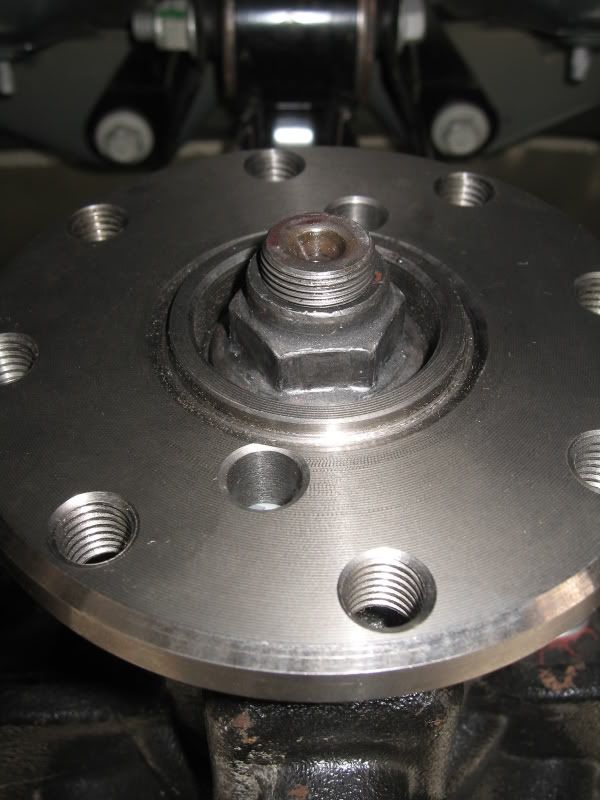
Once the stock flange is loose and ready to come out, get the replacement flange ready to minimize oil loss.
Once the drive pinion seal is pressed into the case, no more oil should leak out.

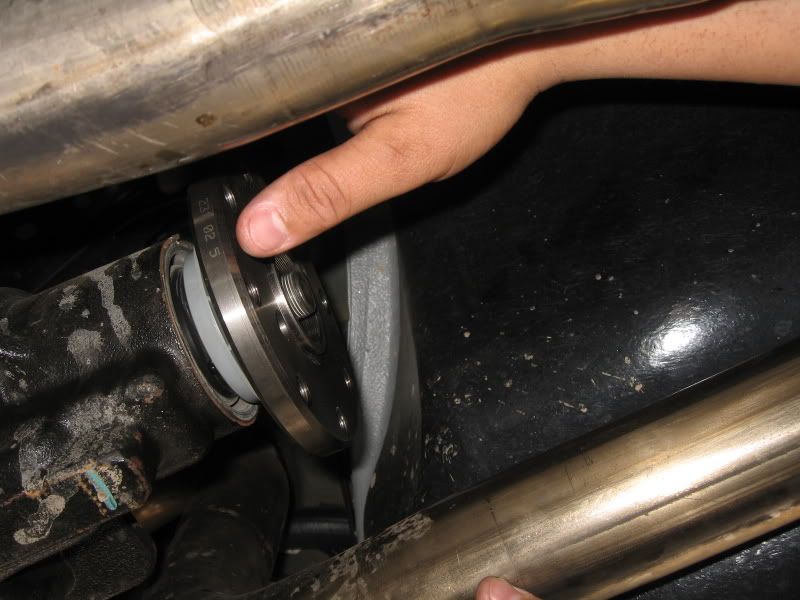
Re-install the pinion nut and run down with a ratched to seat the pinion flange and drive pinion seal.
Note: Do not apply thread locker at this time.
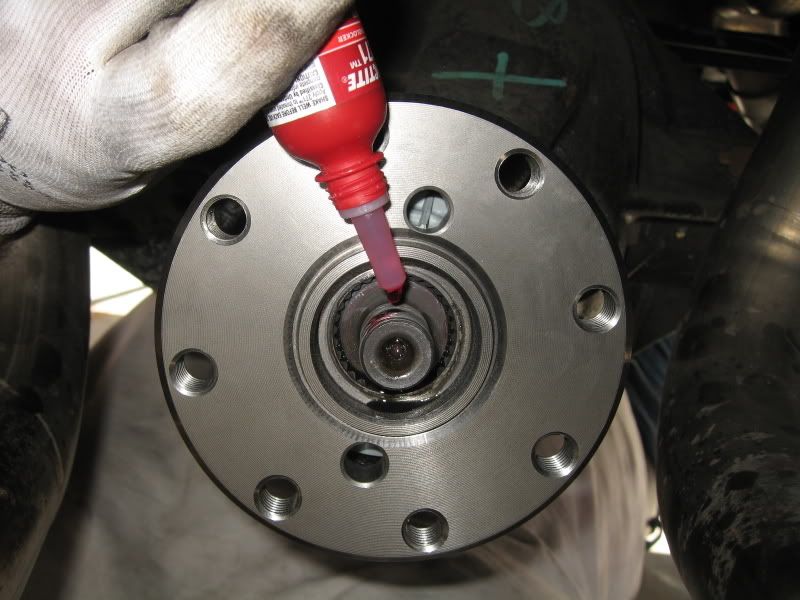
Once seated, back off and remove the pinion nut and apply thread locker to the pinion thread, then re-install nut until tight.
Set torque wrench to 140 lbs-ft and torque the pinion nut.
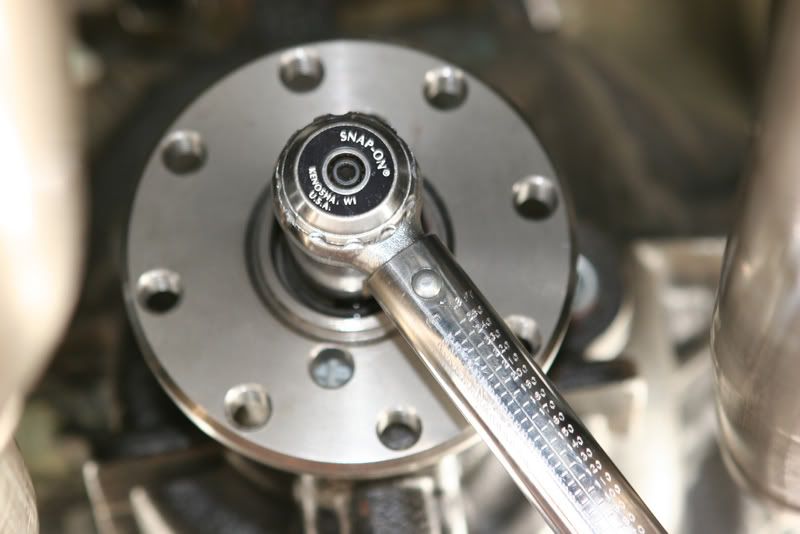
Installation complete.
This is the alternate (or primary, depending what view you have) method when installing a 1-pc driveshaft.
A 3.5" Shaftmasters 1-pc aluminum driveshaft with a replacement pinion flange was used for this installation.
This 'How-To' will only cover the removal and installation of the pinion flange only. The entire driveshaft install can be found here.
Note: This is how we performed the installation and is not meant to replace the Manufacturer's installation instructions or the Ford Service Manual, it is meant for reference only.
Tools required:
27mm socket (6-pt impact preferred)
1/2" drive ratchet
Impact gun
Harmonic balancer/gear puller
Threadlocker, red - High Strength
Torque wrench (up to 140 lbs-ft)
Apply penetrating oil on the pinion nut and let soak for a few minutes (we used PB Blaster).
Set e-brake.
Using the impact gun with the 27mm socket, remove the pinion nut.
Pinion nut removed. Set aside, will be re-used.
Get the new replacement pinion flange ready to install.
If you're fortunate, the stock pinion flange may simply pull out. No harm in giving this a quick try. If it does pull out, have the new flange ready to go.
The goal is to minimize gear oil loss when the stock flange is pulled out to when the new flange is installed.
If you need the assist of a gear puller, install it at this point.
Pictured is one type of puller which utilizes the factory driveshaft to flange bolts. The 3-jaw puller should work just as easliy.
Once the stock flange is loose and ready to come out, get the replacement flange ready to minimize oil loss.
Once the drive pinion seal is pressed into the case, no more oil should leak out.
Re-install the pinion nut and run down with a ratched to seat the pinion flange and drive pinion seal.
Note: Do not apply thread locker at this time.
Once seated, back off and remove the pinion nut and apply thread locker to the pinion thread, then re-install nut until tight.
Set torque wrench to 140 lbs-ft and torque the pinion nut.
Installation complete.
Team Mustang Source
Joined: September 14, 2005
Posts: 3,477
Likes: 1
From: SoCal
Just wanted to stop by and thank TacoBill for the awesome documentation. I'm not used to having 2 or 3 cameras snapping away while I work, but what the heck.
Not to alter Bill's instructions in anyway but I think if I could have gotten the car maybe 1-2 inches higher we could have used the leverage better on the pinion flange nut. I typically don't break out the impact gun unless I have to and I would have liked to been able to better use the leverage on the 1/2" breaker bar. I used 1/2" drive tools on all the big pieces and always do so with high-torque applications, a 3/8" drive just doesn't cut it. IMO
Not to alter Bill's instructions in anyway but I think if I could have gotten the car maybe 1-2 inches higher we could have used the leverage better on the pinion flange nut. I typically don't break out the impact gun unless I have to and I would have liked to been able to better use the leverage on the 1/2" breaker bar. I used 1/2" drive tools on all the big pieces and always do so with high-torque applications, a 3/8" drive just doesn't cut it. IMO
 Glad the install of your flange went better than mine on my Spydershaft.
 Team Mustang Source
Joined: September 14, 2005
Posts: 3,477
Likes: 1
From: SoCal
We had the front higher than the back and the amount of oil lost was probably less than a tablespoon (or teaspoon whichever is bigger). It was minimal at best because we had the new flange ready to go. As soon as the old one was off the new one was put on and pushed on the pinion to stop the oil from draining any more.


Banned
Joined: November 30, 2007
Posts: 218
Likes: 0

Team Mustang Source
Joined: September 14, 2005
Posts: 3,477
Likes: 1
From: SoCal
Now that it has stopped raining, I know in So Cal strange huh?, I've been able to test the car a little bit more. Took the car up on 80+ mph runs, decel down a sizeable hill, quick starts (some more sideways than I ought to) and there are no problems whatsoever, no moans/groans, clunking or vibrations of any sort. All of which is attributable to the quality of the driveshaft and how straight forward the install was.
This as been one of the best mods I have done to date. The driveshaft is really nice with every bit of it brand new. The quality from my un-trained eye looks to be top-notch and well done all around. Many thanks to Shaftmasters and again to TacoBill for the assistance, documentation and help I couldn't have done it without him.
This as been one of the best mods I have done to date. The driveshaft is really nice with every bit of it brand new. The quality from my un-trained eye looks to be top-notch and well done all around. Many thanks to Shaftmasters and again to TacoBill for the assistance, documentation and help I couldn't have done it without him.
Banned
Joined: November 30, 2007
Posts: 218
Likes: 0
Now that it has stopped raining, I know in So Cal strange huh?, I've been able to test the car a little bit more. Took the car up on 80+ mph runs, decel down a sizeable hill, quick starts (some more sideways than I ought to) and there are no problems whatsoever, no moans/groans, clunking or vibrations of any sort. All of which is attributable to the quality of the driveshaft and how straight forward the install was.
This as been one of the best mods I have done to date. The driveshaft is really nice with every bit of it brand new. The quality from my un-trained eye looks to be top-notch and well done all around. Many thanks to Shaftmasters and again to TacoBill for the assistance, documentation and help I couldn't have done it without him.
This as been one of the best mods I have done to date. The driveshaft is really nice with every bit of it brand new. The quality from my un-trained eye looks to be top-notch and well done all around. Many thanks to Shaftmasters and again to TacoBill for the assistance, documentation and help I couldn't have done it without him.
We are always glad to hear that our customers are happy with our product. By the way, your Mustang is one sweet looking ride!

Robert

Now where do you want me to send the check to?

Legacy TMS Member
Joined: January 9, 2005
Posts: 6,982
Likes: 6
From: New Carlisle, Ohio (20 miles north of Dayton)
Hey Robert...
You know what they say don't you?? " What goes around comes around" Right??
Well I am glad "Habu" changed out his pinion flange so easily. And so you'll have a little more ammunition for the next time you  me about my age here you go.. I will be 54 on Thursday the 28th!!
  You know they say you are only as old as you feel...right??
Scott
Banned
Joined: November 30, 2007
Posts: 218
Likes: 0
Hey Robert...
You know what they say don't you?? " What goes around comes around" Right?? Well I am glad "Habu" changed out his pinion flange so easily. And so you'll have a little more ammunition for the next time you me about my age here you go.. I will be 54 on Thursday the 28th!! You know they say you are only as old as you feel...right??
Scott
You know what they say don't you?? " What goes around comes around" Right??
Well I am glad "Habu" changed out his pinion flange so easily. And so you'll have a little more ammunition for the next time you me about my age here you go.. I will be 54 on Thursday the 28th!! You know they say you are only as old as you feel...right?? Scott
 I read about your trip to Brenspeed. Glad to hear it all went well for you guys. I'm also glad that "Habu" had an easy time with that pinion flange. It shows that you just never know from one time to the next just what kind of an experience one might have with that darn thing. I suggested to them guys to count the number of threads showing past the pinion nut before removing their old pinion flange. Then once they drew down the new one they could go slow until they got close to that point with the new flange before torqueing it down with the torque wrench. Since they were able to draw it down with a ratchet tells me it went much easier then it did for you. You had to use an impact gun to get it to move, correct?
Robert
Legacy TMS Member
Joined: October 12, 2006
Posts: 479
Likes: 3
From: Merritt Island, FL
I am not a proponent of doing this as you can never set the bearing preload on the pinion gear bearings properly this way. It may work properly with no problems for a while. If you start to eat pinion bearings then you will have to tear the rearend down completely to get the bearing races and the rear pinion bearing out. If and when I go to a single piece shaft I'll opt for the adapter plate as I really really hate tearing down Ford's 8.8 rear ends.
Other than that it was a very good writeup with great photos.
B B
B
Semper Fi
Other than that it was a very good writeup with great photos.
B
Semper Fi
Banned
Joined: November 30, 2007
Posts: 218
Likes: 0
I am not a proponent of doing this as you can never set the bearing preload on the pinion gear bearings properly this way. It may work properly with no problems for a while. If you start to eat pinion bearings then you will have to tear the rearend down completely to get the bearing races and the rear pinion bearing out. If and when I go to a single piece shaft I'll opt for the adapter plate as I really really hate tearing down Ford's 8.8 rear ends.
Other than that it was a very good writeup with great photos.
BB
Semper Fi
Other than that it was a very good writeup with great photos.
B
Semper Fi
Robert