When you click on links to various merchants on this site and make a purchase, this can result in this site earning a commission. Affiliate programs and affiliations include, but are not limited to, the eBay Partner Network.
Very cool (no pun intended) and good video. For the clearance on the sway bar, wonder if you could get some more 90 deg fittings to be able tuck the lines closer to the chassis. But I guess sharp bends don't help for flow and you've got to leave some slack for the suspension movement.
Just curious, saw that scooter battery at the beginning, are you going to use that to power the fan between runs? Or just use the car battery? When you're running it, do you leave the trunk open to let the heat escape?
it will be hooked up to the fuse panel and run off the car's power system. However you have given me a great idea. For pit cooling. I will need two batteries because of the amount of amps needed. but I can pick up two for under $50 bucks on ebay and they will run the pump and fan for about 30 mins with no problem and that with a four year old battery. Great idea, thanks
Decided to route wire to the center compartment and the power supply and ground from the fuse panel located on the right kick panel. Routing the wire to the center storage compartment was the hardest part of this complete build. Mounted the twin switches to a project box that fit perfect inside the compartment.
The final piece was constructed and put in place. I faded a support table to go around the cooler/pimp and lines that will sit flush with the underside of the cover. now I can tthrow a spare in the trunk with out worrying about breaking the cover.
I might be a bit concerned with the legs maybe rubbing the tub down there and possibly causing a paint rub through and subsequent rusting thereto, so... might there be some sort of decent rubber matting under the legs I don't see? Or maybe I need to be less worried as not daily and all that...
I might be a bit concerned with the legs maybe rubbing the tub down there and possibly causing a paint rub through and subsequent rusting thereto, so... might there be some sort of decent rubber matting under the legs I don't see? Or maybe I need to be less worried as not daily and all that...
I like it though! Well done!
thanks and great idea. I have some indoor/outdoor carpet left over from a project that i have not thrown away yet. I am going to cut thin strips and contact cement them at the bottom of each upright.
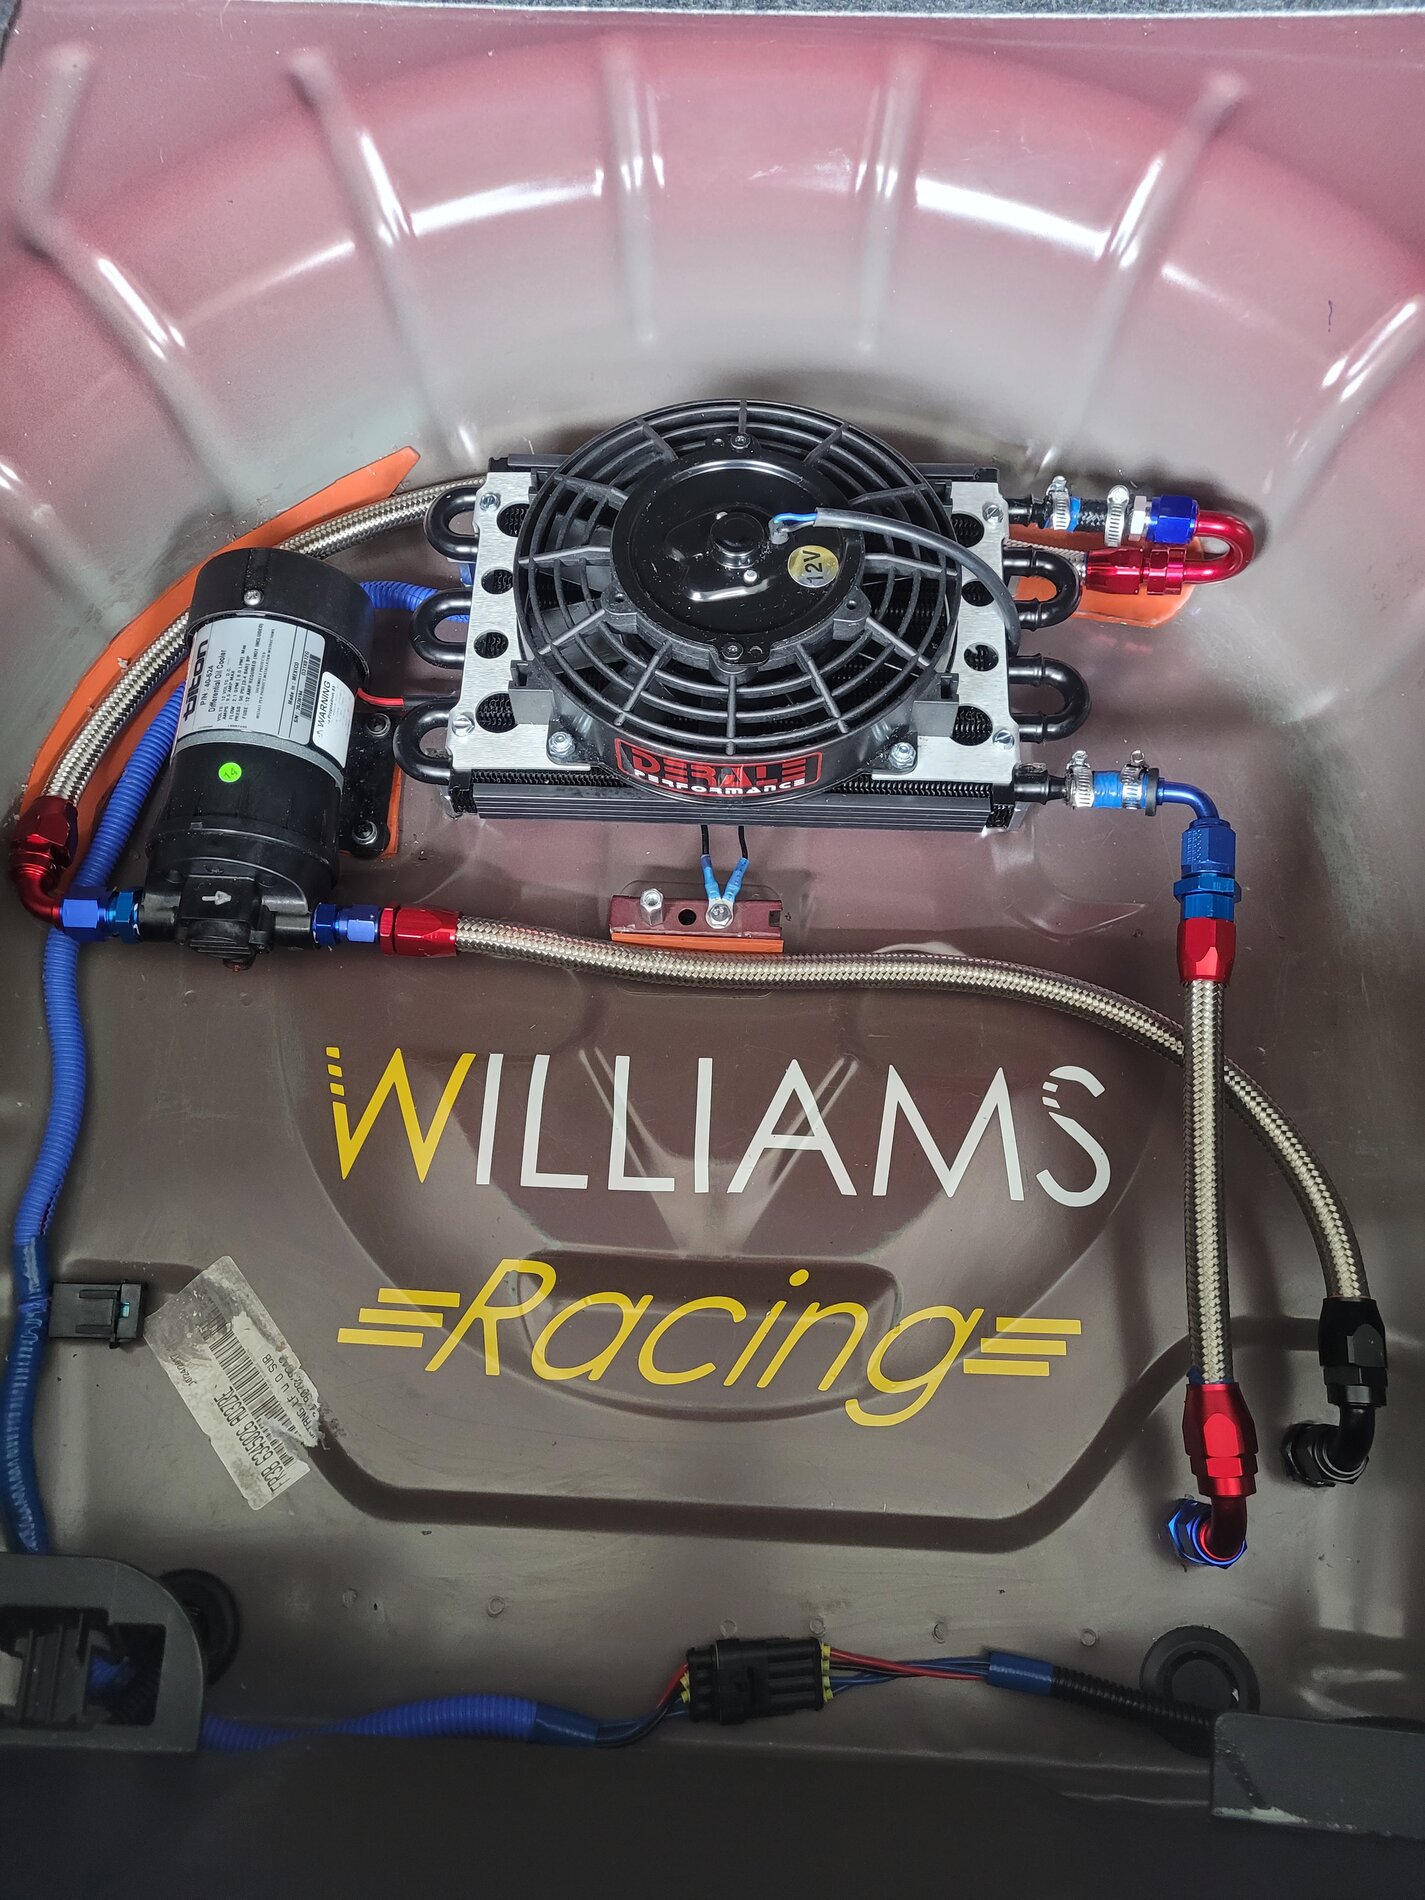
Here is a update to my diff cooler build. The most asked question and comment is reguarding why I put the pump before the cooler because it is poor practice. Answer is they are correct, to a point. If the location of the pump is located close any extra heat source that will not allow any airflow around the pump. However, due to the fact of the pump and coolers location, (inside the spare tire well), excessive heat soak was not a issue. But this really bother some people. So just to show how easy it was and is to hook it up correctly I did. Now all is well and to be honest it should have been done this way the first time but I was one AN fitting short. So here it is all corrected. I also improved the overall install by adding some 3/32 thick rubber sheet to any area that might touch the tub and under the pump for a little more vib damping.
Last edited by 1 old racer; Apr 24, 2021 at 09:30 PM.