
Custom amplifier enclosure + picture walkthrough (WARNING: many, many pics)

Thread Starter
Joined: May 31, 2007
Posts: 1,200
Likes: 0
From: Washington DC Metro Area
Custom amplifier enclosure + picture walkthrough (WARNING: many, many pics)
Update 1/07/2008:
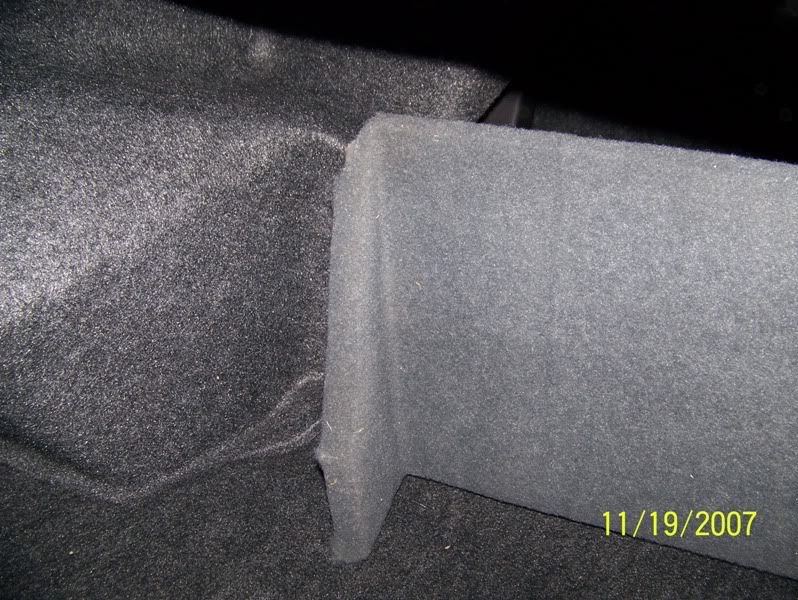
Got new trunk liner for the amp rack so the carpet colors match better:

---
Original post:
Goal:
Clean amplifier enclosure that:
1) Does not waste trunk space
2) Looks clean & OEM
3) Does not scream "steal me" to passerby's who see the trunk open. Only says "steal me" in a very moderate volume voice.
Ingredients:
Alpine PDX-1.1000 1000 Watt RMS Mono Subwoofer Amplifier
Alpine SWX-1243D 1000 Watt RMS / 3000 Watt Peak 12" Subwoofer (in a pre-made Scosche custom-fit fiberglass enclosure for 05-08 Mustangs)
1/2" MDF panel (8'x4' was the smallest Home Depot stocked...) - ~$20
20 feet of 1"x2" spruce - ~$20
Screws, hinges, staples - ~$20
Lexan (plexiglass) - about 25" x 35"? - ~$15
Trunk carpet from Pep boys - ~$10-15
Epoxy - $15
Paint + Primer - $5
------------------
Total (not including electronics): ~$110.
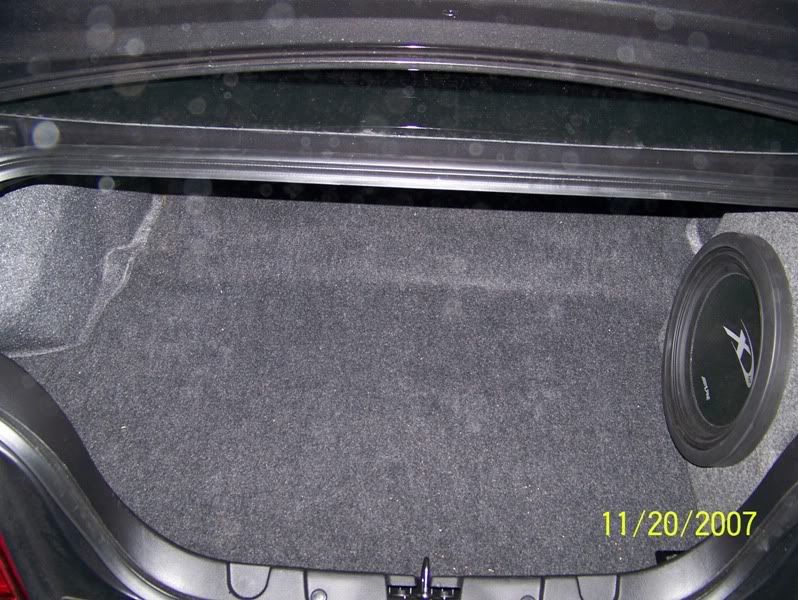
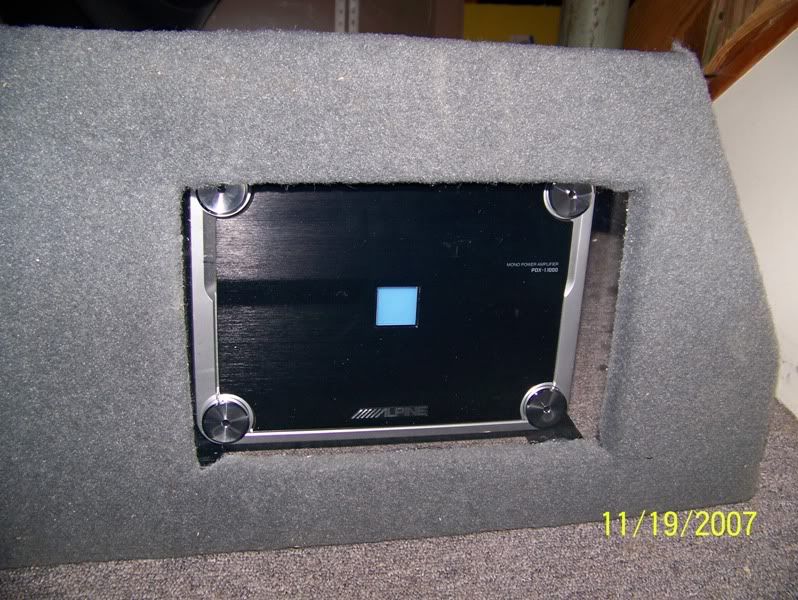
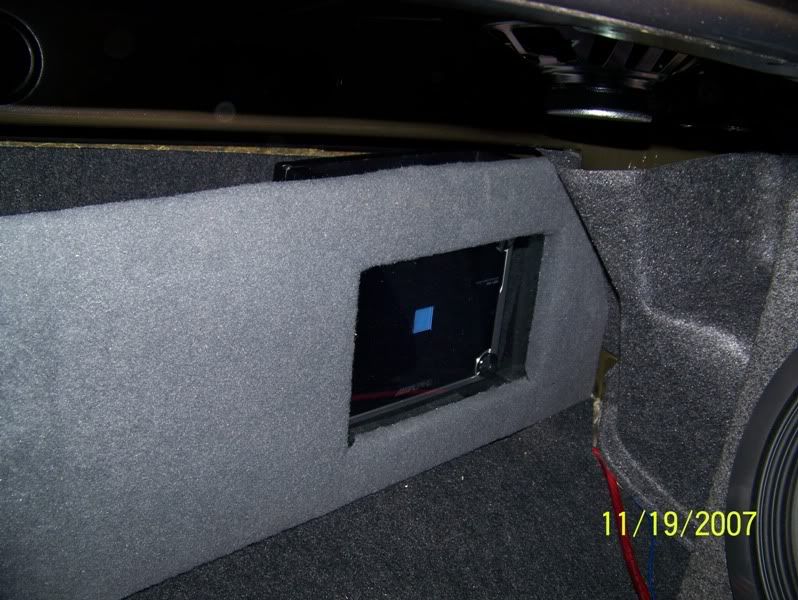
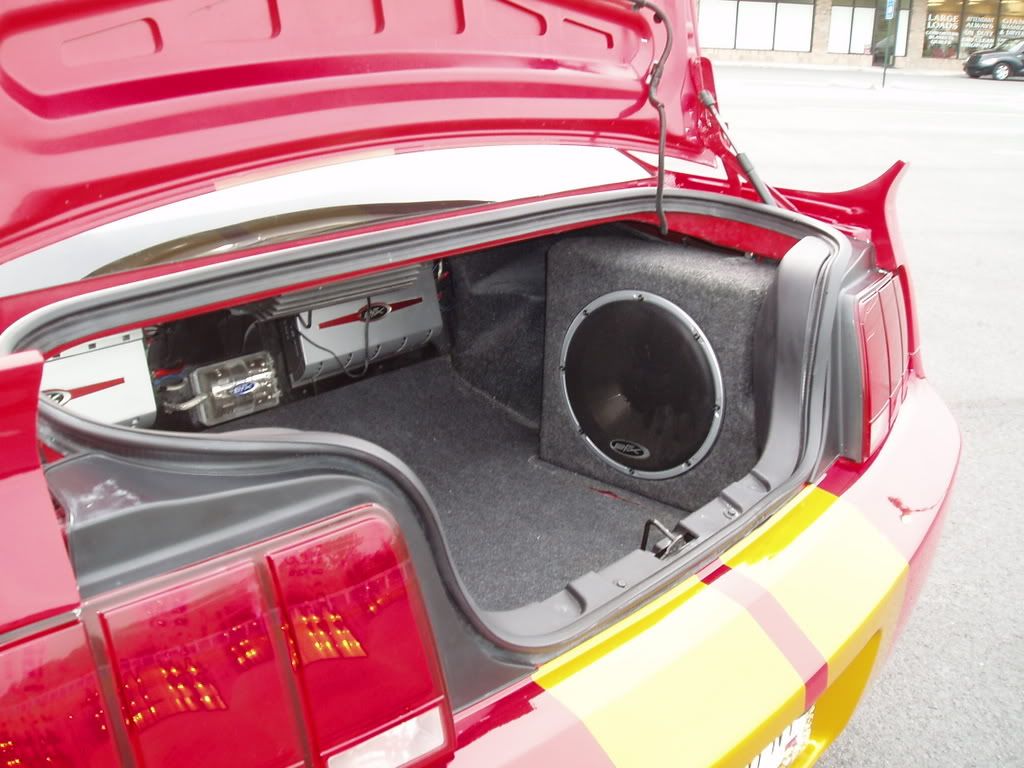
Completed Product:
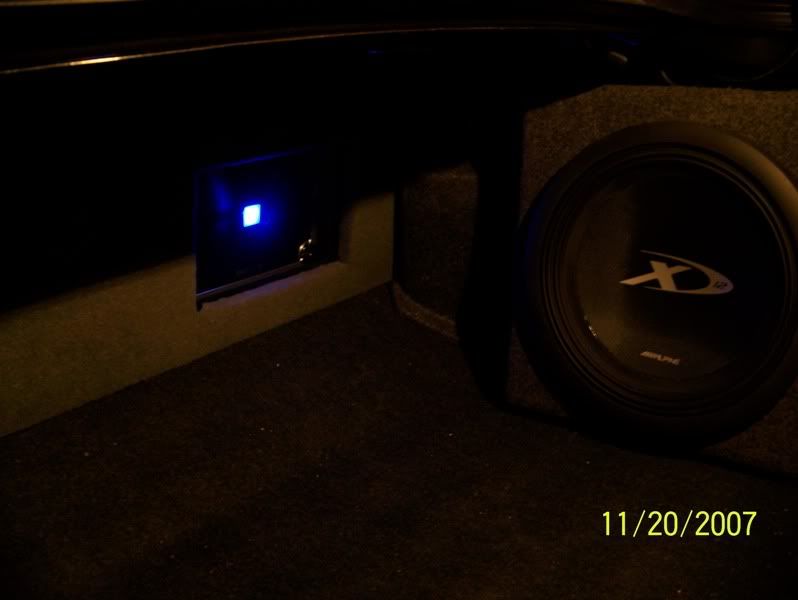
Closeup:
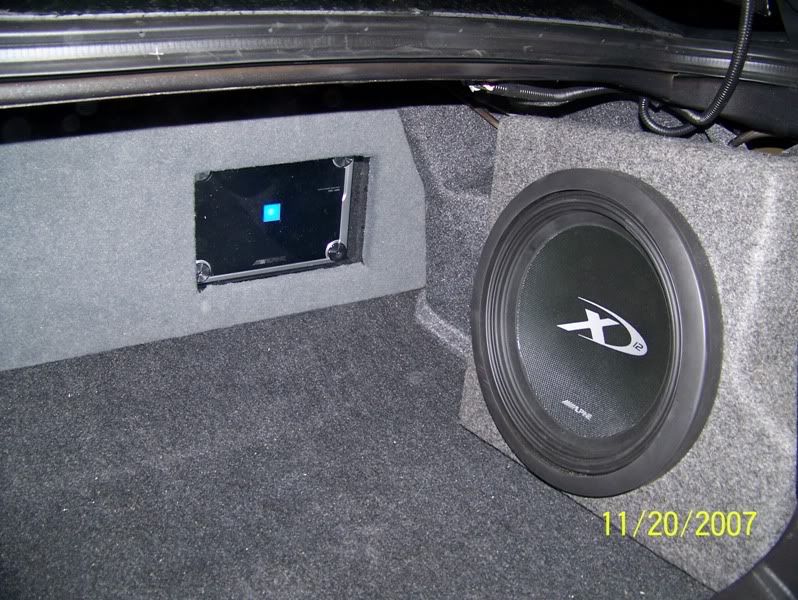
No flash:
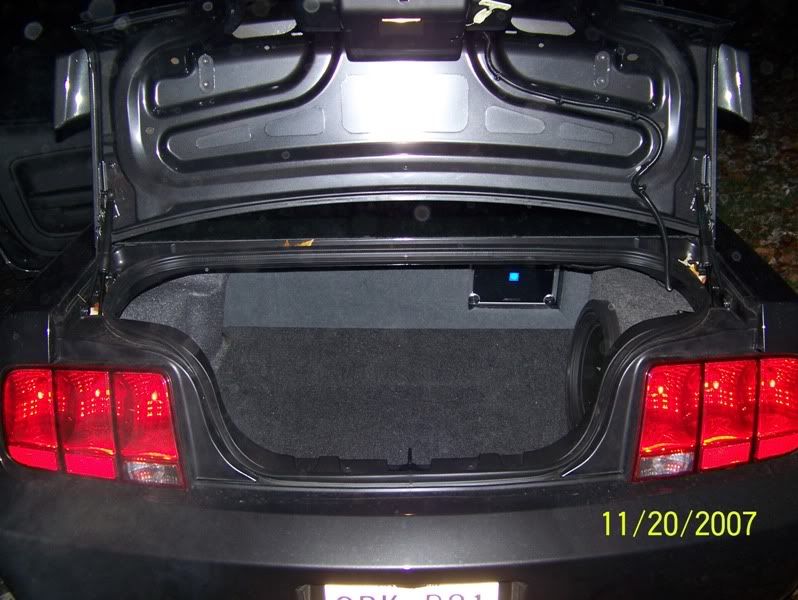
And I still have all my trunk space:
Thread Starter
Joined: May 31, 2007
Posts: 1,200
Likes: 0
From: Washington DC Metro Area
Installation/etc...
Installation:
Yes, dated 11/03... I actually started this part 2 weeks ago and gave up for a while...
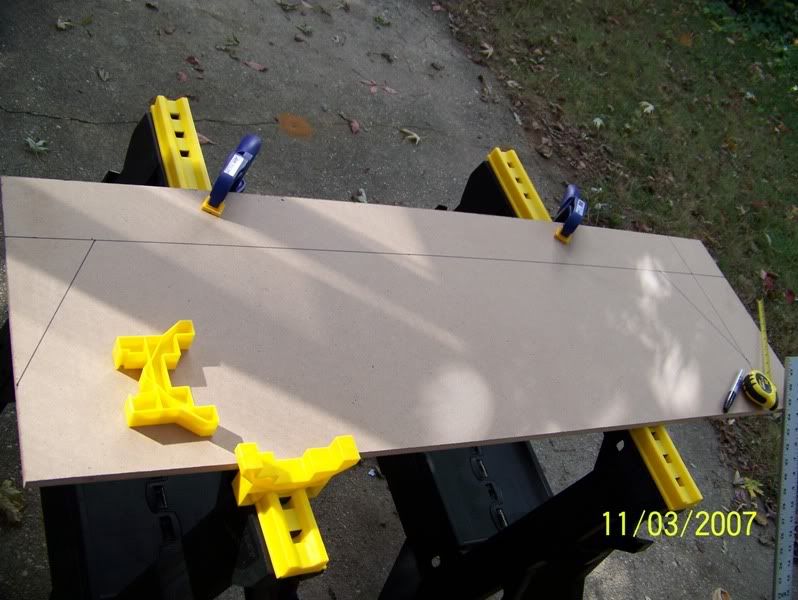
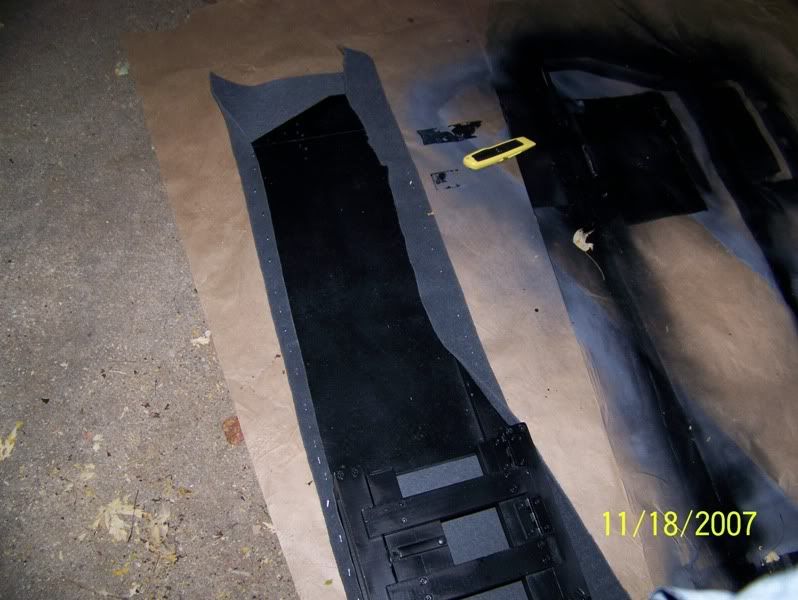
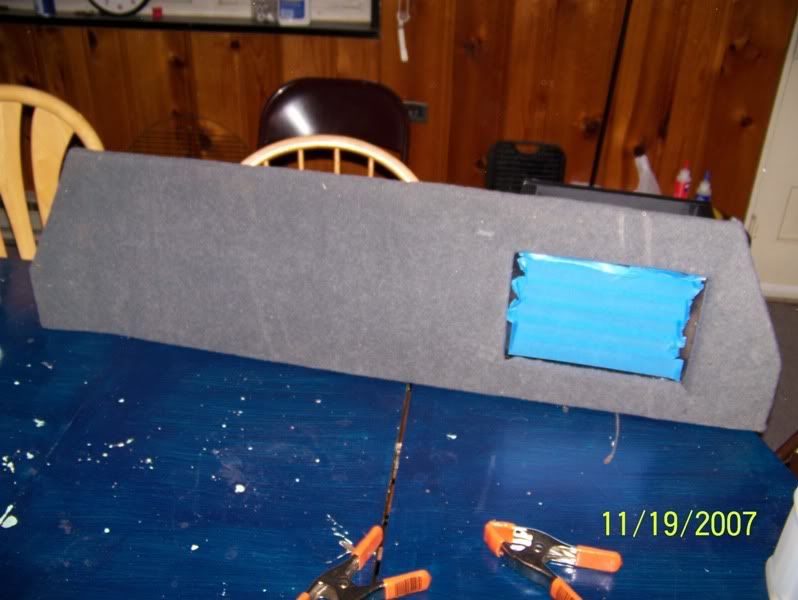
Saw along lines:
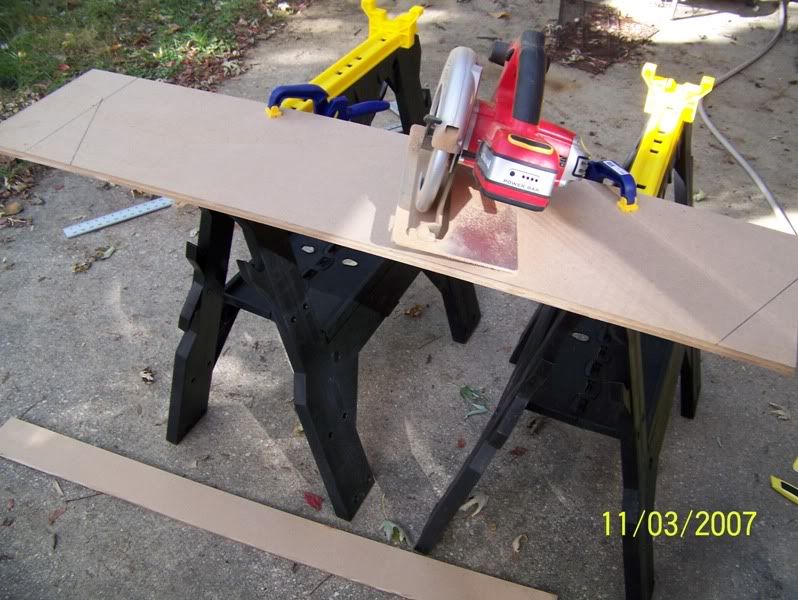
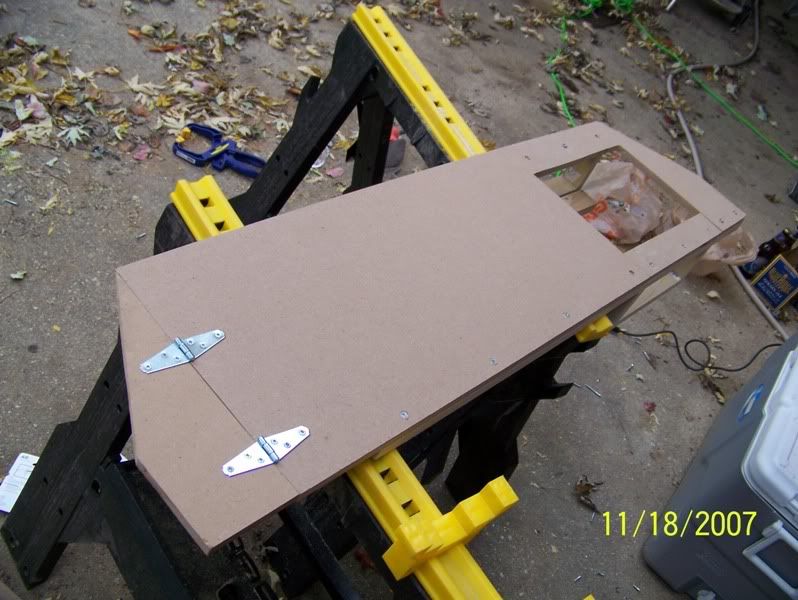
Cut rectangle out for amp and install hinges (why they are necessary will become evident at the end):
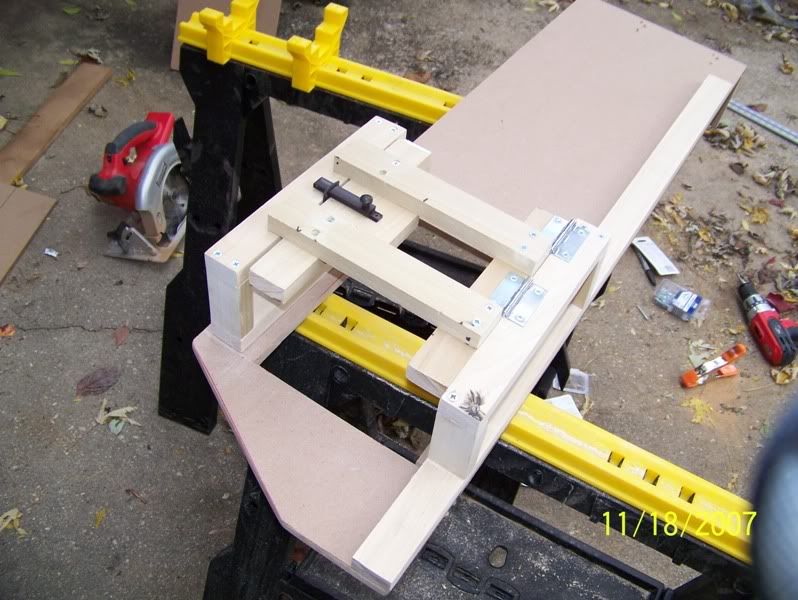
Cut a bunch of 1x2 spruce up and screw them together. Create burn marks by using Dremel cutoff tool to cut off screws with stripped heads that got stuck halfway in. ****ing Philips heads.
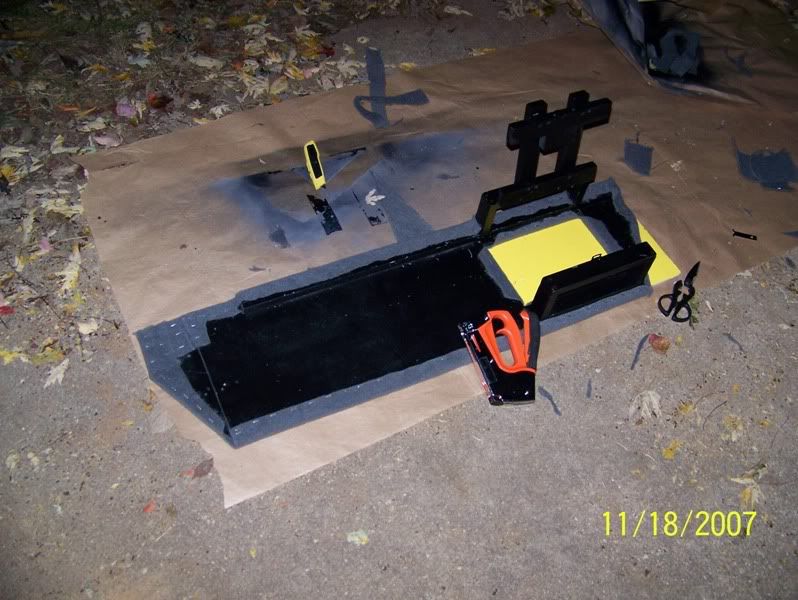
Hey look, it opens for amp servicing:

Primer: (this is unnecessary, nobody actually sees this part except me)
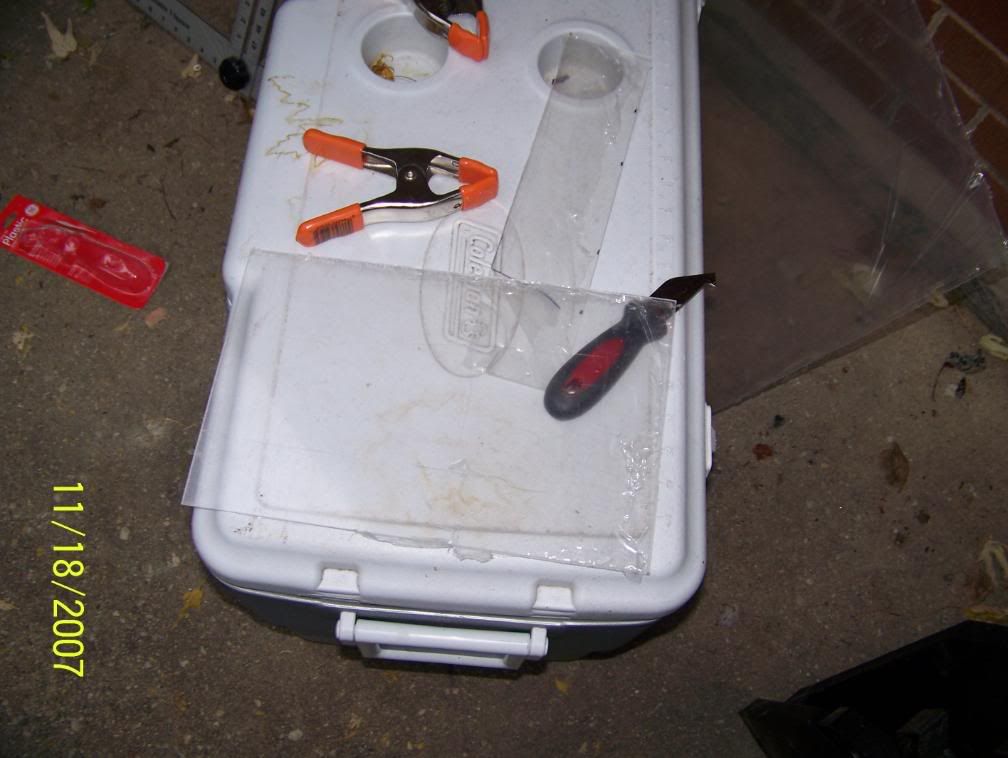
While primer's drying, cut up some Lexan:
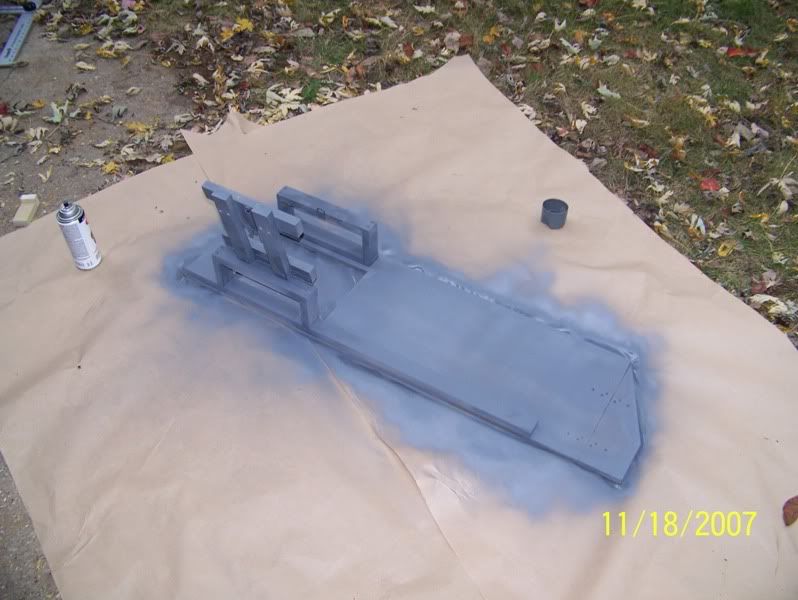
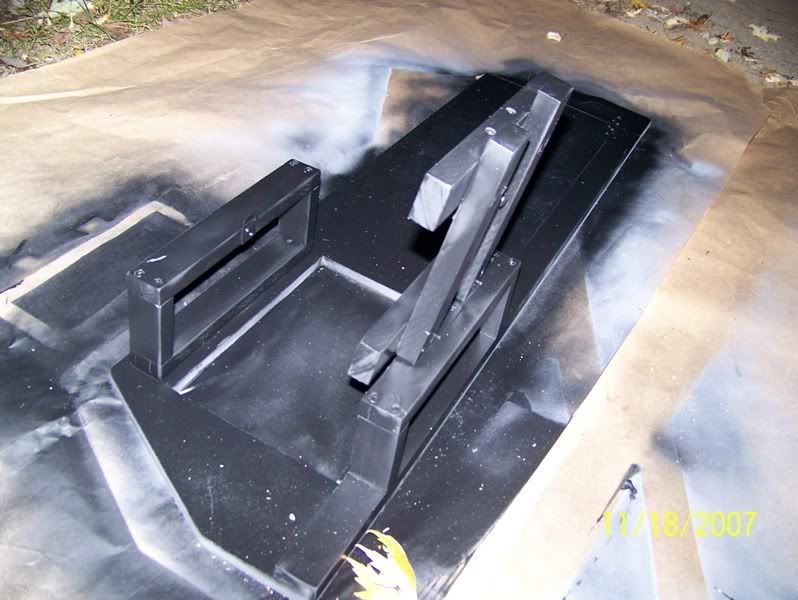
Paint: (also unnecessary, but why not)
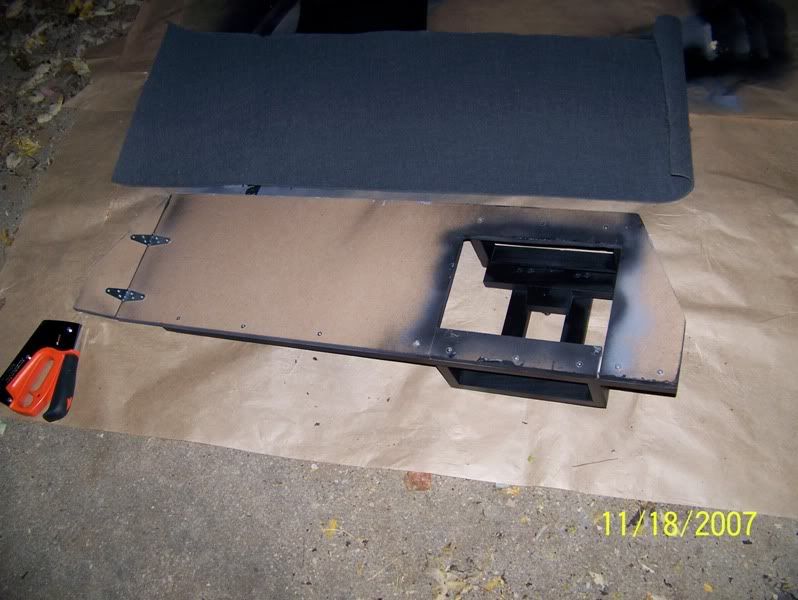
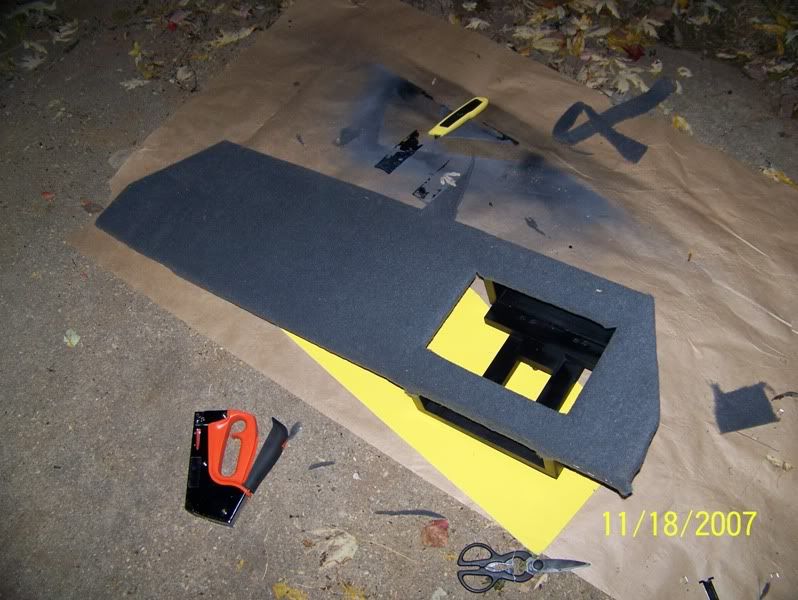
Measure out trunk carpet, cut it up:
Staple:
Cut hole in carpet for amp window:
More staples:
Peel off protective plastic off one side of Lexan, so epoxy can stick to it. Cover majority of that side with painters tape to protect it from epoxy/dirt/scratches during install:
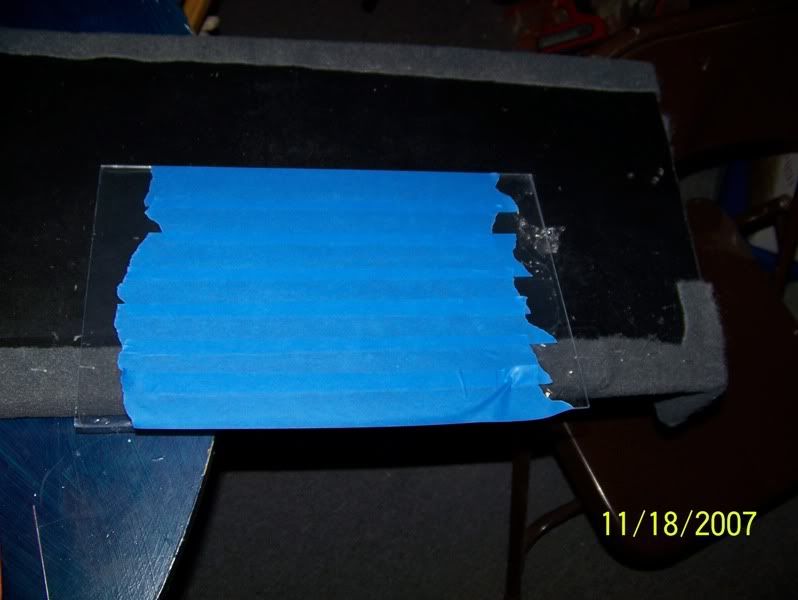
Epoxy Lexan onto inside/backside, clamp, let sit overnight:
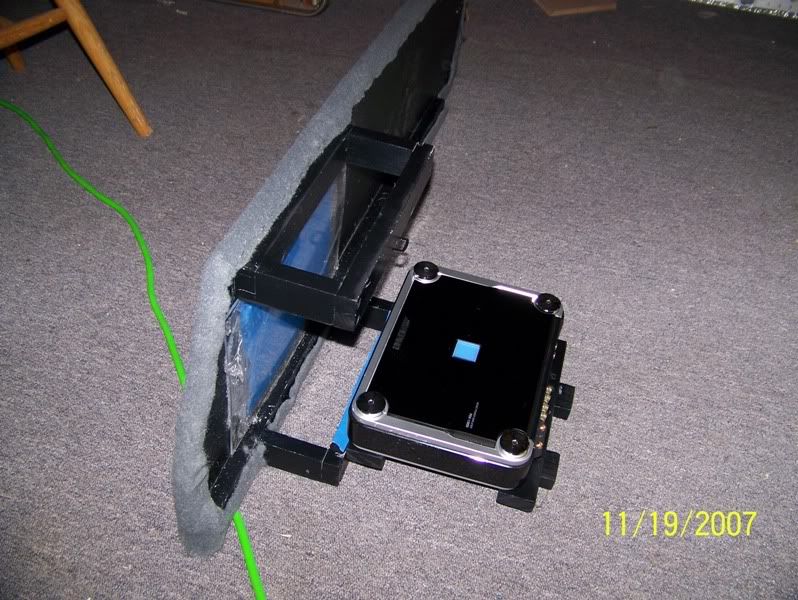
Install amp:
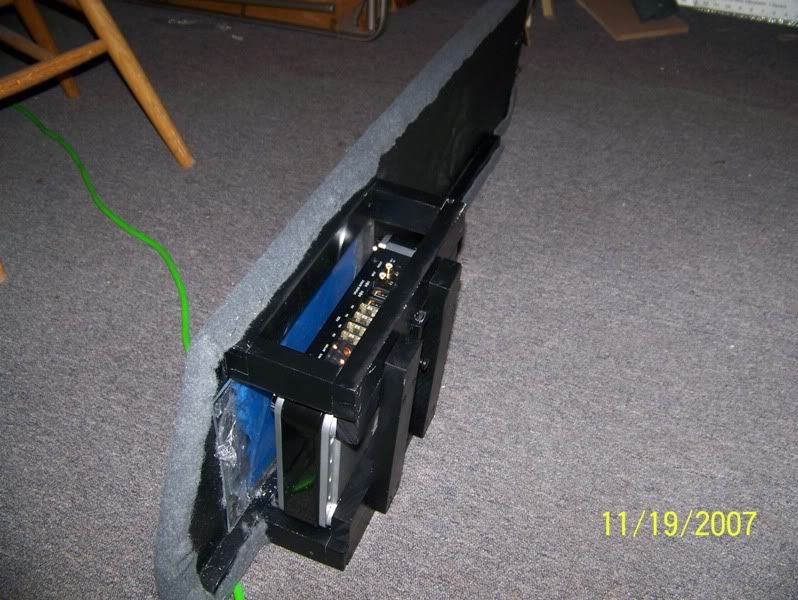
Yep, hinges still work after the paint:
Done:
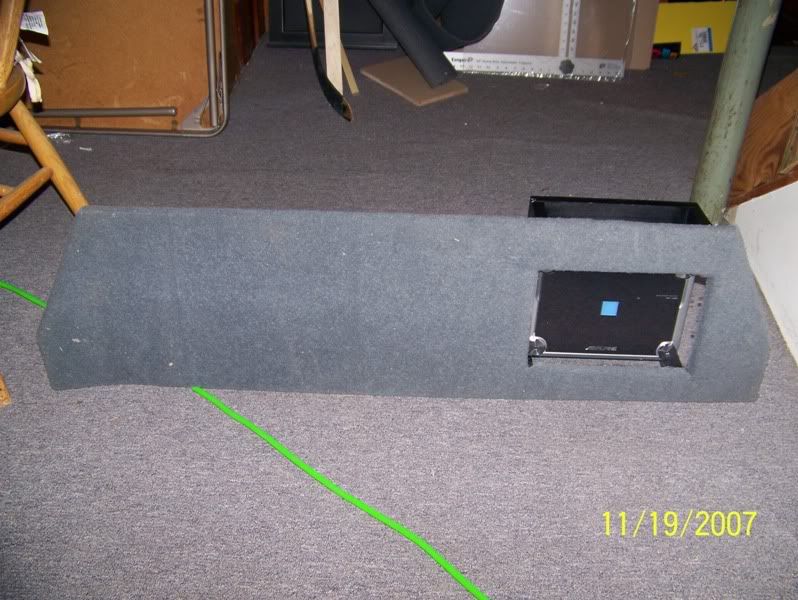
Closeup:
Actual Installation:
Stick in trunk:
Hinges.
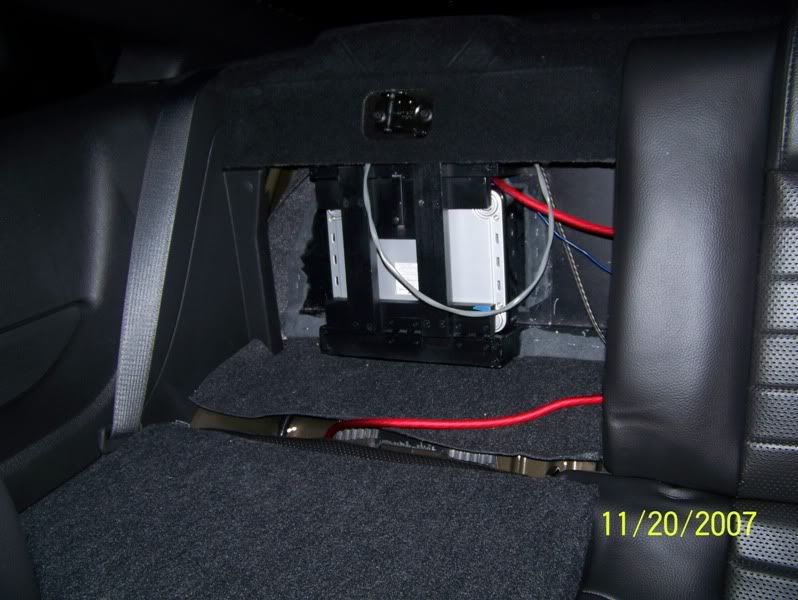
From inside the car:
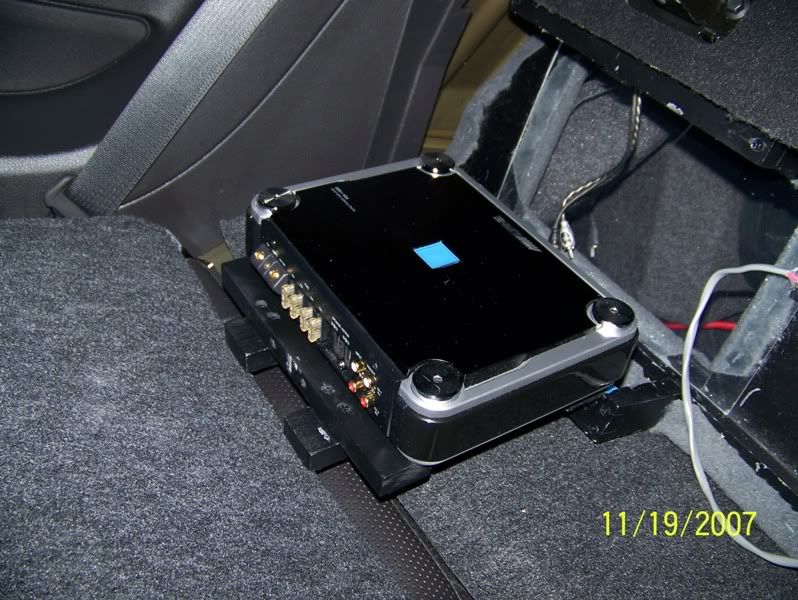
Connect cables:
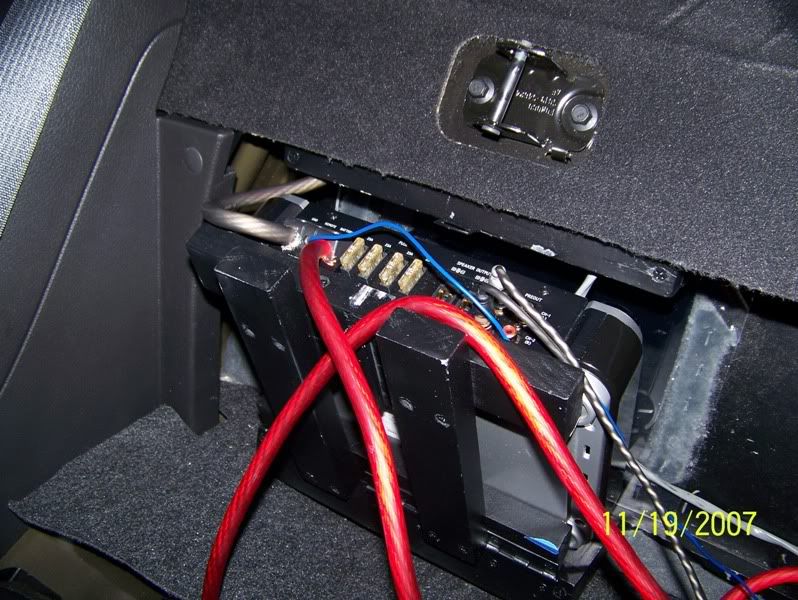
Swing amp up:
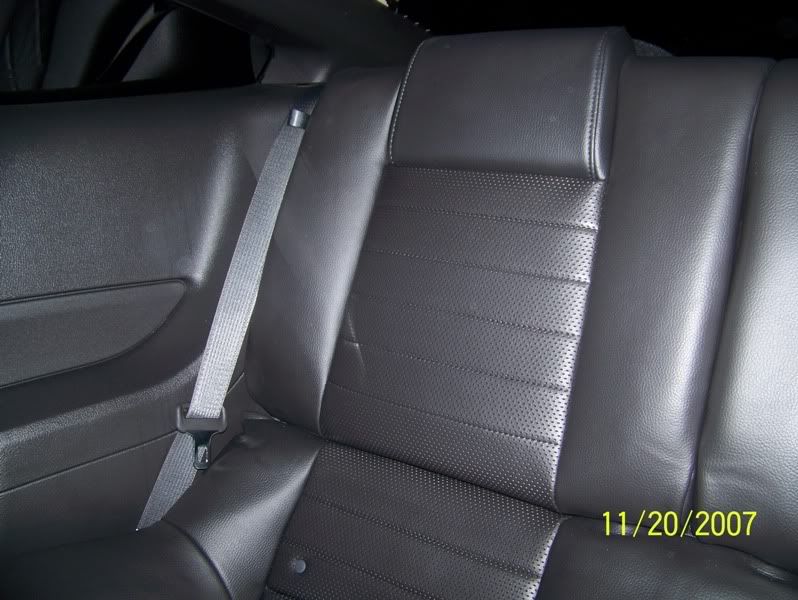
No evidence.
Bam.
Yes, dated 11/03... I actually started this part 2 weeks ago and gave up for a while...
Saw along lines:
Cut rectangle out for amp and install hinges (why they are necessary will become evident at the end):
Cut a bunch of 1x2 spruce up and screw them together. Create burn marks by using Dremel cutoff tool to cut off screws with stripped heads that got stuck halfway in. ****ing Philips heads.
Hey look, it opens for amp servicing:
Primer: (this is unnecessary, nobody actually sees this part except me)
While primer's drying, cut up some Lexan:
Paint: (also unnecessary, but why not)
Measure out trunk carpet, cut it up:
Staple:
Cut hole in carpet for amp window:
More staples:
Peel off protective plastic off one side of Lexan, so epoxy can stick to it. Cover majority of that side with painters tape to protect it from epoxy/dirt/scratches during install:
Epoxy Lexan onto inside/backside, clamp, let sit overnight:
Install amp:
Yep, hinges still work after the paint:
Done:
Closeup:
Actual Installation:
Stick in trunk:
Hinges.
From inside the car:
Connect cables:
Swing amp up:
No evidence.
Bam.
Thread Starter
Joined: May 31, 2007
Posts: 1,200
Likes: 0
From: Washington DC Metro Area
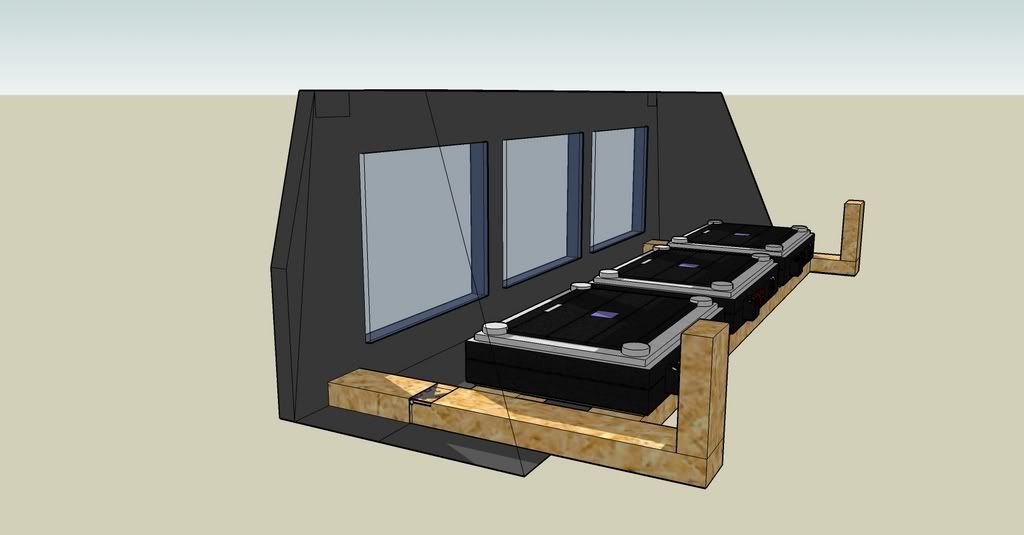
Will he ever stop posting pics?
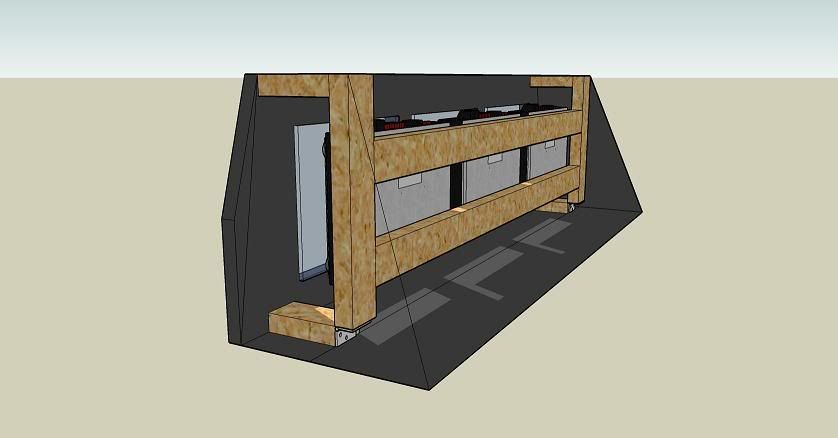
Preliminary 3d sketches of future plans (carputer/etc):
Carputer animated video:
http://s221.photobucket.com/albums/d...andtwoamps.flv
Carputer animated video:
http://s221.photobucket.com/albums/d...andtwoamps.flv


Thread Starter
Joined: May 31, 2007
Posts: 1,200
Likes: 0
From: Washington DC Metro Area
Thanks for the feedback guys.
RE: Carpet
I would love it if all the carpets matched and would not mind wrapping over my sub enclosure and re-wrapping the amp enclosure if anyone knows where we can find trunk carpet that matches our OEM carpet. Any suggestions?
RE: Carpet
I would love it if all the carpets matched and would not mind wrapping over my sub enclosure and re-wrapping the amp enclosure if anyone knows where we can find trunk carpet that matches our OEM carpet. Any suggestions?
Cobra R Member
Joined: January 12, 2007
Posts: 1,875
Likes: 0
Thats a really clean looking install, I like the amplified box.
try crutchfield.com for the carpeting, or even the over priced tweeter.
As far as your sub enclosure goes, I really suggest a bigger box. That kind of power running to a small box like that will blow the sides off in no time, I found that out the hard way when I had 2 subs with those specs each in seperate boxes and both broke.
Cobra R Member
Joined: September 26, 2006
Posts: 2,019
Likes: 5
From: East Moline, IL
Thats a really clean looking install, I like the amplified box.
try crutchfield.com for the carpeting, or even the over priced tweeter.
As far as your sub enclosure goes, I really suggest a bigger box. That kind of power running to a small box like that will blow the sides off in no time, I found that out the hard way when I had 2 subs with those specs each in seperate boxes and both broke.
try crutchfield.com for the carpeting, or even the over priced tweeter.
As far as your sub enclosure goes, I really suggest a bigger box. That kind of power running to a small box like that will blow the sides off in no time, I found that out the hard way when I had 2 subs with those specs each in seperate boxes and both broke.
I would also check crutchfield for carpet, or try a google search.
edit - this looks like it should match. Looks like the guy would probably send you a sample cheap.
http://www.yourautotrim.com/black8.html
Cobra Member
Joined: May 20, 2005
Posts: 1,071
Likes: 0
Thats a really clean looking install, I like the amplified box.
try crutchfield.com for the carpeting, or even the over priced tweeter.
As far as your sub enclosure goes, I really suggest a bigger box. That kind of power running to a small box like that will blow the sides off in no time, I found that out the hard way when I had 2 subs with those specs each in seperate boxes and both broke.
try crutchfield.com for the carpeting, or even the over priced tweeter.
As far as your sub enclosure goes, I really suggest a bigger box. That kind of power running to a small box like that will blow the sides off in no time, I found that out the hard way when I had 2 subs with those specs each in seperate boxes and both broke.
Thread Starter
Joined: May 31, 2007
Posts: 1,200
Likes: 0
From: Washington DC Metro Area
DarkFire:
Thanks for the link, I ordered a sample of each of their 3 trunk carpet colors. I'll let you guys know how they match.
DarkFire/Dynamic:
The box isn't made of MDF. I think it's either fiberglass or something that looks similar, covered in carpet.
Thanks for the link, I ordered a sample of each of their 3 trunk carpet colors. I'll let you guys know how they match.
DarkFire/Dynamic:
The box isn't made of MDF. I think it's either fiberglass or something that looks similar, covered in carpet.
V6 Member
Joined: June 22, 2006
Posts: 76
Likes: 0
Nice Job
Nice work, should look sweet with matching carpet. I have a PDX-4.100 that I mounted upside down on the rear deck. Looking forward to see how you do the car pc.
I just finished up my car pc a few months ago:
http://www.mp3car.com/vbulletin/work...g-install.html
I just finished up my car pc a few months ago:
http://www.mp3car.com/vbulletin/work...g-install.html
Mach 1 Member
Joined: December 14, 2004
Posts: 876
Likes: 1
Thread Starter
Joined: May 31, 2007
Posts: 1,200
Likes: 0
From: Washington DC Metro Area
That looks like the Scosche sub box and if I'm not misstaking it is made of the MDF,not just fiberglass, I have the very first box off the production line.It was sent to me directly from Scosche in 05. I know it's too heavy to be made of just fiberglass,but I could be wrong.this is what the car looked like before the audio up-grade being done: will post new pictures when finished.
Yep, I have the Scosche box too. Did you get the preloaded (sub-installed) version? The weight could just be the sub itself. Before you install your sub, if you look at the edge of the material under the carpet, around the 12" sub hole, it looks like some sort of fiber-glass-like material soaked in resin. It's definately not any sort of wood, but I didn't look hard enough to be 100% sure it was fiberglass.
Thread Starter
Joined: May 31, 2007
Posts: 1,200
Likes: 0
From: Washington DC Metro Area
Nice work, should look sweet with matching carpet. I have a PDX-4.100 that I mounted upside down on the rear deck. Looking forward to see how you do the car pc.
I just finished up my car pc a few months ago:
http://www.mp3car.com/vbulletin/work...g-install.html
I just finished up my car pc a few months ago:
http://www.mp3car.com/vbulletin/work...g-install.html
Before I saw your setup a few months ago, I originally planned on getting an integrated touchscreen/dvd-rom/am-fm-radio/amp for the "head unit." (http://www.revo-sys.com/Double_DIN_V...37aa8db1e3c193)
But you inspired me to grow the ***** to try to custom fabricate a Xenarc or Lilliput panel into the double DIN hole and have a serious OEM look, along with external amps/etc. Progress so far: I've had a replacement plastic console cover sitting on my shelf for the last few months, waiting for me to do something with it. I'll let you know how that goes.

