Matte Silver and Carbon Fiber Wrap
Back in April, after I finished installing my new seat leather (link), I decided to go for a matte wrap. In May I ordered 55ft of 3M 1080 Matte Grey Aluminum from Auto Vinyl Solutions, a 3M squeegee, and a utility knife. I picked up a heat gun at Home Depot and a friend and I got started on it the Saturday before Memorial Day.
I used to do partial wraps and window and that kind of thing, so I'm familiar with the process. The difference here is that you lay these premium materials down dry, and they use a pressure sensitive adhesive with air release channels. That means it's more forgiving, not to mention that you can stretch it with heat without compromising the finish or appearance. But even that experience only helped so much. I'm not going to give a complete rundown of the process...you can get the idea from youtube vids and a few really comprehensive write ups out there. This one is great...lots of detail and background, variety of tools, in progress pics, and lessons learned. But if you're using the 1080, DO NOT apply wet. It will affect the adhesive and the drying time. This material is thick enough that if you make a mistake, you can pull it up, and try again...as many times as necessary. There's no need for a wet application. So, my advice: 1. 2 people, at least, is da*n near mandatory. Don't be a hero. 2. Make sure you remove things like antennas, tape stripes, and windshield spray nozzles before you start. You'll regret it if you don't. 3. Every install has seams. There's a wrapped Ferarri in my apartment garage that's been matte grey and matte white since I've lived there...both jobs had numerous seams. Just plan them out so they are small and mostly hidden. 4. Get a felt wrapped squeegee to protect the vinyl, especially if you're using the textured carbon fiber. My unwrapped 3M was fine for the grey, but left creases in the CF on the roof which are visible in sunlight. 5. The front bumper is a PITA. It can be done, but you have to be more patient than any other part of the car. It helps to remove it and take it inside. 6. When you start a body panel (other than the bumpers) remove the backing from the entire piece of vinyl and lay it out on the entire panel. I saw recommendations for both this and for only peeling back a portion at a time. We tried both methods, and peeling the whole piece gave better results. 7. Use heat sparingly. If you're not going around a corner, or the fender flares, there's no reason to heat the vinyl. Yes, if you heat it, you can remove any small creases or folds you've created, but every time you heat it, you'll stretch it just a little, and it will come back to haunt you. You can see evidence of this on my hood. 8. Be patient. This can take a long time. The hood took 3 hours. Pros can do it in 45 minutes, but we were far from pros. We rushed, and it led to some ugly stretch marks that are really apparent in direct sunlight. I'll add more as I think of them. The plan was matte grey body, with CF roof, mirrors, gas door and door handles. Sorry, but there are only a couple of in progress pics.  The first day took 6 hours to do the hood, roof, and trunk. Learning the process takes time, but you'll start going faster. We forgot to take the spray nozzles off the hood, and so ended up with some nasty wrinkles where it stretched and wouldn't lay down after cutting.  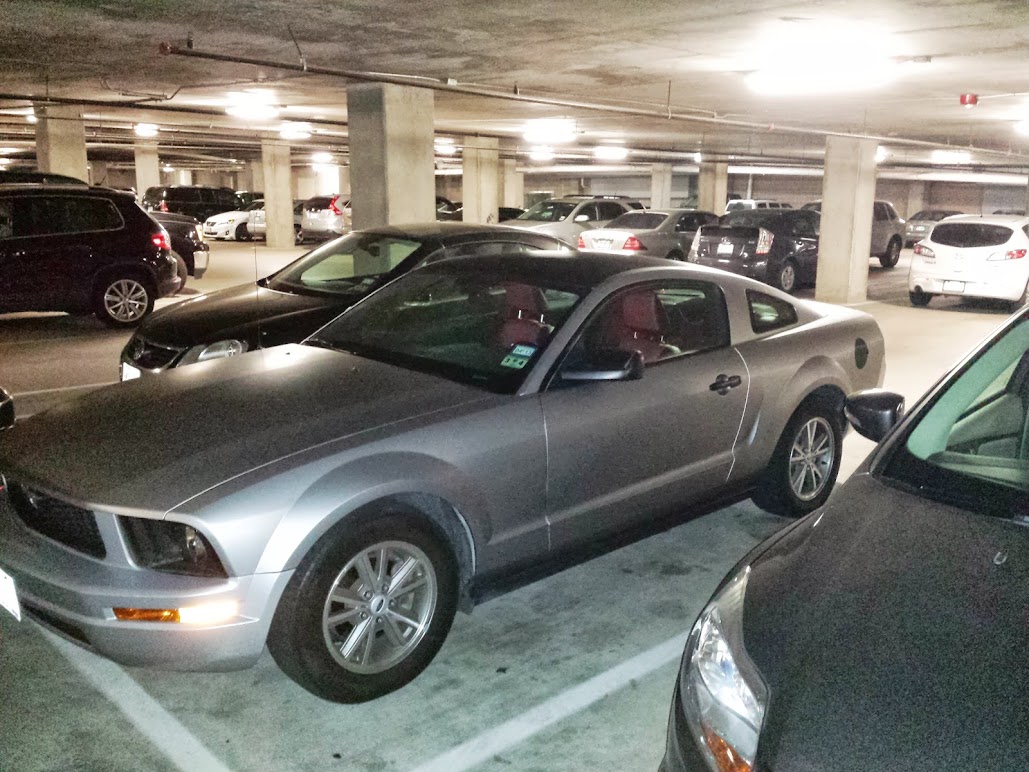 The CF gas door looked great, but the material was too thick. It started to tear the material on the fender on the left, near the hinge.  At this point (the day after I got these wheels) I was parked on the street in Dallas and got dinged. There was damage to the fender and door on the driver's side. After paint and body work, the insurance covered professional replacement, which I gladly accepted. I decided to leave the gas door grey and pick up one from AM soon. There were a few seams: one above the antenna (about an inch), one behind each door handle (about 4 inches...the pro who replaced the driver's door didn't need one, though), one below the decklid emblem, and one on the front bumper where I screwed up and overheated the material. I took it to Wraps1 in Fort Worth for the repair, and talked with the owner. I told him I did it myself, and pointed out the mistakes. He'd already inspected the car and said he hadn't even seen them, and that wraps are meant to be evaluated from a distance. His shop's work is impeccable, so he wasn't copping out on quality, but letting me know what the standard is. He said mine (with the exception of the hood) would be acceptable coming from an installer. Speaking of the hood, yesterday I took the last of my carbon fiber and some Knifeless Tape, and laid a stripe on the hood. The texture of the CF is enough to hide the wrinkles around the spray nozzles. In this shot you can see the streaks and stretch marks in the hood from impatience and overuse of heat.  Overall I'm really happy with the outcome. I will, in the next couple of months, strip the vinyl from the hood and redo both the gray and the stripe, but for now it looks great. |
Awesome job. It looks really great. I had applied many stripes with the wet method, but recently did my stripes with the dry material, in a matte gold carbon fiber. It was a different experience, and my first time doing it was pretty much exactly as you wrote it up here.
|
Originally Posted by Skeetch11
(Post 6698385)
Back in April, after I finished installing my new seat leather (link), I decided to go for a matte wrap. In May I ordered 55ft of 3M 1080 Matte Grey Aluminum from Auto Vinyl Solutions, a 3M squeegee, and a utility knife. I picked up a heat gun at Home Depot and a friend and I got started on it the Saturday before Memorial Day.
I used to do partial wraps and window and that kind of thing, so I'm familiar with the process. The difference here is that you lay these premium materials down dry, and they use a pressure sensitive adhesive with air release channels. That means it's more forgiving, not to mention that you can stretch it with heat without compromising the finish or appearance. But even that experience only helped so much. I'm not going to give a complete rundown of the process...you can get the idea from youtube vids and a few really comprehensive write ups out there. This one is great...lots of detail and background, variety of tools, in progress pics, and lessons learned. But if you're using the 1080, DO NOT apply wet. It will affect the adhesive and the drying time. This material is thick enough that if you make a mistake, you can pull it up, and try again...as many times as necessary. There's no need for a wet application. So, my advice: 1. 2 people, at least, is da*n near mandatory. Don't be a hero. 2. Make sure you remove things like antennas, tape stripes, and windshield spray nozzles before you start. You'll regret it if you don't. 3. Every install has seams. There's a wrapped Ferarri in my apartment garage that's been matte grey and matte white since I've lived there...both jobs had numerous seams. Just plan them out so they are small and mostly hidden. 4. Get a felt wrapped squeegee to protect the vinyl, especially if you're using the textured carbon fiber. My unwrapped 3M was fine for the grey, but left creases in the CF on the roof which are visible in sunlight. 5. The front bumper is a PITA. It can be done, but you have to be more patient than any other part of the car. It helps to remove it and take it inside. 6. When you start a body panel (other than the bumpers) remove the backing from the entire piece of vinyl and lay it out on the entire panel. I saw recommendations for both this and for only peeling back a portion at a time. We tried both methods, and peeling the whole piece gave better results. 7. Use heat sparingly. If you're not going around a corner, or the fender flares, there's no reason to heat the vinyl. Yes, if you heat it, you can remove any small creases or folds you've created, but every time you heat it, you'll stretch it just a little, and it will come back to haunt you. You can see evidence of this on my hood. 8. Be patient. This can take a long time. The hood took 3 hours. Pros can do it in 45 minutes, but we were far from pros. We rushed, and it led to some ugly stretch marks that are really apparent in direct sunlight. I'll add more as I think of them. The plan was matte grey body, with CF roof, mirrors, gas door and door handles. Sorry, but there are only a couple of in progress pics. The first day took 6 hours to do the hood, roof, and trunk. Learning the process takes time, but you'll start going faster. We forgot to take the spray nozzles off the hood, and so ended up with some nasty wrinkles where it stretched and wouldn't lay down after cutting. The CF gas door looked great, but the material was too thick. It started to tear the material on the fender on the left, near the hinge. At this point (the day after I got these wheels) I was parked on the street in Dallas and got dinged. There was damage to the fender and door on the driver's side. After paint and body work, the insurance covered professional replacement, which I gladly accepted. I decided to leave the gas door grey and pick up one from AM soon. There were a few seams: one above the antenna (about an inch), one behind each door handle (about 4 inches...the pro who replaced the driver's door didn't need one, though), one below the decklid emblem, and one on the front bumper where I screwed up and overheated the material. I took it to Wraps1 in Fort Worth for the repair, and talked with the owner. I told him I did it myself, and pointed out the mistakes. He'd already inspected the car and said he hadn't even seen them, and that wraps are meant to be evaluated from a distance. His shop's work is impeccable, so he wasn't copping out on quality, but letting me know what the standard is. He said mine (with the exception of the hood) would be acceptable coming from an installer. Speaking of the hood, yesterday I took the last of my carbon fiber and some Knifeless Tape, and laid a stripe on the hood. The texture of the CF is enough to hide the wrinkles around the spray nozzles. In this shot you can see the streaks and stretch marks in the hood from impatience and overuse of heat. Overall I'm really happy with the outcome. I will, in the next couple of months, strip the vinyl from the hood and redo both the gray and the stripe, but for now it looks great. everything you've done so far looks great. if it where possible you should wrap the side skirts in the carbon fiber too!! |
Thanks guys.
Brian - yeah, the first time through is just awkward and slow. The whole process for the stripe (measuring, laying tape, checking and rechecking...pulling up all the vinyl 2 minutes in because I forgot the nozzles again) took about 40 minutes by myself. So I definitely got faster after some practice. Skoundrel - I'd considered the CF for the skirts, but they're tough to get clean and they aren't smooth, so they won't adhere as well. And that material is expensive. I'll probably leave them matte, and get one of the textured chin spoilers to finish it off. |
Originally Posted by Skeetch11
(Post 6698541)
Thanks guys.Skoundrel - I'd considered the CF for the skirts, but they're tough to get clean and they aren't smooth, so they won't adhere as well. And that material is expensive. I'll probably leave them matte, and get one of the textured chin spoilers to finish it off.
|
I really like the color! I think your next mod should be lowering springs, it'll make the car look much more aggressive IMO
Nick C. |
and.. i love the new wheels too. :)
|
do anything else lately??
|
| All times are GMT -6. The time now is 11:28 PM. |
© 2024 MH Sub I, LLC dba Internet Brands