When you click on links to various merchants on this site and make a purchase, this can result in this site earning a commission. Affiliate programs and affiliations include, but are not limited to, the eBay Partner Network.
Wow @houtex what a journey! You most definitely have the patience of a saint, that's for dang sure! I'm tired just reading about your adventures, I can't imagine having to go through what you did.
I'll be glued to my screen to see the outcome of your journey to get Awesome up and running once more.
What if... and hear me out on this... what if I just... never ever remove the K member again? Like... I dunno... weld the dang thing in? Like the old cars used to be before they came up with 'go from underneath' engine mounting manufacturing?
And then... what if I just... I dunno... put in a tubular K member from BMR or such? With more clearance than the stock one doesn't have for oil pan removal? Weld that in because racecar?
I mean...
...
... yeah, maybe that's a little silly. Just for a bolt. I'll just grind at the problem later as planned... I guess I'd just like some Tinkertoys...
What if... and hear me out on this... what if I just... never ever remove the K member again? Like... I dunno... weld the dang thing in? Like the old cars used to be before they came up with 'go from underneath' engine mounting manufacturing?
And then... what if I just... I dunno... put in a tubular K member from BMR or such? With more clearance than the stock one doesn't have for oil pan removal? Weld that in because racecar?
You know what my stance is on things being broken and performance parts...
I'm surprised its stuck in there. With the head sheared off it should be free. I had a bolt snap off on my diff and once I pulled the cover off I just grabbed what was sticking out and unscrewed it. I have had bolts seize in, but you had these out and were tightening everything down. :shrug:
so is the 1/4" bit that snapped off still in there?
Couple thoughts. Have you tried drilling it out with a left-handed drill bit? The act of drilling into it will try to unscrew it. Another thought, if you have a welder, or know somebody who does, or if you can limp it to a shop, maybe somebody can tack a metal rod to the bolt and you can unscrew it that way.
In order... The bolt is stuck up inside past the frame. It's flush with the sleeve nut start, even in a little bit. So anyway I can't grab it. I wish I could, I have plenty big vice grips to deal with that! Surely is the confusing part. I admit I was using an impact, but I was just on 'spin it in', not 'hammer it home'. I have a theory about that... later.
It's just the end of the bit. Not much. But enough. Cobalt vs cobalt won't get me anywhere, and HSS even with titanium ain't gonna cut it either. I'm getting the Dremel Tungsten cutters and I'll get that nubbin out and continue with the project, I'm thinkin'.
I have. No dice. Just spins in there. And being HSS, it doesn't want to cut either. I may try again though.
That's the plan now. Forget that particular idiotic thing and otherwise finish this reclamation project. Get her otherwise back together and running, then take her somewhere to figure out that bolt... if I don't figure it out first, that is. I'm gonna see first as a last item thing to try to get that out before I take her off the jackstands. See if those Tungsten Carbide cutters on the Dremel (and I'll buy more than one, and more than one type and/or side, just to cover bases) can eat that drill bit out. If so, we can proceed.
I may, if that works, try an extractor. I may also try to pound a slightly oversized for the hole allen wrench in the thing and try to spin it out with that. Gonna need a hardened allen key though... Maybe an impact allen bit... I dunno. I got ideas, people, but I don't wanna have to keep drilling hardened metal outta there, y'know?
I work at a dealership, and I'm figuring last resort I sweet talk someone at the body shop to maybe attack this. I'm bettin' they know.
First things first at this point: Build the engine, get her running and driving... ish.
---
Thoughts on the bolt snap: I see Bill at CJ Pony in the BMR tube K member replacement video using impacts on the nuts and bolts, zipping them snug and then hammering and THEN torquing. That's the confusing part. But then I did have a difficulter time getting that particular bolt out of that particular sleeve nut. Or maybe it was the other bolt. I don't know. Threads weren't boogered up at all. Just... I don't know. They were ALL a bit more work until nearly out, party the loctite they used, partly age... they haven't (ostensibly) been removed since 2006, after all, that's 14 years of fastenating, so...
But then... my K member seems to show some pulling from some previous action before I got her, I think. The holes in the bottom show where they've been yanked on, and hard. I compared to a '14, and that metal is smooth. Same (overall) K member.
So something happened in her past, I think, that isn't on the Carfax. Somebody may have been tugging on the K member, and maybe, just maybe that caused a fracture point in the bolts heads. Given the geometry and such, it would *not* surprise me at this point. Where that bolt broke, exactly, makes me wonder greatly if I'm right. Not that it really matters, it is what it is now... I may get three more of these bolts on order, just in case... I probably should also chase all these sleeve nuts...
...if I dont just weld the thing in and never be able to drop it again. Still waffling on that idea...
/And still sorta thinkin' about that BMR K member... it's 20 pounds less or something, pretty, and I'd not have to worry about that oil pan issue again... I think...?
Update on moodishnessying things: I'm not rushing anymore. Not that I was... well, I was here and there... but I'm not anymore either. I'll be done when I'm done, because I'd rather be right than rush and get it wrong.
So, with that, updates might not be as ludicrously long as usual.
*everyone claps, hollers positively, and carries on wayy too giddily at that last statement*
Well... allrighty then, be that way!
---
Today I got the engine about where it needs to be to start the reassembly process!
I first had to reorganize the garage again. I got a little out of sorts from the drilling last week. Just left things in a pile, walked away in a lil' huff and didn't worry about it. But come time to do things(R), I had to clean it up, because that won't do. I gotta be better about that, but... "frustration is the path to the Meh side. Frustration leads to sad, sad leads to tired, tired... leads to lazy." - Master Mechanic Yoda.
So I got everything cleaned up, figured out, sorted and put in place, ready to work. Here we go...
Left side first, because easier access over the fender. Pretty much how it's going to go, left first to figure out how it goes, then right side right after. Wiring harness is in the way over there, gotta work around it. Not bad, just... a lil' annoying for the middle back of things.
Anyway. Cam caps come off front, back, front mid, back mid, middle. In that order. Lower bolt, then upper bolt. I loosened them up a little in order, then a bit more in order, then spun out the bolts and pulled the caps off. Pretty as you please, really, the front cap being the only one to be sorta attached, but not a big. Rest of them just popped right off. Cam straight up (heavy/dense lil' beast) and everything squared away, marked/sorted. Would you look at all that stuff...
I also took out the phaser solenoid, then covered up all the innards. I took my time and cleaned the valve cover surfaces, best I can, and where it needs to be. Looks as good as it can be, to me!
I admit the nasty stuff above the gasket line is there, but it'd have to be seriously attacked by mean and nasty methods which frankly I'm not gonna employ. It's tarnished/stained from being exposed, and it's just fine according to 'them' the way I have it here. Sending it, let's see how much she leaks.
I then took the shop towel covers off rather adroitly, keeping the scrapings from getting in the innards. I then took out the followers, leaving the lash adjusters in for the moment. Then I did some cleaning of innards. I'm sure somethings of hopefully not-big-deal got into the pan, but the filter should catch it, and I'll be changing the oil fairly straight away too. Like... I dunno, immediately after getting it to the oil change place or something, maybe 20 miles. Just in case. Then again in 500. But that's later. Anywho, I cleaned all the things I could find and get to, and hopefully I did a yeoman's job overall to this point of keeping things clean. 181K and 14 years, you get teeny nasty bits, you clean things out, and you deal, I suppose...
The end result is a head that's ready to be rebuilt, the cam, towers and caps all look normal and feel nice and smooth (even though you can see the wear grooves, it's more like visual texture, not feeling texture), and it's almost brand new in there, really. Quite pleased overall. I oiled the pedestals just to be sure, and then I covered it all up really nice so that it can stay that way until it's Time. May be a minute, more later. Goodnight, sweetheart.
At this point I had a grandiose idea that "I bet I can start installing things in a minute!" so I went ahead and put the new lash adjusters and followers into a container and put fresh oil in it. There they will stay... until called for... Thank The Maker! This oil bath is going to feel SOOO good!
Look at all those bubbles after just a few minutes! I put a cover over them to keep them from harm as they enjoy their bath. Oh, and while I was a little loathe to just jumble all those things in there together like that, they actually come in the packaging in two little bags all jumbled up. So much for precision and all that. So I figured putting them in this container like won't be a big deal either. Just be careful extracting them, eh?
Repeat all that overall mess of disassembly and cleaning on the right side... with one exception. The caps on the right side did *not* want to come off, except the rear one. That wasn't an issue. The first, big one was a little tough, but I didn't feel it was tougher than the other side, given its job. It came off, then I got the rear one off like I figured I should, then... man. This cap is stuck... Had to sorta rock/pry it gently with the cap bolts in them to get them broke out of their little jails, all three of the middle ones. Also, the middle cap bolts were not all that nice coming out. I may have to chase the bolt holes, and I am NOT liking that idea... but it'd also figure, given the history of this project...
The reason for the stickiness of the caps was this: Ew. Gross.
I have NO idea how the heck varnish got all up in between the holes and the dowels of the caps, but... there it was. Glued them in. Nice. And let me tell you, cleaning them out was... fun. Brake cleaner in a lil' container, and Q-Tips. The real kind Q-Tips, not them generic ones. Only the best for my ears... er, I mean, cap cap dowel holes! Took quite a few of them to scrub out the varnish. Soak the tip, apply the tip to the varnish, repeat... then use a clean one to scrub out the remnants. And then blow the things out (the bores are not through to anywhere, thankfully) and you eventually, mostly, but not completely, wind up getting them nice and clean! Time consuming and not exactly comfortable work, but it's not terrible, just a thing. I'm probably going to do the other side just to be sure. I want a smooth install, thankya.
So, both sides disassembled, cleaned, inspected, lubed... that's all I got done. Oh, I put the caps and cams in a safe place... on the trunk of the car, in boxes... and I oiled up the cams really good so they should survive there no issues, being steel and all, yes? Yes.
Oh! I found this on the right side too! You sneaky devil you...
Yup. Thing was hiding. The last of the cruddi. All those lil' dots of dirtiness were cleaned out, I assure you, as well. That little thing could have caused some fun if it had gotten in the spring, maybe... Maybe dodged a larger caliber bullet than the one I took already...
And that's about it. We'll see how it goes tomorrow and what goes on...
---
I must admit, the right side didn't look nearly as good as the left side on the pedestals and caps. Like a *touch* more scoring on the right. But they feel pretty much the same. The cams both look the same on the.. um... IDK, 'mount lobes'? I'll have to look it up or something, or maybe one of you fine people can just blurt it out... Anyway, I feel it's probably ok, and I'm being a bit paranoid, which is normal.
At this point, assembly of the engine timing could start. It could. But it won't. Everything is 'safed' regarding the engine, and the cams and all that. They won't be getting hurt by not going back together just yet. The reason being that the timing cover and the valve covers must be addressed now. The valve covers are filthy outside. Perfect inside, really. And the timing cover needs to have the front seal beaten in. And all the seals of the covers and the valve cover bolts redid. And that's what I'll be doing tomorrow before the Superb Owl, which I'mma watch with my pops. That's not negotiable. Like I said, not hurrying, especially when these cams are gonna be quite the job to get back in with those followers... 12 of them... individually installed... both banks... 24 total...
And since I gotta do the covers, that sounds like it's about the right time to do that and do it good. So that'll be what I do.
Thing is... Norminal valve cover bolt and flange...
That's what the all look like on the right cover. And mostly on the left. But there's three of them... ...then it exploded. Sorry about the blurry, dang cover just can't sit still, y'know?
I have NO idea what the heck's going on. One near the front, two near the back. I don't think that's right. Am I talking a new valve cover?
And if so... well... But that seems a bit much, don'tcha think? And given the condition of the thing, a bit wasted. I mean, I try to keep Awesome clean, but that engine is just so... I dunno... *crannyish*. and a daily just gets dirty. So these nice things would be not-nice pretty quick So it'd probably be best to just go to a junk yard and find a left side cover and be done with it... Kinda interesting that new Dorman (no) ones from Summit, together, are the same price as these. And if I did get them, well... I have a spare valve cover gasket set, I suppose. Hey, who knows, maybe I'll need it in the future. The far far future, thankyouverymuch...
One last thing. Check this, it really freaked me out, man... What the heck is that? What the HECK is that? WHAT in the HECK is THAT dang thing? - Steve Martin and Bill Murray
So... you see this bore, where I pulled a lash adjuster. And in that bore was some oil, sure, and this black stuff! What is that black stuff in there? So I go and get to cleaning it... and it's not coming out! That can't be good. I mean, there's not supposed to be black crud in there... So I pull another lash adjuster. MORE BLACK STUFF! What's happened in there!? What the heck have I run into now?! I mean... C'MON, MA...
...wait...
oh.
That's the sinkhole the oil comes in to oil up the lash adjuster. It's just dark in there, so it looks black. Now you can see the journal behind the the raggedy hole. Real fancy work there, Ford, looks precision as all get out!
And people are worried about aluminum in their oil pan flaking off. Ford isn't, obviously. The things I've found on this adventure... Heh.
---
But hey! Excepting that frame bolt... and I still have ideas/stuff to try on that, ain't worried about it no more, and it'll be LAST... There's light. I see actual light. It's waaaaay up in the distance of the tunnel, but it's definitely there! Very exciting. Just a few more whiles to go...
<End of Update>
/So much for 'not ludicrously long'... but maybe it's the pictures...
//And to be honest, if I can get the valve covers (disregarding the explody flanges and just goin' with it) all ready to go, I may just throw the cams on anyway, because it's 10 bolts and they'd be safer than sitting on a piece of cardboard all oiled up, I'd think. But I'm ok either way with things. Them flanges got me having a hecka concern...
Yeah, about that... But first, I'm glad someone's thinking of me!
Well, ok, you can admit you're thinking of Awesome, poor girl.
---
Last weekend I screwed up my meds and wound up not doing anything because I didn't wanna get hurt. I was worried I'd faint or something and then Bad Things, so... yeah. Dumb mistake, thankfully, nothing happened to speak of, and I was real careful to ensure it didn't. I'm much better now, just the same 'ol (shaft wrapped with an inclined plane)y me. And work also called, yay. That was fun. I've fixed the problem with the pills so I can't do that again without *really* trying. First time I messed up like that, hopefully the last.
The weekend before my own internals weren't good on Saturday. And then I wound up workin' with my parents on a computer that my mom can talk to for Google searches, and it'll read the results back to her. And then she can pick the link and it'll read the page to her too. And she can go back and forth and stop and start and restart all that stuff. Dad's been working with something to do this, and it works pretty good for her. She can't see well, and the internet isn't really set up well for visually impaired people, so you have to play games to get things to read... He may have found a way to make it work semi-consistenly, using the number pad and a bit of orderliness... Not all that good for completely blind people, but for her and her limited sight it actually was working well! I'm glad I could help. Donated an all in one I had wound up with for reasons, with a big touch screen, and also did a few helpful tricks on it to fix a couple of oddities regarding the whole thing... and tada, she was using it! Totally worth waiting another weekend, I think, which wound up messed up too as you saw, but still. They have the Alexa thing, but it's apparently really really dumb when you ask it things.
The weekdays themselves are work work work, and it's a bit much to start doing anything to the car given my schedules overall, and this and that and... Yeah yeah, everyone has 'em. And I said I ain't rushing. Any work that's gonna get done is gonna get done right. I ain't snappin' no more bolts or other equivalent 'darnits'. Which also means no 1-2 hours at the end of a long day before I have to go to bed, and that's about that on that.
---
SO. This weekend. HOPEFULLY, things happen. I do have an resemblance of a plan... Fingers crossed and such. I'll let y'all know!
Wait... that doesn't quite sound right... Eh, I'm leavin' it.
---
Captmanders Log, Garagedate 3-14-2020. The Boobyprise has arrived at... here. Yay us. houtex out.
---
I think I'm just putting filler in so it's not such a measly update. Get to it, me. Yessir, on it.
Today was a 'not much' day regarding this. It's been a 'not anything' set of days regarding this because... reasons. Excuses abound, but suffice to say if I wasn't doing it, there was a few great reasons.
Ok, good reasons.
Well, maybe just allright ones. - Captain Malcom Reynolds of the Firefly class ship Serenity
---
I got one thing done. The timing cover.
I have to be honest, it was scaring me. I was sorta afraid I'd break it or mess up the flange where the front main seal goes as I beat the old one out and beat the new one in.
But first... previously to this day at some point in the past, I'd gone to Helene Fran O'Toole's.. then the OTHER Honor Fight Tours, and picked up the bigger ball joint tool set. All to get exactly ONE (1) piece of it:. The 2 1/2 (I think? Memory's hazy) inch receiver cup. The exact purpose of which was to pound in the new front seal into the front cover. I think I also went to Norbert Twins to see if I could find a big ol' socket, but MAN... they were hella expensive, as much as the ball joint kit! So thanks, but no.
I'm sure I did other things, but that'll do. Back to today. I finally got a little time to deal with the timing cover. It was *nasty* with grime and oil and sludge. So that took a minute. It's all cleaned up now... well, good enough, I'd need a lot more time, and I didn't have it. I may degrease it with proper stuff later, but I did a good enough job I'm not concerned with it, I'm sending it.
All cleaned and blown dry, I then set up to pound out the old seal. Deep breath... Took a mediumish punch and tapped the old one out. No damage to the flange, yay, I'm not totally incompetent, which is what I was afeared of. :yay:
I then went about taking out the RTV from the various places and ensuring the channels for the three seals would be ready to go. I used plastic razor blades, and lemme tell you, they're a treat. I think I mentioned them before. They wear out really quick, but they work fantastic on that aluminum. I'll be keeping those in stock for sure. I also had to resort to a small straight pick here and there, and a very *very* small torx screwdriver which really worked better than I thought it would. Used the sides of the torx end to scrape gently where the razor and the pick wouldn't work. One place wound up needing a small screwdriver. Whatever it takes, yeah? I got it all done, channels are ready.
I then cleaned the flange again, just to be sure, lathered it up with some dielectric grease, lathered the new seal with, guess what, yep, dielectric grease, and then, using my new ball joint receiver cup and a decorative red oak oval which happens to be flat and dense enough and large enough to cover that cup, proceeded to pound the seal in. The cup is *perfect*, it goes over the inner lip of the seal, like a socket would on a nut or bolt, and is thin enough that it'd just about go through the timing cover flange, and properly pushes on that seal. *Fan. Tastic.*
It was good it did this, because guess what else? I drove it in too far. JUST a smidge on one side. Not really sure how, it wasn't moving then *wham* it moved a LOT... grr...
Flipped the cover over... :hm:...
*Ccarefully* positioned the cup on the seal's 'underside' (again, it's *perfect*. I can't be happier about this.) And... tappy tap tap....
TADA!
Seal's in and perfectly aligned and set in the cover. Heck, I even aligned the thing 'up and down', as there's some witness mark on the outside, like the halves of a mold or something. So I put those lines ' north and south', because I like it.
Pic related: It's a little... ok a lot... blurry, but there it is. Glorious, right?
Aand... that's it. I put that in a safe, covered place for now.
I was going to attack the valve covers, but it got a little dark, being cloudy, outside, and also drizzly. I need to be outside so I can properly degrease these messy things before I work on them, so I can spray them down and not get it everywhere in the garage, so.. yeah. Guess that was the cue to put things up.
Hopefully I can get them valve covers done tomorrow. I really want those done. If I can get those done, I can put the covers on and off temporarily (being mindful of the main seal, of course, and not tight, just there) to protect the oil pan and other bits I don't want stuff in... Be a lot easier to deal with.
Captmander's Log, Supplemental, the next day, Garagedate 3-15-2010.
(REMINDER: At the beginning, I told y'all I am doing this for cathartic reasons, not a tutorial regarding extracting pieces of a broken timing chain guide and an entire timing redo on a 4.6L/5.4L 3v Ford motor. You want that, go check out FordTechMakuLoco on Youtube, the four part series, the entire reason I even choose to attempt this. You're welcome, both for the mention to send you to and the reminder of catharticism goin' on here. Thanks for watchin'.)
---
Today was... stupid. I didn't get up. I just... didn't want to. I have no other reason, just that. Sorry. I was dreading what I had to do today. Irrationality is a thing in my head...
I went to the stores.
It was... stupid. I said that, but it bears repeating. I just wanted some Coke Zeros as I was gettin' low, I could use a refill bottle of hand soap as my current one is not long for this earth in quantity, my big bottle of dish soap is less than 1/4 to empty, and I need pecans and cashews, because it turns out they're pretty good to keep one... well, how should I put this... not in a bind? Yeah. Not so much regular, as it isn't (rhymes with exasperated) and makes things easier. Think prunes, maybe, but I'm not a prune fan. And while I was at the store(s), maybe I get some other pantry items because there. No panicking, hoarding, flippin'... just need some stuff, no big...
Well, it was... stupid. (repeating bears are happening) I did get the Coke Zeros... barely. There were exactly three (3) 24 packs at the Wallyworl. I got two. That'll do. They do not have the correct kind of pecans and cashews. Just bits and pieces and it's just not right. That I expected, and had planned to go to another store anyway for those. I also got some other things, but the report on the stupid (aaah! a bear!) is thus: They were out of ALL THE SOAPS. Every. Stinkin'. Kind. Bar, liquid hand, dish... The entire heck is that? Well, ok, they had a couple of bars of Dove, so I grabbed those. I happen to use that (skin sensitivity issue, this sovled that, partly.) They were also out of all the waters, except Aquafina, which ought to tell you all you need to know about Aquafina, I suppose. They were stupid low on air filters for the house. And get this: ALL THE BREADS AND FLOURS.
Anyway, I took my cans of stuff and other items I went ahead and got, got out of Wallyworl, and went to Kegger. (If you don't know what a Kegger, name changed to protect the monetary stream or something, it's a grocery store.) See the above. Same exact deal, except also MILK. ALL of it. Except the weird ones like Almond or Glutlactfatcalorie free kinds. Butter was gettin' scarce, dry beans are gone, and the meats are way way low on stock. Even Jello Pudding was gone except a couple of chocolates and all the Dulce De Leche kind, which ought to tell you all you need to know about Jello Dulce De Leche kind puddin'. BUT... I did manage to get one of the last dish soaps. Not my normal kind, but hey, I'll at least have some now. And I also got two of the very last liquid hand soaps. So yay, I have all my soaps for a little bit. And the pecans and cashews, as I spoilered up there.
And all that?
4 hours. I am not even kidding.
It was... stupid. (Dang bears, they get into everything.
---
So as you can see, I've got a late start and I'm just put out about the day. I needed to recover after those stores and puttin' and the things up. Mentally not in a good place. But I said I'd attack those valve covers. And attack them I did. Which means to be cleaning them and prepping them for reinstallation without having crud that'll drop in the head or engine. So I got set up and started to do things(tm).
I had trouble not understanding how the bolts were supposed to come out. So I didn't. The grommets around them felt just fine and dandy, actually, so I wasn't all that concerned... except for the cleaning maybe messing them up and/or getting stuff between the cracks and crevices... and I *really* can't get behind those bolts... ugh... this is taking too long. Cleaning the groove where the new gasket is supposed to go is just tedious and the bolts are in the way....
But I got it done. The right cover is all ready to go, clean as it can be... and hey, did you guys know the valve cover is supposed to be a gray color? Not black? I know, right? Fooled me...
I'm guessin' 181,000 and 14 years will do that to an engine overall, being a daily. Also, these things are NOT prettily done, functional first, and I understand why covers are a thing for these. Still better than the old 5.0s with all that... stuff... on the engine... these seem simpler and cleaner in many ways in execution, but still... dirt and oil magnets, looks like.
Anyway. Attacked the left cover. That one went just about as badly. And it was so much worse than the right, with all the oil changes and drippings thereto that people don't clean up. I'm going to definitely remember that, and clean it up right after. Just *caked* on grime... And then I figured out the bolt problem. They're 'clipped' in by the grommet by three little tabs, the grommet is around a sleeve/keeper, and that is why the bolt won't come out. I just got gorilla with one because frustrated and it popped right out. Simplistic Verde is a pretty good lube, seems. Yay. But they hurt my hands. So I figured out that a 10 millimeter can be used as a pry tool. Only problem is the grommet is done after that. Ain't a big though, I happen to have got some with the new valve cover gaskets! Ain't that something? They just threw them in there. And they're BLUE not black, so they'll be noticeable!
"Three (3) and a half hours later..." - That Spongebob announcer.
I'm done. And I ain't happy. Some... thing... happened. See the pics below. TL;DR;TL: I'm going to be hunting for a good left side valve cover now. Oh, it's clean... but it's toast. I can't put it back on.
And that's it. Just those two. Learned a bit. I'm all ready to go on the gasket replacement for everything on them. But maybe I've wasted the time, effort and money spent on that bit, as it may be more prudent at this point to just buy new ones. In blue. Because why wouldn't you? Same price, so why they heck not?
... well... it turns out I have a 'white with black and silver/chrome/grey/gray where appropriate' theme on the color set of Awesome, so yeah, I'll be gettin' the black ones. Which means even if I kept the old ones, I really messed up cleaning them...
Still, I'm going to try to find one in a junkyard search. The 5.4 and 4.6 is interchangeable on this, thankfully, so Mustang, Explorer, F150, Navigators are all eligible to donate a valve cover or two... If I can't find the one I need, I'll break down, I suppose.
Awrighty then. Pics ensuing, with descriptions. Peace out, homeslices.
---
Right side valve cover, with all the bolts in a pretty-ish row, and the extractor tool.
Dunno what's up with this. Looks like it's from the wiring harness loom going down to the right cam, crank, and A/C compressor...? How did that happen?
The left side, and all the bolts in a pile, with the channel cleaning inducer tool and the extractor tool. You can also, if you squint, see why the thing is toast. Maybe. Sorry 'bout the blurry, but I can still see 'the why'..
Say 'aaah'... (It should not be saying 'aaah', by the way, that should be all one tab, but it's opened up...?) "ANOTHER!" - Thor in *Thor*. This one has powdery stuff in it...? o.0 And yet another one... And a fourth. Except now it's broken and but good. The black stuff is powdery and all that flaked away and left a hole... In case you didn't see it. You can see wood behind that hole. What the... um... blazes? We'll go with that. The piece that broke off during grommet/bolt extraction. I should have known better, but I didn't, but now I do, so I will go back in time... :| And then there's this, which I think is a coil pack hold down with nutsert in it. Clearer view of the coil pack recess.
Just remember -- Tito's doesn't make a good hand sanitizer. That's what Everclear is for. And degreasing engines. And cleaning carbs. And preserving lab specimens.
Those valve covers, I've looked at a few up close and I've always seen casting defects but ... WTF happened there? Looks like some major corrosion. those marks over where the phasers are do look about the right spacing of the ribs on the wiring loom, doubt its from rubbing, more likely whatever corroded other parts of the covers was on the loom and did its thing where it was contacting.
I was able to scrounge up a set of valve covers for $100, usually something somebody took off when they put on the fancy laser engraved ones. If you can't find any, I have a set I was in the middle of painting a few years ago that I'd be willing to let go. I haven't fully given up on the idea of painting 'em, but if there's someone with a greater need I'll give up.
Re: Everclear. Yup, I just saw that HTME video, he recommended that over Coronas for makin' sanitizer. But he also said Corona doesn't taste good which disappointed me as I kinda like it. Reason it disappointed me is I'm not sure which of us has the bad taste... It makes really good beer bread, I tell ya...
Re: WTF happened: I dunno, you tell me, strangest dang thing I seen. I don't think it's corrosion, I think it's just a bad one that got through the line and wasn't really an issue...? I know I can't find any info on that phenomenon on them intarwebs... Only other thing that might have done that is heat? Not fire, per se... It looks like it delaminated and expanded... very strange.
I'm still debating what to do about it, but I'm not concerned just yet. I'm not desperate or hurtin' or such, please paint yours! And of course: pictures. I would do Eddie Van Halen's Guitar style maybe, but that's me, but that's also on a fully rebuilt block I'd be painting up too. Because why the heck not at that point. Could you imagine that? I can. I love it already. Heck, I wanna yank Awesome's motor now just to paint it! All red with white and black stripes... yeah. Although there's an EVH style that's apparently black with white stripes only that I kinda dig too and would fit the theme better... Of course, with the engine out, that entire engine compartment would be painted glossy black...
OOOH... WAIT.
Just... wait...
Got it.
EVH, for sure. But the block is the black EVH. The intake and covers are the red EVH.
Man, now I *really* wanna do that...
No. Stop givin' me ideas, ok? I just... I need her outta the garage... No painting.
This time...
Anyway, bacon track. I'mma see what happens at the junkya...er, auto parts reclamation and recycling center(s)... Plenty of 3Vs that'll do out there I'm sure. I'll also be takin' my messed up left side in there with me to ensure that if I find a 5.4 everything matches up. I'll have 'em mark it with something, I think they'll do that...? We'll see. Just when am I goin' now is the trick...
/I hope I get good progress this weekend... Cams and timing chain hopefully at the very least... and spun around 720 just to be sure everything is ok...
//those blue covers, even at the expense, are calling me somethin' fierce... reminds me of old '66 TBird engines we'd work on...
Like Sands in the Hourglass... Wait, no, get that sand outta here, it'll get in my engine and that's not happenin'.
---
WHAT is up guys, welcome back to houtex's Adventures, and today, we are going to do stuff and have shaky move-y camera shots as we mess up and do over and rethink things all in an attempt to entertain, inform, and get that sweet MeToob ad revenue! Don't forget to Like, Subscribe, Join, Comment, and if you like what you see here, maybe check out my Patrone page and send me some green, and while you're at it look me up on Instantgraham, and for the latest info before it hits MeToob, be sure to join me on FacetiousPaperback! Now, on to the show!
---
Dang, man, I could totally do that, right?
Ok, real deal. It's been a little crazy with the stuff goin' on in the world. I'm really not happy being 'essential', as if IT guy is essential, but I do work at a dealership, and I'm luckier than some who are being forced to not work, or being furloughed because of the reduced traffic, but still... I feel like a long tailed cat in a room full of rockers going full blast. I ain't happy havin' to touch other people's stuff to fix their computers, like, at ALL. I'm bein' as careful as I can, being paranoid about my hands being clean and cleaned, and absolutely *not* touching myself... er, face. Anything I touch before I get my hands cleaned gets sanitzied pronto. Thankfully, I have a big bottle of the stuff and lysol wipes already, and I keep it (hidden) in the car.
I hope they figure this one out sooner. I really don't want it. I don't want to pass it along neither if I do get it.
This. (Siphons with a large amount of negative pressure).
---
Diatribe 'bout the Coronavirus over... oh, dang, I just demonitized myself, apparently... meh, oh well...
I didn't get a lot done. But I got another fairly large step done. And I know, I'm two weekends since last time, but I really wasn't doin' good last weekend. This one neither, but I was good enough to get a little bit done. It's been... tough. All I'll say, don't ask. It'd take too long. Just... yeah. Issues.
Anyway. Pics at the bottom.
I got the cams on! Both sides. Finally. Of course, the cleaning of the timing cover and valve covers previously was important to that, and here's why.
I attacked the left side first, as it'd be easier, not as much in the way. Took off the shop paper towels from the area, double checked their cleanliness (and I was very happy with it, to be honest!) Removed all the lash adjusters, replaced with the new ones. And yes, I double checked they're correct, they match the height and diameter of the old ones, so we're good. They been soaking in oil like *forever* so I'm pretty sure they're good to go.
Oiled up the cam towers, and then gingerly put the left cam in place. It had been oiled and put in a secure, dry, covered place, so it was cleaned and ready to go. I re-oiled it up really good, then I put the pre-cleaned cam caps on, having oiled them up as needed as well. First the front one as indicated, which 'centers' the cam front-back, then the rest. Properly, yet gingerly, torqued all of them down to 89 in-lb, which is about 7.4 ft-lb turns out, or 10 N-m. As I have no 1/4" torque wrench, I did the best I could with my 3/8" one, and was very careful to get the right torque on it, plus took a very good amount of time and care. Snapping of bolts is not an option here, or anywhere, really. And it was all done in the proper middle to back middle to front middle to back to front, and the down-up up-down up-down down-up down-up patterns. Which is to say, all finger tight, caps securely down properly, then middle cap, bottom bolt, then top. Mid-back, top bottom. Ditto Mid-front. Then back cap, bottom top. Ditto front. That's how it's done. If you didn't know. Now you do...?
And oh, by the way... after I placed the cam, I spun it as I oiled it so I had it well lubed up for when the time comes to spin it for reals. And then I put the caps on as above, and then I spun the cams again. It's all Verra Nice. And oh yeah, by the way, I also did the fingernail cleaning in the front cams for the little journal. Oh, and yeah, by the way, I did the fingernail check on all the cam towers, cam caps, and cams in all the spinny places. All of them pass just fine, so they're pretty good to go, I'd say. I also installed the phaser solenoid after dunking it in oil (see where the oil is from below.)
So, now, there's extra 'get dirt on it' applied to the heads. Whee. Can't have that. NOW is when that valve cover business is comin' in. I know, I know... I'm having a struggle with the mounting ears for the bolts on the left one... and I still am. That said, I've decided I'm just gonna send it with the ones I have to get it out of the garage. It's "just" valve covers. And it's the top sides to boot. Not the bottoms or ends. So... they'll do. For now. I'll replace them later on after she's back on her feet. Gotta get this done.
I had previously removed all the bolts and grommets out of both covers, if y'all don't remember, so now the deal is to put the new grommets in as well as the main gasket. No problem. Mostly. Getting the old grommets off the bolts... well, the keeper collars on the bolts... was being nofun. None at all. So I just razored them off. Cut them lengthwise down the grommet, split 'em apart, and voila, Nadine's your uncle, ready for new grommets. That was semi-easy, but a little tiring/tedious. Dipped the bolts, with the keeper collars shoved all the way down, into the lil' bucket of oil holding the cam followers (and the right side's yet to be done lash adjusters), spin that in the grommet a little, then shove. And shove. And shove. Pop. It's on. Clean the excess off. Repeat something like 23 more times, I don't remember how many there are, it's close. Then, you just pop them all into the valve covers where they'll stay... except those two on this left side cover, but I made it work. They *really* didn't want to go back in, they're so warped and a mess... but they're in.
I then applied the gasket to the valve cover, gave it a good blow of air from the compressed air cans I have, and installed it lightly on that left side head. Squished the grommets on the top side, and the corners and middle of the bottom side. Just a little. Enough there's a good seal to protect the cam and head. Yay, left side cam and adjusters are done!
Now, having learned lessons, I got the right side valve cover ready to go *first*. Then the same process on the right head/cam. Removed all the old lash adjusters, cleaned things up on the head, esp. the cam pedestals. Installed new lash adjusters. Oiled up cam pedestals. Place cam, oil up well, spin as oiling until satisfied, lobes too. install front cam cap (it's clean) after oiling it. Repeat with all other cam caps. tighten all bolts finger tight, ensuring all caps are down and seated. Torque as shown above, gingerly. Spin cam to ensure it's all good. It is. Dunk phaser solenoid in oil. Install. Clean excess oil from gasket surface of head, install valve cover, all tops, three bottoms, squish grommets just a little.
Then I put some clean shop towels in the front overhang that is where the valve covers and timing cover is supposed to meet. To keep things out of those heads. Being as the timing cover's not on yet... And... that's 'bout all I did. Sorry it's not more, truly. But it's something I wanted to get done, because I really didn't like having the heads exposed like that. Not that I like the oil pan exposed, but that rag in it is doing fine. I'll throw my inspection camera in that before I button it up with the timing cover when that time comes. Heh. Time. But if there's anything in there, I'll get it out with a vacuum. Shouldn't be anything in there, really. *crossing of fingers*.
So anyway, now it's on to the phasers, then the timing itself. All the chains and sprockets and guides and stuff. And then a timing cover, I suppose, as if it's all aligned and correct, no reason it can't go on at that point. Then the followers (that'll be fun. ) then the heater pipe stuff, oil adapter gasket, intake, cooling, fuel rails, wiring... not sure I have that in the right order... reassembly in any event, filling of things and then somewhere in there I'mma turn it over, I'm sure...
The beat goes on. Forward progess is slow but happening. Maybe I won't be workin' this week so much at actual work and I can play with the car more this week, it'd be a good thing for me...
Y'all stay safe. And thanks for reading this stupidness. I know it's not very technical, bullet point or such, but it helps me, if in fits and starts, to keep goin' on this. Much obliged y'all, till the next update!
---
Pics as promised
(sorry, I didn't get any of the cams in place. I'll prove that next update, ok? Sorry. More about these valve covers, really...)
(also sorry, they're blurry sometimes, and I can't figure out why my phone isn't focusing right. I gotta work on that...) This is the bucket of oil with lash adjusters and cam followers. Believe it or else, this is how they come shipped too, just not in the oil bucket. I believe I've previously mentioned that...
So, the problem is getting this guy off off that bolt/collar. It really REALLY doesn't want to. It's sort malleable, but stiff enough it's just... yeah.
End result. Repeat 23(?) more times. Toss said grommets.
The trick was to dip the bolt and the slid-forward keeper collar in the oil bucket, the slather the inside of the grommet before you shove the grommet on the keeper.
Most of them did this. I had to spin them 180 and shove that bit on... fun times. But they go 'pop' and then...
Tada and things. One installed grommet. Clean up your excess oil and keep going until you get them all done.
This was sort of my method. I had removed the grommets, then put the bolts in the valve covers. Removed the one I'm replacing, pop the grommet on, put it back. These are the last two I had to do. Sorry it's blurry. That way I sort of kept track.
And it's on! Left side, this shows one of the split ears. Fun to get this particular one in, it really didn't wanna go...
And the worst of the four. This is almost a 'why', but it's working enough. still weird. I don't like it, but eh... Left side all buttoned up. I'm happy about it, really! Big milestone in my head.
And both done! Notice the shop towels peeking out from under the fronts of the valve covers, just in case something decides to crawl up in there. I really dig the blue grommets and gaskets, to be honest, they look pretty nifty!
I hope that helped someone regarding these grommets. Lil' pains in the hands, I tell ya.
Update, April 20, 2020... *snickers* Far out, man...
---
Ok, it's done!
Well, ok it's NOT done, exactly, but I did get the timing and valve covers on and done, which is what I mean, THAT's done! :yay:
I ain't gotta worry as much regarding things(tm) getting in the oil areas. No more dust and dirt and water and whatever worries. All ready to add oil!
... well, ok, mostly. I still gotta put the heater hose back in, put the intake and fuel rails and such back on, secure the dipstick, get the oil adapter reattached, put the steering rack back in, and add those whiteline bumpsteer kits because may as well because I mushroomed one of the tie rods like a dummy so that's gotta be replaced and I wanted to do that anyway, get the camber bolts in because I wanted to do that anyway, maybe, JUST MAYBE get a new radiator as I may or may not have accidentally messed this one up but I can't be sure, but why take a chance, and put back all those hoses, but before I do that maybe I go ahead and get a new water pump just in case because right there and now I don't have to worry about the water issue when it comes out and stuff and then maybe I can fill it up with oil, water, turn the key and get oil pressure then hit it and vroom and things and finally, after all these months of what the heck ever kept me not driving my car all this time I will finally be in her left front seat again.
Provided there's nothing goes wrong, like I somehow got the chains messed up.
---
So today's work was thus, briefly:
Spin the motor 360 to ensure there's no binding. I was just makin' sure. Smooth and no issues, compression everywhere. Sweet.
Install cam phasers. That's fun. But I did, even the 90 degree turn thing.
Position the crankshaft, use tool to ensure. Well worth the money to ensure I don't kill a motor.
Install chains. It's simple, or so it seems. After the crank is in place, you put the left chain dark link on the crank sprocket where the dot is at full down, slide sprocket sorta, but not all the way, on, position phaser mark (L) and other dark link on chain, and voila, timed the left. Repeat on right side, as it has to go second, and it's easier to get that dark link on the crank sprocket, and then the other end is the R. Just lines is all up, easy. And it verified in the book as 'right', so I'm good to go, I hope.
Put reluctor on crank, so I don't forget.
Now the FUN part. Cam followers. 24 of those. 12 per side. 8 intake and 4 exhaust per side. It's just plain easier to do one side then the other. And I can tell you without any reservation that in the car, the left side is the harder of the two, so do that first. Further, the four (4) exhaust followers are an *extreme* pain on the left side. Well, they are for both, truth, but definitely that left side. Angry. Had to 'ohhmmm' a few times to prevent... issues. Also learned my cute lil' step wasn't quite tall enough on the left side, so I wound up dragging my 9.5" wide, but that tall on it's side, wheel, with mats to protect it, on the right side, and that helped things a bit. Still, the right side has more room to position arms/hands, and made it quite the quicker install. I think it was 1.5 hours on the left at the end, maybe, not including picture time, and about 45 minutes on the right? Something like that. Still, 24 of those are tedious, slow, imprecise precision work. Making sure the valves dropped down and didn't lose the keepers was a bit harrowing, but a little pressure on the stems ensured everything stayed good. And so yes, I got them all in and done.
Cleaned up all the oil on the surfaces for gaskets. Because now it's time for... TIMING COVER! I installed the thing! And then... VALVE COVERS! I installed those things! Left first, right second, and same thing: Left side's a PAIN. Brake booster and fuel stuff and dipstick... ugh.
---
And that's it! For now, of course. More to do before I get there. I think I'm gonna attack the steering next, I really wanna get that done before stupidness happens. Unless that's gonna affect the oil adapter and the coolant hose thereto. Decisions decisions... Oh, I made a little video regarding the chain slap and why it's really REALLY important you address it, unlike me, the ignoramus who asked about it and was actually told by a Ford tech, and supposedly a good one, "nah, it'll be fine, it's just that tensioner."
No. It's kind of a gonna a be a big dang deal, don't ignore it. Get it done. It siphons greatly to do, but if you don't... it's worse. Much much worse.
---
Ok, that's really it. So on to the pics, which will be in order for those who wanna see, but first! My video! Enjoy, and be kind, it's my first ever YouTube one.
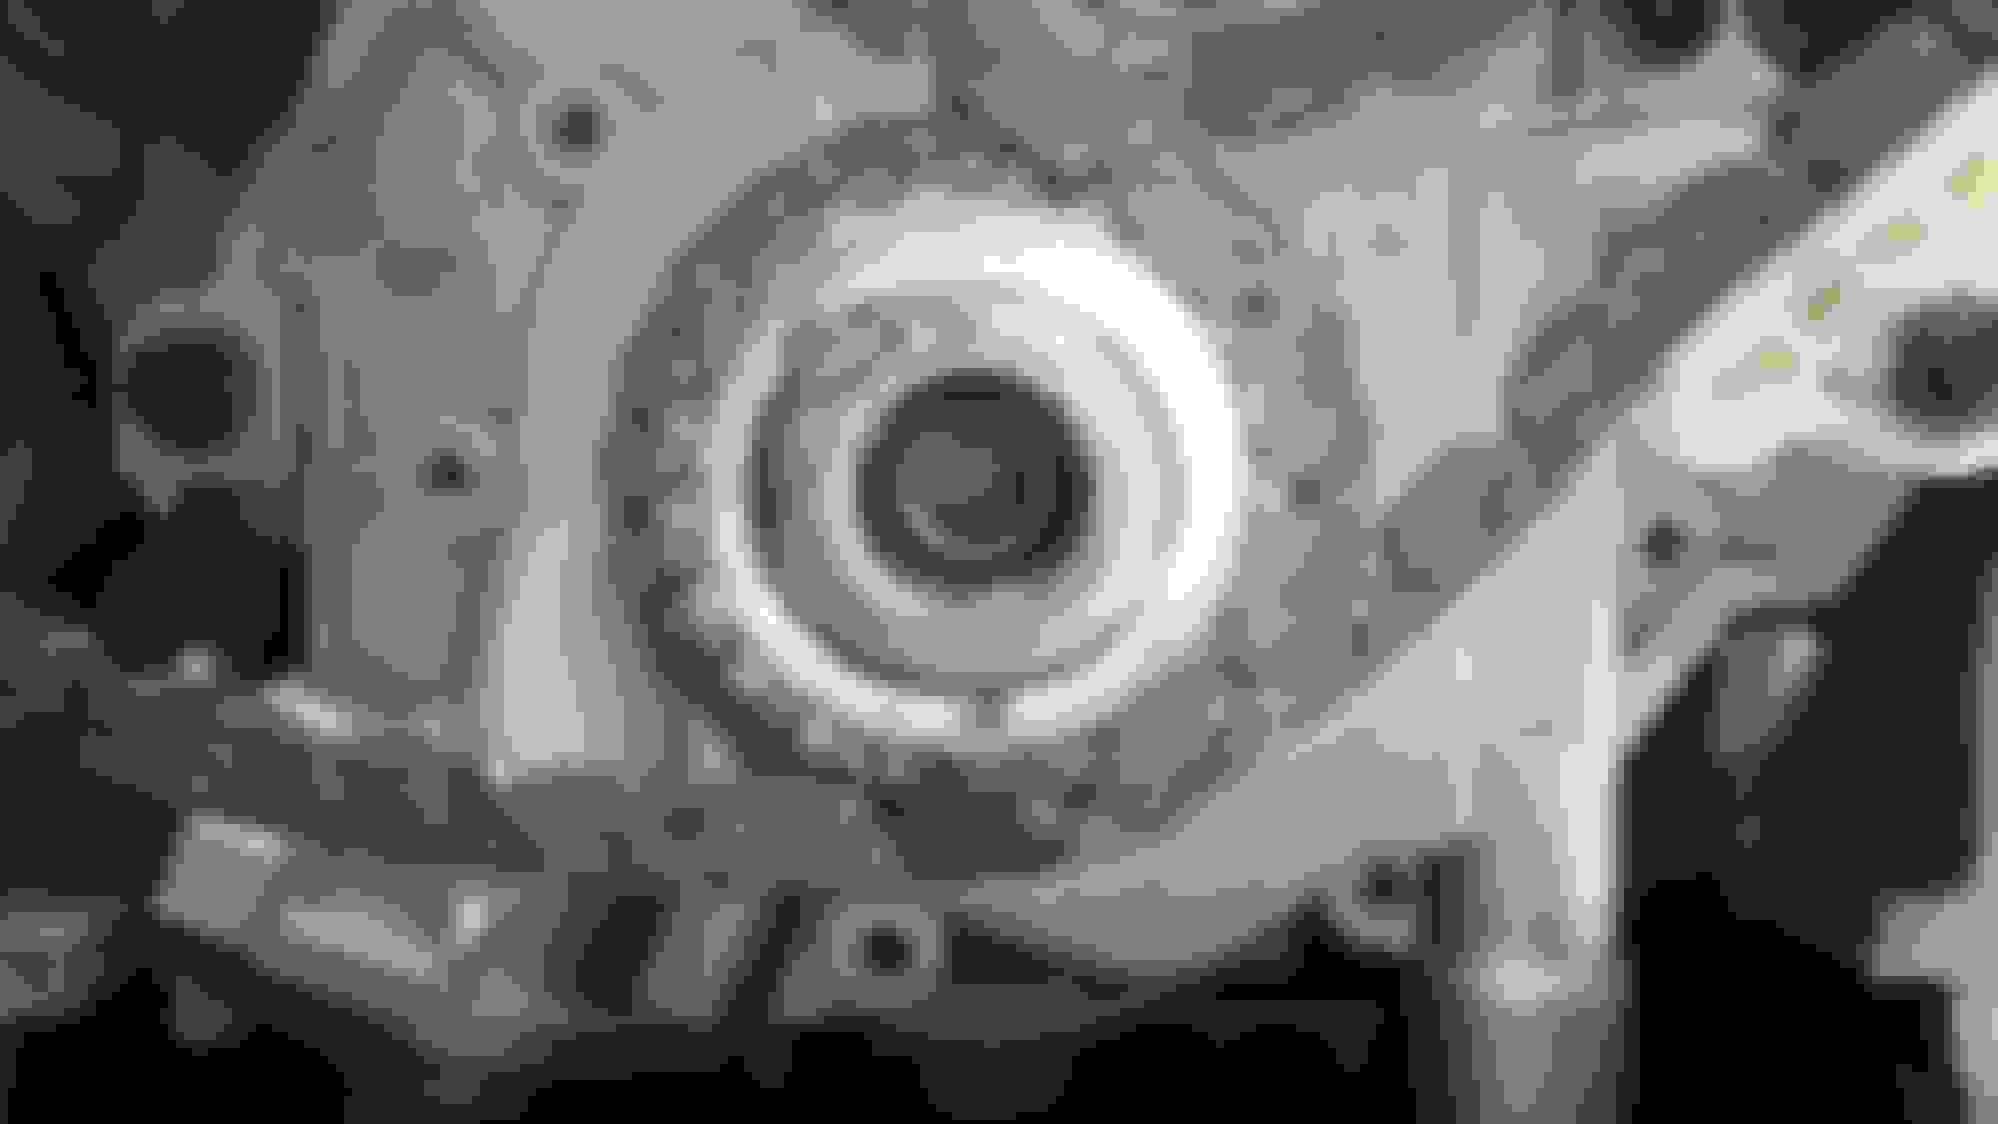
And now... PICTURES!!! WHEEEEEE! A 32MM deep socket fits over the key on the crank, and turns the motor quite nicely.
Left phaser on! Paint was used to do the 90 degree after torque that's required on this.
The right one on. Notice the paint. Painted the bolt on the top, turned until it lined up 90 right. The dots are a big help. You can also see the holding tool bolted to the front of the block which is locking the phaser in place.
So for some reason I put the phasers on with the R up on both, and I realigned the paint marks so you can see what I wound up with. Doesn't matter, really, they're free spinning at this point. Still, kinda irked me after that I'd done that. Grr.
Spun that crank to get it aligned, and this tool ensures the timing is perfect. If you need one, get it. Worth it over the engine performing a rapidly unscheduled disassembly, y'know.
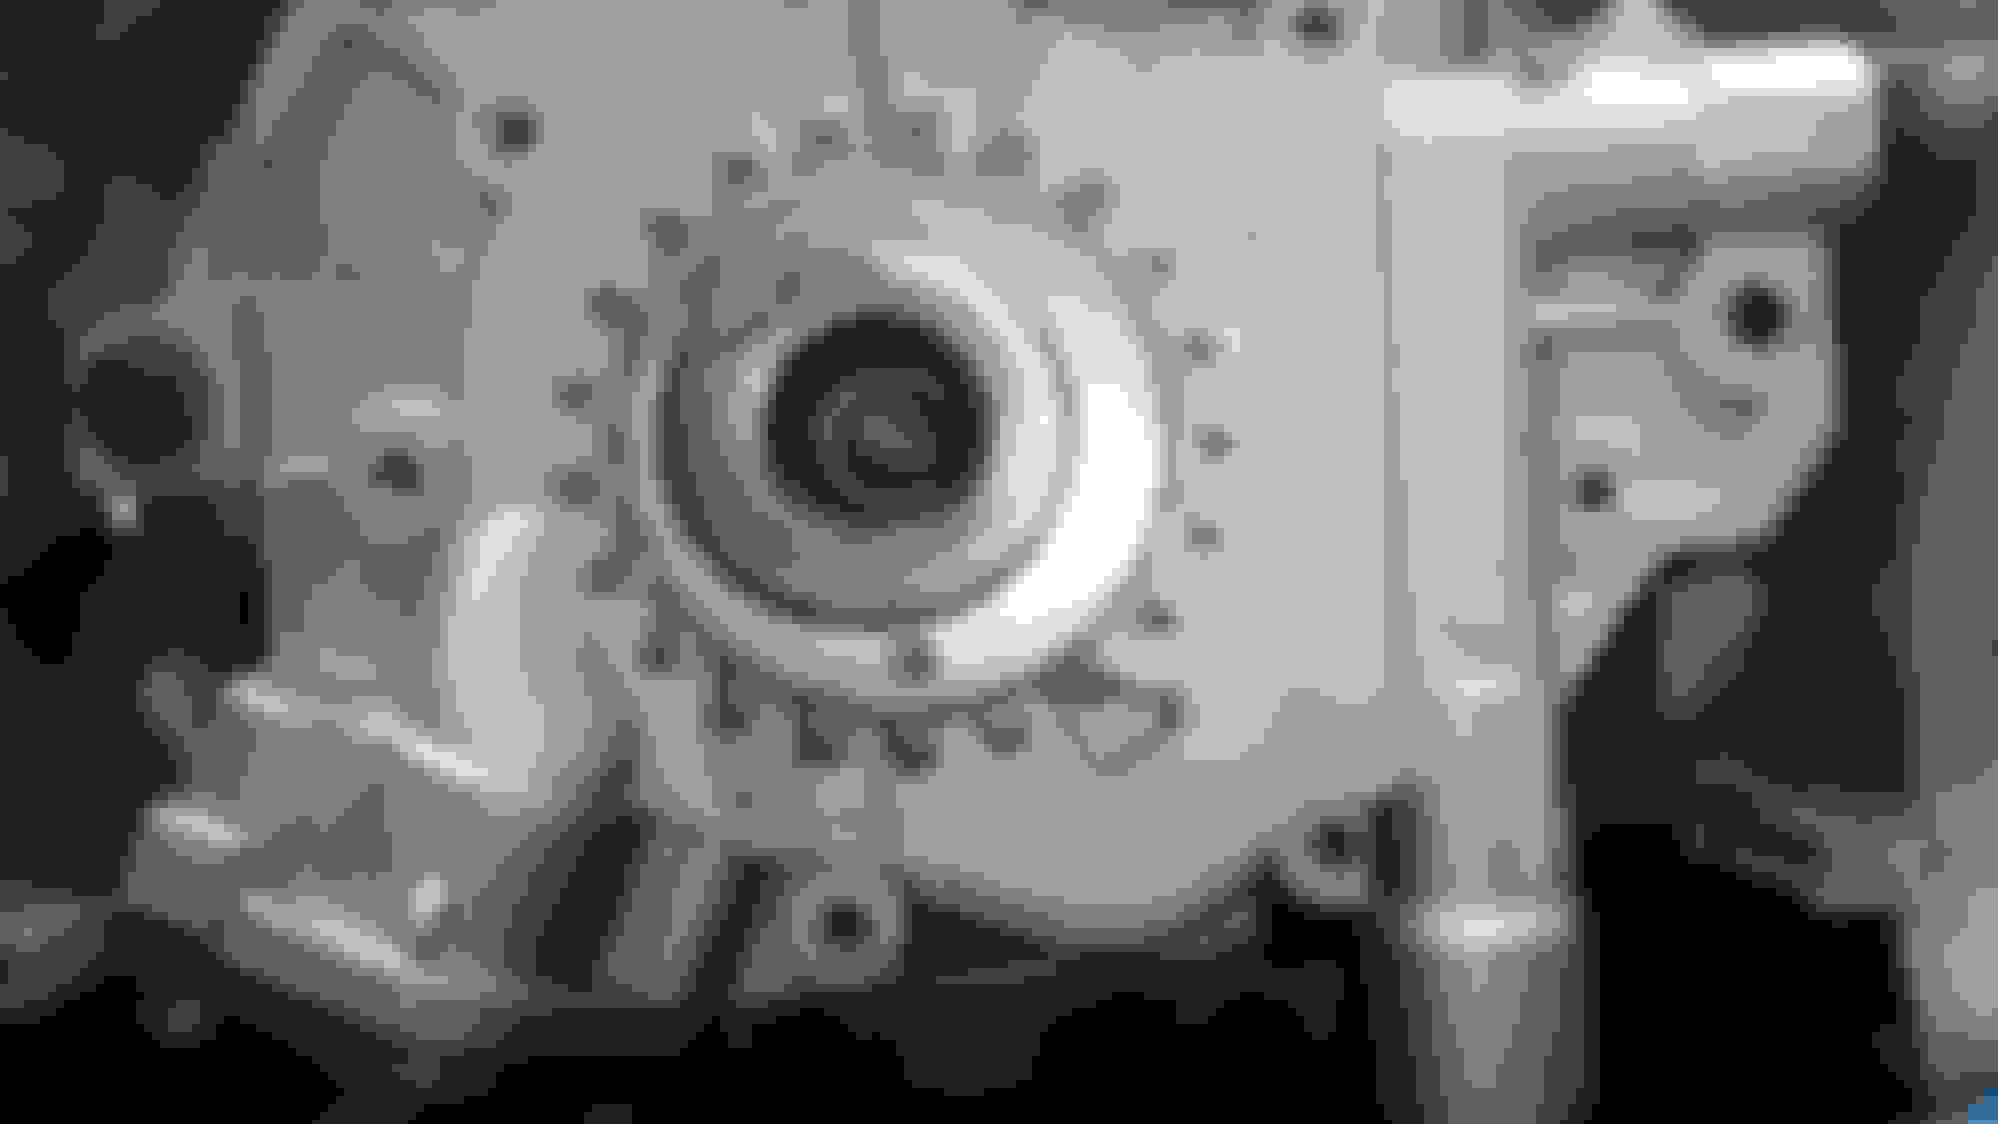
New sprocket for the crank. Oiled up the works before I put it on. Fit perfectly.
Dot at the '6 o'clock'/down position. Right where it needs to be.
Left side is already on, but the right side is in front of it. Both had their dark links put on the dot, they're good to go.
Guides and chains are on both sides. Notice how the left side is almost already in tension, versus the right side is slack on the bottom? That's your problem right there, lady!
Because if the tensioner is working that's the result. Left side doesn't look all that different, eh?
I PULLED THE PINS, OMG OMG OMG!!! But you kinda have to. This 'activates' the tensioners, they're now pushing on the tension arms, picking up the slack. Timing is done.
Crank position reluctor wheel on correctly. Says 'front' right on it and stuff.
The sparklies is because probably a little dirty lens and the sun was out. Sorry. This shows a correctly installed valve compression tool. It's a three piece unit, a fork to go under the cam and rest on the head, the compression fork for the valve, and a screw top that goes on the valve compressor fork that is hand tightenable... mostly. 16MM wrench may be needed for reasons. Also, push down on the valve stem while compressing, or get ready to drop the valve when the keepers come out. Serious.
The tool is finicky to put in for the exhaust. Intakes are easy because gravity assist and visibility. Exhaust is a three armed scenario, which unless you're Zaphod Beeblebrox, makes things a bit difficult. I managed. Notice the lash adjuster cup being in place too.
In the middle you can see the fork that pushes down on the valve assembly. Foreground is another exhaust valve. When the tension is released, this one will look like that too.
Tada! 12 valves, ready to rock! Now do the other side. *groan*
Cleaned my lens. After all those valves were done, well, time for the timing cover! At last. Everything torqued as required in order and spec. Very happy about that. Which leads to...
Valve covers on! Every bolt torqued to spec and in order. Best I could, it only needed 89 in-lb. Which is a stupid low amount, but I did the best I could, the click-type torque wrench was a bit weird... I got it I think. That's it! Until next update!
Great to see parts headed back under the hood again. Did you put your original valve covers back on, or find replacements at a yard?
I just decided that since the ear splits were happening on the top side... eh. It'll probably be ok. The bottom sides are all good, and all of them torqued down, so I just went with my current originals. If it gives me problems, I'm gonna treat myself and Awesome with the black new ones. I mean, yeah, that engine bay and engine could use some decent cleaning and paint (workhorse, she is), but if she works after all this mess, I'm down with gettin' them, and I figure maybe, just maybe, they'll be a little bit better quality...
And the day it happens (it will, it's just when, let's be honest), when the engine DOES come out, oh yeah. Fenders and front and hood all come off too, and that engine bay is gettin' painted satin black. Which will make those covers look fantastic. I'll then paint the current intake cover I have lurkin' around to match (taping that Mustang on it will be sooo fun...) and that'll look pretty good, I think. But not yet, I hope, I'd rather enjoy her some more, at least until I can get a good stablemate so she can then have that stuff done...
Originally Posted by Mustang Freak
Awesome job! I couldn't do any of that even with a gun pointed at my head!
Well, yeah, naturally. You want a shop manual pointed at your face, not a gun.

 1/27/20, 08:15 PM


 Surely is the confusing part. I admit I was using an impact, but I was just on 'spin it in', not 'hammer it home'. I have a theory about that... later.


 And let me tell you, cleaning them out was... fun. Brake cleaner in a lil' container, and Q-Tips. The real kind Q-Tips, not them generic ones. Only the best for my ears... er, I mean, cap cap dowel holes! Took quite a few of them to scrub out the varnish. Soak the tip, apply the tip to the varnish, repeat... then use a clean one to scrub out the remnants. And then blow the things out (the bores are not through to anywhere, thankfully) and you eventually, mostly, but not completely, wind up getting them nice and clean! Time consuming and not exactly comfortable work, but it's not terrible, just a thing. I'm probably going to do the other side just to be sure. I want a smooth install, thankya.
 Maybe dodged a larger caliber bullet than the one I took already...


 But that seems a bit much, don'tcha think? And given the condition of the thing, a bit wasted. I mean, I try to keep Awesome clean, but that engine is just so... I dunno... *crannyish*. and a daily just gets dirty. So these nice things would be not-nice pretty quick So it'd probably be best to just go to a junk yard and find a left side cover and be done with it... Kinda interesting that new Dorman (no) ones from Summit, together, are the same price as these. And if I did get them, well... I have a spare valve cover gasket set, I suppose.
  The far far future, thankyouverymuch...
 What is that black stuff in there? So I go and get to cleaning it... and it's not coming out!
  That can't be good. I mean, there's not supposed to be black crud in there... So I pull another lash adjuster. MORE BLACK STUFF!
  What's happened in there!? What the heck have I run into now?! I mean... C'MON, MA...


 Not really sure how, it wasn't moving then *wham* it moved a LOT... grr...


 BUT... I did manage to get one of the last dish soaps. Not my normal kind, but hey, I'll at least have some now. And I also got two of the very last liquid hand soaps. So yay, I have all my soaps for a little bit. And the pecans and cashews, as I spoilered up there.

 ... well... it turns out I have a 'white with black and silver/chrome/grey/gray where appropriate' theme on the color set of Awesome, so yeah, I'll be gettin' the black ones. Which means even if I kept the old ones, I really messed up cleaning them...