Spring and Summer 2012 Mods ñ 08 GT/CS
 6/4/12, 09:43 PM
#1
Mach 1 Member
Thread Starter
Spring and Summer 2012 Mods ñ 08 GT/CS
Got a few more things from my mod list completed:
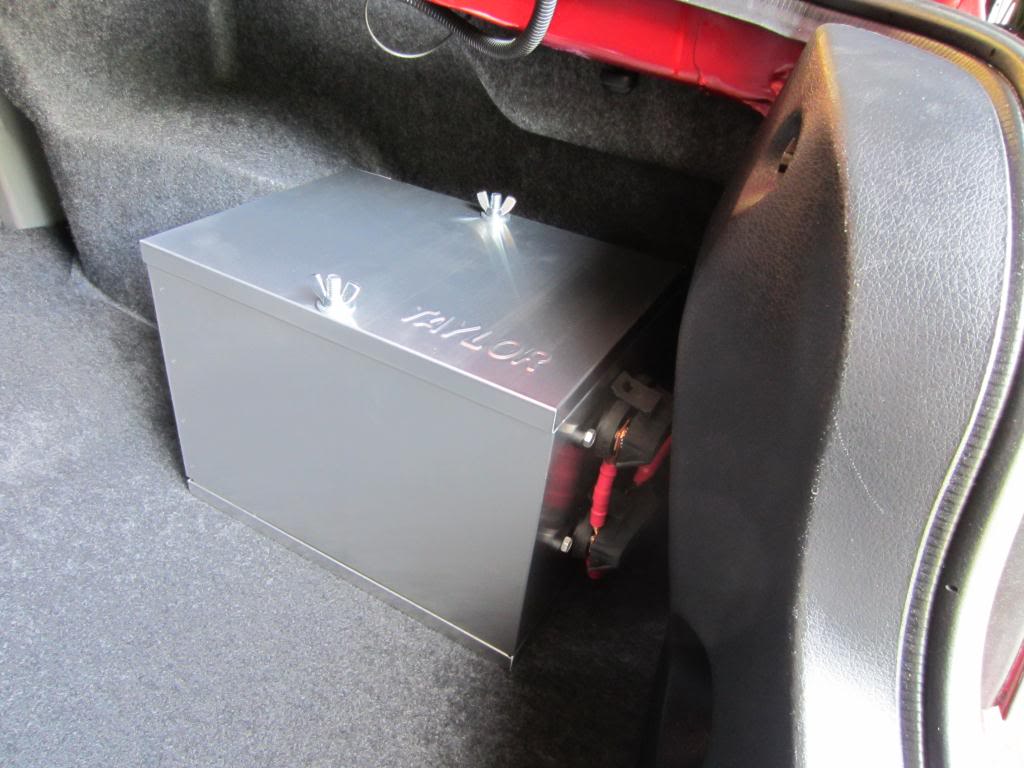
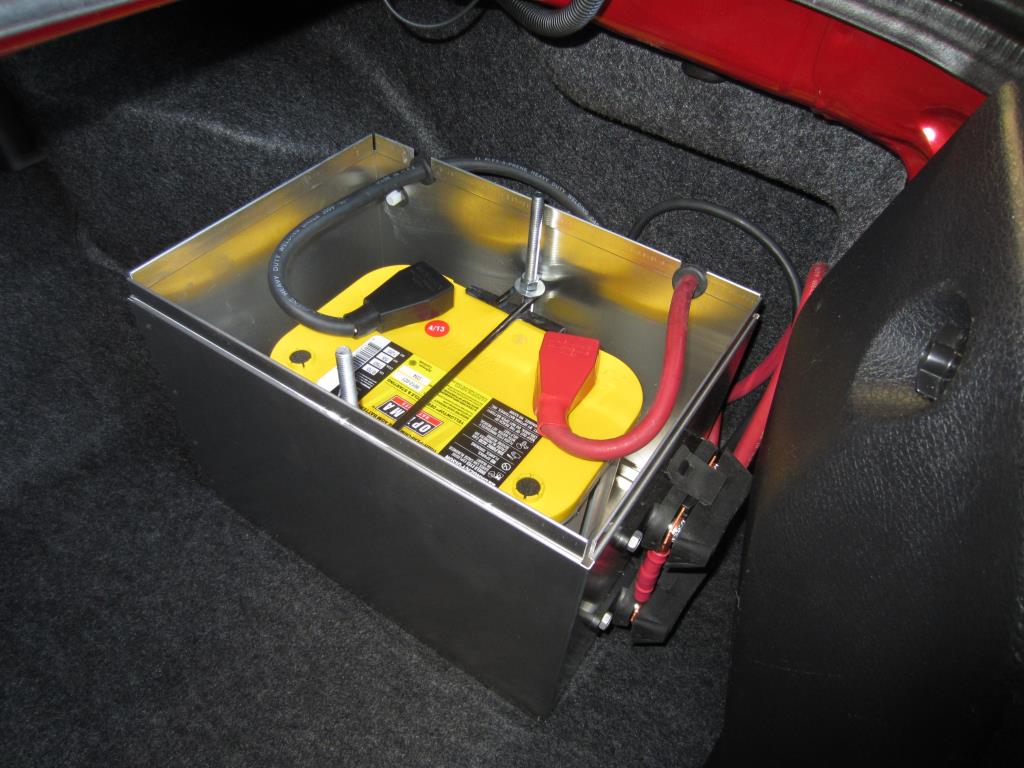
Relocated battery to the trunk to make room for additional supercharger cooling capacity.
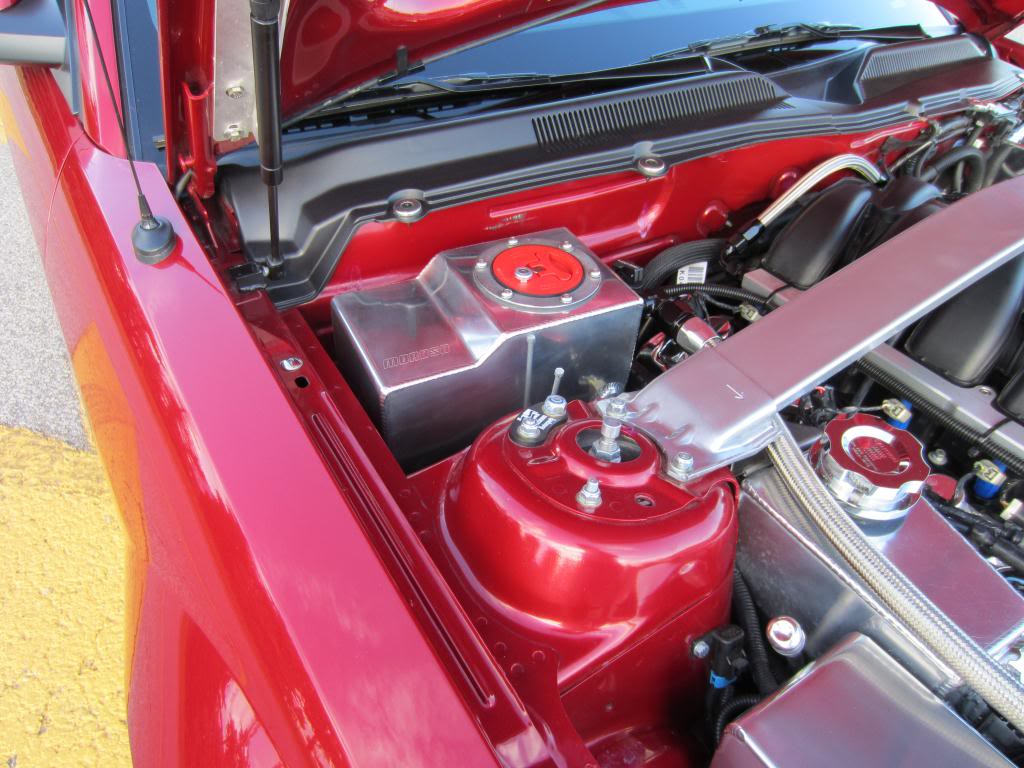
Added a Moroso Supercharger Coolant Tank
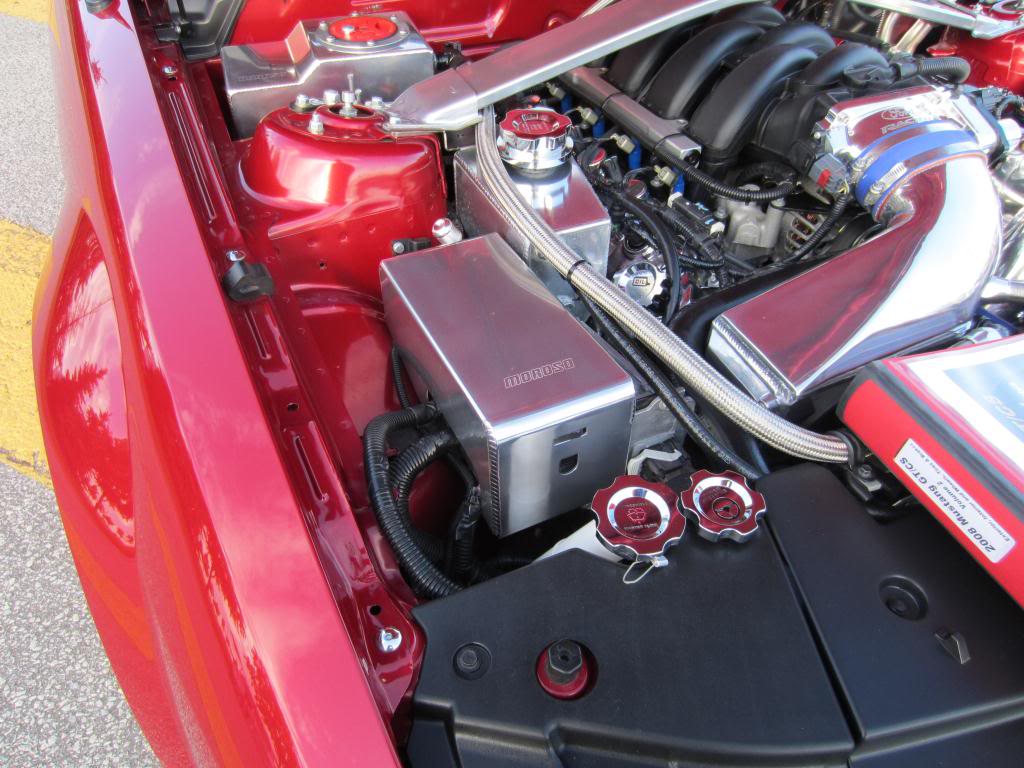
Added a Moroso Fuse Box Cover
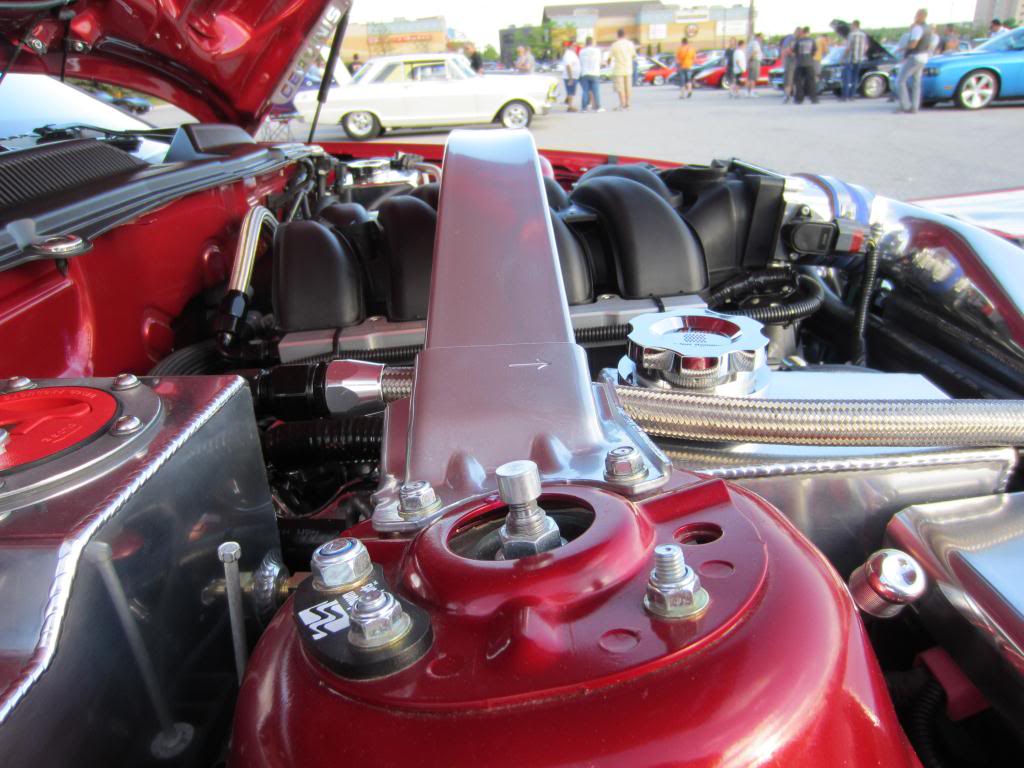
Replaced my FRPP Strut Tower Brace with a BOSS 302 Brace (The BOSS Brace provides clearance for a FRPP 3V Intake)
FRPP Intake ready to install
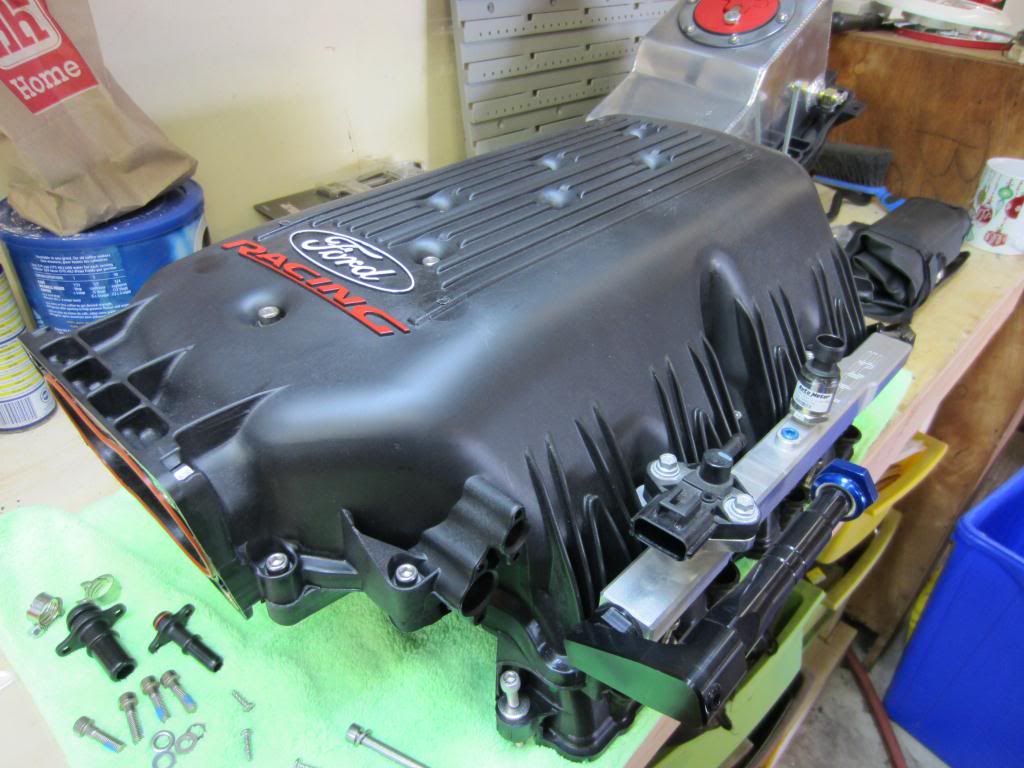
However, I ran into a problem as illustrated in the next two pictures. As part of the Vortech Supercharger install Vortech provides a Ωî spacer that goes under the thermostat housing to allow clocking the thermostat housing a few degrees clockwise for supercharge clearance around the radiator hose. This extra Ωí of height on the thermostat housing prevents the intake from seating. First pictures shows the intake sitting on the thermostat housing and the second picture shows the spacer and the gap between the intake and the head.
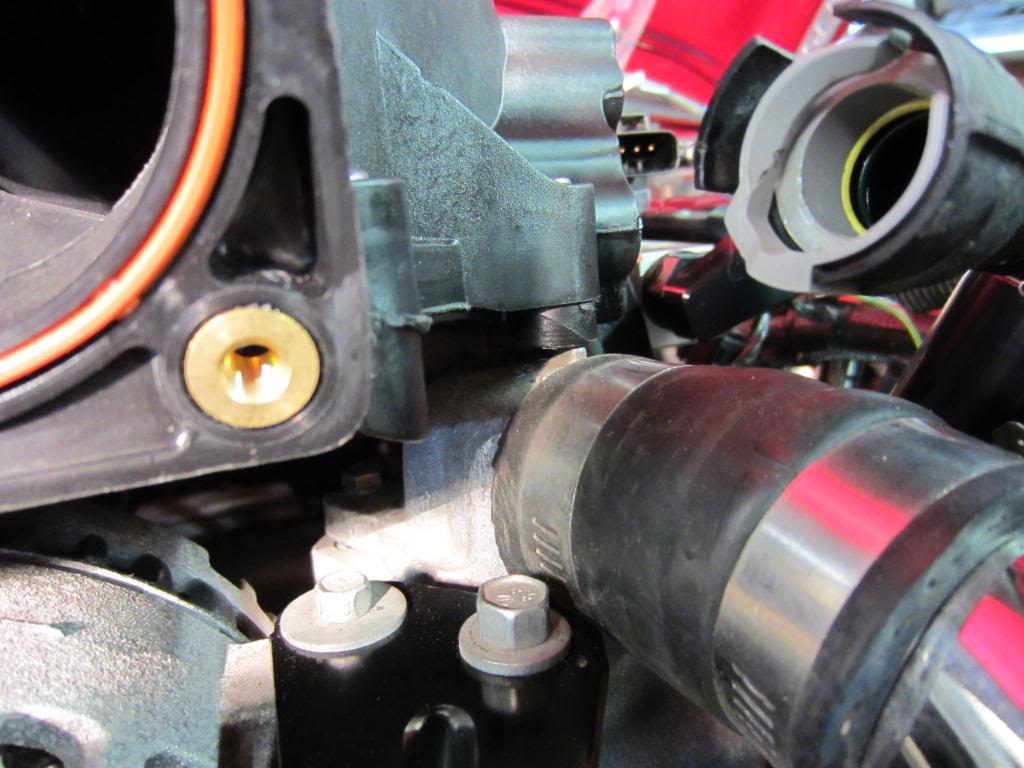
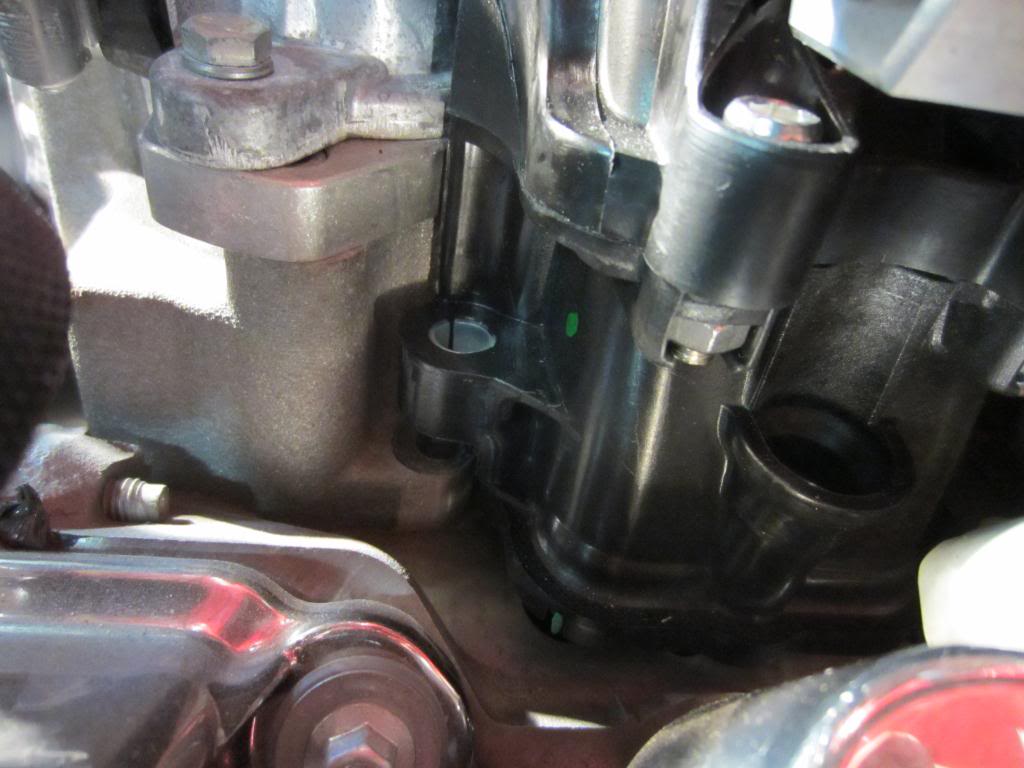
Back to the drawing board on this mod. I need to fashion a solution that eliminates the Vortech spacer and permits clocking the thermostat housing.
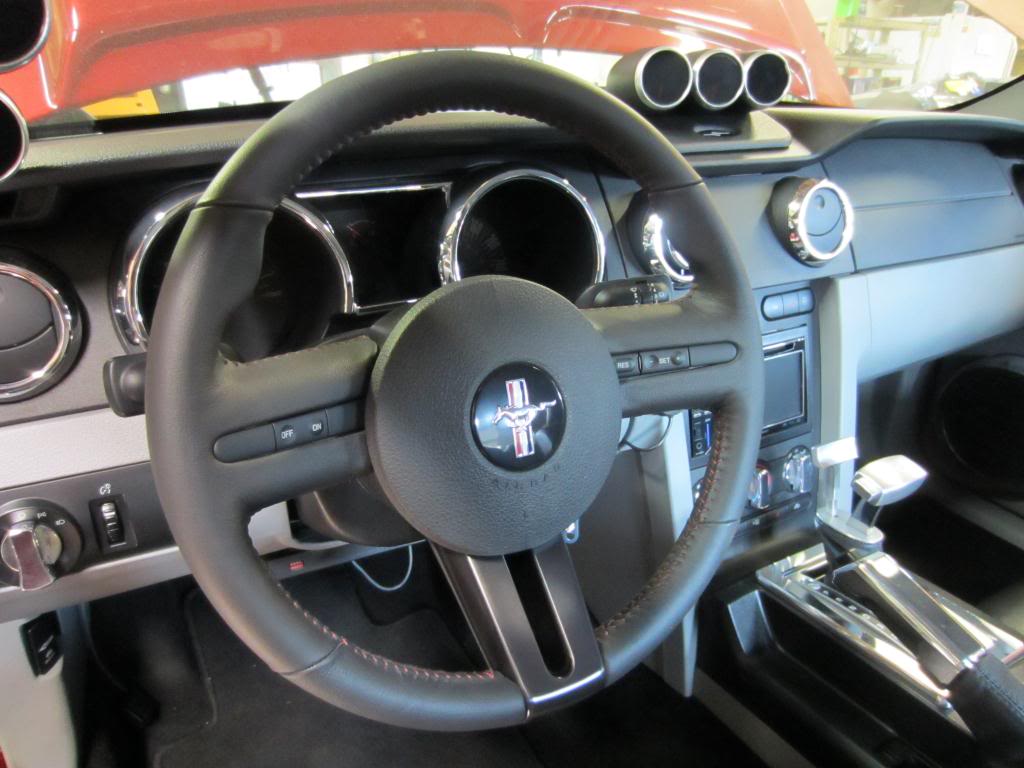
Installed a FRPP GT500 leather Wrapped Steering Wheel
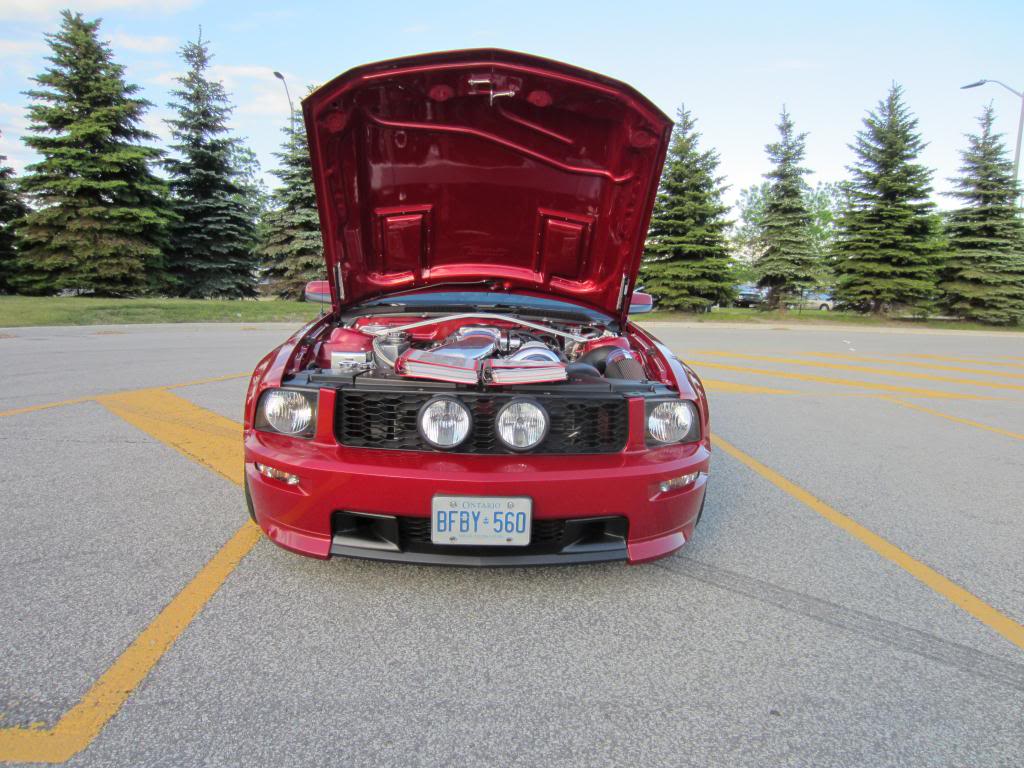
And lastly added a Center Fog Light Honeycomb Grille by Street Scene
Relocated battery to the trunk to make room for additional supercharger cooling capacity.
Added a Moroso Supercharger Coolant Tank
Added a Moroso Fuse Box Cover
Replaced my FRPP Strut Tower Brace with a BOSS 302 Brace (The BOSS Brace provides clearance for a FRPP 3V Intake)
FRPP Intake ready to install
However, I ran into a problem as illustrated in the next two pictures. As part of the Vortech Supercharger install Vortech provides a Ωî spacer that goes under the thermostat housing to allow clocking the thermostat housing a few degrees clockwise for supercharge clearance around the radiator hose. This extra Ωí of height on the thermostat housing prevents the intake from seating. First pictures shows the intake sitting on the thermostat housing and the second picture shows the spacer and the gap between the intake and the head.
Back to the drawing board on this mod. I need to fashion a solution that eliminates the Vortech spacer and permits clocking the thermostat housing.
Installed a FRPP GT500 leather Wrapped Steering Wheel
And lastly added a Center Fog Light Honeycomb Grille by Street Scene
 6/6/12, 10:51 AM
#3
Mach 1 Member
Thread Starter
Steering wheel install is pretty straight forward, about 30 minutes while taking a few pictures. In the mess I call a garage it likely took me longer to find all the tools than do the job. lol
You need a small flat blade screw driver, 8mm deep socket, 24mm socket, ratchet and torque wrench and that is about it.
Basically:
1. Disconnect battery.
2. Remove plastic caps (2) with a flat blade screw driver and then 8mm bolts (2) (one each on either side) of the wheel/column.
3. Pull the center of the steering wheel out (CAREFULL airbag)
4. Disconnect air bag connections (2).
5. Remove the center bolt with 24mm socket.
6. Carefully pull the wheel off (no puller required) and using your flat blade screw driver disconnect the harness from the plug.
7. Repeat the steps in the reverse order (torque the 24mm bolt to 41 lb/ft) and you are done.
5/6/13, 05:44 AM
#4
Mach 1 Member
Thread Starter
Replaced the 2008 OEM Ford battery with an Optima Yellow Top D34. Ford battery was not dead, but I am sure it was living on borrowed time and could give up the ghost any day now!
 5/13/13, 05:32 AM
#7
Mach 1 Member
Thread Starter
Part number is AR3Z-16A200-A it is the brace for a 2012 Boss 302 and also the base Mustang. Fits just fine on my 08. I needed this brace because it is higher than the FRPP Brace and it will clear a FRPP 3V Intake. I do have an aftermarket hood, wonder if that is why it fits?
5/13/13, 06:09 AM
#8
Mach 1 Member
Thread Starter
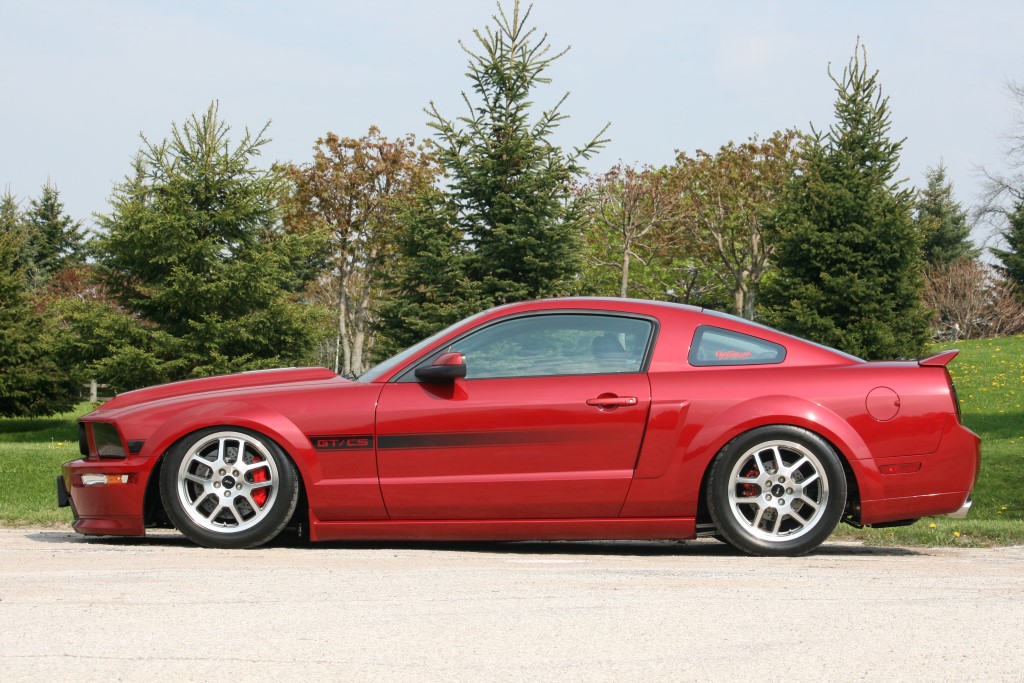
ìRideî quality is clearly an aspect of personal choice. In addition to the GT/CS I have a 1970 BOSS 302 (now in a very slow restoration). My wife would describe the BOSS as ìnoisy, bumpy and stinkyî; she describes the GT/CS as ìnoisy and bumpyî. While I think both cars are neither noisy nor bumpy, the BOSS was definitely stinky. I would describe the ride in the GT/CS as nothing but ìfunî!
I will be shortly completing a forged engine build and after the new motor is in I am sure I will be able to describe the ride as ìeven more funî. Lol
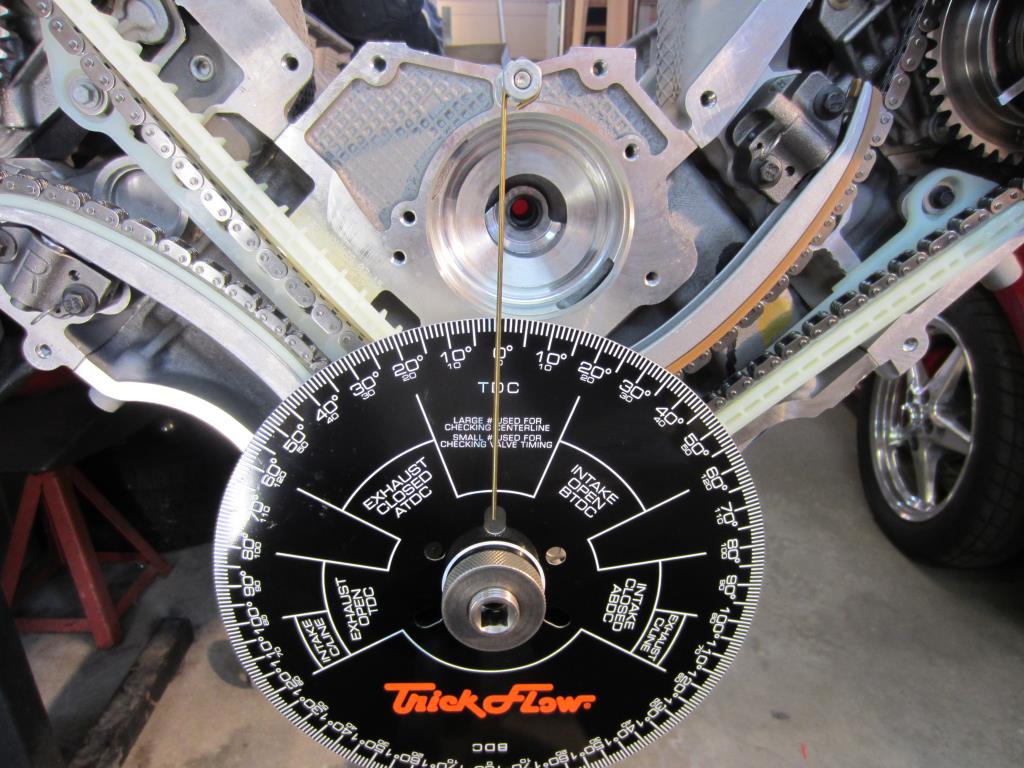
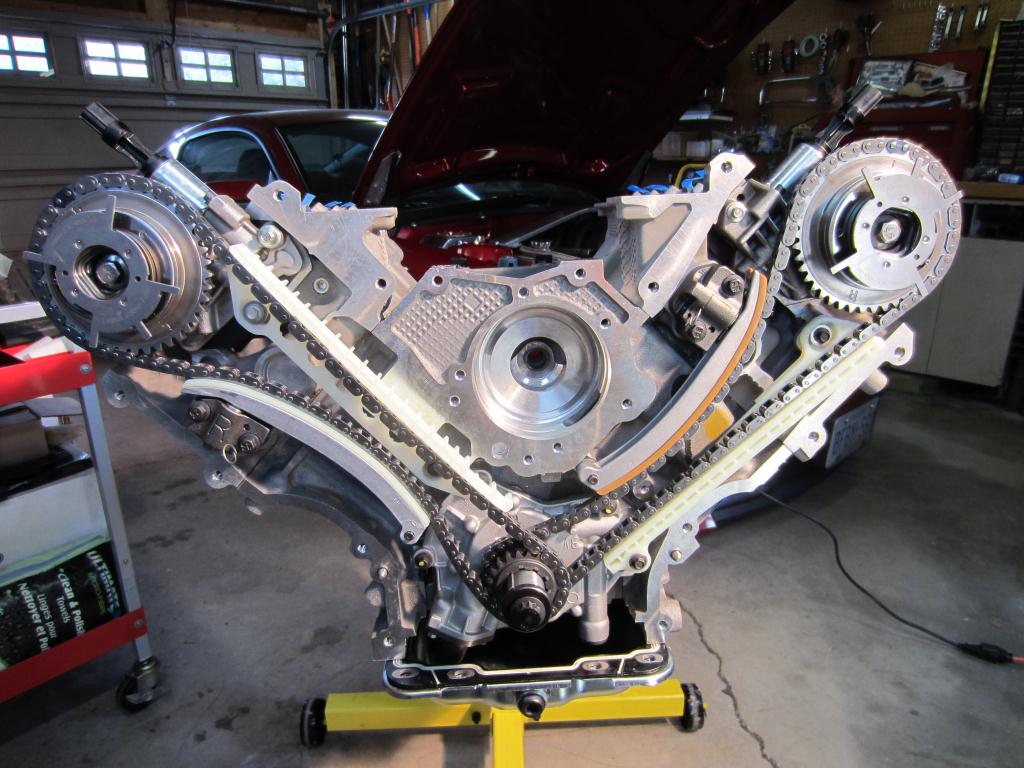
I will be shortly completing a forged engine build and after the new motor is in I am sure I will be able to describe the ride as ìeven more funî. Lol


 10/10/14, 08:52 AM
#11
Mach 1 Member
Thread Starter
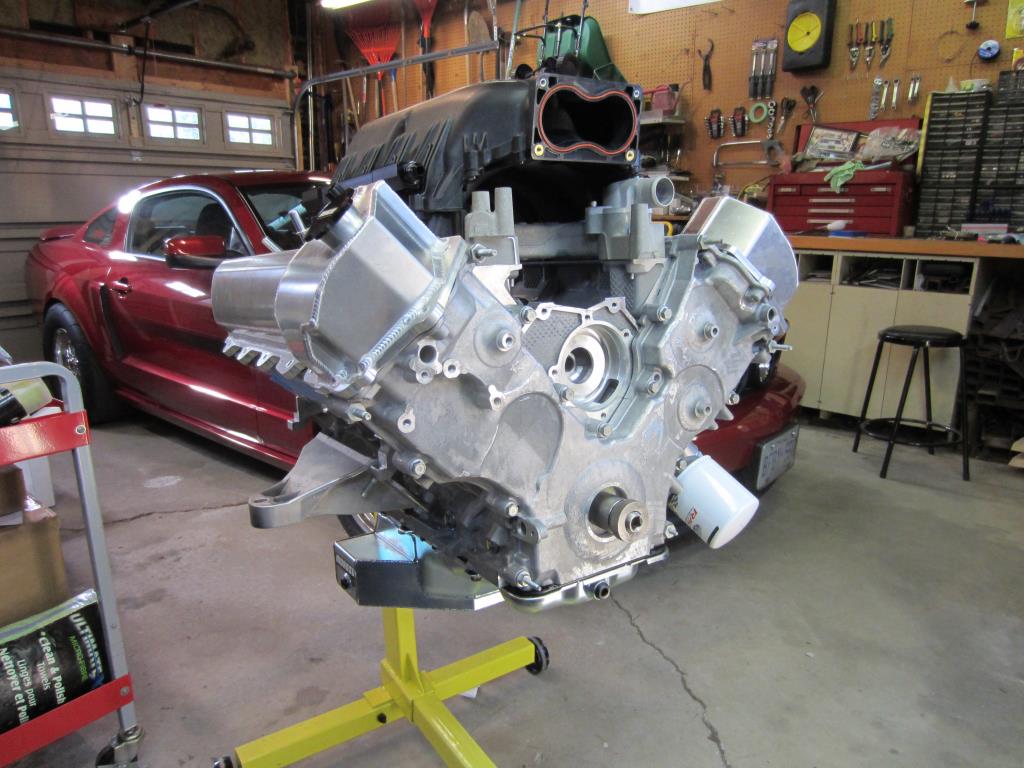
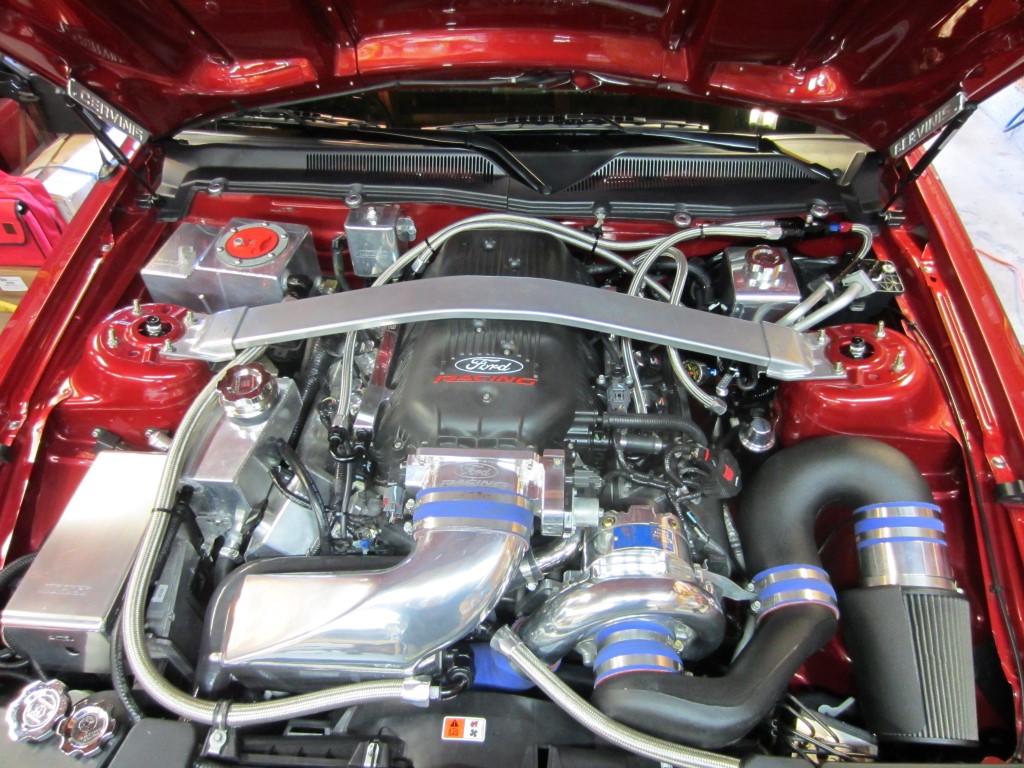
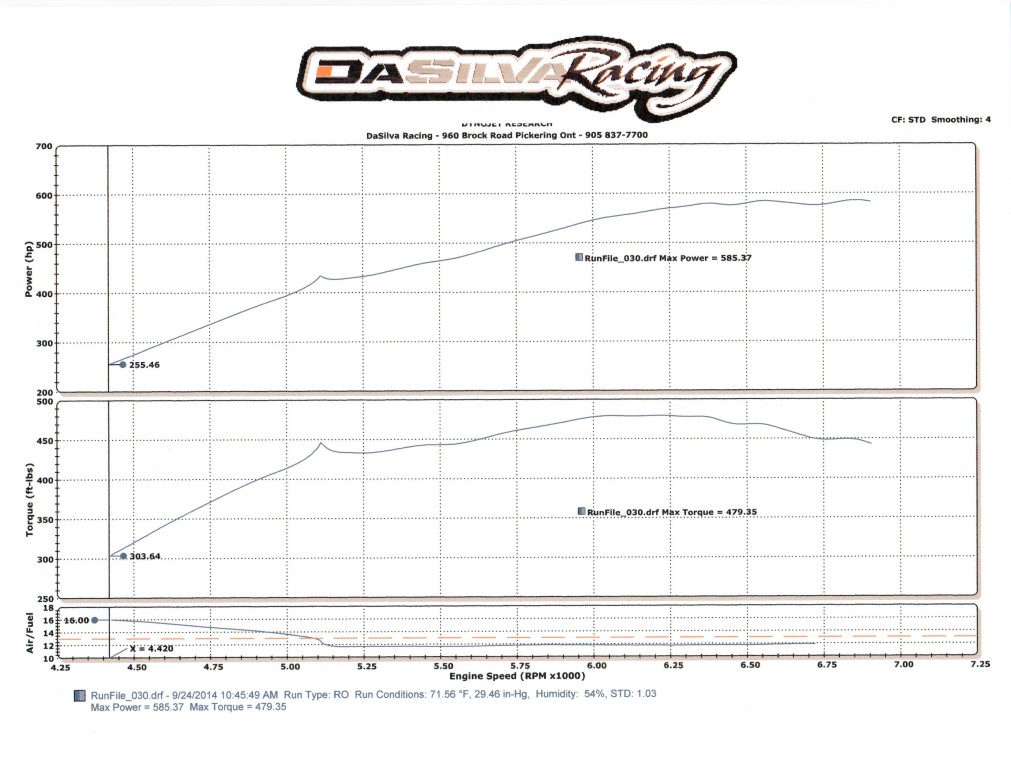
Forged motor is finally broken in and I have been off to the dyno (585 RWHP with 479 torque through the AUTOMATIC! Oh yes I also installed an Air Lift Performance suspension in the meantime.


Thread
Thread Starter
Forum
Replies
Last Post
M3hunter
Suspension, Brakes, and Tire Tech
5
9/10/15 09:26 AM