2004 MUSTANG, Buddy the V6 build thread
 3/24/15, 04:54 PM
#41
Mach 1 Member
Thread Starter
well all the work is done, so I am going to drive it around for a few days to see if the noise goes away, it seems a bit quieter then the original but not by much, I am hoping the noise goes away soon though, and once all is good will be paying the shop for the use of there lift and other equipment that was used at the time.
 3/25/15, 04:55 PM
#42
Mach 1 Member
Thread Starter
Clutch pedal extender Review
Well got the extender in and LOVE it, feels so much better, will need to readjust the seat and mirrors but should make for a more comfortable ride now. pics will come later when I have the time to snap some, too all of 10 minutes for me to install! hardest thing to do was find the correct size Philips screw driver...
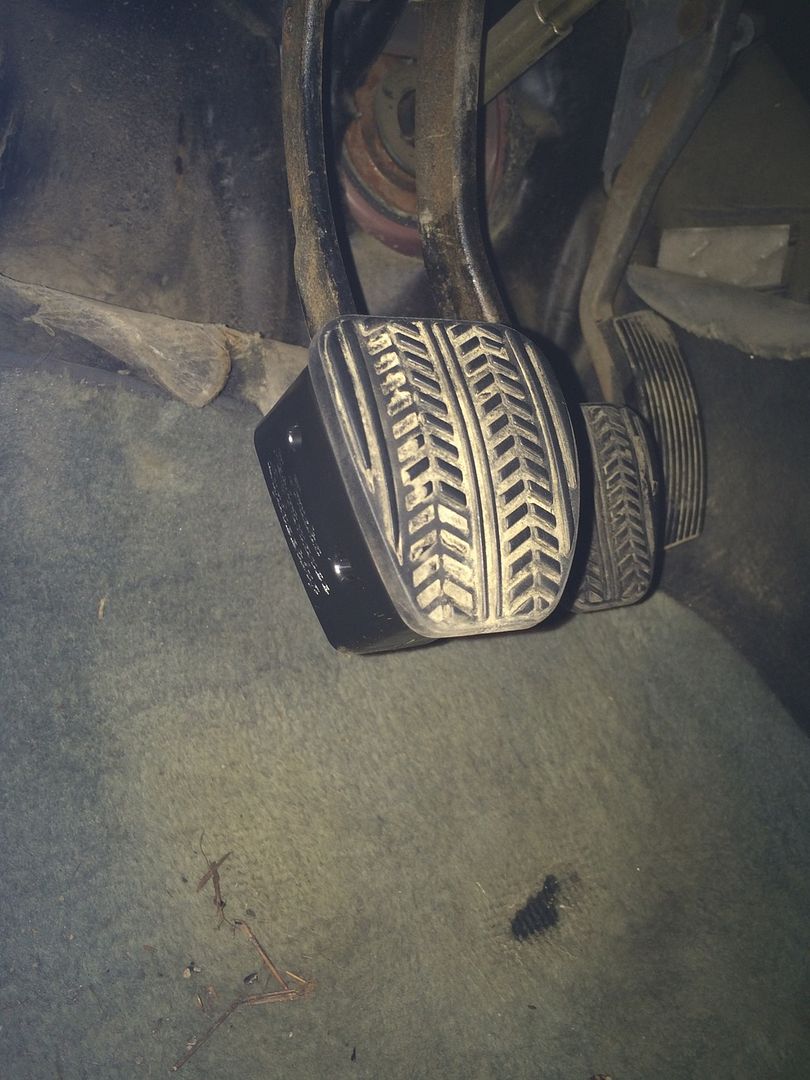
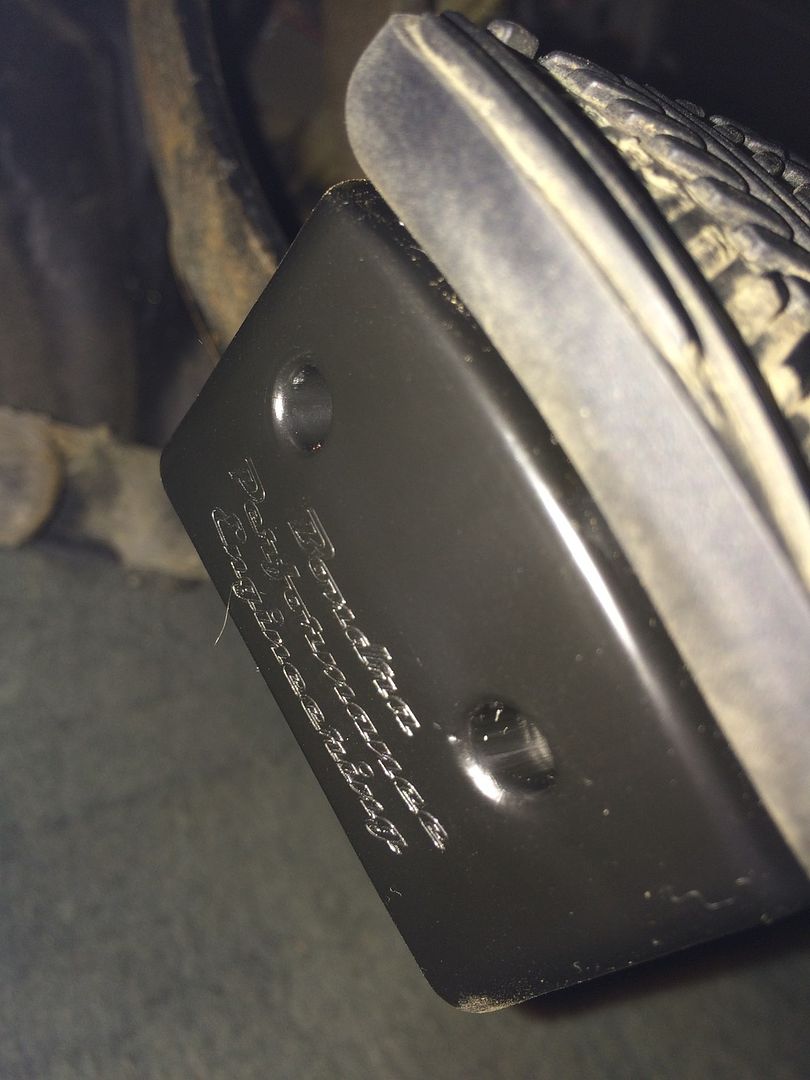
EDIT: Here are the pictures of it installed!!


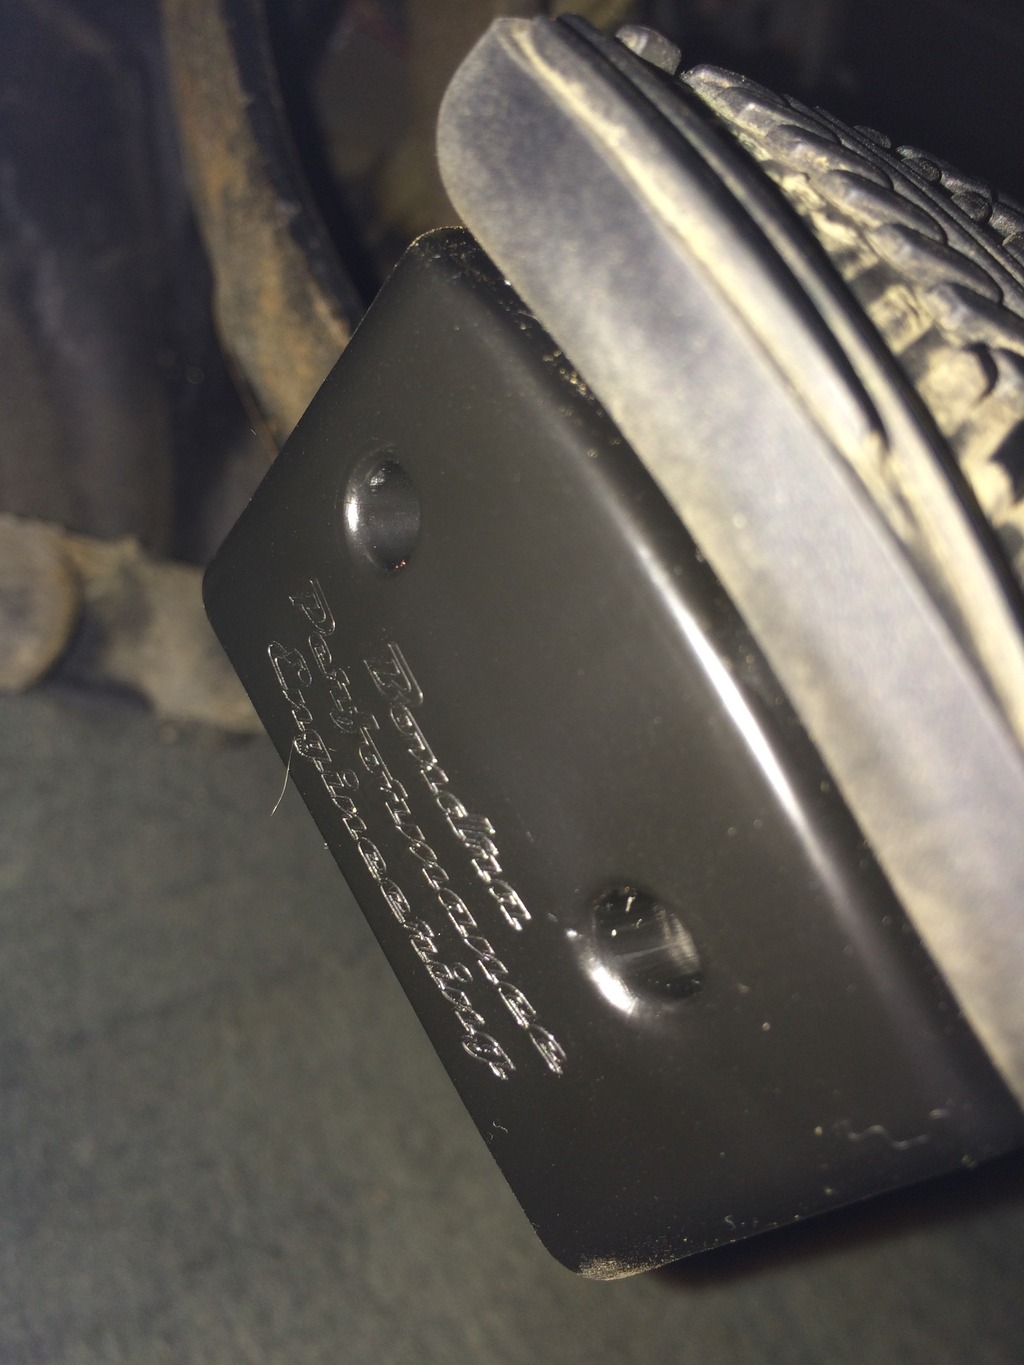
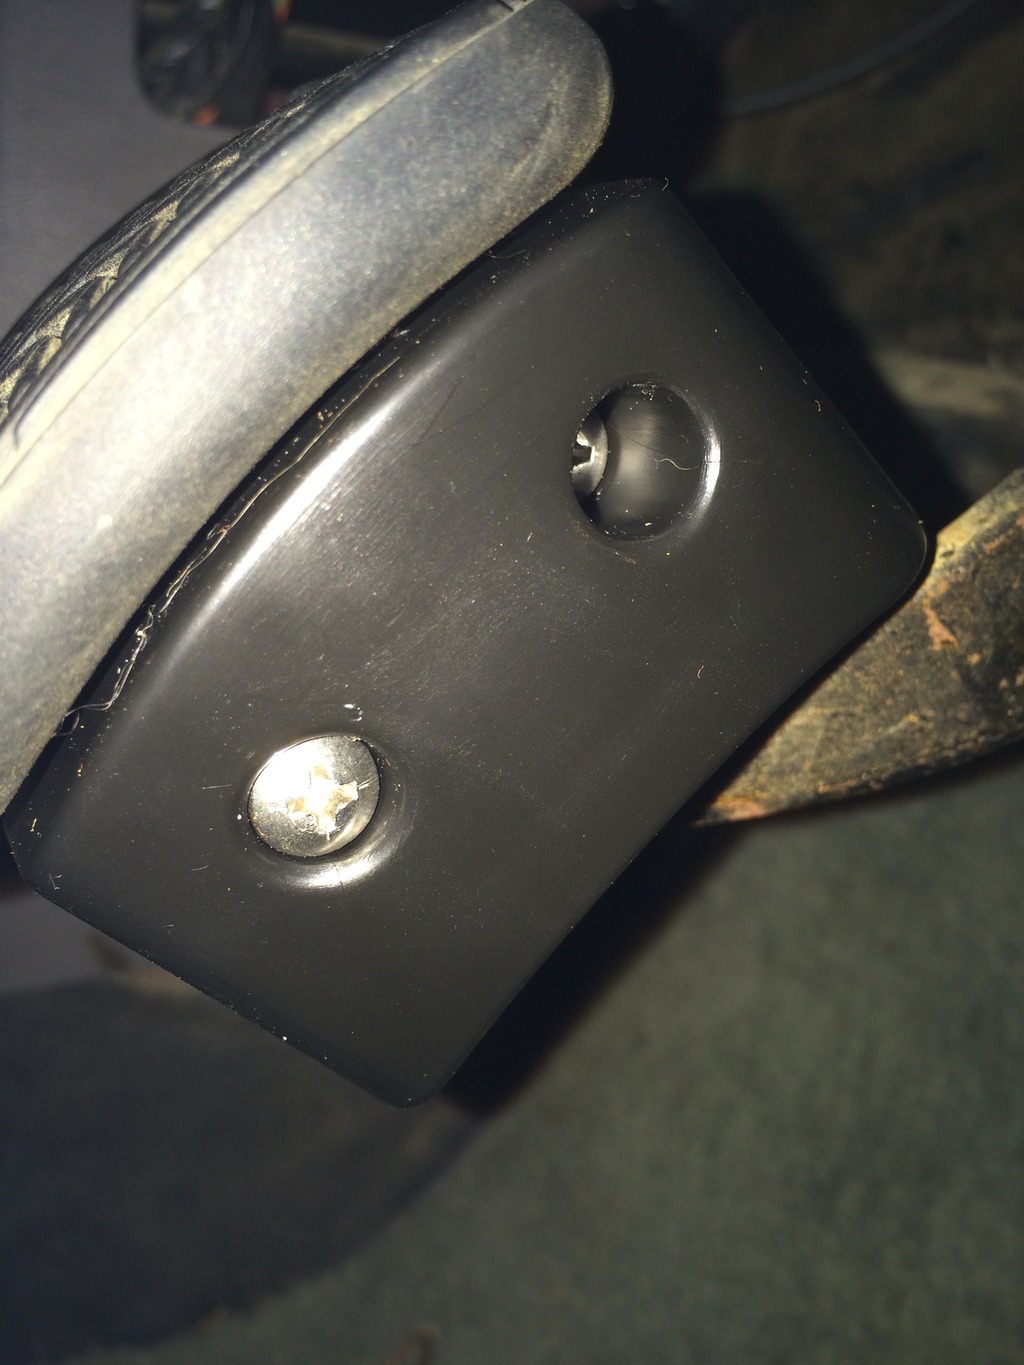
Its actually very easy to install, and I would suggest if you are not familiar with what to do, reading over the directions first, and also would suggest if you have the type of pedal I have (the pad part) putting it in warm water (heat water up to approximately 150* or near boiling, but don't keep it in the water for more then 5 minutes (should be enough time to get the rubber pliable with out risking damage). then stretch the pad over the extender (sorry I didn't take install pics as this took less time then the photography would have taken), best way I can suggest is get the unit on the clutch foot then screw it down as snug as possible (i used a bit of loc tite (I believe the read is weaker then the blue)just so it doesn't have the screws backing out (sure they won't but still worth the precaution).
Best way to install the pad I would say would be to either put the pad on either the top or the bottom then slowly work your figures around together as you move in the direction to the edge that you picked to be last and that should allow you to get the pad on, then once your finished take the car for a nice drive.
I took mine out for a spin and while its taking a bit of getting used to (having to find the sweet spot for the seat) its already making a huge improvement in the drive, and I can actually move my self away further from the wheel so I am very pleased with this purchase and glad I made it, and if your height challenged like my self I would strongly recommend this product as its simple, stays out of the way and its easy to move to other vehicles that use the same type of pad foot design!!
as for ease of install I would rate it a 9.8 out of 10 (just because your pad can be quite irritating to work with and the suggested clam shell idea did not work as was suggested)
ease of use: 10 out of 10
looks: 10 out of 10 (its Acrylonitrile Butadiene Styrene plastic)
Comfort: 10 out of 10
Overall score:9.95
Would I recommend this to others: Heck yes I will
tools needed: One Philips screw driver (1)
every thing is included in the kit as far as parts go
EDIT: Here are the pictures of it installed!!
Its actually very easy to install, and I would suggest if you are not familiar with what to do, reading over the directions first, and also would suggest if you have the type of pedal I have (the pad part) putting it in warm water (heat water up to approximately 150* or near boiling, but don't keep it in the water for more then 5 minutes (should be enough time to get the rubber pliable with out risking damage). then stretch the pad over the extender (sorry I didn't take install pics as this took less time then the photography would have taken), best way I can suggest is get the unit on the clutch foot then screw it down as snug as possible (i used a bit of loc tite (I believe the read is weaker then the blue)just so it doesn't have the screws backing out (sure they won't but still worth the precaution).
Best way to install the pad I would say would be to either put the pad on either the top or the bottom then slowly work your figures around together as you move in the direction to the edge that you picked to be last and that should allow you to get the pad on, then once your finished take the car for a nice drive.
I took mine out for a spin and while its taking a bit of getting used to (having to find the sweet spot for the seat) its already making a huge improvement in the drive, and I can actually move my self away further from the wheel so I am very pleased with this purchase and glad I made it, and if your height challenged like my self I would strongly recommend this product as its simple, stays out of the way and its easy to move to other vehicles that use the same type of pad foot design!!
as for ease of install I would rate it a 9.8 out of 10 (just because your pad can be quite irritating to work with and the suggested clam shell idea did not work as was suggested)
ease of use: 10 out of 10
looks: 10 out of 10 (its Acrylonitrile Butadiene Styrene plastic)
Comfort: 10 out of 10
Overall score:9.95
Would I recommend this to others: Heck yes I will
tools needed: One Philips screw driver (1)
every thing is included in the kit as far as parts go
Last edited by Jim74656; 3/26/15 at 05:43 PM.
3/26/15, 07:15 AM
#43
Former Vendor

Well got the extender in and LOVE it, feels so much better, will need to readjust the seat and mirrors but should make for a more comfortable ride now. pics will come later when I have the time to snap some, too all of 10 minutes for me to install! hardest thing to do was find the correct size Philips screw driver...
EDIT: Here are the pictures of it installed!!


Its actually very easy to install, and I would suggest if you are not familiar with what to do, reading over the directions first, and also would suggest if you have the type of pedal I have (the pad part) putting it in warm water (heat water up to approximately 150* or near boiling, but don't keep it in the water for more then 5 minutes (should be enough time to get the rubber pliable with out risking damage). then stretch the pad over the extender (sorry I didn't take install pics as this took less time then the photography would have taken), best way I can suggest is get the unit on the clutch foot then screw it down as snug as possible (i used a bit of loc tite (I believe the read is weaker then the blue)just so it doesn't have the screws backing out (sure they won't but still worth the precaution).
Best way to install the pad I would say would be to either put the pad on either the top or the bottom then slowly work your figures around together as you move in the direction to the edge that you picked to be last and that should allow you to get the pad on, then once your finished take the car for a nice drive.
I took mine out for a spin and while its taking a bit of getting used to (having to find the sweet spot for the seat) its already making a huge improvement in the drive, and I can actually move my self away further from the wheel so I am very pleased with this purchase and glad I made it, and if your height challenged like my self I would strongly recommend this product as its simple, stays out of the way and its easy to move to other vehicles that use the same type of pad foot design!!
as for ease of install I would rate it a 9.8 out of 10 (just because your pad can be quite irritating to work with and the suggested clam shell idea did not work as was suggested)
ease of use: 10 out of 10
looks: 10 out of 10 (its Acrylonitrile Butadiene Styrene plastic)
Comfort: 10 out of 10
Overall score:9.95
Would I recommend this to others: Heck yes I will
tools needed: One Philips screw driver (1)
every thing is included in the kit as far as parts go
EDIT: Here are the pictures of it installed!!
Its actually very easy to install, and I would suggest if you are not familiar with what to do, reading over the directions first, and also would suggest if you have the type of pedal I have (the pad part) putting it in warm water (heat water up to approximately 150* or near boiling, but don't keep it in the water for more then 5 minutes (should be enough time to get the rubber pliable with out risking damage). then stretch the pad over the extender (sorry I didn't take install pics as this took less time then the photography would have taken), best way I can suggest is get the unit on the clutch foot then screw it down as snug as possible (i used a bit of loc tite (I believe the read is weaker then the blue)just so it doesn't have the screws backing out (sure they won't but still worth the precaution).
Best way to install the pad I would say would be to either put the pad on either the top or the bottom then slowly work your figures around together as you move in the direction to the edge that you picked to be last and that should allow you to get the pad on, then once your finished take the car for a nice drive.
I took mine out for a spin and while its taking a bit of getting used to (having to find the sweet spot for the seat) its already making a huge improvement in the drive, and I can actually move my self away further from the wheel so I am very pleased with this purchase and glad I made it, and if your height challenged like my self I would strongly recommend this product as its simple, stays out of the way and its easy to move to other vehicles that use the same type of pad foot design!!
as for ease of install I would rate it a 9.8 out of 10 (just because your pad can be quite irritating to work with and the suggested clam shell idea did not work as was suggested)
ease of use: 10 out of 10
looks: 10 out of 10 (its Acrylonitrile Butadiene Styrene plastic)
Comfort: 10 out of 10
Overall score:9.95
Would I recommend this to others: Heck yes I will
tools needed: One Philips screw driver (1)
every thing is included in the kit as far as parts go
Hey Jim74656 - Thanks for taking the time to have this posted up! I'm really happy to hear that you're enjoying the extender so much! It's amazing how such a small modification can make such a world of difference from the day to day commute!
Make sure to have a review posted up on the Clutch Pedal Extension Product Page as well and if there's anything else I can help out with you know where to find me!
Happy Modding!
Alex
3/26/15, 02:53 PM
#45
Mach 1 Member
Thread Starter
Shift handle review
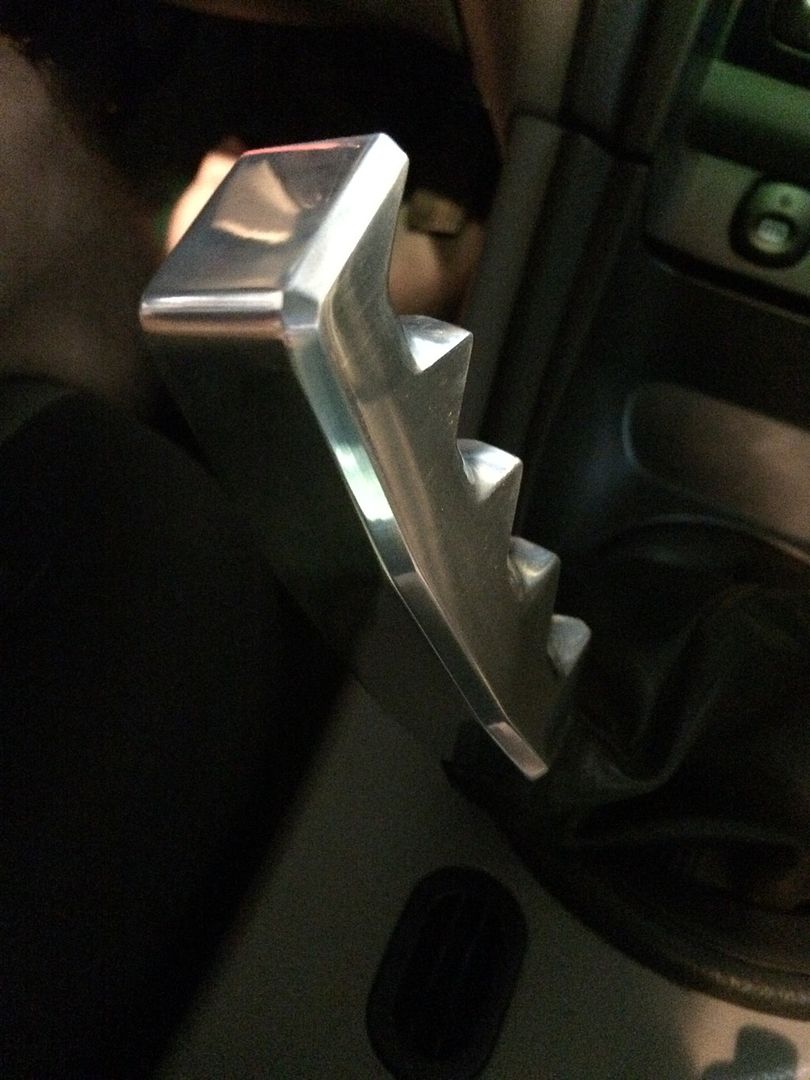
well I got more goodies from AM today!! YAY! my shiftier came in today along with my T-shirt that I got from AM (thanks American Muscle!) and I absolutely love how the shiftier feels!!!
as for the shiftier its self, while I would have proffered it to be packed better then just in a plastic baggie in a cardboard box (it was able to be shaken) the package was ok, but come on really, a baggie and an empty box with OUT any type of padding or package peanuts?? not smart, but this review is not about that, so lets get on with the good juicy bits, the meat perhaps?
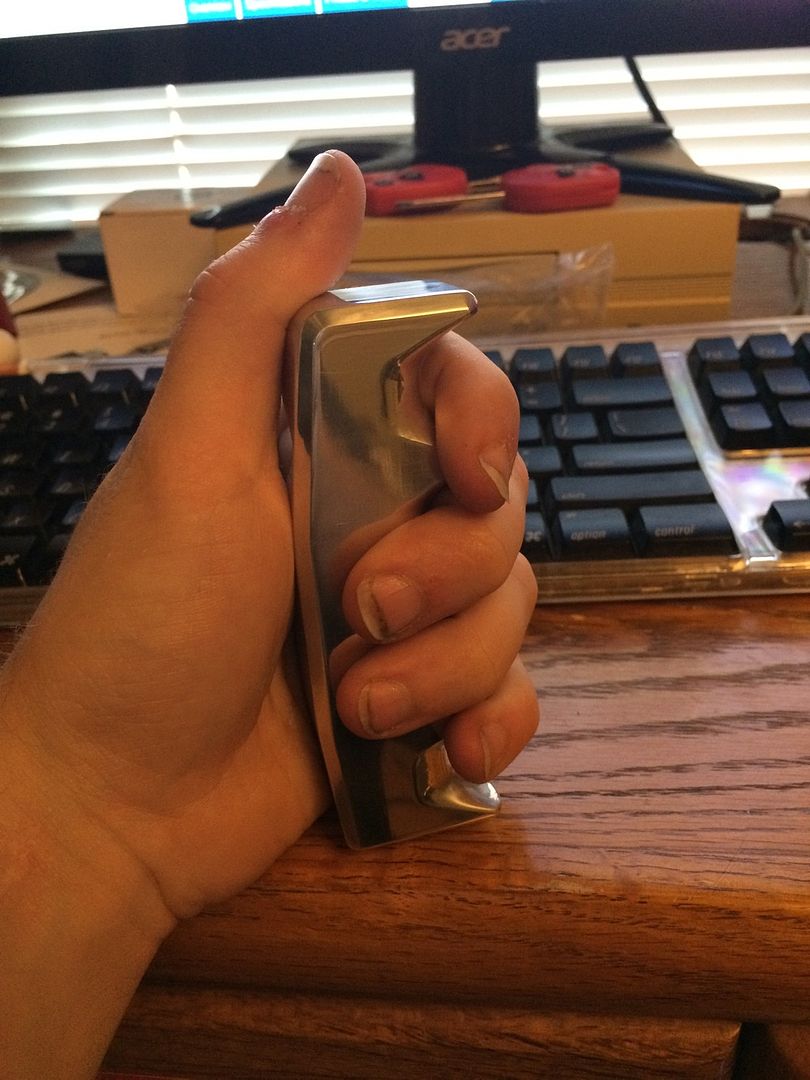
anyways holding the unit in hand its got a good feel to it, not too heavy and not to light, and it doesn't feel like some of the "knock offs" and I have seen a few.
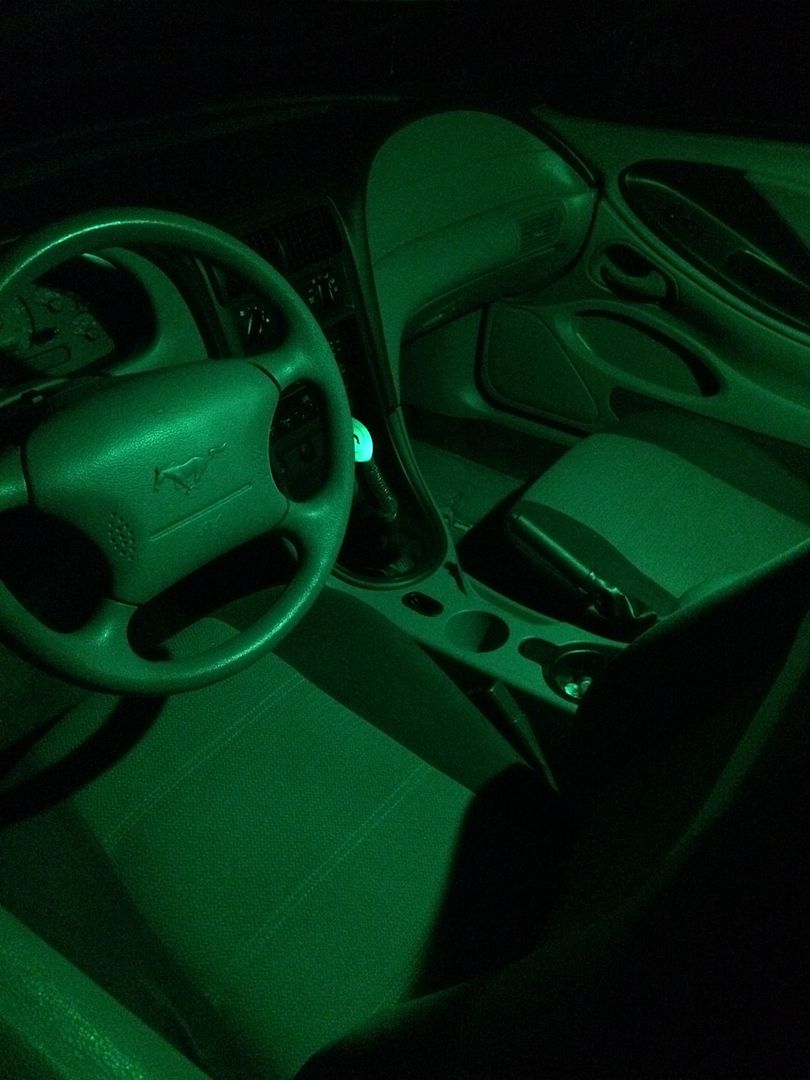
Now if we compare it to the "Browning" handle this is by far lighter by at least a half a lb (estimated), at the moment I sadly don't have a picture of the Browning handle on file, and the one I have is back in its packaging to be returned, but as far as the comparison goes they are close to the same height, while this one looks and feels to be a slight bit shorter (the other handle highest point came to the radio **** level when in second/third gears), this one does not, the grip sections your fingers go in defiantly are more pronounced and the other handle feels more like a pistol grip (as its name implies), below are two pictures showing each

(sorry about the green light, I forgot to turn on the standard lighting (this is the night time light)
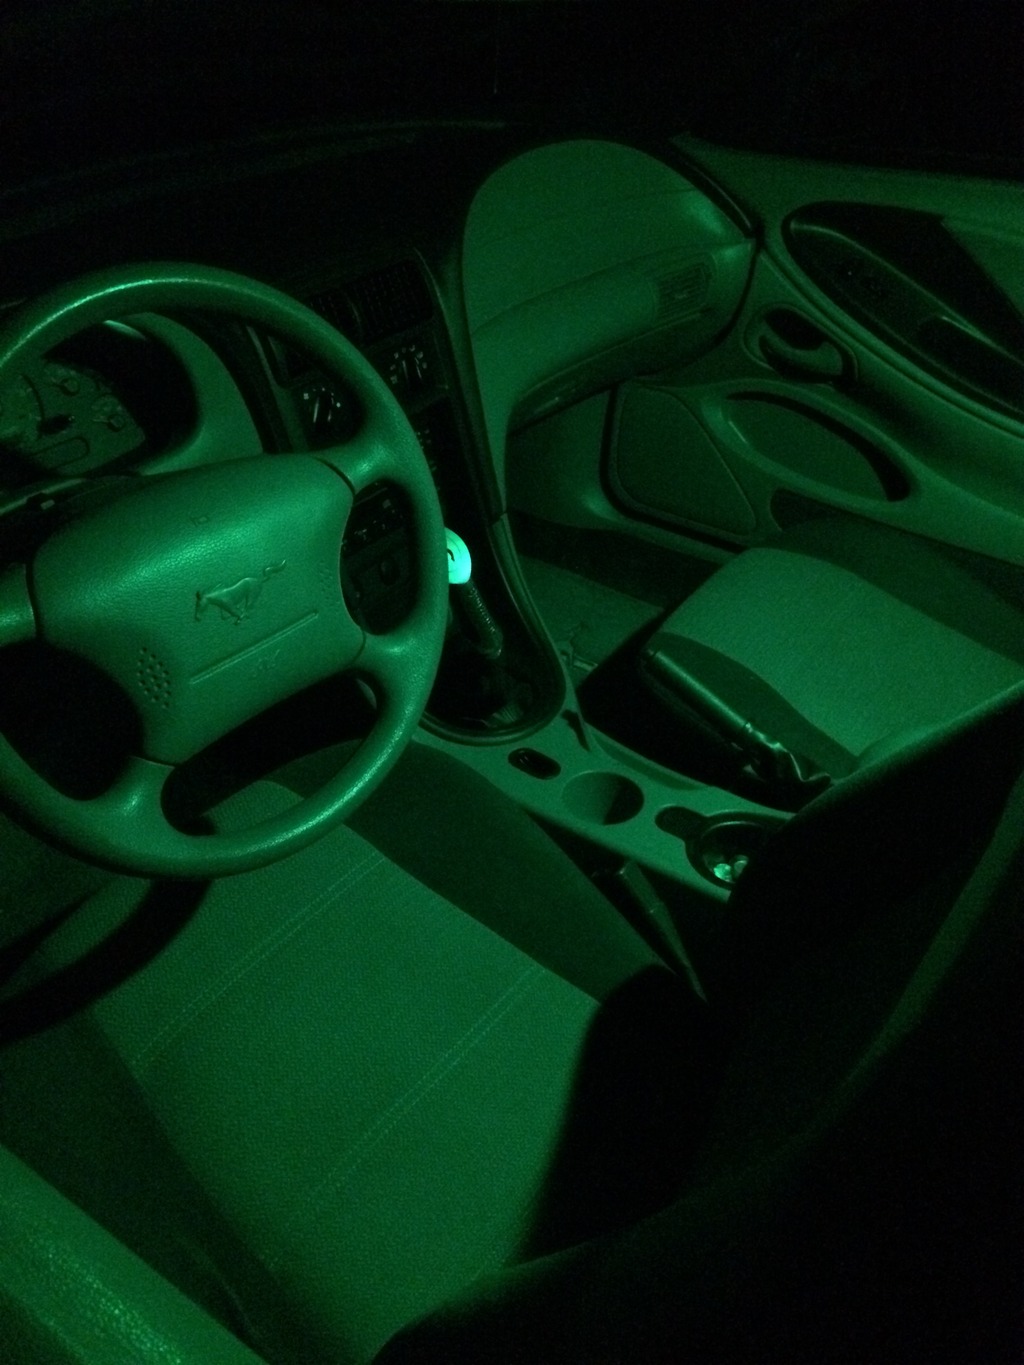
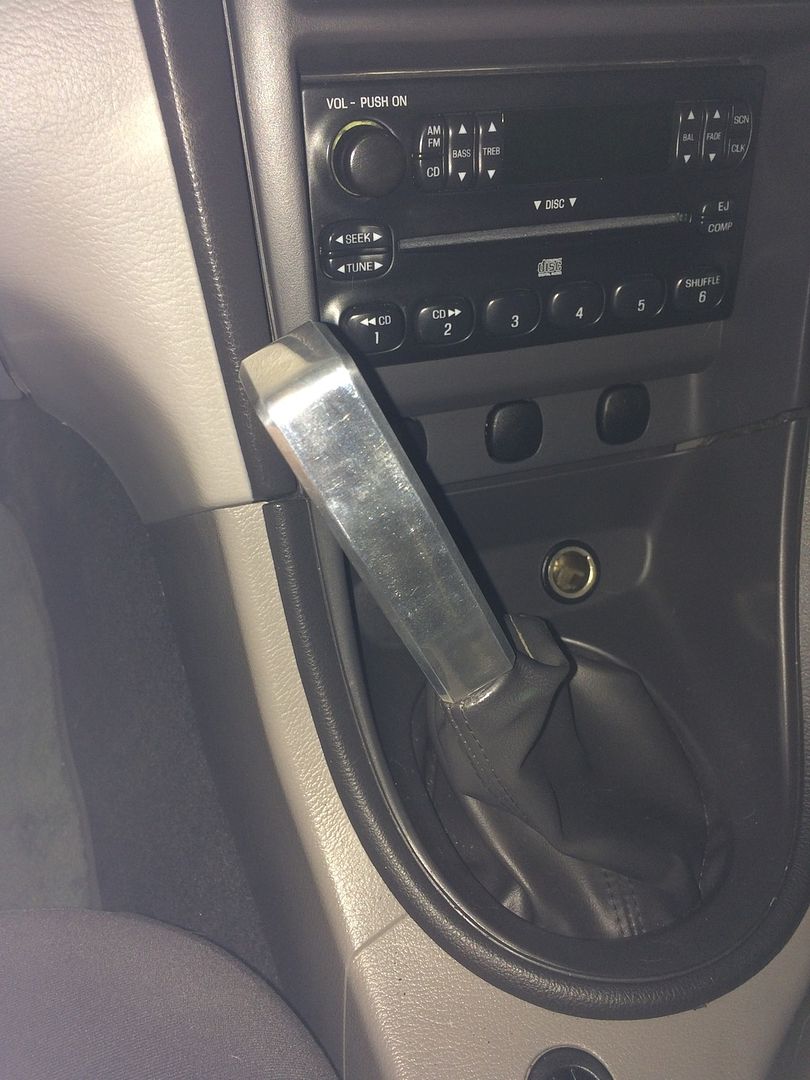
now as far as rowing through the gears the feel is more or less the same, however the one from AM does feel more "solid" as it screws on to your shift lever as well as using a set screw (pictured as best as I could) to hold it in place, where as the plastic insert the other handle sat on (that it went over) would just spin on the lever, and this happened after about a week of use, hence why its packed away to be returned to place of purchase.
Here is the set screw, and if you look closely you should be able to see the threading with in the part that the lever goes into
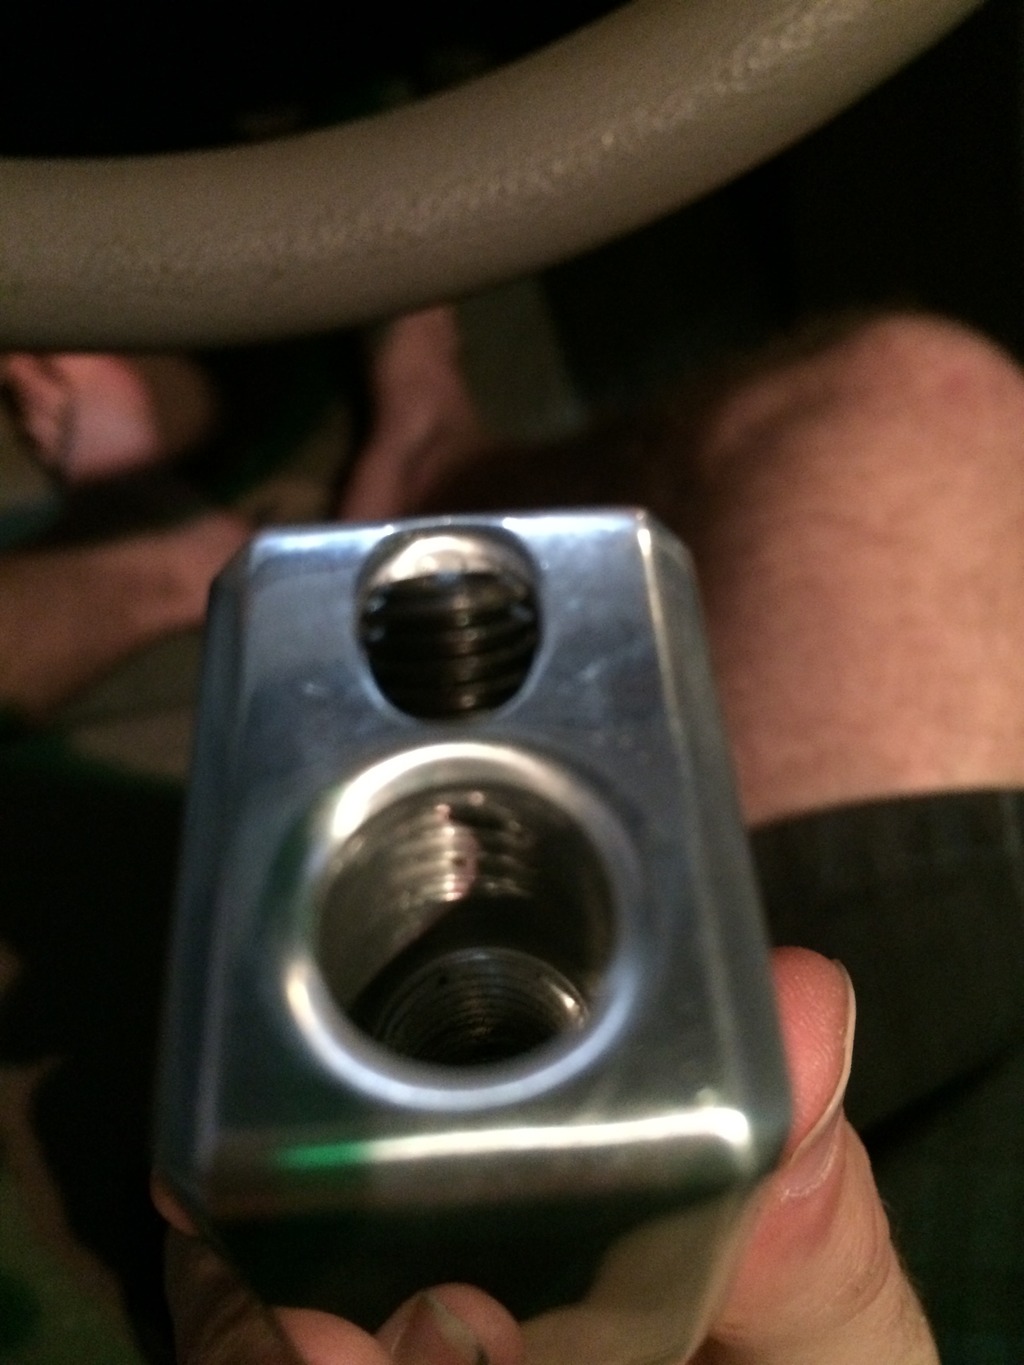
even though my hands are small (compared to an avrage persons hands I suppose), it does have a good feel to it, and while I would have made it out of the same material (billit?) I would have also wanted to see some sort of rubber padding on the sides for the days when it will be hot out and have the sun baking it
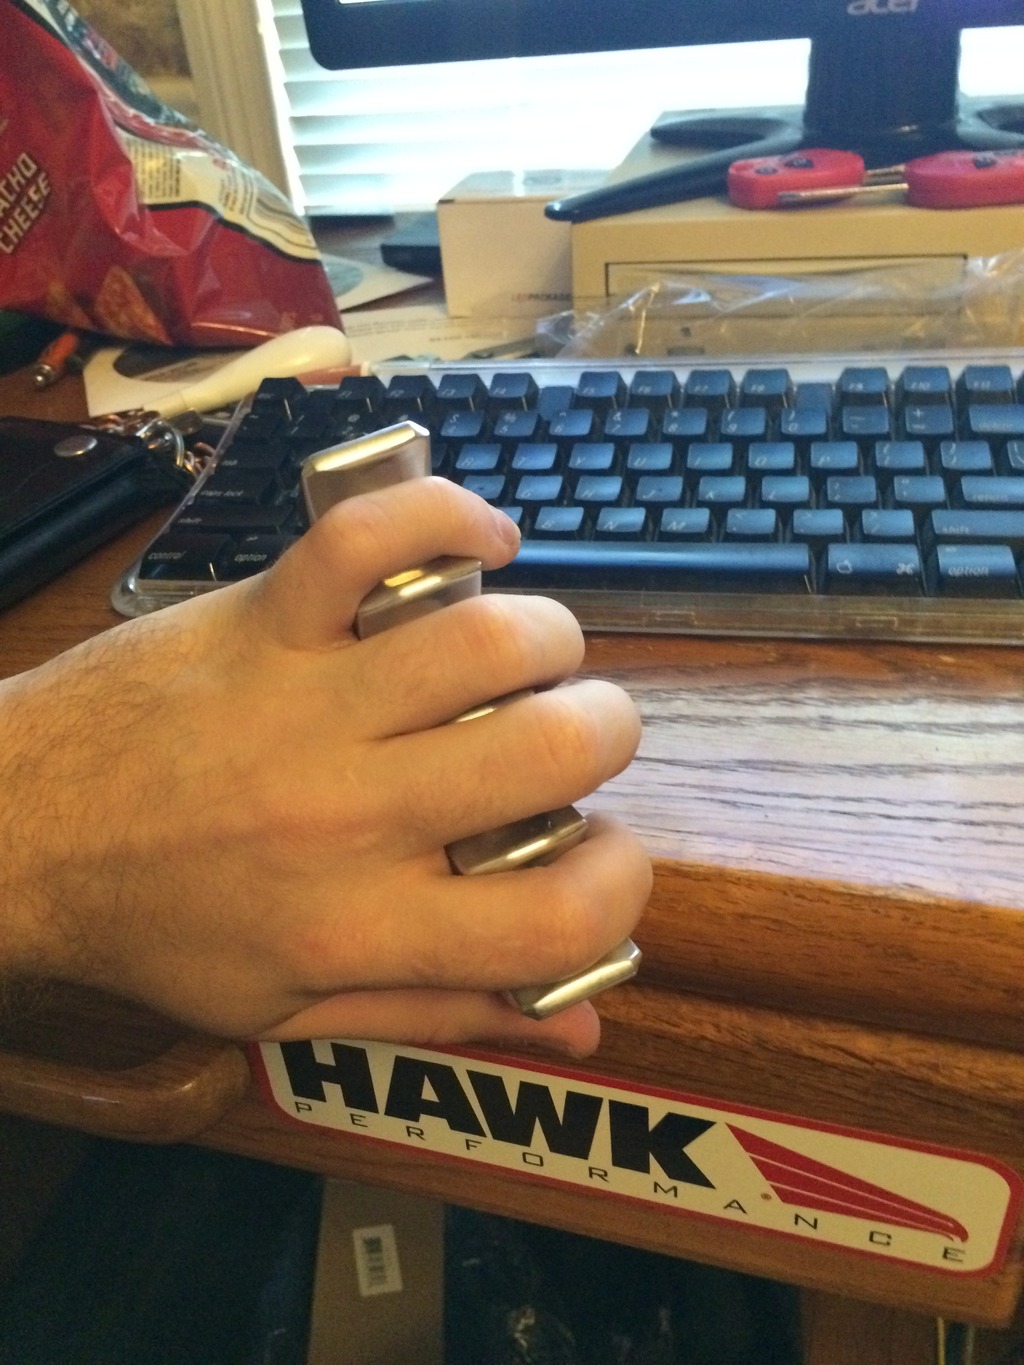

Now it really is a nice looking piece that one can put in there Mustang, and yes it took me all of 30 seconds to screw it on and tighten the set screw down I do like the chrome look, but I would love to see in the future perhaps some color options Anodized colors like Black, red, or other colors, but again that is a personal preference thing I guess.
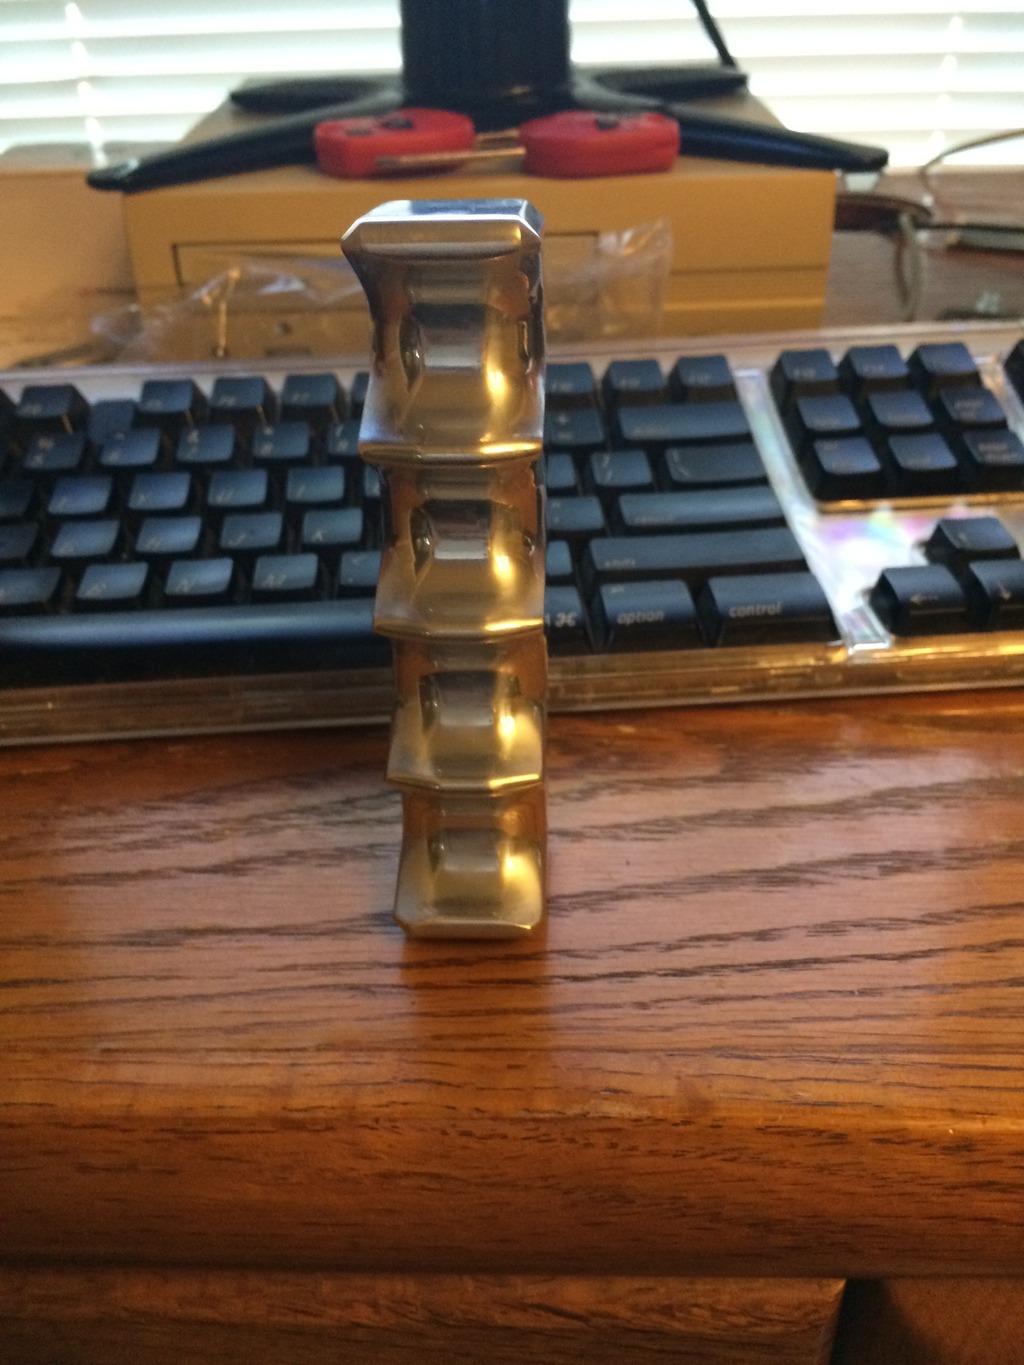
It does get smudges on it rather easy (what would you expect?) but its also very easy to wipe down with a damp cloth and mild soap if you wanted to remove the oils and the like off it, and if your making a show car this is a great option to dress up the car as well! Would I recommend this to others looking for this type of item, sure it looks good, just look at the pictures for your self!

Ease of use 10 of 10
Looks: 10 of 10
ease to clean 10 of 10
ease of install 10 of 10 (just screw and set)
installation: easy (novice experience)
time to install: 30 seconds (or approximately)
fun factor: too much fun it might become illegal
overall score 10
overall impression: impressed
recommended product for show cars or just general street use: yes
as for the shiftier its self, while I would have proffered it to be packed better then just in a plastic baggie in a cardboard box (it was able to be shaken) the package was ok, but come on really, a baggie and an empty box with OUT any type of padding or package peanuts?? not smart, but this review is not about that, so lets get on with the good juicy bits, the meat perhaps?
anyways holding the unit in hand its got a good feel to it, not too heavy and not to light, and it doesn't feel like some of the "knock offs" and I have seen a few.
Now if we compare it to the "Browning" handle this is by far lighter by at least a half a lb (estimated), at the moment I sadly don't have a picture of the Browning handle on file, and the one I have is back in its packaging to be returned, but as far as the comparison goes they are close to the same height, while this one looks and feels to be a slight bit shorter (the other handle highest point came to the radio **** level when in second/third gears), this one does not, the grip sections your fingers go in defiantly are more pronounced and the other handle feels more like a pistol grip (as its name implies), below are two pictures showing each
(sorry about the green light, I forgot to turn on the standard lighting (this is the night time light)
now as far as rowing through the gears the feel is more or less the same, however the one from AM does feel more "solid" as it screws on to your shift lever as well as using a set screw (pictured as best as I could) to hold it in place, where as the plastic insert the other handle sat on (that it went over) would just spin on the lever, and this happened after about a week of use, hence why its packed away to be returned to place of purchase.
Here is the set screw, and if you look closely you should be able to see the threading with in the part that the lever goes into
even though my hands are small (compared to an avrage persons hands I suppose), it does have a good feel to it, and while I would have made it out of the same material (billit?) I would have also wanted to see some sort of rubber padding on the sides for the days when it will be hot out and have the sun baking it
Now it really is a nice looking piece that one can put in there Mustang, and yes it took me all of 30 seconds to screw it on and tighten the set screw down I do like the chrome look, but I would love to see in the future perhaps some color options Anodized colors like Black, red, or other colors, but again that is a personal preference thing I guess.
It does get smudges on it rather easy (what would you expect?) but its also very easy to wipe down with a damp cloth and mild soap if you wanted to remove the oils and the like off it, and if your making a show car this is a great option to dress up the car as well! Would I recommend this to others looking for this type of item, sure it looks good, just look at the pictures for your self!
Ease of use 10 of 10
Looks: 10 of 10
ease to clean 10 of 10
ease of install 10 of 10 (just screw and set)
installation: easy (novice experience)
time to install: 30 seconds (or approximately)
fun factor: too much fun it might become illegal
overall score 10
overall impression: impressed
recommended product for show cars or just general street use: yes
Last edited by Jim74656; 3/26/15 at 05:42 PM.
3/27/15, 08:26 AM
#46
Former Vendor
Alex
well I got more goodies from AM today!! YAY! my shiftier came in today along with my T-shirt that I got from AM (thanks American Muscle!) and I absolutely love how the shiftier feels!!!
as for the shiftier its self, while I would have proffered it to be packed better then just in a plastic baggie in a cardboard box (it was able to be shaken) the package was ok, but come on really, a baggie and an empty box with OUT any type of padding or package peanuts?? not smart, but this review is not about that, so lets get on with the good juicy bits, the meat perhaps?
anyways holding the unit in hand its got a good feel to it, not too heavy and not to light, and it doesn't feel like some of the "knock offs" and I have seen a few.
Now if we compare it to the "Browning" handle this is by far lighter by at least a half a lb (estimated), at the moment I sadly don't have a picture of the Browning handle on file, and the one I have is back in its packaging to be returned, but as far as the comparison goes they are close to the same height, while this one looks and feels to be a slight bit shorter (the other handle highest point came to the radio **** level when in second/third gears), this one does not, the grip sections your fingers go in defiantly are more pronounced and the other handle feels more like a pistol grip (as its name implies), below are two pictures showing each
(sorry about the green light, I forgot to turn on the standard lighting (this is the night time light)
now as far as rowing through the gears the feel is more or less the same, however the one from AM does feel more "solid" as it screws on to your shift lever as well as using a set screw (pictured as best as I could) to hold it in place, where as the plastic insert the other handle sat on (that it went over) would just spin on the lever, and this happened after about a week of use, hence why its packed away to be returned to place of purchase.
Here is the set screw, and if you look closely you should be able to see the threading with in the part that the lever goes into

even though my hands are small (compared to an avrage persons hands I suppose), it does have a good feel to it, and while I would have made it out of the same material (billit?) I would have also wanted to see some sort of rubber padding on the sides for the days when it will be hot out and have the sun baking it

Now it really is a nice looking piece that one can put in there Mustang, and yes it took me all of 30 seconds to screw it on and tighten the set screw down I do like the chrome look, but I would love to see in the future perhaps some color options Anodized colors like Black, red, or other colors, but again that is a personal preference thing I guess.

It does get smudges on it rather easy (what would you expect?) but its also very easy to wipe down with a damp cloth and mild soap if you wanted to remove the oils and the like off it, and if your making a show car this is a great option to dress up the car as well! Would I recommend this to others looking for this type of item, sure it looks good, just look at the pictures for your self!
Ease of use 10 of 10
Looks: 10 of 10
ease to clean 10 of 10
ease of install 10 of 10 (just screw and set)
installation: easy (novice experience)
time to install: 30 seconds (or approximately)
fun factor: too much fun it might become illegal
overall score 10
overall impression: impressed
recommended product for show cars or just general street use: yes
as for the shiftier its self, while I would have proffered it to be packed better then just in a plastic baggie in a cardboard box (it was able to be shaken) the package was ok, but come on really, a baggie and an empty box with OUT any type of padding or package peanuts?? not smart, but this review is not about that, so lets get on with the good juicy bits, the meat perhaps?
anyways holding the unit in hand its got a good feel to it, not too heavy and not to light, and it doesn't feel like some of the "knock offs" and I have seen a few.
Now if we compare it to the "Browning" handle this is by far lighter by at least a half a lb (estimated), at the moment I sadly don't have a picture of the Browning handle on file, and the one I have is back in its packaging to be returned, but as far as the comparison goes they are close to the same height, while this one looks and feels to be a slight bit shorter (the other handle highest point came to the radio **** level when in second/third gears), this one does not, the grip sections your fingers go in defiantly are more pronounced and the other handle feels more like a pistol grip (as its name implies), below are two pictures showing each
(sorry about the green light, I forgot to turn on the standard lighting (this is the night time light)
now as far as rowing through the gears the feel is more or less the same, however the one from AM does feel more "solid" as it screws on to your shift lever as well as using a set screw (pictured as best as I could) to hold it in place, where as the plastic insert the other handle sat on (that it went over) would just spin on the lever, and this happened after about a week of use, hence why its packed away to be returned to place of purchase.
Here is the set screw, and if you look closely you should be able to see the threading with in the part that the lever goes into
even though my hands are small (compared to an avrage persons hands I suppose), it does have a good feel to it, and while I would have made it out of the same material (billit?) I would have also wanted to see some sort of rubber padding on the sides for the days when it will be hot out and have the sun baking it
Now it really is a nice looking piece that one can put in there Mustang, and yes it took me all of 30 seconds to screw it on and tighten the set screw down I do like the chrome look, but I would love to see in the future perhaps some color options Anodized colors like Black, red, or other colors, but again that is a personal preference thing I guess.
It does get smudges on it rather easy (what would you expect?) but its also very easy to wipe down with a damp cloth and mild soap if you wanted to remove the oils and the like off it, and if your making a show car this is a great option to dress up the car as well! Would I recommend this to others looking for this type of item, sure it looks good, just look at the pictures for your self!
Ease of use 10 of 10
Looks: 10 of 10
ease to clean 10 of 10
ease of install 10 of 10 (just screw and set)
installation: easy (novice experience)
time to install: 30 seconds (or approximately)
fun factor: too much fun it might become illegal
overall score 10
overall impression: impressed
recommended product for show cars or just general street use: yes
Keep me in the loop as always and happy modding!
Alex

 3/28/15, 01:38 AM
#49
Mach 1 Member
Thread Starter
well just ordered 6 LED #74 bulbs for Buddy (used the Volvo S80s burnt out instrument cluster as the excuse to do so  ) and can't wait for them to get here... I figured I would order a small number just incase they don't work right I am not out much money, and the nice thing about all this is the Volvo S80 looks to use the same type of bulbs so I can at least inter change them!!
) and can't wait for them to get here... I figured I would order a small number just incase they don't work right I am not out much money, and the nice thing about all this is the Volvo S80 looks to use the same type of bulbs so I can at least inter change them!!
3/28/15, 11:27 PM
#50
Mach 1 Member
Thread Starter
Well another shameless bump as I updated the list of mods and things to do...will this madness ever stop??? well I hope everyone is enjoying the build and is more then welcome to comment...
3/30/15, 06:58 PM
#51
Mach 1 Member
Thread Starter
Well here is another shameless bump...

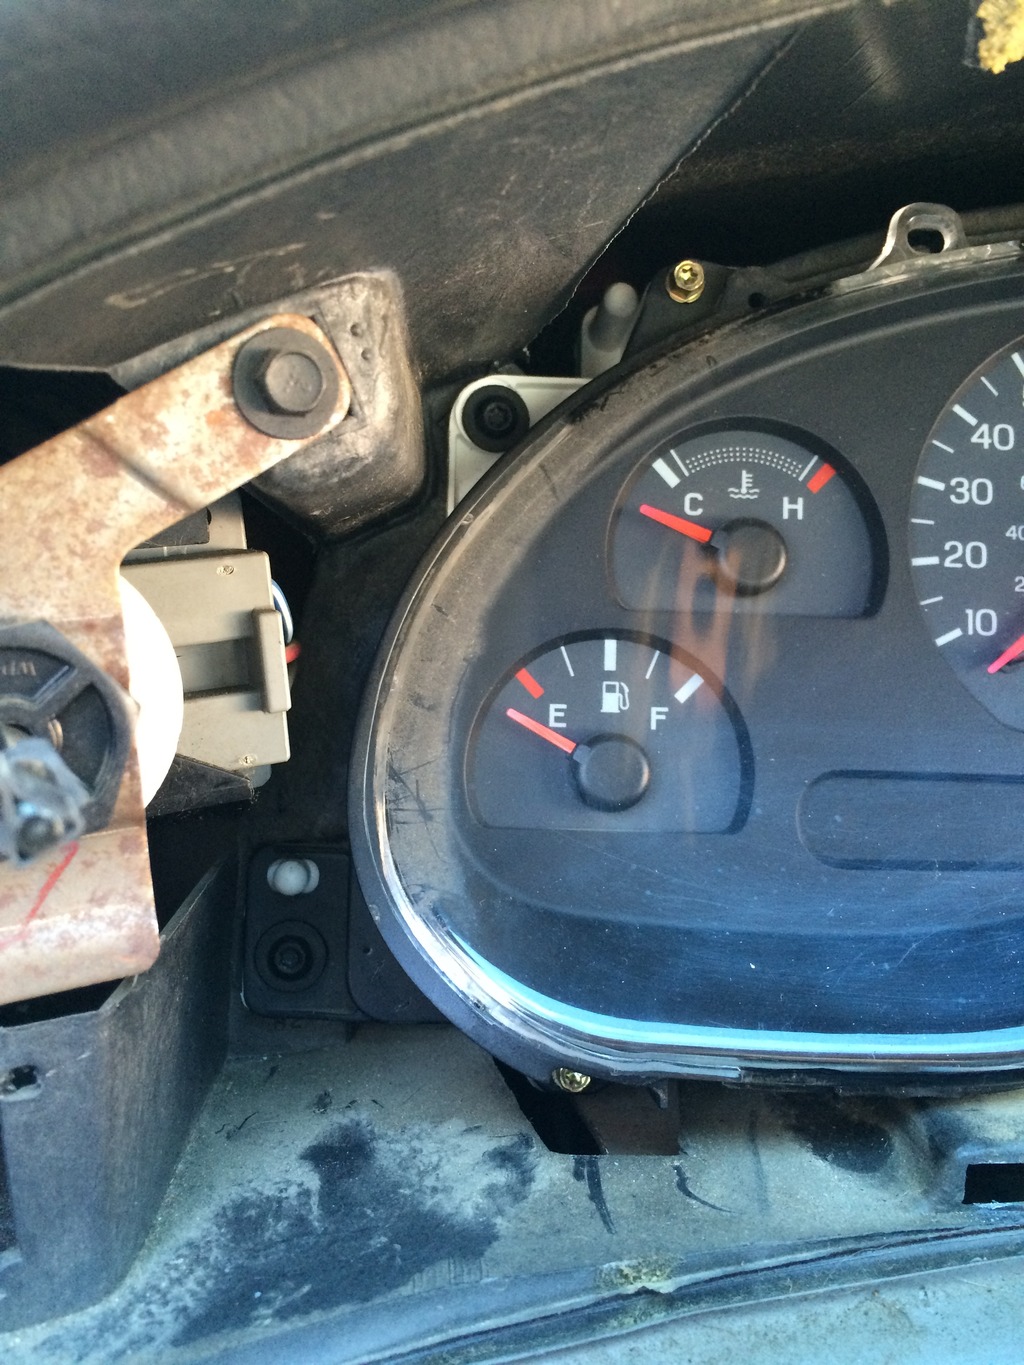
Got my 6 LEDs installed and even though it is not fully completed WOW what a difference!!! The looks are night and day compared to the stock bulbs! for got to get a picture of the stock set up as far as the turn signals , but I do have pictures of the install.
Tools needed will be a T15, T20
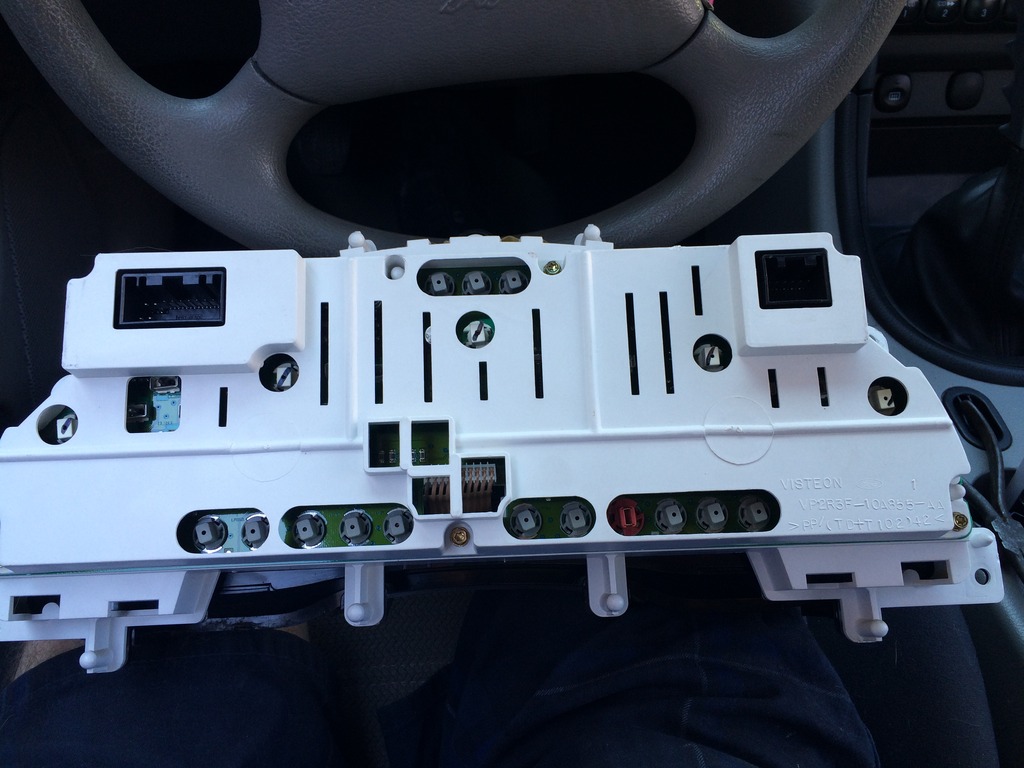
you need to start by removing the T20 screws, that hold the dash fashia in place along with the 4 that hold the cluster in
The tool you should use

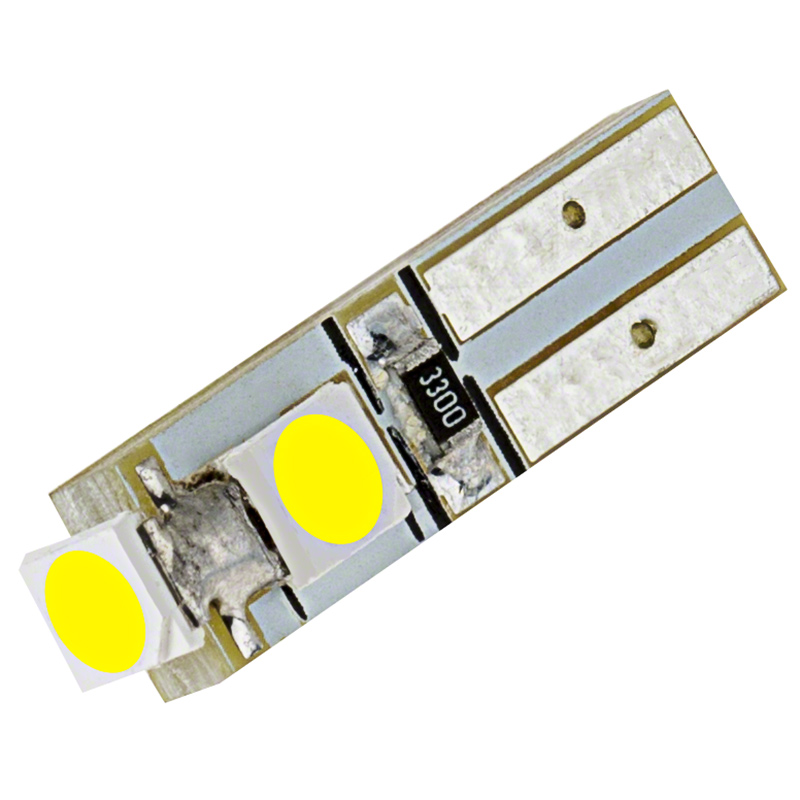
LED bulb compaired to one of the screws, this is a #74

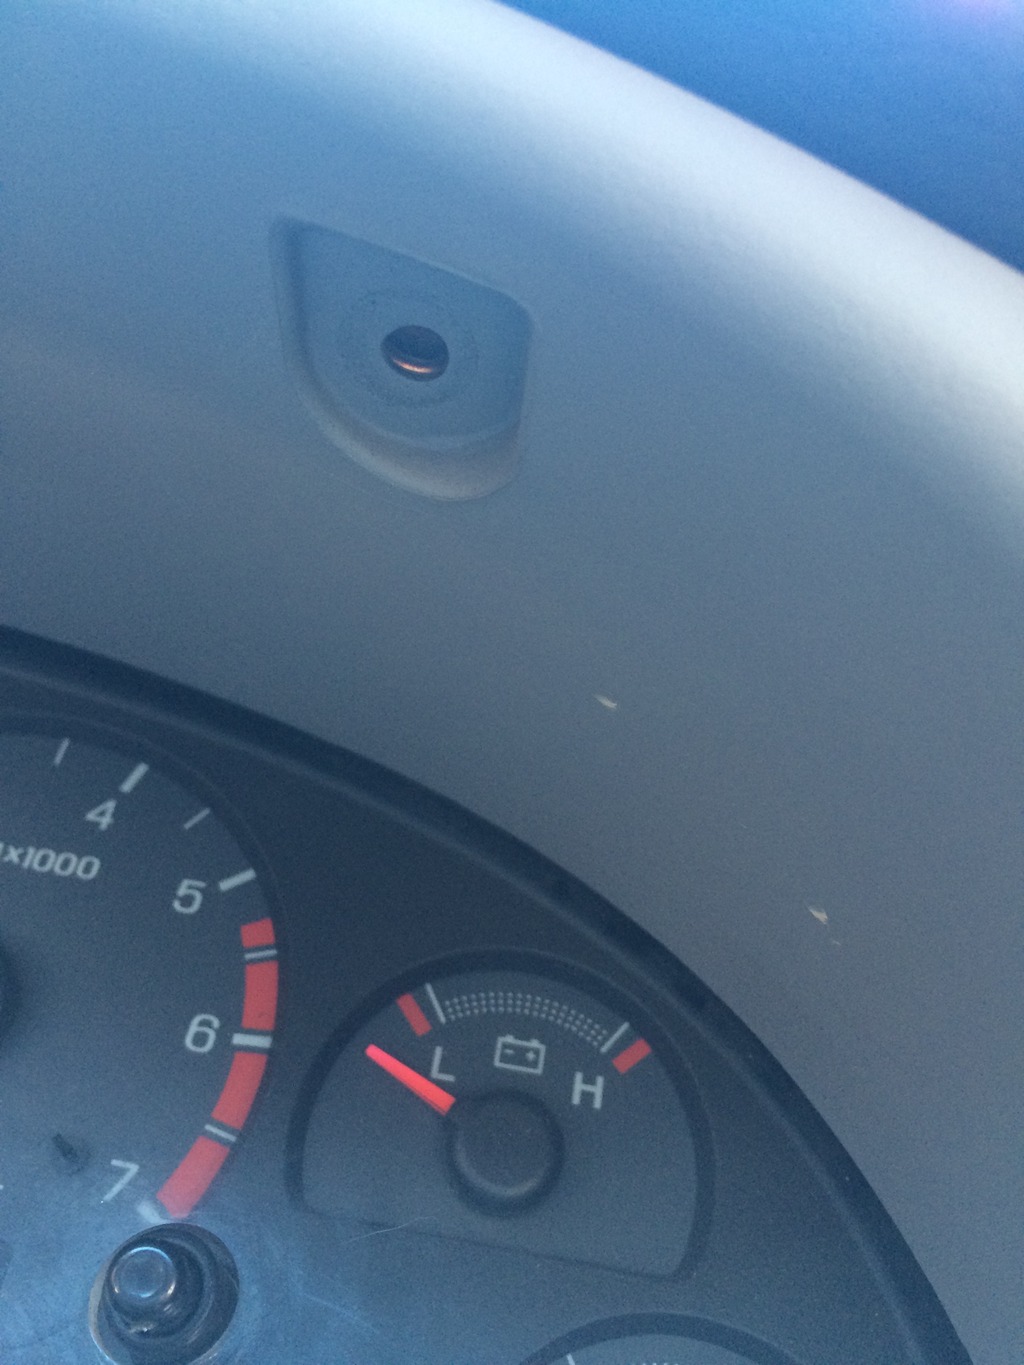
make sure you pop this guy off, but be sure you don't loose the ****
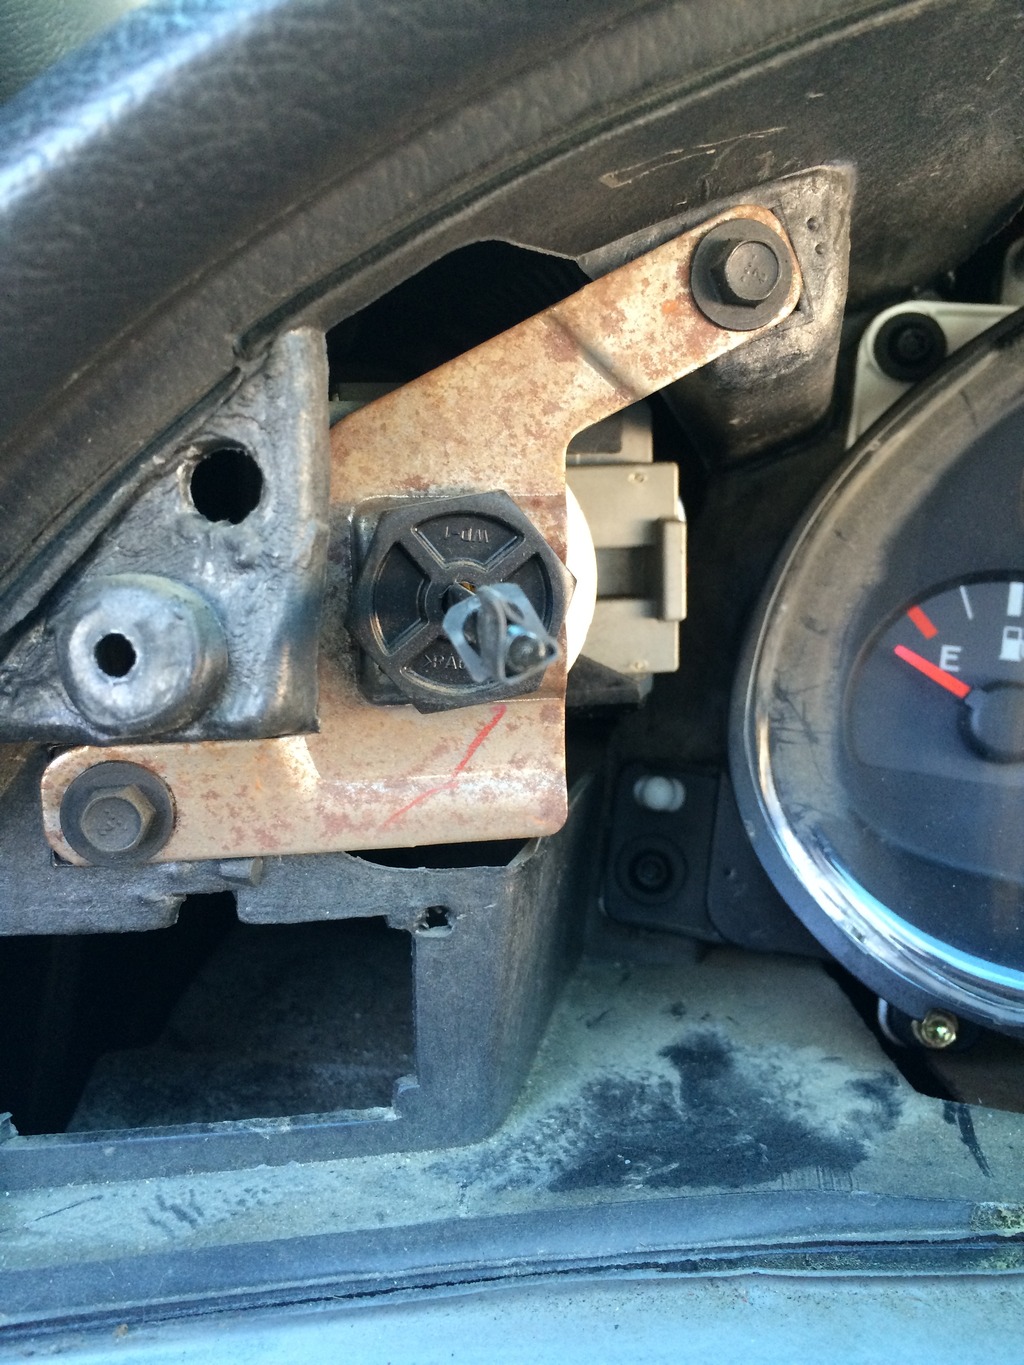
Here are the 4 screws (T20 that need to be removed)
Here are the two connectors that need to be disconnected as well!
Once you have the cluster out there will be 6 (six) gold screws that are T15 I would suggest removing those to get the white plate off to get better access to the bulb holder pieces!
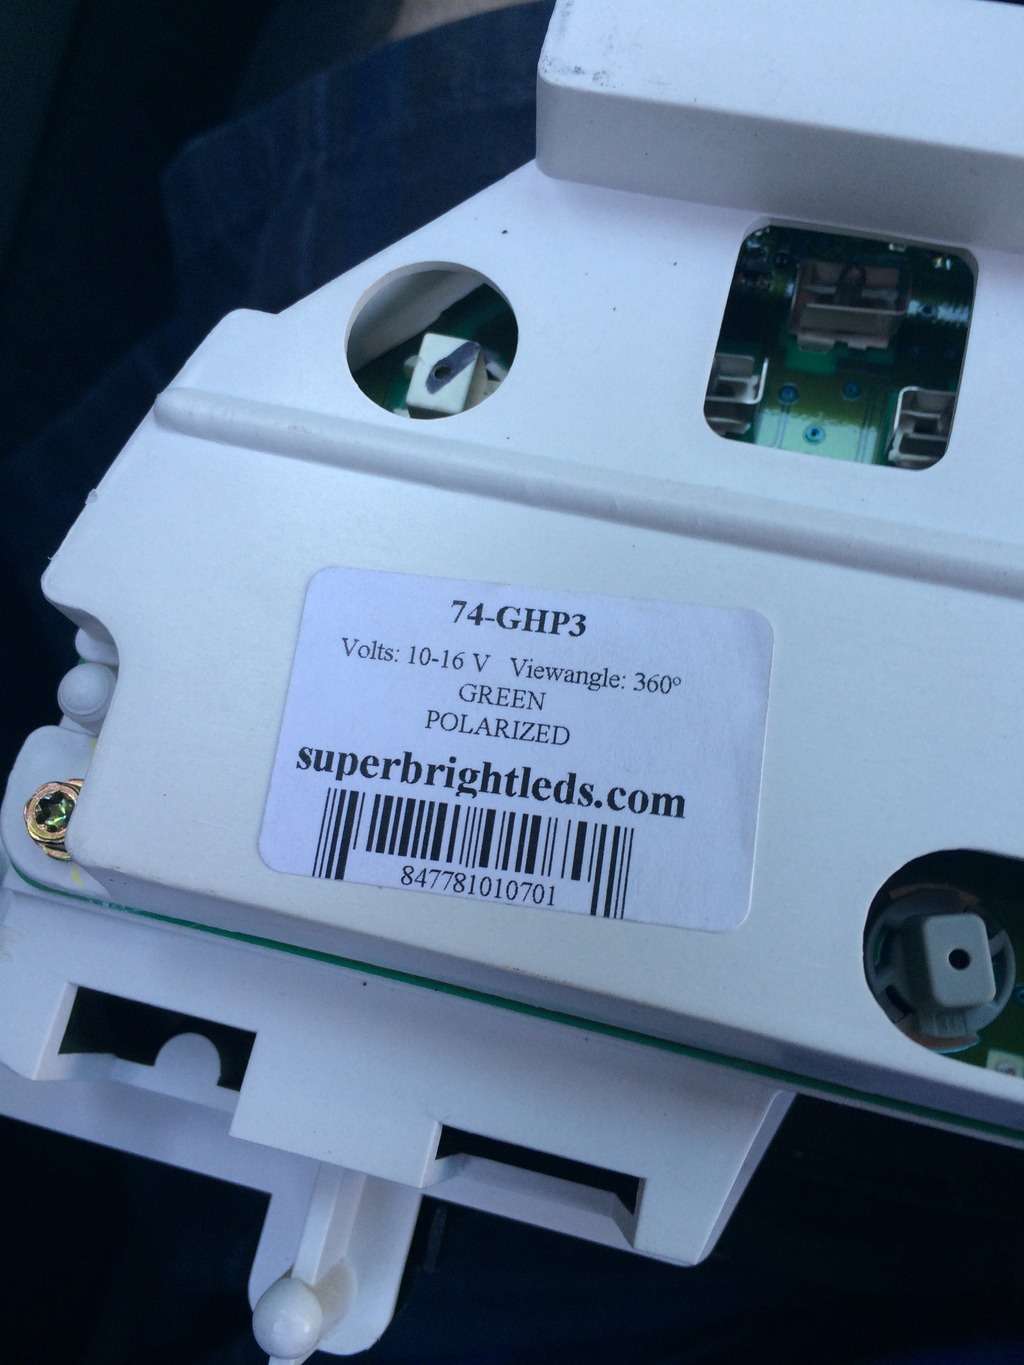
here is one of the stickers that came on one of the baggies that the bulbs came in so that way I have it for reference purposes in the future when I order more and also incase if I ever have to sell the car there will be a way for the next owner to get the same type of bulbs (don't worry im not planing on selling my Mustang)
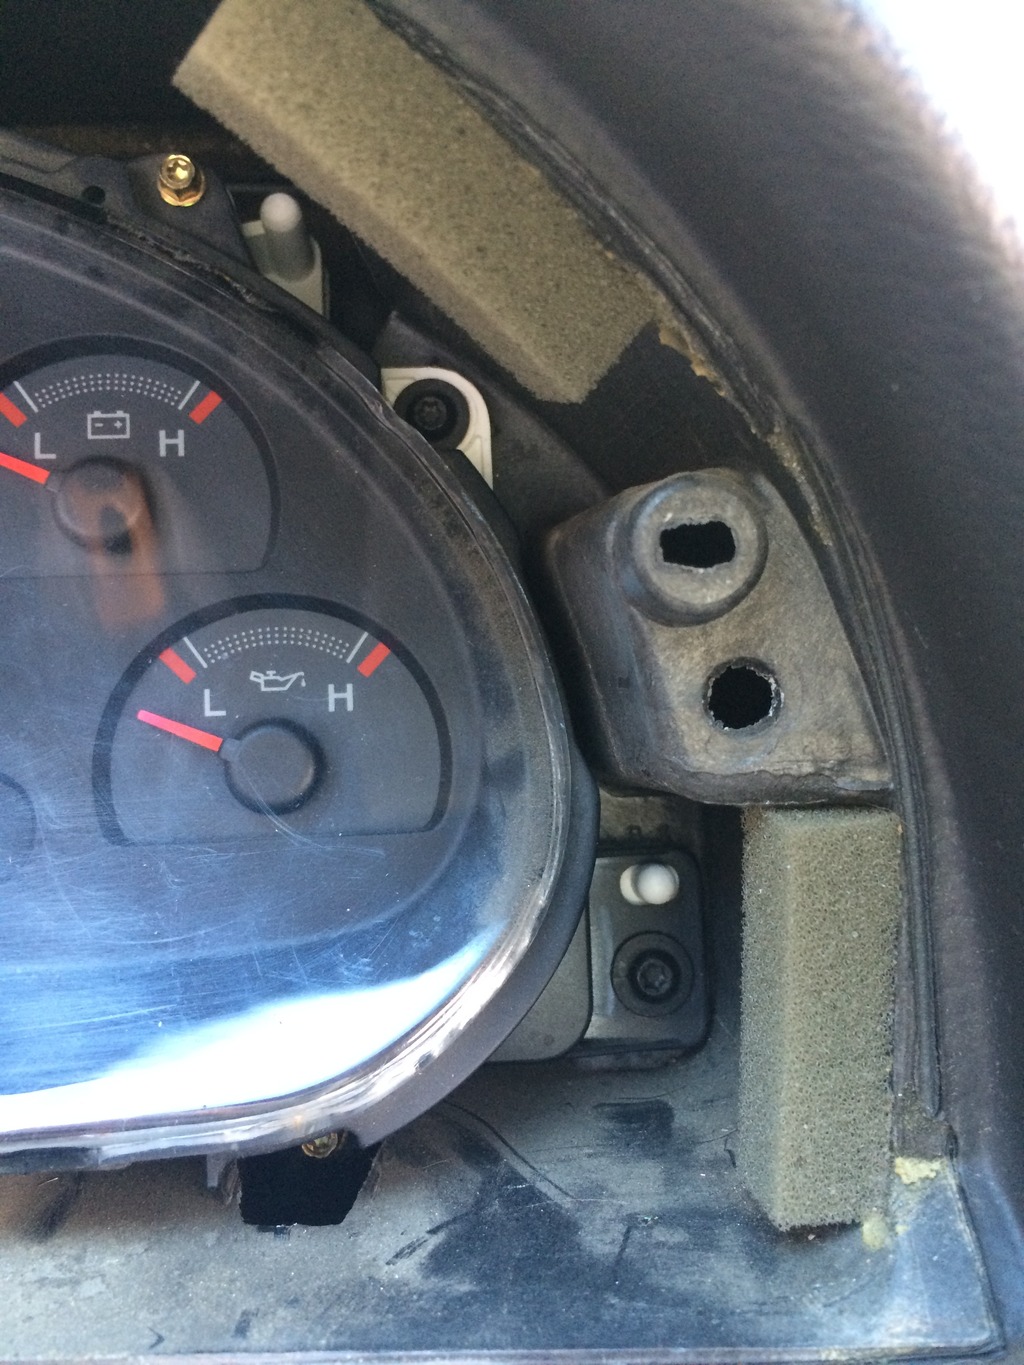
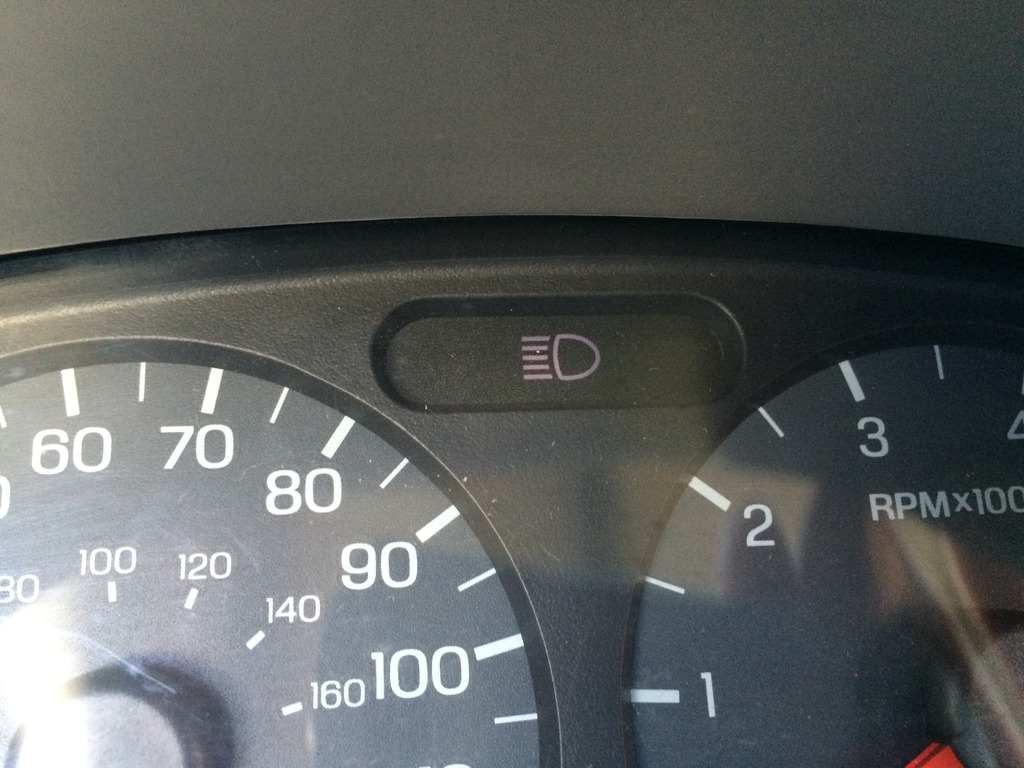
here is a shot with a stock bulb for the high beam indicator
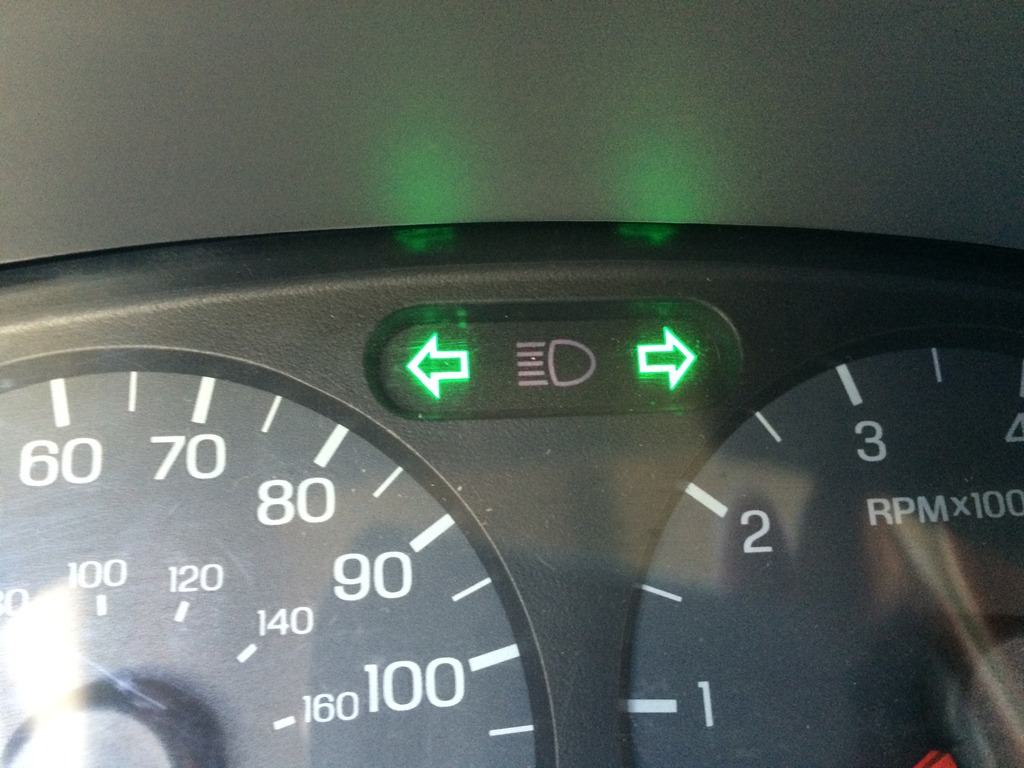
and here is the new installed LED turn signal lights!
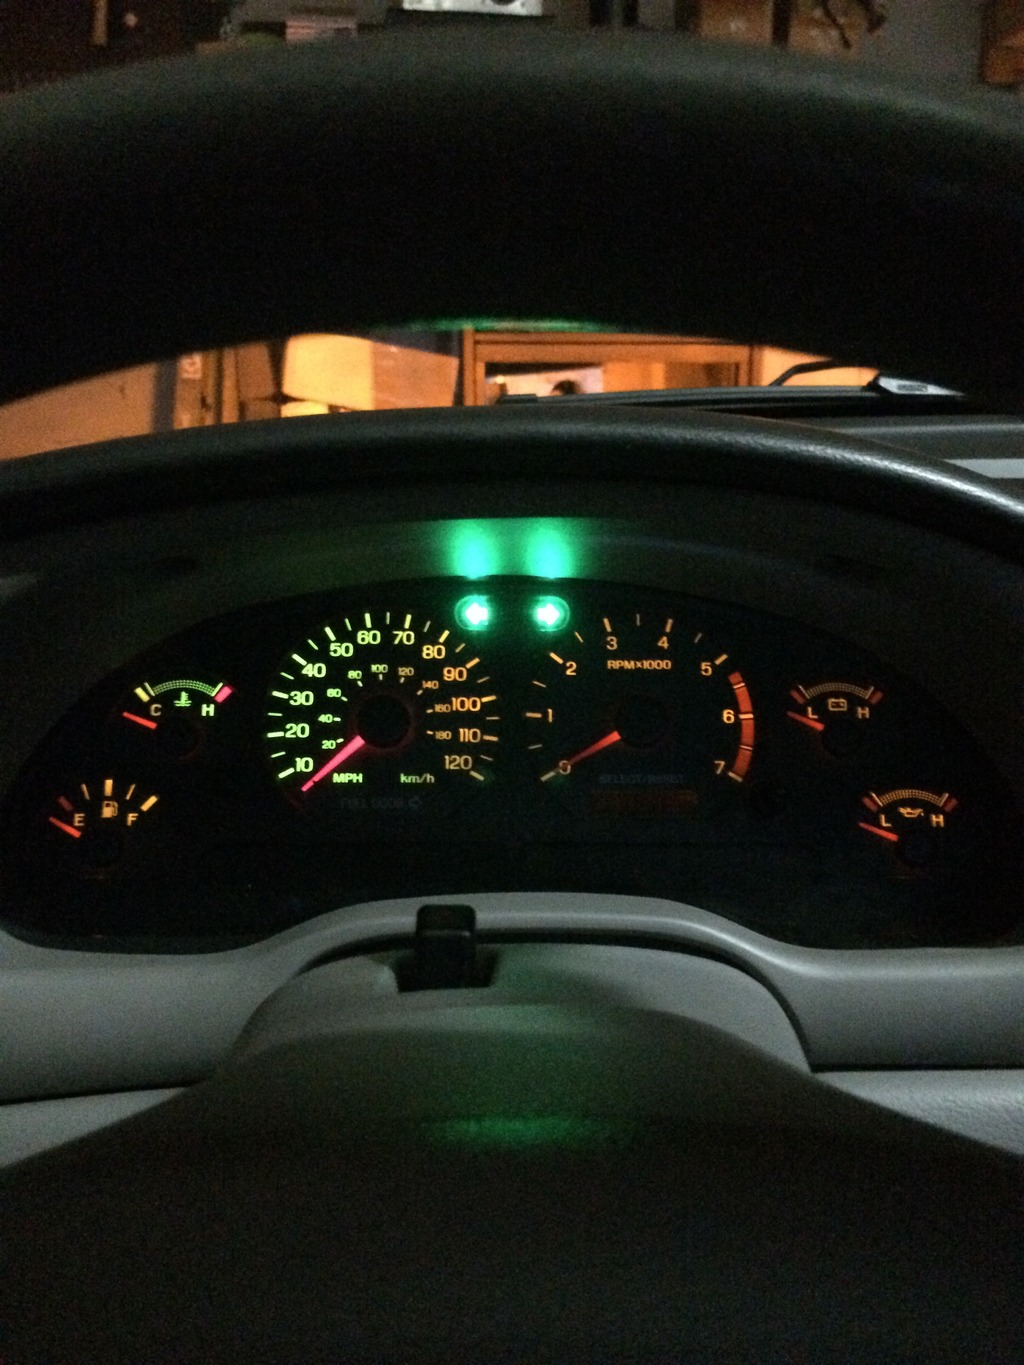
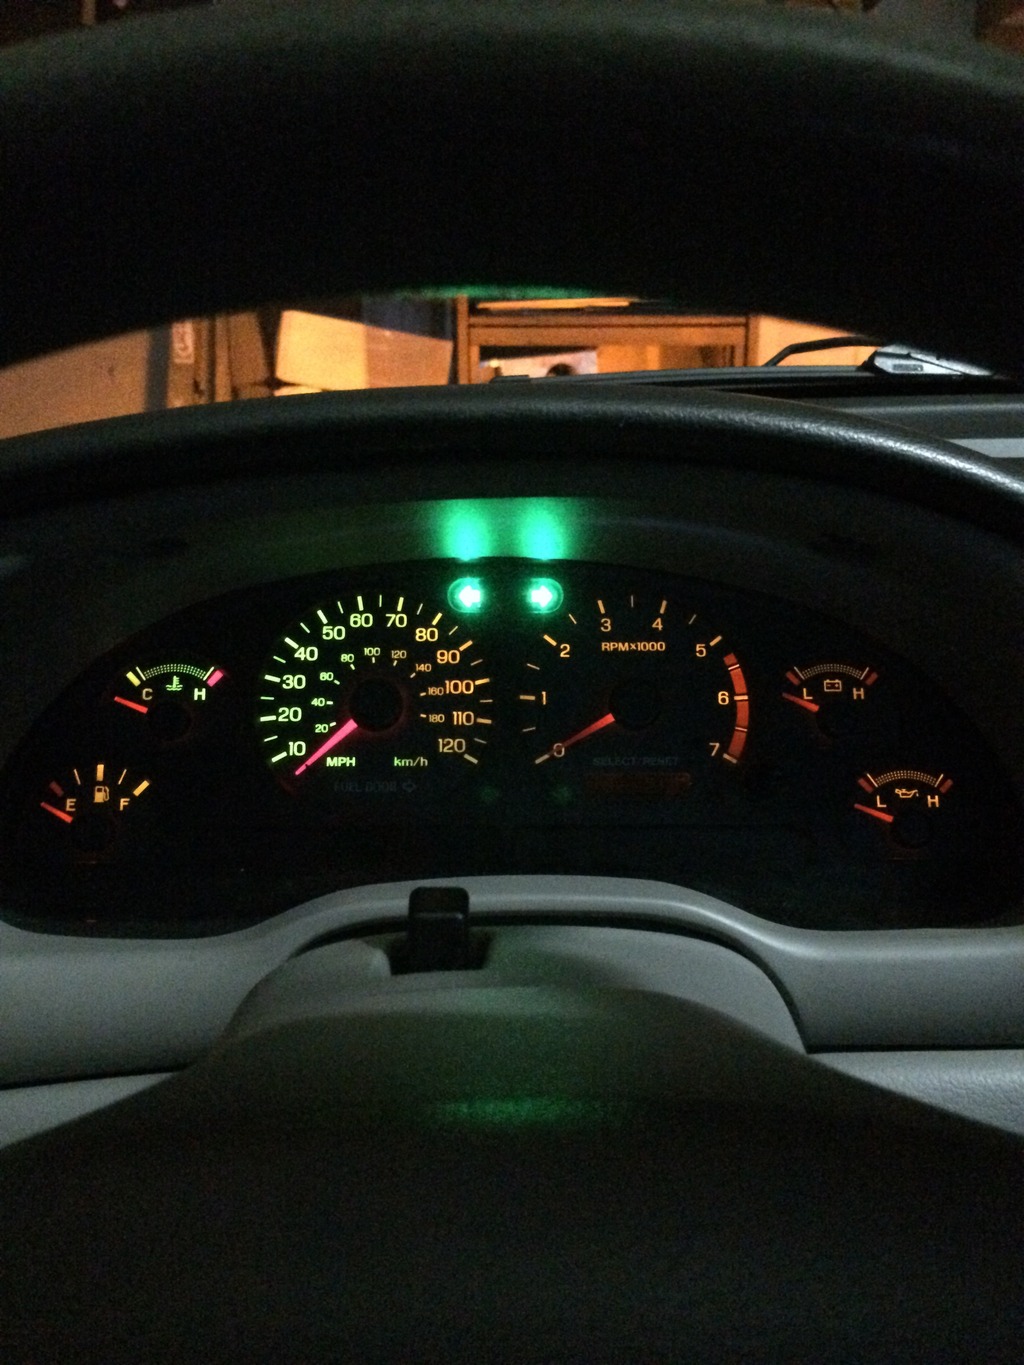
all lights turned on , seems I failed to account for one extra bulb when I ordered these
 , but I originally ordered based on the fact that these had a possibility of not producing the effect I wanted, or being placed in the AMBER sections of the cluster for lights like the service engine and other lights like that, now that I know the amber (while darker) can be seen and works I will order more, unless you guys feel a different colour might be better??
Got my 6 LEDs installed and even though it is not fully completed WOW what a difference!!! The looks are night and day compared to the stock bulbs! for got to get a picture of the stock set up as far as the turn signals
, but I do have pictures of the install.Tools needed will be a T15, T20
you need to start by removing the T20 screws, that hold the dash fashia in place along with the 4 that hold the cluster in
The tool you should use
LED bulb compaired to one of the screws, this is a #74
make sure you pop this guy off, but be sure you don't loose the ****
Here are the 4 screws (T20 that need to be removed)
Here are the two connectors that need to be disconnected as well!
Once you have the cluster out there will be 6 (six) gold screws that are T15 I would suggest removing those to get the white plate off to get better access to the bulb holder pieces!
here is one of the stickers that came on one of the baggies that the bulbs came in so that way I have it for reference purposes in the future when I order more and also incase if I ever have to sell the car there will be a way for the next owner to get the same type of bulbs (don't worry im not planing on selling my Mustang)
here is a shot with a stock bulb for the high beam indicator
and here is the new installed LED turn signal lights!
all lights turned on
, seems I failed to account for one extra bulb when I ordered these, but I originally ordered based on the fact that these had a possibility of not producing the effect I wanted, or being placed in the AMBER sections of the cluster for lights like the service engine and other lights like that, now that I know the amber (while darker) can be seen and works I will order more, unless you guys feel a different colour might be better??
Last edited by Jim74656; 3/31/15 at 12:24 PM.
4/2/15, 05:27 PM
#52
Mach 1 Member
Thread Starter
Well some more parts came in today

I got the next installment of the LED lights to finish the cluster LED upgrade (well at least the main portions, still have the blue High beam to do and the 4 amber lamps at the bottom
anyways, going to do that when I feel like doing so as its raining out side and I want to not get the inside wet (ok ok so I have a garage to work in...Im wanting to be lazy!!!
also On another note, I went to a junk yard today and happened to run across a mustang that had good looking tail lamps so I grabbed them while there helping a friend, price? $0.00 so that is a good mod in my book!!
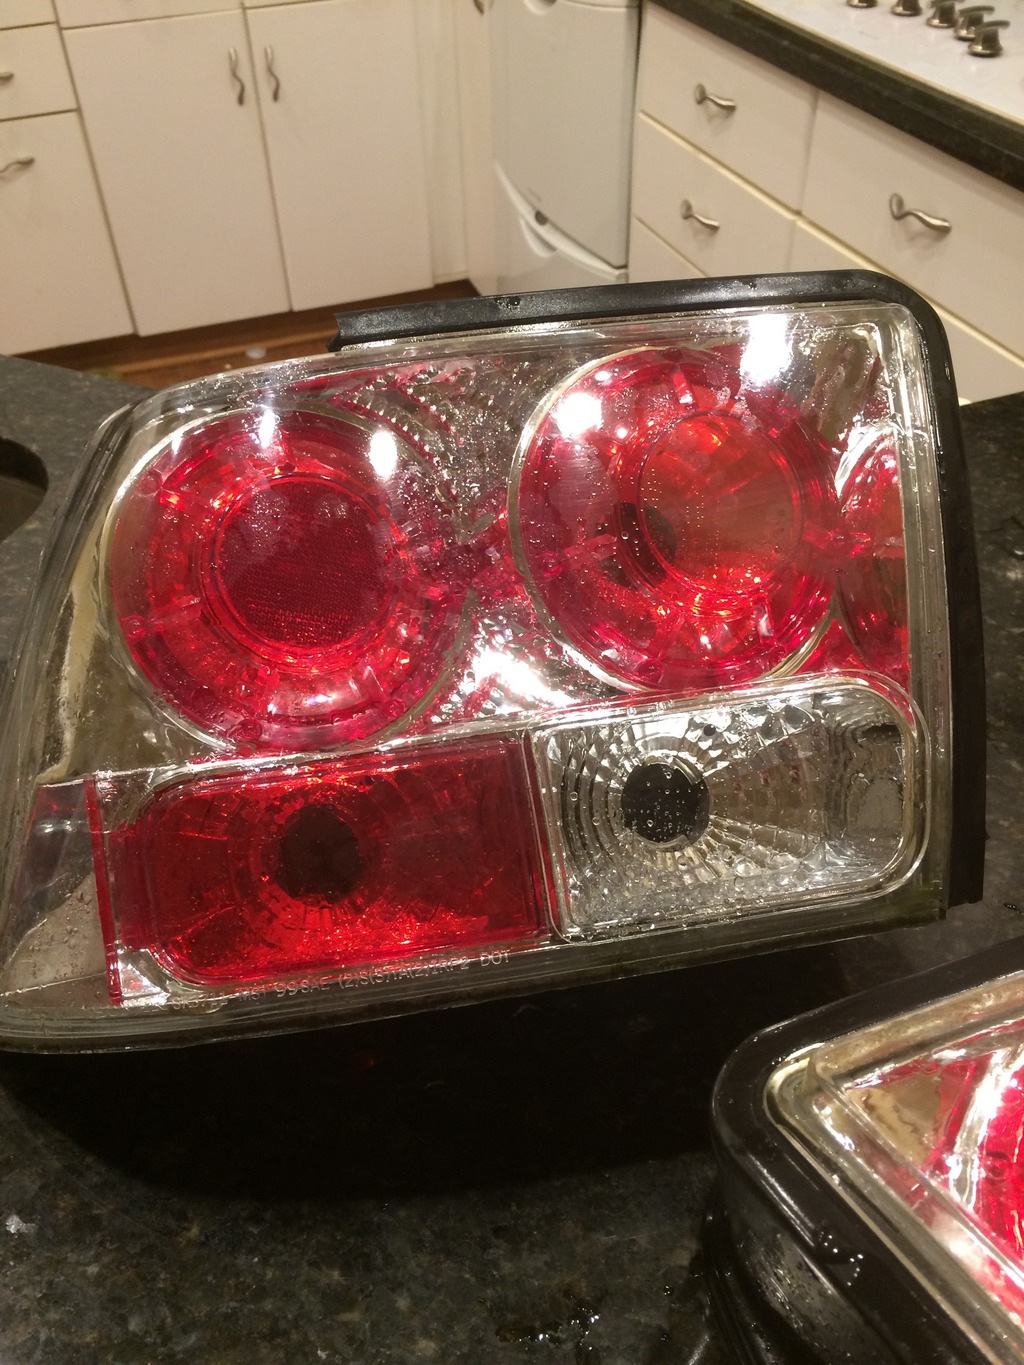
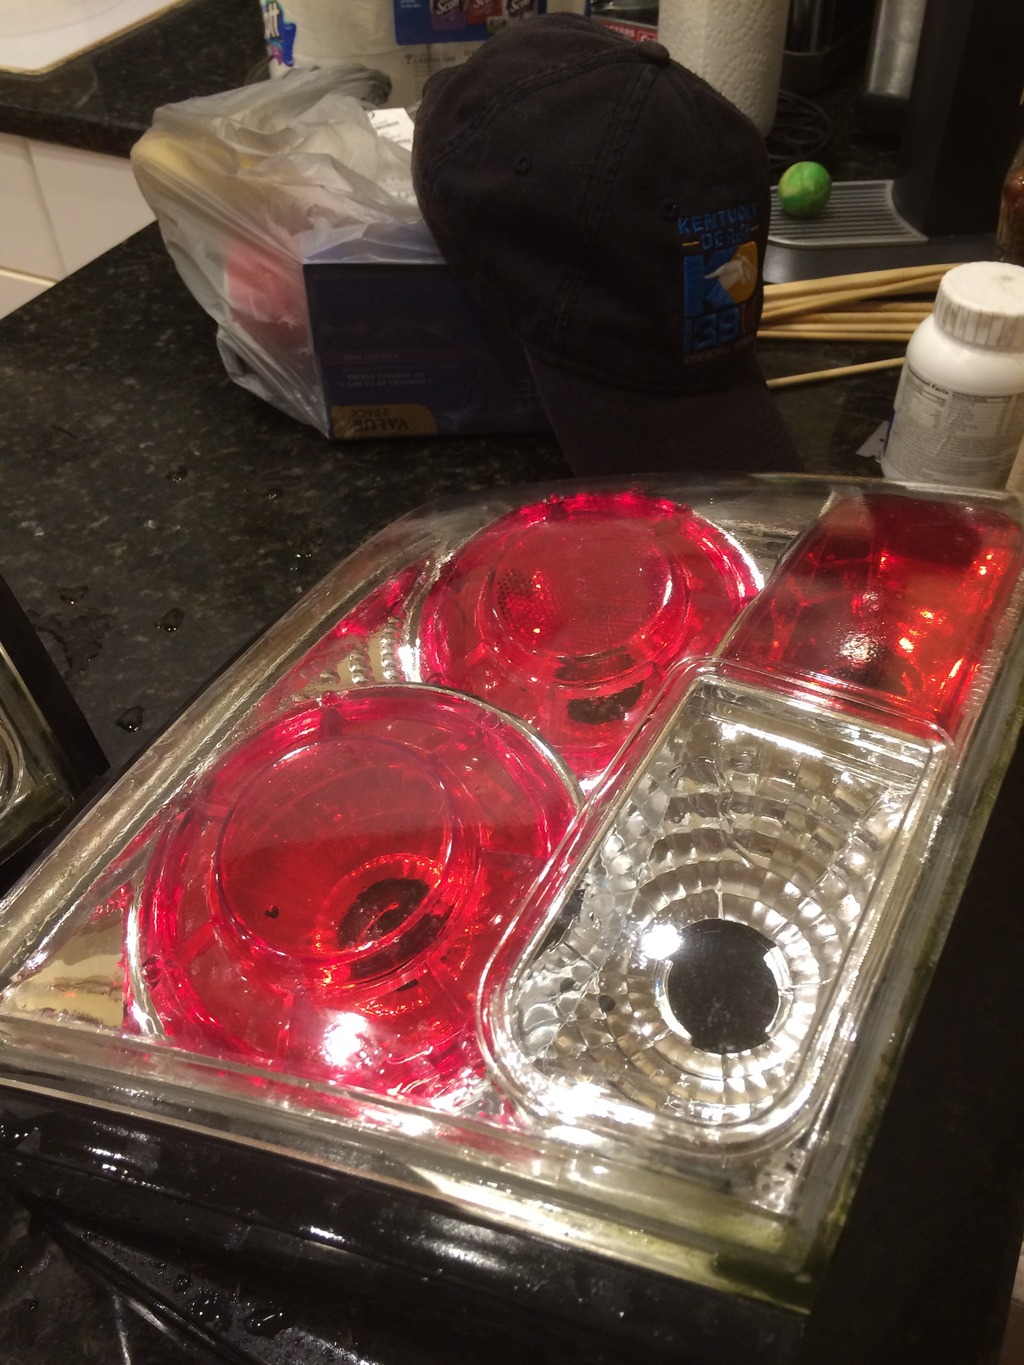

So once the water is all dry off them, I will be putting them on along with installing the last few LED bulbs!!
I got the next installment of the LED lights to finish the cluster LED upgrade (well at least the main portions, still have the blue High beam to do and the 4 amber lamps at the bottom
anyways, going to do that when I feel like doing so as its raining out side and I want to not get the inside wet (ok ok so I have a garage to work in...Im wanting to be lazy!!!
also On another note, I went to a junk yard today and happened to run across a mustang that had good looking tail lamps so I grabbed them while there helping a friend, price? $0.00
so that is a good mod in my book!!So once the water is all dry off them, I will be putting them on along with installing the last few LED bulbs!!
Last edited by Jim74656; 4/2/15 at 07:09 PM.
4/6/15, 09:22 PM
#53
Mach 1 Member
Join Date: June 22, 2013
Location: the beautiful "Shenandoah Valley of Virginia"
Posts: 577
Received 101 Likes
on
74 Posts
I enjoyed the read, like most of what you've done ...... it is fun to see someone enjoy their car.
That clutch pedal extension ..... I did that last year on our '08 5 spd, that mod is super. Back in the old days clutch pedals set higher than power brake pedals, but clutch pedals then did not have to go all the way to the floor every time. Your brake pedal doesn't. But both the left and right leg pivot from the same driver's hip. This mod brings clutch action back more in line with where your brakes are. I'm 5'10" and it sure made ours more comfortable to drive.
I gotta say ..... not a fan of those aftermarket tail lights ..... the OEM ones look much better ..... but pay me no mind.
4/7/15, 10:12 PM
#54
Mach 1 Member
Thread Starter
well I did try them and they were out the same day...they had a leak in them (both units)I discovered said leak when I was cleaning them (used a damp sponge to clean the crud and grime that was caked on the back side, so I figure that was a wash, thankfully the only commodity I am out was the time of install, testing and removal...(thankfully I found this out before worse things happened) and sadly I do not know where the water came from...which sucks...but I also think it might from the rain earlyer that day as it did rain just after I undid the last connector for the lamps (might have been a good idea to leave them in I guess...)
oh well. stockies are back on and I am going to search for LED bulbs at least for now that will let me complete my conversion...
also ordered a "Bluedriver" from Amazon, should have it here hopefully by Friday!!! can't wait for it to arrive!!!
Tbear, thanks for the comments, glad you enjoyed the thread thus far, I feel good when people take the time to let me know they enjoy the build threads (I partly do them as I love working on cars and enjoy giving people something good to read!!
oh well. stockies are back on and I am going to search for LED bulbs at least for now that will let me complete my conversion...
also ordered a "Bluedriver" from Amazon, should have it here hopefully by Friday!!! can't wait for it to arrive!!!
Tbear, thanks for the comments, glad you enjoyed the thread thus far, I feel good when people take the time to let me know they enjoy the build threads
(I partly do them as I love working on cars and enjoy giving people something good to read!!
Last edited by Jim74656; 4/8/15 at 01:44 PM.


 4/10/15, 05:42 PM
#56
Mach 1 Member
Thread Starter
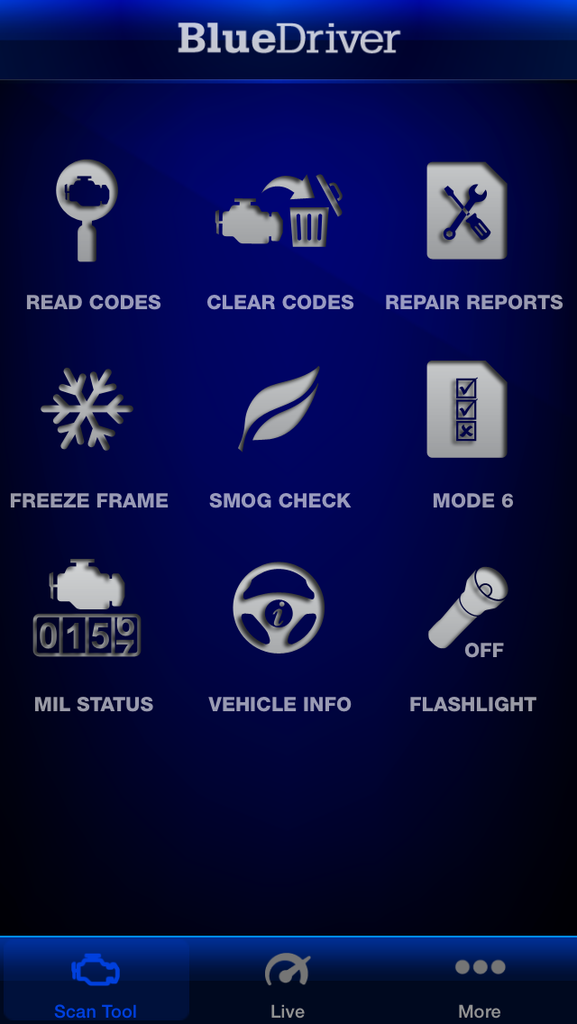
Lemur BlueDriver Review
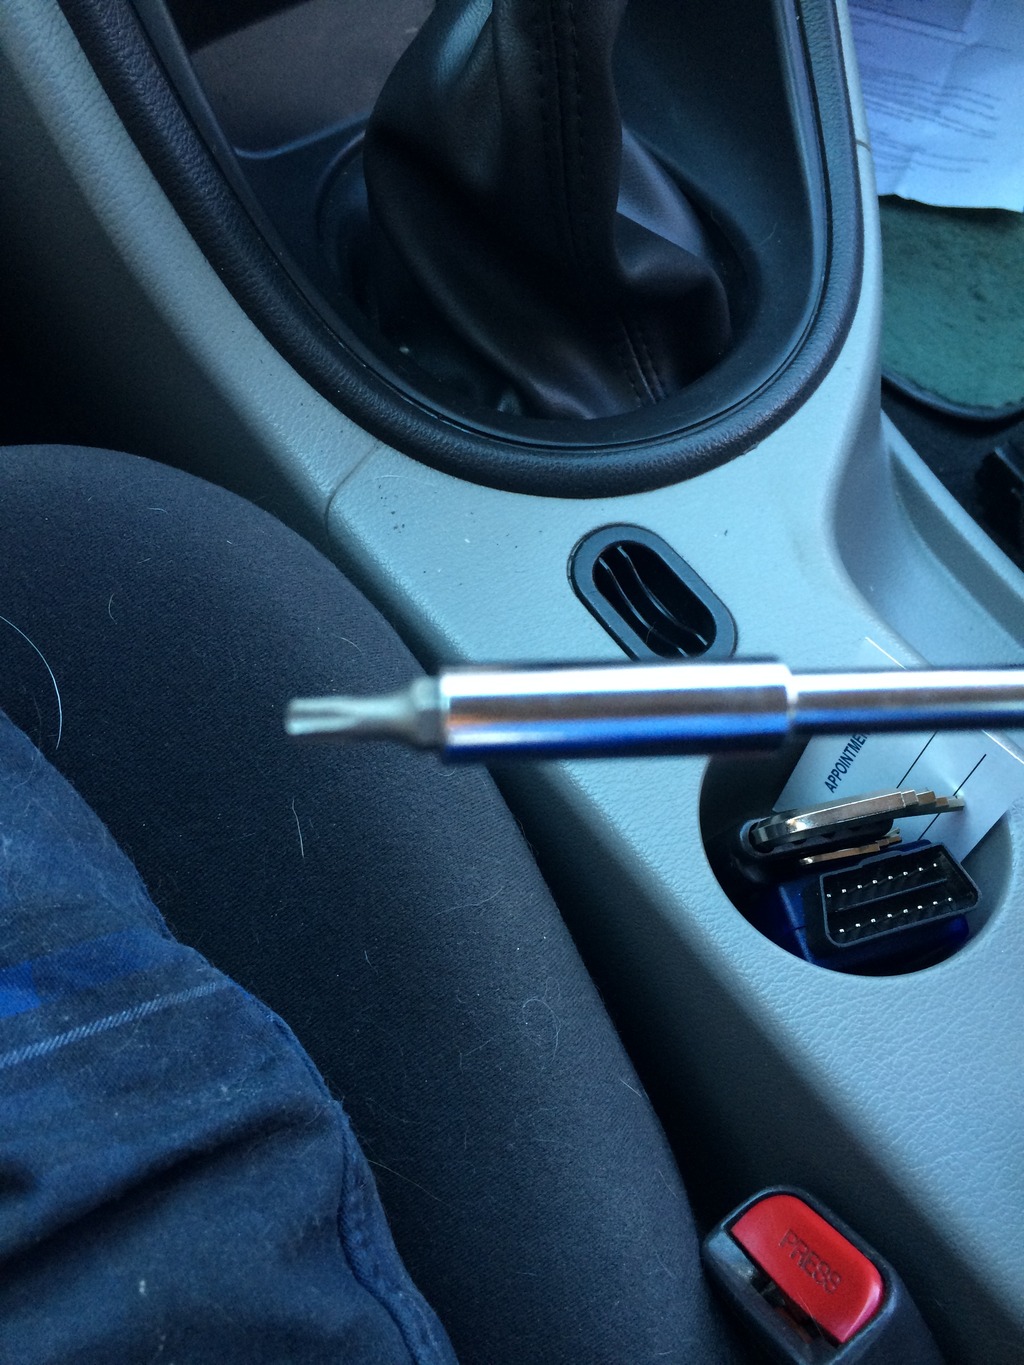
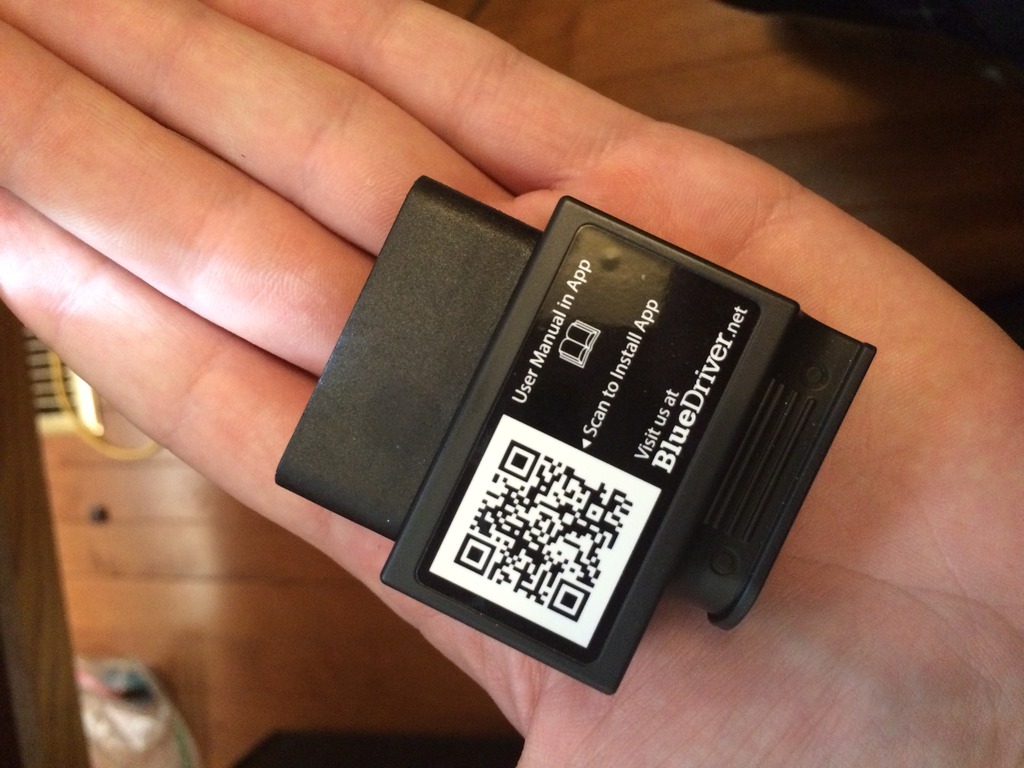
Well I just received this from Amazon (a day late but what ever), and I must say having the ability to scan my car using my phone or iPad is very nice, granted it may not be the same as an Autel Maxidas or similar device. So lets get on with what it does!!
As far as Installing the App (done with my iPhone 5C) you can install it one of three ways, you can either scan the QR code, go to the App store and search for it and install, or (my favorite way) connect your phone to the device via bluetooth and the device will prompt you to install the App which at that point it will take you to the app store and let you start the down load, this App is free on the App store, as for the android I haven't tested that just yet so I am not sure but I would suspect that it may also be free!!
as far as this tool is concerned its small and fits in your hand!
The packing is decent, at least its good for this device!
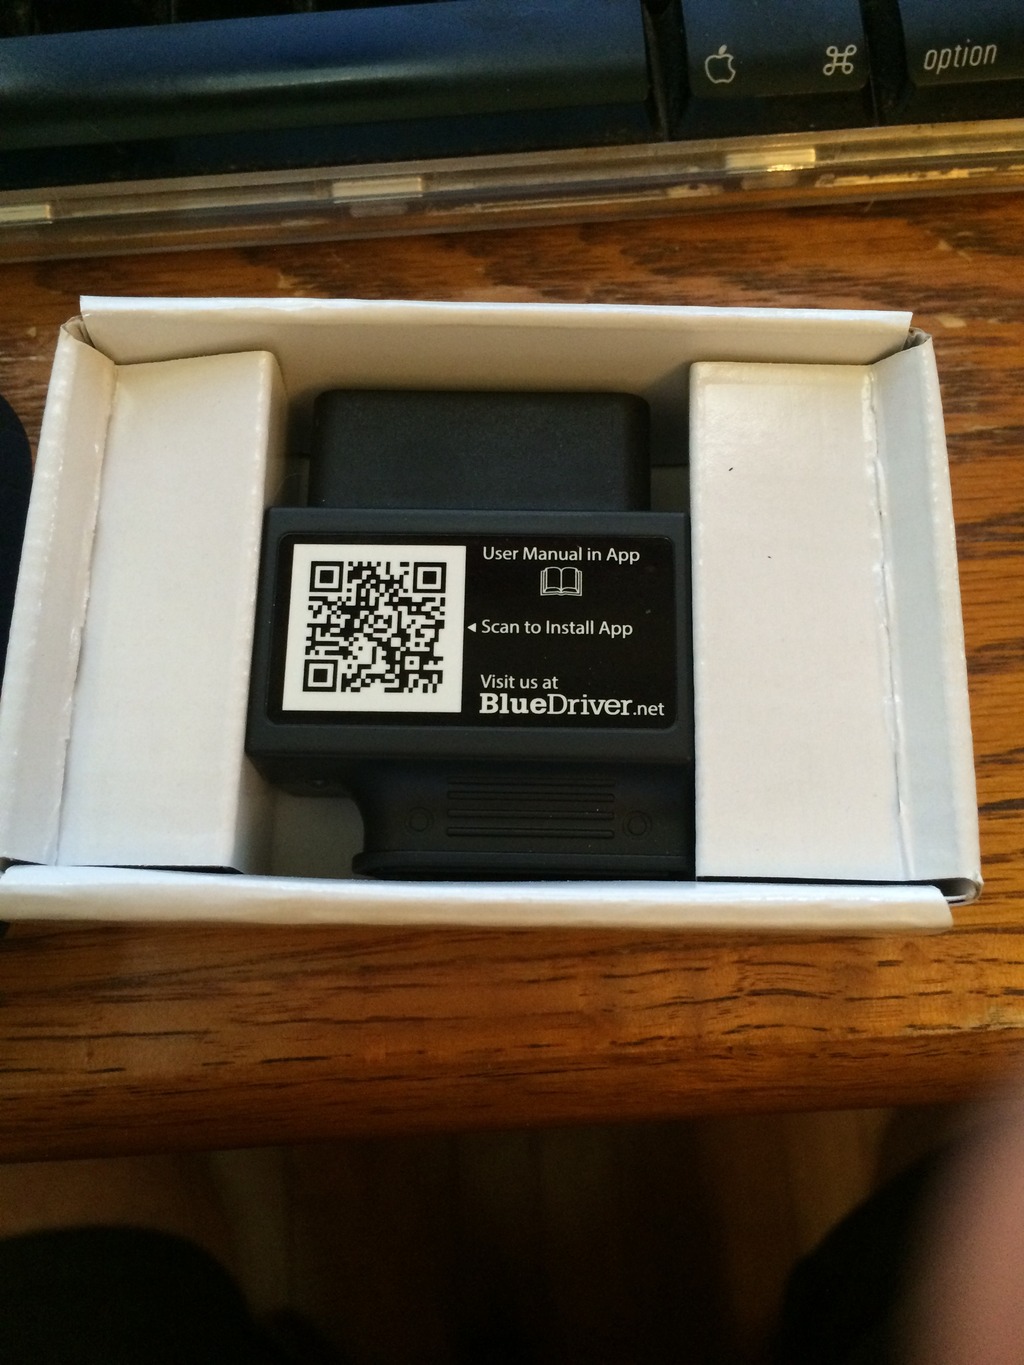
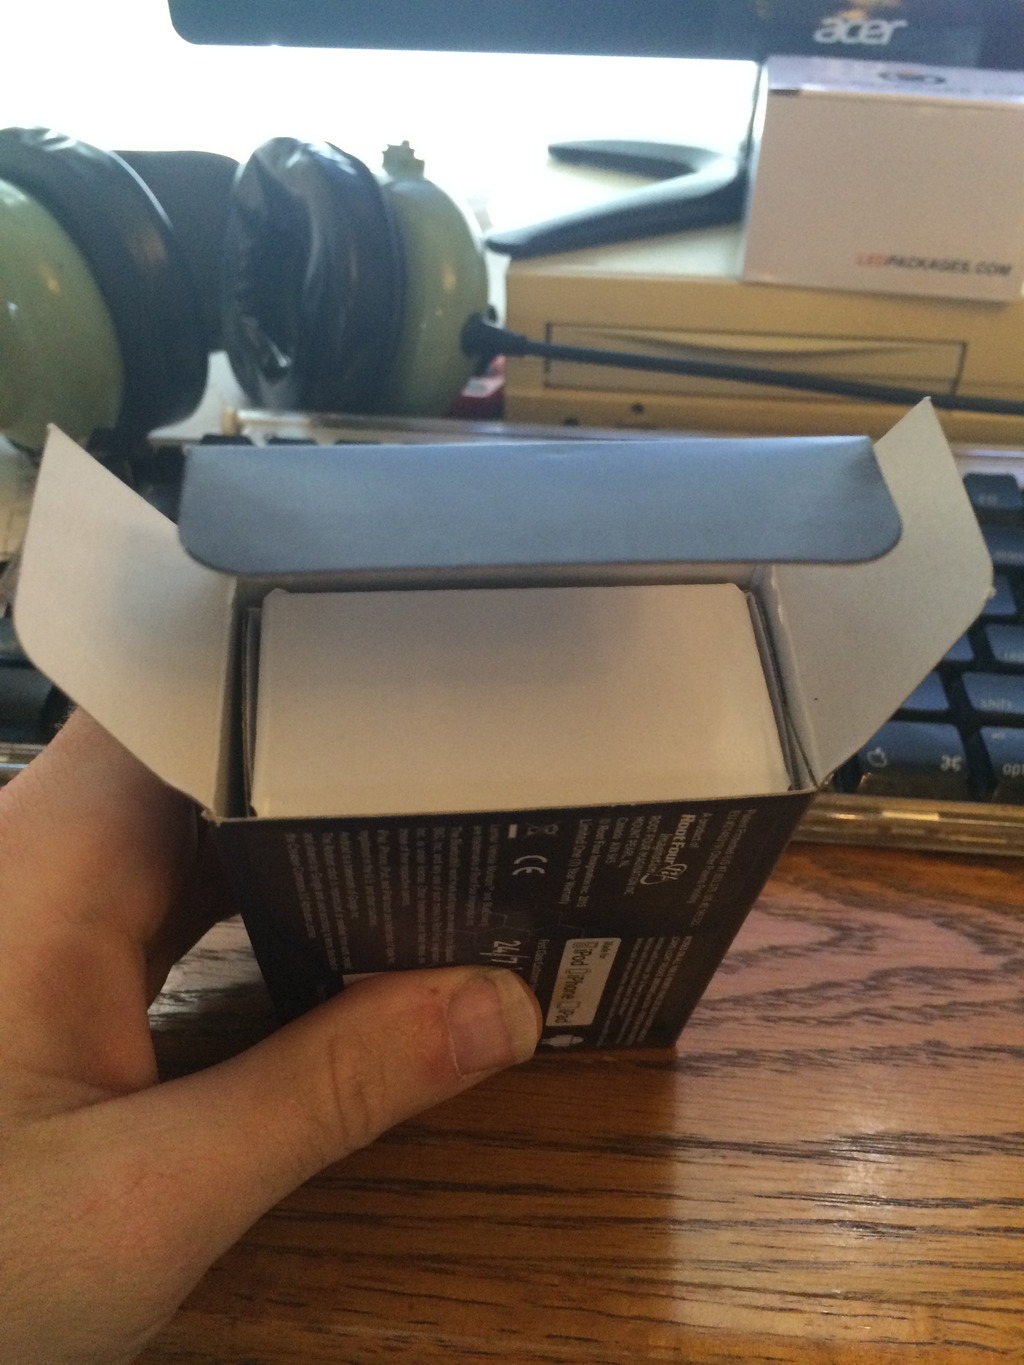
Here is an image of the box, still relatively small, still does fit in your hand

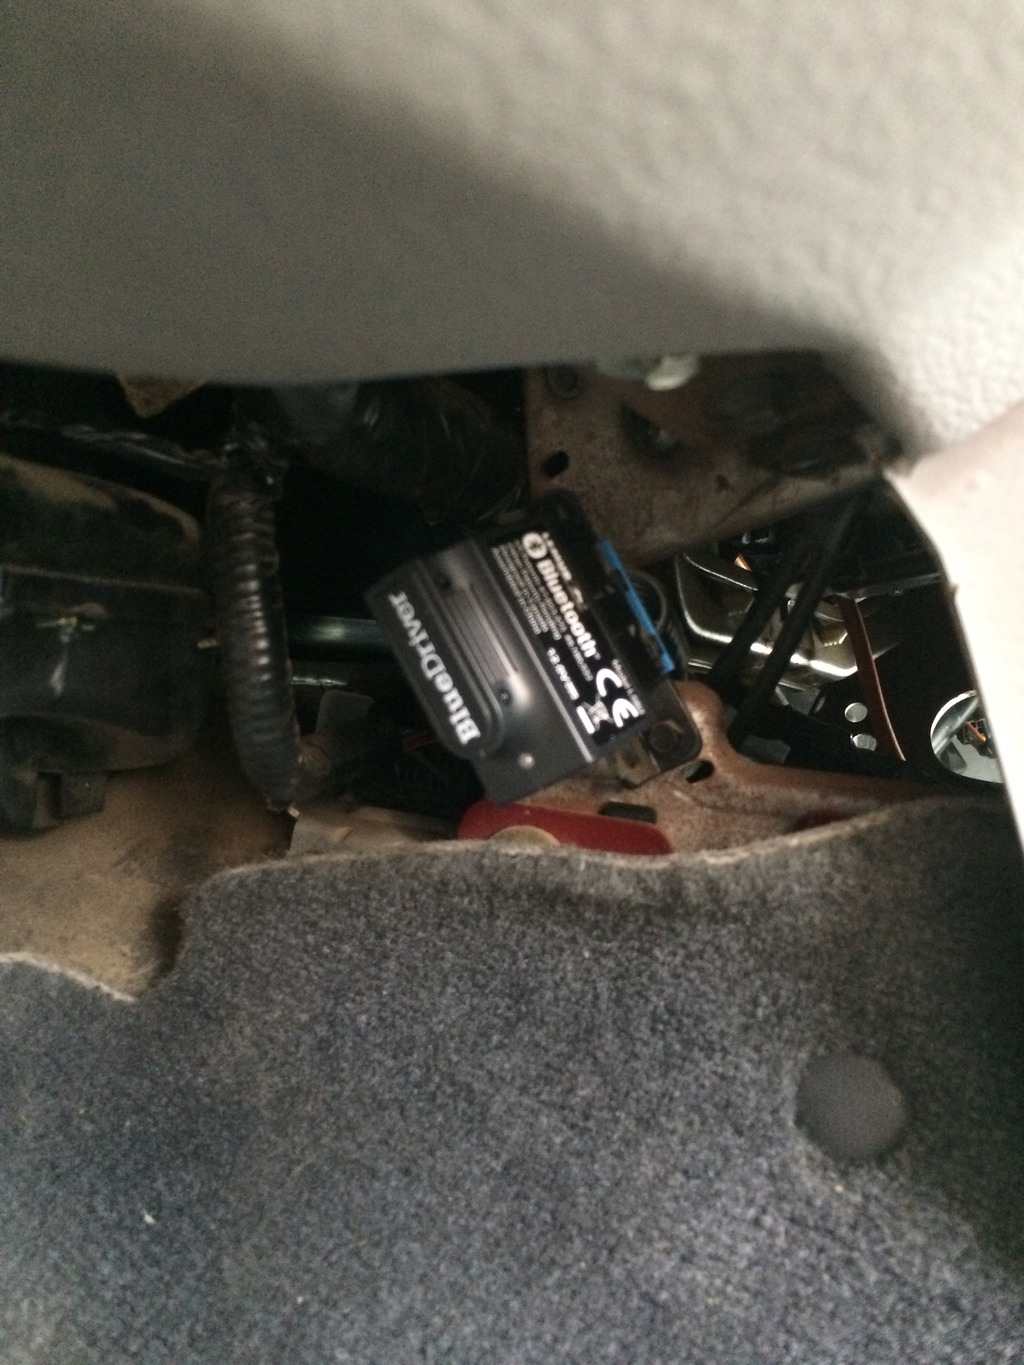
Now as far as installing the device it is simply plug and play, literally!! This little guy can be put on your OBD2 port with ease and you can even drive with it there!
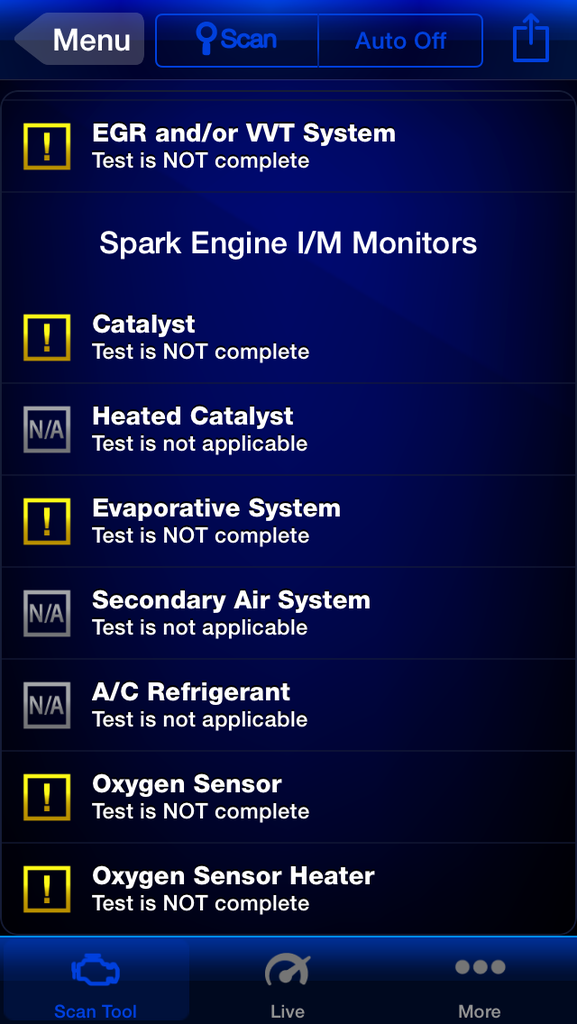
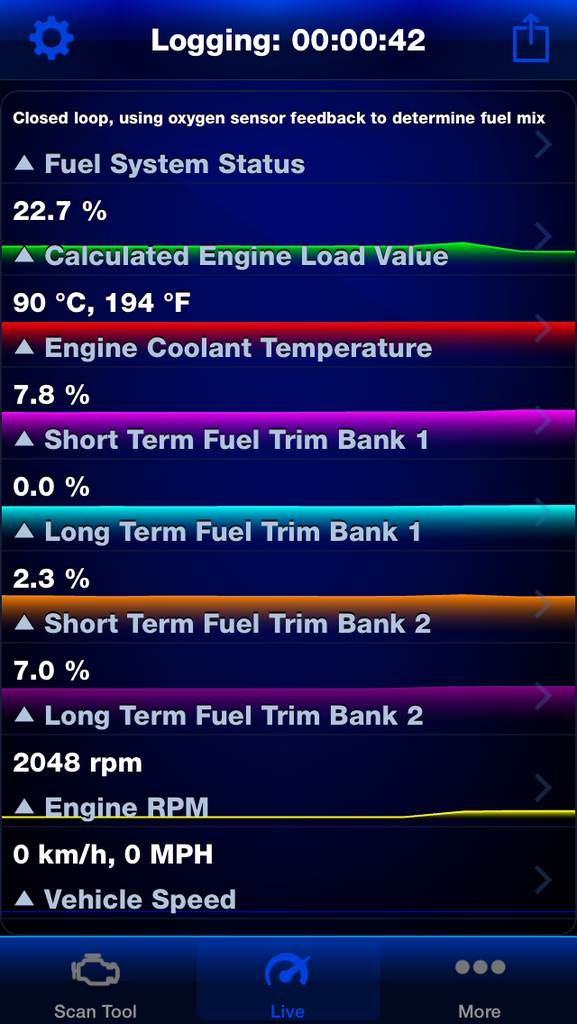
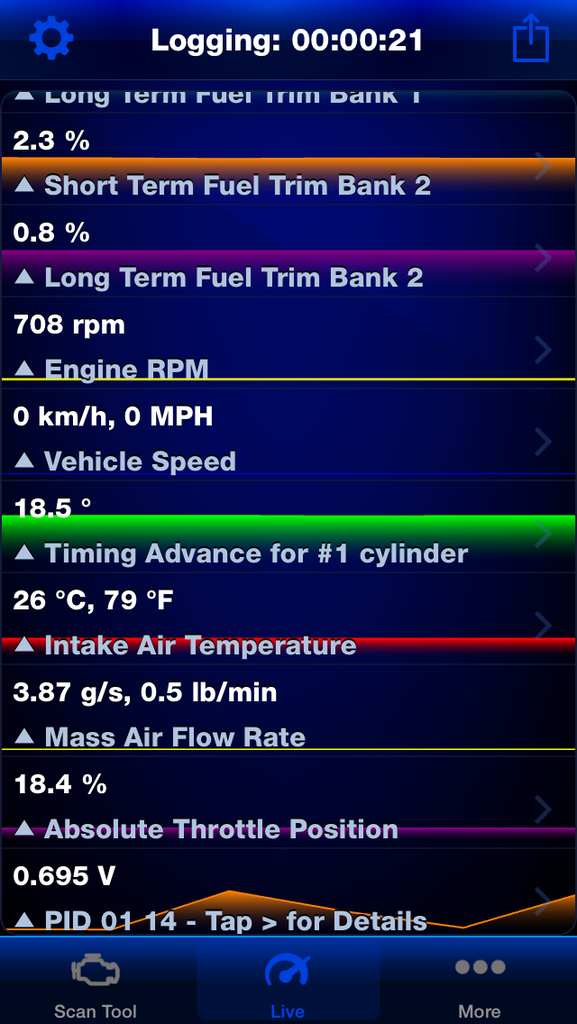
looking at the program it does look to have a good smattering of in-depth abilities, and can read systems not only related to the engine, but it can look at Airbag system as well as others!!
lets take a look at some of the screen shots from the App its self

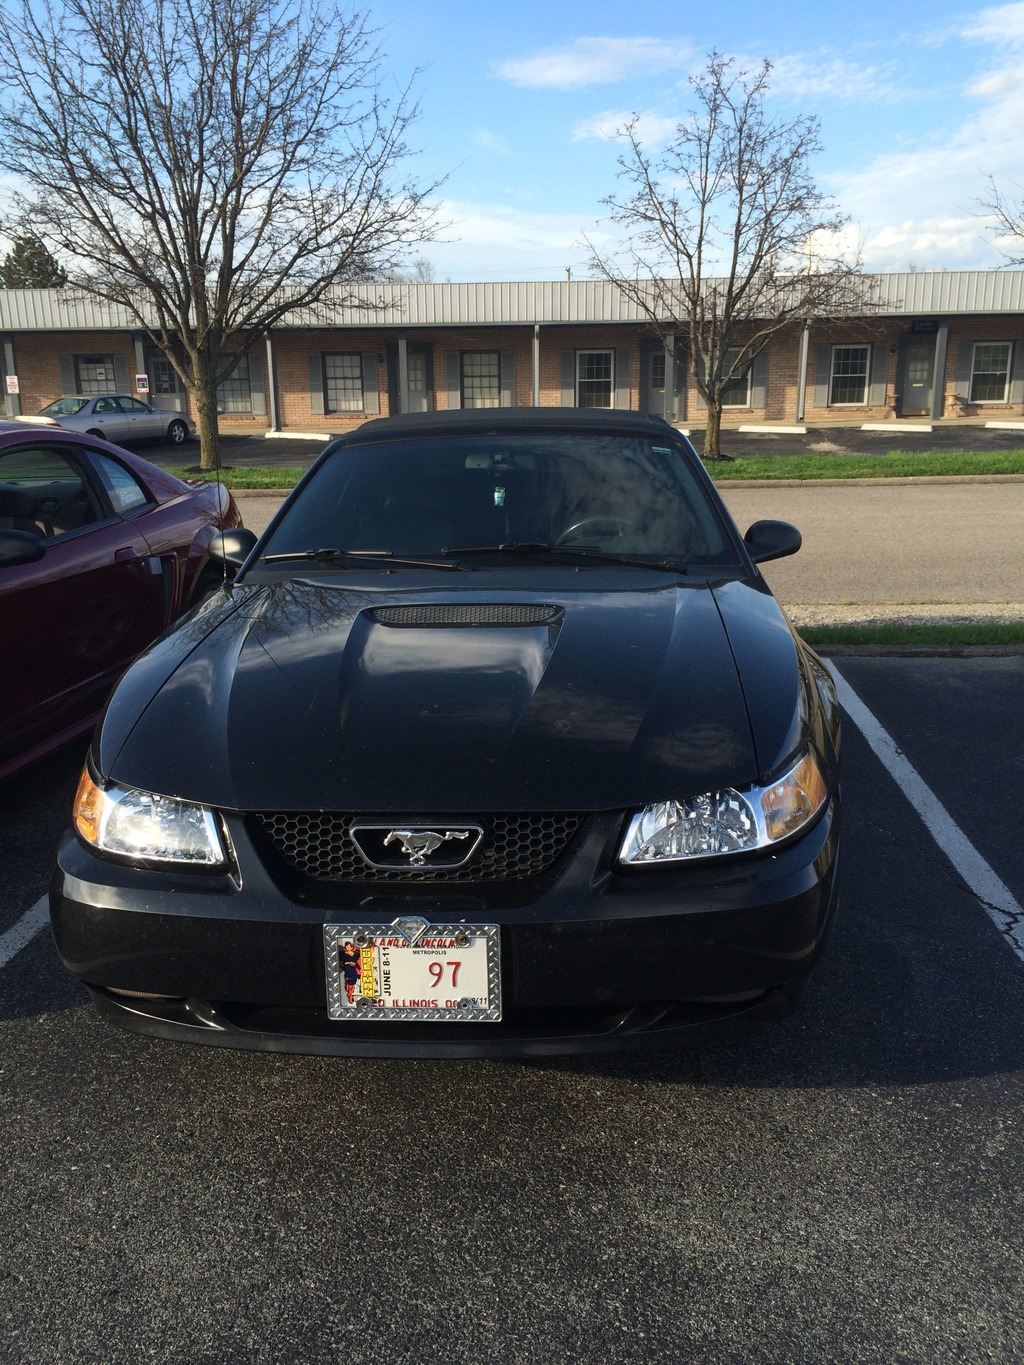
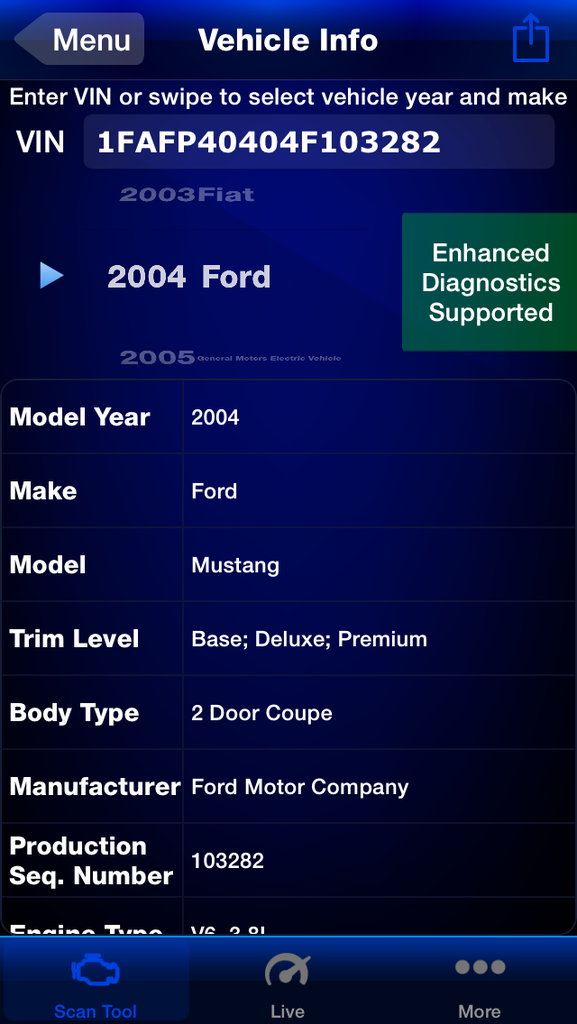
It even has the ability on some vehicles to read the VIN number (as seen on my Mustang which was used as a test subject�
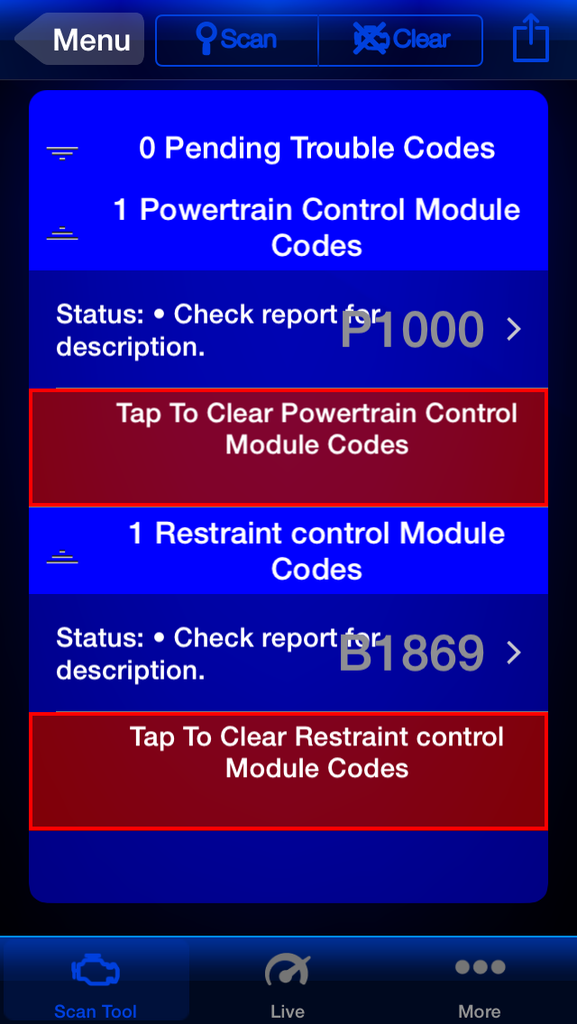
Here is the programme scanning for trouble codes (don't have any stored except some Airbag code which I think is from me putting an LED light in place of the bulb
Over all this programme is a neat little utility and I can see this being very useful for someone who works on there car or even in a shop environment where you work on various cars, especially as some of the other systems out there like Autel can get a bit pricy! this only cost me $103.99 (including 3.99 next day shipping) so for the price I paid for it I think its well worth it. it looks like it can do more functions which I am still playing around with!
Ease of use 10 of 10
Skill Level: Novice to moderate (program me is the part that may take a bit of time to understand if you are not familiar with this program me, but its very easy after you spend a little time with it and read the guide that the App has)
Looks: 10 of 10
ease to clean N/A
ease of install 10 of 10 (just plug it in)
installation: easy (novice experience)
time to install: 30 seconds (or approximately)
fun factor: N/A
overall score 10
overall impression: impressed
recommended product for show cars or just general street use: yes (good for the DIY'er or even a shop situation)
Anyways I hope you guys are enjoying my build thread and this review!!! Please be sure to comment and let me know your thoughts!
As far as Installing the App (done with my iPhone 5C) you can install it one of three ways, you can either scan the QR code, go to the App store and search for it and install, or (my favorite way) connect your phone to the device via bluetooth and the device will prompt you to install the App which at that point it will take you to the app store and let you start the down load, this App is free on the App store, as for the android I haven't tested that just yet so I am not sure but I would suspect that it may also be free!!
as far as this tool is concerned its small and fits in your hand!
The packing is decent, at least its good for this device!
Here is an image of the box, still relatively small, still does fit in your hand
Now as far as installing the device it is simply plug and play, literally!! This little guy can be put on your OBD2 port with ease and you can even drive with it there!
looking at the program it does look to have a good smattering of in-depth abilities, and can read systems not only related to the engine, but it can look at Airbag system as well as others!!
lets take a look at some of the screen shots from the App its self
It even has the ability on some vehicles to read the VIN number (as seen on my Mustang which was used as a test subject�
Here is the programme scanning for trouble codes (don't have any stored except some Airbag code which I think is from me putting an LED light in place of the bulb
Over all this programme is a neat little utility and I can see this being very useful for someone who works on there car or even in a shop environment where you work on various cars, especially as some of the other systems out there like Autel can get a bit pricy! this only cost me $103.99 (including 3.99 next day shipping) so for the price I paid for it I think its well worth it. it looks like it can do more functions which I am still playing around with!
Ease of use 10 of 10
Skill Level: Novice to moderate (program me is the part that may take a bit of time to understand if you are not familiar with this program me, but its very easy after you spend a little time with it and read the guide that the App has)
Looks: 10 of 10
ease to clean N/A
ease of install 10 of 10 (just plug it in)
installation: easy (novice experience)
time to install: 30 seconds (or approximately)
fun factor: N/A
overall score 10
overall impression: impressed
recommended product for show cars or just general street use: yes (good for the DIY'er or even a shop situation)
Anyways I hope you guys are enjoying my build thread and this review!!! Please be sure to comment and let me know your thoughts!
Last edited by Jim74656; 4/10/15 at 09:41 PM.
6/1/15, 09:07 PM
#58
Jim, give us a call here at 858 527 8727 John
__________________
John www.zl1addons.com
John www.zl1addons.com
6/2/15, 10:35 AM
#59
Mach 1 Member
Thread Starter
6/2/15, 10:46 AM
#60
Super Boss Lawman Member
I really like how the strut kit cleans up the engine bay after you remove the prop rod. Ford should make them that way to begin with. My prop rod is safely stored with the factory airbox, sound tube, and mufflers.