Car Detailing 101
 12/29/11, 06:39 AM
#1
I Have No Life
Thread Starter
Car Detailing 101
7/23/12
Edited first post just to show the results and how important a proper, swirl-free wash can be.
Marilyn was washed with a dual bucket method, dual grit guards, 3 mitts, ONR in rinse bucket, CG honeydew and ONR in wash bucket, ARO for rims, boars brush for brakes and spokes and lug nuts, sponges for rims, old mf's for inner wheel wells.
Marilyn was dried with the sheeting method, then leaf blow dried, then MF's with FK425. Then all door jambs were dried with V7. Rims sealed with V7. Hood jambs also dried with V7.
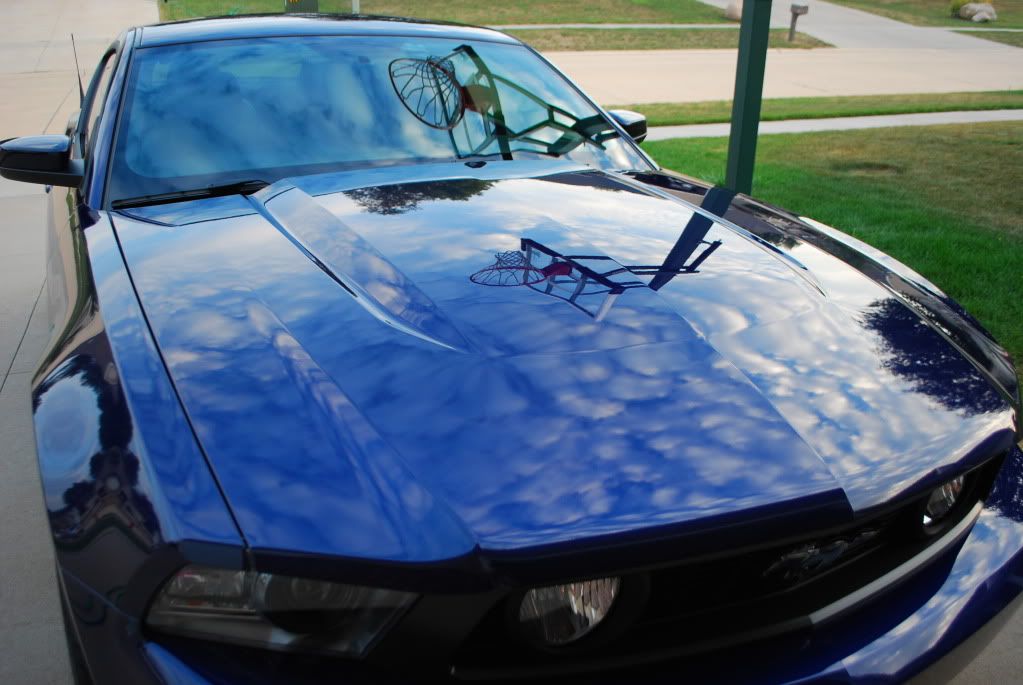
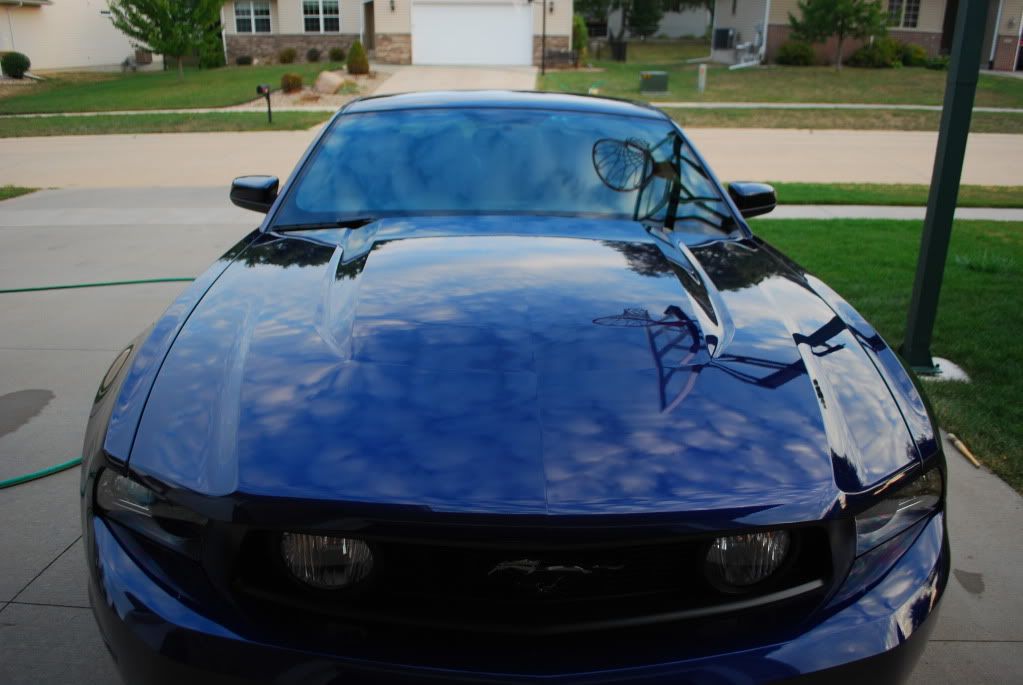
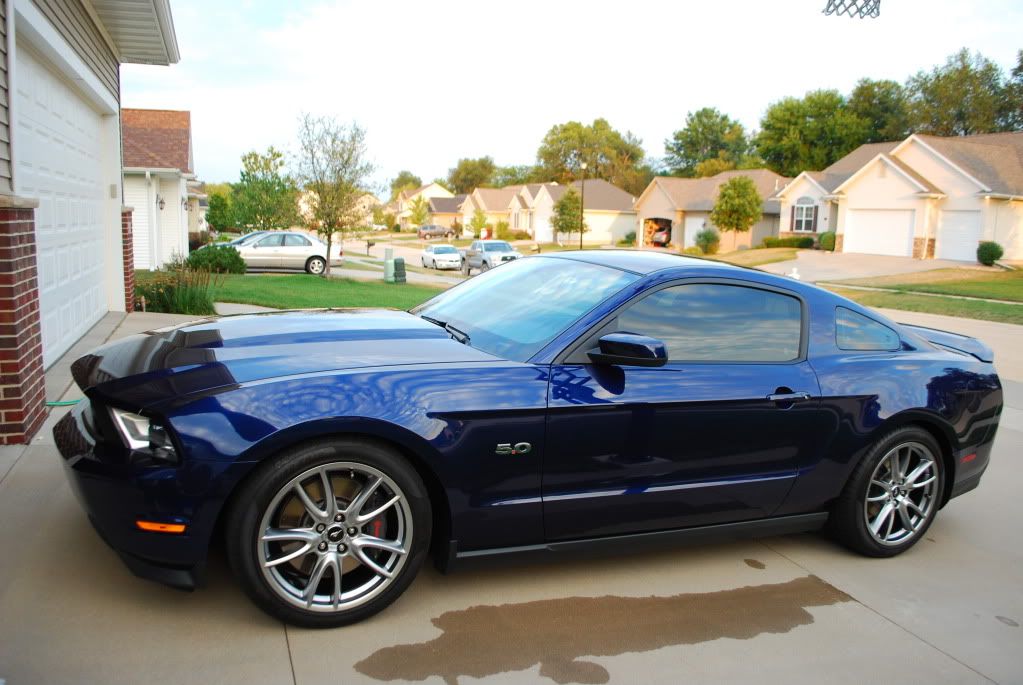
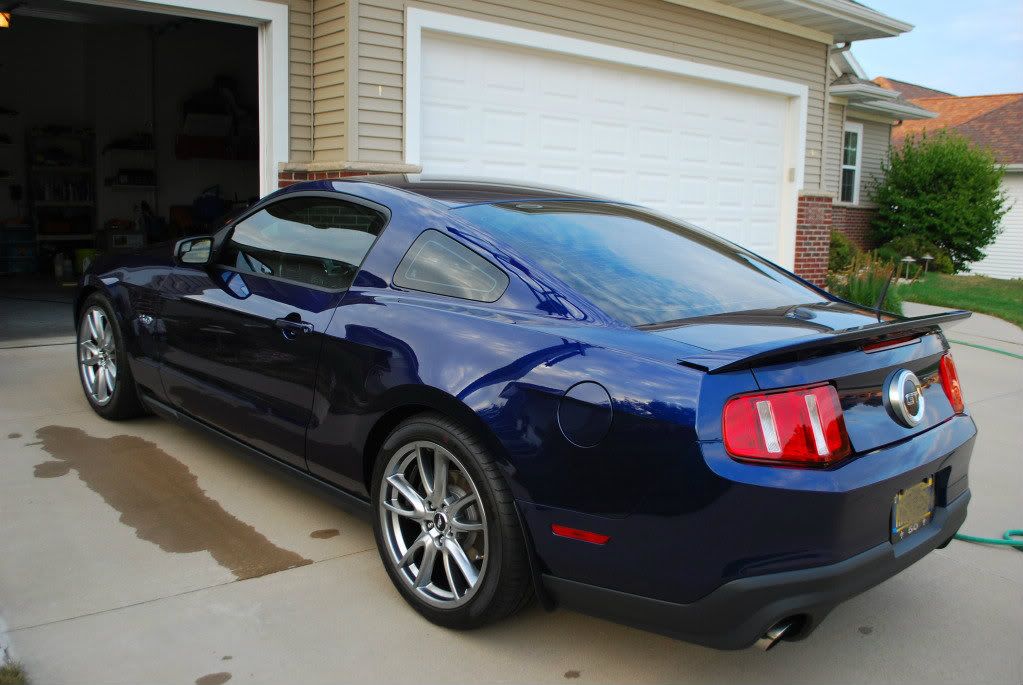
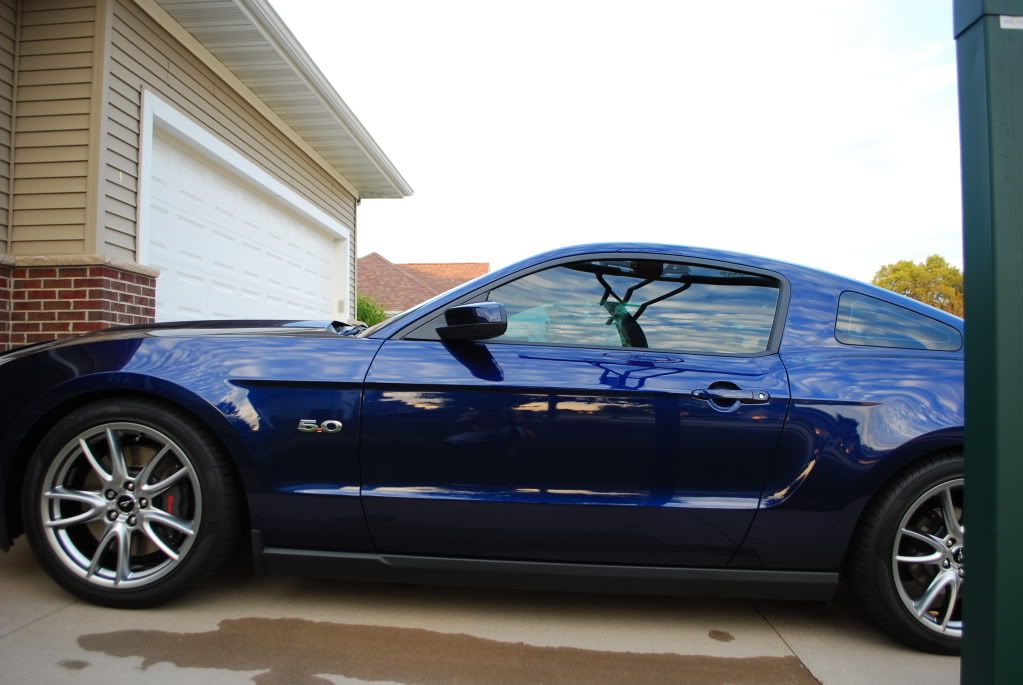
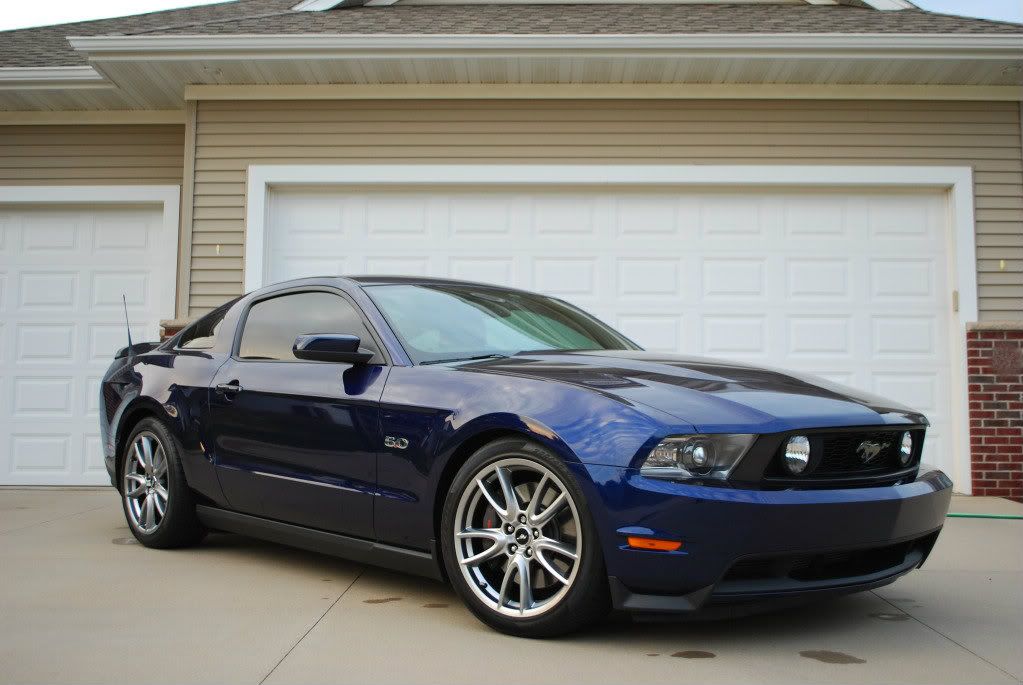
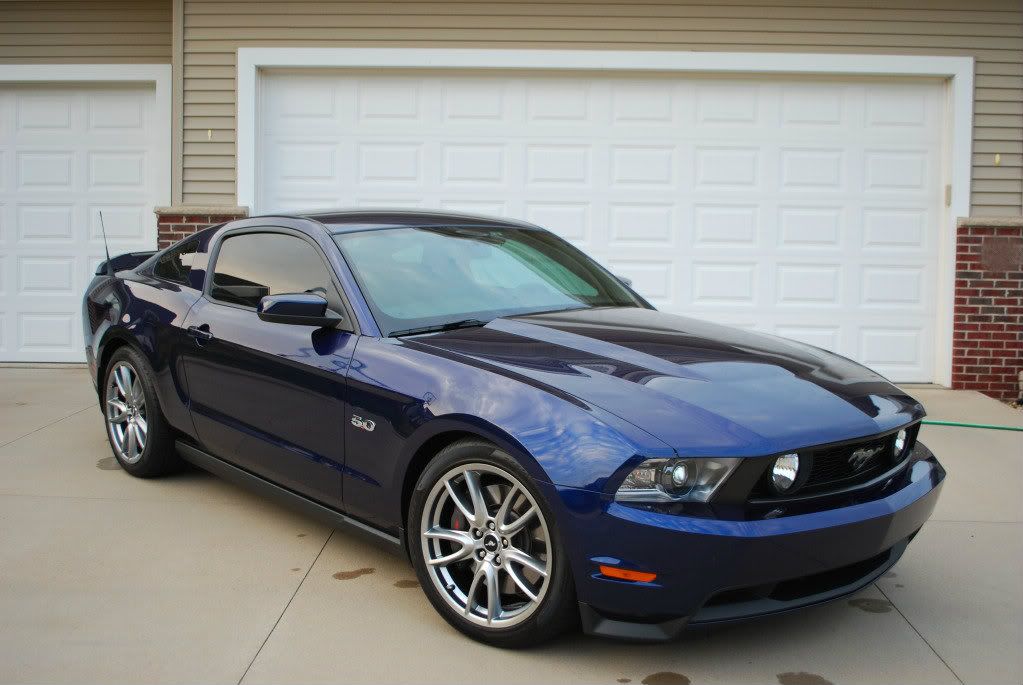
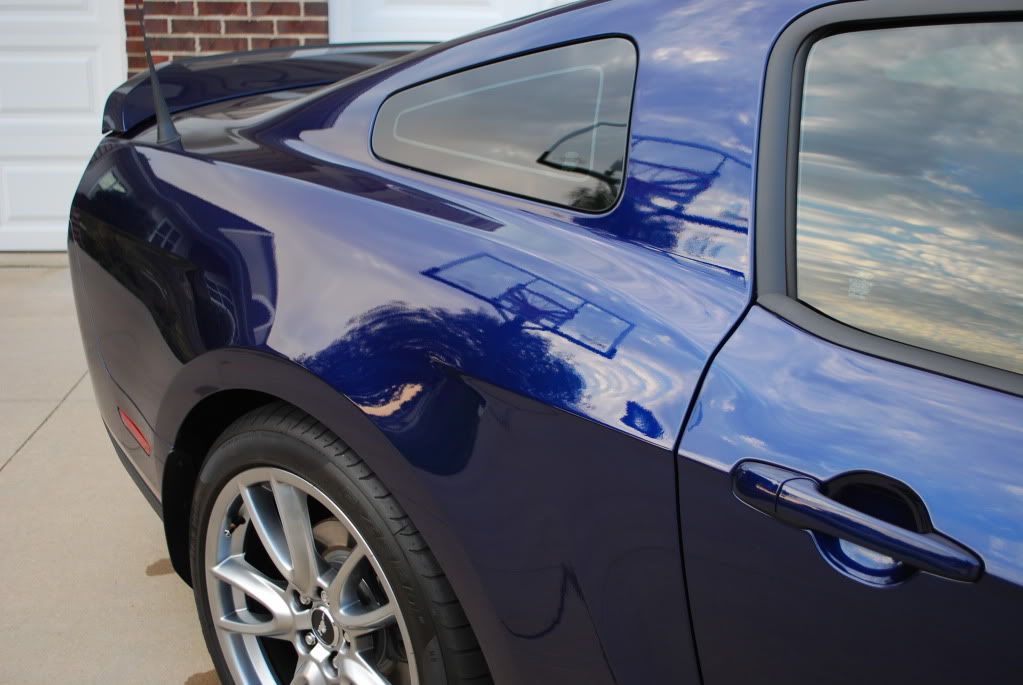
Here's the results of what proper washing techniques can do. I have not corrected/buffed Marilyn since November last year, and even then, it was just a light white polish pad with some light polish. Marilyn is still swirl free from the factory I can still remember the day I brought her home off the truck.....ahhhh
Anyways, here's some photos, taken at dusk (I LOVE dusk lighting) all unedited. She is still wearing Victoria Concours Red Wax from last week. I plan to put another coat on her this week. Sorry the photos are just in my driveway.... but I wasn't going to drive her until I get another layer of Victoria Red on her, maybe tomorrow.

7/16/12
Edited first post to add a how to for, clay barring. I realized I never expanded on this subject.
CLAY BAR - what exactly is its purpose and how to use it?
A clay bar is exactly that. A "clay" "bar". Lol. Imagine playdoh for grown ups who love cars. Lol. Its purpose? To remove surface contaminants embedded in your car's clear coat. These contaminants feel rough to the touch, and take away from the smooth glass finish that we all strive to get. It may take away from the best shine and wet look you are trying to achieve. Worst of all? If not removed, these contaminants can lead to surface rust if not removed diligently.
So how will you know if you need to clay? After a good car wash, grab a sandwich bag (not the ziploc type). Insert in on your hand like a glove. Run your hand across the paint surface. If you feel resistance and or rough spots, you need to clay.
How to clay? Buy yourself a good claybar... Like mothers or meguiars. To be honest, I found the mothers yellow clay bar to be too aggressive... Aggressive clay bars require less repetition but can damage paint (i.e. marring) easily..so choose wisely. If you're gonna correct paint (buff and deswirl) anyways, go with mothers.
Anyways, grab several mf towels. Grab a ton of detail spray. Work panel by panel.... 2'x2' at a time, no more. Spray the surface liberally. The using the claybar, lay it flat on your three fingers sans thumb. Glide the bar across the lubed area. Keep rubbing until it is smooth as glass. Knead the clay bar, and remold into another good surface, often. Do NOT rub a dirty clay bar on to your paint. Once surface was clayed, wipe off with good clean mfs.
As for pressure and direction, use only your three fingers (index, middle, ring). Let the clay do the work. DO NOT PUSH DOWN on the clay. Just let it glide. It will pick up the contaiminants on its own. On horizontal surfaces clay AWAY from the car. On vertical surfaces, clay DOWNWARD.
Wipe clayed area with clean mfs. Re-test with the sandwich bag. Is it smooth as glass? You're done. If not....repeat steps for claying.
Does that help?
Remember:
1) if bar is dropped, throw it away.
2) keep claying until finish is smooooooooooth as glass
3) once clayed, you are ready to correct paint and deswirl....or if already swirl free, then seal or wax.
You will be amazed at how much better your paint will look from claying alone. And especially after waxing.... you are maximizing gloss because your surface is entirely flat.
====================================
Updated with ONR use/tips below:
=====================================
Alright guys…happy holidays! I've been asked by a few folks to post a thread on some car detailing basics, so this will essentially be a detailing thread. Mods, please leave this in this forum to allow for maximum visibility. After all, we all could use a swirl-free 'stang I will try to answer questions to this thread as they come up. I'm not claiming to be the ULTIMATE EXPERT at detailing. I'm just an avid car detailer, and I used to run my own detailing business. But life caught up to me, I got married and had kids, so... now I just work on my cars mostly, but I still have a few clients who I do on the side sometimes... I just learned on my own, like you folks... did a lot of reading, and working on my own.
In this thread, I will discuss how-to's, going from proper basic car washing techniques and all the way to how to buff your paint surface to get it to a mirror-like finish. There's MANY MANY other topics like how to properly clean an engine bay, wheels, emblems, interior detail, etc etc... but I will focus just on exterior paint today.
I will separate this discussion into TWO topics.
a) Swirl/Scratch repair - most of you are probably in this boat already. So what do you do to get RID of those swirls and scratches?
b) Swirl/Scratch avoidance - after you complete phase a), you will want to make sure you continually stay in phase b).
SWIRL/SCRATCH REPAIR
The most effective way to do this is to use a machine, or do it by hand. Doing it by hand is not as effective, and is a big waste of time. Your hand would fall off before you finish a whole car, more so with unimpressive results. Some hard to reach places, like the space behind door handles, etc, will have to be by hand, but not worth discussing here. So your options are either with a Rotary or Dual-Action buffer. I personally don't use a Rotary, because I don't have the need for it. It also "can" be more daunting to use, especially with the prospect of "burning" through your paint if not used properly. This could happen very quickly. Professional detailing shops often use rotaries, but most of these shops are unskilled at this trait, and may not only burn through your paint, but also cause unsightly holograms. I personally use a Flex 3401VG. It has the strength of a rotary, but the safety of a DA. I'm not dinging the rotary, because in the proper hands, it corrects VERY fast and VERY effectively. But I am assuming for most of you guys on here, you don't own a detailing shop nor do you plan to, correct? You're just interested in the best way to care for YOUR own car, YOUR own mustang
So, let's focus on a DA. It's safe, effective, cost-friendly, and VERY easy to use. I recommend the Porter Cable 7424 XP. You can purchase this through any major automotive detailing supplier, like Autogeek or Detailing Image, etc. To use a DA, you will need:
a) pads
b) polish liquid
c) pad conditioner
Pads - for most corrections, I use a Foam pad. Not worth discussing wool, etc. pads here. Foam pads are color coded for surface texture/amount of correction ability, or more so, its ability to "cut" paint to correct it. Think of it like sandpaper with various finishes, right? You start out with a rougher finish, then end up with a very fine pad to get it to a mirror finish. Same concept with the pads. There are many colors out there, so I won't go through them all… but I personally use an Orange pad for major corrections, then a White pad for minor corrections, then a Gray pad for "jeweling" (process of really making that finish pop!!!). On my 5.0, it was mostly swirl-free, so I just used a gray pad on 90% of the surface, then white pad on specific spots.
This will help you understand pads more: http://www.auto-geek.net/charts/buff...d-chart-lc.htm
Polish - of course you will need the magic liquid that makes serves as the abrasive and lubricant between your pad and the paint. These particles are what gets worked into the paint and removes those surface defects. Again, there are a VARIETY of these polishes, so I won't go through them all. Personally, I recommend just 2 basic polishes… one that cuts well, and one that is a fine polish. I personally use Menzerna products as they are the best IMHO. I tried a lot, but came back to this brand. Namely, Power and Super finish.
Pad Conditioner - this helps keep the pad lubricated so you can have a longer working time, and helps avoid heating the surface too much. Again, any brand will do.
So the process? Makes sure your paint surface is clean (clay bar if necessary). Spray a couple times of pad conditioner, apply an X mark of polish onto the pad. Press the pad onto the paint surface, move it around with the DA off. Turn speed to 2. Spread it around your working surface (no more than 2' x 2'). Then increase the speed to 5 or 6. Apply even pressure on the DA, enough to compress the pad 1/2 way. Do about 4-6 section passes. This means vertically (1 pass) then horizontally (another pass). Once done, wipe off with an MF towel, then voila! Repeat process with the finer polish and gray pad. Apply your favorite glaze/sealant/nuba wax as necessary.
So you see, it really is not that hard. Don't be daunted by the fact that it's a "machine". It's very user friendly and will give you STUNNING results.
Here are some pics showing a 50/50 of what I had done to my minivan earlier this spring. Left side is post-polished, left is before.
More details can be found here: http://www.autogeekonline.net/forum/...ng-detail.html
SWIRL/SCRATCH AVOIDANCE
IMHO, this is the MOST important phase of detailing. Correcting paint should theoretically be only done ONCE. It's proper maintenance methods that keep your paint swril-free. So how do you get swirls in the first place??? Essentially, ANYTHING that touches your paint surface will cause swirls, albeit very minor ones. Over time, rubbing even the cleanest MF towels across your paint will give your swirls. So remember this key fact: the less you touch your paint, the better off you are.
But we all know we HAVE to touch our paint, right? To wash, apply wax, etc etc. So how do we best do this?
Washing - make sure you use at least 2 buckets to wash, with a grit guard (used to trap dirt on the bottom of the bucket). Never wash in direct sunlight. Use a soft mitten or sponge. I use 3, one for the top 1/2 of the car, one for the bottom, and one for the rims. I also do it in that order. Work top-down. First bucket is your rinse water…always rinse your mitten after each panel. Second bucket is your soapy water. Use any washing soap you want… just not DAWN or dishwashing liquid, unless you plan on stripping the LSP's you applied. Remember Dawn is used to cut through the grease of your cooking pans… and waxes are essentially oils. So there you have it. Wash properly, and avoid putting any new swirls on the car. Most people don't realize they swirl their cars a million times over with improper washing.
Drying - here's another way you can swirl your car up if not done properly. I use only MF towels to dry… CLEAN ones. I also use a leaf blower to blow off excess water before "blot-drying". Remember, what I said above… the more you touch the paint, the chances go up of swirling it.
Waxing - use any one you like. The final gloss/finish is 95% surface preparation (the polishing you did in phase a)). Applying wax is the bonus... it's therapy for me So anyways, always use a CLEAN foam applicator or MF applicator. Apply VERY THIN LAYERS. Remember, THIN is IN. Apply the wax vertically in vertical panels, the on horizontal panels (hood, trunk, roof), apply in straight lines going the direction of the car (don't criss cross). Then remove with a clean MF towel, folded 2x times, to give you 8 distinct cleaning surfaces. Use a new towel if needed after a few panels.
There… that's the VERY QUICK CRASH COURSE on Detailing 101. I really breezed through this stuff… there's a LOT more I can tell you on this, but I would fill up 10 pages or more. If you have specific questions, just post it on here and I will try my best to answer. Also, try visiting sites like Autogeek.net and Autopia to get further details on more specific things like how to use a clay bar, which polish to use, etc etc. It's an addicting hobby though, I should warn you...
Here's some other posts I started that may help you all out, with further info on the detailing process and what I did on my 2002 Civic, now with almost 100k on it.
http://www.autogeekonline.net/forum/...-02-civic.html
Optimum No Rinse. It's essentially a new type of product of multiple uses, primarily being able to wash a car with just 1 bucket of water and ONR mixed in. (I don't recommend 1 bucket due to chances of grit and dirt getting embedded in the mitten/same bucket, and thus gets rubbed into your paint). So it's called "no rinse" because as soon as you wipe down a panel with your ONR dipped mitten/sponge, you immediately wipe dry with an MF. Voila.
===========
Kyle,
I think the griots spray on wash kit, is essentially a detail spray on steroids. In other words, you spray liberally, then wipe off with 1 or 2 or more towels, right? This is way different from ONR. ONR and other "rinseless" products use a lot more water (via buckets of water) and a mitt... just like washing a car using a bucket, mitts, and a hose. Only difference is, the wash and rinse cycle is essentially one process, hence "No Rinse".
IMO, the ONR method is much safer than the spray wash. The spray wash and other detail sprays I don't like using on a dirty/dusty car, because again, you are rubbing dirt on the car. With ONR, and hose washing, you further reduce the risk of marring because ONR is super lubed, but also the wet mitt picks up the dust/dirt and remaining liquid slides the debris off.
Here's my caveat... I only use ONR is the dirt on my car is purely topical dust!!! Meaning, after a few drives, never been in rain, and it's dusty. That's when I use ONR. If it's been rained on? Bucket wash!!! Safer. Also, I use my foam gun prior to any regular wash (that again is another topic).
You know, I typed this much already, I might as well talk about how to PROPERLY use ONR. I will update the first post in this thread to talk about ONR use.
My method:
- 2 buckets
- at least 2 mitts
- grit guards
- onr, 4 capfuls, 2 in each bucket, fill with water to about 1/2.
- a LOT of MF (microfiber) towels
- detail spray (I use FK425 or CG V7)
Again, do this ONLY when dust is on paint!!!
Get your mitts and towels and spray ready. Make sure all mitts and towels are CLEEEEEAN.
Designate one bucket as the wash bucket, the other the rinse bucket.
Place mitt in wash bucket (wb). Rub against grit guard. Start on roof. Glide/drag mitt in straight lines, back to front. Don't go swirl happy like you're having a seizure. Never do that. Always straight lines. Emphasis on glide and drag the mitts. It is NOT necessary to push the mitt down on the paint...no no. That will marr/scratch. Let the weight of the watered down mitt do the work for you. Remember you're just removing DUST.
Once done, place mitt in rinse bucket (rb). Get detail spray and spray liberally on panel just washed. Get 1 mf towel, dry in straight lines again, with little to no pressure. Let the mf towel do the work. Turn over frequently. Get 2nd mf towel, and wipe dry to a high gloss. Stand back and admire
Remember that mitt you threw in the rb? You can either choose to reuse it in wb, but be sure to rub it against the grit guard well. OR you can choose to have a new mitt for every panel... it's a bit overkill, so I go between. I use a mitt for every 2-3 panels. There are 9 panels, so I use about 3 to 4 mitts. Up to you guys. Less chance to marr/scratch, better for me.
Anyways, repeat process on all remaining panels, and VOILA. btw, I use OLD and raggedy mitts to use ONR on my rims and tires and lower plastic trims.
I hope this process helps. I will try to make more updates to this post/thread with other secrets and techniques.
Edited first post just to show the results and how important a proper, swirl-free wash can be.
Marilyn was washed with a dual bucket method, dual grit guards, 3 mitts, ONR in rinse bucket, CG honeydew and ONR in wash bucket, ARO for rims, boars brush for brakes and spokes and lug nuts, sponges for rims, old mf's for inner wheel wells.
Marilyn was dried with the sheeting method, then leaf blow dried, then MF's with FK425. Then all door jambs were dried with V7. Rims sealed with V7. Hood jambs also dried with V7.
Here's the results of what proper washing techniques can do. I have not corrected/buffed Marilyn since November last year, and even then, it was just a light white polish pad with some light polish. Marilyn is still swirl free from the factory
I can still remember the day I brought her home off the truck.....ahhhhAnyways, here's some photos, taken at dusk (I LOVE dusk lighting) all unedited. She is still wearing Victoria Concours Red Wax from last week. I plan to put another coat on her this week. Sorry the photos are just in my driveway.... but I wasn't going to drive her until I get another layer of Victoria Red on her, maybe tomorrow.
7/16/12
Edited first post to add a how to for, clay barring. I realized I never expanded on this subject.
CLAY BAR - what exactly is its purpose and how to use it?
A clay bar is exactly that. A "clay" "bar". Lol. Imagine playdoh for grown ups who love cars. Lol. Its purpose? To remove surface contaminants embedded in your car's clear coat. These contaminants feel rough to the touch, and take away from the smooth glass finish that we all strive to get. It may take away from the best shine and wet look you are trying to achieve. Worst of all? If not removed, these contaminants can lead to surface rust if not removed diligently.
So how will you know if you need to clay? After a good car wash, grab a sandwich bag (not the ziploc type). Insert in on your hand like a glove. Run your hand across the paint surface. If you feel resistance and or rough spots, you need to clay.
How to clay? Buy yourself a good claybar... Like mothers or meguiars. To be honest, I found the mothers yellow clay bar to be too aggressive... Aggressive clay bars require less repetition but can damage paint (i.e. marring) easily..so choose wisely. If you're gonna correct paint (buff and deswirl) anyways, go with mothers.
Anyways, grab several mf towels. Grab a ton of detail spray. Work panel by panel.... 2'x2' at a time, no more. Spray the surface liberally. The using the claybar, lay it flat on your three fingers sans thumb. Glide the bar across the lubed area. Keep rubbing until it is smooth as glass. Knead the clay bar, and remold into another good surface, often. Do NOT rub a dirty clay bar on to your paint. Once surface was clayed, wipe off with good clean mfs.
As for pressure and direction, use only your three fingers (index, middle, ring). Let the clay do the work. DO NOT PUSH DOWN on the clay. Just let it glide. It will pick up the contaiminants on its own. On horizontal surfaces clay AWAY from the car. On vertical surfaces, clay DOWNWARD.
Wipe clayed area with clean mfs. Re-test with the sandwich bag. Is it smooth as glass? You're done. If not....repeat steps for claying.
Does that help?
Remember:
1) if bar is dropped, throw it away.
2) keep claying until finish is smooooooooooth as glass
3) once clayed, you are ready to correct paint and deswirl....or if already swirl free, then seal or wax.
You will be amazed at how much better your paint will look from claying alone. And especially after waxing.... you are maximizing gloss because your surface is entirely flat.
====================================
Updated with ONR use/tips below:
=====================================
Alright guys…happy holidays! I've been asked by a few folks to post a thread on some car detailing basics, so this will essentially be a detailing thread. Mods, please leave this in this forum to allow for maximum visibility. After all, we all could use a swirl-free 'stang
I will try to answer questions to this thread as they come up. I'm not claiming to be the ULTIMATE EXPERT at detailing. I'm just an avid car detailer, and I used to run my own detailing business. But life caught up to me, I got married and had kids, so... now I just work on my cars mostly, but I still have a few clients who I do on the side sometimes... I just learned on my own, like you folks... did a lot of reading, and working on my own.In this thread, I will discuss how-to's, going from proper basic car washing techniques and all the way to how to buff your paint surface to get it to a mirror-like finish. There's MANY MANY other topics like how to properly clean an engine bay, wheels, emblems, interior detail, etc etc... but I will focus just on exterior paint today.
I will separate this discussion into TWO topics.
a) Swirl/Scratch repair - most of you are probably in this boat already. So what do you do to get RID of those swirls and scratches?
b) Swirl/Scratch avoidance - after you complete phase a), you will want to make sure you continually stay in phase b).
SWIRL/SCRATCH REPAIR
The most effective way to do this is to use a machine, or do it by hand. Doing it by hand is not as effective, and is a big waste of time. Your hand would fall off before you finish a whole car, more so with unimpressive results. Some hard to reach places, like the space behind door handles, etc, will have to be by hand, but not worth discussing here. So your options are either with a Rotary or Dual-Action buffer. I personally don't use a Rotary, because I don't have the need for it. It also "can" be more daunting to use, especially with the prospect of "burning" through your paint if not used properly. This could happen very quickly. Professional detailing shops often use rotaries, but most of these shops are unskilled at this trait, and may not only burn through your paint, but also cause unsightly holograms. I personally use a Flex 3401VG. It has the strength of a rotary, but the safety of a DA. I'm not dinging the rotary, because in the proper hands, it corrects VERY fast and VERY effectively. But I am assuming for most of you guys on here, you don't own a detailing shop nor do you plan to, correct? You're just interested in the best way to care for YOUR own car, YOUR own mustang
So, let's focus on a DA. It's safe, effective, cost-friendly, and VERY easy to use. I recommend the Porter Cable 7424 XP. You can purchase this through any major automotive detailing supplier, like Autogeek or Detailing Image, etc. To use a DA, you will need:
a) pads
b) polish liquid
c) pad conditioner
Pads - for most corrections, I use a Foam pad. Not worth discussing wool, etc. pads here. Foam pads are color coded for surface texture/amount of correction ability, or more so, its ability to "cut" paint to correct it. Think of it like sandpaper with various finishes, right? You start out with a rougher finish, then end up with a very fine pad to get it to a mirror finish. Same concept with the pads. There are many colors out there, so I won't go through them all… but I personally use an Orange pad for major corrections, then a White pad for minor corrections, then a Gray pad for "jeweling" (process of really making that finish pop!!!). On my 5.0, it was mostly swirl-free, so I just used a gray pad on 90% of the surface, then white pad on specific spots.
This will help you understand pads more: http://www.auto-geek.net/charts/buff...d-chart-lc.htm
Polish - of course you will need the magic liquid that makes serves as the abrasive and lubricant between your pad and the paint. These particles are what gets worked into the paint and removes those surface defects. Again, there are a VARIETY of these polishes, so I won't go through them all. Personally, I recommend just 2 basic polishes… one that cuts well, and one that is a fine polish. I personally use Menzerna products as they are the best IMHO. I tried a lot, but came back to this brand. Namely, Power and Super finish.
Pad Conditioner - this helps keep the pad lubricated so you can have a longer working time, and helps avoid heating the surface too much. Again, any brand will do.
So the process? Makes sure your paint surface is clean (clay bar if necessary). Spray a couple times of pad conditioner, apply an X mark of polish onto the pad. Press the pad onto the paint surface, move it around with the DA off. Turn speed to 2. Spread it around your working surface (no more than 2' x 2'). Then increase the speed to 5 or 6. Apply even pressure on the DA, enough to compress the pad 1/2 way. Do about 4-6 section passes. This means vertically (1 pass) then horizontally (another pass). Once done, wipe off with an MF towel, then voila! Repeat process with the finer polish and gray pad. Apply your favorite glaze/sealant/nuba wax as necessary.
So you see, it really is not that hard. Don't be daunted by the fact that it's a "machine". It's very user friendly and will give you STUNNING results.
Here are some pics showing a 50/50 of what I had done to my minivan earlier this spring. Left side is post-polished, left is before.
More details can be found here: http://www.autogeekonline.net/forum/...ng-detail.html
SWIRL/SCRATCH AVOIDANCE
IMHO, this is the MOST important phase of detailing. Correcting paint should theoretically be only done ONCE. It's proper maintenance methods that keep your paint swril-free. So how do you get swirls in the first place??? Essentially, ANYTHING that touches your paint surface will cause swirls, albeit very minor ones. Over time, rubbing even the cleanest MF towels across your paint will give your swirls. So remember this key fact: the less you touch your paint, the better off you are.
But we all know we HAVE to touch our paint, right? To wash, apply wax, etc etc. So how do we best do this?
Washing - make sure you use at least 2 buckets to wash, with a grit guard (used to trap dirt on the bottom of the bucket). Never wash in direct sunlight. Use a soft mitten or sponge. I use 3, one for the top 1/2 of the car, one for the bottom, and one for the rims. I also do it in that order. Work top-down. First bucket is your rinse water…always rinse your mitten after each panel. Second bucket is your soapy water. Use any washing soap you want… just not DAWN or dishwashing liquid, unless you plan on stripping the LSP's you applied. Remember Dawn is used to cut through the grease of your cooking pans… and waxes are essentially oils. So there you have it. Wash properly, and avoid putting any new swirls on the car. Most people don't realize they swirl their cars a million times over with improper washing.
Drying - here's another way you can swirl your car up if not done properly. I use only MF towels to dry… CLEAN ones. I also use a leaf blower to blow off excess water before "blot-drying". Remember, what I said above… the more you touch the paint, the chances go up of swirling it.
Waxing - use any one you like. The final gloss/finish is 95% surface preparation (the polishing you did in phase a)). Applying wax is the bonus... it's therapy for me
So anyways, always use a CLEAN foam applicator or MF applicator. Apply VERY THIN LAYERS. Remember, THIN is IN. Apply the wax vertically in vertical panels, the on horizontal panels (hood, trunk, roof), apply in straight lines going the direction of the car (don't criss cross). Then remove with a clean MF towel, folded 2x times, to give you 8 distinct cleaning surfaces. Use a new towel if needed after a few panels.There… that's the VERY QUICK CRASH COURSE on Detailing 101. I really breezed through this stuff… there's a LOT more I can tell you on this, but I would fill up 10 pages or more. If you have specific questions, just post it on here and I will try my best to answer. Also, try visiting sites like Autogeek.net and Autopia to get further details on more specific things like how to use a clay bar, which polish to use, etc etc. It's an addicting hobby though, I should warn you...
Here's some other posts I started that may help you all out, with further info on the detailing process and what I did on my 2002 Civic, now with almost 100k on it.
http://www.autogeekonline.net/forum/...-02-civic.html
Optimum No Rinse. It's essentially a new type of product of multiple uses, primarily being able to wash a car with just 1 bucket of water and ONR mixed in. (I don't recommend 1 bucket due to chances of grit and dirt getting embedded in the mitten/same bucket, and thus gets rubbed into your paint). So it's called "no rinse" because as soon as you wipe down a panel with your ONR dipped mitten/sponge, you immediately wipe dry with an MF. Voila.
===========
Kyle,
I think the griots spray on wash kit, is essentially a detail spray on steroids. In other words, you spray liberally, then wipe off with 1 or 2 or more towels, right? This is way different from ONR. ONR and other "rinseless" products use a lot more water (via buckets of water) and a mitt... just like washing a car using a bucket, mitts, and a hose. Only difference is, the wash and rinse cycle is essentially one process, hence "No Rinse".
IMO, the ONR method is much safer than the spray wash. The spray wash and other detail sprays I don't like using on a dirty/dusty car, because again, you are rubbing dirt on the car. With ONR, and hose washing, you further reduce the risk of marring because ONR is super lubed, but also the wet mitt picks up the dust/dirt and remaining liquid slides the debris off.
Here's my caveat... I only use ONR is the dirt on my car is purely topical dust!!! Meaning, after a few drives, never been in rain, and it's dusty. That's when I use ONR. If it's been rained on? Bucket wash!!! Safer. Also, I use my foam gun prior to any regular wash (that again is another topic).
You know, I typed this much already, I might as well talk about how to PROPERLY use ONR. I will update the first post in this thread to talk about ONR use.
My method:
- 2 buckets
- at least 2 mitts
- grit guards
- onr, 4 capfuls, 2 in each bucket, fill with water to about 1/2.
- a LOT of MF (microfiber) towels
- detail spray (I use FK425 or CG V7)
Again, do this ONLY when dust is on paint!!!
Get your mitts and towels and spray ready. Make sure all mitts and towels are CLEEEEEAN.
Designate one bucket as the wash bucket, the other the rinse bucket.
Place mitt in wash bucket (wb). Rub against grit guard. Start on roof. Glide/drag mitt in straight lines, back to front. Don't go swirl happy like you're having a seizure. Never do that. Always straight lines. Emphasis on glide and drag the mitts. It is NOT necessary to push the mitt down on the paint...no no. That will marr/scratch. Let the weight of the watered down mitt do the work for you. Remember you're just removing DUST.
Once done, place mitt in rinse bucket (rb). Get detail spray and spray liberally on panel just washed. Get 1 mf towel, dry in straight lines again, with little to no pressure. Let the mf towel do the work. Turn over frequently. Get 2nd mf towel, and wipe dry to a high gloss. Stand back and admire
Remember that mitt you threw in the rb? You can either choose to reuse it in wb, but be sure to rub it against the grit guard well. OR you can choose to have a new mitt for every panel... it's a bit overkill, so I go between. I use a mitt for every 2-3 panels. There are 9 panels, so I use about 3 to 4 mitts. Up to you guys. Less chance to marr/scratch, better for me.
Anyways, repeat process on all remaining panels, and VOILA. btw, I use OLD and raggedy mitts to use ONR on my rims and tires and lower plastic trims.
I hope this process helps. I will try to make more updates to this post/thread with other secrets and techniques.
Last edited by FromZto5; 7/23/12 at 09:57 PM.
 12/29/11, 07:15 AM
#5
I Have No Life
Thread Starter
I will edit the first post to add this.
http://www.auto-geek.net/charts/buff...d-chart-lc.htm
12/29/11, 08:08 AM
#6
Cobra Member
I was wondering, having a black car I dread the swirls, etc that seem to show quicker on black than other colors. Since I only drive the car on clear days and it is stored in winter under a very soft satin cover ( actually 2 since the first one they sent was too big so they sent another free), would using only a spray wax with multiple soft MF towels help in keeping swirls away? I realize it does not offer the same protection as a paste or liquid wax and would need to be done more often, but I would think I would not need as much protection since the car is not driven that often and never in rain. I then will use a detailing spray between spray waxing. I occasionally use a California Duster but now read those can cause problems as well, unless you barely touch the car when using it. Any comments appreciated!!
12/29/11, 08:15 AM
#7
I Have No Life
Thread Starter
I was wondering, having a black car I dread the swirls, etc that seem to show quicker on black than other colors. Since I only drive the car on clear days and it is stored in winter under a very soft satin cover ( actually 2 since the first one they sent was too big so they sent another free), would using only a spray wax with multiple soft MF towels help in keeping swirls away? I realize it does not offer the same protection as a paste or liquid wax and would need to be done more often, but I would think I would not need as much protection since the car is not driven that often and never in rain. I then will use a detailing spray between spray waxing. I occasionally use a California Duster but now read those can cause problems as well, unless you barely touch the car when using it. Any comments appreciated!!
First thing you need to do is to MAKE SURE 100% that you truly have a swirl-free finish. It may "look" like you don't have swirls/scratches, but I bet you, you do. Look at it under direct sunlight, or get some halogen lights. Lights don't lie. It will reveal your true finish. If you do have swirls, remove them first...
Now that your surface is swirl free, use any LSP you like. Spray waxes are fine... they just tend to not last long, nor do they offer the gloss/wetness look that true nubas and sealants do. I too, never drive my car in rain, EVER. But I still wax it. In fact, that's the best part. If you do use spray waxes, just make sure your surface is clean, and your MF towels are uber clean. Wipe in one unilateral direction if possible...
I dont' personally recommend car covers... again, because the more that touches your paint, the chances increase for swirls. The worse that it gets in the garage is dust. And dust is superficial. Wash them away. Swirls require a little more effort
The Cali duster is ok... but may tend to swirl over time. After all, you are DRAGGING dirt across your paint finish. I personally use Optimum No Rinse (ONR) which is essentially a rinse free bucket wash you can do in the garage. I can discuss this further if you like.
Last edited by FromZto5; 12/29/11 at 08:28 AM.
12/29/11, 08:29 AM
#8
Cobra Member
Thanks for the comment…your car looks awesome…I may just have to add that shifter you added at some point. It sounds like it makes a big difference. Due to my wife’s illness I could not afford the V8 (as much as I would have loved to) so I went with the most bang for my buck, the V6 manual with the performance package, no other options. While not in the same league as the V8, it still has amazing performance considering its 0-60 and quarter mile times. I may also add the Premium steering wheel at some point as the base one is..well…. quite base. It would dress up the interior a bit.
12/29/11, 10:00 AM
#10
I just picked up some ONR for use during the winter months. Sounds promising. Definitely a lot of true statements in the thread. It's not a simple one step process. You really need to rethink your entire paint maintenance process if you want to reduce swirls.
12/29/11, 02:37 PM
#11
I Have No Life
Thread Starter
Thanks for the comment�your car looks awesome�I may just have to add that shifter you added at some point. It sounds like it makes a big difference. Due to my wife�s illness I could not afford the V8 (as much as I would have loved to) so I went with the most bang for my buck, the V6 manual with the performance package, no other options. While not in the same league as the V8, it still has amazing performance considering its 0-60 and quarter mile times. I may also add the Premium steering wheel at some point as the base one is..well�. quite base. It would dress up the interior a bit.
Optimum No Rinse. It's essentially a new type of product of multiple uses, primarily being able to wash a car with just 1 bucket of water and ONR mixed in. (I don't recommend 1 bucket due to chances of grit and dirt getting embedded in the mitten/same bucket, and thus gets rubbed into your paint). So it's called "no rinse" because as soon as you wipe down a panel with your ONR dipped mitten/sponge, you immediately wipe dry with an MF. Voila.
So here are my tips and tricks to use ONR.
1) Only use ONR on dust-laden cars... if your car got rained on, and driven in, I don't recommend going with ONR. Go with a regular 2 bucket hose wash. You "can" ONR it, but why risk the chance of getting scratches and marring and swirls from caked on dirt getting rubbed into your paint?
2) Always use 2 buckets, at least. One with ONR (2 capfuls for 2 gallons), and one with regular rinse water. Both buckets with grit guards of course. Follow the 3 mitt/sponge rule I outlined in my first post.
3) Go panel by panel. After one panel is complete, spray with detail spray (I use FK 425 or CG V7), then have 2 MF's ready. One for the initial wipe, then one to buff. Switch towels every 2 panels. So you'll need about 6 for a whole car.
4) Make sure you simply lightly drag the mitt across the paint surface. Don't push down EVER. Just let the weight of the liquid laden mitt rest on the paint surface, and pull. Since it's just dust on there, it is not necessary to exert any pressure.
5) Once all panels are complete, use your damp MF's to finish off the glass panels. Then use your very very old mitt or MF specifically used for rims, and do your rims. Dry with old old MF specifically for rims. Don't MIX with your MF's for paint!!! EVER!
There you have it. Swirl-free ONR use.
12/29/11, 03:21 PM
#12
GT Member

Join Date: October 2, 2011
Location: IL
Posts: 162
Likes: 0
Received 0 Likes
on
0 Posts
How do you like the FLEX? I have been thinking of in the spring bitting the bullet and maybe getting one. Im still using the old PC and I just seem to have a hard time specially on the side pannels keeping the pad spinning all the time. Figure not have that prob with the FLEX  Is it hard to control when doing the sides and such with the forced orbital action?
Or my other idea was to save some money and drop down to a 5.5" pad on my PC and ditch the 6" ones.
Is it hard to control when doing the sides and such with the forced orbital action? Or my other idea was to save some money and drop down to a 5.5" pad on my PC and ditch the 6" ones.
12/29/11, 03:46 PM
#13
Cobra Member
Car care
Today I ordered the ONR, the Optimm Spray Wax, and he Grit guard insert....I want to keep the black paint looking like new for as long as possible. This is my car ( sorry it was taken with my phone, will need to break out the real camera next spring:
12/29/11, 11:02 PM
#15
Shelby GT350 Member
Great write up man! I appreciate that you took the time to explain in detail. I'm going to save this for future reference.
I'm constantly chasing swirls with my Kona. I did a decent job covering them up, but needs some tlc again. I just got a 10" orbital Craftsman buffer for xmas. I wanted one more along the lines of the Porter Cable you reccommended. My only complaints with mine is the size and it only has 1 speed - 2800rpm. Should I exchange it for one like you recommend or is mine sufficient?
I'm constantly chasing swirls with my Kona. I did a decent job covering them up, but needs some tlc again. I just got a 10" orbital Craftsman buffer for xmas. I wanted one more along the lines of the Porter Cable you reccommended. My only complaints with mine is the size and it only has 1 speed - 2800rpm. Should I exchange it for one like you recommend or is mine sufficient?
12/30/11, 10:26 PM
#16
I Have No Life
Thread Starter
How do you like the FLEX? I have been thinking of in the spring bitting the bullet and maybe getting one. Im still using the old PC and I just seem to have a hard time specially on the side pannels keeping the pad spinning all the time. Figure not have that prob with the FLEX Is it hard to control when doing the sides and such with the forced orbital action?
Or my other idea was to save some money and drop down to a 5.5" pad on my PC and ditch the 6" ones.
Is it hard to control when doing the sides and such with the forced orbital action? Or my other idea was to save some money and drop down to a 5.5" pad on my PC and ditch the 6" ones.
Great write up man! I appreciate that you took the time to explain in detail. I'm going to save this for future reference.
I'm constantly chasing swirls with my Kona. I did a decent job covering them up, but needs some tlc again. I just got a 10" orbital Craftsman buffer for xmas. I wanted one more along the lines of the Porter Cable you reccommended. My only complaints with mine is the size and it only has 1 speed - 2800rpm. Should I exchange it for one like you recommend or is mine sufficient?
I'm constantly chasing swirls with my Kona. I did a decent job covering them up, but needs some tlc again. I just got a 10" orbital Craftsman buffer for xmas. I wanted one more along the lines of the Porter Cable you reccommended. My only complaints with mine is the size and it only has 1 speed - 2800rpm. Should I exchange it for one like you recommend or is mine sufficient?
Per my comment in the other thread...ditch that orbital. I woudn't let that thing get close to my car, if I were you. Invest in a pc or flex and don't look back. Those orbitals are going to add more swirls than remove any. Trust me... i tried those in the past. The pc actually corrects, and get vary speed greatly, allowing for maximum compatibility.
Last edited by FromZto5; 12/30/11 at 10:33 PM.
12/31/11, 09:06 AM
#17
Team Mustang Source
Join Date: March 30, 2005
Posts: 3,639
Likes: 0
Received 0 Likes
on
0 Posts
Great write up! I've been using ONR for a few years now and haven't had any issues with marring. I do have harder paint but what I do to prevent swirls is to presoak the car with a 1 ounce to 1 gallon mixture in a chemical sprayer. If its really bad I do what overboost is planning to do and go to the coin-op and blast the car off first. So far, no issues at all.
1/1/12, 01:25 PM
#20
Originally Posted by Hytek
What do you think about the waffle weave MF towels for drying? I have a couple now that don't really work well, but there's lots of positive reviews on them.