One piece driveshaft: Which one do I buy???
#1
Member
Thread Starter
One piece driveshaft: Which one do I buy???
Hey all,
Looking into buying a 1 piece shaft for my 05 GT (manual trans) as my xmsn went out last week and the U-joint in my stock driveshaft is slinging grease (probable cause is bad bearings in the transmission which I'm waiting on parts to replace/overhaul, came to this conclusion as the transmission is softly grinding/not running right and spitting ATF out of the output shaft seal...bad seal, bad u-joint = bad bearing)
Anyway, the U-Joint is the "pressed" non-serviceable kind, plus I've been reading that the one piece design is great.
My questions is this: I'm not looking to make the car incredibly faster (until I get a job that pays more money.... ) but would like any input on a one piece design. I've read the driveshaft shop is great, etc. But there seems to be no general consensus on which is preferred for a stock (not lowered) s197.
Any tips/pointers/pros would be greatly appreciated.
Thanks!
Looking into buying a 1 piece shaft for my 05 GT (manual trans) as my xmsn went out last week and the U-joint in my stock driveshaft is slinging grease (probable cause is bad bearings in the transmission which I'm waiting on parts to replace/overhaul, came to this conclusion as the transmission is softly grinding/not running right and spitting ATF out of the output shaft seal...bad seal, bad u-joint = bad bearing)
Anyway, the U-Joint is the "pressed" non-serviceable kind, plus I've been reading that the one piece design is great.
My questions is this: I'm not looking to make the car incredibly faster (until I get a job that pays more money....
Any tips/pointers/pros would be greatly appreciated.
Thanks!
#5
The only big differences between most of these one piece shafts is the diameter and the rear pinion flange U-joint. Some models will have a 6 bolt flange (direct bolt) and other will have a regular 4-bolt u-joint and an adapter plate. I have had shops tell me they don't like the adapter plates but I have never had an issue with mine, something about vibration and balancing. Diameter on the aluminum shafts will effect rotational mass and strength. My next driveshaft (for another build) will be carbon fiber for strength.
#7
Member
Thread Starter

As far as the aluminum vs carbon fiber debate...we used aluminum driveshafts on the helicopters i worked on in the Corps. They held up very well at 1400+ RPMs. Carbon fiber I'm skeptical of because of things like delamination if any scrapes or nicks occur. Maybe i'm just talking out of my butt.😲😊
#9
Member
Thread Starter
#12
Member
Thread Starter
Yeah this has been a pretty taxing process. Dropping a transmission by myself has been a pain in the butt. My colorful vocabulary has certainly been getting practice. I'll probably bump this thread up with a detailed write-up of everything I did and learned, which is a LOT.
#14
Member
Thread Starter
#16
Member
Thread Starter
Verdict is in:
The stang runs great.
This all initially kicked off from the tranny giving a soft whining/grinding in gear.
Parts replaced:
Clutch
Flywheel
Pilot bearing
Throw out bearing all from LUK clutches. Very smooth OEM feel.
The install process was a PITA as the car was on 3 ton jackstands and I dropped the xmsn with a motorcycle jack. The dropping was less troublesome than the reinstallation. My advice for those planning to change their clutch: either invest in a transmission jack or a transmission jack adapter. Also....don't do this on jack stands. Go somewhere with a lift. 😂
The process I took in dropping the Trans was as follows:
Disconnect H pipe. I DID NOT remove the oxygen sensors as the car had 125k miles and the entire exhaust was stock (the cats on the H pipe were rattling as the filtrous material inside was dust).
I ended up snapping one of the pressed in header bolts and this ordered new headers. After doing research I learned that aftermarket shorties often colide with the steering shaft if the engine mounts are old--so I ordered some a those too. 😀
Remove driveshaft
Remove wire harness on xmsn
Drain xmsn (first time servicing the tranny--it needed to be serviced)
Remove xmsn crossmember/mount
Remove starter
Remove hydraulic clutch to Throw out bearing line. I suggest you get a hydraulic line cap, otherwise your clutch will "self bleed" 😂
Remove bellhousing bolts: protip-- BUY 1/2 DRIVE EXTENSIONS AND AN IMPACT DRIVER. I had about 2 feet of extensions and an impact universal socket. A little stiffer than universal joint + socket so less flexion for the top 2 bolt. Also, I sprayed, resprayed, and sprayed again all the bellhousing bolts and the flange around the bellhousing with a rust penetrating lubricant. I recommend freeze off. Note: if you do this, your clutch and flywheel absolutely must be cleaned with brake cleaner if you don't replace it as the lubricating oils will contaminate your clutch.
I had the motorcycle jack under the transmission at all times-- safety first. 👍
A little jerking and some prying got the veryrusted transmission broke free.
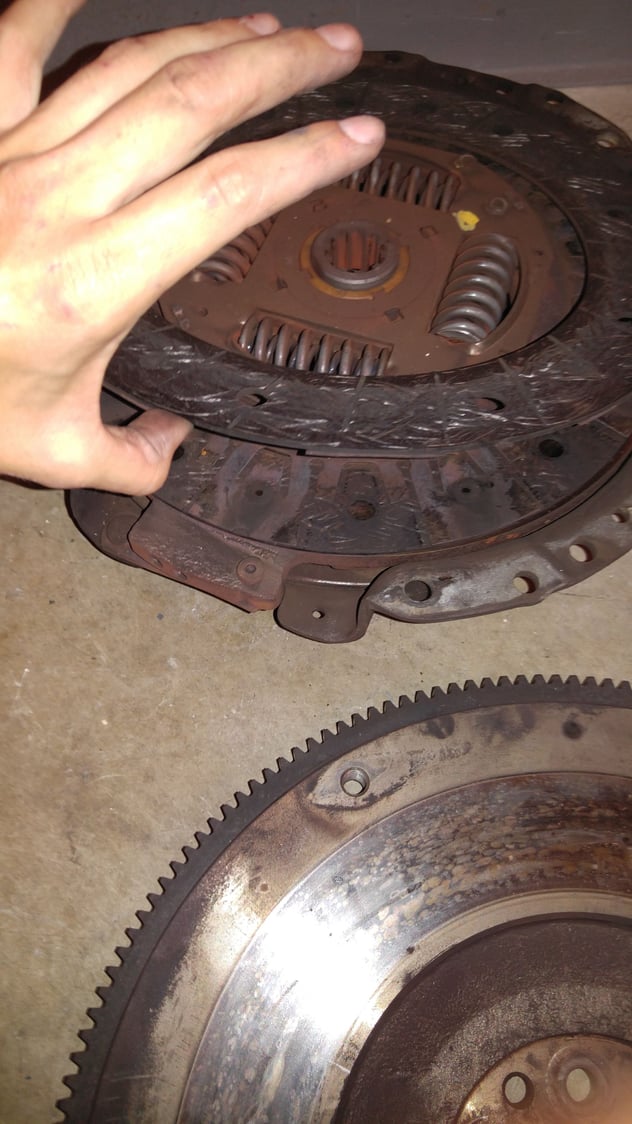
The clutch replacement went fine. I'll attach photos of the old clutch and flywheel. It was shot, multiple hotspots and glazing, and the clutch was coming apart. When removing the pilot bearing USE A SLIDE HAMMER AND THE PILOT BEARING PULLER!!! I rented one from a parts store for "free". The grease/bread/putty/towel method does not work. Trust me.
Slapped it all back together. Wear latex or nitrile gloves when handling clutch parts, clean liberally with brake cleaner, so as not to contaminate with oils from your hands.
While the Trans was out I replaced the headers and motor mounts. I suggest you do this as well if you're looking to upgrade.
Reinstalling the transmission I balanced the rear of the tranny on the motorcycle jack and used a 2 and 1/2 ton jack to jack the bellhousing portion to put the tranny at a 35 degree slant so that the input shaft didn't damage the fingers of the pressure plate. After the shaft cleared the fingers, I edged it forward while slowly raising the back of the transmission so it leveled out, allowing the input shaft to engage the clutch teeth without gouging them. Guide it onto the bushings on the engine. Make sure gap around bellhousing to engine remains even before seating transmission. To ensure input shaft teeth engage clutch and pilot bearing turn the output flange of the transmission intermittently.
To make sure the transmission doesn't roll on the input shaft before it's seated on dowels on engine, I put screwdrivers through the bolt holes.
And reinstall the rest opposite of removal.
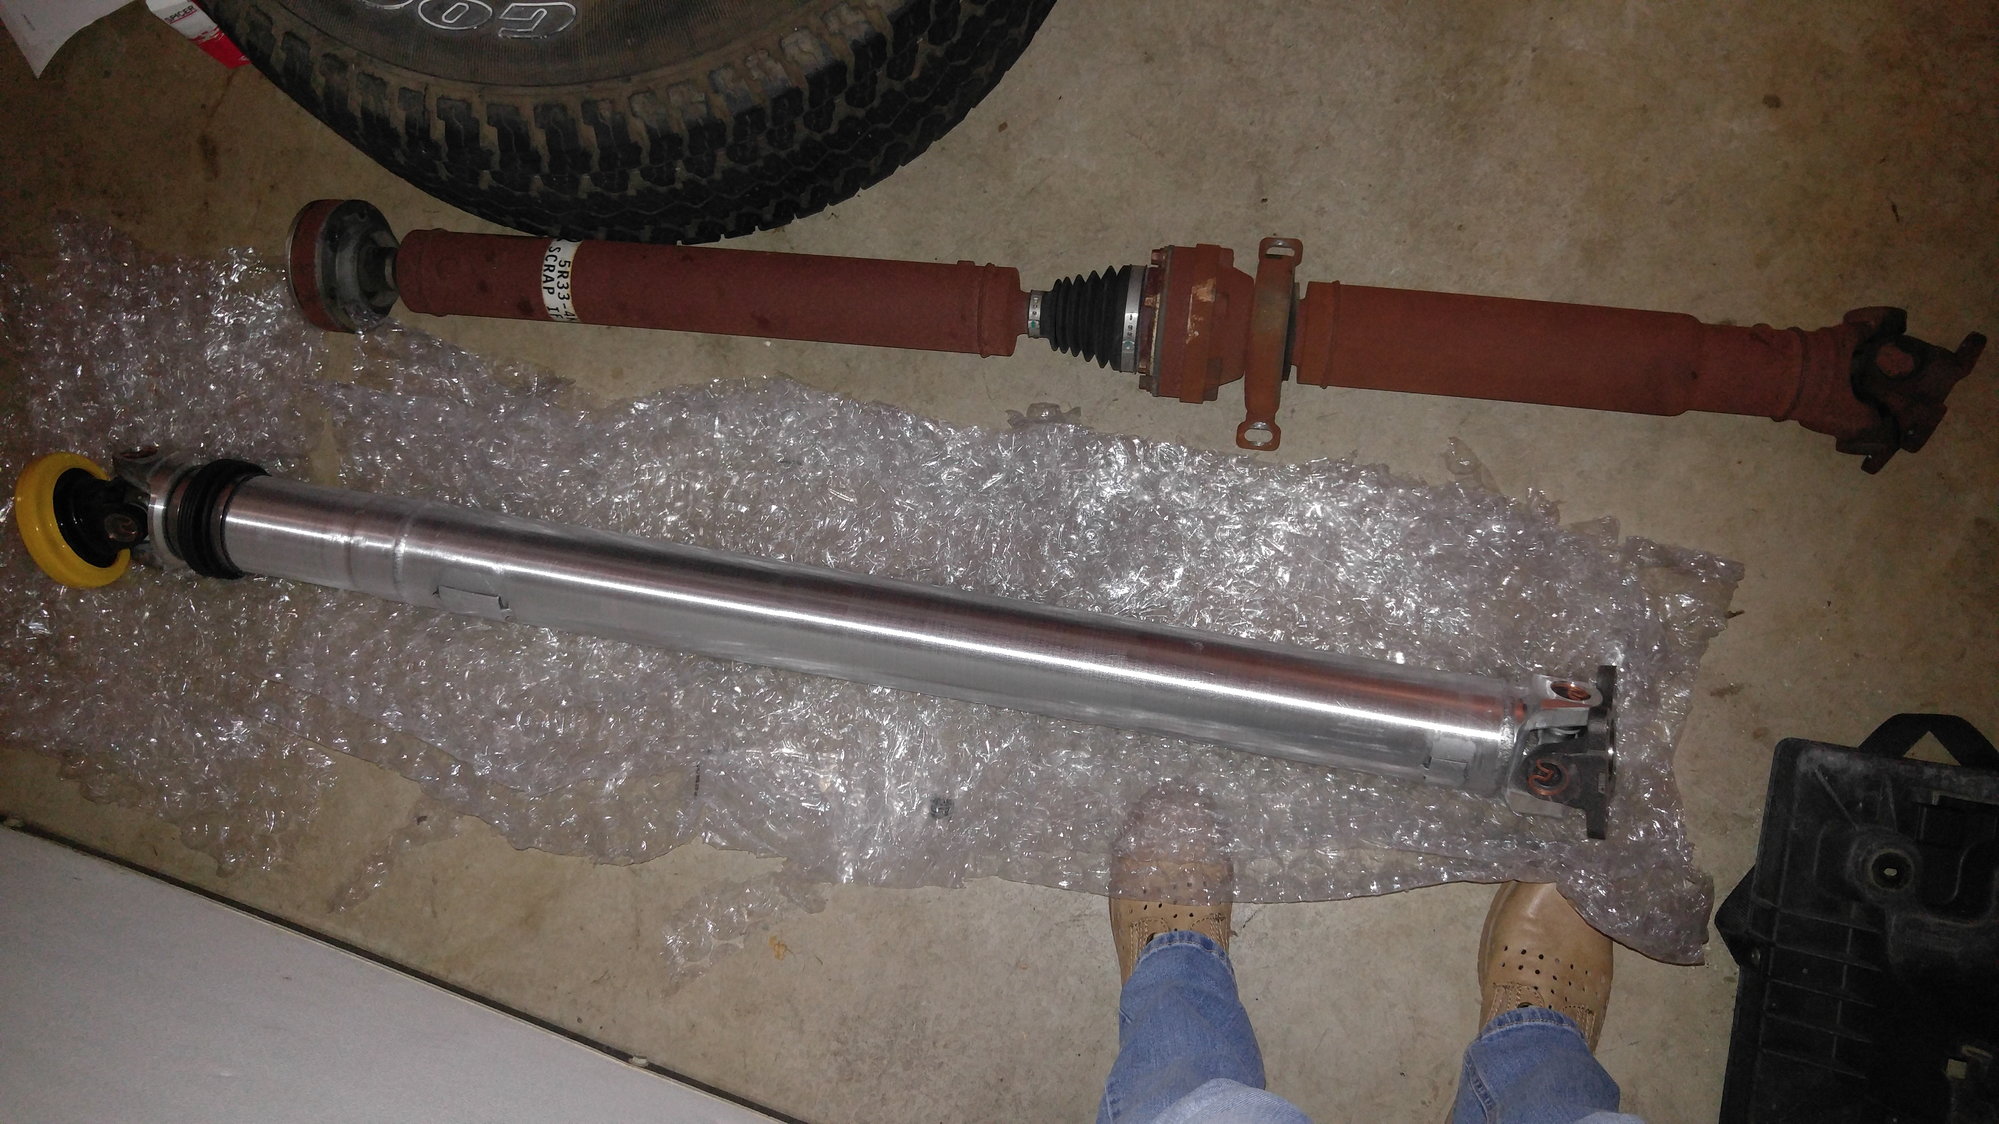
Single piece aluminum driveshaft from. shaftmasters. I'm VERY pleased with the driveshaft response--hardly any backlash or clunk when taking off from first.
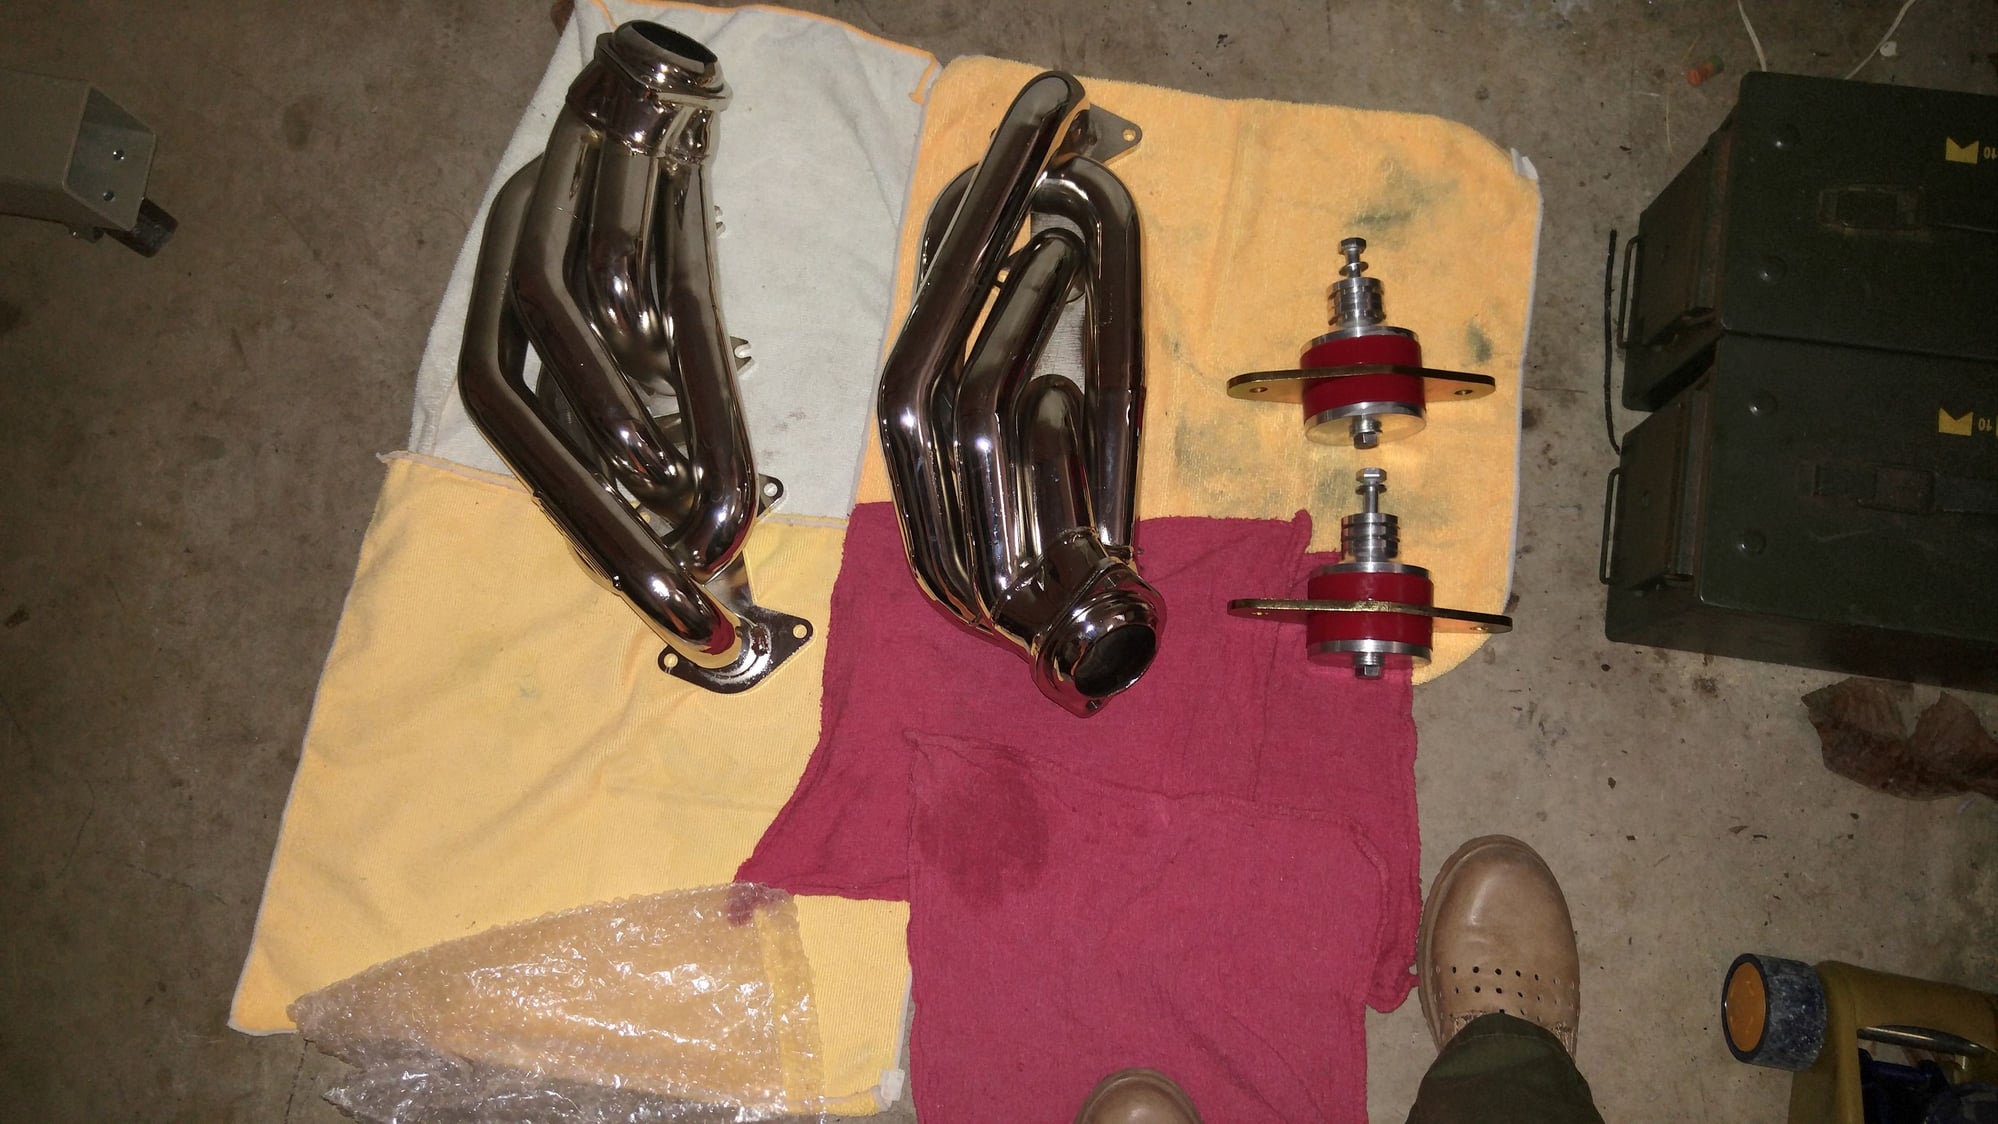
BBK shorties and BBK catted x-pipe (and new oxygen sensors) -- the drivers side header will contact your steering shaft, even with new motor mounts. I dimpled the header where the shaft was rubbing with a mallet and half inch drive extension. Sound is raspy and nice.
Steeda motor mounts (poly) : PITA to install correctly. I was cursing steeda the entire install.
Overall, increase in responsiveness and the transmission sound has been solved.
Hope this helps some folks, if y'all have any questions just let me know.
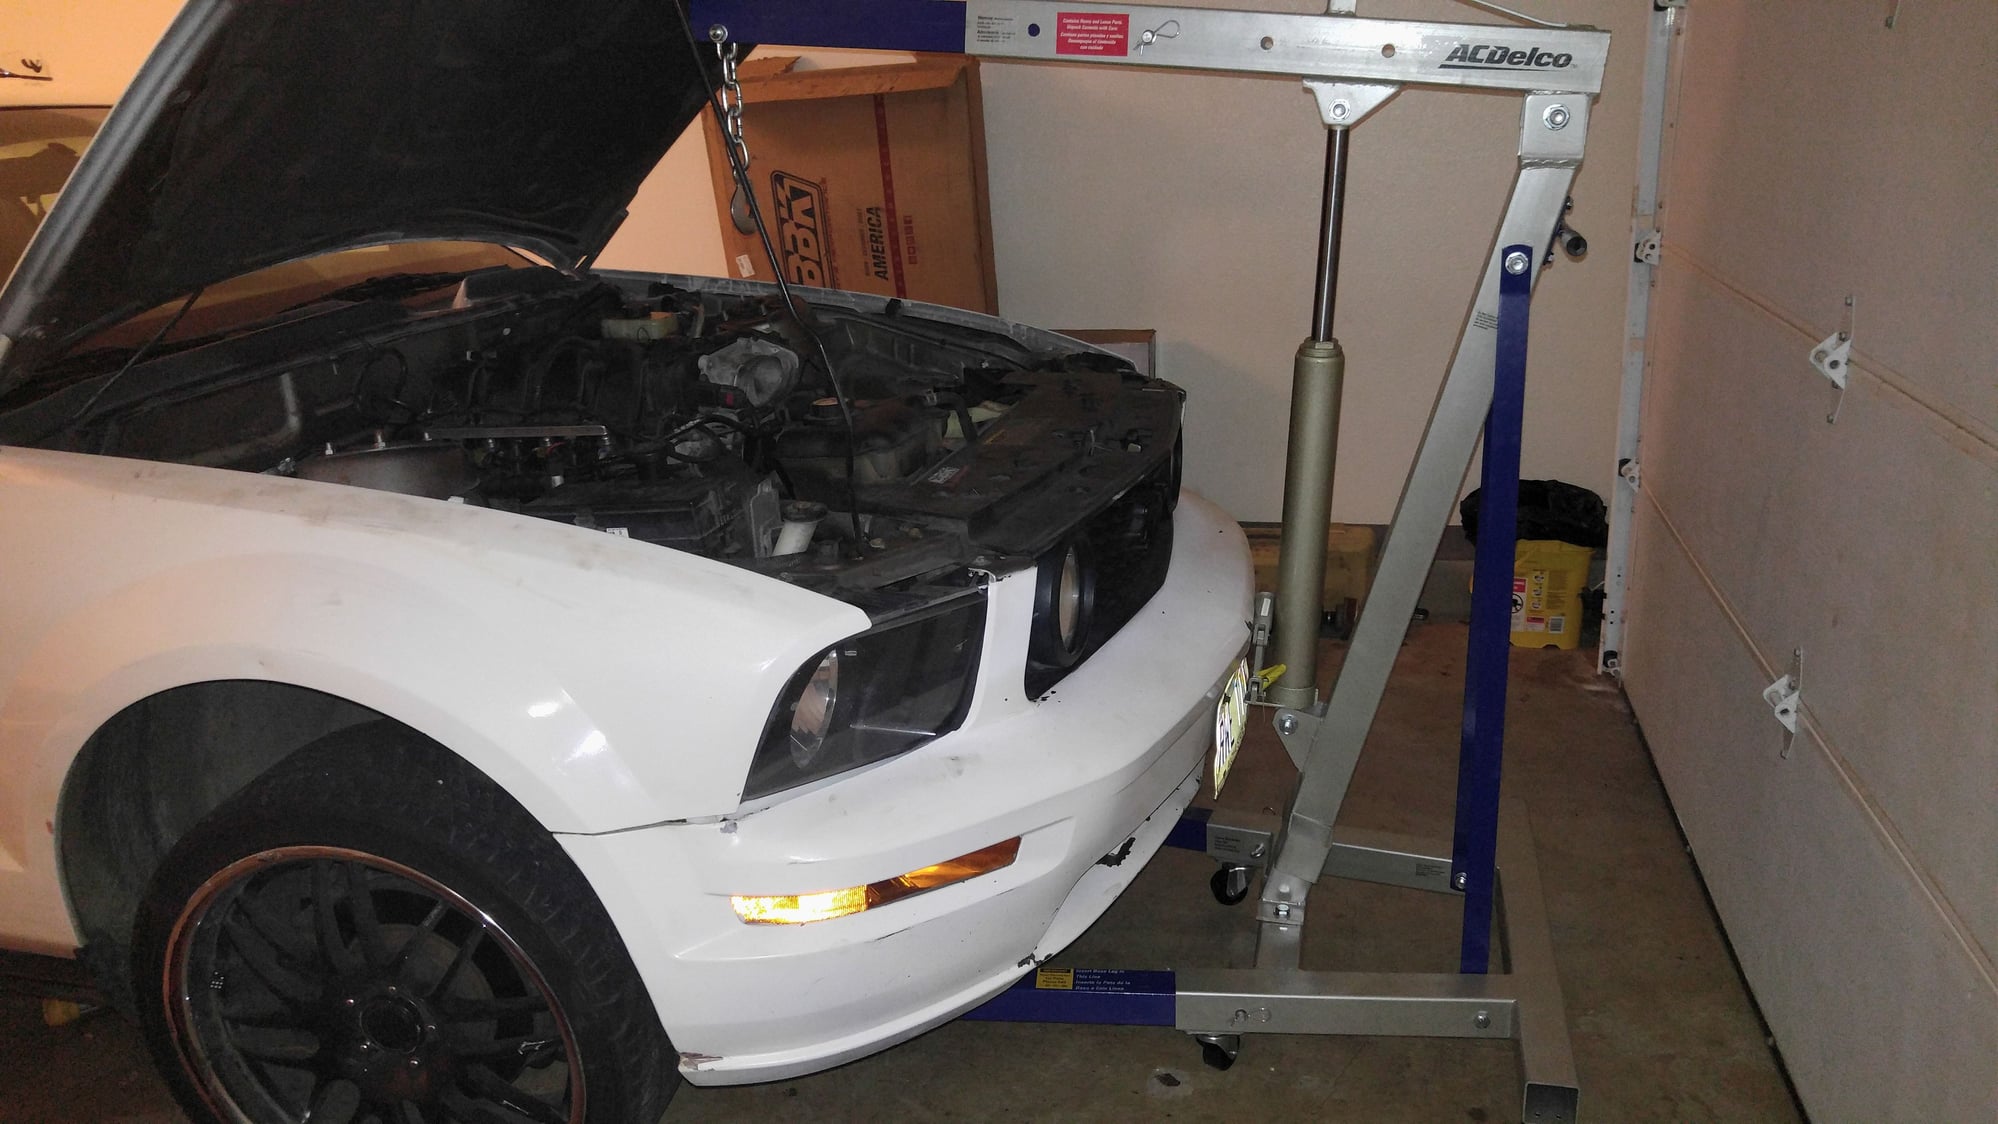
Here's some pictures from the install:
The following users liked this post:
mrkabc (9/22/16)
#17
Verdict is in:
The stang runs great.
This all initially kicked off from the tranny giving a soft whining/grinding in gear.
Parts replaced:
Clutch
Flywheel
Pilot bearing
Throw out bearing all from LUK clutches. Very smooth OEM feel.
The install process was a PITA as the car was on 3 ton jackstands and I dropped the xmsn with a motorcycle jack. The dropping was less troublesome than the reinstallation. My advice for those planning to change their clutch: either invest in a transmission jack or a transmission jack adapter. Also....don't do this on jack stands. Go somewhere with a lift. 😂
The process I took in dropping the Trans was as follows:
Disconnect H pipe. I DID NOT remove the oxygen sensors as the car had 125k miles and the entire exhaust was stock (the cats on the H pipe were rattling as the filtrous material inside was dust).
I ended up snapping one of the pressed in header bolts and this ordered new headers. After doing research I learned that aftermarket shorties often colide with the steering shaft if the engine mounts are old--so I ordered some a those too. 😀
Remove driveshaft
Remove wire harness on xmsn
Drain xmsn (first time servicing the tranny--it needed to be serviced)
Remove xmsn crossmember/mount
Remove starter
Remove hydraulic clutch to Throw out bearing line. I suggest you get a hydraulic line cap, otherwise your clutch will "self bleed" 😂
Remove bellhousing bolts: protip-- BUY 1/2 DRIVE EXTENSIONS AND AN IMPACT DRIVER. I had about 2 feet of extensions and an impact universal socket. A little stiffer than universal joint + socket so less flexion for the top 2 bolt. Also, I sprayed, resprayed, and sprayed again all the bellhousing bolts and the flange around the bellhousing with a rust penetrating lubricant. I recommend freeze off. Note: if you do this, your clutch and flywheel absolutely must be cleaned with brake cleaner if you don't replace it as the lubricating oils will contaminate your clutch.
I had the motorcycle jack under the transmission at all times-- safety first. 👍
A little jerking and some prying got the veryrusted transmission broke free.
The clutch replacement went fine. I'll attach photos of the old clutch and flywheel. It was shot, multiple hotspots and glazing, and the clutch was coming apart. When removing the pilot bearing USE A SLIDE HAMMER AND THE PILOT BEARING PULLER!!! I rented one from a parts store for "free". The grease/bread/putty/towel method does not work. Trust me.
Slapped it all back together. Wear latex or nitrile gloves when handling clutch parts, clean liberally with brake cleaner, so as not to contaminate with oils from your hands.
While the Trans was out I replaced the headers and motor mounts. I suggest you do this as well if you're looking to upgrade.
Reinstalling the transmission I balanced the rear of the tranny on the motorcycle jack and used a 2 and 1/2 ton jack to jack the bellhousing portion to put the tranny at a 35 degree slant so that the input shaft didn't damage the fingers of the pressure plate. After the shaft cleared the fingers, I edged it forward while slowly raising the back of the transmission so it leveled out, allowing the input shaft to engage the clutch teeth without gouging them. Guide it onto the bushings on the engine. Make sure gap around bellhousing to engine remains even before seating transmission. To ensure input shaft teeth engage clutch and pilot bearing turn the output flange of the transmission intermittently.
To make sure the transmission doesn't roll on the input shaft before it's seated on dowels on engine, I put screwdrivers through the bolt holes.
And reinstall the rest opposite of removal.
Single piece aluminum driveshaft from. shaftmasters. I'm VERY pleased with the driveshaft response--hardly any backlash or clunk when taking off from first.
BBK shorties and BBK catted x-pipe (and new oxygen sensors) -- the drivers side header will contact your steering shaft, even with new motor mounts. I dimpled the header where the shaft was rubbing with a mallet and half inch drive extension. Sound is raspy and nice.
Steeda motor mounts (poly) : PITA to install correctly. I was cursing steeda the entire install.
Overall, increase in responsiveness and the transmission sound has been solved.
Hope this helps some folks, if y'all have any questions just let me know.
Here's some pictures from the install:
The stang runs great.
This all initially kicked off from the tranny giving a soft whining/grinding in gear.
Parts replaced:
Clutch
Flywheel
Pilot bearing
Throw out bearing all from LUK clutches. Very smooth OEM feel.
The install process was a PITA as the car was on 3 ton jackstands and I dropped the xmsn with a motorcycle jack. The dropping was less troublesome than the reinstallation. My advice for those planning to change their clutch: either invest in a transmission jack or a transmission jack adapter. Also....don't do this on jack stands. Go somewhere with a lift. 😂
The process I took in dropping the Trans was as follows:
Disconnect H pipe. I DID NOT remove the oxygen sensors as the car had 125k miles and the entire exhaust was stock (the cats on the H pipe were rattling as the filtrous material inside was dust).
I ended up snapping one of the pressed in header bolts and this ordered new headers. After doing research I learned that aftermarket shorties often colide with the steering shaft if the engine mounts are old--so I ordered some a those too. 😀
Remove driveshaft
Remove wire harness on xmsn
Drain xmsn (first time servicing the tranny--it needed to be serviced)
Remove xmsn crossmember/mount
Remove starter
Remove hydraulic clutch to Throw out bearing line. I suggest you get a hydraulic line cap, otherwise your clutch will "self bleed" 😂
Remove bellhousing bolts: protip-- BUY 1/2 DRIVE EXTENSIONS AND AN IMPACT DRIVER. I had about 2 feet of extensions and an impact universal socket. A little stiffer than universal joint + socket so less flexion for the top 2 bolt. Also, I sprayed, resprayed, and sprayed again all the bellhousing bolts and the flange around the bellhousing with a rust penetrating lubricant. I recommend freeze off. Note: if you do this, your clutch and flywheel absolutely must be cleaned with brake cleaner if you don't replace it as the lubricating oils will contaminate your clutch.
I had the motorcycle jack under the transmission at all times-- safety first. 👍
A little jerking and some prying got the veryrusted transmission broke free.
The clutch replacement went fine. I'll attach photos of the old clutch and flywheel. It was shot, multiple hotspots and glazing, and the clutch was coming apart. When removing the pilot bearing USE A SLIDE HAMMER AND THE PILOT BEARING PULLER!!! I rented one from a parts store for "free". The grease/bread/putty/towel method does not work. Trust me.
Slapped it all back together. Wear latex or nitrile gloves when handling clutch parts, clean liberally with brake cleaner, so as not to contaminate with oils from your hands.
While the Trans was out I replaced the headers and motor mounts. I suggest you do this as well if you're looking to upgrade.
Reinstalling the transmission I balanced the rear of the tranny on the motorcycle jack and used a 2 and 1/2 ton jack to jack the bellhousing portion to put the tranny at a 35 degree slant so that the input shaft didn't damage the fingers of the pressure plate. After the shaft cleared the fingers, I edged it forward while slowly raising the back of the transmission so it leveled out, allowing the input shaft to engage the clutch teeth without gouging them. Guide it onto the bushings on the engine. Make sure gap around bellhousing to engine remains even before seating transmission. To ensure input shaft teeth engage clutch and pilot bearing turn the output flange of the transmission intermittently.
To make sure the transmission doesn't roll on the input shaft before it's seated on dowels on engine, I put screwdrivers through the bolt holes.
And reinstall the rest opposite of removal.
Single piece aluminum driveshaft from. shaftmasters. I'm VERY pleased with the driveshaft response--hardly any backlash or clunk when taking off from first.
BBK shorties and BBK catted x-pipe (and new oxygen sensors) -- the drivers side header will contact your steering shaft, even with new motor mounts. I dimpled the header where the shaft was rubbing with a mallet and half inch drive extension. Sound is raspy and nice.
Steeda motor mounts (poly) : PITA to install correctly. I was cursing steeda the entire install.
Overall, increase in responsiveness and the transmission sound has been solved.
Hope this helps some folks, if y'all have any questions just let me know.
Here's some pictures from the install:

Best Regards,
TJ
#18
This is great stuff! Wiley, you are inspiring me as well, since I need to get my clutch done. I'm getting the Exedy clutch kit. You got the Shaftmasters driveshaft? Where do I get a hydraulic line cap?
I don't care about replacing the exhaust manifolds (I'm in Commiefornia, the smog ***** will come knocking) but the motor mount replacement is a good idea. What was wrong with the Steeda mounts?
Didn't see pix? I am highly interested since this will be my project in the next couple of weeks.
I don't care about replacing the exhaust manifolds (I'm in Commiefornia, the smog ***** will come knocking) but the motor mount replacement is a good idea. What was wrong with the Steeda mounts?
Didn't see pix? I am highly interested since this will be my project in the next couple of weeks.
#19
Member
Thread Starter
This is great stuff! Wiley, you are inspiring me as well, since I need to get my clutch done. I'm getting the Exedy clutch kit. You got the Shaftmasters driveshaft? Where do I get a hydraulic line cap?
I don't care about replacing the exhaust manifolds (I'm in Commiefornia, the smog ***** will come knocking) but the motor mount replacement is a good idea. What was wrong with the Steeda mounts?
Didn't see pix? I am highly interested since this will be my project in the next couple of weeks.
I don't care about replacing the exhaust manifolds (I'm in Commiefornia, the smog ***** will come knocking) but the motor mount replacement is a good idea. What was wrong with the Steeda mounts?
Didn't see pix? I am highly interested since this will be my project in the next couple of weeks.
 to move the engine a little.
 As far as the headers, the BBK shorties are carb certified. Unfortunately...the catted x pipe is not. But I'm keeping the stock h pipe. As for the line cap, should be able to pick them up at an auto parts store, or be prepared to have an oil catch pan under the line.
And the shaftmasters shaft: easy quick install. Great driveshaft, looks and feels great.


The following users liked this post:
mrkabc (9/22/16)
#20
Member
Thread Starter
Also...watch this video! It saved my behind in the whole process.
And protip! Bag and label all your parts as you remove them. Nothing worse than looking for the little clip for the hydraulic line and Not being able to find it.
And protip! Bag and label all your parts as you remove them. Nothing worse than looking for the little clip for the hydraulic line and Not being able to find it.


